Table of Contents
The Ultimate Homemade Bread: A Culinary Revolution in Your Kitchen
Ingredients
For two perfect loaves, you’ll need:
- 160ml (⅔ cup) lukewarm water
- 3g (1 tsp) fresh yeast or 2g (½ tsp) active dry yeast
- 60g (¼ cup) plain yogurt
- 15ml (1 tbsp) vegetable oil
- 320g (2½ cups) bread flour
- 6g (1 tsp) salt
Step-by-Step Instructions
1. Activating the Yeast (5 minutes)
I begin by combining the lukewarm water, yeast, yogurt, and vegetable oil in a large mixing bowl. The lukewarm water activates the yeast, while the yogurt adds a subtle tanginess and helps create a tender crumb. The oil contributes to the bread’s softness and helps extend its shelf life.
2. Forming the Dough (5 minutes)
To this wet mixture, I add the bread flour and salt. Using a wooden spoon or my hands, I mix until there’s no dry flour visible. Unlike traditional bread recipes, there’s no need for extensive kneading here. This minimal mixing approach helps develop a light, airy texture in our final loaf.
3. Initial Rest (30 minutes)
I cover the bowl with a clean kitchen towel or plastic wrap and let it rest for 30 minutes. During this time, the flour begins to hydrate, and the yeast starts its magic, producing carbon dioxide that will give our bread its characteristic texture.
4. Stretch and Fold Technique (5 minutes)
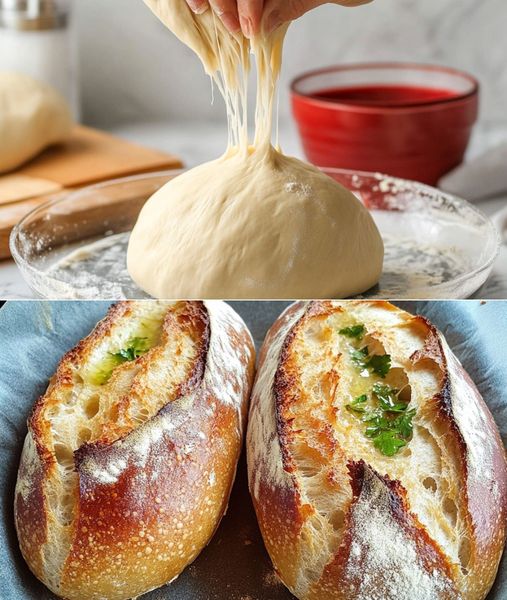
After the rest, I use the “stretch and fold” technique. With wet hands to prevent sticking, I grab one side of the dough, stretch it up and fold it over to the center. I repeat this on all four sides of the dough. This technique helps develop the gluten structure without traditional kneading.
Next, I employ the “lift and slap” method. I lift the entire dough and slap it back into the bowl. This action further develops the gluten and incorporates air into the dough.
5. Second Rest and Repeat (35 minutes)
I cover the dough again and let it rest for another 30 minutes. After this rest, I repeat the stretch and fold and lift and slap techniques. These steps are crucial for developing the dough’s structure and flavor.
6. Bulk Fermentation (2 hours)
Now comes the main fermentation period. I cover the dough and let it rise for about 2 hours, or until it doubles in size. This long, slow fermentation is key to developing complex flavors in our bread.
7. Shaping the Loaves (15 minutes)
Once the dough has doubled, I gently turn it out onto a lightly floured surface. I divide it into two equal portions and shape each into a ball. After a brief 10-minute rest, I flatten each ball gently, then roll and press it with my fingertips to create the final loaf shape.
I seal the edge by pinching it firmly, then place each loaf on a baking tray, seam side down. These shaped loaves are then covered and left to rise for a final 30 minutes.
8. Preparing for Baking (5 minutes)
Just before baking, I lightly dust the loaves with flour and smooth it with my hand. Using a sharp blade or knife, I score the top of each loaf. This scoring not only looks beautiful but also allows the bread to expand properly during baking.
I sprinkle a little water between the loaves to create steam in the oven, which will contribute to a crispy crust. Then, I cover the loaves with another baking tray – this creates a mini steam oven, crucial for achieving that perfect crust.
9. Baking to Perfection (30 minutes)
I preheat the oven to 230°C (450°F) and bake the covered loaves for 20 minutes. This initial high-heat, covered bake allows the bread to rise fully and begin forming its crust.
After 20 minutes, I remove the top tray and reduce the oven temperature to 200°C (390°F). The bread bakes for an additional 10 minutes uncovered, allowing the crust to achieve that perfect golden-brown color and crispness.
10. Cooling and Enjoying
Once baked, I remove the loaves from the oven and let them cool on a wire rack. The hardest part is waiting for them to cool before slicing – but this patience is rewarded with perfectly set bread that’s easier to cut.
Nutrition Information
Per slice (based on 12 slices per loaf):
- Calories: 120
- Protein: 4g
- Carbohydrates: 23g
- Fiber: 1g
- Fat: 1g

