Author: Admin

  • Alpine Cheese Delight Pork Chops

    Alpine Cheese Delight Pork Chops

    Alpine Cheese Delight Pork Chops is a dish that brings together the comforting flavors of the Midwest with a touch of European flair. This recipe is perfect for those who cherish the slow-cooked tenderness of pork chops, enhanced by a rich, cheesy sauce. It’s a dish that reminds me of family gatherings on chilly evenings, where the aroma of a hearty meal filled the farmhouse kitchen. The combination of Swiss cheese and cream of mushroom soup creates a creamy, savory sauce that wraps around each pork chop like a cozy blanket. This recipe is a testament to the beauty of simple, wholesome ingredients coming together to create something truly special.

    This dish pairs beautifully with classic Midwestern sides like buttery mashed potatoes or a warm loaf of crusty bread to soak up the delicious sauce. A crisp green salad or steamed green beans can add a fresh contrast to the rich flavors of the pork chops. For a touch of sweetness, consider serving with a side of homemade applesauce or roasted carrots.

    . Alpine Cheese Delight Pork Chops
    . Servings: 4

    Ingredients

    4 boneless pork chops
    Salt and pepper to taste
    1 tablespoon olive oil
    1 can (10.5 oz) condensed cream of mushroom soup
    1/2 cup chicken broth
    1 cup shredded Swiss cheese
    1 small onion, finely chopped
    2 cloves garlic, minced
    1 teaspoon dried thyme


    Directions

    1. Season the pork chops with salt and pepper.
    2. In a skillet, heat the olive oil over medium heat and brown the pork chops on both sides.
    3. In a slow cooker, mix together the cream of mushroom soup, chicken broth, Swiss cheese, onion, garlic, and thyme.
    4. Submerge the browned pork chops in the mixture in the slow cooker.
    5. Cook on low for 6-8 hours until the pork chops are tender.
    6. Before serving, stir the sauce and adjust the seasoning with salt and pepper.

    Variations & Tips

    For a different cheese flavor, try using Gruyère instead of Swiss cheese. If you like a bit of heat, add a pinch of red pepper flakes to the sauce. To make this dish gluten-free, use a gluten-free cream of mushroom soup. You can also add sliced mushrooms or bell peppers to the slow cooker for extra flavor and nutrition.

  • Savory Potato and Chicken Skillet

    Savory Potato and Chicken Skillet

    If you’re looking for a quick and satisfying dinner, this savory potato and chicken skillet is a great option. With a creamy batter, tender chicken, and flavorful vegetables, it’s an easy one-pan meal that comes together in no time.

    Preparation Time

    Prep Time: 15 minutes
    Cook Time: 15-20 minutes
    Total: 30-35 minutes

    Ingredients

    For the Batter:
    Eggs: 2
    Milk: 150 ml (about 2/3 cup)
    Salt: 1/2 teaspoon
    Garlic Powder: 1/2 teaspoon
    Black Pepper: 1/2 teaspoon
    Extra Virgin Olive Oil: 2 tablespoons
    Boiled Potatoes: 150 g, mashed (about 1 medium potato)
    Flour: 4 tablespoons
    Baking Powder: 1 teaspoon

    For the Filling:
    Extra Virgin Olive Oil: For cooking
    Onion: 1, chopped
    Green Bell Pepper: 1, chopped
    Red Bell Pepper: 1, chopped
    Salt and Black Pepper: To taste
    Chicken Breast: 150 g, diced (about 1 cup)
    Black Pepper, Garlic Powder, Oregano: To taste
    Tomato Sauce: 2 tablespoons
    Cream for Cooking: 3 tablespoons
    Grated Cheese: As desired


    Instructions

    Prepare the Batter:
    In a blender or food processor, combine the eggs, milk, salt, garlic powder, black pepper, extra virgin olive oil, mashed boiled potatoes, flour, and baking powder. Blend until smooth.
    Cook the Vegetables:
    In a large skillet, heat a tablespoon of extra virgin olive oil over medium heat.
    Add the chopped onion, green bell pepper, and red bell pepper. Cook until the vegetables are soft, about 5 minutes.
    Season with salt and black pepper to taste. Remove the vegetables from the skillet and set aside.
    Cook the Chicken:
    In the same skillet, add a little more olive oil if needed.
    Add the diced chicken breast and cook until it’s no longer pink, about 5-7 minutes.
    Season with black pepper, garlic powder, and oregano to taste.
    Stir in the tomato sauce and cook for another 2 minutes.
    Combine and Cook:
    Pour the batter into the skillet with the chicken.
    Add the cooked vegetables back into the skillet.
    Stir in the cream for cooking.
    Sprinkle grated cheese over the top.
    Cover the skillet and cook on low heat until the cheese is melted and the batter is set, about 10 minutes.
    Serve:
    Serve the dish warm. Enjoy this quick and incredibly good dinner!
    Serving Suggestions:

    Pair with a simple green salad or steamed veggies for a complete meal.
    Great on its own or with a side of crusty bread.
    Storage Tips:

    Refrigeration: Store leftovers in an airtight container in the refrigerator for up to 3 days.
    Reheating: Reheat in the skillet over low heat or in the microwave until warmed through.
    Tips for Perfect Skillet Dish:

    Ensure Even Cooking: Make sure to spread the batter evenly in the skillet to ensure it cooks through properly.
    Cover the Skillet: Covering the skillet helps the cheese melt evenly and the batter to cook thoroughly.
    FAQ

    Can I use a different type of cheese?
    Yes, you can use any type of cheese you prefer or have on hand. Cheddar, mozzarella, or a cheese blend works well.

    Can I make this dish ahead of time?
    Yes, you can prepare the dish ahead of time. Just store it in the refrigerator and reheat before serving. The flavors may develop further after sitting for a bit.

    Can I substitute the chicken with another protein?
    Absolutely! You can use cooked beef, pork, or even tofu as a substitute for chicken. Adjust the cooking time based on the protein you choose.

    What if I don’t have fresh vegetables?
    You can use frozen or canned vegetables as a substitute. Just be sure to drain and cook them according to package instructions before adding them to the skillet.

    Can I use dairy-free alternatives?
    Yes, you can substitute dairy-free milk, cream, and cheese if you prefer. Ensure that the alternatives are suitable for cooking to maintain the dish’s texture and flavor.

    How do I know when the batter is set?
    The batter is set when it is firm to the touch and the top is golden brown. You can also insert a knife into the center; it should come out clean if the dish is fully cooked.

    Can I add more spices or herbs?
    Definitely! Feel free to adjust the seasoning and add your favorite spices or herbs to enhance the flavor of the dish.

    Is this recipe suitable for freezing?
    Yes, this dish freezes well. Allow it to cool completely, then wrap tightly and freeze for up to 3 months. Thaw in the refrigerator before reheating.

    How do I make the dish spicier?
    You can add a pinch of red pepper flakes, cayenne pepper, or hot sauce to the filling for an extra kick.

    Can I use a different type of flour?
    You can use whole wheat flour or gluten-free flour if preferred. Just be aware that it may slightly change the texture of the batter.

    Conclusion:
    This savory potato and chicken skillet is a delicious and easy-to-make meal that’s perfect for a busy weeknight dinner. With its rich flavors and creamy texture, it’s sure to be a hit with the whole family. Enjoy the simplicity and taste of this delightful dish!

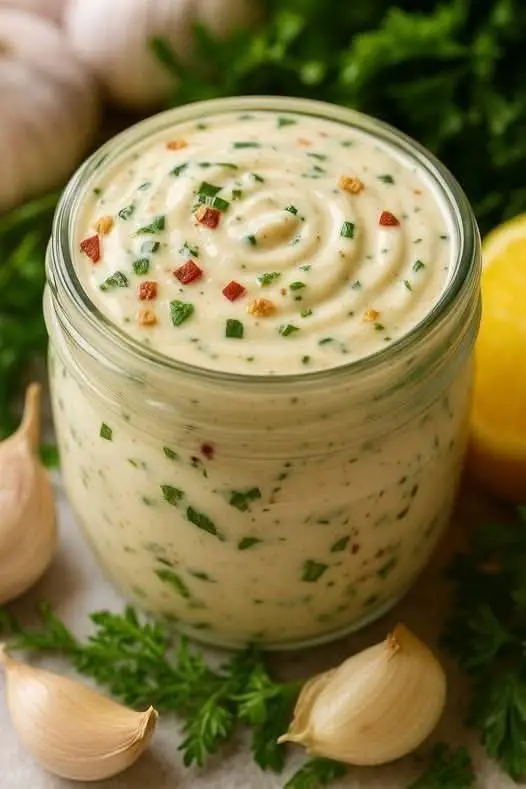
  • Creamy garlic sauce: no cooking required and ready in 5 minutes

    Creamy garlic sauce: no cooking required and ready in 5 minutes

    This intensely flavored garlic sauce will last up to 5 days in good condition.

    The creamy white garlic sauce is a true culinary gem, known for its simplicity and intense yet balanced flavor.

    Originating from Mediterranean cuisines, it has become popular around the world for its velvety texture and versatility.

    And the best part: it doesn’t need to be heated, making it an ideal solution for those looking for practicality without sacrificing quality.

    Made with a base of milk and oil, emulsified with fresh garlic, this smooth cream is perfect for enhancing roast meats, baked potatoes, steamed vegetables, sandwiches, wraps and salads.

    It’s also great as a dip for artisan breads or vegetable chips.

    Best of all, this recipe can be made in less than 5 minutes, with ingredients you probably already have at home.

    It’s a homemade, preservative-free alternative to industrialized versions — with a more authentic flavor that can be customized your way.


    Ingredients

      • 3 peeled garlic cloves
      • ½ cup of very cold milk
      • 1 teaspoon salt
    • 1 cup neutral oil (such as sunflower or vegetable oil)

    Preparation method

    1. Place the garlic cloves, cold milk and salt in a blender jar or use a hand blender.
    2. Blend for a few seconds until the garlic is completely dissolved in the milk.
    3. Start adding the oil little by little, in a thin, continuous stream, without stopping to beat. This step must be done slowly so that the emulsion forms correctly.
    4. The mixture will turn white and begin to thicken. Continue beating until it reaches a creamy, firm texture.
    5. Adjust salt if necessary and refrigerate if not using immediately.

    Additional tips

    • Type of garlic : If you want a milder flavor, use roasted garlic or blanch the cloves for a minute in boiling water.
    • Adjustable texture : For a lighter consistency, add a little more milk; for a thicker sauce, increase the oil a little.
    • Vegan version : Replace the milk with an unsweetened plant-based drink, such as soy or almond milk. The emulsion may take a little longer to set, but it works very well.
    • Flavor accents : Add ingredients like lemon juice, white vinegar, Dijon mustard, chopped parsley or black pepper to add a special touch, depending on the occasion.
    • Recommended uses : Ideal for shawarma, kebabs, burgers, fresh salads or even as a sauce for cold pasta.
    • Storage : Store the sauce in a covered jar in the refrigerator. It will last up to 5 days in good condition. Freezing is not recommended, as the emulsion may separate.
  • Egg Drop Soup

    Egg Drop Soup

    Egg Drop Soup

    Ingredients:

    • 4 cups chicken broth (or vegetable broth)

    • 2 large eggs

    • 1 tablespoon cornstarch (optional, for thickness)

    • 1 tablespoon water (for cornstarch slurry)

    • ½ teaspoon grated ginger (optional)

    • 1 tablespoon soy sauce

    • ¼ teaspoon white pepper (or black pepper)

    • Salt to taste

    • 2 green onions, finely chopped

    • Sesame oil (few drops, optional)


    Instructions:

    1. Heat the broth:
      In a medium saucepan, bring the chicken broth to a gentle boil. Add soy sauce, ginger, pepper, and salt.

    2. Thicken (optional):
      If you want a thicker soup, mix 1 tablespoon cornstarch with 1 tablespoon water in a small bowl. Stir into the broth and simmer for 2 minutes until slightly thickened.

    3. Beat the eggs:
      Crack the eggs into a bowl and beat them lightly with a fork or whisk.

    4. Create the egg ribbons:
      Reduce the soup to a simmer. Slowly drizzle the beaten eggs into the soup while stirring in a circular motion. The eggs will cook instantly and form beautiful ribbons.

    5. Add finishing touches:
      Add chopped green onions and a few drops of sesame oil. Simmer for 30 more seconds and turn off the heat.

    6. Serve hot:
      Ladle the soup into bowls and serve immediately.


    Q&A Section:

    Q: Can I make it vegetarian?
    A: Yes! Use vegetable broth instead of chicken broth and skip the soy sauce or use a vegan version.

    Q: What do the egg ribbons mean?
    A: When the beaten eggs are poured into hot broth slowly while stirring, they form silky strands or “ribbons” – the signature of egg drop soup.

    Q: Can I add vegetables or protein?
    A: Absolutely. Add mushrooms, corn, spinach, tofu, or cooked chicken for extra texture and nutrition.

    Q: How to make it gluten-free?
    A: Use gluten-free soy sauce (like tamari) and ensure all other ingredients are GF-certified.

    Q: How long does it last?
    A: Best enjoyed fresh, but you can store leftovers in the fridge for up to 2 days. Reheat gently to avoid overcooking the egg.


    Enjoy your warm, comforting bowl of homemade egg drop soup!

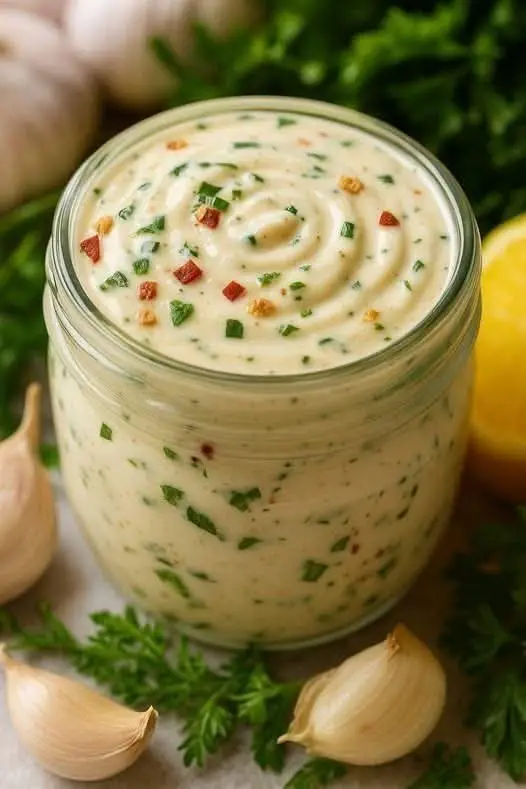
  • Creamy garlic sauce: no cooking required and ready in 5 minutes

    Creamy garlic sauce: no cooking required and ready in 5 minutes

  • Fluffy Vanilla Butter Cake (No-Oven Method)

    Fluffy Vanilla Butter Cake (No-Oven Method)

    This rich, buttery vanilla cake is soft, fluffy, and made without an oven—perfect for those who love homemade cakes but don’t have access to a traditional oven. Whether you’re baking on the stovetop or in a covered pot, this recipe ensures a moist, bakery-style vanilla cake every time.


    Ingredients

    Wet Ingredients:

    • 6 large eggs

    • 1 cup (240 ml) milk

    • ½ cup (120 ml) vegetable oil

    • 1 tablespoon vanilla essence

    • 1 teaspoon white vinegar

    Dry Ingredients:

    • 1½ cups (300 g) granulated sugar

    • 2½ cups (310 g) cake flour (sifted)

    • 1 tablespoon baking powder


    Equipment Needed:

    • 8 or 9-inch round or square cake pan

    • Heavy-bottomed pot with lid (if baking without oven)

    • Electric mixer or whisk

    • Mixing bowls

    • Measuring cups and spoons

    • Parchment paper or butter & flour for greasing


    Instructions

    Step 1: Prepare Your Pan

    1. Grease and flour your cake pan generously.

      • Rub with butter (or oil), then lightly dust with flour.

      • Tap out excess flour.

      • Optionally, line the bottom with parchment paper.


    Step 2: Mix Wet Ingredients

    In a large mixing bowl:

    1. Crack in 6 eggs and beat until foamy.

    2. Add 1 cup of milk and beat well.

    3. Add ½ cup of oil and beat again.

    4. Add 1½ cups of sugar and continue beating until the sugar dissolves slightly.

    5. Add 1 tablespoon of vanilla essence and 1 teaspoon of vinegar. Mix until combined.


    Step 3: Incorporate Dry Ingredients

    1. In a separate bowl, sift together:

      • 2½ cups cake flour

      • 1 tablespoon baking powder

    2. Gradually add the dry ingredients into the wet mixture, mixing continuously.

    3. Beat for about 2 minutes or until the batter is smooth and lump-free.


    Step 4: Prepare for Baking Without an Oven

    You can use one of the following no-oven methods:

    Stovetop Pot Method:

    1. Use a heavy-bottomed pot large enough to hold your cake pan.

    2. Place a metal trivet or ring at the bottom of the pot.

    3. Preheat the pot with the lid on over low to medium-low heat for 10 minutes.


    Step 5: Bake the Cake

    1. Pour the batter into the prepared pan.

    2. Gently tap the pan on the counter to release any air bubbles.

    3. Place the cake pan onto the trivet inside the preheated pot.

    4. Cover the pot with a tight-fitting lid, wrap it with a kitchen towel (optional) to trap steam and heat evenly.

    5. Bake on low heat for 50–60 minutes.

      • Do not open the lid before 50 minutes or the cake may collapse.

      • Check doneness by inserting a toothpick—it should come out clean.

      • The top should look slightly golden or lightly toasted.


    ❄️ Step 6: Cool and Serve

    1. Once baked, turn off the heat and let the cake sit covered for 10 minutes in the warm pot.

    2. Remove from the pot and let it cool in the pan for 15 minutes.

    3. Transfer to a wire rack to cool completely.

    4. Optional: Sprinkle with powdered sugar or glaze once cool.


    Tips & Tricks for the Best Result:

    • Room-temperature eggs help incorporate air better.

    • Use cake flour for a finer, softer crumb.

    • Beat well after each addition to keep the batter light and fluffy.

    • Keep the pot lid closed tightly to simulate oven heat properly.

    • Try adding a pinch of lemon zest or nutmeg for a flavor twist.


    ️ Serving Suggestions:

    This vanilla butter cake pairs beautifully with:

    • Fresh berries and whipped cream

    • A drizzle of honey or chocolate sauce

    • Your favorite tea or coffee


    Storage:

    • Store in an airtight container at room temperature for up to 3 days.

    • Can be wrapped and frozen for up to 2 months.

  • Just mix water and oats! Gluten-free – Easy, delicious, and healthy recipe!

    Just mix water and oats! Gluten-free – Easy, delicious, and healthy recipe!

    A gluten-free snack that’s filling, very light and nutritious, and delicious.

    Imagine a delicious, easy-to-make, gluten-free snack perfect for any occasion. Got it?

    So, come and check out this delicious recipe, super light and melt-in-your-mouth.

    Don’t miss the step-by-step guide to this divine, unmissable, and irresistible snack! I bet it will be your family’s favorite.

    Ingredients:

    • 1 cup (tea) of water
    • ½ cup (tea) of oat flour
    • Salt to taste
    • 1 dash of olive oil
    • 1 chopped tomato
    • 2 eggs
    • 1 cup (tea) of fried and shredded chicken breast

    Preparation method:

    In a bowl, mix the water, oat flour and salt, beating well with a mixer until a homogeneous dough forms.

    Heat a frying pan over low/medium heat, add a drizzle of olive oil and spread well.

    Add a small portion of the batter and cook until golden brown on both sides, forming a pancake. Repeat the process until the batter is gone, then set aside.

    In the same frying pan, add a drizzle of olive oil and add the chopped tomatoes, beaten eggs and shredded chicken.

    Place a pancake on top and let it brown on both sides. Remove from heat, serve, and enjoy this wonderful gluten-free snack!

    Simple, quick and full of flavor!

  • Revitalize Your Strength Naturally: The Ultimate Vitality Smoothie for Men

    Revitalize Your Strength Naturally: The Ultimate Vitality Smoothie for Men

    Every man deserves to feel confident, energized, and in control—both in everyday life and in moments that matter most. If you’re searching for a natural way to support stamina, enhance blood flow, and boost overall performance, this revitalizing Vitality Smoothie is a powerful addition to your daily routine. Made with nutrient-dense ingredients like beetroot, spinach, ginger, and banana, this smoothie is designed to support energy, circulation, and male vitality from the inside out.

    Why These Ingredients Work Together

    Beetroot – A Natural Nitric Oxide Booster
    Beets are rich in nitrates, which the body converts to nitric oxide. This compound helps relax blood vessels, promoting better circulation, oxygen flow, and overall cardiovascular health. Improved blood flow is essential for endurance, energy, and physical performance.

    Spinach – A Mineral-Rich Green
    Packed with magnesium, iron, and folate, spinach supports testosterone production and helps reduce inflammation. These nutrients also contribute to muscle function and overall energy levels.

    Banana – The Natural Energy Source
    Bananas provide quick-release carbohydrates for sustained energy, along with potassium to support nerve function and muscle control. They also help replenish electrolytes lost through physical activity.

    Ginger – A Circulation Enhancer
    Ginger increases blood flow and supports hormone regulation. Its anti-inflammatory properties also help reduce fatigue and enhance physical readiness.

    Lemon – For Detox and Clarity
    Lemon juice adds a dose of vitamin C, helping with toxin elimination and immune support. It also promotes hydration and digestion.

    Optional Additions for Extra Benefits:

    • Flaxseed or chia seeds for omega-3s and hormone balance
    • Maca powder to support stamina and libido
    • A small handful of walnuts for zinc and healthy fats

    Vitality Smoothie Recipe


    • 1 small raw beetroot (peeled and chopped)
    • 1 cup fresh spinach leaves
    • 1 ripe banana
    • 1-inch piece of fresh ginger (peeled and chopped)
    • Juice of half a lemon
    • 1 cup water or coconut water
    • 1 teaspoon raw honey (optional)
    • Ice cubes (optional)

    Instructions:

    1.  Add all ingredients to a high-speed blender.
    2. Blend until smooth and creamy.
    3. Serve immediately for maximum freshness and nutrient impact.

    When to Drink for Best Results

    • Morning – To energize your day and improve circulation
    • Pre-workout – For enhanced stamina, endurance, and muscle activation
    • Afternoon slump – As a natural pick-me-up without caffeine or sugar crashes

    Final Thoughts

    This Vitality Smoothie is more than just a healthy drink—it’s a strategic blend of ingredients that support male wellness from multiple angles. Whether you’re looking to improve energy, support circulation, or maintain hormonal balance, this smoothie offers a natural, effective, and delicious solution.

    Make it part of your daily wellness ritual and feel the difference in your strength, focus, and confidence.

    Would you like a visual 4-panel collage (JPG format) to go with this article as well I can generate one for you.

  • Say goodbye to store-bought bread! Quick, no-knead recipe for beginners

    Say goodbye to store-bought bread! Quick, no-knead recipe for beginners

    Easy homemade bread, soft on the inside and crispy on the outside.

    Making bread at home may seem complicated, but this simple recipe proves otherwise!

    With just a few ingredients and no need to knead the dough, you can get bread that’s fluffy on the inside and has an irresistibly crispy crust.

    The whole process takes about an hour and a half, and the result is incredible!

    Ingredients:

    • 280 g of warm water
    • 5 g fresh yeast
    • 350 g wheat flour
    • 1 teaspoon of salt

    Preparation method:

    In a bowl, dissolve the yeast in the warm water, mixing well.

    Add the flour and salt, stirring until completely incorporated, without leaving any dry patches.

    Cover the bowl with plastic wrap and let it rest in a warm place for 30 minutes.

    With slightly damp hands, pull the edges of the dough and fold them toward the center. Repeat this process two more times, always letting the dough rest between folds.

    When the dough has doubled in size, transfer it to a floured surface and form a ball. Let it rest for 20 minutes.

    Shape the dough into an elongated shape and place it on a baking sheet dusted with flour.

    Cover with plastic wrap and let rise in a warm place for another 60 minutes, until doubled in size.

    Preheat the oven to 240°C. Sprinkle a little water over the dough, make a few cuts and bake for 15 minutes covered with a lid (you can use another pan to cover).

    Remove the covering and bake for another 15 minutes, until the bread is golden brown and has a crispy crust.

    Now just wait for it to cool down a little and enjoy the aroma and flavor of homemade bread fresh from the oven!

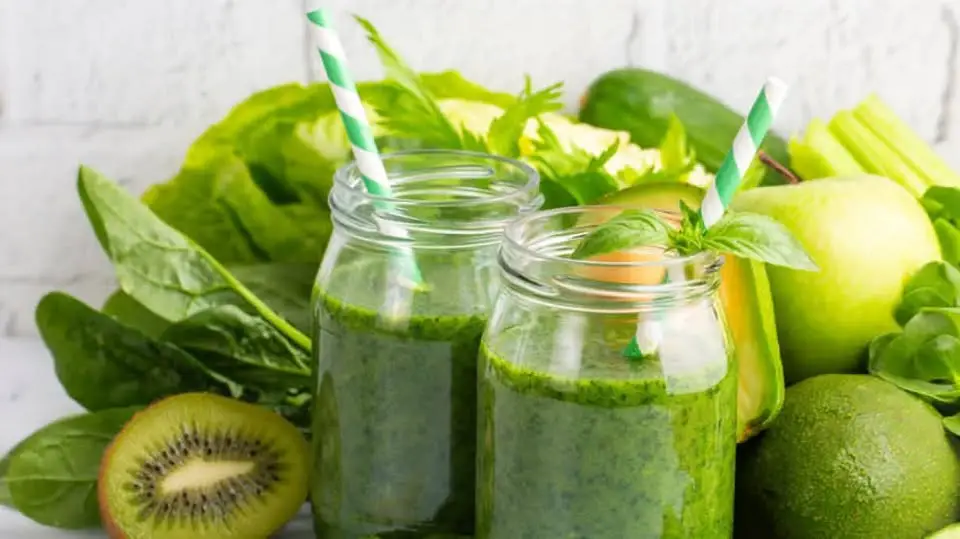
  • Avocado Mint Green Smoothie

    Avocado Mint Green Smoothie

    Avocado Mint Green Smoothie 1f9511f33f

    Ingredients:
    – 1 ripe avocado
    – 1 handful of fresh mint leaves
    – 1 cup spinach
    – 1 banana
    – 1 cup almond milk
    – 1 tablespoon honey
    – Ice cubes (optional)

    Directions:

    Step 1: Prepare Ingredients
    Gather the ripe avocado, fresh mint leaves, spinach, banana, almond milk, honey, and ice cubes.

    Step 2: Blend Avocado and Greens
    In a blender, combine the avocado, mint leaves, spinach, and almond milk. Blend until smooth.

    Step 3: Add Banana and Honey
    Add the banana and honey to the blender. Blend again until all ingredients are well combined.

    Step 4: Adjust Consistency
    If desired, add ice cubes to the blender to make the smoothie colder and thicker. Blend until smooth.

    Step 5: Serve
    Pour the avocado mint green smoothie into glasses and garnish with mint leaves. Enjoy your refreshing and nutritious smoothie!

    Prep Time: 10 minutes | Total Time: 15 minutes | Servings: 2

  • SUNSHINE SMOOTHIE!

    SUNSHINE SMOOTHIE!

    SUNSHINE SMOOTHIE! ❤️1f31e
    1f4dd Ingredients:
    1f34d 1 cup fresh pineapple chunks
    1f34a 1 orange, peeled and segmented
    1f34c 1 ripe banana
    1f96d 1/2 cup mango chunks (fresh or frozen)
    1f95b 1 cup coconut water (or any preferred juice)
    1f36f 1 tablespoon honey (optional for extra sweetness)
    1f9ca A handful of ice cubes
    1f373 Preparation Steps:
    1f964 In a blender, add the pineapple, orange segments, banana, and mango chunks.
    1f95b Pour in the coconut water and add honey if you like it sweeter.
    1f9ca Toss in the ice cubes to make it extra cold and refreshing.
    1f504 Blend until smooth and creamy.
    1f379 Pour into a glass, garnish with a slice of orange or pineapple

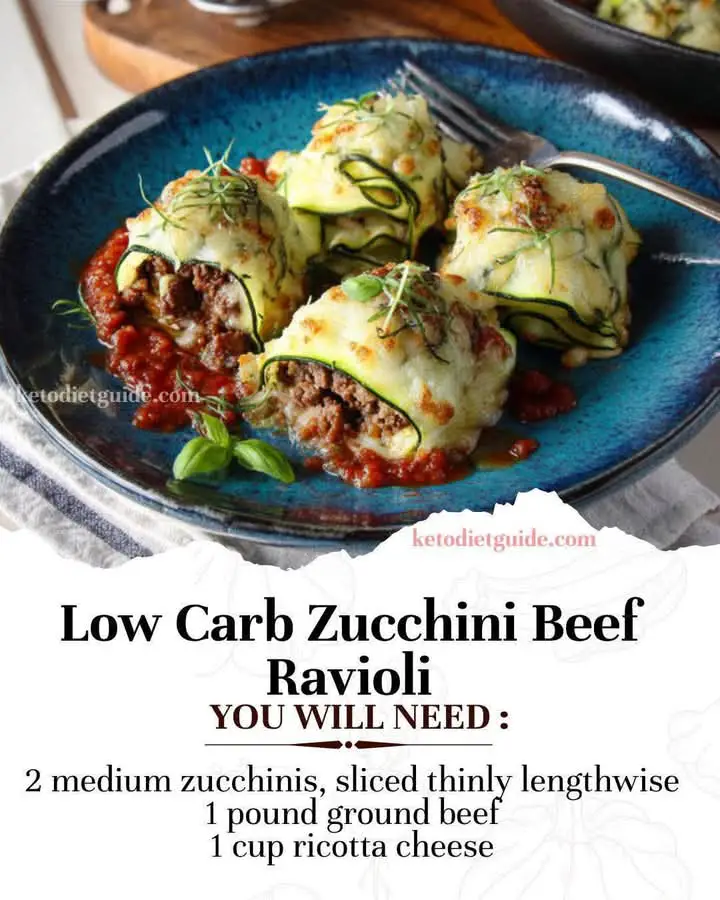
  • Mediterranean Zucchini Beef Ravioli (Low Carb)

    Mediterranean Zucchini Beef Ravioli (Low Carb)

    Mediterranean Zucchini Beef Ravioli (Low Carb)


    Ingredients:

    • 2 medium zucchinis, sliced thinly lengthwise (use a mandoline for best results)
    • 1 pound ground beef (or ground lamb for a more Mediterranean taste)
    • 2 tablespoons olive oil
    • 2 cloves garlic, minced
    • 1 teaspoon dried oregano
    • 1/2 teaspoon ground cumin (optional, for depth)
    • Salt and black pepper, to taste
    • 1 cup ricotta cheese (or labneh for tang)
    • 1/4 cup chopped fresh parsley or basil
    • 1 cup shredded mozzarella cheese
    • 1/2 cup grated Parmesan or kefalotyri cheese
    • 1/2 cup crushed tomatoes (or cherry tomatoes, finely chopped)
    • Optional: red pepper flakes for a mild kick


    Instructions:


    Preheat oven to 375°F (190°C).

    Prepare the zucchini strips:

    Slice zucchinis lengthwise into thin ribbons.

    Lightly salt and let sit for 10 minutes to draw out moisture.

    Pat dry with a paper towel.

    Cook the beef:

    In a skillet, heat olive oil over medium heat.

    Add garlic and sauté for 30 seconds until fragrant.

    Add ground beef, cumin, oregano, salt, and pepper. Cook until browned.

    Remove from heat and let it cool slightly.

    Make the filling:

    In a bowl, mix the cooked beef with ricotta, chopped parsley (or basil), and half of the Parmesan cheese.

    Assemble ravioli:

    On a clean surface, lay two zucchini slices in a cross shape.

    Spoon about 1–2 tablespoons of the beef-ricotta mixture in the center.

    Fold each end of the zucchini over the filling like a parcel.

    Place seam-side down in a lightly greased baking dish.

    Top and bake:

    Spoon a little crushed tomato over each ravioli parcel.

    Sprinkle with mozzarella and remaining Parmesan.

    Cover with foil and bake for 15 minutes.

    Uncover and broil for 3–5 minutes until cheese is golden and bubbly.

    Garnish & Serve:

    Top with extra fresh herbs (parsley, oregano, or basil) and a drizzle of extra virgin olive oil. Serve warm with a side of Greek salad or roasted eggplant.

  • Mediterranean Zucchini Beef Ravioli (Low Carb)

    Mediterranean Zucchini Beef Ravioli (Low Carb)

     Mediterranean Zucchini Beef Ravioli (Low Carb)

    Ingredients:

    • 2 medium zucchinis, sliced thinly lengthwise (use a mandoline for best results)
    • 1 pound ground beef (or ground lamb for a more Mediterranean taste)
    • 2 tablespoons olive oil
    • 2 cloves garlic, minced
    • 1 teaspoon dried oregano
    • 1/2 teaspoon ground cumin (optional, for depth)
    • Salt and black pepper, to taste
    • 1 cup ricotta cheese (or labneh for tang)
    • 1/4 cup chopped fresh parsley or basil
    • 1 cup shredded mozzarella cheese
    • 1/2 cup grated Parmesan or kefalotyri cheese
    • 1/2 cup crushed tomatoes (or cherry tomatoes, finely chopped)
    • Optional: red pepper flakes for a mild kick

    Instructions:

    1. Preheat oven to 375°F (190°C).
    2. Prepare the zucchini strips:
    3. Slice zucchinis lengthwise into thin ribbons.
    4. Lightly salt and let sit for 10 minutes to draw out moisture.
    5. Pat dry with a paper towel.
    6. Cook the beef:
    7. In a skillet, heat olive oil over medium heat.
    8. Add garlic and sauté for 30 seconds until fragrant.
    9. Add ground beef, cumin, oregano, salt, and pepper. Cook until browned.
    10. Remove from heat and let it cool slightly.
    11.  Make the filling:
    12. In a bowl, mix the cooked beef with ricotta, chopped parsley (or basil), and half of the Parmesan cheese.
    13. Assemble ravioli:
    14. On a clean surface, lay two zucchini slices in a cross shape.
    15. Spoon about 1–2 tablespoons of the beef-ricotta mixture in the center.
    16. Fold each end of the zucchini over the filling like a parcel.
    17. Place seam-side down in a lightly greased baking dish.
    18.  Top and bake:
    19. Spoon a little crushed tomato over each ravioli parcel.
    20. Sprinkle with mozzarella and remaining Parmesan.
    21. Cover with foil and bake for 15 minutes.
    22. Uncover and broil for 3–5 minutes until cheese is golden and bubbly.

    Garnish & Serve:

    Top with extra fresh herbs (parsley, oregano, or basil) and a drizzle of extra virgin olive oil. Serve warm with a side of Greek salad or roasted eggplant.

  • Mediterranean Pea Salad

    Mediterranean Pea Salad

    Mediterranean Pea Salad

    Fresh, herby, and tangy – with a creamy finish!

    Ingredients:

    • 1 (16-ounce) package of frozen sweet peas, thawed (or canned peas, drained)
    • 2 hard-boiled eggs, chopped
    • 1/2 cup crumbled feta cheese (instead of cheddar)
    • 1/2 cup chopped cucumber (adds crunch and freshness)
    • 1/4 cup chopped red onion (or use green onions for a milder flavor)
    • 1/4 cup sliced black or kalamata olives
    • 2 tablespoons chopped fresh parsley (or mint)
    • 1 tablespoon extra virgin olive oil
    • 2 tablespoons Greek yogurt (or labneh, for creaminess)
    • 1 tablespoon fresh lemon juice
    • 1/4 teaspoon black pepper
    • Salt to taste
    • Optional: 4–6 slices turkey bacon, crisped and crumbled, or sun-dried tomatoes for a vegetarian option


    Instructions:

    • 1. Prep the peas: If using frozen peas, thaw and drain them. If using canned peas, rinse and drain gently.
    • 2. In a large mixing bowl, combine peas, chopped eggs, feta, cucumber, red onion, olives, and parsley.
    • 3. In a small bowl, whisk together olive oil, Greek yogurt, lemon juice, black pepper, and salt.
    • 4. Pour the dressing over the salad and toss gently to coat everything well.
    • 5. Top with crumbled turkey bacon or sun-dried tomatoes if using.
    • 6. Chill for 30 minutes before serving to let the flavors meld.
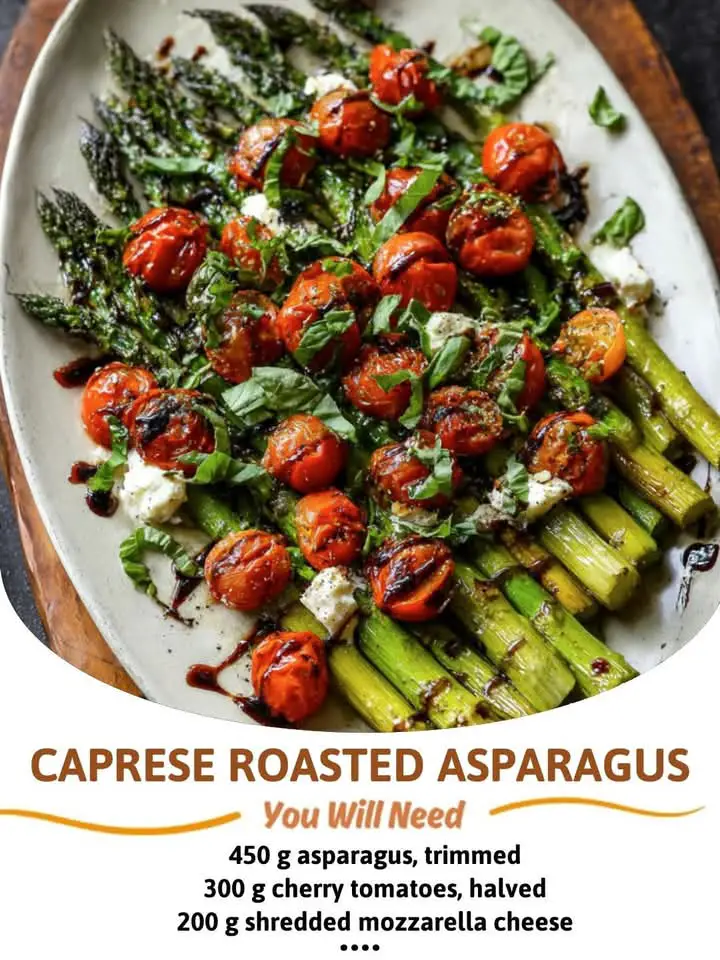
  • Mediterranean Caprese Roasted Asparagus

    Mediterranean Caprese Roasted Asparagus

    Mediterranean Caprese Roasted Asparagus

    Recipe

    A vibrant, healthy twist on the classic Caprese—featuring tender roasted asparagus, juicy cherry tomatoes, creamy mozzarella, and a drizzle of herbed balsamic glaze.

    Ingredients

    → Vegetables

    • 450 g asparagus, trimmed
    • 300 g cherry tomatoes, halved

    → Cheese

    • 200 g shredded mozzarella cheese (or fres mozzarella pearls for a more traditional Caprese flavor)

    → Oils & Condiments

    • 2 tablespoons extra virgin olive oil Kosher salt, to taste
    • Freshly ground black pepper, to taste

    → Herbs & Garnish

    • 8–10 fresh basil leaves, torn
    • 1 teaspoon dried oregano
    • Optional: 1 teaspoon minced garlic or garlic powder

    → Optional Balsamic Glaze (for drizzling)

    • 1/4 cup balsamic vinegar
    • 1 teaspoon honey

    Instructions

    1. Preheat Oven:
    Preheat your oven to 200°C (400°F). Line a baking tray with parchment paper.

    2. Prepare the Veggies:
    Lay the trimmed asparagus on the tray. Scatter halved cherry tomatoes over the asparagus. Drizzle with olive oil, sprinkle with salt, pepper, oregano, and garlic (if using). Toss lightly to coat.

    3. Roast:
    Roast in the oven for 12–15 minutes, or until the asparagus is tender and tomatoes are slightly blistered.

    4. Add the Cheese:
    Remove from oven, sprinkle mozzarella evenly on top, and return to the oven for another 3–4 minutes, or until the cheese is melted and bubbly.

    5. Finish with Mediterranean Touch:
    Remove from oven and top with fresh basil leaves. Optionally, drizzle with balsamic glaze (see below).