Author: Admin

  • Comfort in a Skillet: Creamy Chicken with Orzo and Herbs

    Comfort in a Skillet: Creamy Chicken with Orzo and Herbs

    Ingredients:
    2 tablespoons extra virgin olive oil
    1 yellow onion, chopped
    1 pound boneless chicken breasts or thighs
    1 teaspoon yellow curry powder
    6 tablespoons salted butter
    2 tablespoons fresh thyme leaves
    1 tablespoon chopped fresh sage
    3 cups low sodium chicken broth
    2 tablespoons lemon juice
    2 shallots, halved
    2 ribs celery, chopped
    4 carrots, chopped
    1 head garlic, halved
    3/4 cup dry orzo
    1 parmesan rind (optional for added flavor)
    Salt and pepper, to taste
    Instructions:
    Preheat the oven to 400°F (200°C).
    In a large oven-safe skillet, heat olive oil over medium heat. Add the chopped onion and cook for 5 minutes until fragrant.
    Push the onions to the side and add the chicken, sprinkling it with the curry powder. Season with salt and pepper. Add butter, shallots, celery, carrots, thyme, and sage to the skillet. Cook for another 5 minutes until the vegetables start to soften.
    Pour in 2-3 cups of chicken broth (save the remaining for later) and add the lemon juice, garlic, and parmesan rind. Transfer the skillet to the oven and cook uncovered for 15 minutes until the chicken is fully cooked.
    Remove the skillet from the oven, add the orzo, and pour in 1/2 cup of the remaining broth. Return to the oven and cook for an additional 10-12 minutes, until the orzo is al dente. If you prefer more broth, add the remaining 1-2 1/2 cups during this time.
    Once done, serve the chicken over the orzo with broth. Top with freshly grated parmesan (optional) and garnish with extra thyme or parsley if desired.

  • Zesty Grilled Steak Fajitas with Fresh Veggies

    Zesty Grilled Steak Fajitas with Fresh Veggies

    Ingredients:
    2 pounds skirt, flank, sirloin, or hanger steak, sliced into 1/2-inch strips
    1 red pepper, deseeded and sliced into thin strips
    1 bell pepper, deseeded and sliced into thin strips
    1 medium onion, peeled and sliced into thin strips
    3 tablespoons olive oil
    1 tablespoon lime juice
    1/2 teaspoon chili powder
    1 teaspoon ground cumin
    Pinch of cayenne pepper
    1/2 teaspoon Kosher salt
    1/2 teaspoon ground black pepper
    2 cloves garlic, minced
    6-8 tortillas, warmed
    Optional Garnishes:
    Sour cream
    Guacamole
    Salsa
    Instructions:
    Marinate the Steak and Vegetables: Place the steak into a sealable bag. Place the peppers and onion into a separate sealable bag. In a jar with a screw-top lid, combine olive oil, lime juice, chili powder, cumin, cayenne pepper, salt, black pepper, and minced garlic. Shake until well mixed. Pour 1/3 of the marinade over the steak and another 1/3 over the vegetables. Reserve the remaining marinade. Seal the bags tightly and refrigerate for at least one hour, up to overnight for best flavor.
    Cook the Vegetables: Heat a large skillet over medium-high heat. Pour the marinated vegetables into the skillet and cook until they are just tender-crisp, about 5 minutes. Remove the vegetables from the skillet and set aside.
    Cook the Steak: In the same skillet, cook the steak strips for about 7-10 minutes until cooked through. Once the steak is done, add the reserved marinade along with the cooked vegetables back into the skillet. Stir and heat through for 1-2 minutes.
    Assemble and Serve: Serve the steak fajitas with warmed tortillas. Garnish with optional toppings like sour cream, guacamole, or salsa.
    Prep Time: 10 minutes | Marinating Time: 1 hour | Cook Time: 15 minutes | Total Time: 1 hour 25 minutes | Servings: 6

  • Chocolate brownies

    Chocolate brownies

    Ingredients


    1/2 cup (115g) unsalted butter, melted


    1 cup (200g) granulated sugar


    2 large eggs


    1 teaspoon vanilla extract


    1/3 cup (40g) unsweetened cocoa powder


    1/2 cup (65g) all-purpose flour


    1/4 teaspoon salt


    1/4 teaspoon baking powder


    1/2 cup (90g) chocolate chips or chopped chocolate (optional)


    1/2 cup (60g) chopped nuts (optional)


    Instructions


    1. Preheat your oven to 350°F (175°C) and grease or line an 8×8-inch (20×20 cm) baking pan with parchment paper.


    2. In a mixing bowl, whisk together melted butter and sugar until smooth.


    3. Add the eggs and vanilla extract, and whisk until well combined.


    4. Sift in cocoa powder, flour, salt, and baking powder, then gently fold the ingredients together using a spatula.


    5. Stir in chocolate chips or nuts if using.


    6. Pour the batter into the prepared baking pan and spread evenly.


    7. Bake for 20-25 minutes, or until a toothpick inserted in the center comes out with a few moist crumbs.


    8. Let the brownies cool in the pan for 10 minutes, then transfer to a wire rack to cool completely before cutting.


    Enjoy your fudgy and rich chocolate brownies! Let me know if you’d like any modifications, like making them extra gooey or adding caramel.

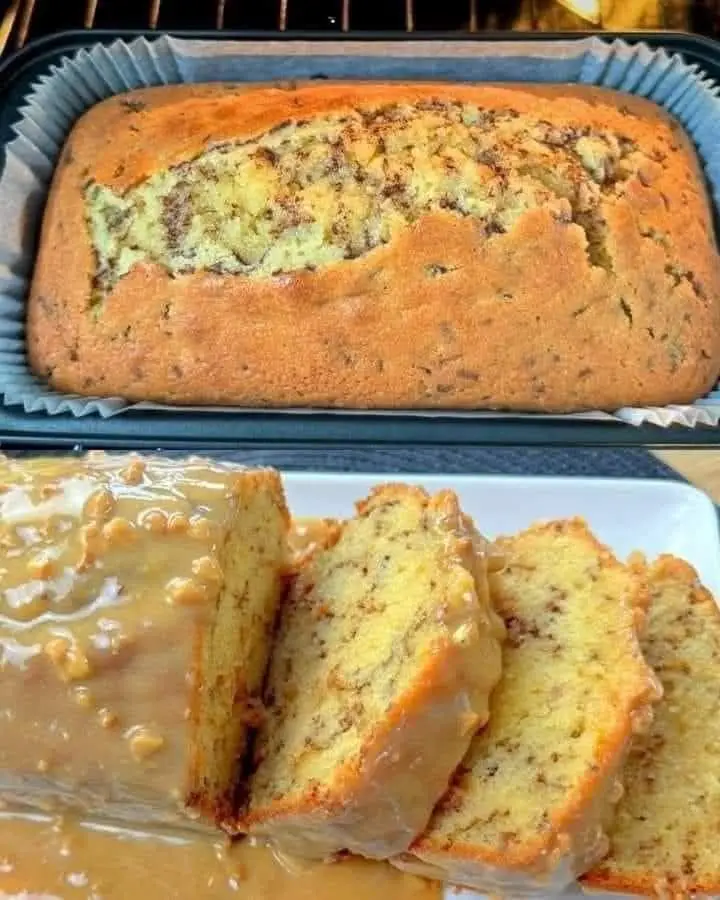
  • Classic Cinnamon Coffee Cake: A Comforting Slice of Tradition

    Classic Cinnamon Coffee Cake: A Comforting Slice of Tradition

    Classic Cinnamon Coffee Cake: A Comforting Slice of Tradition

    The Heartwarming Story of Cinnamon Coffee Cake

    Cinnamon Coffee Cake is more than just a dessert – it’s a nostalgic journey through American baking traditions. Originating from European streusel cakes brought by immigrants, this beloved treat has become a staple of weekend breakfasts, afternoon coffee breaks, and family gatherings. The perfect balance of tender cake, rich cinnamon, and crumbly streusel topping creates a symphony of flavors that warms both heart and home.


    Ingredient List with US and Metric Measurements

    For the Cake Batter:

    1 3/4 cups (220g) all-purpose flour

    1 1/2 teaspoons (7g) baking powder

    1/4 teaspoon (1.5g) baking soda

    1/2 teaspoon (3g) salt

    1/4 cup (57g) unsalted butter, softened

    1/4 cup (60ml) canola or vegetable oil

    3/4 cup (150g) granulated sugar

    2 large eggs (100g), room temperature

    1 teaspoon (5ml) vanilla extract

    1/2 cup (120ml) milk, room temperature

    For the Cinnamon Streusel:

    1 cup (220g) light brown sugar, gently packed

    1 tablespoon (7g) ground cinnamon

    1/2 cup (63g) all-purpose flour

    1/4 cup (57g) unsalted butter, softened

    Step-by-Step Cooking Instructions

    Prepare for Baking

    Preheat oven to 350°F (175°C)

    Grease an 8×8 inch (20×20 cm) square baking pan

    Ensure pan is well-greased to prevent sticking

    Mix Dry Ingredients

    In a medium bowl, whisk together:

    Flour

    Baking powder

    Baking soda

    Salt

    Set aside and prepare for later use

    Cream Butter and Sugar

    In a large mixing bowl, cream together:

    Softened butter

    Canola oil

    Granulated sugar

    Beat until light and fluffy

    This process incorporates air for a tender cake

    Add Wet Ingredients

    Add eggs one at a time, mixing well after each addition

    Stir in vanilla extract

    Mix until fully incorporated and smooth

    Combine Cake Batter

    Alternately add dry ingredients and milk

    Add in halves to prevent overmixing

    Mix just until ingredients are combined

    Avoid overworking the batter to keep cake tender

    Prepare Cinnamon Streusel

    In a small bowl, combine:

    Brown sugar

    Ground cinnamon

    Flour

    Add softened butter

    Work butter into dry ingredients

    Mix until crumbly and well-combined

    Assemble the Cake

    Pour half the batter into prepared pan

    Spread evenly to cover bottom of pan

    Sprinkle half of the cinnamon streusel over batter

    Add remaining batter, carefully spreading to cover

    Top with remaining streusel

    Baking

    Bake for 35-40 minutes

    Test with a toothpick inserted in center

    Toothpick should come out clean

    Look for golden brown top and set center

    Cooling and Serving

    Let cool in pan for at least 10 minutes

    Allows cake to set and makes cutting easier

    Serve warm or at room temperature

    Nutritional Information

    Per Serving (Approximate):


    Calories: 300-350

    Protein: 4-5g

    Carbohydrates: 45-50g

    Fat: 15-18g

    Preparation Time: 20 minutes

    Baking Time: 35-40 minutes

    Total Time: 1 hour

    Servings: 9-12 slices

    Pro Cooking Tips and Tricks

    Ingredient Temperature:

    Use room temperature eggs and milk

    Helps create a smoother, more consistent batter

    Mixing Technique:

    Do not overmix the batter

    Stir just until ingredients are combined

    Streusel Secrets:

    Work butter into dry ingredients with fingertips

    Creates a perfect crumbly texture

    Baking Precision:

    Use an oven thermometer for accurate temperature

    Rotate pan midway for even baking

    Serving Suggestion:

    Serve slightly warm for maximum flavor

    Pairs perfectly with coffee or tea

    Recipe Variations and Substitutions

    Gluten-Free Option: Use gluten-free flour blend

    Nut Lovers: Add chopped pecans or walnuts to streusel

    Dairy-Free Version: Use plant-based milk and margarine

    Spice Variations: Add nutmeg or cardamom to streusel

    Healthier Twist: Substitute some butter with applesauce

    Frequently Asked Questions

    Q1: Can I make this cake ahead of time? A: Yes! Can be made 1-2 days in advance and stored at room temperature.


    Q2: How do I keep the streusel from sinking? A: Ensure batter is thick and don’t overmix. Layer streusel carefully.


    Q3: Can I freeze Cinnamon Coffee Cake? A: Absolutely! Freeze individual slices for up to 3 months.


    Q4: Why is my cake dry? A: Likely due to overbaking or overmixing. Check oven temperature and mix gently.


    Q5: Can I use different spices? A: Experiment with nutmeg, cardamom, or pumpkin pie spice.


    Storage and Make-Ahead Tips

    Room Temperature: Store in airtight container for 3 days

    Refrigeration: Keeps up to 1 week

    Freezing: Wrap slices individually, freeze up to 3 months

    Thawing: Bring to room temperature or warm slightly

    Preparation Hack: Make streusel and measure dry ingredients in advance

    Indulge in this delightful Cinnamon Coffee Cake – a true celebration of comfort and flavor

  • Almond Cream Cake: A Slice of Pure Indulgence

    Almond Cream Cake: A Slice of Pure Indulgence

    The Enchanting Story Behind This Divine Dessert

    Picture a dessert that transcends ordinary baking—a cake so delicate, so rich with flavor, that it transforms an everyday moment into a celebration. The Almond Cream Cake is more than just a recipe; it’s a culinary journey that weaves together the warmth of freshly baked bread, the richness of cream, and the delicate crunch of almond petals.


    Rooted in traditional baking techniques, this cake represents the art of patience and passion. From the gentle rising of the yeast dough to the careful layering of cream and almonds, each step is a testament to the magic that happens when simple ingredients are treated with love and skill.


    Ingredients: Your Gateway to Baking Bliss

    Gather these carefully selected ingredients:


    Warm Milk: 200 ml (6.8 fl oz / 3/4 cup + 1 tbsp)

    Active Dry Yeast: 2 tsp

    Sugar (for yeast): 2 tbsp

    Eggs: 2 large

    Vanillin: 2 g (1/2 tsp vanilla extract)

    Salt: 1 pinch

    Butter (melted): 120 g (4.2 oz / 1/2 cup)

    All-Purpose Flour: 470 g (16.6 oz / 4 cups)

    Sugar (for sprinkling): 120 g (4.2 oz / 1/2 cup)

    Butter (for sprinkling): 50 g (1.8 oz / 1/4 cup)

    Almond Petals: As needed for topping

    Heavy Cream: 125 ml (4.2 fl oz / 1/2 cup)

    Step-by-Step Cooking Instructions: Crafting the Perfect Almond Cream Cake

    Activate the Yeast

    Warm the milk to about 110°F (43°C)

    Add 2 tbsp of sugar to the warm milk

    Sprinkle 2 tsp of active dry yeast over the milk

    Stir gently and let sit in a warm place

    Wait 15-20 minutes until the mixture becomes frothy

    This step is crucial for developing the cake’s light, airy texture

    Prepare the Wet Ingredients

    In a large mixing bowl, combine the activated yeast mixture

    Add 2 eggs at room temperature

    Pour in 120 g of melted butter

    Add 2 g of vanillin or 1/2 tsp of vanilla extract

    Whisk thoroughly to combine all ingredients

    Ensure butter is not too hot to prevent cooking the eggs

    Create the Dough

    Sift 470 g of all-purpose flour to remove any lumps

    Gradually add flour to the wet ingredients

    Add a pinch of salt

    Knead the dough until smooth and elastic

    This process takes about 10-15 minutes

    The dough should be soft but not sticky

    First Rise

    Place the dough in a lightly greased bowl

    Cover with plastic wrap or a clean kitchen towel

    Let rise in a warm, draft-free place

    Allow 1 hour for the dough to double in size

    Ideal rising temperature is around 80-85°F (27-29°C)

    Prepare the Topping

    In a small bowl, mix 120 g of sugar

    Add 50 g of cold, refrigerated butter

    Work the mixture until it resembles coarse crumbs

    This will create a delightful streusel-like topping

    Shape and Second Rise

    Grease a baking pan (9×13 inch or similar)

    Gently transfer the risen dough to the pan

    Spread evenly with your hands

    Let rise again for 20-30 minutes

    Preheat oven to 180°C (350°F)

    Prepare for Baking

    Use your fingers or the back of a spoon to create small indentations

    Sprinkle the sugar-butter mixture over the top

    Dust lightly with additional sugar if desired

    Bake to Golden Perfection

    Place in preheated oven

    Bake for 25-30 minutes until lightly golden brown

    Look for a rich, even color across the top

    Cream and Almond Finish

    Remove cake from oven

    Pour 125 ml of heavy cream over the warm cake

    Sprinkle generously with almond petals

    Return to oven for an additional 10 minutes

    This step adds moisture and a beautiful finish

    Cooling and Serving

    Remove from oven and let cool completely

    The cake will continue to set as it cools

    Cut into generous squares

    Serve at room temperature

    Nutritional Information and Cooking Details

    Serving Size: 1 slice (approximately 100g)

    Calories: 350-400

    Preparation Time: 1 hour 30 minutes

    Rising Time: 1 hour 20 minutes

    Baking Time: 35-40 minutes

    Total Time: Approximately 3 hours

    Servings: 12-16 slices

    Pro Baking Tips and Tricks

    Yeast Activation: Use warm (not hot) milk to activate yeast

    Dough Rising: Create a warm environment for optimal rise

    Flour Sifting: Ensures smooth, lump-free dough

    Butter Temperature: Use room temperature ingredients

    Oven Positioning: Bake in the center of the oven for even browning

    Recipe Variations and Substitutions

    Gluten-Free Option: Use gluten-free flour blend

    Dairy-Free Adaptation: Substitute milk and butter with plant-based alternatives

    Flavor Variations: Add lemon zest or almond extract

    Nut-Free Version: Replace almond petals with coconut flakes

    Spice Twist: Add a pinch of cinnamon or cardamom

    Frequently Asked Questions

    Q1: Can I make this cake ahead of time? A: Yes, you can prepare the dough a day in advance and refrigerate before the second rise.


    Q2: How do I store the cake? A: Store at room temperature, covered, for 2-3 days. Refrigerate for up to 5 days.


    Q3: Can I freeze this cake? A: Yes, wrap tightly and freeze for up to 1 month. Thaw at room temperature.


    Q4: What if my dough doesn’t rise? A: Ensure yeast is fresh and milk is at the right temperature. Warm environment is key.


    Q5: Can I use instant yeast instead? A: Yes, but reduce the amount to 1 1/2 tsp and mix directly with flour.


    Storage and Make-Ahead Tips

    Room Temperature Storage: 2-3 days in an airtight container

    Refrigeration: Up to 5 days

    Freezing: Can be frozen for up to 1 month

    Reheating: Warm briefly in oven at 300°F (150°C)

    Prep Ahead: Dough can be made a day in advance

    Indulge in this heavenly Almond Cream Cake—a true celebration of flavor, texture, and baking

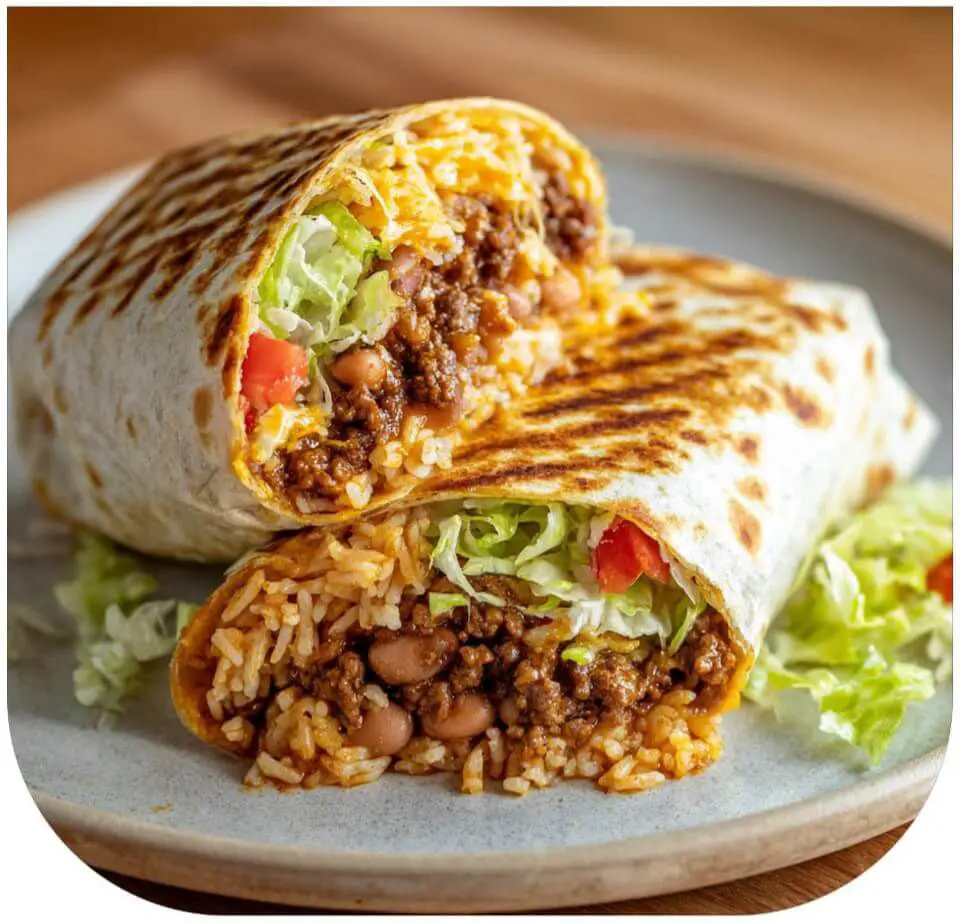
  • Cheesy Beef Tortilla Wraps: A Flavor-Packed Dinner Delight

    Cheesy Beef Tortilla Wraps: A Flavor-Packed Dinner Delight

    Cheesy beef tortilla wraps are a fantastic, customizable, and quick dinner option! Here’s a recipe and some tips to make them a flavor-packed delight:

    Ingredients:

    • For the Beef Filling:
      • 1 lb ground beef
      • 1 medium onion, diced
      • 2 cloves garlic, minced
      • 1 bell pepper (any color), diced
      • 1 (14.5 oz) can diced tomatoes, undrained
      • 1 (4 oz) can diced green chilies (optional, for heat)
      • 2 tbsp chili powder
      • 1 tsp cumin
      • 1/2 tsp paprika
      • Salt and pepper to taste
    • For the Wraps:
      • 8-10 large flour tortillas
      • 2 cups shredded cheese (cheddar, Monterey Jack, or a blend)
      • Optional toppings: sour cream, guacamole, salsa, jalapeños, cilantro

    Instructions:

    1. Cook the Beef:
      • In a large skillet over medium-high heat, brown the ground beef, breaking it up with a spoon.
      • Drain any excess grease.
      • Add the diced onion and bell pepper, and cook until softened, about 5 minutes.
      • Add the minced garlic and cook for another minute until fragrant.
    2. Add the Flavor:
      • Stir in the diced tomatoes, green chilies (if using), chili powder, cumin, paprika, salt, and pepper.
      • Bring to a simmer and cook for 10-15 minutes, or until the sauce has thickened slightly.
    3. Assemble the Wraps:
      • Warm the tortillas according to package directions. This makes them more pliable.
      • Lay a tortilla flat on a clean surface.
      • Spoon a generous amount of the beef filling onto the center of the tortilla.
      • Sprinkle with shredded cheese.
      • Add any other ingredients you would like, such as sour cream, or salsa.
    4. Wrap and Serve:
      • Fold in the sides of the tortilla, then roll it up tightly from the bottom.
      • You can serve the wraps as is, or you can brown them in a pan.
      • To brown them, heat a little oil in a pan, and place the wraps seam side down. Cook until golden brown, then flip and brown the other side.
      • Serve immediately with your favorite toppings.

    Tips and Variations:

    • Spice it Up: Add a pinch of cayenne pepper or a few dashes of hot sauce to the beef filling for extra heat.
    • Vegetarian Option: Substitute the ground beef with cooked lentils or black beans.
    • Cheese Variety: Experiment with different types of cheese, such as pepper jack for a spicy kick.
    • Add Veggies: Include other vegetables like corn, black beans, or mushrooms in the filling.
    • Make it Crispy: For crispy wraps, you can also bake them in the oven at 375°F (190°C) for 10-15 minutes, or until golden brown.
    • Make it ahead: The beef filling can be made ahead of time and stored in the refrigerator for a quick and easy meal.

    Enjoy your delicious cheesy beef tortilla wraps!

  • Ricotta and raisin cake

    Ricotta and raisin cake

    Ingredients

    150 g flour about 5 tablespoons with a slide
    2 eggs
    1 teaspoon baking powder
    80 g butter
    80 g raisins
    100 g sugar about 4 tablespoons
    A pinch of salt
    1 teaspoon vanilla sugar
    130 g ricotta
    Process

    Start by preheating the oven to 180°C. Prepare a baking tray by lining it with baking paper or greasing it with butter and flour.
    In a large bowl, beat the eggs with the sugar, vanilla sugar and a pinch of salt until the mixture is well beaten and foamy.
    Melt the butter and let it cool slightly. Add it to the egg mixture together with the ricotta, mixing well until you have a smooth and homogeneous mixture.
    In another bowl, sift the flour with the baking powder. Gradually add the flour mixture to the wet mixture, stirring gently to combine the ingredients.
    Add the raisins to the mixture, stirring carefully to distribute them evenly.
    Pour the prepared mixture into the pan and level the surface with a spatula to ensure even cooking.
    Bake in the preheated oven and bake for about 30-35 minutes, or until the cake is golden and a toothpick inserted in the center comes out clean.
    Once baked, remove the cake from the oven and let it cool in the pan for a few minutes. Then transfer it to a wire rack to cool completely.
    If desired, sprinkle the cake with a little icing sugar before serving.
    Enjoy your meal!

    Nutritional information
    Serving size: approximately 1/8
    Calories: 180
    Carbohydrates: 24 g
    Protein: 4 g
    Fat: 7 grams
    Source page Ricette facilli

  • Elegant Apple Rose Cakes – A Simple Yet Spectacular Dessert

    Elegant Apple Rose Cakes – A Simple Yet Spectacular Dessert

    I have perfected these beautiful apple rose cakes that transform simple ingredients into a stunning dessert. This recipe emerged from the creative baking scene in France, where chefs were looking to create visually striking desserts using minimal ingredients. The technique of arranging thin slices of apple to look like rose petals has since become a much-loved method of creating spectacular cakes.

    Why this recipe works
    These delicate cakes combine buttery puff pastry with tender cinnamon-spiced apples to create an elegant dessert that looks much more complicated than it actually is. The spiral arrangement of the apple slices creates a dramatic rose effect, while the puff pastry provides a perfectly flaky base.

    Ingredients
    For the pastries

    400g (14oz) puff pastry, thawed if frozen
    3 medium red apples
    30g (2 tbsp) granulated sugar
    10g (1 tbsp) ground cinnamon
    30g (2 tbsp) melted butter
    Powdered sugar for dusting
    For the apple preparation
    Cold water
    1 tbsp lemon juice
    Pinch of salt
    Step-by-step instructions

    1. Apple preparation
      Fill a large bowl with cold water and lemon juice.
      Core the apples and cut in half.
      Slice very thinly (2-3mm) using a mandolin.
      Dip the slices into lemon water immediately.
      Microwave the slices for 30 seconds if needed for extra flexibility.
    2. Dough Preparation
      Preheat oven to 375°F (190°C)
      Roll dough on a floured surface into a rectangle.
      Cut into 6-8 strips (2 inches/5 cm wide)
      Keep unused strips refrigerated.
    3. Assembly Process

    Brush each strip with melted butter.
    Sprinkle with cinnamon-sugar mixture.
    Dry apple slices
    Place along one edge, overlapping slightly.
    Fold bottom half of dough over apple bases.
    Carefully roll up from one end.
    Place in greased muffin tin.

    1. Baking Instructions
      Bake for 40-45 minutes until golden.
      Let cool in tin for 5-10 minutes.
      Remove to wire rack to cool.
      Sprinkle with powdered sugar
      Pro Tips for Success

    Slice apples evenly into thin slices for even baking.
    Keep dough chilled until ready to use.
    Work quickly to prevent dough from warming up.
    Use red apples for a more appealing appearance.
    Make sure muffin pan is well greased.

  • Blood Sugar Balancing Vegetable Soup – A Therapeutic Wellness Dish

    Blood Sugar Balancing Vegetable Soup – A Therapeutic Wellness Dish

    As a nutritionist and chef specializing in therapeutic cuisine, I have perfected this vegetable soup recipe to maximize its blood sugar stabilizing properties. This nutrient-dense soup combines specific vegetables known for their positive impact on glucose regulation, creating a delicious and healing meal that is both satisfying and medicinal.

    Preparation Details
    Prep Time: 15 minutes
    Cook Time: 30 minutes
    Total Time: 45 minutes
    Servings: 6 bowls
    Calories: 120 per serving
    Ingredients
    Basic Vegetables
    2 medium potatoes (400 g), peeled and diced
    1 large carrot (120 g), grated
    1 medium bell pepper (150 g), diced
    ¼ medium cabbage (300 g), shredded
    2 celery stalks (100 g), thinly sliced
    1 medium onion (150 g), diced
    Liquid Base

    2 liters (8 cups) filtered water
    1 teaspoon sea salt (adjust to taste)
    Fresh Herbs
    2 tablespoons chopped fresh basil
    ¼ cup chopped fresh parsley
    Optional Garnish
    Freshly grated Parmesan or Pecorino Romano cheese
    Freshly ground black pepper ground
    Drizzle of extra virgin olive oil
    Instructions

    1. Vegetable preparation
      Wash all vegetables thoroughly.
      Peel and cut potatoes into 1-inch cubes.
      Grate carrot using a large-hole box grater.
      Finely chop onion
      Slice celery into thin half-moons.
      Grate cabbage into thin strips.
      Core and dice bell pepper
    2. Initial cooking phase
      Fill a large pot with 2 quarts of filtered water.
      Add diced potatoes and grated carrots.
      Bring to a gentle boil over medium heat.
      Reduce heat to maintain a steady simmer.
      Cook for 15 minutes or until potatoes are tender when pierced with a fork.
    3. Creating Layers of Flavor
      Add to the simmering pot:
      Diced onion
      Shredded cabbage
      Sliced ​​celery
      Season with salt
      Add chopped basil
      Sit for 10 minutes
    4. Final Additions
      Add diced bell pepper
      Stir in fresh parsley.
      Cover and let simmer for 5 minutes.
      Taste and adjust seasoning.
    5. Serving
      Serve in warm bowls.
      Optional: Top with:
      Grated cheese
      Fresh black pepper
      Drizzle of olive oil
      Pro Tips for Maximum Benefits
      Use starchy potatoes for better blood sugar control
      Don’t overcook vegetables to preserve nutrients.
      Add vegetables in proper sequence for optimal texture.
      Store leftovers in glass containers for up to 3 days.
      Health Benefits
      Blood Sugar Regulation

    Fiber-Rich Components:
    Cabbage and celery provide soluble fiber.
    Potatoes offer resistant starch when chilled.
    Combined effects slow glucose absorption
    Mineral Content:
    Chromium in bell peppers supports insulin function
    Magnesium in green vegetables supports glucose metabolism.
    Potassium helps regulate fluid balance.
    Additional Health Benefits
    Digestive Health:
    High fiber content supports gut health.
    Prebiotic properties feed beneficial bacteria
    Aids in regular elimination.
    Cardiovascular Support:
    Potassium helps regulate blood pressure.
    Antioxidants protect blood vessel health
    Low sodium option when prepared at home
    Weight Management:
    Low calorie density
    High satiety factor
    Supports healthy metabolism.
    Nutritional Information (per serving)

    Calories: 120
    Total Fat: 0.5g
    Saturated Fat: 0g
    Cholesterol: 0mg
    Sodium: 425mg
    Total Carbohydrates: 27g
    Dietary Fiber: 5g
    Sugar: 6g
    Protein: 4g
    Vitamin A: 80% DV
    Vitamin C: 90% DV
    Potassium: 15% DV
    Iron: 10% DV
    This therapeutic vegetable soup is more than just a meal – it’s a natural way to maintain healthy blood sugar levels while also nourishing the body with essential nutrients. The combination of fiber-rich vegetables, complex carbohydrates, and anti-inflammatory ingredients makes it a great choice for those looking to maintain stable blood sugar levels or improve overall metabolic health. Perfect for lunch or dinner, this soup can be enjoyed daily as part of a balanced, healthy diet.

  • The low glycemic index morning cake recipe: healthy and tasty

    The low glycemic index morning cake recipe: healthy and tasty

    • Ingredients:
    • 1 cup of oatmeal
    • 1/2 cup chopped almonds
    • 1 apple, peeled and cut into cubes
    • 1 egg
    • 1/2 cup fresh or frozen cranberries
    • 2 tablespoons honey (or to taste to sweeten)
    • 2 tablespoons coconut oil (melted)

    Procedure:

    1. Preheat the oven to 180°C and line a baking tray with baking paper.
    2. In a large bowl, mix together the oats, chopped almonds and diced apple.
    3. In another bowl, lightly beat the egg and then add it to the oat, almond and apple mixture. Mix well.
    4. Add the cranberries to the mixture and mix gently.
    5. Pour the melted coconut oil and honey over the mixture and mix until smooth.
    6. Pour the mixture into the prepared pan and level it with a spoon.
    7. Bake for about 25-30 minutes, or until the cake is golden brown and a toothpick inserted into the center comes out clean.
    8. Once cooked, let the cake cool for a few minutes before cutting it into portions and serving.

    Health benefits

    1. Low glycemic index: Ingredients such as oat flakes, almonds, apple and cranberries have a low glycemic index, which means they release sugar into the blood more slowly, avoiding blood sugar spikes and ensuring a constant release of energy.
    2. Rich in fiber: Oats, apple and cranberries are rich in fiber, which promotes digestive health, maintains satiety and regulates blood sugar levels.
    3. Proteins and healthy fats: Almonds provide proteins and healthy fats that help maintain satiety and provide long-term energy.
    4. Antioxidants: Cranberries are rich in antioxidants that help fight oxidative stress and support the body’s overall health.

    Try preparing this tasty low glycemic index cake, ideal for breakfast: it can be part of a very healthy diet, giving you the right energy in the morning and helping you get through lunch without hunger and without the desire for sweet foods.

  • Pumpkin Pie Perfection Smoothie

    Pumpkin Pie Perfection Smoothie

    Pumpkin Pie Perfection Smoothie 1f3831f9671f964✨

    Ingredients:

    1f383 ½ cup canned pumpkin puree
    1f34c ½ frozen banana (for creaminess)
    1f95b 1 cup milk of choice
    1f366 ½ cup vanilla Greek yogurt (or vanilla ice cream for indulgence)
    1f36f 1 tbsp maple syrup (or honey)
    1f33f ½ tsp cinnamon
    1f330 ⅛ tsp nutmeg
    1f944 ¼ tsp ground ginger
    ❄️ Handful of ice
    1f366 ½ tsp vanilla extract
    Instructions:
    1️⃣ Add all ingredients to a blender.
    2️⃣ Blend until smooth and creamy.
    3️⃣ Pour into a glass, top with a sprinkle of cinnamon 1f342, and enjoy that cozy pumpkin pie flavor! 1f60b✨

  • Turmeric Cleanser Smoothie recipe!

    Turmeric Cleanser Smoothie recipe!

    Turmeric Cleanser Smoothie recipe! 1f49b✨1f964

    Ingredients:
    1f34c ½ banana (for natural sweetness)
    1f34d ½ cup pineapple (for digestion & tropical flavor)
    1f955 ½ small carrot (for beta-carotene & detox)
    1f33f ½ tsp turmeric powder (anti-inflammatory boost)
    ️ A pinch of black pepper (helps absorb turmeric)
    1f965 1 cup coconut water or almond milk
    1f34b Juice of ½ lemon (for cleansing)
    1f36f 1 tsp honey or maple syrup (optional)
    1f9ca A few ice cubes (optional)
    Instructions:
    1️⃣ Add all ingredients to a blender.
    2️⃣ Blend until smooth and creamy.
    3️⃣ Pour into a glass and enjoy the golden detox! 1f964✨

  • Homemade Pistachio Gelato

    Homemade Pistachio Gelato

    Ingredients: 1 1/2 cups shelled pistachios (unsalted, preferably raw) 3/4 cup granulated sugar (divided) 2 cups whole milk 1 cup heavy cream 4 large egg yolks 1 teaspoon pure vanilla extract Pinch of salt Optional: a drop of green food coloring (for color only)

    Instructions:

    1. Prepare the Pistachios: Place the pistachios in a food processor or blender with 1/4 cup of the sugar. Pulse until finely ground, being careful not to over-process into a paste.

    2. Heat the Milk and Cream: In a medium saucepan, combine the milk and heavy cream. Heat over medium heat until steaming but not boiling. Stir in the ground pistachios and a pinch of salt.

    3. Infuse the Flavor: Remove from heat, cover, and let the pistachio mixture steep for about 30 minutes to develop a rich flavor.

    4. Prepare the Egg Mixture: In a mixing bowl, whisk together the egg yolks and the remaining 1/2 cup of sugar until pale and thick.

    5. Temper the Eggs: Slowly pour the warm pistachio-infused milk mixture into the egg yolks, whisking constantly to prevent scrambling. Once combined, pour the mixture back into the saucepan.

    6. Cook the Custard: Return the saucepan to medium-low heat. Cook the mixture, stirring constantly with a wooden spoon or heat-safe spatula, until it thickens slightly and coats the back of the spoon (about 170–175°F or 77–80°C). Do not let it boil.

    7. Strain and Chill: Remove from heat and strain the mixture through a fine-mesh sieve into a clean bowl to remove the pistachio solids. Stir in the vanilla extract and optional food coloring for a classic pistachio green hue.

    Let the custard cool to room temperature, then cover and refrigerate for at least 4 hours or overnight until fully chilled.

    8. Churn the Gelato: Pour the chilled custard into your ice cream maker and churn according to the manufacturer’s instructions, usually about 20–25 minutes.

    9. Freeze to Set: Transfer the gelato to an airtight container and freeze for at least 2 hours for a firmer texture.

    10. Serve: Scoop and serve cold. Garnish with chopped pistachios or a drizzle of honey for extra flair.

    Tips:

    Flavor Boost: For an even deeper pistachio flavor, you can toast the pistachios lightly before blending.

    No Ice Cream Maker? Pour the chilled mixture into a shallow container and freeze, stirring every 30 minutes for 2–3 hours to break up ice crystals.

    Storage: Homemade gelato is best enjoyed within a week for optimal texture and flavor.

    Homemade Pistachio Gelato is luxuriously creamy with the nutty richness of real pistachios in every bite. A dreamy, refreshing treat for any season! Enjoy!

  • Cottage Cheese-Stuffed Pancakes with Sour Cream Glaze

    Cottage Cheese-Stuffed Pancakes with Sour Cream Glaze

    Pancakes with Sour Cream Glaze

    Cottage cheese-stuffed pancakes are a delightful combination of tender, golden pancakes filled with a rich, creamy cottage cheese mixture and topped with a luscious sour cream glaze. This dish is a favorite across many cultures, where variations of stuffed pancakes are cherished for breakfast, brunch, or dessert. With a balance of flavors from the lightly sweet pancake batter to the tangy glaze, this recipe is a versatile treat that can be enjoyed any time of the day.


    Perfect for family gatherings or as a special indulgence, these pancakes offer a harmonious blend of textures and tastes. Whether served warm from the oven or enjoyed as leftovers, they bring a sense of warmth and nostalgia to the table. Let’s dive into this classic recipe and explore why it remains a timeless favorite.


    Full Recipe:

    Ingredients

    For the Pancakes:

    Milk: 350 ml

    Eggs: 3 pcs

    Flour: 170 g

    Sugar: 1 tbsp

    Vanilla sugar: 0.5 tsp

    Salt: 0.5 tsp

    Oil: 3–4 tbsp

    For the Filling:

    Cottage cheese: 350 g

    Egg yolk: 1 pc

    Sugar: 2 tbsp

    Vanilla sugar: 1 tsp

    Salt: 0.5 tsp

    For the Glaze:

    Butter: 50 g

    Sour cream: 2 tbsp

    Sugar: 1 tbsp

    Prep Time, Cooking Time, and Total Time

    Prep Time: 20 minutes

    Cooking Time: 40 minutes

    Total Time: 1 hour

    Servings and Nutrition Facts

    Servings: 6

    Calories (per serving): Approximately 350 kcal

    Macronutrients (per serving):

    Protein: 12 g

    Carbohydrates: 30 g

    Fat: 20 g

    Steps to Make Cottage Cheese-Stuffed Pancakes

    1. Prepare the Pancake Batter

    In a mixing bowl, whisk together the eggs, milk, sugar, vanilla sugar, and salt until combined.

    Gradually add the flour, whisking constantly to prevent lumps.

    Stir in the oil, ensuring the batter is smooth and slightly runny. Let the batter rest for 10–15 minutes.

    2. Cook the Pancakes

    Heat a non-stick skillet over medium heat and lightly grease it with oil.

    Pour a ladleful of batter into the skillet, swirling it to coat the surface evenly.

    Cook for 1–2 minutes on one side until lightly golden, then flip and cook the other side for another minute.

    Repeat with the remaining batter, stacking the pancakes on a plate.

    3. Prepare the Filling

    In a bowl, combine the cottage cheese, egg yolk, sugar, vanilla sugar, and salt. Mix until smooth and creamy.

    4. Assemble the Pancakes

    Take a cooked pancake and place a spoonful of the cottage cheese filling in the center.

    Fold the pancake into a rectangle or roll it into a cylinder, ensuring the filling is sealed inside

    Repeat with the remaining pancakes and filling.

    5. Bake the Stuffed Pancakes

    Preheat your oven to 180°C (356°F). Arrange the stuffed pancakes in a greased baking dish.

    6. Prepare the Glaze

    In a small saucepan, melt the butter over low heat. Add the sour cream and sugar, stirring until the glaze is smooth and slightly thickened.

    7. Glaze and Bake

    Pour the glaze over the stuffed pancakes, ensuring they are evenly coated.

    Bake for 10–15 minutes until the glaze is bubbling and the pancakes are heated through.

    8. Serve

    Serve the pancakes warm, garnished with fresh fruit, a drizzle of honey, or a sprinkle of powdered sugar, if desired.

    Why This Recipe is Timeless

    Cottage cheese-stuffed pancakes are a testament to the enduring appeal of comfort food. Their simplicity, versatility, and rich flavors make them a favorite across generations. The soft pancakes, combined with the creamy, slightly tangy filling, offer a delightful contrast that appeals to both sweet and savory palates.


    This recipe’s timelessness also lies in its adaptability. While the classic version calls for cottage cheese and a sour cream glaze, it can easily be customized with different fillings like cream cheese, fruit preserves, or even chocolate. Similarly, the glaze can be swapped for a dusting of powdered sugar or a dollop of whipped cream, making it a versatile dish for any occasion.


    Nutrition Facts (Per Serving)

    Calories: 350 kcal

    Protein: 12 g

    Carbohydrates: 30 g

    Fat: 20 g

    Fiber: 1 g

    Sugar: 10 g

  • Healthy Banana Chocolate Cake: A Guilt-Free Chocolate Dream

    Healthy Banana Chocolate Cake: A Guilt-Free Chocolate Dream

    Healthy Banana Chocolate Cake: A Guilt-Free Chocolate Dream

    Ingredients

    For the Cake:

    3 large ripe bananas (about 1.5 cups mashed)

    ½ cup oat flour (60g)

    ½ cup unsweetened cocoa powder (50g)

    2 large eggs, room temperature

    ¼ cup pure maple syrup (60ml)

    1 teaspoon baking powder

    1 teaspoon pure vanilla extract

    ¼ teaspoon salt

    ¼ cup chopped walnuts (optional)

    Optional Chocolate Ganache:

    ½ cup dark chocolate chips

    ¼ cup almond milk or coconut milk

    Detailed Instructions

    Preparation:

    Preheat oven to 350°F (175°C)

    Line an 8-inch round cake pan with parchment paper

    Lightly grease the sides of the pan

    Making the Batter:

    Banana Preparation:

    Choose very ripe bananas with brown spots

    Mash thoroughly until no lumps remain

    Measure to ensure you have 1.5 cups

    Wet Ingredients:

    In a large bowl, combine mashed bananas

    Add room temperature eggs

    Pour in maple syrup

    Add vanilla extract

    Whisk until well combined

    Dry Ingredients:

    In a separate bowl, whisk together:

    Oat flour

    Cocoa powder

    Baking powder

    Salt

    Combining:

    Gradually fold dry ingredients into wet

    Mix until just combined

    Don’t overmix to keep cake tender

    Fold in walnuts if using

    Baking Process:

    Pour batter into prepared pan

    Smooth top with spatula

    Bake for 25-30 minutes or until:

    Toothpick comes out mostly clean

    Top springs back when lightly pressed

    Edges start to pull away from pan

    Optional Ganache Topping:

    Heat almond milk until just simmering

    Pour over chocolate chips

    Let stand 2 minutes

    Stir until smooth

    Pour over cooled cake

    Storage Tips

    Room temperature: 2 days in airtight container

    Refrigerated: up to 5 days

    Freezer: up to 3 months (wrap well)

    Nutrition Information

    Per slice (1/8 of cake, without ganache):


    Calories: 145

    Protein: 4g

    Carbohydrates: 25g

    Fiber: 4g

    Sugar: 12g (all from natural sources)

    Fat: 5g

    Potassium: 280mg

    Iron: 1.5mg

    Expert Tips

    Use very ripe bananas for maximum sweetness

    Make fresh oat flour by blending rolled oats

    Bring eggs to room temperature for better mixing

    Don’t overbake – cake should remain fudgy

    Cool completely before adding toppings

    Sift cocoa powder to prevent lumps

    Variations

    Add ½ teaspoon cinnamon or espresso powder

    Replace walnuts with pecans or almonds

    Add dark chocolate chips to the batter

    Top with sliced bananas

    Spread with almond butter instead of ganache

    Add orange zest for chocolate-orange flavor

    This healthy banana chocolate cake is perfect for:


    Clean eating desserts

    Gluten-free diets

    Post-workout treats

    Kid-friendly healthy snacks

    Breakfast cake

    Special occasions requiring a healthier option

    The beauty of this cake lies in how it transforms everyday healthy ingredients into a decadent dessert that satisfies even the strongest chocolate cravings. It’s particularly impressive served to those who are skeptical about healthy desserts – they won’t believe it’s made without traditional flour or refined sugar!