Blog

  • Grilled Ribeye Steaks The Perfect Recipe

    Grilled Ribeye Steaks The Perfect Recipe

    Indulge in the ultimate steak experience with our “Sizzling Perfection” Grilled Ribeye Steaks, a recipe that showcases the rich, marbled texture of ribeye to perfection. Grilling ribeye steaks unlocks their natural flavors, creating a crust that’s irresistibly crispy on the outside while remaining succulent and tender on the inside. Whether you’re celebrating a special occasion or simply treating yourself to a gourmet meal at home, this grilled ribeye steak recipe promises a restaurant-quality result that’s sure to impress.

    INGREDIENTS:

    • Ribeye steaks: 2 steaks, about 1 to 1.5 inches thick
    • Salt To taste, preferably coarse or kosher for a better crust
    • Freshly ground black pepper: To taste
    • Olive oil: For coating the steaks, helps seasoning stick and prevents sticking on the grill
    • Garlic powder: Optional, to taste
    • Butter: A pat for each steak, for finishing (optional)
    • Fresh herbs: Such as rosemary or thyme, for garnish and added aroma (optional)

    INSTRUCTIONS

    1. Prepare the Steaks:
      • Remove the ribeye steaks from the refrigerator at least 30 minutes before grilling. This allows them to come to room temperature for more even cooking.
      • Pat the steaks dry with paper towels. This helps to get a better sear.
      • Coat each steak lightly with olive oil. Season generously on both sides with salt, freshly ground black pepper, and garlic powder if using. Press the seasoning into the meat to adhere.
    2. Preheat the Grill:
      • Preheat your grill to high heat. Aim for a temperature of around 450°F to 500°F (232°C to 260°C). If you’re using a charcoal grill, prepare it for direct grilling with a hot zone for searing.
    3. Grill the Steaks:
      • Place the steaks on the hot grill over direct heat. Grill for about 4-5 minutes on one side. You’re looking for a deep brown sear.
      • Flip the steaks and grill for another 3-4 minutes for medium-rare, or longer depending on your desired doneness. Use a meat thermometer to check for doneness: 135°F (57°C) for medium-rare, 145°F (63°C) for medium.
      • In the last minute of grilling, place a pat of butter on each steak and add fresh herbs if desired. The butter will melt and add richness to the steak, while the herbs will add aroma.
    4. Rest the Steaks:
      • Transfer the grilled steaks to a cutting board or a plate and cover loosely with foil. Let them rest for about 5-10 minutes. Resting allows the juices to redistribute throughout the steak, making it more tender and juicy when cut.
    5. Serve:
      • Serve the ribeye steaks with your favorite side dishes. Classic options include grilled vegetables, baked potatoes, or a simple salad.
  • Potato & Leek Gratin

    Potato & Leek Gratin

    Potato & Leek Gratin

    A sharp knife will work just as well, but a mandoline will slice the potatoes precisely and rapidly. Rather than completely submerging the potatoes and leeks in cream, a thin layer of milk is added to each layer of the gratin, resulting in incredibly crispy and tender potatoes and a golden coating of melted cheese. The end product is a flavorful and textural combination of rich and rustic potatoes with a hint of crunch to balance the stuffing, sauces, and mashes on the dish. For breakfast, reheat leftovers in the oven until they are crisp and heated through. Serve with eggs and a side of fruit.

    Ingredients:

    • a half-cup of whole milk
    • One-half pound of raw Yukon Gold potatoes
    • two mashed cloves of garlic
    • One tablespoon of butter without salt
    • One large leek that has been cut, sliced, and halved lengthwise (approximately 2 cups)
    • One teaspoon, divided, kosher salt
    • Two ounces of shredded Gruyère cheese (about half a cup)
    • One ounce of grated Parmesan cheese, or roughly 1/4 cup
    • Grind ½ teaspoon of black pepper freshly.

    Directions:

    1. Preheat oven to 375°F.
    2. Combine milk, potatoes and garlic in a large saucepan; bring to a boil. Reduce heat and simmer 5 minutes or until potatoes are almost tender. Drain in a colander over a bowl, reserving 1/2 cup milk mixture.
    3. In a 10-inch cast-iron skillet set over medium heat, melt butter. Add the leek and simmer, turning occasionally, for 8 minutes or until soft. Turn off the heat and transfer the leek mixture into a bowl. In the bottom of a pan or gratin dish, arrange half of the potato slices in a single layer. Evenly top with half of the leek mixture. Add a half teaspoon of salt and a quarter cup of Gruyère cheese. Continue layering the remaining 1/2 teaspoon salt, 1/4 cup Gruyère, remaining half of the potatoes, and remaining half of the leek mixture.
    4. Sprinkle with Parmesan and drizzle with the leftover 1/2 cup milk mixture. Bake the pan, covered with foil, at 375°F for 25 minutes, or until the cheese is melted. Take the foil out of the pan. Preheat the broiler (leave the pan in the oven). For five minutes, broilor until bubbly and golden brown. Remove pan from oven, and sprinkle with pepper; cool. Cut into 10 wedges.
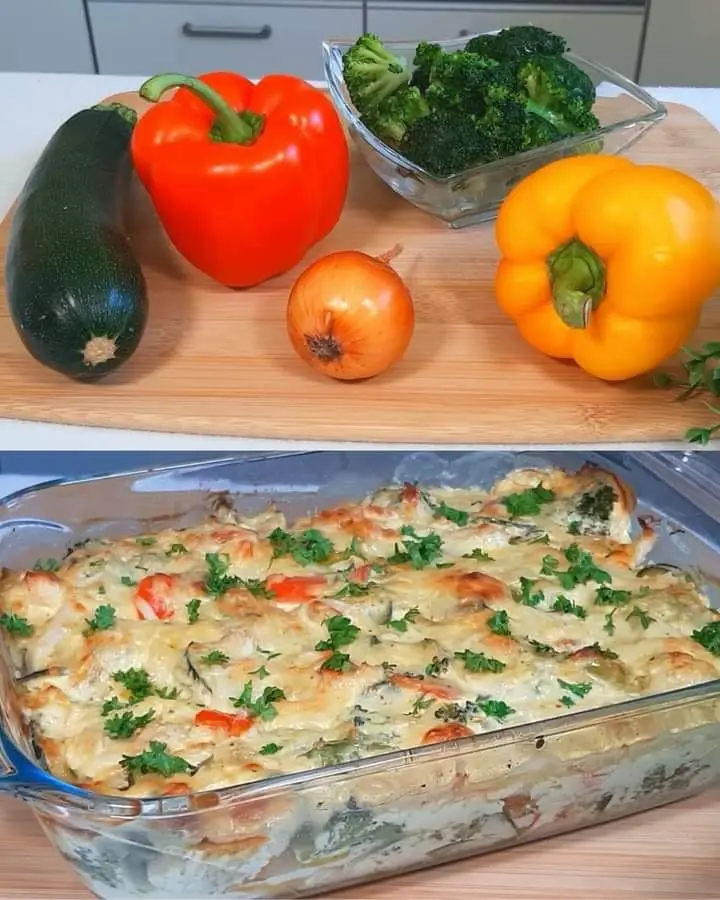
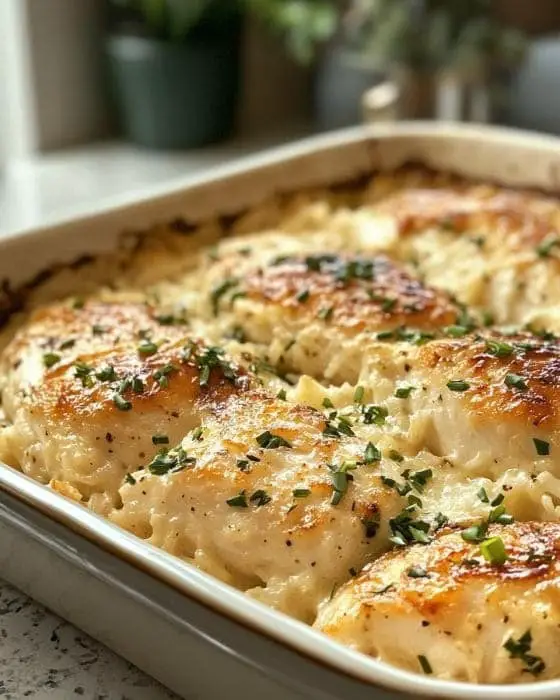
  • Stovetop Chicken & Broccoli Casserole

    Stovetop Chicken & Broccoli Casserole

    Stovetop Chicken & Broccoli Casserole

    We reduced the amount of fat in this cheesy chicken and broccoli casserole by 9 grams and the number of calories by over 100. For a simple weekday supper, all the raw ingredients are piled in a skillet and cooked.

    Ingredients for chicken and broccoli casserole

    • Whole-wheat egg noodles, 8 ounces
    • One fourteen-oz can of low-sodium chicken broth
    • One pound of trimmed, skinless, boneless chicken breasts cut into 3/4-inch pieces
    • One bag (four to sixteen ounces) of frozen broccoli florets, thawed and diced if preferred
    • a quarter cup skim milk
    • Half a cup low-fat mayonnaise
    • one third cup all-purpose flour
    • 1/2 tsp dried mustard
    • One-half teaspoon of powdered garlic
    • Half a teaspoon each of salt and freshly ground pepper
    • 1 1/2 cups of shredded cheddar or Colby-Jack cheese

    Directions

    1. Transfer noodles to big skillet. Cover the noodles with broth.
    2. Arrange the chicken and broccoli on top of the noodles.
    3. In medium bowl, whisk together milk, mayonnaise, flour, dry mustard, garlic powder, salt, and pepper. Dollop onto the broccoli.
    4. Lift the heat to medium-high and simmer.
    5. After lowering the heat to maintain simmer and covering the pan, cook for 15 to 18 minutes, turning occasionally, or until the noodles and chicken are thoroughly cooked.
    6. Meanwhile, preheat the broiler and place the rack in the upper third of the oven.
    7. Once the casserole is finished, cover with cheese and broil for three minutes, or until the cheese begins to faintly brown.
  • Creamy Broccoli-Cauliflower Chicken Casserole

    Creamy Broccoli-Cauliflower Chicken Casserole

    Creamy Broccoli-Cauliflower Chicken Casserole

    Any night of the week, this creamy casserole full of vegetables is a great option for dinner. To save time, use any leftover shredded chicken you have on hand or replace it with store-bought rotisserie chicken.

    Ingredients for broccoli cauliflower chicken casserole:

    • Four cups of one-inch cauliflower florets
    • Four cups of one-inch broccoli florets
    • Two tablespoons of pure olive oil
    • one cup of finely chopped onion
    • two minced garlic cloves
    • Two tablespoons of flour (all-purpose)
    • Half a teaspoon of salt
    • One-half teaspoon of ground pepper
    • Two cups low-fat milk
    • Two ounces of room-temperature reduced-fat cream cheese
    • 1 cup of finely grated Parmesan cheese, split
    • Three cups of cooked chicken, diced or shredded.

    Directions:

    1. Preheat oven to 375°F. Coat an 8-inch-square baking dish with cooking spray.
    2. In a big pot with a steamer basket attached, bring one or two inches of water to a boil. Add the broccoli and cauliflower and steam, covered, for about five minutes, or until almost soft. After transferring the veggies to a baking sheet with a rim, pat them dry. Wipe out the pot and discard the water.
    3. In the saucepan, heat the oil over medium heat. Add the onion and simmer, stirring, for about 3 minutes, or until it begins to soften. Add the garlic and stir-fry for approximately a minute, or until fragrant. Add flour, salt, and pepper; cook for one minute while stirring. Turn the heat up to medium-high and stir in the cream cheese and milk. Cook for two to three minutes, stirring occasionally, until the cream cheese is combined and the sauce has thickened. Take off the heat and whisk in 3/4 cup Cheese Parmesan. Stir to coat the chicken, broccoli, and cauliflower after adding them. Place in the baking dish that has been prepared. Add the final 1/4 cup of Parmesan on top.
    4. Bake for about 20 minutes, or until the top is lightly browned and the edges are bubbling.
  • Skillet Caprese Chicken Casserole for Two

    Skillet Caprese Chicken Casserole for Two

    Skillet Caprese Chicken Casserole for Two

    This one-skillet meal has all the flavors of a caprese salad: mozzarella, tomatoes, and basil. This delicious dish gains depth and heartiness from the addition of chicken and noodles.

    Ingredients for chicken casserole salad:

    • Four ounces of rotini or whole-wheat penne
    • Eight ounces of skinless, boneless chicken breasts that have been trimmed and sliced into little pieces
    • Half a pint of grape tomatoes
    • Four teaspoons of freshly chopped basil, divided
    • Two teaspoons plus one cup of low-sodium chicken broth
    • Half a cup low-fat milk
    • half a cup of low-fat sour cream
    • a quarter of a cup all-purpose flour
    • One-half teaspoon of onion powder
    • Half a teaspoon of dried mustard
    • One-half teaspoon of salt
    • Half a teaspoon of crushed pepper
    • ½ cup of mozzarella cheese, shredded
    • Superior balsamic vinegar (optional)

    Directions:

    1. In a medium broiler-safe skillet, mix spaghetti, chicken, tomatoes, and 2 tablespoons basil. In a measuring cup, whisk together broth, milk, sour cream, flour, onion powder, dry mustard, salt, and pepper. Drizzle the spaghetti mixture on top.
    2. Lift the heat to medium-high and simmer. Lower the heat to sustain a gentle simmer, place a cover over it, and cook, stirring twice, for 14 to 16 minutes, or until the pasta is soft and the chicken is thoroughly cooked.
    3. As you wait, place the rack in the upper third of the oven and turn the broiler on high. Once the casserole is finished, cover with cheese and broil for two to three minutes, or until the cheese is melted and gently browned. If desired, garnish with a drizzle of vinegar and the remaining 2 tablespoons of basil before serving.
  • Cheddar and Zucchini Frittata

    Cheddar and Zucchini Frittata

    Cheddar and Zucchini Frittat

    This frittata is made with cheddar cheese and zucchini and is quick and easy to prepare. With just 115 calories per serving, this is a guilt free meal.

    Ingredients:

    • One cup of thawed or chilled egg product, or four eggs
    • Finely shred ½ cup of reduced-fat cheddar cheese
    • Two teaspoons of freshly chopped flat-leaf parsley
    • ¼ teaspoon of black pepper, ground
    • One-half teaspoon of salt
    • two tsp olive oil
    • 12 ounces of lengthwise halved and sliced zucchini
    • Four thinly sliced green onions.

    Directions:

    1. Adjust an oven rack to the top third and preheat the oven to 450 degrees Fahrenheit.
    2. Mix the eggs, cheese, half of the parsley, salt, and pepper in medium-sized bowl. Put aside Heat the olive oil in 9- to 10-inch ovenproof skillet over medium-high heat.
    3. Stir often and cook for to minutes, or until zucchini and green onions are just soft.
    4. Scatter the egg mixture over the veggies with caution. Turn down the heat to medium. Run a spatula around the skillet’s edge as the mixture hardens, raising the egg mixture so that the uncooked portion flows below. Cook for a further five minutes or until the egg mixture is almost set, raising the edges (the top will be damp). As needed, turn down the heat to avoid overbrowning.
    5. Put the frying pan inside the oven. Bake for approximately five minutes, or until the frittata is set and has a golden crust. Add the final two tablespoons of parsley on top. Chop into wedges. Warm up and serve.


  • Creamy Mushroom, Chicken & Asparagus Bake

    Creamy Mushroom, Chicken & Asparagus Bake

    Creamy Mushroom, Chicken & Asparagus Bake

    Ingredients for mushroom and chicken asparagus bake:

    1. A quarter of a cup of extra virgin olive oil and one and a half teaspoons, separated
    2. Two packages (8 ounces) of fresh button mushrooms, sliced.
    3. One cup of finely chopped yellow onion
    4. one third cup all-purpose flour
    5. a half-cup of whole milk
    6. Two tsp freshly chopped tarragon
    7. Half a teaspoon of salt
    8. Split a half-cup of finely grated Parmesan cheese.
    9. One pound of freshly clipped and cut into one-inch pieces of asparagus.
    10. One 8.8-ounce microwaveable package of whole-grain brown rice or one and a half cups of cooked brown rice
    11. two cups of cooked, chopped chicken breast
    12. A quarter cup of whole-wheat panko breadcrumbs.

    Directions:

    • Set oven temperature to 375°F. In large cast-iron pan set over medium-high heat, heat 1/2 tablespoons of oil.
    • Add the onion and mushrooms, and simmer, stirring frequently, for to 10 minutes, or until the moisture produced from the vegetables evaporates and the mushrooms are gently browned.
    • Add flour and cook for minute, stirring regularly.
    • Add the milk gradually and heat, stirring constantly, for about two minutes, or until the liquid thickens. Add 1/4 cup Parmesan, tarragon, and salt; stir until melted.
    • Add chicken, rice, and asparagus and stir. Take off the heat.
    • In a small bowl, toss panko with 1/4 cup Parmesan and the remaining 1 1/2 tablespoons oil; sprinkle over chicken mixture. Bake for about 15 minutes, or until the mixture is bubbling and the topping is brown.
  • (Japanese Fried Chicken)

    (Japanese Fried Chicken)

     Japanese Fried Chicken

    Ingredients for japanese fried chicken:

    • 1 freshly sliced garlic clove
    • One tablespoon of fresh ginger, finely grated
    • three tsp of soy sauce
    • three tsp sake
    • One spoonful of miri
    • 1/2 tsp sesame oil
    • ¼ teaspoon of black pepper, ground
    • One cayenne pepper pinch
    • One-half teaspoon of white sugar
    • 1/4 tsp kosher salt
    • One and a half pounds of skinless, boneless chicken thighs, sliced into 2-inch pieces
    • one cup of potato starch
    • Canola oil in a quart, or as required.

    Directions for japanese fried chicken:

    • In a medium bowl, stir together garlic, ginger, soy sauce, sake, mirin, sesame oil, black pepper, cayenne, sugar, and salt.
    • After adding the chicken to the marinade, toss it around until it is well coated. Refrigerate for one to ten hours with a cover on.
    • Establish the dredging station: Over a baking sheet covered with foil, place a wire rack. Fill a large, shallow basin with potato starch.
    • Take the chicken out of the fridge. To coat with marinade, stir. Once they are properly coated, toss two or three pieces at a time in the potato starch. After shaking off extra starch, put the chicken on the wire rack. Continue dredging the remaining bits.
    • Tap the rack on the baking sheet to remove any loose chunks of starch, then transfer the baking sheet and rack of chicken to the refrigerator for 15 to 30 minutes.
    • In a deep fryer, heat the oil to 350 degrees Fahrenheit (175 degrees Celsius).
    • Gently place the chicken in batches into the heated oil, making sure not to crowd it. Fry for 3 to 4 minutes, stirring periodically, or until cooked through and the outside is crunchy and browned. Transfer to a plate covered with paper towels to drain. Continue with the leftover chicken.
  • Popcorn In The Air Fryer (Easy Recipe)

    Popcorn In The Air Fryer (Easy Recipe)

    Popcorn In The Air Fryer (Easy Recipe)

    The whole family will enjoy this easy air fryer popcorn recipe, which is really simple to make. It’s a terrific substitute for movie theater popcorn because it’s lower in fat and calories and more healthier.

    People of all ages adore popcorn, which is a traditional, simple snack. When made with significantly less oil and hot air, it’s tasty, nutritious, and simple to make.


    However, using conventional stovetop or microwave ways to make popcorn can be messy and time-consuming. This is where the air fryer comes into play; it’s a quick and simple method to consistently generate crispy, fluffy popcorn.

    Ingredients

    • 1/4 cup plain popcorn kernels
    • Sea salt
    • 1/4 cup melted butter

    Instructions:

    • To create popcorn in an air fryer, just add 1/4 cup of popcorn kernels to the foil-covered air fryer basket (note: make sure the foil doesn’t cover the entire basket; refer to the directions photo for clarification). For even popping, make sure the kernels are distributed in a single layer.
    • After closing the basket, turn the temperature down to 400°F. It will take around three minutes for the kernels to pop.
    • Give it 7-8 minutes to cook.
    • Turn off the air fryer and leave it for a minute to let any leftover kernels to pop after the popping calms down.

    When your popcorn from the air fryer is finished, you can top it with your preferred toppings and seasonings, such butter, salt, nutritional yeast,or even cinnamon sugar. You can also get creative with different flavor combinations, such as garlic and parmesan, ranch seasoning, or spicy chili powder.

  • Juicy Air Fryer Whole Chicken with Crispy Skin

    Juicy Air Fryer Whole Chicken with Crispy Skin

    Juicy Air Fryer Whole Chicken with Crispy Skin

    There are still solutions available if your air fryer is smaller. Perhaps a larger chicken could fit in your air fryer if the grate is removable. Furthermore, organic hens often weigh about 4 pounds less.

    Blend of spices:

    • Two tsp of avocado oil
    • One tablespoon of kosher salt
    • One teaspoon of finely powdered black pepper
    • one tsp powdered garlic
    • One tsp of paprika
    • One-half teaspoon of dried basil
    • Half a teaspoon of dried oregano
    • a smidgeon of dried thyme


    After using paper towels to pat the entire chicken dry, tuck the wings beneath.

    To make a paste, combine all of the seasoning blend spices and oil in a small bowl. Apply half of the spice rub to the chicken’s breast side using a basting brush

    Raise the chicken by its legs and put it, breast side down, in the air fryer basket. Apply the rub to the remaining portion of the chicken using the basting brush.

    Advice 💡: You’ll see that I took the grate out of my air fryer’s bottom. If your air fryer is compatible, I would suggest doing this. The chicken will produce a lot of liquids during cooking, and the breast meat will become exceptionally juicy as a result of the meat practically marinating in these juices during cooking.

    Ingredients for Air fryer chicken

    1. 5–6 lbs. entire bird, the giblets removed
    2. Two tablespoons of your preferred cooking oil, or avocado oil
    3. Half a teaspoon of kosher salt
    4. One tsp finely ground black pepper
    5. One tsp powdered garlic
    6. One teaspoon of paprika—I like mine smoked—
    7. One-half tsp dried basil
    8. Half a teaspoon Oregano, dried
    9. Half a teaspoon Thame that has dried
    • Wet the chicken with paper towels and pat dry. Make a paste by combining all the ingredients and oil in a small bowl. Apply half of the spice to the chicken’s breast side using a basting brush. Place the chicken in the air fryer basket, breast side down, after picking it up by its legs. (Note: For this recipe, I took the grate out of my air fryer. I would follow suit if yours permits.
    • It will enable a larger bird, and as it cooks, the liquids released from the breast meat will marinade it. Apply the rub to the remaining portion of the chicken using the basting brush.
    • For fifty minutes, air fried at 360 degrees Fahrenheit (182 degrees Celsius). Cook the chicken for a further ten minutes after flipping it to the breast side up. Using an instant read thermometer, confirm that the interior temperature of your chicken breast meat is 165F (74C). Cooking times will vary based on the size, wattage, and style of your air fryer. Cook the food until the desired temperature is achieved. Before serving, remove from the air fryer basket and place on a chopping board to rest for five to ten minutes.


    1. Store in an airtight container in the refrigerator for up to 4 days.
    2. If you have chicken thighs or chicken legs you would like to cook in your air fryer:
  • EASY AIR FRYER RANCH POTATOES

    EASY AIR FRYER RANCH POTATOES

    EASY AIR FRYER RANCH POTATOES

    Nothing celebrates the arrival of summer quite like ranch dressing over potatoes, so I’m thrilled to be sharing a sponsored post with The Little Potato Company that features one of my favorite summertime recipes!

    This is one of those meals that can be prepared in about five minutes, after which the air fryer takes care of everything!


    This recipe is made even simpler by using Little potatoes from The Little Potato Company. There is less preparation required because they are already cleaned and wrapped! Before discovering these, I can’t even begin to estimate how much time I wasted washing potatoes.

    It’s invaluable on hectic summer evenings!

    This recipe works great as is, but if you want to add a little extra flavor to your ranch potatoes, you can add these ingredients:

    • Bacon bits or crumbled bacon from an air frying
    • Cheese Parmesan
    • I adore ranches, thus I love ranch dressing!
    • two cloves of minced garlic or half a teaspoon of garlic powder


    1. Once the ranch potatoes are cooked, take them out of the air fryer and wrap them in aluminum foil or put them in a pan that fits inside the air fryer.
    2. Re-insert them into the air fryer and top with shredded cheddar cheese.
    3. Once the cheese has completely melted, boil the potatoes for one to two minutes at 350 degrees Fahrenheit with the air fryer closed.
    4. Take them out of the air fryer with care, then eat!
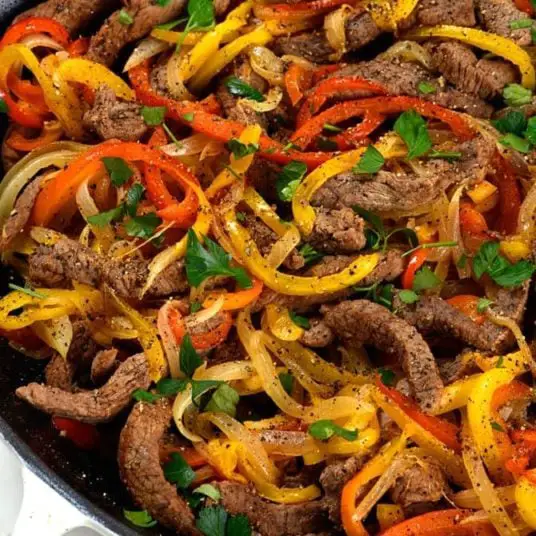
  • Air Fryer Chicken Fajitas

    Air Fryer Chicken Fajitas

    Air Fryer Chicken Fajitas

    Here is a recipe for Air Fryer Chicken Fajitas

    Ingredients:

    1.  1 lb chicken breasts, sliced into ¼ inch thick strips
    2. – 2 bell peppers, sliced into strips
    3. – 1 red onion, sliced into strips
    4. – 2 cloves garlic, minced
    5. – 2 tablespoons olive oil
    6. – 1 tablespoon chili powder
    7. – ½ teaspoon smoked paprika
    8. – ½ teaspoon cumin
    9. – ½ teaspoon ground coriander
    10. – ½ teaspoon garlic powder
    11. – ½ teaspoon onion powder
    12. – ½ teaspoon salt
    13. – ¼ teaspoon black pepper
    14. – Tortillas, sour cream, avocado, lime slices, fresh cilantro

    Instructions:

    • Preheat the air fryer*:Preheat air fryer to 400°F.

    – *Prepare the chicken and vegetables*:

    • In a large bowl, add the chicken, bell peppers, onion, and garlic. Drizzle with olive oil and spices and gently mix together until the chicken is fully coated in the spice mixture.
    • – *Cook*: Transfer to the preheated air fryer basket and cook for 15 minutes, shaking halfway, or until fully cooked, or until the edges of the vegetables become lightly charred. If your air fryer basket is small, you may need to cook in 2-3 batches.
    • – *Serve*: Remove from the air fryer and garnish with cilantro. Serve on tortillas or rice along with avocado, sour cream or guacamole.

    Tips:*

    • – *Preheat the air fryer*: This will heat up your air fryer and get it ready to go for perfectly charred fajitas! If your air fryer has a preheat button, use that, if not set it at 400 degrees about 3-4 minutes before cooking.
    • – *Work in batches*: If your air fryer basket is small, you may need to cook in 2-3 batches. There should only be one layer of food on the bottom. You don’t want to overcrowd the veggies and chicken because they will steam rather than bake, and won’t be quite as delicious.

    – *Toppings*:

    We love to top our chicken fajitas with guacamole, salsa and fresh cilantro. Feel free to use flour tortillas or corn tortillas.

  • Wheat Berry Pudding 

    Wheat Berry Pudding 

    Wheat Berry Pudding

    The wheat berries must be soaked overnight, then boiled until tender.

    The ratio of wheat to water is generally 1:3, so if I’m making 1 cup of wheat berries then I’ll add 3 cups of water. However, I strongly recommend that you keep checking on your wheat berries every 10-15 minutes in case you need to add a little bit of more boiling water. You will also need to give the wheat berries a stir every now and then, as they’re known for liking to stick to the bottom of the pot!

    Ingredients:

    • – 3 cups water –
    • 1 cup wheat berries
    • – Two sticks of cinnamon
    • – Three stars with anise
    • – ½ teaspoon of cinnamon powder
    • One tsp ground anise.
    • – One teaspoon of fennel powder
    • – A quarter cup sugar, or to taste
    • – One cup chopped dried fruit

    Technique:-

    1. Leave the wheat berries in the water overnight, then rinse them with cold water until the water runs clean.
    2. – Bring the whole spices and water to a boil in a pot. After the wheat berries have partially cooked, add the ground spices and dried fruit, and continue cooking for a further 15 to 20 minutes, or until the wheat is soft and fully cooked.
    3. – Typically, the entire cooking process takes thirty to forty-five minutes.
    4. – Nuts: walnuts, almonds, pine nuts, pistachios; – Pomegranate seeds; – Desiccated or shredded coconut

    – Fennel candy and candied chickpeas.

    Enjoy!

  • Beef Stroganoff Casserole

    Beef Stroganoff Casserole

    Beef Stroganoff Casserole

    Warm up the oven.

    Preheat your oven to 350°F (175°C) before beginning the process. When you assemble the casserole, you want the oven to be ready to bake. Next, take out a 9 by 13-inch (23 by 33 cm) baking dish and reserve it.

    The ingredients for this casserole dish measure 8 ounces,

    • one pound of ground beef,
    • one chopped medium onion,
    • two minced cloves of garlic,
    • one cup of low-sodium beef broth,
    • one cup of sour cream, and one and a half ounces of condensed cream of mushroom soup.
    • Two cups of shredded mozzarella cheese,one can,
    • one tablespoon of Worcestershire sauce, and two tablespoons of fresh parsley

    Guidelines

    • Set the oven temperature to 350°F (175°C).
    • As directed on the package, cook the egg noodles until they are al dente. After draining, set the noodles aside.
    • Cook the chopped onion in the skillet for about five minutes, or until it becomes tender. Add the minced garlic, salt, and black pepper, and sauté until fragrant, about 1 more minute.
    • Add the Worcestershire sauce, sour cream, condensed cream of mushroom soup, and beef broth and stir. Stirring regularly, simmer the mixture for approximately 10 minutes or until it thickens somewhat
    • In a large mixing dish or pan, combine the cooked egg noodles with the beef mixture, making sure the noodles are fully covered with the sauce.
    • Arrange half of the noodle and beef mixture in a 9 x 13-inch (23 x 33 cm) baking dish. Over the layer, scatter 1 cup of shredded cheese. Evenly distribute the leftover noodle and meat mixture on top. Over the top layer, scatter the remaining 1 cup of shredded cheese.
    • The casserole should be baked for 25 to 30 minutes in a preheated oven, or until the cheese is bubbling and melted.

    Enjoy!

  • Seafood Mac and Cheese

    Seafood Mac and Cheese

    Seafood Mac and Cheese

    Ingredients for seafood Mac and cheese:

    1. freshly ground black pepper and kosher salt
    2. Two tsp olive oil
    3. two minced garlic cloves
    4. One medium yellow onion, finely chopped
    5. One pound of lump or blue crabmeat, diced and sifted for shells
    6. Half a cup of dry sherry
    7. Twice as much unsalted butter
    8. One tablespoon of flour for all purposes
    9. One pint of thick cream
    10. one cup of milk
    11. One tablespoon of freshly chopped parsley, with more for sprinkling
    12. One tablespoon of freshly chopped tarragon
    13. One tablespoon of freshly chopped thyme
    14. two tsp finely ground mustard 
    15. One tsp of smoky paprika
    16. Four ounces of shredded Gruyere (about a cup)
    17. About 1 cup or 4 ounces of shredded Parmesan cheese
    18. 12 ounces of extra-sharp, shredded yellow cheddar (about 3 cups)
    19. One pound of macaroni elbow
    20. Four ounces of cream cheese

    Directions for seafood  Mac and cheese :

    • Start the oven at 375 degrees Fahrenheit.
    • Add one tablespoon of olive oil to a big saucepan of boiling salted water.
    • In a large skillet, heat the remaining tablespoon of olive oil over medium-high heat. Add the onion and garlic, and simmer for about 5 minutes, stirring now and again, until they begin to soften. Add the crab and simmer, stirring periodically, for 3 to 5 minutes, or until the crab begins to brown. Pour the skillet’s contents into a basin and put it aside.
    • Sherry is used to deglaze the skillet, and it is reduced for roughly five minutes. Melt the butter, then stir in the flour and cook, stirring, until no clumps remain. Add the milk, heavy cream, paprika, tarragon, thyme, mustard, and parsley. Then, whisk in the Gruyere, Parmesan, and eight ounces of cheddar cheese. After bringing to a simmer, reduce the heat, and cook for ten minutes on low. Add pepper and salt for seasoning.
    • As you wait, add the noodles to the boiling water and cook them as directed on the package. After setting aside cup of pasta water, drain the noodles and add them back to the saucepan (I prefer to leave small amount of pasta water in the pot after draining). Mix thoroughly after adding the cream cheese, crab, and cheese sauce. (If the mixture is too thick, stir in 1/4 cup of pasta water at time.) If necessary, add extra salt and pepper for seasoning.
    • Transfer the blend into a 9-by-13-inch baking pan. Evenly distribute the final 4 ounces of cheddar cheese on top. Bake for 10 to 15 minutes, or until the cheese is nicely golden. (Take caution—the cheese in the oven can burst.) Before serving, allow it to rest for 15 to 20 minutes. Add a little parsley on top.

    Note from the Cook

    Prepare the seafood mac and cheese in advance, store it, and then reheat it for 15 to 20 minutes at 200 degrees Fahrenheit.