Blog

  • Brownie Recipe

    Brownie Recipe

    Ingredients:

    • Dry Ingredients:
      • 1 cup almond flour
      • 1/2 cup unsweetened cocoa powder
      • 1/2 teaspoon baking powder
      • 1/4 teaspoon salt
      • 1/2 cup keto-friendly sweetener (like erythritol, monk fruit, or stevia)
    • Wet Ingredients:
      • 1/2 cup unsalted butter, melted
      • 2 large eggs
      • 1 teaspoon vanilla extract
      • 1/4 cup unsweetened almond milk (or coconut milk)
    • Optional Add-ins:
      • 1/2 cup sugar-free chocolate chips
      • 1/4 cup chopped nuts (like walnuts or pecans)

    Step 1: Preheat the Ove

    1. Prepare the Pan: Preheat your oven to 350°F (175°C). Grease an 8×8-inch baking dish or line it with parchment paper for easy removal.

    Step 2: Mix the Dry Ingredients

    1. Combine Dry Ingredients: In a medium mixing bowl, whisk together the almond flour, cocoa powder, baking powder, salt, and sweetener until well combined.

    Step 3: Mix the Wet Ingredients

    1. Combine Wet Ingredients: In a separate bowl, whisk together the melted butter, eggs, vanilla extract, and almond milk until smooth.

    Step 4: Combine Mixtures

    1. Combine Wet and Dry: Pour the wet ingredients into the dry ingredients and mix until just combined. Be careful not to overmix. If desired, fold in the chocolate chips and nuts.

    Step 5: Bake the Brownies

    1. Pour into Pan: Spread the brownie batter evenly into the prepared baking dish.
    2. Bake: Bake in the preheated oven for 20-25 minutes, or until a toothpick inserted into the center comes out with a few moist crumbs (but not wet batter). The brownies will continue to set as they cool.

    Step 6: Cool and Serve

    1. Cool: Allow the brownies to cool in the pan for about 10-15 minutes before transferring them to a wire rack to cool completely.
    2. Cut and Enjoy: Once cooled, cut into squares and enjoy your delicious, guilt-free keto brownies!
    See also  Mini Sugar Doughnuts

    Tips and Variations:

    • Fudgier Brownies: For even fudgier brownies, reduce the baking time slightly. Just keep an eye on them!
    • Storage: Store leftover brownies in an airtight container at room temperature for up to 3 days or refrigerate for up to a week. They can also be frozen for longer storage.
    • Add Flavor: Enhance the flavor by adding a teaspoon of espresso powder or a pinch of sea salt to the batter.

    Final Thoughts:

    These Keto Brownies are a perfect way to satisfy your chocolate cravings without compromising your low-carb lifestyle. Rich and fudgy, they’re sure to impress even those who aren’t on a keto diet. Enjoy this delightful treat with a dollop of whipped cream or a scoop of keto-friendly ice cream for an extra special dessert!

  • cream caramel-pudding

    cream caramel-pudding

    A delicious dessert that goes by many different names: crème caramel, flan, caramel pudding, condensed milk pudding, or caramel custard. A Creme Caramel is a classic French dessert that is both delicate and rich. It’s a perfect dessert for a special occasion or for those who crave a sweet treat after dinner—a great way to impress your dinner guests! The dessert is made up of a silky smooth custard base that is topped with a layer of golden caramel, which adds a lovely touch of sweetness. With a few simple ingredients and a little patience, you can make this French, elegant dessert in the comfort of your own home!

    What is Cream Caramel Pudding

    While the names for this dessert are often used interchangeably, there are slight differences between flan and crème caramel.

    The Cream caramel is a classic French dessert consisting of a custard base with a sweet caramel layer. It’s made with milk, eggs, and sugar, and is usually flavored with vanilla. Once cooked the dessert is inverted onto the serving plate, to reveal the sticky caramel layer.

    Unlike cream caramels, which are always sweet, flans come on both savory and sweet. Recipes for flans date back to Roman times, where it has been served as a main course or dessert. When made for dessert, flans look much like cream caramel. But when it’s made into a savory dish, it resembles a quiche and is often served in squares.

    Tips
    Unlike the Vietnamese Flan which contains a lot of small bubbles, a classic Cream Caramel should never contain bubbles, but be a smooth mixture instead. Prevent these bubbles by not over-whisking your custard.

    The flan should be slightly jiggly when it comes out of the oven, it will continue to cook from residual heat.

    Use room-temperature eggs for best results—they’ll be less likely to scramble once you add the milk

    Don’t skip the straining step, this creates a smooth custard.

    How to Store Cream Caramel
    Store the Cream Caramel in the fridge for up to 4 days.

    Can I Make It Ahead of Time?
    This recipe is great for making ahead of time. Once the dessert has cooled, cover it tightly with plastic wrap and store it in the fridge.

    Ingredients
    SUGAR
    70g (1/3 cup)
    WATER
    20ml (4 tsp)
    HOT WATER
    15ml
    EGGS
    4
    EGG YOLK
    2
    SUGAR
    70g (20g+50g)
    MILK
    420ml (1 3/4 cups)
    HEAVY CREAM
    100ml (1/2 cup)
    VANILLA EXTRACT
    1tsp
    Instructions
    Place the sugar and 4 tsp water in a saucepan over medium heat. Stir until the mixture becomes dark and caramelized. Once the mixture turns to caramel, add the extra hot water and stir.

    Step 1
    Pour the caramel into a baking dish, making sure that the entire surface is covered with the caramel. Allow to cool.

    Step 2
    In the meanwhile, make the custard. In another pan, combine the sugar, milk, and vanilla extract, and mix until dissolved. Allow to cool.

    Step 3
    In another bowl, combine the egg yolks and sugar, and mix.

    Step 4
    Pour in cooled milk into the egg mixture.

    Step 5
    Pour the mixture through a sieve, and transfer it to a pan.

    Step 6
    Strain the mixture again, pouring it onto the cooled caramel.

    Step 7
    Place the baking dish in a water bath and cover with foil. Bake with water at 150°C (300°F) for 50 minutes.

    Step 8
    Invert the dish carefully onto a serving plate.

    Step 9
    Slice with a sharp knife, and serve.

    Step 10
    Enjoy!

    read more on: https://www.cookist.com/cream-caramel-pudding-the-secret-to-making-it-perfect/p5/
    https://www.cookist.com/

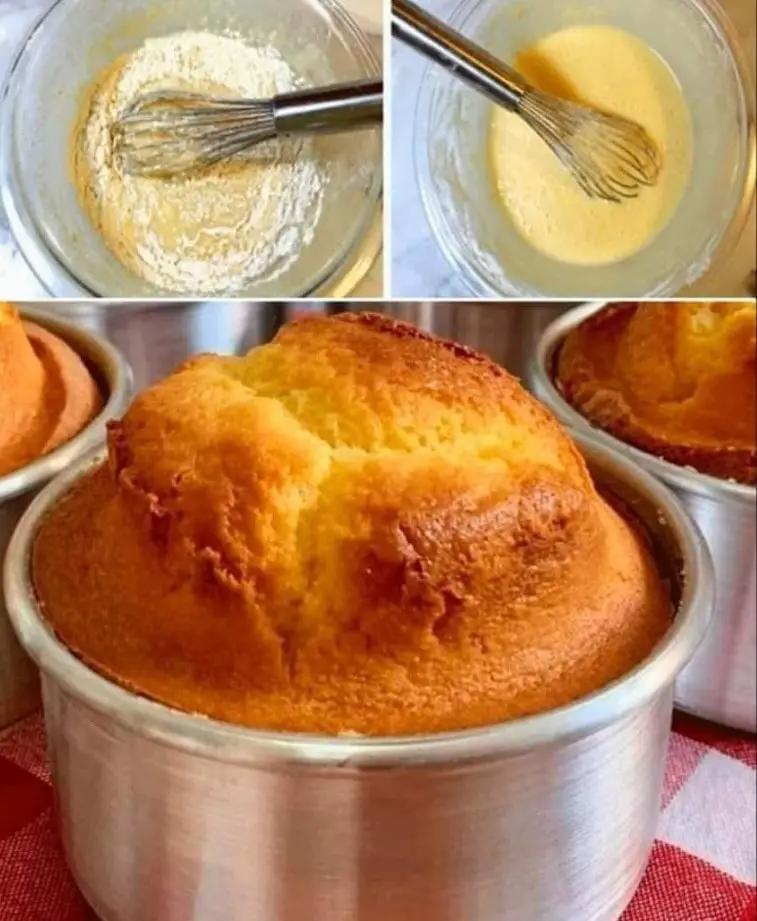
  • LEMON CAKE Preheat the oven

    LEMON CAKE Preheat the oven

    LEMON CAKE Preheat the oven

    Table of Contents

    Ingredients:
    • 4 eggs
    • 100 ml of extra virgin olive oil or butter
    • 180g of sugar
    • 280g of flour
    • 15 g baking powder
    • 150 g plain yogurt NOT Greek yogurt
    • 60ml lemon juice
    • The grated zest of 2 lemons
    Preparation:

    1. Preheat the oven. Grease a round mold with butter and sprinkle it with flour. Eliminate excess flour (instead of flour and butter you can use baking paper). Mold diameter: 20 cm.
    2. Beat the egg with the sugar until creamy and whitish. Keep beating and add the oil little by little.
    3. Add the grated lemon peel, lemon juice and yogurt. Beat a little more so that the mixture is homogeneous.
    4. Add flour and baking powder. Beat a little more until smooth.
    5. Pour the lemon cake batter into the mold and smooth it out. Bake for about 45 minutes. Oven: 180ºC.
    6. When you take the cake out of the oven, leave it in the pan for 10 minutes, then remove the pan and transfer it to a wire rack to cool completely.

  • Quick and Delicious Christmas Cake in 15 Minutes

    Quick and Delicious Christmas Cake in 15 Minutes

    Quick and Delicious Christmas Cake in 15 Minutes

    Table of Contents

    Ingredients:

    For the Dough:

    • 6 eggs 1f95a
    • A pinch of salt 1f9c2
    • 80g sugar 1f36c
    • 60g flour 1f370
    • 100g ground hazelnuts 1f330
    • 1 teaspoon baking powder 1f944

    For the Cream:

    • 4 eggs 1f95a
    • A pinch of salt 1f9c2
    • 100g sugar 1f36c
    • 120g cornstarch 1f33d
    • 1L milk 1f95b
    • 200g butter 1f9c8
    • 200g chocolate 1f36b
    • 15g cocoa 1f36b
    • 100g hazelnuts (roasted and chopped) 1f330
    • 8g vanilla sugar 1f36c

    For the Topping:

    • 400ml cream (33% fat) 1f95b
    • 50g sugar 1f36c
    • 300g cream cheese 1f9c0
    Instructions:
    1. Preheat your oven to 180°C (356°F).
    2. For the dough, beat 6 eggs with a pinch of salt until frothy. Gradually add 80g of sugar while continuing to beat.
    3. Gently fold in 60g of flour, 100g of ground hazelnuts, and 1 teaspoon of baking powder.
    4. Pour the dough into a 24x24cm baking pan and bake for 30 minutes.
    5. For the cream, whisk 4 eggs with a pinch of salt. Add 100g of sugar and 120g of cornstarch, whisking until well combined.
    6. Heat 1L of milk in a saucepan until almost boiling. Gradually add the egg mixture while stirring constantly until it thickens.
    7. Remove from heat, add 200g of butter, 200g of chocolate, 15g of cocoa, 100g of roasted and chopped hazelnuts, and 8g of vanilla sugar. Mix until smooth.
    8. Pour the cream over the baked dough.
    9. Whip 400ml of cream with 50g of sugar until stiff peaks form, then fold in 300g of cream cheese.
    10. Spread the cream mixture over the chocolate layer.
    11. Allow the cake to cool and set in the refrigerator.
    12. Enjoy your scrumptious Christmas cake with family and friends!
  • Banana Cake with 1 Egg and 2 Bananas: A Delicious Treat

    Banana Cake with 1 Egg and 2 Bananas: A Delicious Treat

    Banana Cake with 1 Egg and 2 Bananas: A Delicious Treat

    Table of Contents

    If you’re craving a sweet and moist banana cake but don’t have an oven, worry not! In this article, we’ll guide you through the simple steps of making a delectable [No-Oven] Banana Cake with just 1 egg and 2 ripe bananas. This easy-to-follow recipe is perfect for those moments when you want a homemade dessert without the hassle of using an oven. Let’s dive right in and satisfy those banana cake cravings.

    Ingredients You’ll Need

    Before we get started, make sure you have the following ingredients at hand:

    For the Cake:
    • 2 ripe bananas
    • 1 egg
    • 1/4 cup of sugar
    • 1/4 cup of flour
    • 1 tsp baking powder
    • 1/4 tsp salt
    • 2 tbsp butter, melted
    • 1/4 cup of milk
    • 1/2 tsp vanilla extract
    For the Topping:
    • 1/4 cup brown sugar
    • 2 tbsp butter
    • 1 banana, sliced
    The Step-by-Step Guide

    Now that we have all our ingredients ready, let’s dive into the process of making this scrumptious [No-Oven] Banana Cake:

    Preheat or Grease
    • First, preheat your oven to 350°F (175°C). If you don’t have an oven, don’t worry; we’ll address that in a moment.
    • Alternatively, if you’re going the oven-less route, grease a 9-inch round cake pan with butter or cooking spray.
    Prepare the Topping
    • In a small saucepan, melt 2 tablespoons of butter over low heat.
    • Add 1/4 cup of brown sugar and stir until the sugar is dissolved.
    • Pour this delicious mixture into the prepared cake pan, ensuring it spreads evenly on the bottom.
    • Now, place the banana slices on top of this caramelized mixture and set it aside.
    See also  The Softest 5-Minute Cake in the World
    Mix the Cake Batter
    • In a mixing bowl, mash 2 ripe bananas with a fork until they are nice and smooth.
    • Add 1 egg, 1/4 cup of sugar, 1/4 cup of flour, 1 tsp baking powder, 1/4 tsp salt, 1/4 cup of milk, 2 tbsp melted butter, and 1/2 tsp of vanilla extract to the mashed bananas.
    • Mix all these delicious ingredients until you have a smooth and well-combined batter.
    Assemble and Bake
    • Carefully pour the cake batter over the banana slices in the cake pan, ensuring it covers them completely.
    • Now, if you’re using an oven, bake for 25-30 minutes or until a toothpick inserted in the center comes out clean. If you’re going oven-less, stay with us a little longer.
    • Remove the cake from the oven when it’s done, and let it cool for about 5 minutes.
    Unmold the Cake
    • Using a knife, gently loosen the edges of the cake from the pan.
    • Place a plate on top of the cake pan and with a confident flip, invert the pan. The cake should come out beautifully, with the banana topping now on top for a delightful presentation.
    Conclusion

    There you have it, a delightful [No-Oven] Banana Cake with 1 Egg and 2 Bananas that’s bound to impress your taste buds. Whether you’re baking it in an oven or trying the oven-less method, this recipe is easy, accessible, and absolutely delicious. Give it a try today and enjoy a slice of homemade heaven.

  • Quick Strawberry Jam-Filled Muffins

    Quick Strawberry Jam-Filled Muffins

    Quick Strawberry Jam-Filled Muffins

    Table of Contents

    Ingredients:
    • 2 eggs 1f95a
    • 100g Sugar 1f36c
    • 8g Vanilla sugar 1f366
    • A pinch of salt 1f9c2
    • 125g Vanilla yogurt 1f368
    • 50ml milk 1f95b
    • 100ml oil 1f33b
    • 200g Flour 1f35e
    • 8g Baking powder 1f9c1
    • Strawberry jam 1f353
    • Almonds (for topping) 1f330

    Instructions:

    1. Preheat your oven to 180°C (356°F) and line a muffin tin with paper liners.
    2. In a bowl, whisk together eggs, sugar, vanilla sugar, and a pinch of salt until well combined.
    3. Add vanilla yogurt, milk, and oil. Mix until smooth.
    4. Gradually add flour and baking powder, stirring until the batter is lump-free.
    5. Fill each muffin cup halfway with batter.
    6. Add a teaspoon of strawberry jam to each muffin cup.
    7. Top with more batter, filling each cup about 2/3 full.
    8. Sprinkle almond slices on top for added crunch and flavor.
    9. Bake for 15-20 minutes or until a toothpick comes out clean when inserted into the muffins.
    10. Let them cool for a few minutes in the tin before transferring to a wire rack to cool completely.
    11. These delightful muffins take only 10 minutes to prepare and are incredibly delicious. Enjoy!
  • Fresh Fruit and Milk Delight: A Gelatin-Free Dessert

    Fresh Fruit and Milk Delight: A Gelatin-Free Dessert

    Fresh Fruit and Milk Delight: A Gelatin-Free Dessert

    Table of Contents


    Ingredients:

    Tangerines, peeled and sections separated
    Kiwis, peeled and sliced
    Persimmons, peeled and sliced
    Grapefruit, peeled and sections separated
    Apple, cored and chopped
    Banana, peeled and sliced
    8 g agar-agar
    50 ml water
    350 ml milk
    200 grams condensed milk
    200 grams sour cream or yogurt

    See also  Yogurt Cornstarch Cake Recipe

    Instructions:

    Prepare the Fruit:
    Arrange the sliced tangerines, kiwis, persimmons, grapefruit, apple, and banana in individual serving dishes or a large serving bowl.
    Prepare the Agar-Agar Mixture:
    In a small saucepan, mix the agar-agar with 50 ml of water. Let it soak for about 3-5 minutes.
    Heat the mixture over medium heat, stirring constantly, until the agar-agar completely dissolves. Remove from heat.
    Mix the Milk Mixture:
    In a separate saucepan, gently warm the milk and condensed milk together, just enough to integrate smoothly. Do not boil.
    Once the milk is warm, stir in the dissolved agar-agar mixture. Mix well to ensure everything is fully combined.
    Combine with Sour Cream or Yogurt:
    Remove the milk mixture from the heat. If using yogurt, ensure it’s at room temperature to prevent curdling. Mix the sour cream or yogurt into the milk mixture until smooth.
    Assemble the Dessert:
    Pour the milk and yogurt mixture over the arranged fruits.
    Let the dessert sit until it begins to firm up, then refrigerate for at least 1 hour to fully set.
    Serve:
    Once set, serve the dessert chilled. It can be garnished with additional fresh fruit or a drizzle of honey for extra sweetness.
    Serving Suggestions:

    This Fresh Fruit and Milk Delight is an excellent way to end any meal on a light and refreshing note. It’s also perfect as an afternoon snack on warm days. The creamy texture and vibrant flavors of the fruits make this dessert a delightful treat for both kids and adults.

    Ezoic
    Enjoy the natural goodness of fruits in this simple, quick, and delicious dessert that’s sure to become a new favorite in your household!

  • Nest Milk Pavé Recipe with Strawberry

    Nest Milk Pavé Recipe with Strawberry

    Ingredients for the Cream:
    1 box of condensed milk
    6 Tablespoons of Nest Milk
    2 Boxes of Sour Cream
    1 Tablespoon Unsalted Butter
    Ingredients for Assembly:
    2 strawberry trays
    200 g of Maizena Biscuit
    Milk (to moisten)
    Cream Preparation:
    In a pan, add the condensed milk, the nest milk, the cream and the butter. Mix and bring to the low fire, stirring constantly until it starts to unglue from the bottom of the pan.
    Pour into a bowl and cover with plastic wrap. Wait until it cools down completely.
    Mounting:
    Wash and slice the strawberries. Reserve. Dip the biscuits quickly in the milk, but without soaking. Place a layer of cookies on the bottom of a serving dish.
    Cover with the cream and make a layer of strawberry. Repeat this process until the cream is last. Cover with plastic wrap and place in the fridge for 2 hours.
    After this time, decorate the pavé with Ninho milk and strawberry. Serve immediately.

  • Quick and Delicious Christmas Cake in 15 Minutes

    Quick and Delicious Christmas Cake in 15 Minutes

    Ingredients:

    For the Dough:

    • 6 eggs 1f95a
    • A pinch of salt 1f9c2
    • 80g sugar 1f36c
    • 60g flour 1f370
    • 100g ground hazelnuts 1f330
    • 1 teaspoon baking powder 1f944

    For the Cream:

    • 4 eggs 1f95a
    • A pinch of salt 1f9c2
    • 100g sugar 1f36c
    • 120g cornstarch 1f33d
    • 1L milk 1f95b
    • 200g butter 1f9c8
    • 200g chocolate 1f36b
    • 15g cocoa 1f36b
    • 100g hazelnuts (roasted and chopped) 1f330
    • 8g vanilla sugar 1f36c

    For the Topping:

    • 400ml cream (33% fat) 1f95b
    • 50g sugar 1f36c
    • 300g cream cheese 1f9c0
    Instructions:
    1. Preheat your oven to 180°C (356°F).
    2. For the dough, beat 6 eggs with a pinch of salt until frothy. Gradually add 80g of sugar while continuing to beat.
    3. Gently fold in 60g of flour, 100g of ground hazelnuts, and 1 teaspoon of baking powder.
    4. Pour the dough into a 24x24cm baking pan and bake for 30 minutes.
    5. For the cream, whisk 4 eggs with a pinch of salt. Add 100g of sugar and 120g of cornstarch, whisking until well combined.
    6. Heat 1L of milk in a saucepan until almost boiling. Gradually add the egg mixture while stirring constantly until it thickens.
    7. Remove from heat, add 200g of butter, 200g of chocolate, 15g of cocoa, 100g of roasted and chopped hazelnuts, and 8g of vanilla sugar. Mix until smooth.
    8. Pour the cream over the baked dough.
    9. Whip 400ml of cream with 50g of sugar until stiff peaks form, then fold in 300g of cream cheese.
    10. Spread the cream mixture over the chocolate layer.
    11. Allow the cake to cool and set in the refrigerator.
    12. Enjoy your scrumptious Christmas cake with family and friends!
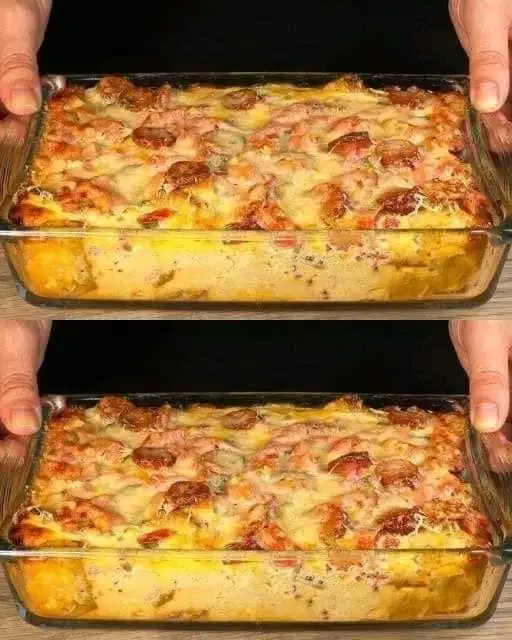
  • Chicken & Vegetable Casserole with Mozzarella

    Chicken & Vegetable Casserole with Mozzarella

    Ingredients

    For the Egg Mixture:

      • 4 large chicken eggs
      • ½ tsp salt
      • 125 ml (½ cup) milk
      • 113 g (4 oz) flour
      • 28 g (1 oz) spring onions, chopped
      • 28 g (1 oz) fresh dill, chopped
      • Black pepper to taste
    • 85 g (3 oz) mozzarella cheese, shredded

    For the Vegetables & Chicken:

      • 4 medium potatoes, peeled and diced
      • 1 zucchini, diced
      • 1 onion, chopped
      • 2 cloves garlic, minced
      • 1 carrot, grated
      • 1 chicken fillet, diced
      • 1 sweet fresh pepper, chopped
      • 1 tsp salt
      • Black pepper to taste
      • ½ tsp sweet paprika
      • 28 g (1 oz) olives, sliced
      • 2 cherry tomatoes, halved
      • 1 tbsp olive oil

    Directions

      • Prepare the Vegetables: Peel and dice the potatoes, chop the zucchini, onion, pepper, and garlic. Grate the carrot.
      • Cook the Chicken & Vegetables: In a large pan, heat olive oil over medium heat. Add the diced chicken fillet, season with salt, black pepper, and sweet paprika. Cook for 5-7 minutes until browned. Remove and set aside.
      • Sauté the Vegetables: In the same pan, sauté onions, garlic, carrots, zucchini, and sweet pepper for 4-5 minutes until they soften slightly.
      • Make the Egg Mixture: In a large bowl, whisk together eggs, salt, black pepper, and milk. Gradually add the flour, mixing until smooth. Stir in chopped spring onions and dill.
      • Layer the Casserole: Preheat the oven to 180°C (360°F). Grease a casserole dish with olive oil. Spread the diced potatoes at the bottom, then add the cooked chicken and sautéed vegetables. Pour the egg mixture over the top.
      • Bake: Bake the casserole for 30 minutes at 180°C (360°F) until the top is set and golden brown.
    • Add Mozzarella & Final Toppings: Remove the casserole from the oven. Sprinkle shredded mozzarella cheese on top, add sliced olives and halved cherry tomatoes. Return to the oven and bake for an additional 7 minutes until the cheese is melted and bubbly.
    • Serve: Garnish with extra dill or spring onions if desired and serve hot.

    Serving Suggestions

      • Pair with a simple green salad or steamed broccoli for a complete meal.
    • Serve with crusty bread or garlic toast for added texture.

    Cooking Tips

      • For a more flavorful egg mixture, add a pinch of nutmeg or smoked paprika.
      • You can substitute mozzarella with any melty cheese like cheddar or gouda.
    • If you prefer crispier potatoes, pre-bake the diced potatoes for 10 minutes before adding them to the casserole.

    Nutritional Benefits

      • High Protein: Chicken and eggs provide a great source of protein, helping with muscle repair and overall health.
      • Rich in Fiber: The vegetables, especially zucchini and potatoes, are rich in fiber, which aids in digestion.
    • Essential Vitamins: Zucchini, peppers, and carrots are rich in vitamins A and C, supporting immune health.

    Dietary Information

      • Gluten-Free Option: Use gluten-free flour to make this dish gluten-free.
      • Vegetarian Option: Omit the chicken and increase the quantity of vegetables for a vegetarian version.
    • Low Carb Option: Substitute the potatoes with cauliflower for a low-carb alternative.

    Nutritional Facts (Per Serving, makes 6 servings)

      • Calories: 320
      • Protein: 18 g
      • Carbohydrates: 25 g
      • Fiber: 5 g
      • Fat: 16 g
    • Sugars: 4 g

    Storage Tips

      • Refrigeration: Store leftovers in an airtight container in the fridge for up to 3 days.
      • Freezing: Freeze individual portions in airtight containers for up to 2 months. Reheat in the oven or microwave before serving.
    • Reheating: Reheat in a preheated oven at 150°C (300°F) for 10-15 minutes or in the microwave for 2-3 minutes.
  • Cheesy Broccoli and Cauliflower Gratin

    Cheesy Broccoli and Cauliflower Gratin

    Ingredients:

    • 1 grosse tête de brocoli, coupée en fleurons
    • 1 grosse tête de chou-fleur, coupée en fleurons
    • 2 cuillères à soupe d’huile d’olive
    • Sel et poivre au goût
    • 3 cuillères à soupe de beurre
    • 3 gousses d’ail hachées
    • 3 cuillères à soupe de farine tout usage
    • 2 tasses de lait
    • 1 tasse de crème épaisse
    • 2 tasses de fromage râpé (cheddar, gruyère ou un mélange)
    • 1/2 cuillère à café de noix muscade
    • 1 tasse de chapelure
    • 1/2 tasse de parmesan râpé
    • Persil frais haché (pour la garniture)

    PREPARATION:

    1. Préchauffer et préparer :
      • Préchauffez votre four à 375 degrés Fahrenheit (190 degrés Celsius).
      • Graisser un grand plat de cuisson avec du beurre ou un spray antiadhésif.
    2. Rôtir les légumes :
      • Mélangez les fleurons de brocoli et de chou-fleur avec de l’huile d’olive, du sel et du poivre. Étalez-les sur une plaque à pâtisserie et faites-les rôtir au four préchauffé pendant environ 20 à 25 minutes jusqu’à ce qu’ils commencent à devenir tendres et à prendre de la couleur.
    3. Préparez la sauce au fromage :
      • Dans une casserole, faites fondre le beurre à feu moyen. Ajoutez l’ail émincé et faites revenir jusqu’à ce qu’il soit parfumé, environ 1 minute.
      • Incorporez la farine et laissez cuire environ 2 minutes pour éliminer le goût de farine crue. Incorporez progressivement le lait et la crème épaisse en fouettant, en veillant à ce qu’il n’y ait pas de grumeaux.
      • Portez à ébullition et laissez mijoter jusqu’à ce que la sauce épaississe, environ 5 minutes. Retirez du feu et incorporez le fromage râpé et la muscade jusqu’à ce que le fromage soit fondu et que la sauce soit lisse.
    4. Combiner et cuire :
      • Placez le brocoli et le chou-fleur rôtis dans le plat de cuisson préparé. Versez la sauce au fromage uniformément sur les légumes.
      • Dans un petit bol, mélanger la chapelure avec le parmesan et saupoudrer sur le dessus du gratin.
      • Cuire au four pendant 25 à 30 minutes ou jusqu’à ce que le dessus soit doré et croustillant.
    5. Servir:
      • Laissez refroidir le gratin quelques minutes avant de le servir. Décorez de persil frais haché.

    Enjoy !

  • Creamy Tortellini Soup with Sausage (Slow Cooker Recipe)

    Creamy Tortellini Soup with Sausage (Slow Cooker Recipe)

    Creamy Tortellini Soup with Sausage (Slow Cooker Recipe)

    There’s something undeniably comforting about a warm, hearty bowl of soup on a cold winter night, especially in the Midwest, where the winters can be particularly harsh. When I first came across this recipe for creamy tortellini soup with sausage, I knew I had to try it, and it didn’t disappoint. The rich flavors, combined with the convenience of slow cooking, made it an instant hit in my household.

    I originally started searching for a recipe that would modernize an old favorite that my grandma used to make. Her soups were always filled with love, but I needed something that could fit into my busy schedule. That’s when I found this slow cooker version. It retains all the comforting elements of grandma’s recipe but adds a creamy twist that takes it to the next level. The robust Italian sausage, tender cheese-filled tortellini, and the rich, creamy broth all come together in perfect harmony, making every bite satisfying and full of flavor.

    What I love most about this recipe is how simple it is to prepare. With minimal effort in the kitchen, you can let the slow cooker do all the work while you go about your day. Whether you’re juggling work, family, or just need a hands-off meal option, this recipe has you covered.

    Servings: 6

    Ingredients:

    • 1 lb Italian sausage (mild or spicy)
    • 1 small onion, chopped
    • 3 cloves garlic, minced
    • 6 cups chicken broth
    • 1 can (15 oz) diced tomatoes, drained
    • 1 (9 oz) package refrigerated cheese tortellini
    • 3 tbsp heavy cream
    • 2 cups fresh spinach, roughly chopped
    • ½ tbsp pesto
    • 1½ tsp dried oregano
    • Salt and pepper, to taste
    • Grated Parmesan cheese (optional, for garnish)

    Instructions:

    1. Brown the Sausage: In a skillet over medium heat, cook the sausage, breaking it into small pieces. Drain excess fat.
    2. Sauté Veggies: Add the chopped onion and garlic to the skillet. Sauté until the onion is translucent, about 5 minutes.
    3. Slow Cook: Transfer the sausage mixture to the slow cooker. Add chicken broth, diced tomatoes, oregano, and pesto. Stir to combine.
    4. Cook Time: Cover and cook on low for 6 hours or on high for 3 hours.
    5. Add Tortellini: About 30 minutes before serving, stir in the tortellini, heavy cream, and spinach.
    6. Finish Cooking: Continue cooking for another 30 minutes, or until the tortellini is tender.
    7. Season and Serve: Season with salt and pepper to taste. Serve hot, optionally garnished with grated Parmesan.

    Pro Tips for Making Creamy Tortellini Soup

    1. Sauté First: Always sauté the sausage and vegetables before adding them to the slow cooker. This step enhances the flavors and gives the soup a richer taste.
    2. Use Fresh Ingredients: Fresh spinach adds a vibrant flavor and texture. If you prefer, you can also use frozen spinach; just make sure to thaw and drain it first.
    3. Adjust the Spice: If you like a bit of heat, opt for spicy Italian sausage. For a milder flavor, go with the mild variety or use turkey sausage.
    4. Don’t Overcook the Tortellini: Add the tortellini in the last 30 minutes of cooking to ensure they remain tender and don’t become mushy.
    5. Make It Ahead: This soup freezes well. Make a double batch and store leftovers in airtight containers for a quick meal later on.
    6. Garnish Wisely: For added flavor and presentation, sprinkle fresh herbs or a drizzle of olive oil before serving.
    7. Cream Variations: If you’re looking for a lighter option, you can substitute heavy cream with half-and-half or a non-dairy cream for a delicious twist.
  • Caramelized Custard French Toast

    Caramelized Custard French Toast

    Caramelized Custard French Toast

    There’s something undeniably comforting about waking up to the smell of sweet, decadent French toast baking in the oven. But what if you could take that classic breakfast dish and give it an elegant, dessert-like twist? Enter Crème Brûlée French Toast, the perfect blend of indulgence and sophistication. Imagine layers of soft, pillowy brioche or challah bread soaked in a rich, custard-like mixture, then baked to golden perfection with a caramelized topping that crackles as you dig in. It’s like enjoying your favorite dessert for breakfast!

    This recipe is ideal for those special occasions when you want to impress your guests with minimal effort or even just treat yourself to a luxurious morning meal. The best part? You can prepare everything the night before, letting the bread absorb all the sweet, creamy flavors while you sleep. In the morning, all that’s left is to pop it in the oven, and you’ll have a beautifully golden, puffy French toast that’s rich and flavorful, with just the right amount of crispiness from the caramelized sugar topping.

    Whether you’re hosting brunch or simply craving something a little more indulgent, this Crème Brûlée French Toast is sure to become a favorite. You can even add a touch of your own creativity by including seasonal spices like cinnamon and nutmeg or layering in fresh fruit like apples or pears for a delightful twist. Perfect for lazy weekends, holidays, or any time you want to start your day with a treat, this dish combines the best of two worlds: the comfort of French toast and the elegance of crème brûlée.

    Ingredients:

    • 1/2 cup (1 stick) unsalted butter
    • 1 cup packed brown sugar
    • 2 tbsp light corn syrup
    • 1 loaf brioche or challah bread, sliced 1/2 inch thick
    • 5 large eggs
    • 1/2 cup fat-free milk
    • 1/2 cup half-and-half
    • 1 tsp vanilla extract
    • 1 tsp orange liqueur or Grand Marnier (optional)
    • 1/2 tsp salt (optional)
    • 1/4 cup granulated sugar (for caramelizing)

    Instructions:

    1. Prepare Caramel Base
      In a small saucepan over medium heat, melt butter. Add brown sugar and corn syrup, stirring until smooth. Pour this mixture into a 9×13-inch baking dish.
    2. Layer the Bread
      Arrange the sliced bread evenly over the caramel base in the baking dish. Trim slices to fit if needed.
    3. Make the Custard
      In a large bowl, whisk together eggs, milk, half-and-half, vanilla, salt, and liqueur (if using). Pour the custard over the bread slices, pressing down gently so the bread absorbs it.
    4. Chill
      Cover the dish with plastic wrap and refrigerate for at least 8 hours or overnight.
    5. Bake
      Preheat the oven to 350°F (175°C). Remove the plastic wrap and let the dish come to room temperature. Bake for 35-40 minutes, or until golden and puffed. Let cool slightly.
    6. Caramelize (Optional)
      For an extra touch, sprinkle granulated sugar on top and use a kitchen torch to caramelize until crisp and golden

    Tips:

    • For a seasonal twist, add cinnamon and nutmeg to the custard.
    • For variety, try layering sliced apples or pears between the bread slices.
    • Reduce sugar and butter for a less sweet version, or use whole grain bread for added texture.
  • Believe It or Not: A Delicious Sugar-Free Apple Cake You’ll Love!

    Believe It or Not: A Delicious Sugar-Free Apple Cake You’ll Love!

    Believe It or Not: A Delicious Sugar-Free Apple Cake You’ll Love!

    Table of Contents

    Ingredients:

    For the Crust:

      • 200 grams (7 ounces) rolled oats
      • 1 pinch of salt
      • 7 grams (0.25 ounces) baking powder
      • 2 apples
      • 10 ml (0.3 fl oz) lemon juice
    • 1 egg
    • Olive oil (for greasing the pan)

    For the Filling:

      • 900 grams (32 ounces) apples (about 4-5 medium apples)
      • 15 ml (0.5 fl oz) lemon juice
      • Sweetener or honey, to taste
      • 7 grams (0.25 ounces) ground cinnamon
      • 60 grams (2 ounces) dried cranberries or raisins
      • 70 grams (2.5 ounces) walnuts, chopped

    Instructions:

      1. Prepare the Crust: In a blender or food processor, grind the rolled oats into a fine, flour-like consistency.
      2. In a large mixing bowl, combine the ground oatmeal, salt, and baking powder.
      3. Peel, core, and grate the 2 apples. Toss the grated apples with the lemon juice to prevent browning.
    1. Add the grated apples and egg to the dry ingredients in the bowl. Mix well until a thick batter forms.

    Tips:

      • For a more rustic texture, you can pulse the oats in the blender a few times instead of grinding them into a fine powder.
    • If you don’t have a blender or food processor, you can use a rolling pin to crush the oats in a sealed plastic bag.
      1. Preheat the Oven and Grease the Pan: Preheat your oven to 180°C (360°F). Lightly grease a baking dish with olive oil.


      1. Assemble the Crust: Pour the oatmeal batter into the prepared baking dish and spread it evenly with your hands to form a compact crust.

      2. Prepare the Filling: Peel, core, and chop the remaining apples (about 900 grams) into bite-sized pieces.


      3. Cook the Apples: In a large saucepan over medium heat, combine the chopped apples, lemon juice, and ground cinnamon. Cook for 15-20 minutes, or until the apples are softened and tender.

    Tips:

      • If the apples start to stick to the pan, add a tablespoon or two of water and continue cooking.
      • For a sweeter filling, taste the apples after cooking and add your preferred sweetener or honey to taste.
      1. Incorporate the Dried Fruit and Nuts: While the apples are cooking, soak the dried cranberries or raisins in a bowl of cold water for 15-20 minutes. Drain the soaked fruit before adding it to the apple mixture.


      2. Combine Filling and Crust: Once the apples are cooked and the dried fruit is drained, add the chopped walnuts to the apple mixture and stir to combine. Pour the apple filling over the oatmeal crust in the baking dish.


      3. Bake the Cake: Bake the cake in the preheated oven for 30-40 minutes, or until the crust is golden brown and the filling is bubbly.


    1. Cool and Serve: Remove the cake from the oven and let it cool completely before slicing and serving. Enjoy your delicious sugar-free apple cake!

  • broccoli and cauliflower salads

    broccoli and cauliflower salads

    Here are a couple of tasty recipes for broccoli and cauliflower salads that are perfect as sides or light meals!

    ### Broccoli Salad

    #### Ingredients
    – 4 cups fresh broccoli florets
    – 1/2 cup red onion, diced
    – 1/2 cup shredded cheddar cheese
    – 1/2 cup cooked bacon, crumbled
    – 1/4 cup sunflower seeds
    – 1/2 cup raisins or dried cranberries

    **For the Dressing:**
    – 1/2 cup mayonnaise
    – 2 tablespoons apple cider vinegar
    – 1 tablespoon sugar (or honey)
    – Salt and pepper to taste

    #### Instructions
    1. **Prepare the Salad:**
    – In a large bowl, combine the broccoli, red onion, cheddar cheese, bacon, sunflower seeds, and raisins.

    2. **Make the Dressing:**
    – In a separate bowl, whisk together the mayonnaise, apple cider vinegar, sugar, salt, and pepper.

    3. **Combine:**
    – Pour the dressing over the salad and toss until everything is well coated.

    4. **Chill:**
    – Refrigerate for at least 30 minutes before serving to allow flavors to meld.

    ### Cauliflower Salad

    #### Ingredients
    – 1 head of cauliflower, cut into florets
    – 1/2 cup cherry tomatoes, halved
    – 1/4 cup red onion, diced
    – 1/4 cup feta cheese, crumbled
    – 1/4 cup olives (black or green), sliced
    – 2 tablespoons fresh parsley, chopped

    **For the Dressing:**
    – 1/4 cup olive oil
    – 2 tablespoons lemon juice
    – 1 teaspoon Dijon mustard
    – Salt and pepper to taste

    #### Instructions
    1. **Blanch the Cauliflower:**
    – Bring a pot of salted water to a boil. Add cauliflower florets and blanch for about 3-4 minutes until tender but still crisp. Drain and rinse under cold water to stop cooking.

    2. **Prepare the Salad:**
    – In a large bowl, combine the blanched cauliflower, cherry tomatoes, red onion, feta cheese, olives, and parsley.

    3. **Make the Dressing:**
    – In a small bowl, whisk together the olive oil, lemon juice, Dijon mustard, salt, and pepper.

    4. **Combine:**
    – Drizzle the dressing over the salad and toss gently to combine.

    5. **Chill:**
    – Let it sit for at least 15 minutes before serving to enhance the flavors.

    Enjoy these fresh and vibrant salads! They’re perfect for gatherings or as healthy meal options.