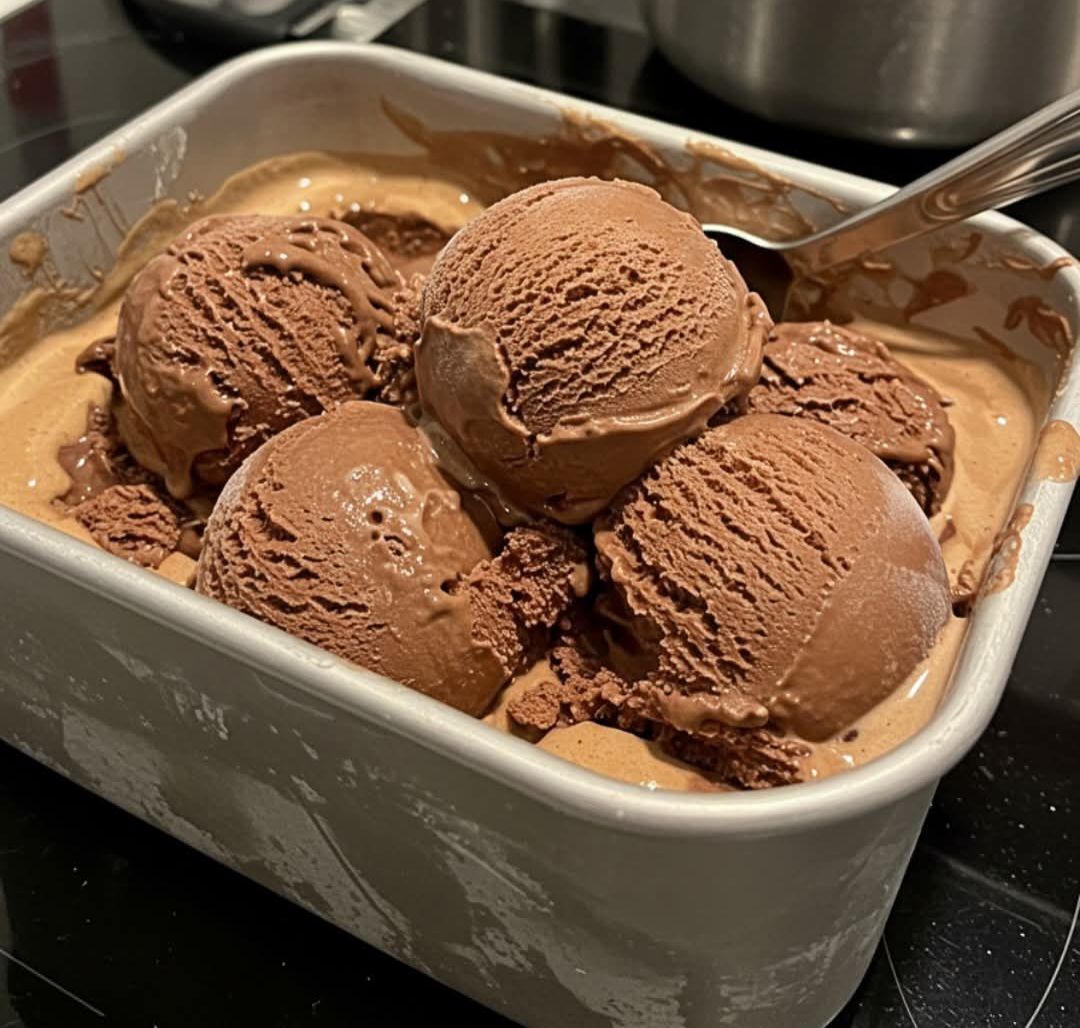
Nothing beats the satisfaction of a scoop of homemade chocolate ice cream. Store-bought tubs may be convenient, but they can never compare to the freshness, creaminess, and richness of ice cream made right in your own kitchen. Whether you’re craving a refreshing dessert on a hot day or planning a cozy treat for a movie night, this homemade chocolate ice cream recipe will be your go-to.
The beauty of making ice cream at home is that you control everything — from the sweetness level to the intensity of chocolate flavor. Plus, you can experiment with add-ins like nuts, brownie chunks, or swirls of fudge sauce.
Let’s dive into the recipe in detail.
Ingredients
For the Ice Cream Base:
2 cups (480 ml) heavy cream
1 cup (240 ml) whole milk
3/4 cup (150 g) granulated sugar
1/2 cup (50 g) unsweetened cocoa powder
200 g (about 7 oz) semisweet or dark chocolate, finely chopped
4 large egg yolks (optional, for custard-based richness)
1 teaspoon vanilla extract
Pinch of salt
Instructions
Method 1: Custard-Style Chocolate Ice Cream (Extra Creamy)
This method uses egg yolks for a rich custard base.
Heat the Milk & Cream:
In a medium saucepan, combine milk, half the cream, sugar, salt, and cocoa powder. Whisk well to blend. Heat over medium until the mixture is steaming but not boiling.
Melt the Chocolate:
Remove from heat and stir in the chopped chocolate. Whisk until completely smooth and glossy.
Temper the Egg Yolks:
In a separate bowl, whisk the egg yolks. Slowly pour a little of the hot chocolate mixture into the yolks while whisking constantly. This prevents curdling. Gradually whisk in more until the yolks are warm.
Cook the Custard:
Return the egg yolk mixture to the saucepan. Cook over medium-low, stirring constantly with a wooden spoon, until the custard thickens and coats the back of the spoon (about 170–175°F or 77–80°C).
Cool the Base:
Pour the custard through a fine mesh sieve into a clean bowl. Stir in the remaining cream and vanilla extract. Cover and chill in the refrigerator for at least 4 hours or overnight (the colder the base, the creamier your ice cream).
Churn the Ice Cream:
Pour the chilled base into an ice cream maker and churn according to manufacturer’s instructions (usually 20–25 minutes). The texture will be soft-serve at this stage.
Freeze:
Transfer to a lidded container and freeze for 4–6 hours, or until scoopable.
Method 2: No-Churn Chocolate Ice Cream (Easy & Egg-Free)
If you don’t have an ice cream maker, this method is foolproof and only needs 3 main ingredients.
Ingredients:
2 cups (480 ml) heavy whipping cream (cold)
1 can (14 oz / 400 g) sweetened condensed milk
1/2 cup (50 g) cocoa powder (sifted)
100 g (3.5 oz) melted chocolate (optional, for richness)
1 teaspoon vanilla extract
Steps:
Whip the Cream: In a chilled bowl, beat heavy cream with an electric mixer until stiff peaks form.
Mix the Chocolate Base: In another bowl, whisk together condensed milk, cocoa powder, melted chocolate, and vanilla.
Combine: Gently fold the whipped cream into the chocolate mixture until no streaks remain.
Freeze: Transfer to a container, cover, and freeze for at least 6 hours. Scoop and enjoy!
Tips for Perfect Chocolate Ice Cream
Quality Chocolate Matters: Always use high-quality cocoa powder and chocolate bars instead of chocolate chips for a deeper, smoother flavor.
Chill Thoroughly: The longer the base chills before churning, the smoother the final texture.
Prevent Ice Crystals: Cover the surface with plastic wrap before sealing the container to minimize ice crystal formation.
Extra Creamy Hack: Add 1 tablespoon of corn syrup or honey to the base — it helps keep ice cream soft.
Variations & Mix-Ins
Homemade ice cream is a blank canvas! Try these creative twists:
Rocky Road: Add marshmallows, almonds, and chocolate chunks.
Chocolate Fudge Swirl: Fold in ribbons of homemade fudge sauce before freezing.
Mocha Ice Cream: Add 1 tablespoon of instant espresso powder to the base.
Nutty Delight: Stir in chopped hazelnuts, pecans, or walnuts for crunch.
Mint Chocolate: Add 1/2 teaspoon peppermint extract and fold in crushed chocolate mints.
Serving Suggestions
Classic Sundae: Top scoops with whipped cream, chocolate syrup, and a cherry.
Ice Cream Sandwiches: Spread between homemade cookies for a handheld treat.
Brownie à la Mode: Serve a warm brownie topped with a scoop of chocolate ice cream.
Affogato: Pour a shot of hot espresso over a scoop for an Italian-style dessert.
Milkshake: Blend 2 scoops with 1/2 cup milk for a rich, creamy chocolate milkshake.
Storage Instructions
Store in a freezer-safe airtight container.
Press a piece of parchment or plastic wrap directly on top of the ice cream before sealing — this prevents freezer burn.
Best enjoyed within 2 weeks for maximum freshness.
Why You’ll Love This Recipe
Rich & Creamy: Both versions deliver smooth, indulgent texture.
Customizable: You can make it plain or load it with your favorite add-ins.
Beginner-Friendly: The no-churn version is so easy that anyone can make it — no fancy equipment required.
Crowd-Pleaser: Chocolate ice cream is a universal favorite, perfect for family gatherings and parties.
Final Thoughts
Homemade chocolate ice cream is pure comfort in a bowl. Whether you prefer the traditional custard-based method for maximum richness or the simple no-churn recipe for ease, you’ll end up with a frozen treat that rivals (or even surpasses) any store-bought pint.
The first spoonful will hit you with deep chocolate flavor, followed by silky creaminess that melts perfectly on your tongue. Once you make it yourself, you’ll realize why homemade is worth the effort — it’s fresher, more flavorful, and endlessly customizable.
So grab your favorite chocolate, whip up a batch, and get ready to scoop happiness into a bowl. ✨

