Table of Contents
Table of Contents
hide
Creamy Banana Custard Dessert
Ingredients:
-
- 50g butter
- 5 bananas or plantains (500g)
-
- 1/2 lemon (30ml juice)
- 300ml milk (cold or hot, depending on preference)
- 50g cornstarch (can be replaced with 100g flour)
-
- 3 egg yolks
- 1 teaspoon vanilla essence
- 500ml very cold cream (either dairy cream or vegetable cream)
Step-by-Step Instructions:
Step 1: Preparing the Bananas
-
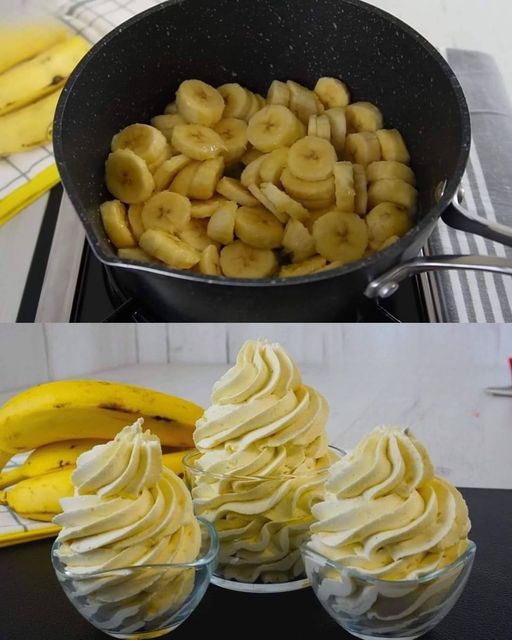
- Peel and slice the bananas: Start by peeling all the bananas and slicing them into medium-sized pieces. This will make them easier to mash later.
- Mash the bananas: Place the banana slices in a bowl and mash them using a fork or potato masher until they form a smooth puree.
- Add lemon juice: To prevent the bananas from browning and to add a fresh, zesty flavor, squeeze the juice of half a lemon (about 30ml) over the mashed bananas. Stir well to combine. Set the banana mixture aside.
Step 2: Making the Custard
-
- Prepare the cornstarch mixture: In a small bowl, mix 50g of cornstarch with a few tablespoons of the cold or hot milk (from the 300ml) until the cornstarch dissolves completely. If you’re using flour, mix it in the same way until you get a smooth paste.
- Whisk the egg yolks: In another bowl, whisk the 3 egg yolks until smooth and creamy. Set aside.
- Heat the milk: Pour the remaining milk (either cold or hot) into a saucepan and heat it over medium heat until it just begins to simmer. Avoid letting it boil.
-
- Add the cornstarch and egg yolks: Slowly pour the cornstarch mixture and the whisked egg yolks into the heated milk, whisking continuously to avoid lumps.
- Stir in the butter: Add the 50g of butter and continue stirring until the custard thickens. This should take about 3-5 minutes. Once the mixture is thick and smooth, remove it from heat.
- Add the vanilla essence: Stir in the teaspoon of vanilla essence for added flavor.
- Combine the banana puree with the custard: Gently fold the mashed bananas into the custard mixture, ensuring the banana flavor is evenly distributed throughout the custard.
Step 3: Preparing the Whipped Cream
-
- Whip the cream: In a large, cold mixing bowl, pour 500ml of very cold cream (either dairy or vegetable cream). Using a hand mixer or whisk, whip the cream until soft peaks form. This should take about 3-5 minutes.
- Fold in the whipped cream: Once the banana custard mixture has cooled slightly, gently fold in about half of the whipped cream to create a lighter, fluffier texture. Reserve the other half for topping.
Step 4: Assembling the Dessert
-
- Layer the dessert: In individual serving glasses or a large serving dish, layer the banana custard mixture, alternating with dollops of whipped cream. You can create as many layers as you like, depending on the size of the container.
- Top with whipped cream: Finish the dessert by topping it with a generous layer of the reserved whipped cream.
- Chill the dessert: Refrigerate the dessert for at least 1-2 hours before serving. This will allow the flavors to meld and the custard to set perfectly.
Cooking Tips:
-
- Cornstarch vs. flour: If you choose to use flour instead of cornstarch, remember that the flour will take a little longer to thicken. Stir continuously to avoid lumps.
- Whipping cream: Ensure your cream is very cold before whipping to achieve the best results. You can even place your mixing bowl and beaters in the fridge for 10-15 minutes before starting.
- Banana substitutes: If you want a variation of this dessert, you can substitute bananas with other fruits like mango, peach, or berries for a different flavor.
- Serving suggestion: For a crunchier texture, consider adding a layer of crushed cookies or graham crackers between the custard and whipped cream layers.
Nutritional Information (per serving, approximate):
-
- Calories: 360 kcal
- Carbohydrates: 40g
-
- Protein: 6g
- Fat: 20g
- Sugar: 28g
- Fiber: 3g

