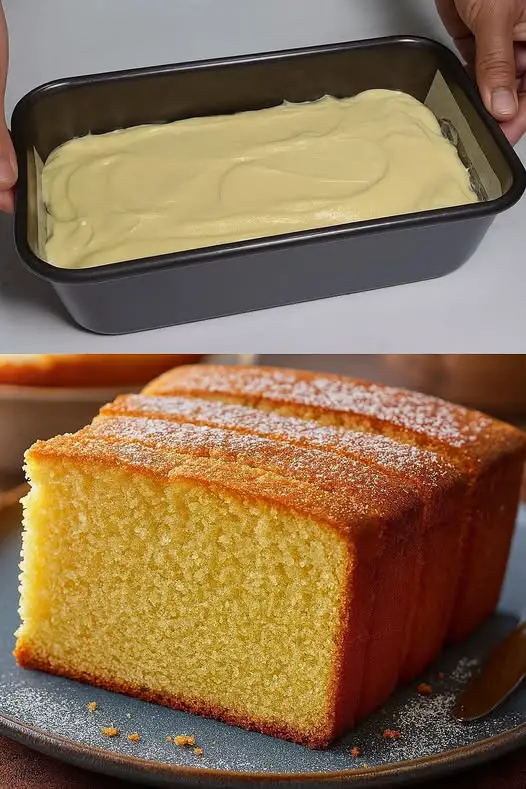
A soft, fluffy, and delicately sweet vanilla sponge cake that’s perfect for layering, frosting, or enjoying as-is with a dusting of powdered sugar. Whether used for birthdays, afternoon tea, or elegant layer cakes, this staple never goes out of style.
Recipe Details
-
Yield: One 8-inch round cake (or two thinner 6-inch layers)
-
Prep Time: 25 minutes
-
Bake Time: 30–35 minutes
-
Cooling Time: 1 hour
-
Skill Level: Intermediate
-
Diet: Vegetarian
Ingredients
Dry Ingredients
-
1 ½ cups (180g) all-purpose flour, sifted twice
-
1 ½ teaspoons baking powder
-
¼ teaspoon salt
Wet Ingredients
-
4 large eggs, at room temperature
-
1 cup (200g) granulated sugar
-
½ cup (120ml) whole milk, room temperature
-
¼ cup (60g) unsalted butter
-
1 tablespoon pure vanilla extract
Instructions
Step 1: Preheat & Prepare the Pan
-
Preheat your oven to 350°F (175°C).
-
Grease an 8-inch round cake pan with butter or non-stick spray.
-
Line the bottom with parchment paper, then lightly dust the sides with flour.
-
Tap out any excess flour to prevent clumps.
Step 2: Sift Dry Ingredients
-
In a medium bowl, whisk together:
-
Flour, baking powder, and salt.
-
-
Sift the mixture twice to ensure lightness and even distribution of leavening agents. This helps achieve a fine, airy crumb.
Step 3: Whip Eggs & Sugar
-
Crack the 4 eggs into a large mixing bowl.
-
Add the granulated sugar.
-
Using a stand mixer or hand mixer on high speed, beat for 5–7 minutes, until:
-
The mixture is pale, thick, and tripled in volume.
-
It forms ribbons when lifted—this is crucial for sponge texture.
-
✅ This is called the “ribbon stage.” The eggs trap air which creates rise instead of chemical leaveners like baking soda.
Step 4: Warm the Milk & Butter
-
In a small saucepan over low heat, combine:
-
Whole milk
-
Unsalted butter
-
-
Heat just until the butter has melted. Do not boil.
-
Remove from heat and let cool slightly. It should be warm, not hot.
This step helps create a more even crumb and improves texture.
Step 5: Fold in Dry Ingredients
-
Sift the flour mixture one last time, this time directly over the egg-sugar mixture in 3 stages.
-
Use a rubber spatula to gently fold after each addition.
-
Cut down through the center of the bowl, sweep the bottom, and come up the side, turning the bowl with each fold.
-
⚠️ Avoid stirring or overmixing. This deflates the airy batter and leads to a dense cake.
Step 6: Add Warm Milk-Butter & Vanilla
-
Pour the warm milk-butter mixture slowly down the side of the bowl.
-
Add vanilla extract.
-
Fold gently and carefully until fully incorporated.
-
The batter should remain light, glossy, and smooth.
-
Step 7: Pour & Bake
-
Pour the batter into the prepared cake pan.
-
Gently smooth the top with a spatula.
-
Bake for 30–35 minutes, or until:
-
The top is golden brown
-
A toothpick inserted in the center comes out clean or with dry crumbs
-
⏱ Rotate the pan halfway through if your oven has hot spots.
❄️ Step 8: Cool
-
Let the cake cool in the pan for 10 minutes.
-
Run a knife around the edges to loosen.
-
Invert onto a wire rack, peel off the parchment, and flip right side up.
-
Allow to cool completely before frosting or slicing.
Frosting & Filling Ideas
| Option | Description |
|---|---|
| Whipped Cream & Berries | Spread lightly sweetened whipped cream and fresh strawberries or raspberries. |
| Classic Buttercream | Vanilla, lemon, or chocolate buttercream works beautifully with the light sponge. |
| Cream Cheese Frosting | Slight tang balances sweetness; ideal for layered cakes. |
| Fruit Jam or Compote | A thin layer of strawberry, raspberry, or apricot jam adds fruity depth. |
| Simple Powdered Sugar | Dust the top for an elegant, minimalist look. |
Expert Tips for Success
-
Use Room Temperature Eggs
Whip to greater volume, helping the sponge rise without baking powder overload. -
Sift Dry Ingredients 2–3 Times
Prevents clumps and ensures even leavening. -
Don’t Overmix
Folding, not stirring, is the key to maintaining a fluffy structure. -
Warm Milk & Butter
Helps emulsify the fat into the batter smoothly for a fine crumb. -
Don’t Overbake
Begin testing around the 28-minute mark; every oven varies slightly.
Storage Instructions
-
Room Temperature: Store plain cake in an airtight container up to 2–3 days.
-
Refrigerated (Frosted): Store in fridge up to 5 days; bring to room temp before serving.
-
Freezing: Wrap cooled cake tightly in plastic + foil. Freeze up to 2 months. Thaw overnight in the fridge.
Final Thoughts
The vanilla sponge cake is a baking classic for a reason—its lightness, versatility, and elegant simplicity make it a go-to for any occasion. Whether layered for a birthday, used in a trifle, or simply dusted with sugar, it always delivers soft, moist perfection.

