Category: Recipes
-
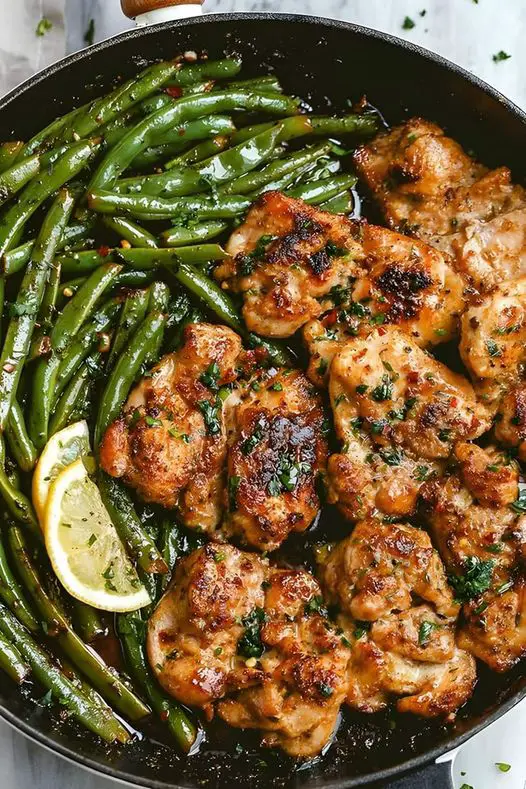
Lemon Garlic Butter Chicken and Green Beans Skillet
Ingredients:For the Lemon Garlic Butter Chicken:4 boneless, skinless chicken breastsSalt and pepper, to taste2 tablespoons olive oil4 cloves garlic, minced1 teaspoon dried oregano1 teaspoon dried thyme1/2 teaspoon paprikaZest and juice of 1 lemon3 tablespoons unsalted butterFresh parsley, chopped for garnishFor the Green Beans:1 lb (450g) fresh green beans, trimmedSalt, to taste2 tablespoons olive oil2 cloves garlic, mincedJuice of 1/2 lemonSalt and pepper, to tasteInstructions:1. Prepare the Chicken:1. Season the chicken breasts with salt and pepper on both sides.2. In a large skillet, heat olive oil over medium-high heat.3. Add the seasoned chicken breasts to the skillet and cook for about 6-7 minuteson each side, or until they are golden brown and cooked through. Remove thechicken from the skillet and set aside.2. Make the Lemon Garlic Butter Sauce:1. In the same skillet, add minced garlic, dried oregano, dried thyme, and paprika.Sauté for about 1 minute, until fragrant.2. Add lemon zest and juice to the skillet, stirring to combine.3. Reduce the heat to low and add the butter to the skillet, stirring until meltedand incorporated into the sauce.4. Return the cooked chicken breasts to the skillet, spooning the lemon garlicbutter sauce over them. Cook for an additional 2-3 minutes to allow the flavorsto meld together.3. Prepare the Green Beans:1. While the chicken is cooking, bring a pot of salted water to a boil. Add thetrimmed green beans and cook for about 3-4 minutes, or until they are crisp-tender. Drain the green beans and set aside.2. In a separate skillet, heat olive oil over medium heat. Add minced garlic andsauté for about 1 minute, until fragrant.3. Add the blanched green beans to the skillet, along with lemon juice, salt, andpepper. Cook for an additional 2-3 minutes, tossing occasionally, until thegreen beans are coated in the lemon garlic mixture and heated through.4. Serve:1. Serve the lemon garlic butter chicken alongside the green beans.2. Garnish the chicken with freshly chopped parsley for a pop of color andfreshness.3. Serve immediately and enjoy the delicious flavors of this skillet meal!This Lemon Garlic Butter Chicken and Green Beans Skillet is a perfect balance of savory and tangy flavors, and it’s easy to make in one pan. It’s a satisfying meal that’s sure to become a favorite at your dinner table!
-
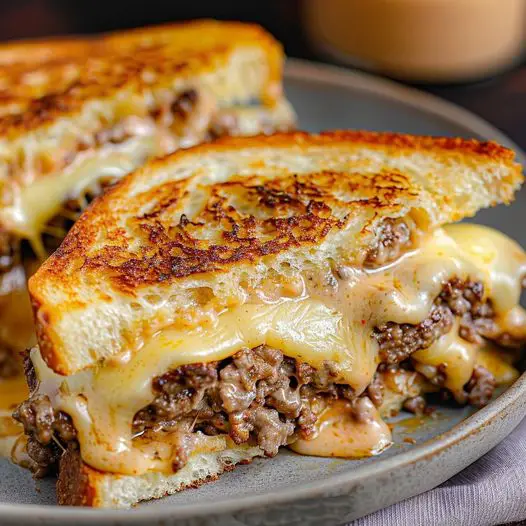
How to Make Cheesy Patty Melts with Special Sauce At Home
Indulge in the ultimate comfort food experience with “Gourmet Griddle: Cheesy Patty Melts with Special Sauce,” a mouthwatering creation that combines juicy burgers with melted cheese, all sandwiched between buttery, toasted bread. This dish elevates the classic patty melt with a special sauce that adds an irresistible zing, making it a perfect choice for lunch, dinner, or any meal where you crave something satisfyingly savory.
Why You’ll Love Cheesy Patty Melts with Special Sauce:
- Rich and Satisfying: The combination of melted cheese, succulent beef, and a flavorful sauce guarantees a deeply satisfying meal.
- Customizable: Easily adapt the ingredients to suit your tastes or dietary needs.
- Perfect for Any Occasion: Ideal for a casual family dinner, a comforting weekend meal, or a friendly get-together.
- Easy and Quick: Simple to prepare, delivering gourmet flavors in a classic diner-style sandwich.
Ingredients Notes For Cheesy Patty Melts with Special Sauce:
- Ground Beef: Use a higher fat content for juicier patties, such as 80/20 beef to lean/fat ratio.
- Cheese: Swiss or cheddar cheese melts beautifully and provides a nice flavor contrast to the beef.
- Onions: Thinly sliced onions, caramelized to bring out their natural sweetness.
- Bread: Rye or sourdough bread provides the best flavor and sturdiness to hold up to the fillings.
- Butter: For toasting the bread to golden perfection.
- Special Sauce Ingredients: Mayonnaise, ketchup, relish, and a dash of Worcestershire sauce mixed together for a tangy and sweet flavor.
Recipe Steps:
- Prepare the Special Sauce:
- In a small bowl, mix together mayonnaise, ketchup, relish, and Worcestershire sauce. Adjust the proportions to taste. Set aside.
- Cook the Patties:
- Form the ground beef into oval-shaped patties slightly larger than your bread slices. Season with salt and pepper.
- Heat a skillet over medium-high heat and cook the patties until they are well browned and cooked to your desired doneness. Set aside.
- Caramelize the Onions:
- In the same skillet, reduce heat to medium-low, add a bit more butter if necessary, and add the sliced onions. Cook slowly, stirring occasionally, until they are golden brown and sweet.
- Assemble the Patty Melts:
- Butter one side of each bread slice. Spread the special sauce on the non-buttered side of half the bread slices.
- Place a slice of cheese on each sauced bread slice, add a cooked patty, top with caramelized onions, and another slice of cheese. Cover with another slice of bread, buttered side out.
- Grill the Sandwiches:
- Heat a clean skillet over medium heat. Place the assembled sandwiches in the skillet, pressing them slightly. Cook until the bread is golden brown and the cheese has melted, about 3-4 minutes per side.
- Serve:
- Cut the patty melts in half and serve hot with extra special sauce or your favorite side dish.
Storage Options:
- Refrigerate: Store any leftovers in an airtight container for up to 3 days. Reheat in a skillet for best results.
- Freeze: Freezing is not recommended for assembled sandwiches as the bread may become soggy when thawed.
INGREDIENTS
For the Patties:
- 1 pound ground beef (80/20 blend for juiciness)
- Salt and pepper, to taste
- 1 tablespoon Worcestershire sauce
For the Special Sauce:
- 1/2 cup mayonnaise
- 2 tablespoons ketchup
- 1 tablespoon yellow mustard
- 1 tablespoon relish (sweet or dill, based on preference)
- 1 teaspoon onion powder
- 1 teaspoon garlic powder
- Hot sauce, to taste (optional)
For the Patty Melts:
- 8 slices rye or sourdough bread
- 1 large onion, thinly sliced
- 8 slices of cheese (such as Swiss, cheddar, or American)
- Butter, for spreading on bread
INSTRUCTIONS
- Prepare the Patties:
- In a bowl, mix the ground beef with Worcestershire sauce, salt, and pepper. Form into 4 oval-shaped patties to fit the bread slices.
- Heat a skillet over medium-high heat and cook the patties for about 4-5 minutes per side or until they reach the desired doneness. Remove and set aside.
- Make the Special Sauce:
- In a small bowl, combine mayonnaise, ketchup, mustard, relish, onion powder, garlic powder, and hot sauce (if using). Mix well until smooth. Set aside.
- Cook the Onions:
- In the same skillet, reduce heat to medium and add a bit more butter or oil if needed. Add the sliced onions and cook, stirring occasionally, until caramelized and golden, about 15-20 minutes. Remove from heat.
- Assemble the Patty Melts:
- Butter one side of each bread slice. Spread the special sauce on the non-buttered side of four slices.
- On each of these slices, place a slice of cheese, a cooked patty, a portion of the caramelized onions, another slice of cheese, and finally top with another slice of bread (buttered side out).
- Grill the Patty Melts:
- Heat a clean skillet or griddle over medium heat.
- Place the assembled sandwiches in the skillet, pressing them down slightly with a spatula. Cook until the bread is golden and crispy and the cheese has melted, about 3-4 minutes per side.
- Serve:
- Once cooked, remove from the skillet, cut diagonally, and serve immediately.
-

Italian Cream Cake
Italian Cream Cake
Ingredients: 6 egg whites whisked until they form firm peaks
2 cups of sweetened shredded coconut, separated
1 tsp vanilla
1 cup of milk
1 cup of pecans, chopped
2 cups of self-rising flour
Six egg yolks
2 cups of refined sugar
0.5 cups of vegetable shortening
1/2 cup of softened unsalted butter
To make the icing
0.5 cups of pecans, chopped
1 tsp vanilla
1 lb of powdered sugar
8 ounces of cream cheese that has been let to reach room temperature
1/4 cup of softened butterDirections:
Set the oven temperature to 350 degrees.
Prepare three 8-inch cake pans by coating them with grease and dusting them with flour. Put aside.
Combine butter in a spacious basin until it reaches a creamy and smooth consistency. Incorporate the sugar and vigorously whisk until well combined.
Incorporate the egg yolks well.
Strain the flour and incorporate it into the sugar-butter mixture, adding one-third of it at a time, while alternating with the milk.
Incorporate vanilla, 1 cup of coconut, and pecans into the mixture.
Delicately incorporate the egg whites until there are no visible air pockets remaining.
Distribute equally among the three pans that have been prepared.
Place in the oven and cook for a duration of 25 minutes, then move to a cooling rack until it reaches a totally cooled state.
While the cakes are in the process of being cooked, evenly distribute a cup of coconut on a baking sheet and place it in the oven alongside your patties. Allow it to toast for around 8 to 10 minutes, or until it becomes a brown color and develops a nutty aroma. Ensure to stir it often to prevent it from scorching. Subsequently, place it away to chill.
To frost: Combine the butter and cream cheese until well mixed. Subsequently, include the vanilla and powdered sugar, ensuring thorough amalgamation.
Apply the spread between the layers of the cake and on the top and sides.
With manual dexterity, firmly apply the toasted coconut to the sides using your hands.
Scatter pecans over the surface. -
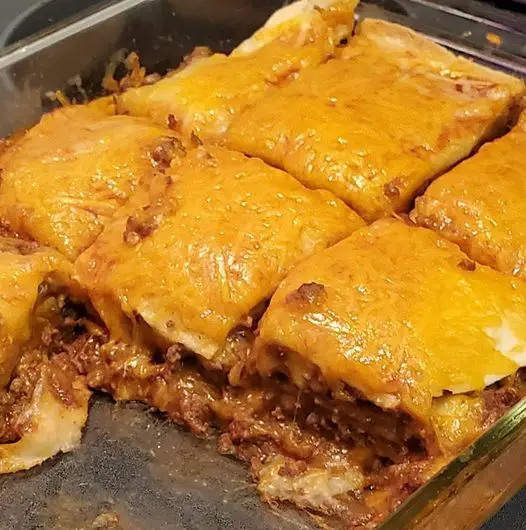
Easy Steps to Make Beef Enchilada Casserole
Dive into the vibrant layers of our “Rustic Fiesta” Beef Enchilada Casserole, a dish that encapsulates the heart and soul of Mexican cuisine with a homely twist. This casserole combines the rich, savory flavors of seasoned ground beef, the mild heat of enchilada sauce, and the comforting texture of tortillas, all smothered in melted cheese. Perfect for family dinners, potlucks, or any occasion that calls for a hearty and satisfying meal, this beef enchilada casserole is a crowd-pleaser that’s as easy to prepare as it is delicious to devour.
Why You’ll Love “Rustic Fiesta” Beef Enchilada Casserole:
- Layered with Flavor: Each bite delivers a harmonious blend of beef, cheese, and spices.
- Comfort Food Classic: A warm, filling dish that’s ideal for cozy evenings.
- Easy to Make: Simple ingredients and straightforward preparation make this casserole a weeknight winner.
- Customizable: Adapt the recipe to suit your taste preferences with different cheeses, spices, or additional fillings like beans or vegetables.
Ingredients Notes For “Rustic Fiesta” Beef Enchilada Casserole:
- Ground Beef: The base of the casserole. Choose lean ground beef for a lighter option.
- Enchilada Sauce: Use your favorite store-bought brand or homemade sauce for added authenticity.
- Corn Tortillas: The traditional choice for enchiladas, providing a sweet, earthy flavor. Flour tortillas can be used as a substitute if preferred.
- Cheese: A mix of shredded cheddar and Monterey Jack cheese offers a perfect melt and a blend of flavors.
- Onions and Garlic: For aromatic depth in the beef mixture.
- Spices: Cumin, chili powder, and salt enhance the meat with classic Mexican flavors.
Recipe Steps:
- Preheat the Oven: Start by preheating your oven to a moderate temperature, setting the stage for baking.
- Cook the Beef: Sauté onions and garlic until soft, then add ground beef. Cook until browned, then stir in spices and a portion of the enchilada sauce.
- Layer the Casserole: In a baking dish, start with a layer of enchilada sauce, followed by tortillas, the beef mixture, and a generous sprinkle of cheese. Repeat the layers until all ingredients are used, finishing with cheese on top.
- Bake to Perfection: Cover with foil and bake until bubbly. Remove the foil in the last few minutes to brown the cheese.
- Serve and Enjoy: Let the casserole cool slightly before slicing. Garnish with fresh cilantro, diced tomatoes, or sour cream if desired.
Storage Options:
- Refrigerate: Store leftovers in an airtight container for up to 3 days. Reheat in the oven or microwave.
- Freeze: For longer storage, freeze the casserole either whole or in portions. Thaw overnight in the refrigerator before reheating.
INGREDIENTS
- Ground beef: 1 lb (450g)
- Onion: 1 medium, chopped
- Garlic cloves: 2, minced
- Enchilada sauce: 2 cups (480ml), divided
- Corn tortillas: 8-10, cut into bite-sized pieces
- Cheddar cheese: 2 cups (200g), shredded, divided
- Black beans: 1 can (15oz/425g), drained and rinsed (optional)
- Corn: 1 cup (frozen or canned), drained (optional)
- Green chilies: 1 can (4oz/113g), diced (optional)
- Cumin: 1 teaspoon
- Chili powder: 1 teaspoon
- Salt and pepper: to taste
- Fresh cilantro: for garnish (optional)
- Sour cream: for serving (optional)
INSTRUCTIONS
- Preheat the Oven:
- Preheat your oven to 375°F (190°C). Grease a 9×13 inch baking dish.
- Cook the Beef:
- In a large skillet over medium heat, cook the ground beef until it’s no longer pink. Drain the excess fat.
- Add the chopped onion and minced garlic to the skillet with the beef. Cook until the onion is softened, about 5 minutes.
- Stir in 1 cup of enchilada sauce, cumin, chili powder, salt, and pepper. If using, add the black beans, corn, and green chilies. Simmer the mixture for about 5 minutes until everything is well combined and heated through.
- Layer the Casserole:
- Spread a thin layer of the remaining enchilada sauce on the bottom of the prepared baking dish.
- Layer half of the tortilla pieces over the sauce.
- Spread half of the beef mixture over the tortillas.
- Sprinkle half of the shredded cheese over the beef layer.
- Repeat the layers with the remaining tortillas, beef mixture, and cheese.
- Bake:
- Cover the dish with aluminum foil and bake in the preheated oven for 20 minutes.
- Remove the foil and bake for an additional 10-15 minutes, or until the cheese is bubbly and slightly golden.
- Serve:
- Let the casserole cool for a few minutes before serving. Garnish with fresh cilantro and serve with sour cream on the side, if desired.
-
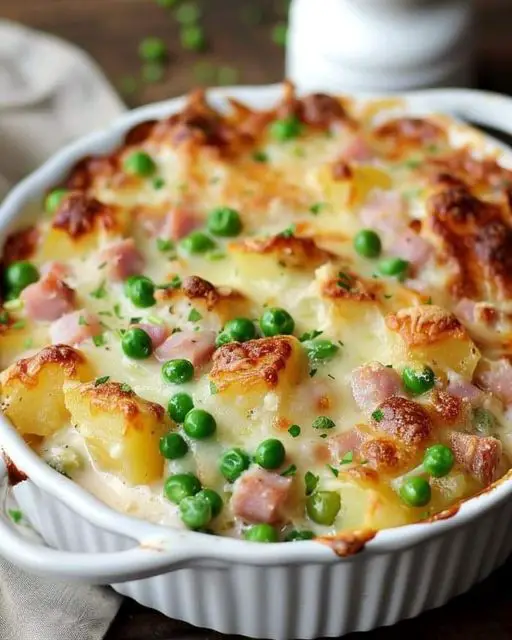
Cheesy Ham and Potato au Gratin with Peas
Cheesy Ham and Potato au Gratin with Peas:
This indulgent dish is a comforting symphony of flavors and textures, blending tender slices of ham, creamy potatoes, and vibrant green peas, all smothered in a rich and velvety cheese sauce. Each layer of thinly sliced potatoes is carefully nestled between generous portions of savory ham and plump peas, creating a hearty and satisfying dish that is sure to delight the senses.
The star of this culinary masterpiece is the creamy cheese sauce, a decadent blend of sharp cheddar, creamy Gruyère, and velvety béchamel, infused with aromatic spices and a hint of garlic. As the dish bakes in the oven, the cheese sauce envelops the potatoes, ham, and peas, forming a golden crust on top while infusing every layer with its rich and savory essence.
With each forkful, you are treated to a symphony of flavors and textures. The tender potatoes, cooked to perfection, melt in your mouth, while the savory ham adds a delicious smokiness to every bite. The peas, bright and vibrant, provide a refreshing contrast to the richness of the cheese sauce, adding a burst of color and flavor to the dish.
As you savor each spoonful, the creamy cheese sauce coats your palate, leaving behind a lingering warmth and satisfaction. This dish is the epitome of comfort food, a hearty and indulgent meal that soothes the soul and satisfies the appetite. Whether enjoyed as a cozy family dinner or served at a special gathering with friends, Cheesy Ham and Potato au Gratin with Peas is sure to be a crowd-pleaser, earning rave reviews and leaving everyone craving seconds.
Servings: 6
Ingredients
2 tablespoons unsalted butter
1 medium onion, finely chopped
3 garlic cloves, minced
3 tablespoons all-purpose flour
2 cups whole milk, warmed
1 cup heavy cream
1 teaspoon salt
1/2 teaspoon black pepper
1/4 teaspoon nutmeg
2 pounds potatoes, sliced thin (about 1/8 inch)
1 cup cooked ham, diced
1 cup sharp cheddar cheese, shredded
1/2 cup peas (fresh or frozen and thawed)
1/2 cup Parmesan cheese, gratedDirections
1. Preheat the oven to 375 degrees F (190 degrees C). Grease a baking dish with butter.
2. In a large saucepan over medium heat, melt the butter. Add the onion and garlic, and cook until the onion is translucent, about 5 minutes.
3. Stir in the flour and cook for 1 minute to remove the raw flour taste. Gradually whisk in the warm milk and cream, bringing it to a boil. Cook until thickened, about 5 minutes.
4. Season the sauce with salt, pepper, and nutmeg. Remove from heat.
5. Arrange half of the potato slices in the bottom of the prepared baking dish. Top with half of the ham, half of the peas, and half of the cheddar cheese. Pour half of the sauce over the layers.
6. Repeat with the remaining potatoes, ham, peas, cheddar, and sauce.
7. Sprinkle the top with grated Parmesan cheese.
8. Cover with aluminum foil and bake in the preheated oven for 40 minutes.
9. Remove the foil and bake for an additional 20-30 minutes or until the top is golden brown and the potatoes are tender.
10. Let stand for 10 minutes before serving.
Variations & Tips
For a vegetarian version, omit the ham and add sautéed mushrooms or zucchini. You can also swap out cheddar for Gruyère for a nuttier flavor or include breadcrumbs mixed with herbs and butter on top for added texture. For those who enjoy a spicier dish, a pinch of cayenne pepper or a few dashes of hot sauce in the cream sauce can add a pleasant heat.
-
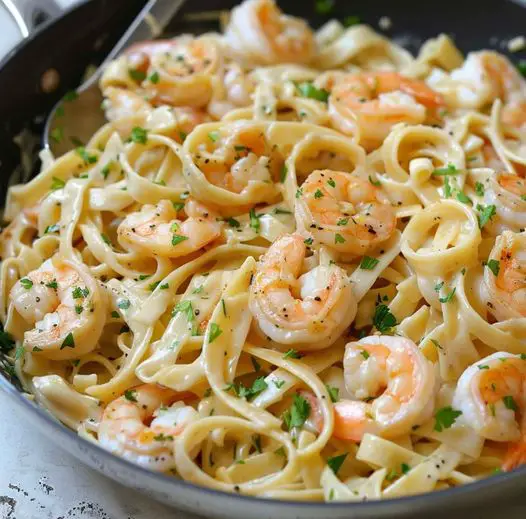
Cooking One Pan Shrimp Fettuccine Alfredo for Beginners
Dive into the creamy, luxurious world of One Pan Shrimp Fettuccine Alfredo, a dish that promises to delight seafood and pasta lovers alike. This recipe simplifies the classic Italian favorite into a one-pan wonder, combining tender shrimp, perfectly cooked fettuccine, and a rich, garlic-infused Alfredo sauce. Ideal for busy weeknights, romantic dinners, or when you’re in need of a comforting meal, this dish brings the elegance of a restaurant-quality meal to your table with minimal cleanup. Embrace the blend of simplicity and sophistication, and prepare to impress with this delectable one-pan creation.
The journey to perfecting this One Pan Shrimp Fettuccine Alfredo began on a quest for a simple yet indulgent meal that could be enjoyed any night of the week. Inspired by a memorable dining experience at a cozy Italian bistro, I set out to recreate that creamy pasta perfection but with the ease of minimal dishes and fuss. The first attempt was magical—each strand of fettuccine coated in a silky sauce, with the shrimp adding a sweet, succulent contrast that elevated the entire dish.
This recipe quickly became a cherished favorite, a symbol of how gourmet cooking doesn’t require hours in the kitchen or an endless pile of pots and pans. It’s a dish that brings joy and comfort, proving that with a few quality ingredients and a bit of culinary creativity, you can turn an ordinary evening into a special occasion.
Why You’ll Love One Pan Shrimp Fettuccine Alfredo
- Flavorful and Rich: A creamy sauce, succulent shrimp, and hearty pasta combine for an unforgettable taste.
- Efficient Cooking: Everything cooks in one pan, making preparation and cleanup a breeze.
- Versatile: Easy to adapt with different proteins or add-ins, catering to all tastes.
- Elegant: Perfect for impressing guests or treating yourself to a luxurious meal at home.
Ingredients Notes For One Pan Shrimp Fettuccine Alfredo
- Shrimp: Fresh or frozen (thawed) shrimp, peeled and deveined, serve as the protein highlight.
- Fettuccine: This flat, thick pasta is ideal for holding onto the creamy sauce.
- Heavy Cream: Forms the base of the Alfredo sauce, providing richness and depth.
- Parmesan Cheese: Adds a salty, nutty flavor to the sauce, enhancing its creamy texture.
- Garlic: Infuses the dish with a subtle warmth and aroma.
- Butter: Used to sauté the shrimp and create a velvety foundation for the sauce.
Recipe Steps
- Sauté Shrimp: Begin by cooking the shrimp in butter until pink and slightly golden. Remove and set aside.
- Cook Pasta: In the same pan, add water (or broth for more flavor) and bring to a boil. Add fettuccine, cooking according to package instructions until al dente.
- Create Alfredo Sauce: Reduce the heat, and stir in heavy cream, garlic, and Parmesan cheese, simmering until the sauce thickens and coats the pasta.
- Combine: Return the shrimp to the pan, tossing everything together to ensure the pasta and shrimp are evenly coated in the sauce.
- Serve: Garnish with additional Parmesan, fresh parsley, or cracked black pepper before serving warm.
Storage Options
- Refrigerate: Store leftovers in an airtight container for up to 2 days. Gently reheat, adding a splash of cream if necessary to loosen the sauce.
INGREDIENTS
- Olive oil: 2 tablespoons
- Shrimp: 1 lb (450g), peeled and deveined
- Salt and pepper: to taste
- Garlic: 3 cloves, minced
- Chicken broth: 3 cups
- Heavy cream: 1 cup
- Fettuccine pasta: 8 oz (225g)
- Parmesan cheese: 1 cup, grated
- Fresh parsley: chopped, for garnish
INSTRUCTIONS
- Prepare the Shrimp:
- Season the shrimp with salt and pepper. Heat 1 tablespoon of olive oil in a large skillet or pan over medium-high heat. Add the shrimp and cook until they are pink and opaque, about 2 minutes per side. Remove the shrimp from the pan and set aside.
- Sauté the Garlic:
- In the same pan, add the remaining olive oil and the minced garlic. Sauté for about 1 minute, or until fragrant, being careful not to burn the garlic.
- Cook the Pasta:
- Add the chicken broth and heavy cream to the pan and bring to a simmer. Break the fettuccine in half if necessary to fit it into the pan. Submerge the pasta in the liquid as much as possible.
- Cook the pasta, stirring occasionally, for about 12-15 minutes, or until the pasta is al dente and the liquid has reduced to a creamy sauce. You may need to adjust the heat to maintain a gentle simmer.
- Combine and Finish:
- Once the pasta is cooked, stir in the grated Parmesan cheese until melted and the sauce is smooth. Add the cooked shrimp back into the pan, tossing to coat them in the sauce and heat through.
- Serve:
- Taste and adjust seasoning with additional salt and pepper if needed. Serve the shrimp fettuccine Alfredo hot, garnished with chopped fresh parsley.
-

Chicken Bacon Ranch Roll-Ups
Ingredients:– 6 slices of mozzarella cheese– 1 1/2 cups cooked shredded or grilled chicken– 1/4 cup cooked bacon (2-3 slices)– 1 tablespoon low-carb ranch dressing– 1 teaspoon finely sliced green onionInstructions :1. Combine shredded chicken, cooked bacon, ranch dressing, and green onions in a bowl. Set aside.2. Preheat the oven to 350°F and line a large baking sheet with a silicone baking mat.3. Arrange the mozzarella slices on the silicone baking mat. Bake for 5-7 minutes until the cheese is bubbling and the edges are browned.4. Remove from the oven and let cool for about a minute until still pliable but cool enough to handle.5. Spread the chicken bacon ranch mixture along one edge of each mozzarella slice. Roll up tightly, with the seam side down. -

chicken Bacon Ranch Roll-Ups
:– 6 slices of mozzarella cheese– 1 1/2 cups cooked shredded or grilled chicken– 1/4 cup cooked bacon (2-3 slices)– 1 tablespoon low-carb ranch dressing– 1 teaspoon finely sliced green onion:1. Combine shredded chicken, cooked bacon, ranch dressing, and green onions in a bowl. Set aside.2. Preheat the oven to 350°F and line a large baking sheet with a silicone baking mat.3. Arrange the mozzarella slices on the silicone baking mat. Bake for 5-7 minutes until the cheese is bubbling and the edges are browned.4. Remove from the oven and let cool for about a minute until still pliable but cool enough to handle.5. Spread the chicken bacon ranch mixture along one edge of each mozzarella slice. Roll up tightly, with the seam side down. -

–
 :– 6 slices of mozzarella cheese– 1 1/2 cups cooked shredded or grilled chicken– 1/4 cup cooked bacon (2-3 slices)– 1 tablespoon low-carb ranch dressing– 1 teaspoon finely sliced green onion
 :1. Combine shredded chicken, cooked bacon, ranch dressing, and green onions in a bowl. Set aside.2. Preheat the oven to 350°F and line a large baking sheet with a silicone baking mat.3. Arrange the mozzarella slices on the silicone baking mat. Bake for 5-7 minutes until the cheese is bubbling and the edges are browned.4. Remove from the oven and let cool for about a minute until still pliable but cool enough to handle.5. Spread the chicken bacon ranch mixture along one edge of each mozzarella slice. Roll up tightly, with the seam side down.
 -
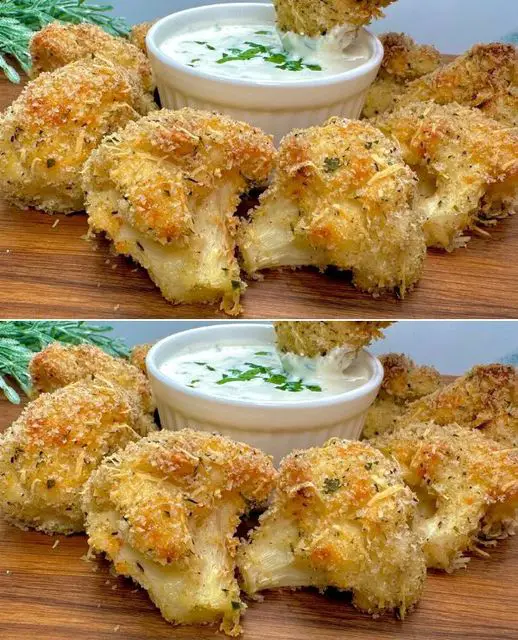
Baked Cauliflower Tastes Better Than Meat! Crispy Roasted Cauliflower
Baked Cauliflower Tastes Better Than Meat! Crispy Roasted Cauliflower
Cauliflower has transcended its reputation as a bland, overlooked vegetable and emerged as a culinary superstar, especially when roasted to perfection. My Crispy Roasted Cauliflower recipe is a testament to the versatility and deliciousness of this humble vegetable. Infused with Italian herbs and Parmesan, this dish promises a crispy, flavorful experience that rivals any meat dish. Whether you are a dedicated vegetarian or simply looking to add more vegetables to your diet, this recipe will win you over with its crispy texture and rich, savory taste.
History
Cauliflower, a member of the Brassica family, has been cultivated for centuries. Originally from the Mediterranean region, it has been a staple in many traditional cuisines. Over time, it has gained popularity worldwide due to its adaptability and nutritional benefits. Roasting cauliflower enhances its natural sweetness and creates a delightful crispiness that makes it a favorite in modern kitchens. This recipe pays homage to the classic roasted cauliflower while elevating it with contemporary flavors and techniques.
Ingredients
- 1 head of cauliflower
- 3 slices of lemon
- A handful of dill
- 1 1/4 cups panko breadcrumbs
- 1 clove of minced garlic
- 3/4 cup all-purpose flour
- 3 eggs
- 5 tbsp olive oil
- 1 tsp Italian herbs
- A handful of chopped parsley
- 1 cup grated Parmesan cheese
- Salt, to taste
- Ground black pepper, to taste
Sauce:
- 3/4 cup sour cream
- 1/2 cup yogurt
- Freshly chopped parsley
- Salt and ground black pepper
- Lemon juice
Directions
Prepare the Cauliflower
Start by cutting the cauliflower into florets. Bring a pot of salted water to a boil and add the lemon slices, a handful of dill, and the cauliflower florets. Boil for five minutes, then drain and set aside. This step helps to infuse the cauliflower with subtle flavors and tenderize it slightly before roasting.
Prepare the Coating Mixture
In a large mixing bowl, combine the panko breadcrumbs, minced garlic, olive oil, Italian herbs, salt, ground black pepper, chopped parsley, and grated Parmesan cheese. Mix until well combined. This breadcrumb mixture will give the cauliflower its irresistible crispy coating.
Coat the Cauliflower
Set up a dredging station with a plate of all-purpose flour, a bowl of whisked eggs, and the bowl of breadcrumb mixture. Dredge each cauliflower floret first in the flour, then dip it in the whisked eggs, and finally coat it in the breadcrumb mixture. Ensure each piece is evenly coated for maximum crispiness.
Bake the Cauliflower
Place the coated cauliflower florets on a parchment-lined baking tray. Preheat your oven to 350°F (175°C) and bake for 20 minutes, or until the cauliflower is golden brown and crispy. The aroma of the herbs and Parmesan will fill your kitchen, making it hard to wait for the finished product.
Prepare the Sauce
While the cauliflower is baking, prepare the sauce. In a small bowl, combine the sour cream, yogurt, freshly squeezed lemon juice, chopped parsley, salt, and ground black pepper. Mix well. This creamy, tangy sauce complements the crispy cauliflower perfectly, adding a refreshing contrast to each bite.
Serve and Enjoy
Once the cauliflower is done baking, remove it from the oven and let it cool slightly. Serve the crispy roasted cauliflower with the prepared sauce. Garnish with extra parsley if desired. Enjoy this delicious, meat-free dish that is sure to impress both vegetarians and meat-lovers alike.
Nutrition Information
Per Serving:
- Calories: 220
- Protein: 10g
- Carbohydrates: 25g
- Dietary Fiber: 3g
- Sugars: 3g
- Fat: 10g
- Saturated Fat: 3g
- Cholesterol: 75mg
- Sodium: 320mg
- Vitamin A: 8% DV
- Vitamin C: 70% DV
- Calcium: 20% DV
- Iron: 10% DV
Conclusion
This Crispy Roasted Cauliflower recipe is a delightful alternative to traditional meat dishes. The combination of herbs, Parmesan, and a crispy breadcrumb coating makes it a standout dish that will leave you craving more. Perfect for a weeknight dinner or as a side dish for a special occasion, this recipe is sure to become a favorite in your household.
-
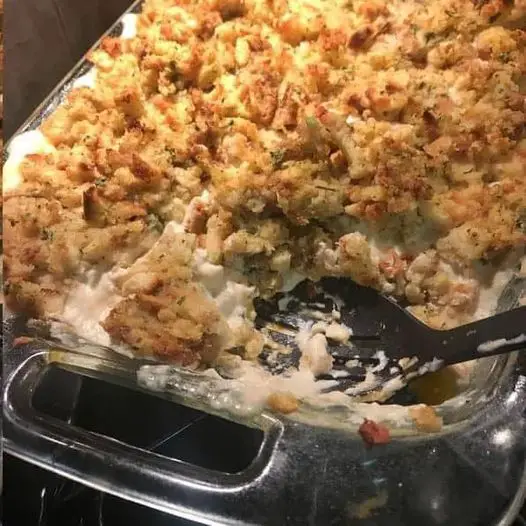
PHILLY CHEESE STEAK CASSEROLE
Philly Cheese Steak Casserole is a delicious meal that combines rich flavors to create a hearty meal. It’s the perfect quick dinner for the whole family.
Ingredients
1 1/2 роundѕ lеаn grоund bееf
2 bеll рерреrѕ
1/2 уеllоw оnіоn
1 сlоvе gаrlіс
1 teaspoon ѕеаѕоnеd salt (Lawry’s or Mortons)
4 ѕlісеѕ Prоvоlоnе cheese
4 lаrgе eggs
1/4 сuр hеаvу сrеаm
1 tеаѕрооn hоt ѕаuсе
1 teaspoon Worcestershire sauce
Preparation
Preheat oven tо 350 dеgrееѕ. Sрrау a 9×9 baking dish with nоn-ѕtісk ѕрrау.
Dісе the рерреrѕ and оnіоnѕ іntо bіtе-ѕіzеd pieces. Mіnсе the gаrlіс.
Add the ground bееf tо a ѕkіllеt and сооk оvеr mеdіum heat, сrumblіng as іt cooks.
-
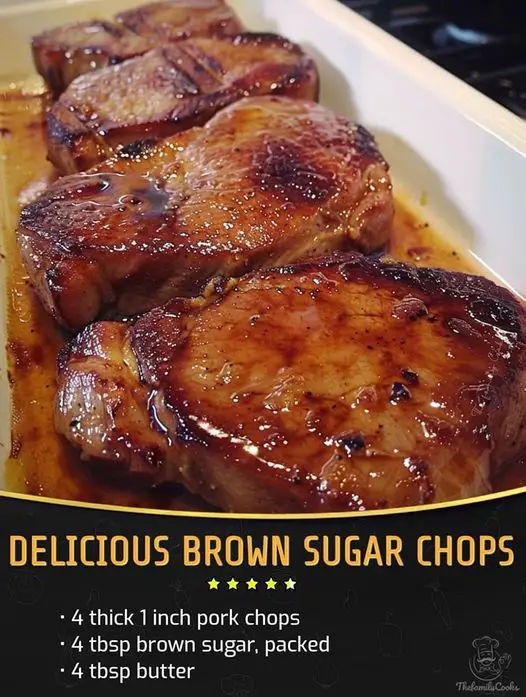
Delicious Brown Sugar Chops
Ingredients:4 thick 1 inch pork chops4 tbsp brown sugar, packed4 tbsp butter1 tbsp soy sauce1 tbsp Worcestershire sauceInstructions:FIRST STEP:Set your oven to preheat to 350F.In a large bake oiled oven pan, lay your pork chops.SECOND STEP:Add one tbsp of brown sugar on each piece of meat.Next add a square tbsp of butter on each pork chop as well.THIRD STEP:Lastly, drizzle both the soy and Worcestershire sauce over.Using tinfoil, cover the pork chops and bake for 40 mins in the oven.FOURTH STEP:After 40 minutes is up, remove the tinfoil and continue to bake for 20 minutes.Pork chops will be golden brown! -
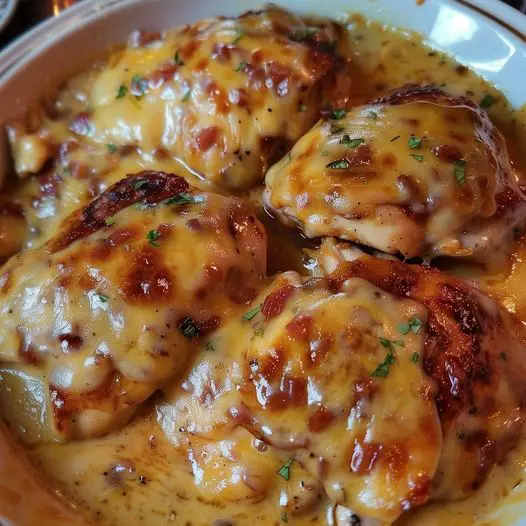
Outback Steakhouse Alice Springs Chicken
Outback Steakhouse The dish is called “Alice Springs Chicken”.
Experience the timeless combination of grilled chicken breasts coated in a honey mustard sauce, complemented with crispy bacon, mushrooms, and melted Colby-Jack cheese. This recipe for replicating Outback Steakhouse’s Alice Springs Chicken will quickly transport your taste senses to Australia!
Recall the nostalgic era when the act of eating out was the simple task of selecting a dish from a menu. On a fateful occasion, I unintentionally entered an Outback Steakhouse. The scent of barbecued meat was captivating, and I became mesmerized by a delicacy called “Alice Springs Chicken.” Several years later, that dish continued to haunt my nightmares. I want to replicate the intricate combination of tastes in my own culinary space. After a series of comical blunders (such as inadvertently substituting chocolate syrup for corn syrup – please refrain from inquiring), I achieved flawless mastery of this version. Currently, I am determined to provide that sense of happiness and delight to your dining experience!
Reasons to Appreciate Outback Steakhouse Alice Springs Chicken:
Abandon the typical practice of grilling chicken and welcome this delectable dish inspired by Outback Steakhouse. What distinguishes it? To begin with, it is a harmonic fusion of flavors that combines sweetness, savoriness, and cheesiness. The honey mustard is not only a condiment; it is a sensory encounter. Additionally, we must consider the inclusion of bacon, since it is well acknowledged that bacon has the ability to enhance the quality of any dish. Enhanced with mushrooms and a generous amount of Colby-Jack cheese, this meal offers not only a delightful culinary experience but also a thrilling journey for your taste buds.List of ingredients
The Honey Mustard Sauce requires the following ingredients: ▢1/2 cup of prepared mustard ▢1/4 cup of pure honey ▢1/4 cup of light corn syrup ▢1/4 cup of mayonnaise
For the Chicken: ▢1 pound of boneless, skinless chicken breasts, divided into 4 portions
▢1/2 teaspoon of McCormick Season All Recipe: ▢6 bacon slices, cooked until crispy and cut in half ▢1 cup of sliced mushrooms, drained (either canned or preserved in a jar) ▢3 cups of finely shredded Colby Jack Cheese ▢2 teaspoons of finely chopped parsleyProcedure To make the Honey Mustard Sauce:
Incorporate mustard, honey, corn syrup, and mayonnaise in a mixing bowl. Stir the mixture vigorously until it attains a uniform texture, making sure there are no clumps. The quantity of corn syrup may be modified according to the pungency of the mustard or individual desire.
To prepare the chicken:
Delicately rub the chicken breasts with the McCormick Season All. Leave the chicken to marinade for around one hour.
In a separate skillet, sauté the bacon until it reaches a crunchy consistency. After completing the task, remove the extra grease and place the bacon to the side.
Cook the chicken breasts in a skillet over medium heat, using a little amount of oil to avoid sticking. The chicken should be roasted on both sides until it has a pale golden color and is fully cooked in the middle without being too dry.
After the chicken is done, take it out of the skillet and transfer it to a clean surface.
Apply a generous amount of honey mustard sauce onto each chicken breast.
Place an equal amount of sliced mushrooms on each chicken breast, and then top with three pieces of bacon.
Thoroughly coat each chicken breast with a uniform coating of shredded Colby-Jack cheese.
Place the chicken in an oven that has been preheated to a temperature of 350°F. The chicken must be kept in the oven until the cheese has completely melted.
After completing the dish, decorate it with finely chopped parsley and serve immediately with extra honey mustard sauce served separately.
It is recommended to serve this meal right away in order to fully appreciate the combination of tastes and textures. -
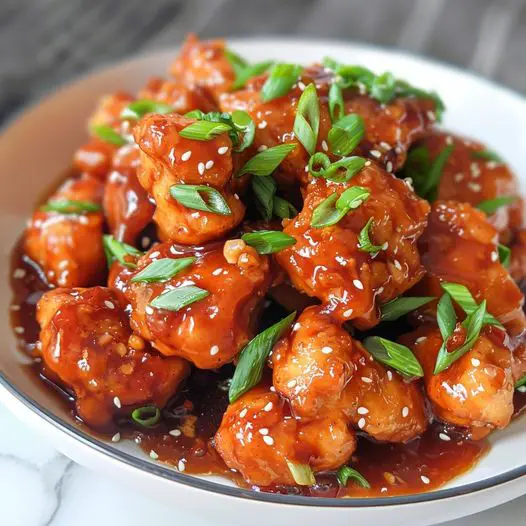
How to Make Honey Sriracha Chicken At Home
Delight your taste buds with “Sweet Heat: Honey Sriracha Chicken,” a dish that masterfully blends the sweetness of honey with the fiery kick of Sriracha sauce. This tantalizing recipe offers a perfect balance of flavors, making it a fantastic choice for anyone looking to spice up their meal routine. Whether you’re cooking a quick dinner or preparing a special dish for friends, this honey Sriracha chicken is sure to impress with its bold flavors and simple preparation.
Why You’ll Love Honey Sriracha Chicken:
- Flavorful Combination: The mix of honey’s sweetness and Sriracha’s spiciness creates a mouthwatering sauce that’s irresistible.
- Versatile Serving Options: Great over rice, noodles, or vegetables, or stuffed in wraps for a delicious meal.
- Quick and Easy: Simple ingredients and about 30 minutes are all you need to whip up this dish.
- Customizable Heat Level: Easily adjust the amount of Sriracha to cater to different spice preferences.
Ingredients Notes For Honey Sriracha Chicken:
- Chicken: Boneless, skinless chicken breasts or thighs work best, cut into bite-sized pieces.
- Honey: Adds natural sweetness that caramelizes beautifully when cooked.
- Sriracha: Provides a robust chili garlic flavor and heat. Adjust the amount based on your spice tolerance.
- Soy Sauce: Adds depth and saltiness to the sauce, balancing the sweet and spicy elements.
- Garlic and Ginger: Freshly minced for the best flavor, enhancing the overall complexity of the dish.
- Lime Juice: A splash of lime juice adds a zesty freshness that lifts the flavors.
- Cornstarch: Helps thicken the sauce to coat the chicken nicely.
Recipe Steps:
- Prepare the Sauce:
- In a small bowl, whisk together honey, Sriracha, soy sauce, lime juice, minced garlic, and ginger. Set aside.
- Cook the Chicken:
- Heat a tablespoon of oil in a large skillet over medium-high heat. Add the chicken pieces and sauté until nicely browned and nearly cooked through.
- Combine Chicken and Sauce:
- Pour the honey Sriracha sauce over the chicken in the skillet. Stir well to coat all the pieces.
- Thicken the Sauce:
- Dissolve a tablespoon of cornstarch in a little water and add to the skillet. Stir continuously as the sauce simmers and thickens, about 3-5 minutes.
- Finish and Serve:
- Once the chicken is coated in the thickened sauce and fully cooked, remove from heat. Optionally, sprinkle with sesame seeds and chopped green onions or cilantro for garnish.
- Serve hot over steamed rice, noodles, or alongside steamed vegetables.
Storage Options:
- Refrigerate: Store any leftovers in an airtight container in the refrigerator for up to 3 days.
- Freeze: Freeze the cooked chicken in sauce for up to a month. Thaw in the refrigerator and reheat gently.
INGREDIENTS
- 1 pound chicken breasts, cut into bite-sized pieces
- Salt and pepper, to taste
- 1 tablespoon vegetable oil
- 2 cloves garlic, minced
- 1/4 cup honey
- 1/4 cup Sriracha sauce
- 2 tablespoons soy sauce
- 1 tablespoon lime juice (optional, for added zest)
- Sesame seeds, for garnish
- Green onions, sliced for garnish
INSTRUCTIONS
- Prepare the Chicken:
- Season the chicken pieces with salt and pepper.
- Cook the Chicken:
- Heat the vegetable oil in a large skillet over medium-high heat.
- Add the chicken to the skillet and cook until golden brown and cooked through, about 5-7 minutes. Remove the chicken and set aside.
- Make the Sauce:
- In the same skillet, add the minced garlic and sauté for about 30 seconds until fragrant.
- Add the honey, Sriracha sauce, and soy sauce to the skillet. Stir to combine and bring the mixture to a simmer.
- Let the sauce simmer for 1-2 minutes until slightly thickened.
- If using, stir in the lime juice for an extra zing.
- Combine Chicken and Sauce:
- Return the cooked chicken to the skillet and toss to coat evenly with the sauce. Cook for another 2-3 minutes until the chicken is well coated and the sauce is sticky.
- Garnish and Serve:
- Sprinkle sesame seeds and sliced green onions over the top for garnish.
- Serve the Honey Sriracha Chicken hot, ideally over a bed of steamed rice or with a side of steamed vegetables.
-
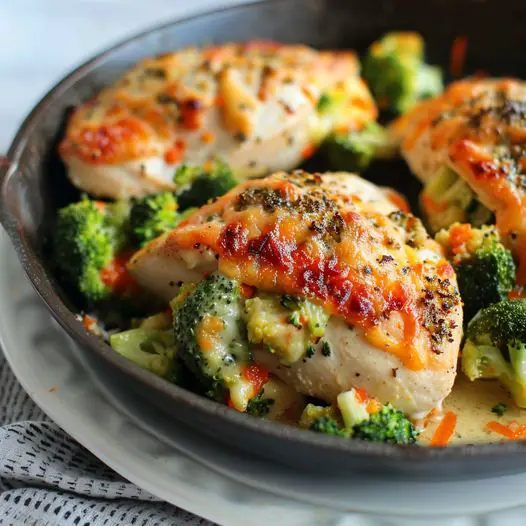
How to Make Broccoli Cheddar Stuffed Chicken
Indulge in the comfort of home-cooked elegance with Gourmet Made Easy: Broccoli Cheddar Stuffed Chicken Breasts. This dish transforms simple ingredients into a delectable meal that’s perfect for a cozy dinner or impressing guests. Juicy chicken breasts are stuffed with a creamy mixture of broccoli and sharp cheddar cheese, then baked to perfection. The result is a harmonious blend of flavors and textures, making each bite a delightful experience. This recipe is a wonderful way to elevate your dinner routine, combining healthful broccoli with the indulgence of melted cheese, all encased in tender chicken.
Why You’ll Love Broccoli Cheddar Stuffed Chicken Breasts:
- Flavorful and Satisfying: The rich taste of cheddar and the freshness of broccoli create a perfect filling for the succulent chicken.
- Healthy yet Indulgent: This dish strikes a balance between nutritious vegetables and comforting cheese.
- Impressive Presentation: Looks sophisticated on the plate, making it great for special occasions or casual dining.
- Simple Ingredients, Big Impact: Requires just a few basic ingredients to produce a meal that’s full of flavor.
Ingredients Notes For Broccoli Cheddar Stuffed Chicken Breasts:
- Chicken Breasts: Use boneless, skinless breasts for easy stuffing and cooking.
- Broccoli: Fresh or frozen broccoli florets, steamed until just tender, work equally well.
- Cheddar Cheese: Sharp or medium cheddar provides a nice flavor contrast to the chicken.
- Seasonings: Salt, pepper, garlic powder, and paprika enhance the natural flavors of the other ingredients.
- Binding Agent: A touch of mayonnaise or cream cheese can be mixed with the broccoli and cheddar to create a creamy filling.
Recipe Steps:
- Prep the Filling: Mix the steamed and chopped broccoli with shredded cheddar cheese, mayonnaise or cream cheese, and seasonings.
- Prepare the Chicken: Slice a pocket into the side of each chicken breast, being careful not to cut all the way through.
- Stuff the Chicken: Spoon the broccoli-cheese mixture into each chicken breast pocket, securing with toothpicks if necessary.
- Season and Cook: Season the outside of the chicken with salt, pepper, and paprika. Bake in a preheated 375°F (190°C) oven for 20-25 minutes, or until the chicken is fully cooked.
- Serve: Let the chicken rest for a few minutes before slicing. Serve warm, garnished with fresh herbs if desired.
Storage Options:
- Refrigerate: Store leftovers in an airtight container in the refrigerator for up to 3 days.
- Reheat: Warm in the oven or microwave, ensuring the chicken is heated through before serving.
INGREDIENTS
- 6 boneless, skinless chicken breasts
- 1 cup finely chopped broccoli
- 3/4 cup shredded cheddar cheese
- 1/3 cup cream cheese, softened
- 1 1/2 teaspoons garlic powder
- 1 1/2 teaspoons paprika
- 1 1/2 teaspoons salt
- 3/4 teaspoon ground black pepper
- 3 tablespoons olive oil
INSTRUCTIONS
- Preparation of chicken: Carefully slice a pocket into each chicken breast, ensuring not to cut through completely.
- Making the filling: In a bowl, mix the finely chopped broccoli with the shredded cheddar cheese, softened cream cheese, garlic powder, a pinch of salt, and pepper until evenly combined.
- Stuffing the chicken: Evenly fill the pockets of the chicken breasts with the broccoli-cheese mixture, then secure the openings with toothpicks to keep the stuffing in place.
- Seasoning: Lightly season the exterior of the chicken breasts with the remaining salt, paprika, and pepper.
- Cooking: Heat the olive oil in a large pan over medium heat. Place the stuffed chicken breasts in the pan and cook for approximately 7 to 10 minutes on each side, until they are golden brown and cooked through.
- Serving: After cooking, let the chicken rest for a couple of minutes before removing the toothpicks. Serve the stuffed chicken breasts hot, ensuring they are fully cooked internally.
This adjusted recipe offers a hearty and flavorful meal for six people, encapsulating the delicious blend of broccoli and cheddar cheese stuffed within juicy chicken breasts.