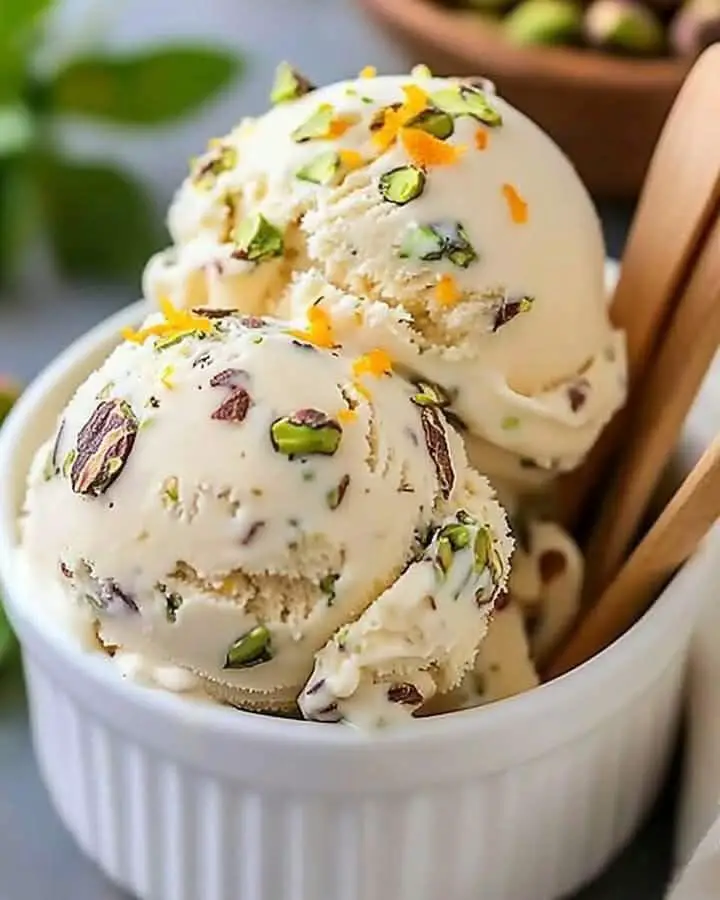
This homemade ice cream blends the natural sweetness of strawberries with the creamy, aromatic touch of vanilla bean for a refreshing treat that’s perfect for any occasion! Ingredients
● 2 cups fresh strawberries, diced
● ½ cup granulated sugar (for the strawberries)
● 1 vanilla bean
● 2 cups heavy cream
● 1 cup whole milk
● ½ cup granulated sugar (for the cream mixture)
● 4 large egg yolks
● 1 tsp vanilla extract Directions
Prepare the Strawberries:
Mix the diced strawberries with ½ cup sugar in a medium bowl. Let sit for 30 minutes to release juices, then mash gently with a fork.
Infuse the Vanilla Cream:
Split the vanilla bean lengthwise and scrape out the seeds.
In a saucepan, combine heavy cream, milk, vanilla bean seeds, and the pod. Heat over medium heat until it simmers, then remove from heat and steep for 15 minutes. Discard the vanilla pod.
Make the Custard Base:
In a separate bowl, whisk egg yolks and the remaining ½ cup sugar until pale yellow and slightly thickened.
Gradually whisk the warm cream mixture into the egg yolks, ensuring you don’t cook the eggs.
Thicken the Mixture:
Return the combined mixture to the saucepan and cook over low heat, stirring constantly, until it thickens enough to coat the back of a spoon (do not boil).
Remove from heat and stir in vanilla extract. Cool to room temperature.
Combine with Strawberries:
Fold the mashed strawberries and their juices into the cooled custard mixture, ensuring even distribution.
Churn the Ice Cream:
Pour the mixture into an ice cream maker and churn according to the manufacturer’s instructions until it reaches a soft-serve consistency.
Freeze and Serve:
Transfer the churned ice cream to a container and freeze for at least 4 hours for the perfect texture. Scoop and enjoy! Prep Time: 15 minutes | Total Time: ~4 hours (including freezing)
Servings: 6-8
Tips:
● For extra texture, add small chunks of fresh strawberries during the final minutes of churning.
● Garnish with fresh strawberries or a drizzle of strawberry syrup for a beautiful presentation.
Indulge in this creamy, fruity delight that’s as fun to make as it is to eat. Perfect for hot summer days or any time you crave something sweet!
Ingredients:
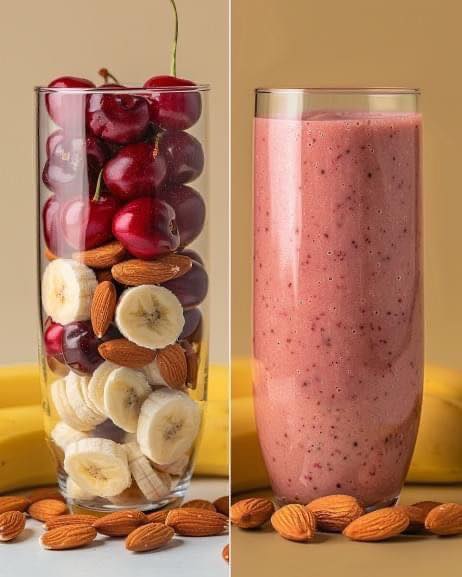
• 1 cup of fresh or frozen blueberries
• 1 ripe banana
• 1/2 cup of milk (can be cow’s, almonds, oats, or whatever you prefer)
• 1/2 cup natural or Greek yogurt (optional, to give it more creaminess)
• 1 teaspoon of honey or sweetener (optional, adjust to taste)
• Ice (optional, if you want it to be cooler and thicker)
• A few drops of vanilla extract (optional, to give it a touch of flavor)
Instructions:
1. Prepare the ingredients:
or If the blueberries are fresh, rinse them well. If they’re frozen, you can use them directly without defrosting them.
or Peel the banana and cut it into slices.
2. Liqueur the ingredients:
or Place the blueberries, banana and yogurt (if you use it) in the blender.
or Add Milk (you can adjust the amount depending on how thick you like your shake).
or If you want an extra touch of sweetness, add honey or sweetener to taste.
or add drops of vanilla extract if desired.
or If you like the smoothie colder and thicker, add ice to taste.
3. Liquidate until you get the desired consistency:
or Blend all the ingredients at high speed until the mixture is smooth and creamy. If the smoothie is too thick, you can add a little more milk to get the consistency you prefer.
4. Serve:
or Pour the smoothie into a large glass and enjoy immediately. If you wish, you can decorate with some whole blueberries or banana slices on top.
Additional Hint:
• Dairy-free option: If you prefer an entirely vegan smoothie, you can use almond milk, oats, or any other plant-based alternative, and also opt for soy or coconut yogurt.
• Add Protein: If you want to make the most filling smoothie, you can add a scoop of protein powder (e.g. pea protein or whey) or even a little bit of almond or peanut butter.
Ingredients:
2 cups (480ml) heavy cream
1 cup (240ml) whole milk
¾ cup (150g) granulated sugar
1 vanilla bean (or 2 tsp pure vanilla extract)
4 large egg yolks
A pinch of salt
Instructions:
Prepare the Vanilla Mixture:
In a medium saucepan, combine the heavy cream, milk, and half of the sugar.
Split the vanilla bean lengthwise, scrape out the seeds, and add both the seeds and pod to the saucepan.
Heat over medium until it steams (do not boil).
Whisk the Egg Yolks:
In a bowl, whisk the egg yolks with the remaining sugar and salt until pale and creamy.
Temper the Eggs:
Slowly whisk a small amount of the warm cream into the yolks to prevent curdling.
Gradually whisk the yolk mixture back into the saucepan.
Cook the Custard:
Cook over low heat, stirring constantly, until thickened (170–175°F or 77–80°C).
Strain through a fine-mesh sieve to remove the vanilla pod and any lumps.
Chill the Custard:
Cool to room temperature, then cover and refrigerate for at least 4 hours or overnight.
Churn the Ice Cream:
Pour into an ice cream maker and churn according to the manufacturer’s instructions until thick and creamy.
Freeze and Serve:
Transfer to an airtight container and freeze for at least 4 hours.
Scoop and enjoy!
Tips:
Use half-and-half for a lighter version.
Add mix-ins (e.g., chocolate chips, fruit) during the last minutes of churning.
No ice cream maker? Freeze in a shallow dish, stirring every 30 minutes for 2-3 hours to break up ice crystals.
This Pink Sweetie Mocktail is the ultimate dreamy drink—creamy, sweet, and oh-so-romantic! With a luscious blend of vanilla, strawberry, and white chocolate, plus a pink sugar rim and heart-shaped sprinkles, it’s pure love in a glass. Perfect for date nights, Galentine’s, or any occasion that calls for a little extra sweetness! Ingredients
For the mocktail:
1 ½ oz vanilla syrup
1 oz strawberry syrup
1 oz white chocolate syrup
1 oz heavy cream or half-and-half
½ oz grenadine (for that gorgeous pink color)
Ice cubes For the garnish:
Whipped cream
Pink sugar (for rim)
Heart-shaped sprinkles Instructions
Sweeten the Rim: Dip the rim of a glass in grenadine, then coat with pink sugar for a romantic, sparkling touch.
Mix It Up: In a shaker filled with ice, combine vanilla syrup, strawberry syrup, white chocolate syrup, cream, and grenadine. Shake well until smooth and chilled.
Pour & Decorate: Strain the silky mixture into the prepared glass. Top with a swirl of whipped cream, heart-shaped sprinkles, and a drizzle of grenadine for extra flair.
Sip & Savor: Indulge in this creamy, dreamy delight—a sweet toast to love and happiness! Prep Time: 5 minutes | Total Time: 5 minutes | Servings: 1
Every sip is like a love letter in a glass!
That sounds like a delicious and refreshing Vitamin-C Boost Smoothie! ✨ Here’s the full recipe with step-by-step instructions:
This smoothie is packed with vitamin C, antioxidants, and fiber to keep you energized and healthy!
✅ 1 cup Frozen Strawberries
✅ 1 Frozen Banana
✅ ½ cup Mango chunks
✅ ½ Peeled Orange
✅ 1 Chopped Carrot
✅ ½ – 1 cup Water or Almond Milk (adjust for desired consistency)
✅ Optional: Handful of Spinach or Kale for extra nutrients
1️⃣ Prep your ingredients – Make sure your fruit is frozen for a creamier texture. Chop the carrot into small pieces.
2️⃣ Blend it up – Add all ingredients to a high-speed blender. Pour in ½ cup of water or almond milk to start.
3️⃣ Adjust consistency – If it’s too thick, add more liquid little by little until smooth.
4️⃣ Serve & Enjoy! – Pour into a glass and sip on this refreshing, vitamin-packed smoothie!
Calorie Count per Serving: Approximately 251 calories
Want extra protein? Add ½ scoop of vanilla protein powder or Greek yogurt.
Need more sweetness? Drizzle a teaspoon of honey or use coconut water instead of water.
Love a citrus boost? Add a splash of fresh lemon or lime juice for an extra zing!
Enjoy this Vitamin-C Powerhouse Smoothie for a refreshing start to your day!
Crispy Oat and Zucchini Sticks – A Flavorful, Crunchy Delight!
Welcome to a culinary adventure where creativity meets nutrition in the kitchen! These Crispy Oat and Zucchini Sticks are a delightful snack or appetizer that brings together the wholesome goodness of zucchini with the crunch of oats and a savory twist from fresh herbs and nutritional yeast. Whether you’re looking for a healthy snack or something to impress your guests, these crispy zucchini sticks will hit the spot. They’re perfect for dipping into marinara, vegan ranch, or spicy aioli for a burst of extra flavor. Let’s get cooking!
Table of Contents
1️⃣ Prepare the Zucchini:
Start by washing your zucchinis and patting them dry with a clean towel. Using a box grater, grate both zucchinis. Once grated, place the zucchini into a clean kitchen towel and squeeze out the excess moisture—this is key to achieving crispy sticks!
2️⃣ Mix the Ingredients:
In a large mixing bowl, combine the grated zucchini, 1 cup of rolled oats, 1/2 cup oat flour, 1/4 cup nutritional yeast, minced garlic, and fresh herbs. Season the mixture with 1/2 teaspoon salt and 1/2 teaspoon black pepper. If you want to spice things up, add 1/2 teaspoon smoked paprika or chili flakes at this stage. Mix everything well until fully combined.
3️⃣ Adjust the Consistency:
If the mixture is too dry, add 1 tablespoon of water at a time to achieve the right consistency. It should be sticky enough to form into sticks. If the mixture feels too wet, add a bit more oat flour until it thickens up.
4️⃣ Shape the Sticks:
Now it’s time to shape your mixture! Take small amounts and roll them into sticks or logs, roughly about 12-16 sticks, depending on the size. Place them on a plate or baking sheet, and refrigerate for 15–30 minutes to help them firm up.
5️⃣ Cook the Sticks:
In a non-stick skillet, heat 1 tablespoon of olive oil over medium heat. Cook the zucchini sticks for about 3-4 minutes per side, or until they turn golden brown and crispy. Avoid overcrowding the pan—if needed, cook the sticks in batches to maintain that crispy texture.
6️⃣ Bake for Extra Crispiness (Optional):
For an extra crispy finish, preheat your oven to 375°F (190°C). Transfer the cooked sticks to a parchment-lined baking sheet and bake them in the oven for 10-15 minutes, or until they become golden brown and super crunchy.
7️⃣ Serve and Enjoy:
Let the crispy oat and zucchini sticks cool slightly before serving. These sticks are best enjoyed with a variety of dips such as marinara sauce, vegan ranch dressing, or spicy aioli for a flavor-packed experience!
Enjoy these Crispy Oat and Zucchini Sticks as a nutritious snack or a fun addition to any meal. They’re easy to make, full of flavor, and sure to become a new favorite in your kitchen! ✨
For the Mousse Base:
Per serving (1/8 of cake):
That sounds like a delicious and refreshing Vitamin-C Boost Smoothie! ✨ Here’s the full recipe with step-by-step instructions:
This smoothie is packed with vitamin C, antioxidants, and fiber to keep you energized and healthy!
✅ 1 cup Frozen Strawberries
✅ 1 Frozen Banana
✅ ½ cup Mango chunks
✅ ½ Peeled Orange
✅ 1 Chopped Carrot
✅ ½ – 1 cup Water or Almond Milk (adjust for desired consistency)
✅ Optional: Handful of Spinach or Kale for extra nutrients
1️⃣ Prep your ingredients – Make sure your fruit is frozen for a creamier texture. Chop the carrot into small pieces.
2️⃣ Blend it up – Add all ingredients to a high-speed blender. Pour in ½ cup of water or almond milk to start.
3️⃣ Adjust consistency – If it’s too thick, add more liquid little by little until smooth.
4️⃣ Serve & Enjoy! – Pour into a glass and sip on this refreshing, vitamin-packed smoothie!
Calorie Count per Serving: Approximately 251 calories
Want extra protein? Add ½ scoop of vanilla protein powder or Greek yogurt.
Need more sweetness? Drizzle a teaspoon of honey or use coconut water instead of water.
Love a citrus boost? Add a splash of fresh lemon or lime juice for an extra zing!
Enjoy this Vitamin-C Powerhouse Smoothie for a refreshing start to your day!
Creating your own creamy and delicious vanilla ice cream at home is simpler than you might think. With just four basic ingredients, you can craft a delightful dessert without the need for an ice cream maker. This easy-to-follow recipe yields a rich and smooth vanilla ice cream that’s perfect on its own or as a base for your favorite mix-ins.
Ingredients:
2 cups heavy whipping cream, cold
1 can (14 ounces) sweetened condensed milk
1 teaspoon vanilla extract
1/8 teaspoon kosher salt
Instructions:
Chill the Equipment: Place a 9×5-inch loaf pan in the freezer to chill.
Whip the Cream: In a large mixing bowl, pour the cold heavy whipping cream. Using an electric mixer, start on low speed and gradually increase to medium, whipping until the cream thickens and forms stiff peaks. This process helps achieve a creamy texture.
Prepare the Base: In a separate bowl, combine the sweetened condensed milk, vanilla extract, and salt. Mix well until fully incorporated.
Combine Mixtures: Gently fold about 1 cup of the whipped cream into the condensed milk mixture to lighten it. Then, pour this mixture back into the bowl with the remaining whipped cream. Carefully fold together until well combined, ensuring not to deflate the whipped cream.
Freeze the Ice Cream: Transfer the mixture into the chilled loaf pan. Cover the surface with plastic wrap or parchment paper to prevent ice crystals from forming. Place in the freezer and let it freeze for at least 5 hours, or until the ice cream is firm.
Serve: Once set, remove the ice cream from the freezer. For easier scooping, let it sit at room temperature for a few minutes. Serve plain or with your favorite toppings and enjoy!
This homemade vanilla ice cream is a versatile treat. Feel free to customize it by adding mix-ins like chocolate chips, fruit, or nuts during step 4 before freezing. Enjoy your homemade creation!
German potato pancakes, known as Kartoffelpuffer, are a beloved traditional dish in Germany. These crispy, savory pancakes are made from grated potatoes and onions, then pan-fried to golden perfection. They’re versatile and can be enjoyed as a side dish, snack, or even a main course.
Ingredients:
6 gold potatoes, peeled and shredded
2 large eggs
2 tablespoons all-purpose flour
½ cup onion, finely chopped
½ teaspoon salt
¼ teaspoon black pepper
¼ teaspoon baking powder
¼ cup vegetable oil, for frying
Instructions:
Prepare the Batter: In a large bowl, combine the shredded potatoes, eggs, flour, finely chopped onion, salt, black pepper, and baking powder. Mix thoroughly until all ingredients are well incorporated.
Heat the Oil: In a large skillet, heat the vegetable oil over medium-high heat until shimmering.
Form and Fry the Pancakes: Scoop ¼-cup portions of the potato mixture and carefully place them into the hot oil, flattening each scoop into a pancake shape. Fry for several minutes on each side until the pancakes are golden brown and crispy.
Drain Excess Oil: Once cooked, transfer the pancakes to a plate lined with paper towels to drain any excess oil.
These delightful potato pancakes pair wonderfully with a variety of toppings. Traditionally, they’re served with applesauce or sour cream, but they also complement savory dishes like meatloaf or roasted chicken. Enjoy them fresh and warm for the best taste and texture.
This Crispy Buttered Ranch Chicken is packed with bold flavors and a golden, crunchy crust. It’s easy to make and perfect for a quick dinner!
4 boneless, skinless chicken breasts
1 cup crushed cornflakes (or panko breadcrumbs for extra crunch)
½ cup grated Parmesan cheese
1 packet (1 oz) ranch seasoning mix
½ teaspoon garlic powder
½ teaspoon paprika ️
½ teaspoon black pepper
½ teaspoon salt
½ cup unsalted butter, melted
1️⃣ Preheat the oven to 375°F (190°C). Line a baking sheet with parchment paper or lightly grease it.
2️⃣ Prepare the coating: In a bowl, mix crushed cornflakes, Parmesan cheese, ranch seasoning, garlic powder, paprika, salt, and black pepper.
3️⃣ Coat the chicken: Dip each chicken breast in melted butter, ensuring it’s well coated. Then, press it into the crispy ranch mixture, making sure it’s evenly covered.
4️⃣ Bake to perfection: Place the coated chicken on the prepared baking sheet. Bake for 25-30 minutes or until the chicken is golden brown and cooked through (internal temp should be 165°F/74°C).
5️⃣ Serve & enjoy: Let the chicken rest for a couple of minutes before serving. Pair it with mashed potatoes, roasted veggies, or a fresh salad! ️
✅ Use panko breadcrumbs for extra crunch.
✅ Add a pinch of cayenne pepper if you like a little heat.
✅ For an air-fryer version, cook at 375°F for 15-18 minutes, flipping halfway.
Enjoy your Crispy Buttered Ranch Chicken—crunchy on the outside, juicy on the inside! ️
Fluffy Cheese and Herb Stuffed Buns
Table of Contents
Ingredients:
For the Dough:
Dry yeast – 10g (1 pack)
Sugar – 1 tablespoon (20g)
Milk – 1.5 cups (300ml), warm
Water – ½ cup (100ml), warm
Oil – 100ml (about ½ cup or 1 tea glass)
Egg white – 1 (reserve the yolk for later)
Vinegar – 1 tablespoon (10ml)
Flour – 5.5 cups (660g), all-purpose
Salt – 1 teaspoon (8g)
To Grease the Dough:
Butter – 150g, melted
For the Filling:
Cheese – Crumbled or grated (use your favorite type like feta, mozzarella, or a mixture)
Fresh parsley – Chopped
For the Topping:
Egg yolk – 1 (reserved from earlier)
Milk – 1 teaspoon
Step-by-Step Instructions:
Step 1: Prepare the Dough
Activate the Yeast: In a small bowl, combine 10g of dry yeast, 1 tablespoon of sugar, and 100ml of warm water. Stir gently and let it sit for about 5-10 minutes, or until the mixture becomes frothy. This means the yeast is activated and ready to use.
Mix Wet Ingredients: In a large mixing bowl, combine 1.5 cups of warm milk, 100ml of oil, 1 egg white (reserve the yolk for later), 1 tablespoon of vinegar, and the activated yeast mixture. Stir well until all the ingredients are fully incorporated.
Add Dry Ingredients: Gradually add 5.5 cups of flour and 1 teaspoon of salt into the wet mixture, stirring with a wooden spoon or using your hands. Mix until a soft dough begins to form.
Knead the Dough: Transfer the dough to a lightly floured surface and knead for about 8-10 minutes until the dough is smooth, soft, and elastic. If the dough is too sticky, add a little more flour, a tablespoon at a time, until it’s manageable but still soft.
Let the Dough Rise: Shape the dough into a ball and place it in a greased bowl. Cover the bowl with a clean kitchen towel or plastic wrap, and let the dough rise in a warm place for about 1-1.5 hours, or until it doubles in size.
See also Delicious Cinnamon Rolls with Simple Ingredients
Step 2: Prepare the Filling
Mix the Filling: While the dough is rising, prepare the filling by combining your favorite cheese (crumbled or grated) with fresh chopped parsley in a small bowl. Set aside. You can adjust the amount of filling based on how cheesy you want the buns to be.
Step 3: Shape the Buns
Divide the Dough: Once the dough has risen, punch it down to release the air. Transfer the dough to a lightly floured surface and divide it into equal portions, depending on the size of the buns you want. For medium-sized buns, divide the dough into 10-12 portions.
Shape and Fill the Buns: Take each portion and roll it into a ball. Flatten the ball slightly and place a spoonful of the cheese and parsley mixture in the center. Fold the edges of the dough over the filling and pinch them together to seal, forming a bun. Place the filled buns, seam side down, on a baking sheet lined with parchment paper.
Grease the Buns: Once all the buns are shaped, brush each one generously with melted butter to give them extra softness and flavor.
Step 4: Let the Buns Rise Again
Second Rise: Cover the baking sheet with a clean towel and let the buns rise again for about 20-30 minutes in a warm place. This second rise ensures the buns will be fluffy and light when baked.
Step 5: Bake the Buns
Preheat the Oven: While the buns are rising, preheat your oven to 180°C (350°F).
Brush with Egg Wash: In a small bowl, whisk together the reserved egg yolk with 1 teaspoon of milk. Brush the tops of the buns with the egg wash to give them a golden, glossy finish.
Bake: Place the buns in the preheated oven and bake for 20-25 minutes, or until the tops are golden brown and the buns are cooked through.
Cool Slightly: Once baked, remove the buns from the oven and let them cool slightly on a wire rack before serving.
See also Blackberry cake with quark!
Step 6: Serve
Enjoy Warm: Serve the fluffy cheese and herb stuffed buns warm. They’re perfect on their own or alongside a bowl of soup, a fresh salad, or as part of a breakfast spread.
Cooking Tips:
Type of Cheese: You can use a variety of cheeses for the filling, depending on your preference. Feta, mozzarella, cheddar, or a mixture of soft and hard cheeses work well.
Vinegar in the Dough: The addition of vinegar helps to tenderize the dough and gives the buns a slight tang, which complements the savory cheese filling.
Make-Ahead Tip: You can prepare the dough ahead of time and store it in the refrigerator overnight. Just bring it to room temperature and allow it to rise before shaping the buns.
Additional Fillings: Feel free to add other ingredients to the filling, such as chopped olives, sun-dried tomatoes, or sautéed spinach, to enhance the flavor.
Storage:
Refrigeration: Store any leftover buns in an airtight container in the refrigerator for up to 3 days. Reheat them in the oven at 160°C (320°F) for 5-10 minutes to refresh them.
Freezing: You can freeze the unbaked buns after shaping them. Place them on a tray to freeze until solid, then transfer them to a freezer-safe bag. When ready to bake, thaw the buns in the refrigerator and let them rise before baking as directed.
Table of Contents
These fluffy onion and cheese rolls are a delightful addition to any meal. With their soft dough and savory filling, they’re sure to become a favorite in your home. Try this recipe and enjoy the deliciousness!
Store the cake in an airtight container at room temperature for up to 3 days, or refrigerate for up to 5 days. You can also freeze it for up to 3 months.