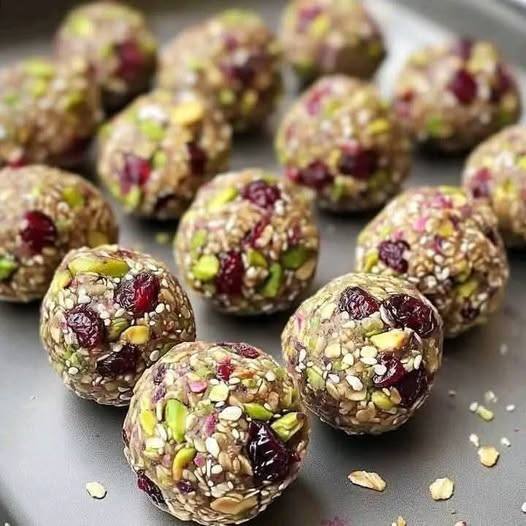
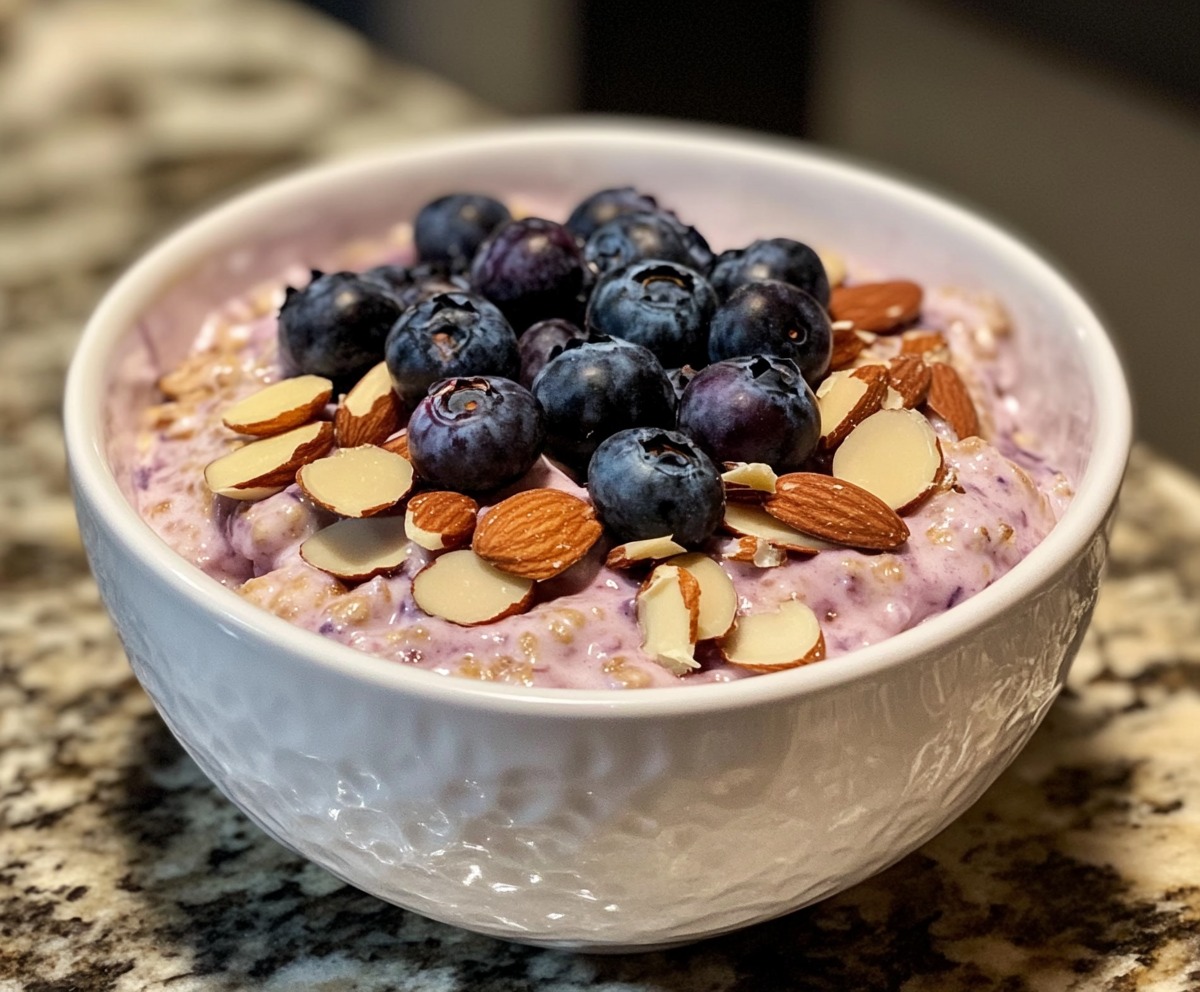
Ingredients:
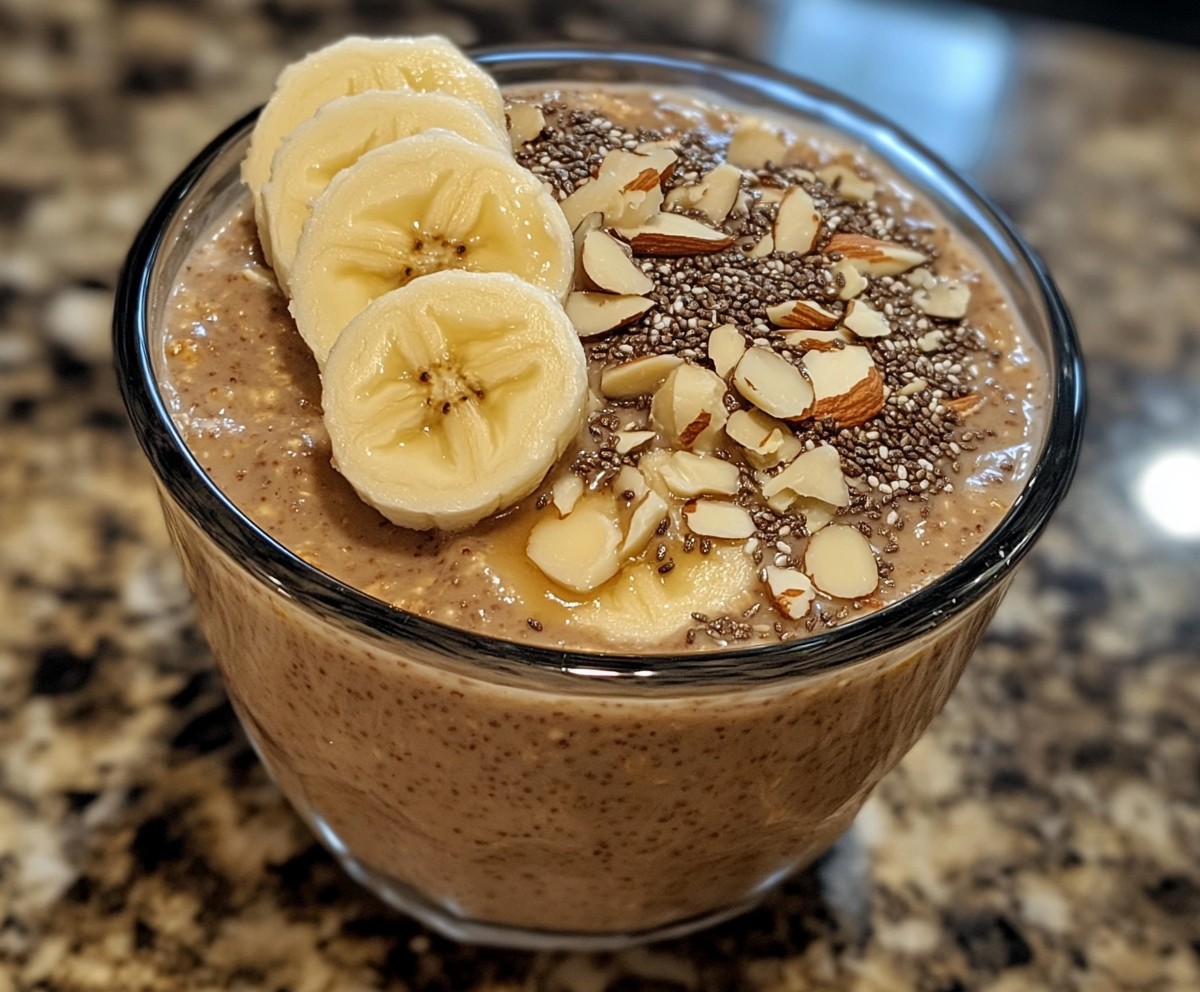
1 cup oats
1/4 cup dried cranberries
1/4 cup dried apricots, chopped
1/4 cup nuts (walnuts, almonds, or pecans), chopped
1 banana, sliced
1 apple, diced
1/4 cup oat flakes
Instructions:
Preheat the oven: Preheat your oven to 180°C (360°F).
Prepare the ingredients:
Slice the banana and dice the apple into small pieces.
Chop the dried apricots and nuts into smaller, bite-sized pieces.
Mix the ingredients:
In a large bowl, combine the oats, cranberries, dried apricots, nuts, banana slices, and apple chunks. Mix well.
Add oat flakes: Stir in the oat flakes, ensuring all ingredients are evenly coated and combined.
Bake: Pour the mixture into a greased or parchment-lined baking dish. Spread evenly and bake for about 25-30 minutes or until golden brown on top.
Cool and serve: Let the baked oatmeal cool slightly before serving. Enjoy warm or at room temperature!
Category: Recipes
-
Baked Oatmeal with Fruits and Nuts
-
Easy Mango Dessert: 3 Ingredients and Yields a Lot
Hi everyone, today we’re going to learn how to make Easy Mango Dessert using simple ingredients. So grab your pen and paper to jot down the ingredients, then follow the complete preparation method.
-
Homemade Ice Hack Weight Loss Smoothie
Ingredients:1 cup spinach1 cup unsweetened almond milk1 medium banana1 tablespoon chia seeds1 tablespoon almond butter1 teaspoon honey (optional)1 cup ice cubesDirections:Blend spinach, almond milk, banana, chia seeds, almond butter, and honey (if using) until smooth. Add ice cubes and blend again until creamy.Pour into a glass and enjoy immediately as a filling, nutritious snack.Notes:Feel free to substitute spinach with kale or add a scoop of protein powder for an extra boost. Adjust sweetness with more or less honey according to your taste. -
Beetroot, Apple, and Carrot Salad
Ingredients (Serves 4)
-
- Salad:
-
- 3 cooked beetroots, peeled and julienned or grated
- 2 apples, julienned or grated
- 2 carrots, peeled and grated
- Juice of 1 lemon
-
- Salad:
-
- Salad Dressing:
-
- 60 ml white wine vinegar
- 1/2 tbsp honey
- 1 tsp mustard (Dijon or whole grain)
- 30 ml olive oil
- Salt and pepper, to taste
-
- Salad Dressing:
- Garnish:
-
- 1 tbsp hemp seeds
- 1 tbsp quinoa flakes
- 2 tbsp chopped walnuts
- Fresh parsley, chopped
-
Directions
-
- Prepare the Salad:
-
- In a large bowl, combine the julienned or grated beetroots, apples, and carrots.
- Squeeze lemon juice over the mixture to prevent the apples from browning and to add extra tang. Toss to coat evenly.
-
- Make the Dressing:
-
- In a small bowl, whisk together the white wine vinegar, honey, mustard, olive oil, salt, and pepper until emulsified. Adjust the seasoning to taste.
-
- Assemble the Salad:
- Pour the dressing over the salad mixture and toss gently to combine, ensuring all ingredients are well coated.
- Prepare the Salad:
-
- Garnish and Serve:
- Sprinkle the salad with hemp seeds, quinoa flakes, chopped walnuts, and fresh parsley for added texture and flavor.
- Serve immediately, or let it chill in the refrigerator for 15-20 minutes to enhance the flavors.
- Garnish and Serve:
Serving Suggestions
- Pair this salad with grilled chicken, fish, or tofu for a complete meal.
- It also works well as a side dish for BBQs, potlucks, or festive gatherings.
Cooking Tips
-
- Preparation: You can prepare the salad and dressing in advance but add the dressing just before serving to maintain the crunch.
- Variations: Feel free to add other nuts or seeds, such as sunflower seeds or pumpkin seeds, for more variety.
Nutritional Benefits
-
- High in Antioxidants: Beetroots and apples are rich in antioxidants, promoting good health and supporting the immune system.
- Good Source of Fiber: The combination of vegetables and fruit helps to maintain digestive health.
- Healthy Fats: The olive oil in the dressing provides healthy monounsaturated fats.
Dietary Information
-
- Vegan
- Gluten-Free
- Dairy-Free
Storage
- Refrigerate: Store leftover salad in an airtight container in the refrigerator for up to 2 days.
- Do Not Freeze: This salad is best enjoyed fresh.
-
-
Oatmeal and Apples Recipe
Oatmeal and Apples Recipe (No Flour, No Sugar)
Ingredients:
- Oatmeal:** 1 cup (90g)
- Warm Milk:** 150 ml (about ⅔ cup)
- Apples:** 2, peeled and diced
- Butter:** 20g (1 ½ tablespoons), melted
- Vanillin (or Vanilla Extract):** 1/2 teaspoon
- Eggs:** 2 large
Instructions:
1. Preheat your oven to 180°C (350°F).
2. In a bowl, mix the oatmeal with warm milk and let it sit for about 5-10 minutes to absorb the liquid.
3. Add the peeled and diced apples to the oatmeal mixture.
4. Stir in the melted butter, vanillin (or vanilla extract), and eggs until well combined.
5. Pour the mixture into a greased baking dish.
6. Bake for 25-30 minutes, or until the top is golden brown and set.
7. Allow to cool slightly, and enjoy!This dish can be eaten for breakfast, lunch, or dinner—it’s wholesome and naturally sweet from the apples!
-
Cheesy Bacon and Sausage Breakfast Bake
This Cheesy Bacon and Sausage Breakfast Bake is a delicious and hearty dish that’s perfect for breakfast or brunch. It’s easy to prepare and full of savory flavors.
Ingredients:
- 6 slices of bread
- 6 slices of cheese
- 6 slices of bacon
- 4 eggs
- Salt, to taste
- Black pepper, to taste
- Fresh parsley, chopped
- Green onion, chopped
- 100 grams hunter sausages, sliced
- 100 grams cheese, grated
Instructions:
- Prepare the Ingredients:
-
- Preheat your oven to 180°C (350°F).
-
- Cook the bacon slices in a skillet over medium heat until crispy. Remove and drain on paper towels.
- Slice the hunter sausages and grate the cheese if not pre-grated.
- Chop the fresh parsley and green onion.
-
Assemble the Bake:
- Lay the slices of bread on the bottom of a baking dish.
- Place a slice of cheese on top of each bread slice.
- Add the cooked bacon slices and the sliced hunter sausages evenly over the bread and cheese.
- In a mixing bowl, beat the eggs with a pinch of salt and black pepper.
- Pour the beaten eggs evenly over the assembled bread, cheese, bacon, and sausages.
- Sprinkle the grated cheese, chopped parsley, and green onion on top.
Bake:
- Place the baking dish in the preheated oven.
- Bake for 15 minutes, or until the eggs are set and the cheese is melted and bubbly.
Serve:
- Let the breakfast bake cool slightly before slicing and serving.
- Enjoy this hearty dish warm with your favorite breakfast sides.
Serving Suggestions:
- Serve with a side of fresh fruit or a green salad for a balanced meal.
- Pair with a cup of coffee or tea for a complete breakfast experience.
Cooking Tips:
- Use your favorite type of cheese for added flavor variety.
- For a spicier version, add a sprinkle of red pepper flakes to the egg mixture.
- If you prefer, substitute the bacon with turkey bacon or omit it for a vegetarian option (using vegetarian sausages).
Nutritional Benefits:
- Provides protein from the eggs, bacon, and sausages.
- Contains calcium from the cheese.
- Fresh parsley and green onion add vitamins and minerals.
Dietary Information:
-
- Contains dairy, gluten, and meat.
- Can be modified to be gluten-free by using gluten-free bread.
Storage:
- Store any leftovers in an airtight container in the refrigerator for up to 2 days.
- Reheat in the oven or microwave before serving.
Why You’ll Love This Recipe:
- It’s a quick and easy dish that’s perfect for feeding a crowd.
- Combines classic breakfast flavors in one convenient bake.
- Versatile and customizable with your favorite ingredients.
Conclusion:
This Cheesy Bacon and Sausage Breakfast Bake is a satisfying and flavorful way to start your day. Easy to prepare and perfect for sharing, it’s sure to become a favorite in your breakfast or brunch rotation. Enjoy the delicious combination of cheese, bacon, sausage, and eggs in every bite!
-
Sliced Baked Potatoes delicious
Ingredients:
4 medium potatoes, Russet is what I used
¼ tsp salt
⅛ tsp pepper
⅛ tsp cayenne pepper
⅛ tsp garlic
⅛ tsp paprika4 to 6 tbsp olive oil
Instructions:
Wash and dry the potatoes
Slice the potato no more than halfway down side to side. (you can also do the slices at angles to get a crispier potato)
Preheat the oven to 400*
Mix the seasoning all together.
Spritz the potatoes with olive oil
Sprinkle the seasoning mixture evenly over the potatoes
Set the potatoes on a parchment lined baking tray
Bake 40 to 45 minutes
Enjoy!
-
Breakfast Sausage Crescent Rolls Recipe
Breakfast sausage crescent rolls are the perfect on-the-go meal, combining savory sausage with buttery, flaky crescent rolls. Whether you’re preparing breakfast for a crowd or need a quick snack, this recipe is a simple yet delicious choice. These rolls are easy to make and loved by both kids and adults alike.
Breakfast sausage crescent rolls are versatile and endlessly customizable. Whether you’re serving them at a brunch gathering or packing them for a lunchbox treat, they’re sure to be a hit. Give this recipe a try, and enjoy the blend of savory sausage and buttery dough in every bite!
Let’s dive into the steps to create this breakfast favorite.
Ingredients:
- 1 can (8 oz) refrigerated crescent roll dough
- 8 breakfast sausage links (pre-cooked or raw, depending on preference)
- 1/4 cup shredded cheddar cheese (optional)
- 1 egg, beaten (for brushing)
- 1 tsp sesame seeds or poppy seeds (optional garnish)
INSTRUCTIONS:Step-by-Step Instructions:
1. Preheat the Oven:
Preheat your oven to 375°F (190°C). Line a baking sheet with parchment paper to prevent sticking.2. Prepare the Sausage Links:
If using raw sausage, cook the links in a skillet over medium heat until fully cooked. Let them cool slightly before handling.3. Roll Out the Dough:
Open the can of crescent roll dough and separate it into triangles along the perforations. Lay the triangles flat on the parchment-lined baking sheet.4. Add the Filling:
Place a sausage link at the wide end of each crescent triangle. If desired, sprinkle a little shredded cheddar cheese over the sausage before rolling.5. Roll the Crescents:
Starting at the wide end, roll up each triangle, encasing the sausage inside. Place the rolls seam-side down on the baking sheet to prevent them from unraveling while baking.6. Brush and Garnish:
Using a pastry brush, lightly coat the tops of the crescent rolls with the beaten egg. If you like, sprinkle sesame or poppy seeds on top for added texture and flavor.7. Bake:
Bake in the preheated oven for 12-15 minutes, or until the crescent rolls are golden brown and flaky.8. Cool and Serve:
Remove the rolls from the oven and let them cool for a few minutes before serving. They’re best enjoyed warm!
Tips for Success:
- Pre-cooked Sausage: Save time by using fully cooked sausage links. If using raw sausage, ensure they’re thoroughly cooked before rolling them in the dough.
- Cheese Options: Try swapping cheddar for other cheeses like pepper jack or mozzarella for a flavor twist.
- Dipping Sauce: Serve these crescent rolls with ketchup, mustard, or a creamy dipping sauce for extra flavor.
- Make Ahead: You can prepare these rolls the night before and refrigerate them. Bake fresh in the morning for a hot, flaky breakfast.
-
Oatmeal, Apple, and Blueberry Loaf Cake
Ingredients:
- 130 g (1 1/3 cups) oat flakes
- 240 ml (1 cup) hot water
- 2 eggs
- 30 g (2 tbsp) erythritol/stevia (or preferred sweetener)
- 1 tsp vanilla extract
- 120 g (1/2 cup) yogurt
- 50 g (3 1/2 tbsp) melted butter
- 1 grated apple
- 80 g (1/2 cup) blueberries
- 7 g (1 1/2 tsp) baking powder
—
Steps:
1. Preheat Oven: Set to 180°C (360°F). Grease a 20 x 8 cm loaf pan.
2. Soak Oats: Combine oats and hot water, let sit for 5 mins.
3. Whisk Wet Ingredients: Beat eggs, sweetener, and vanilla. Mix in yogurt and melted butter.
4. Combine: Stir in soaked oats, grated apple, blueberries, and baking powder.
5. Bake: Pour batter into the pan and bake for 50 mins (toothpick test for doneness).
6. Cool & Serve: Let cool 10 mins in the pan, then transfer to a rack. Enjoy!
Perfectly moist and naturally sweet!
-
Sugar-Free Chocolate Coconut Flour Brownies
—
Ingredients:
- 2 eggs
- 1/4 cup (35 g) stevia powder
- 1 tsp vanilla extract
- 4.2 oz (120 g) sugar-free chocolate (about 3/4 cup chopped)
- 2.8 oz (80 g) butter (about 1/3 cup)
- 1/3 cup (35 g) coconut flour
- ✨ 1/2 tsp baking powder
—
Directions:
1️⃣ Preheat & Prepare:
Preheat your oven to 180°C (360°F).
Line a small baking dish with parchment paper.
2️⃣ Melt Chocolate & Butter:
Melt the sugar-free chocolate and butter together in a heatproof bowl over simmering water (double boiler) or microwave in short bursts. Stir until smooth. ✨
3️⃣ Mix Wet Ingredients:
In a separate bowl, whisk the eggs, stevia powder, and vanilla extract until well combined.
4️⃣ Combine Wet & Chocolate Mixture:
Slowly pour the melted chocolate mixture into the egg mixture, stirring continuously.
5️⃣ Mix Dry Ingredients:
In another bowl, sift together the coconut flour and baking powder.
6️⃣ Combine Everything:
Gently fold the dry ingredients into the wet ingredients until the batter is smooth.
7️⃣ Bake:
Pour the batter into the prepared dish and smooth the top.
Bake for about 15 minutes or until a toothpick inserted in the center comes out clean.
8️⃣ Cool & Serve:
Allow the brownies to cool completely before slicing into squares. Enjoy your guilt-free treat!
—
Serving Suggestions:
Top with whipped cream and sugar-free chocolate shavings.
Serve with fresh berries like raspberries or strawberries.
☕ Pair with hot coffee or tea for a cozy treat.
Drizzle with sugar-free caramel or chocolate sauce.
—
Cooking Tips:
✔️ Ensure the chocolate and butter mixture is fully melted for a smooth batter.
✔️ Do not overbake—check a few minutes early to keep them moist.
✔️ Sift the coconut flour to avoid lumps.
✔️ Use room-temperature eggs for smoother mixing.
✔️ Let the brownies cool completely before cutting to prevent crumbling.
—
A perfect low-carb dessert that’s rich, moist, and irresistibly chocolatey!
-
Lemon & Condensed Milk Ice Cream
You won’t believe how easy and delicious this ice cream is when you combine condensed milk and lemon! The result is a creamy, refreshing treat that everyone will love.
Ingredients
- Condensed Milk: 1 can (about 400g)
- Fresh Lemon Juice: From 2 lemons
- Ice Cubes: A handful
- Water: A splash (optional, for desired consistency)
–
Instructions
1. Blend the Ingredients:
In a blender, combine the condensed milk, lemon juice, ice cubes, and a splash of water (if needed). Blend until smooth and creamy.
2. Chill & Serve:
Pour the mixture into an airtight container and freeze for 4-6 hours, or until set. Scoop and serve your homemade lemon ice cream for a deliciously refreshing treat!
Want to Mix It Up? Try These Variations!
Swiss Lemonade with a Twist: Add fresh mint leaves or a sprinkle of Sicilian lemon zest for a sophisticated flavor.
Lemon Frozen Drink: Blend the same ingredients (condensed milk, lemon juice, ice, and water) for a creamy lemony frozen drink.
Lemon Ice Cream with Cream & Egg Yolk: For an extra creamy texture, blend condensed milk, lemon juice, egg yolks, and cream. Freeze and enjoy a richer lemon ice cream!
Lemon Cake with Condensed Milk Frosting: Bake a soft, moist lemon cake and top it off with a creamy frosting made from condensed milk and lemon juice.
—
More Ideas to Try!
Cocktails: Mix the lemon-condensed milk base with vodka, rum, or gin for a creamy and tangy cocktail.
Desserts: Use the combo in lemon mousse, pavlovas, or tangy pies.
Fruit Sauce: Make a sweet sauce with condensed milk and lemon to drizzle over fresh fruits like strawberries and mangoes.
—
Enjoy the magic of condensed milk and lemon in these fun, delicious creations!
-
Chicken Lollipop Recipe
Chicken lollipops are crispy, flavorful, and perfect as a starter. Here’s a simple recipe:
Ingredients
– 12 chicken drumettes (wings with the meat pushed down to form a “lollipop” shape)
– 1/2 cup all-purpose flour
– 1/2 cup cornstarch
– 1/2 cup rice flour (optional, for extra crispiness)
– 1 tsp paprika or red chili powder
– 1 tsp garlic powder
– 1 tsp onion powder
– 1/2 tsp black pepper
– Salt to taste
– 1/2 cup buttermilk or plain yogurt
– Oil for deep fryingFor the Sauce (optional)
– 1/4 cup soy sauce
– 2 tbsp honey
– 2 tbsp sriracha or chili sauce
– 1 tbsp minced garlic
– 1 tbsp minced gingerInstructions
1. **Prepare the Chicken**:
– Clean and pat dry the chicken drumettes. Use a knife to push the meat down and expose the bone, forming the lollipop shape.2. **Marinate**:
– In a bowl, mix the buttermilk (or yogurt) with salt and pepper.
– Add the chicken lollipops and coat them well. Let them marinate for at least 30 minutes.3. **Coat**:
– In a separate bowl, combine flour, cornstarch, rice flour, paprika, garlic powder, onion powder, black pepper, and salt.
– Dredge each marinated chicken lollipop in the flour mixture, ensuring an even coating.4. **Fry**:
– Heat oil in a deep frying pan or wok over medium-high heat.
– Fry the chicken lollipops in batches until golden brown and crispy, about 5-7 minutes. Make sure the internal temperature reaches 165°F (74°C).
– Drain on paper towels.5. **Prepare the Sauce (optional)**:
– In a pan, combine soy sauce, honey, sriracha, garlic, and ginger. Cook over medium heat until the sauce thickens slightly.
– Toss the fried chicken lollipops in the sauce or serve it on the side for dipping.ENJOY
-
After one bite, my daughter was begging me to tell her how to make it!
Combining the richness of southern cuisine with the European elegance of Chicken Cordon Bleu, this meatloaf captures the best of both worlds. Traditionally, Chicken Cordon Bleu consists of chicken breasts stuffed with ham and cheese, breaded, and then baked to perfection. By transforming this beloved dish into a meatloaf, you not only simplify the preparation but also offer a hearty, comforting meal that’s perfect for family dinners or a cozy night in. The blend of flavors and textures in this dish makes it a standout choice for anyone looking to impress or simply enjoy a delightful twist on a classic.
This Southern Style Chicken Cordon Bleu Meatloaf pairs beautifully with a variety of sides. Consider serving it with a creamy mashed potato, green beans, or even a light garden salad to balance the richness of the meatloaf. A side of cornbread could also complement the southern theme wonderfully. For a touch of acidity, a vinegar-based coleslaw or a tangy cranberry sauce can enhance the flavors and provide a refreshing contrast.Southern Style Chicken Co
rdon Bleu Meatloaf
Servings: 6 servingsIngredients
2 lbs ground chicken
1 cup breadcrumbs
1/2 cup milk
2 large eggs
1/2 cup diced country ham
6 oz Swiss cheese, cubed
1/4 cup chopped fresh parsley
1 tsp garlic powder
1 tsp onion powder
1 tsp paprika
Salt and pepper to taste
1/4 cup Dijon mustard
1/4 cup mayonnaise
1/4 cup honey
2 tbsp butter, melted
Directions1. Preheat your oven to 375°F (190°C) and grease a loaf pan with non-stick spray or butter.
2. In a large mixing bowl, combine the ground chicken, breadcrumbs, milk, and eggs. Mix until well combined.
3. Add the diced country ham, cubed Swiss cheese, chopped parsley, garlic powder, onion powder, paprika, salt, and pepper. Mix thoroughly to ensure even distribution of the ingredients.
4. Transfer the chicken mixture into the prepared loaf pan and shape it into a loaf.
5. In a small bowl, whisk together the Dijon mustard, mayonnaise, and honey. Spread half of this mixture over the top of the meatloaf.
6. Cover the meatloaf with aluminum foil and bake in the preheated oven for about 45 minutes.
7. Remove the foil, spread the remaining sauce over the meatloaf, and drizzle the melted butter on top.
8. Continue baking for another 15-20 minutes, or until the internal temperature reaches 165°F (74°C) and the top is golden brown.9. Let the meatloaf rest for 10 minutes before slicing and serving.
Variations & Tips
For a smoky flavor, consider adding a teaspoon of smoked paprika or incorporating a few slices of bacon on top before baking. You can substitute the Swiss cheese with other types of cheese like Gruyere or Cheddar for a different taste profile. For a gluten-free version, use gluten-free breadcrumbs. Additionally, if you prefer a bit of heat, add some diced jalapeños or a pinch of cayenne pepper to the mix. -
Low Carb Biscuits in a Muffin Tin
Making low-carb biscuits in a muffin tin is a great way to enjoy a fluffy, satisfying bread alternative without the carbs. Here’s a simple recipe to try:
Ingredients:
- 1 ½ cups almond flour
- 2 tablespoons coconut flour
- 1 teaspoon baking powder
- ½ teaspoon salt
- 2 large eggs
- ¼ cup unsalted butter, melted (or coconut oil)
- ½ cup shredded cheddar cheese (optional for extra flavor)
- ¼ cup unsweetened almond milk (or other low-carb milk)
- 1 tablespoon of psyllium husk powder (optional, for added texture)
Instructions:
- Preheat the Oven: Preheat your oven to 350°F (175°C). Grease a muffin tin or line it with paper liners.
- Combine Dry Ingredients: In a large bowl, mix the almond flour, coconut flour, baking powder, salt, and psyllium husk (if using).
- Whisk Wet Ingredients: In another bowl, whisk the eggs, melted butter, and almond milk until fully combined.
- Combine Wet and Dry Ingredients: Pour the wet mixture into the dry ingredients and stir until just combined. If you’re using cheese, fold it into the mixture now.
- Spoon into Muffin Tin: Divide the dough evenly between the muffin cups. You should get about 6-8 biscuits, depending on the size of your tin.
- Bake: Bake in the preheated oven for 18-22 minutes, or until the tops are golden and a toothpick inserted into the center comes out clean.
- Cool and Serve: Let the biscuits cool for a few minutes in the tin before transferring them to a wire rack. Serve warm with butter or your favorite low-carb spread.
Enjoy your low-carb biscuits! They can be stored in an airtight container for a few days or frozen for later use.
-
Eggplant, Ricotta and Feta Filled Filo Pastry
Prep Time: 30 minutes
Cook Time: 30-35 minutes
Total Time: 1 hour
Servings: 6-8This delicious Eggplant, Ricotta, and Feta Filled Filo Pastry is a perfect combination of creamy cheese, savory eggplant, and flaky filo pastry. It’s a wonderful vegetarian dish that works as a light main course, appetizer, or side dish. The rich, cheesy filling is balanced by the slight bitterness of the roasted eggplant, all encased in crispy layers of filo pastry. It’s perfect for entertaining or as a comforting meal at home.
Ingredients:
For the Filling:
- 2 medium eggplants, peeled and diced
- 1 tablespoon olive oil (plus more for brushing)
- Salt and pepper, to taste
- 1/2 cup ricotta cheese
- 1/2 cup crumbled feta cheese
- 1/4 cup grated Parmesan cheese
- 1 small onion, finely chopped
- 2 cloves garlic, minced
- 1 tablespoon fresh basil, chopped (or 1 teaspoon dried basil)
- 1 tablespoon fresh parsley, chopped (or 1 teaspoon dried parsley)
- 1/2 teaspoon dried oregano
- Zest of 1 lemon
- 1 large egg (optional, for binding the filling)
For the Filo Pastry:
- 10-12 sheets of filo pastry (thawed if frozen)
- 1/4 cup melted butter or olive oil (for brushing)
For Garnish (optional):
- Fresh herbs (parsley or basil)
- Extra crumbled feta or Parmesan cheese
Equipment Needed:
- Medium skillet or frying pan
- Mixing bowl
- Pastry brush
- Baking sheet
- Parchment paper
- Knife and chopping board
- Oven preheated to 375°F (190°C)
Instructions:
Step 1: Prepare the Eggplant
- Cook the eggplant:
Heat the olive oil in a medium skillet over medium heat. Add the diced eggplant and sauté for about 8-10 minutes until it softens and becomes golden brown. Stir occasionally to ensure the eggplant cooks evenly. Add salt and pepper to taste. - Sauté the aromatics:
While the eggplant is cooking, add the chopped onion and minced garlic to the skillet and cook for an additional 2-3 minutes, until the onion is soft and translucent. - Cool the mixture:
Once the eggplant and onion are cooked, remove the pan from the heat and allow the mixture to cool for a few minutes.
Step 2: Prepare the Filling
- Mix the filling:
In a large mixing bowl, combine the ricotta cheese, crumbled feta cheese, grated Parmesan, basil, parsley, oregano, lemon zest, and the sautéed eggplant and onion mixture. If you want a firmer filling, add the egg to help bind everything together. Mix well until all ingredients are fully incorporated. Taste and adjust seasoning with salt and pepper as needed.
Step 3: Assemble the Pastry
- Prepare the filo pastry:
Lay out a sheet of filo pastry on a clean surface. Brush it lightly with melted butter or olive oil. Place another sheet on top and brush that with butter or oil as well. Repeat this process for 4-5 layers of filo pastry. - Add the filling:
Spoon about 1/4 to 1/3 of the eggplant and cheese mixture along one edge of the filo pastry, forming a long line along the edge. Leave a small border at both ends of the filo sheet to ensure the filling doesn’t spill out during baking. - Roll the pastry:
Carefully fold the edges of the filo over the filling, then roll it up tightly like a log or a cylinder, encasing the filling in the pastry. You can either roll it into one long log or make smaller individual rolls or parcels. Repeat with the remaining filo sheets and filling. - Place on the baking sheet:
Arrange the filled filo rolls or parcels on a parchment-lined baking sheet. Brush the tops with more melted butter or olive oil for a golden, crisp finish.
Step 4: Bake the Pastry
- Bake:
Place the baking sheet in the preheated oven and bake for 30-35 minutes, or until the filo pastry is golden brown and crispy. - Check for crispness:
The pastry should be well-browned and crispy on the outside. If the top begins to brown too quickly, you can cover the pastry loosely with aluminum foil for the last 10 minutes of baking.
Step 5: Serve
- Garnish (optional):
Once the pastry is done baking, remove it from the oven and allow it to cool slightly before serving. Garnish with fresh herbs and extra crumbled feta or Parmesan cheese, if desired. - Serve:
Slice the pastry into pieces and serve warm. It can be enjoyed on its own or with a side of salad or yogurt for a complete meal.
Notes:
- Filo Pastry Tips: Filo pastry dries out quickly, so it’s important to keep it covered with a damp towel or plastic wrap while you work to prevent it from becoming brittle.
- Eggplant Tips: Make sure to cook the eggplant thoroughly before mixing it into the filling. If you want to reduce the oiliness of the eggplant, you can sprinkle it with salt after chopping and let it sit for 15 minutes to draw out excess moisture before cooking it.
- Make-Ahead: You can prepare the filling and assemble the pastry ahead of time, then store it in the fridge for up to 24 hours before baking. Alternatively, you can freeze the filled and unbaked pastries for up to 1 month. Just be sure to brush with butter and bake directly from frozen (you may need to add a few extra minutes to the cooking time).
Variations:
- Spicy Twist: Add a pinch of chili flakes or cayenne pepper to the filling for a spicy kick.
- Additional Vegetables: You can mix in other vegetables such as spinach, zucchini, or roasted red peppers for added flavor and texture.
- Meat Version: If you prefer to add some meat to the dish, cooked ground lamb or beef can be added to the eggplant mixture for a heartier filling.
This Eggplant, Ricotta, and Feta Filled Filo Pastry is a versatile, flavorful dish that’s sure to be a crowd-pleaser. Whether you make it as a main course or a party appetizer, the combination of savory cheese and tender eggplant wrapped in crisp filo is simply irresistible. Enjoy!