Category: quick and easy recipe

  • Low-Carb Chicken and Cheese Stuffed Bread

    Low-Carb Chicken and Cheese Stuffed Bread

    Low-Carb Chicken and Cheese Stuffed Bread
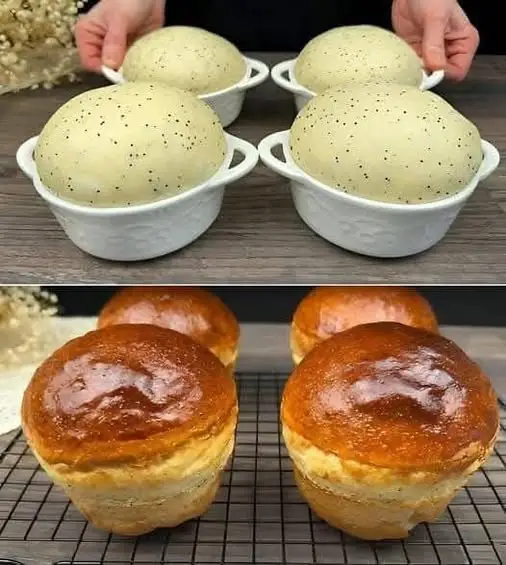
    This low-carb stuffed bread is perfect for a quick meal or snack that’s both filling and flavorful. The oat bran-based dough provides a healthy, fiber-rich base, while the BBQ chicken, mozzarella, and herb filling add a savory and creamy taste. Microwave-friendly and air fryer optional, this recipe can be made in no time and adjusted with your favorite fillings. Whether you’re looking for a keto-friendly option or just something delicious, this stuffed bread is versatile enough for any meal.

    Preparation Time
    Prep time: 10 minutes
    Cook time: 5 minutes (microwave) + 5 minutes (optional air fryer or oven)
    Total time: 20 minutes

    Ingredients

    For the Dough:

    2 large eggs
    A pinch of salt
    1 cup (100g) oat bran (or 100g flaxseed flour for low-carb version)
    1 tablespoon (15ml) olive oil
    100ml (1/3 cup + 2 tbsp) water
    1 teaspoon (4g) baking powder
    For the Filling:

    1/2 small tomato, chopped
    1 slice BBQ chicken, chopped
    1 slice mozzarella cheese, chopped (about 1 oz/28g)
    1 tablespoon fresh parsley and chives, chopped
    Salt and black pepper to taste
    1 tablespoon (15g) ricotta or cream cheese
    Directions
    Crack the 2 large eggs in a mixing bowl and beat lightly with a pinch of salt.
    Add 1 cup oat bran or flaxseed flour and stir until smooth.
    Gradually add 100 ml water and 1 tablespoon olive oil.
    Stir in 1 teaspoon baking powder to create a smooth, malleable dough.
    Wet hands to prevent sticking and form the dough into a small loaf shape.
    Transfer to a microwave-safe dish and cook on high for 5 minutes. The dough should be firm and slightly risen.
    Chop 1/2 tomato, 1 slice BBQ chicken, and 1 slice mozzarella into bite-sized pieces.
    In a small bowl, mix with parsley, chives, ricotta, and season with salt and pepper. Stir until evenly combined.
    Slice the top off the cooked bread and hollow out the center slightly.
    Spoon in the prepared filling and spread it evenly.
    For extra crispness, transfer the filled bread to an air fryer or preheated oven at 180°C (350°F) for 5 minutes, or until cheese is melted.
    Let the bread cool slightly before slicing and serving warm.

    Serving Suggestions
    Enjoy warm as a snack, light lunch, or breakfast.
    Serve with a side salad or vegetable sticks for a balanced meal.

    Cooking Tips
    Flaxseed flour makes the bread lower in carbs and adds more fiber.
    Don’t overcook the dough in the microwave—5 minutes is usually enough.
    Use any protein or cheese you prefer for the filling, such as turkey, ham, or feta.

    Nutritional Benefits
    High in protein and fiber from the oat bran/flaxseed flour and eggs.
    Low-carb and keto-friendly when using flaxseed flour.
    Packed with vitamins and minerals from the fresh herbs, chicken, and cheese.

    Dietary Information
    Low-carb: Substitute flaxseed flour for oat bran.
    Keto-friendly: With flaxseed flour, this recipe fits into a ketogenic diet.
    High protein: Eggs, chicken, and mozzarella provide a protein boost.
    Gluten-free: Ensure ingredients like BBQ chicken and cheese are gluten-free if necessary.

    Nutritional Facts (Per Serving)
    Calories: 250-300 kcal (approx.)
    Protein: 15g
    Carbohydrates: 10g (using oat bran)
    Fat: 18g

    Storage
    Store any leftover bread in an airtight container in the refrigerator for up to 2 days.
    Reheat in the microwave or air fryer before serving.

    Why You’ll Love This Recipe
    Quick and easy to make in just 20 minutes.
    Packed with flavor from the BBQ chicken, mozzarella, and fresh herbs.
    Versatile filling options and can be made low-carb or gluten-free.
    Microwave and air fryer-friendly, perfect for fast, healthy meals.

    Conclusion
    This low-carb stuffed bread is the perfect solution for a quick and delicious meal, combining nutritious ingredients like oat bran, chicken, and mozzarella in a convenient, easy-to-make dish. Whether you’re on a keto diet or just looking for a high-protein, satisfying snack, this recipe is sure to become a favorite. The crispy exterior from the air fryer adds a delightful crunch, while the creamy filling provides bursts of flavor. Enjoy it any time of day and feel great about the healthy choice you’ve made!

    Frequently Asked Questions (FAQs)

    Can I use different fillings?
    Yes! Feel free to substitute the BBQ chicken with ham, turkey, or tofu for a vegetarian option.
    Is this recipe gluten-free?
    Yes, as long as you use oat bran or flaxseed flour and ensure that all other ingredients are gluten-free.
    Can I make this recipe dairy-free?
    Yes, use dairy-free mozzarella and cream cheese for a lactose-free option.
    How can I store leftovers?
    Store leftovers in the fridge for up to 2 days in an airtight container.
    Can I bake the dough in an oven instead of a microwave?
    Yes, bake at 180°C (350°F) for about 10-15 minutes until firm.
    Can I freeze the stuffed bread?
    It’s best enjoyed fresh, but you can freeze the cooked bread without filling and thaw it before reheating.
    What can I substitute for oat bran?
    You can use flaxseed flour, almond flour, or any low-carb flour of your choice.
    Is this recipe suitable for a keto diet?
    Yes, when made with flaxseed flour, this recipe fits into a ketogenic diet.
    Can I omit the baking powder?
    Baking powder helps the dough rise, but you can omit it if needed. The bread will be denser.
    Can I make this recipe without an air fryer?
    Yes, simply bake it in the oven for 5-10 minutes after filling.

  • Green Smoothie Recipe ✅

    Green Smoothie Recipe ✅

    Green Smoothie Recipe ✅

    This green smoothie is packed with nutrients, including healthy fats, fiber, and vitamins, making it the perfect energizing and satisfying drink. Whether you’re looking to kickstart your day or need a quick and healthy snack, this smoothie will give you a natural boost of energy.

    Ingredients:

    • 1 ripe banana 
    • 1/2 avocado 
    • 1/2 cup pineapple chunks  (fresh or frozen)
    • 1 cup spinach leaves  (fresh)
    • 1 cup almond milk  (or any other plant-based milk)

    Instructions:

    1. Prepare the Ingredients:
      • Peel the banana and break it into smaller pieces.
      • Cut the avocado in half, remove the pit, and scoop out the flesh.
      • If using fresh pineapple, peel and chop it into chunks. If using frozen, you can skip the chopping step.
      • Rinse the spinach leaves thoroughly.
    2. Blend:
      • Add the banana, avocado, pineapple, spinach, and almond milk into a high-speed blender.
    3. Blend Until Smooth:
      • Blend everything on high speed until the smoothie reaches a creamy and smooth consistency. You may need to scrape down the sides of the blender to make sure everything blends evenly.
    4. Adjust the Consistency:
      • If the smoothie is too thick for your liking, add a little more almond milk or water until you reach your desired consistency.
    5. Serve:
      • Pour the green smoothie into a glass, garnish with a few extra spinach leaves or fruit slices if desired, and enjoy!

    Optional Add-ins:

    • Chia seeds or flaxseeds: Add 1 tablespoon of either for a boost of omega-3 fatty acids and fiber.
    • Protein powder: For an extra protein kick, add a scoop of plant-based protein powder.
    • Honey or maple syrup: If you like it sweeter, add a little drizzle of honey or maple syrup to taste.
    • Ice cubes: For an extra cold and refreshing smoothie, add a handful of ice cubes.

    Q&A:

    Q: Can I use other fruits in this smoothie?

    A: Yes! You can switch out the pineapple with other fruits like mango, strawberries, or blueberries for a different flavor profile. The banana will still help provide natural sweetness and a creamy texture.

    Q: Can I use another type of milk besides almond milk?

    A: Absolutely! You can substitute almond milk with any other plant-based milk like oat milk, soy milk, or coconut milk. You can also use dairy milk if you prefer.

    Q: Can I make this smoothie ahead of time?

    A: Yes, you can prep the ingredients ahead of time by placing them in a freezer-safe bag or container. When you’re ready to blend, just add the almond milk and blend until smooth. It’s great for busy mornings!

    Q: How can I make the smoothie thicker?

    A: If you want a thicker smoothie, you can add more banana or avocado, or even add a few ice cubes. Frozen fruit works great to thicken the consistency.

    Q: What are the benefits of this smoothie?

    A: This smoothie is packed with nutrients:

    • Bananas provide potassium for heart health.
    • Avocados offer healthy fats, which help with brain function and skin health.
    • Spinach is rich in iron, fiber, and vitamins.
    • Pineapple contains vitamin C and bromelain, which aids digestion.
    • Almond milk is a low-calorie, dairy-free alternative to milk, adding smoothness without extra sugar.

    Final Thoughts:

    This green smoothie is the perfect way to enjoy a delicious and nutritious start to your day. It’s creamy, naturally sweet, and full of healthy ingredients that will leave you feeling energized and satisfied. Enjoy it as a meal replacement, snack, or even as a post-workout refreshment! 

  • Banana Nugget Crispy with Chocolate and Many Toppings

    Banana Nugget Crispy with Chocolate and Many Toppings

    Banana Nugget Crispy with Chocolate and Many Toppings
    Table of Contents
    Banana Nugget Crispy with Chocolate and Many Toppings is a delightful treat that combines the sweetness of bananas, a crispy coating, and a rich chocolate finish. Top it off with a variety of fun and delicious toppings, making this a treat that is not only tasty but also fun to make and eat. Whether you’re looking for a snack, dessert, or party treat, this recipe has got you covered!

    Ingredients for Banana Nugget Crispy with Chocolate and Many Toppings
    For the Banana Nuggets:

    4-5 ripe but firm bananas
    1 cup all-purpose flour
    1/4 cup cornstarch
    1/2 tsp baking powder
    Pinch of salt
    2 tbsp sugar
    1 egg (beaten)
    1 tsp vanilla extract
    1/2 cup milk (dairy or plant-based)
    Vegetable oil (for frying)
    For the Chocolate Coating:

    100-150g dark or milk chocolate
    1 tbsp butter (optional)
    1/2 tsp vanilla extract (optional)
    For the Toppings (Optional but Highly Recommended):

    Chopped nuts (almonds, walnuts, hazelnuts)
    Shredded coconut (sweetened or unsweetened)
    Chocolate chips or sprinkles
    Crushed cookies (Oreos, graham crackers)
    Mini marshmallows or chopped regular marshmallows
    Caramel sauce (optional)
    Powdered sugar (for dusting)
    Fresh fruits (berries, strawberries, kiwi)
    Honey or maple syrup (for drizzling)
    Step-by-Step Recipe
    Step 1: Preparing the Bananas
    Peel and Slice the Bananas: Peel the bananas and cut them into 1-1.5 inch chunks. They should be firm but ripe enough to hold up during frying. For a fun twist, use cookie cutters to create fun shapes like stars, hearts, or circles.
    Set Aside: Place the banana pieces on a plate or cutting board and set them aside while you prepare the batter.
    See also The Irresistible Appeal of Pineapple Upside-Down Cake
    Step 2: Making the Crispy Coating
    Combine Dry Ingredients: In a large bowl, combine the flour, cornstarch, baking powder, salt, and sugar. Stir until well-mixed.
    Add Wet Ingredients: In a separate bowl, beat the egg, then add the milk and vanilla extract. Whisk until smooth.
    Mix Wet and Dry Ingredients: Gradually add the wet ingredients to the dry ingredients, stirring until the batter becomes thick but smooth. If the batter is too thick, add more milk. If too runny, add more flour.
    Step 3: Frying the Banana Nuggets
    Heat the Oil: In a large skillet or deep frying pan, heat enough vegetable oil to submerge the banana pieces. The ideal temperature is around 350°F (175°C). If you don’t have a thermometer, test by dropping a small piece of batter into the oil – if it bubbles and rises to the top immediately, the oil is ready.
    Fry the Nuggets: Carefully dip each banana chunk into the batter, making sure it’s fully coated. Gently drop the batter-coated banana into the hot oil. Fry for 2-3 minutes per side or until golden brown and crispy. Remove the nuggets with a slotted spoon and place them on a paper towel to absorb excess oil.
    Step 4: Preparing the Chocolate Coating
    Melt the Chocolate: While the banana nuggets are cooling, melt the chocolate. Use a microwave in short bursts or a double boiler over simmering water. For a smooth finish, add 1 tablespoon of butter and 1/2 teaspoon of vanilla extract while melting.
    Dip the Nuggets: Once the chocolate is melted, dip each fried banana nugget into the chocolate, ensuring it is fully coated. Place the dipped nuggets on a parchment paper-lined tray.
    See also Discover the Magic of Sweet Potatoes
    Step 5: Adding Toppings
    Top the Nuggets: While the chocolate is still slightly soft, sprinkle your choice of toppings on the nuggets. Some great options include chopped nuts, shredded coconut, sprinkles, crushed cookies, mini marshmallows, or even a drizzle of caramel or honey.
    Let Them Set: Allow the chocolate to harden by letting the nuggets sit at room temperature. For quicker results, refrigerate the nuggets for 10-15 minutes.
    Serving and Enjoying
    Once the chocolate is set, your Banana Nugget Crispy with Chocolate and Many Toppings are ready to be served! These nuggets are best enjoyed fresh with the chocolate still soft and the exterior crispy. Serve them as a dessert, snack, or treat at your next gathering, and watch them disappear in no time!

    Q&A
    Q: Can I use frozen bananas for this recipe?
    A: It’s best to use ripe but firm fresh bananas for this recipe. Frozen bananas tend to become too mushy once fried, which may affect the texture and result in a soggy coating.

    Q: Can I make these banana nuggets without frying?
    A: Yes! You can bake them instead. Preheat your oven to 375°F (190°C), place the battered banana nuggets on a baking sheet, and bake for about 15-20 minutes or until golden and crispy. Just keep in mind the texture will be slightly different.

    Q: Can I substitute the chocolate with something else?
    A: Absolutely! You can use white chocolate, a chocolate drizzle, or even a fruit glaze for a different flavor. The key is ensuring it’s something that will harden or set on the nuggets.

    See also Craved spice milk cookies My home smells delicious
    Q: How long can I store leftover banana nuggets?
    A: These banana nuggets are best enjoyed fresh, but you can store any leftovers in an airtight container at room temperature for up to 1 day. Reheat them briefly in the oven to retain the crispiness.

    Q: Can I add other fruits to the recipe?
    A: Yes, you can! Try dipping other fruits like strawberries or apple slices into the batter and frying them for a fruity variation of the banana nugget.

    Conclusion
    Banana Nugget Crispy with Chocolate and Many Toppings is an incredibly fun and customizable treat that’s perfect for any occasion. Whether you’re making it as a family activity, a party snack, or a sweet dessert, these nuggets will definitely steal the show. Don’t forget to get creative with your toppings, and enjoy the delicious combination of crispy bananas and rich chocolate in every bite!


  • Drink Lemon Water for 30 Days, and Experience Amazing Results!

    Drink Lemon Water for 30 Days, and Experience Amazing Results!

    Drink Lemon Water for 30 Days, and Experience Amazing Results!on Drink Lemon Water for 30 Days, and Experience Amazing Results!

    and benefits.Tips for Success:Use fresh lemons, not lemon juice concentrate, to get the most benefits.If you have concerns about your teeth, drink lemon water with a straw to minimize contact with your teeth and rinse your mouth with plain water afterward.Consistency is key to seeing these benefits. If you stick to drinking lemon water every morning for 30 days, your body will begin to experience these positive changes, potentially leading to lasting health benefits.

    Lemon Drink for Weight Loss: Recipe & Benefits

    Recipe: Lemon Detox Drink

    Ingredients:

    • 1 glass of warm water (250ml)
    • 1 fresh lemon (juiced)
    • 1 teaspoon honey (optional)
    • ½ teaspoon grated ginger (optional)
    • ¼ teaspoon cinnamon (optional)
    • A pinch of cayenne pepper (optional)

    Instructions:

    1. Warm a glass of water (do not boil).
    2. Add freshly squeezed lemon juice.
    3. Stir in honey, ginger, cinnamon, or cayenne pepper if using.
    4. Mix well and drink on an empty stomach in the morning.

    Benefits of Lemon Drink for Weight Loss:

    1. Boosts Metabolism – Lemon helps in speeding up metabolism and fat burning.
    2. Aids Digestion – Promotes gut health and reduces bloating.
    3. Detoxifies the Body – Helps flush out toxins, keeping the liver healthy.
    4. Reduces Appetite – The pectin fiber in lemon helps curb hunger cravings.
    5. Hydrates and Energizes – Provides hydration while improving energy levels.
    6. Balances pH Levels – Alkalizes the body, improving overall health.
    7. Enhances Fat Breakdown – Ginger and cayenne pepper can help in fat burning.

    Tip: For best results, drink it every morning on an empty stomach and follow a balanced diet with regular exercise.

    Would you like variations of this recipe?

  • Why Do Bananas Have Those Tiny Strings? The Secret Behind Them!

    Why Do Bananas Have Those Tiny Strings? The Secret Behind Them!

    Why Do Bananas Have Those Tiny Strings? The Secret Behind Them!)

    Have you ever peeled a banana and noticed those little strings clinging stubbornly to the fruit? They seem to haunt you every time, running vertically along the banana. Most people simply brush them off without thinking much about them. But have you ever wondered why they’re there?

    Let’s uncover the simple reason behind these tiny, mysterious strands.

    What Are the Strings Called?

    Those thin, fibrous strings have a scientific name: phloem bundles. They play an important role in the banana’s growth, even though they might feel like a nuisance when you’re enjoying the fruit.

    Why Do Bananas Have Them?

    Phloem bundles act like natural pipelines inside the banana. They help transport essential nutrients and water throughout the fruit, making sure every part of the banana develops properly as it grows. Without these little bundles, the banana wouldn’t ripen or get all the nourishment it needs.

    Are They Safe to Eat

    Yes, the strings are completely safe to eat! In fact, they contain fiber and nutrients similar to the banana flesh itself. However, they can have a slightly firmer texture, which is why some people prefer to peel them off carefully before taking a bite.

    How to Remove Them Easily:
    • Peel Gently: Start peeling the banana slowly from the stem to avoid pulling the strings deeper into the flesh.
    • Use Your Fingers: Once the skin is off, run your fingers lightly along the banana to lift off the phloem bundles.
    • For Smoothness Lovers: If you’re making smoothies or desserts, you can remove them beforehand for a silkier texture.

    Final Thought:

    Next time you spot those little strings on your banana, remember—they’re not there by accident. They’re part of nature’s perfect design, ensuring every banana grows healthy and sweet. Whether you remove them or not, now you know exactly why they’re there!

  • Baked Potato Rounds with Cheese Recipe

    Baked Potato Rounds with Cheese Recipe

    Baked Potato Rounds with Cheese Recipe

    Table of Contents
    Ingredients:

    For the Potato Rounds:
    4 large potatoes (such as Russet or Yukon Gold), peeled and sliced into ½-inch thick rounds
    2 tablespoons olive oil
    1 teaspoon sea salt
    ½ teaspoon black pepper
    1 teaspoon onion powder
    ½ teaspoon paprika
    ½ teaspoon cayenne pepper (optional)
    For the Toppings:
    ½ cup grated cheese (cheddar, mozzarella, or a combination)
    2 tablespoons fresh parsley, chopped
    Optional: 2 tablespoons fresh chives, chopped
    Optional: Sour cream or ranch dressing for dipping
    Preparation:
    1. Preheat the Oven:

    Preheat the oven to 425°F (220°C) to ensure it’s hot and ready for baking.

    2. Prepare the Potatoes:

    Peel and slice the potatoes into ½-inch thick rounds. If you prefer extra crispy rounds, soak the sliced potatoes in cold water for about 30 minutes to remove excess starch. Pat them dry with paper towels before cooking.
    3. Coat with Olive Oil and Seasonings:

    In a large mixing bowl, add the potato rounds. Drizzle the olive oil over them and season with sea salt, black pepper, onion powder, paprika, and cayenne pepper (if using). Mix the potatoes well to ensure each round is evenly coated with oil and seasonings.
    4. Arrange on Baking Sheet:

    Line a baking sheet with parchment paper. Arrange the seasoned potato rounds in a single layer on the sheet. Make sure the rounds are not overlapping to ensure they cook evenly.
    5. Bake the Potato Rounds:

    Place the baking sheet in the preheated oven and bake for 25-30 minutes, or until the potatoes are tender and golden brown. Flip the rounds halfway through to ensure both sides cook evenly.
    See also Garlic Ritz Snacks
    6. Add Cheese:

    After the potato rounds have baked, remove the baking sheet from the oven. Evenly sprinkle the grated cheese over the hot potato rounds. Return the baking sheet to the oven for an additional 5-7 minutes, or until the cheese is fully melted and bubbly.
    7. Garnish and Serve:

    Once the cheese is melted, remove the rounds from the oven and allow them to cool slightly. Top the cheese-covered rounds with freshly chopped parsley and optional chives for added flavor and color.
    8. Serve:

    Arrange the potato rounds on a serving platter and enjoy them hot. Serve with sour cream, ranch dressing, or a drizzle of spicy olive oil for extra flavor.
    Tips for Perfectly Crispy Potato Rounds:
    Use the Right Potatoes: Russet or Yukon Gold potatoes work best for crispy, fluffy texture.
    Soak the Potatoes: Soaking the potato rounds in water helps remove excess starch and results in crispier baked rounds.
    Don’t Overlap: Make sure the potato slices are in a single layer on the baking sheet. This will help them cook evenly and become crispier.
    Seasoning Variations: Feel free to experiment with different seasonings like garlic powder, dried thyme, or rosemary for additional flavor.
    Cheese Variations: Experiment with different types of cheese such as Gouda, Parmesan, or Monterey Jack for varying tastes.
    Nutritional Benefits:
    Potatoes: Rich in potassium, vitamin C, B6, and dietary fiber, potatoes are a great source of complex carbohydrates, providing energy.
    Dairy (Cheese): A great source of protein and calcium, which are essential for bone health and muscle repair.
    Fresh Herbs (Parsley & Chives): These herbs are packed with vitamins A, C, and K and offer antioxidants with anti-inflammatory properties.
    See also Ultimate Egg Casserole
    Q&A:
    Q1: Can I use sweet potatoes for this recipe?

    Yes! Sweet potatoes can be used instead of regular potatoes for a slightly sweeter flavor and added nutrients like beta-carotene.
    Q2: Can I make these potato rounds in advance?

    Yes, you can prepare the potato rounds ahead of time by seasoning and baking them. Store the baked rounds in an airtight container in the refrigerator. Reheat them in the oven to restore their crispiness before adding cheese and serving.
    Q3: Can I freeze the potato rounds?

    Yes, you can freeze the baked, un cheesed potato rounds. Once cooled, arrange them on a baking sheet in a single layer and freeze them until solid. Then, transfer to a freezer bag. When ready to eat, bake them at 425°F (220°C) for 10-15 minutes before adding cheese.
    Q4: Can I make these rounds without cheese?

    Absolutely! If you want a lighter version or are avoiding dairy, you can serve the potato rounds with toppings like fresh herbs, a sprinkle of sea salt, or a drizzle of olive oil.
    Q5: What is the best way to serve these potato rounds?

    These potato rounds can be served as a side dish, appetizer, or even as a snack. Pair them with a dipping sauce like sour cream, ranch dressing, or even a spicy aioli.
    Q6: Can I make these in an air fryer?

    Yes, you can cook these potato rounds in an air fryer! Preheat the air fryer to 400°F (200°C) and cook the rounds in batches for about 10-15 minutes, flipping halfway through, before adding cheese and cooking for an additional 2-3 minutes to melt the cheese.
    See also Cucumber Salad That Burns Belly Fat!
    Conclusion:
    These baked potato rounds with cheese are the perfect combination of crispy, cheesy, and flavorful! Whether as an appetizer, snack, or side dish, they’re sure to be a hit at any meal. Experiment with your favorite cheeses, seasonings, and toppings to make this recipe your own. Enjoy the delightful flavors and satisfying crunch with every bite!

  • Classic Vanilla Butter Cake with Buttermilk Sauce Recipe

    Classic Vanilla Butter Cake with Buttermilk Sauce Recipe

    Classic Vanilla Butter Cake with Buttermilk Sauce Recipe
    Table of Contents
    This Classic Vanilla Butter Cake is perfectly light, moist, and paired with a rich, decadent Buttermilk Sauce that takes it to the next level. It’s a perfect treat for special occasions or simply when you want to indulge in a homemade dessert!

    Ingredients:
    For the Cake:
    3 tablespoons melted butter
    2/3 cup sugar
    4 large eggs, at room temperature, lightly beaten
    2 teaspoons vanilla extract or vanilla puree
    3 cups all-purpose flour
    1 teaspoon baking soda
    1/2 teaspoon baking powder
    1/2 teaspoon salt
    1 cup buttermilk
    For the Buttermilk Sauce:
    1 cup sugar
    1/4 cup (60 ml) cubed butter
    1/4 cup water
    1/4 teaspoon vanilla extract
    Preparation:
    Step 1: Prepare the Cake Batter
    Mix Sugar and Butter: In a large mixing bowl, beat the sugar and melted butter together until the mixture is light and fluffy.
    Add Eggs and Vanilla: Add the eggs, one at a time, beating well after each addition to incorporate fully. Mix in the vanilla extract, ensuring everything is smooth and well-blended.
    Combine Dry Ingredients: In a separate bowl, whisk together the flour, baking soda, baking powder, and salt.
    Combine Wet and Dry Ingredients: Gradually add the dry ingredients to the wet mixture, alternating with the buttermilk. Start and end with the dry ingredients. Mix gently, just until combined—don’t overmix, as it could affect the cake’s texture.
    See also BOILED EGG FRITTERS
    Step 2: Bake the Cake
    Preheat Oven: Preheat your oven to 350°F (175°C).
    Prepare the Pan: Grease a 10-inch round or bundt pan with oil or non-stick spray.
    Fill the Pan: Pour the cake batter into the prepared pan and spread it out evenly.
    Bake: Place the pan in the oven and bake for 55-70 minutes, or until a toothpick inserted into the center of the cake comes out clean.
    Cool the Cake: Once done, remove the cake from the oven and allow it to cool for 10 minutes in the pan before carefully inverting it onto a wire rack.
    Step 3: Make the Buttermilk Sauce
    Combine Ingredients: In a small saucepan over medium heat, combine the sugar, cubed butter, and water.
    Cook the Sauce: Stir continuously until the sugar dissolves and the butter melts completely.
    Add Vanilla: Remove the saucepan from heat and mix in the vanilla extract. Stir carefully to incorporate.
    Step 4: Assemble the Cake
    Release the Cake from the Pan: Once the cake has cooled slightly, carefully run a knife around the edges of the pan to release the cake. Invert it onto a wire rack placed over a sheet of waxed paper or a tray.
    Poke Holes: Using a skewer or fork, poke small holes all over the cake’s surface.
    Drizzle the Sauce: Drizzle about 1/4 cup of the buttermilk sauce over the cake, letting it soak in. Allow the cake to stand for 15-20 minutes, so the sauce can be fully absorbed into the cake.
    Step 5: Serve and Enjoy
    Slice and Serve: Slice the cake and serve either warm or at room temperature.
    Optional Toppings: For a richer experience, drizzle additional buttermilk sauce over each slice. You can also garnish with whipped cream, fresh berries, or a scoop of vanilla ice cream.
    See also 3-INGREDIENT SPONGE CAKE
    Q&A for Classic Vanilla Butter Cake with Buttermilk Sauce:
    Q1: Can I substitute the buttermilk?
    A1: If you don’t have buttermilk, you can make a substitute by adding 1 tablespoon of vinegar or lemon juice to 1 cup of regular milk. Let it sit for about 5 minutes before using.

    Q2: Can I use salted butter for the cake?
    A2: It’s best to use unsalted butter in baking to control the amount of salt. However, if you only have salted butter, reduce the added salt in the cake batter by about 1/4 teaspoon.

    Q3: Can I make this cake ahead of time?
    A3: Yes! You can make the cake a day ahead. Store the cooled cake in an airtight container at room temperature. Drizzle the buttermilk sauce just before serving.

    Q4: How long can I store leftovers?
    A4: Store any leftover cake in an airtight container at room temperature for up to 3 days. If you have leftover buttermilk sauce, you can store it in the fridge for up to a week. Reheat the sauce gently before serving.

    Q5: Can I make this cake gluten-free?
    A5: Yes, you can make a gluten-free version of this cake by using gluten-free all-purpose flour. Be sure to check the flour blend contains xanthan gum, or add 1/2 teaspoon if not.

    Q6: What if I want a richer sauce?
    A6: For a richer buttermilk sauce, you can add an extra tablespoon of butter or use heavy cream instead of water to make the sauce creamier.

    Q7: How do I know when the cake is done?
    A7: Check for doneness by inserting a toothpick into the center of the cake. If it comes out clean or with just a few crumbs, the cake is done. If it has wet batter on it, bake for a few more minutes and check again.

    See also Baked Chicken Wings with Spiced Potatoes
    Q8: Can I freeze this cake?
    A8: Yes! You can freeze the baked and cooled cake (without the sauce) for up to 3 months. To reheat, let the cake thaw at room temperature and then drizzle the fresh sauce before serving.

    Enjoy!
    This Classic Vanilla Butter Cake with Buttermilk Sauce is a sweet, indulgent dessert that will surely become a family favorite. The combination of the light, fluffy cake with the warm, buttery sauce is simply irresistible!

  •  Mediterranean-Style Stuffed Salmon 

     Mediterranean-Style Stuffed Salmon 

     Mediterranean-Style Stuffed Salmon 

    This Mediterranean-inspired stuffed salmon is bursting with sun-dried tomatoes, spinach, and feta, creating a flavor-packed, nutrient-rich dish. Perfect for an easy yet elegant dinner!

     Ingredients:

    ✔ 1 lb sockeye salmon fillet, cut into four ¼-lb fillets

    ✔ ½ cup sun-dried tomatoes, drained & chopped

    ✔ 3 cups baby spinach

    ✔ ½ cup feta cheese crumbles

    ✔ Sea salt, to taste

    ✔ 1 cup fresh basil (optional)

    ✔ 2 tsp Italian seasoning (optional)

     Instructions:

    1️⃣ Preheat oven to 350°F (175°C) and line a baking sheet with parchment paper.

    2️⃣ Heat chopped sun-dried tomatoes in a small saucepan over medium heat until they sizzle.

    3️⃣ Add spinach and cook until wilted, then remove from heat.

    4️⃣ Mix in feta cheese and a pinch of sea salt. Set aside.

    5️⃣ Slice each salmon fillet across the middle (leaving about ¼ to ½ inch attached) to create a pocket.

    6️⃣ Brush salmon with avocado oil & sprinkle with sea salt.

    7️⃣ Place fillets on the prepared baking sheet and stuff with the filling.

    8️⃣ Bake for 25-30 minutes until salmon is cooked through.

    9️⃣ Garnish with fresh basil (if using) & serve warm!


    Pair with a side of roasted vegetables or a quinoa salad for the ultimate Mediterranean meal!

  • Garlic Herb Compound Butter

    Garlic Herb Compound Butter

    Garlic Herb Compound Butter

    Garlic Herb Compound Butter is a simple yet flavorful addition to elevate any dish. Infused with fresh herbs, garlic, and a hint of spice, this butter is perfect for spreading on warm bread, melting over grilled meats, or tossing with roasted vegetables. It’s easy to prepare and can be stored for later use, making it a versatile staple in your kitchen.

    Total Time: 10 minutes (plus chilling time)
    Prep Time: 10 minutes
    ❄️ Chilling Time: 1 hour

    Ingredients:

    1 cup (2 sticks) unsalted butter, softened

    2 cloves garlic, minced

    2 tbsp fresh parsley, finely chopped

    1 tbsp fresh chives, finely chopped

    1 tsp crushed red pepper flakes (adjust to taste)

    1/2 tsp salt (optional, if using unsalted butter)

    1/2 tsp black pepper

    1 tsp lemon zest (optional for brightness)

    Instructions:

    In a mixing bowl, combine softened butter with garlic, parsley, chives, red pepper flakes, salt, black pepper, and lemon zest.

    Mix thoroughly until all ingredients are well incorporated.

    Place the butter mixture onto a sheet of parchment paper or plastic wrap.

    Roll into a log and twist the ends to secure.

    Refrigerate for at least 1 hour or until firm.

    Slice and use on grilled meats, vegetables, bread, or pasta.

    Tips for Making Garlic Herb Compound Butter

    Use High-Quality Butter: Opt for unsalted, high-fat butter for a rich and creamy texture. If using salted butter, adjust the added salt accordingly.

    Soften, Not Melt: Ensure the butter is softened at room temperature but not melted for easy mixing.

    Customize the Flavors: Experiment with different herbs and spices like thyme, rosemary, basil, or smoked paprika to create unique variations.

    Storage: Wrap tightly in parchment paper or plastic wrap and refrigerate for up to 2 weeks or freeze for up to 3 months.

    Serving Ideas: Use on grilled steak, roasted veggies, baked potatoes, seafood, or as a spread for bread and biscuits.

    Q/A – Common Questions

    Can I use dried herbs instead of fresh?
    ✔ Yes! Use 1 teaspoon of dried herbs for every 1 tablespoon of fresh since dried herbs are more concentrated.

    How do I soften butter quickly?
    ✔ Cut it into small cubes and let it sit at room temperature for 15-20 minutes, or microwave on low power in 5-second intervals.

    Can I make this butter dairy-free?
    ✔ Yes! Substitute regular butter with vegan butter or coconut oil for a dairy-free alternative.

    Can I add cheese to this butter?
    ✔ Absolutely! Parmesan or blue cheese can add extra depth of flavor—just mix in finely grated cheese.

    Garlic Herb Compound Butter – Nutrition Information (Per 1 tablespoon serving)

    Calories: ~100 kcal

    Total Fat: ~11g

    Saturated Fat: ~7g

    Cholesterol: ~30mg

    Sodium: ~30-50mg (depends on added salt)

    Carbohydrates: ~0.2g

    Sugars: 0g

    Protein: ~0.1g

    Note: These values are approximate and can vary based on the type of butter and specific ingredients used. Adjust sodium levels based on whether you use salted or unsalted butter.


  • Peanut and Date Energy Balls

    Peanut and Date Energy Balls

    Peanut and Date Energy Balls
    Peanut and Date Energy Balls are a wholesome and satisfying snack made from two simple ingredients: roasted peanuts and seedless dates. These energy balls are packed with natural sweetness, protein, and healthy fats, making them the perfect snack to fuel your day. Ideal for a quick breakfast, a post-workout snack, or just as a healthy treat during the day, these energy balls are easy to make and require minimal ingredients and effort. Coated in sesame seeds, they also offer a satisfying crunch and an added boost of nutrition. These energy balls provide a natural energy source, without refined sugars or artificial ingredients.

    Preparation, Cook, and Total Times
    Preparation Time: 15 minutes
    Cooking Time: 0 minutes (no cooking required)
    Total Time: 15 minutes
    Cuisine
    This recipe is inspired by Middle Eastern and Mediterranean cuisines, where dates and nuts are commonly used as ingredients for snacks and desserts. The natural sweetness of dates paired with the rich flavor of peanuts creates a perfect balance of flavors. The sesame seed coating is a common addition in many Mediterranean snacks, providing a crunchy texture and nutty taste.

    Full List of Ingredients
    2 cups of roasted peanuts
    2 cups of seedless dates
    Sesame seeds (for coating)
    Step-by-Step Cooking Directions
    1. Prepare the Peanuts
    Start by roasting the peanuts if they are not already roasted. Roasting peanuts intensifies their flavor and gives them a rich, slightly smoky taste that pairs perfectly with the sweetness of dates. Once roasted, crush the peanuts using a food processor or by hand. You want to achieve a coarse, smooth texture that holds together without being too fine. This will help the energy balls bind together and maintain their shape.

    2. Prepare the Dates
    Take your seedless dates and pit them if necessary. Dates are naturally sticky, which helps them hold the mixture together. If your dates are a bit dry, soak them in warm water for about 5-10 minutes to soften them up. After soaking, mash the dates using a fork or food processor until you get a smooth paste. The smooth texture will allow the dates to combine seamlessly with the crushed peanuts, creating a sticky dough for the energy balls.

    3. Combine Peanuts and Dates
    In a large bowl, combine the crushed peanuts and mashed dates. Use your hands to knead the mixture together, ensuring the ingredients are thoroughly incorporated. The dough should be sticky but firm enough to hold its shape when you roll it into balls. If the mixture is too dry, add a bit more date paste. If it’s too sticky, add more crushed peanuts.

    4. Shape the Balls
    Once the mixture is ready, take small portions of the dough and roll them into balls about the size of a walnut. Press gently but firmly to form uniform balls. You can make them as large or small as you like, but keeping them around the size of a golf ball is ideal for easy snacking.

    5. Coat with Sesame Seeds
    Place sesame seeds in a shallow bowl. Roll each peanut and date ball in the sesame seeds, ensuring they are evenly coated. The sesame seeds not only add a delightful crunch to the outside of the energy balls but also provide additional nutrients like calcium, iron, and magnesium.

    6. Serve and Store
    Once the energy balls are coated, they are ready to be served. You can enjoy them right away, or store them in an airtight container. These energy balls can be kept at room temperature for about 2-3 days, or stored in the refrigerator for up to a week. They can also be stored in the freezer for longer shelf life—simply pull them out when you need a quick snack.

    Nutritional Information (Per Serving)
    Calories: 150 kcal
    Protein: 5 g
    Carbohydrates: 18 g
    Fat: 8 g
    Fiber: 3 g
    Sugars: 12 g
    Sodium: 2 mg
    Cholesterol: 0 mg
    The Origins and Popularity of the Recipe
    Energy balls, also known as protein balls or bliss balls, have gained popularity in recent years as a healthy and convenient snack. They are commonly made with a base of dried fruits, nuts, and seeds, making them a great source of natural energy. The combination of peanuts and dates is especially popular in Middle Eastern and Mediterranean cuisine, where both ingredients are used in a variety of dishes. Dates have long been a staple food in the region due to their natural sweetness and energy-boosting properties. Peanuts, on the other hand, are widely consumed in many countries and provide a good source of protein and healthy fats. The addition of sesame seeds gives these energy balls a crunchy texture and is often used in Middle Eastern snacks.

    Reasons Why You’ll Love This Recipe
    Quick and Easy: With only three main ingredients and minimal preparation time, these energy balls come together in just minutes.
    Naturally Sweet: Sweetened only with dates, these energy balls provide a natural, unrefined source of sugar, making them a healthier alternative to many store-bought snacks.
    Portable: These energy balls are easy to take on the go. Pack them in your bag for a mid-morning or afternoon snack to keep you energized throughout the day.
    Nutritious: Packed with protein from peanuts, fiber from dates, and healthy fats from sesame seeds, these energy balls are a balanced snack to fuel your body.
    Customizable: This recipe is highly customizable. You can add extra ingredients like dried fruits, coconut flakes, or chocolate chips to suit your taste.
    Health Benefits
    Natural Energy: Dates are a natural source of quick energy, thanks to their high carbohydrate content, particularly in the form of sugars like glucose, fructose, and sucrose. Combined with the protein and healthy fats from peanuts, these energy balls provide sustained energy.
    Rich in Protein: Peanuts are an excellent source of plant-based protein, which is essential for muscle repair, tissue growth, and immune function.
    High in Fiber: Both peanuts and dates are high in fiber, which aids in digestion, helps regulate blood sugar levels, and keeps you feeling full longer.
    Packed with Healthy Fats: Peanuts and sesame seeds provide healthy fats, which are important for maintaining brain health, regulating hormones, and supporting cardiovascular health.
    Antioxidants: Dates and sesame seeds are rich in antioxidants, which help fight oxidative stress and support overall health.
    Serving Suggestions
    As a Snack: These energy balls are the perfect snack to keep you fueled between meals. Grab one or two to enjoy as a mid-morning or afternoon pick-me-up.
    Pre/Post-Workout: The combination of protein, healthy fats, and carbohydrates makes these energy balls an ideal pre- or post-workout snack to replenish your energy.
    For a Quick Breakfast: Pair these energy balls with a glass of milk or a smoothie for a quick and balanced breakfast that will keep you satisfied until lunchtime.
    As a Treat: Serve these energy balls at parties or gatherings as a healthy and delicious alternative to traditional sugary desserts.
    Cooking Tips
    Use Fresh Dates: If your dates are dry, soaking them in warm water before mashing will help them blend more easily with the peanuts.
    Adjust the Sweetness: If you prefer your energy balls sweeter, you can add a small amount of honey, maple syrup, or agave syrup to the mixture.
    Store Properly: These energy balls can be stored at room temperature for up to 3 days, but refrigerating them will keep them fresher for longer. They also freeze well for up to 2 months.
    Roll Evenly: When rolling the balls, make sure to keep them uniform in size so they cook evenly, and they’re easy to store and grab when needed.
    Variations to Try
    Add Dried Fruits: Incorporate dried fruits like raisins, cranberries, apricots, or figs into the mixture for added flavor and texture.
    Chocolate Chip Energy Balls: Stir in some dark chocolate chips or cacao nibs for a sweet treat that also adds antioxidants.
    Coconut Energy Balls: Roll the balls in shredded coconut in addition to or instead of sesame seeds for a tropical twist.
    Nut Butter Version: If you prefer a creamier texture, add a tablespoon of almond or peanut butter to the mixture.
    Conclusion
    Peanut and Date Energy Balls are a quick, easy, and nutritious snack that can be enjoyed at any time of day. They are packed with natural ingredients that provide sustained energy and essential nutrients, making them the perfect snack for busy individuals who want to maintain a healthy diet. With minimal ingredients and preparation time, these energy balls are not only delicious but also a great alternative to many store-bought snacks. Whether you’re on the go or enjoying a quiet moment at home, these energy balls will keep you energized and satisfied.

  • Italian Lemon Cake: A Citrusy Slice of Heaven

    Italian Lemon Cake: A Citrusy Slice of Heaven

    Italian Lemon Cake: A Citrusy Slice of Heaven

    The Story Behind the Cake

    Imagine a dessert that captures the essence of Italian sunshine – bright, refreshing, and utterly irresistible. This Italian Lemon Cake is more than just a recipe; it’s a culinary journey that transforms simple ingredients into a masterpiece of flavor and texture. Perfect for those who love a touch of citrus in their desserts, this cake comes together in just 15 minutes and fills your kitchen with an intoxicating aroma.

    Ingredients

    For the Lemon Pudding Filling:

    • Zest of 1 lemon
    • 1 large egg
    • 90g (1/2 cup) sugar
    • 1 tbsp cornstarch
    • 1 tbsp all-purpose flour
    • 400 ml (2 cups) milk

    For the Cake Batter:

    • 3 large eggs
    • Pinch of salt
    • 180g (1 cup) sugar
    • 120 ml (1/2 cup) vegetable oil
    • 90 ml (2/5 cup) milk
    • Zest of 1 orange or lemon
    • 290g (almost 2 cups) all-purpose flour
    • 2 tsp baking powder
    • 50 ml (1/4 cup) lemon juice

    For Finishing:

    • Powdered sugar for dusting

    Step-by-Step Instructions

    1. Prepare the Lemon Pudding
      • In a saucepan, combine egg, sugar, cornstarch, and flour
      • Add milk and lemon zest
      • Whisk thoroughly
      • Cook over medium heat
      • Stir constantly until mixture comes to a boil
      • Remove from heat and let cool slightly
    2. Make the Cake Batter
      • Preheat oven to 180°C (360°F)
      • In a large mixing bowl, crack 3 eggs
      • Add a pinch of salt
      • Beat in sugar until light and fluffy
      • Slowly incorporate vegetable oil
      • Pour in milk
      • Add orange or lemon zest
      • Sift flour and baking powder
      • Gradually mix dry ingredients into wet
      • Stir in lemon juice
      • Mix until just combined
    3. Assemble and Bake
      • Grease a 24 cm (9-inch) round baking dish
      • Pour half the cake batter into the dish
      • Spread lemon pudding evenly over the batter
      • Cover with remaining cake batter
      • Bake for 40 minutes
      • Check doneness with a toothpick
      • Toothpick should come out clean
    4. Finish and Serve
      • Remove from oven
      • Let cool in pan for 10 minutes
      • Turn out onto a serving plate
      • Dust generously with powdered sugar
      • Serve warm or at room temperature

    Nutritional Information

    Per Serving:

    • Calories: 320
    • Protein: 6g
    • Carbohydrates: 45g
    • Fat: 14g
    • Fiber: 1g

    Cooking Time:

    • Prep: 15 minutes
    • Cooking: 40 minutes
    • Total: 55 minutes

    Servings: 8-10 slices

    Pro Cooking Tips and Tricks

    • Use room temperature eggs for better mixing
    • Zest citrus fruits before juicing
    • Don’t overmix the batter to keep cake tender
    • Check cake doneness early to prevent overbaking
    • Let pudding cool slightly to prevent scrambling eggs

    Recipe Variations and Substitutions

    • Gluten-Free Option:
      • Use gluten-free flour blend
      • Add 1/2 tsp xanthan gum
    • Dairy-Free Modification:
      • Replace milk with almond or coconut milk
      • Use coconut cream for pudding
    • Flavor Variations:
      • Swap lemon for orange zest
      • Add a splash of vanilla extract
      • Incorporate almond extract for depth

    Frequently Asked Questions

    Q1: Can I make this cake ahead of time? A: Yes! It keeps well at room temperature for 2-3 days.

    Q2: How do I store the cake? A: Cover loosely and store at room temperature.

    Q3: Can I freeze this cake? A: Yes, wrap tightly and freeze for up to 1 month.

    Q4: What if I don’t have a 24 cm baking dish? A: Use a similar-sized round or square baking pan.

    Q5: Can I use bottled lemon juice? A: Fresh is best, but bottled works in a pinch.

    Storage and Make-Ahead Tips

    • Room Temperature: 2-3 days in airtight container
    • Refrigeration: Up to 5 days
    • Freezing: Whole cake or individual slices
    • Reheating: Warm briefly in oven or enjoy at room temperature

    Indulge in the zesty, creamy magic of this Italian Lemon Cake – a dessert that promises to transport you to the sun-drenched coast of Italy with every bite!

  • Japanese Apple Cake: A Heavenly 5-Minute Dessert Sensation

    Japanese Apple Cake: A Heavenly 5-Minute Dessert Sensation

    Japanese Apple Cake: A Heavenly 5-Minute Dessert Sensation

    The Story Behind the Cake

    Discover the magic of Japanese baking with this incredibly simple yet irresistible apple cake. Born from the art of minimalist cooking, this recipe transforms a handful of everyday ingredients into a moist, fragrant dessert that will tantalize your taste buds. Perfect for novice bakers and seasoned pastry chefs alike, this cake proves that delicious doesn’t have to mean complicated.

    Ingredients

    For the Cake Batter:

    • 3 large eggs (US) / 150g eggs (Europe)
    • 120g (1/2 cup + 1 tbsp) granulated sugar
    • 1/2 tsp vanilla sugar or vanilla extract
    • 80 ml (1/3 cup) vegetable oil
    • 100 ml (1/2 cup) milk
    • 1 tsp baking soda
    • 180g (1.5 cups) all-purpose flour
    • Zest of 1/2 lemon
    • Juice of 1/2 lemon

    For the Apple Filling:

    • 2 medium apples
    • 1 tbsp sugar
    • 1/2 tsp vanilla sugar or vanilla extract
    • Lemon zest

    For Serving (Optional):

    • Powdered sugar for dusting

    Step-by-Step Instructions

    1. Prepare the Batter
      • In a large mixing bowl, crack 3 eggs
      • Add granulated sugar and vanilla
      • Beat with a mixer for 2-3 minutes
      • Mixture should become light and fluffy
      • Gradually add vegetable oil
      • Pour in milk
      • Sprinkle baking soda
      • Add lemon zest and lemon juice
    2. Incorporate Flour
      • Sift flour to remove lumps
      • Add flour in two portions
      • Mix thoroughly until smooth
      • Avoid overmixing to keep cake tender
    3. Prepare Apple Filling
      • Peel and core apples
      • Cut into small, uniform cubes
      • Mix apple cubes with sugar
      • Add vanilla and lemon zest
      • Toss to coat evenly
    4. Assemble and Bake
      • Preheat oven to 170°C (340°F)
      • Grease a 24cm (9-inch) baking dish with butter
      • Pour half the cake batter into the dish
      • Distribute apple filling evenly
      • Cover with remaining batter
      • Bake for 35-40 minutes
      • Check with a toothpick for doneness
    5. Finish and Serve
      • Let cake cool in pan for 10 minutes
      • Turn out onto a serving plate
      • Dust with powdered sugar if desired
      • Serve warm or at room temperature

    Nutritional Information

    Per Serving:

    • Calories: 280
    • Protein: 5g
    • Carbohydrates: 40g
    • Fat: 12g
    • Fiber: 2g

    Cooking Time:

    • Prep: 5 minutes
    • Baking: 35-40 minutes
    • Total: 40-45 minutes

    Servings: 8-10 slices

    Pro Cooking Tips and Tricks

    • Use room temperature eggs for better mixing
    • Don’t overmix the batter to keep cake light
    • Dice apples uniformly for even distribution
    • Check cake doneness with a toothpick
    • Let cake cool slightly before removing from pan

    Recipe Variations and Substitutions

    • Gluten-Free Option:
      • Use gluten-free flour blend
      • Add 1/2 tsp xanthan gum
    • Dairy-Free Modification:
      • Replace milk with almond or oat milk
      • Use coconut oil instead of vegetable oil
    • Fruit Variations:
      • Substitute apples with pears
      • Add cinnamon for extra warmth
      • Try mixed berries for a different flavor

    Frequently Asked Questions

    Q1: Can I make this cake ahead of time? A: Yes! It keeps well at room temperature for 2-3 days.

    Q2: How do I store the cake? A: Cover loosely and store at room temperature or refrigerate.

    Q3: Can I freeze this cake? A: Yes, wrap tightly and freeze for up to 1 month.

    Q4: What if I don’t have a mixer? A: Whisk vigorously by hand for about 5 minutes.

    Q5: Can I use different apples? A: Yes! Use any firm baking apples like Granny Smith or Honeycrisp.

    Storage and Make-Ahead Tips

    • Room Temperature: 2-3 days in airtight container
    • Refrigeration: Up to 5 days
    • Freezing: Whole cake or individual slices
    • Reheating: Warm briefly in oven or microwave

    Indulge in the simplicity and deliciousness of this Japanese-inspired apple cake – a true celebration of straightforward, delightful baking!

  • Wholesome Carrot Apple Oatmeal Cake

    Wholesome Carrot Apple Oatmeal Cake

    Wholesome Carrot Apple Oatmeal Cake

    The Story Behind the Dish

    In the world of wholesome baking, some recipes stand out as true gems of nutrition and flavor. This Carrot Apple Oatmeal Cake is a celebration of natural ingredients, bringing together the earthy sweetness of carrots, the brightness of apples, and the hearty texture of oats. More than just a dessert, it’s a testament to how healthy eating can be both delicious and satisfying.

    Ingredients

    • Rolled Oats: 1 cup (130 grams / 4.6 oz)
    • Natural Yogurt: 1 cup (250 ml / 8.45 fl oz)
    • Eggs: 2 large
    • Honey or Maple Syrup: 2 tablespoons (50 grams / 1.7 oz)
    • Carrots: 2 medium (approximately 300 grams / 10.5 oz)
    • Apples: 2 medium (approximately 320 grams / 11.3 oz)
    • Walnuts: For topping (amount to taste)

    Step-by-Step Cooking Instructions

    1. Prepare the Ingredients
      • Preheat oven to 350°F (175°C)
      • Grease a 9-inch (23 cm) round cake pan
      • Wash and peel carrots and apples
      • Grate carrots using a box grater
      • Core and finely dice apples
    2. Mix Wet Ingredients
      • In a large mixing bowl, crack two eggs
      • Add natural yogurt
      • Pour in honey or maple syrup
      • Whisk until well combined and smooth
    3. Combine Dry Ingredients
      • In a separate bowl, measure out rolled oats
      • Add grated carrots and diced apples
      • Mix thoroughly to distribute evenly
    4. Create the Cake Batter
      • Pour wet ingredients into the dry ingredient mixture
      • Stir gently until just combined
      • Avoid overmixing to keep the cake tender
      • Batter will be thick and slightly chunky
    5. Prepare for Baking
      • Transfer batter to the prepared cake pan
      • Spread evenly with a spatula
      • Roughly chop walnuts
      • Sprinkle chopped walnuts over the top of the batter
    6. Bake to Perfection
      • Place in preheated oven
      • Bake for 35-40 minutes
      • Check doneness by inserting a toothpick
      • Toothpick should come out clean or with a few moist crumbs
      • Top should be golden brown and slightly springy
    7. Cool and Serve
      • Remove from oven
      • Let cool in pan for 10 minutes
      • Transfer to a wire rack
      • Allow to cool completely before slicing

    Nutritional Information

    • Servings: 8-10 slices
    • Preparation Time: 20 minutes
    • Cooking Time: 40 minutes
    • Total Time: 60 minutes

    Nutritional Values (per serving):

    • Calories: 180-220
    • Protein: 6-8g
    • Carbohydrates: 25-30g
    • Fat: 8-10g
    • Fiber: 3-4g
    • Vitamin A: 50% Daily Value
    • Vitamin C: 15% Daily Value

    Cooking Tips and Tricks

    • Use old-fashioned rolled oats for best texture
    • Squeeze out excess moisture from grated carrots
    • Choose sweet, crisp apples like Gala or Honeycrisp
    • Toast walnuts briefly for enhanced flavor
    • Use room temperature ingredients for even mixing

    Variations and Substitutions

    • Gluten-Free Option: Use certified gluten-free oats
    • Vegan Alternative: Replace eggs with flax eggs
    • Nut-Free Version: Omit walnuts or replace with seeds
    • Spice It Up: Add cinnamon, nutmeg, or ginger
    • Protein Boost: Add a scoop of protein powder to batter

    Frequently Asked Questions

    Q1: Can I use quick oats instead of rolled oats? A: Rolled oats are recommended for better texture, but quick oats can work in a pinch.

    Q2: How do I store this cake? A: Store in an airtight container at room temperature for 2-3 days or refrigerate for up to a week.

    Q3: Can I freeze this cake? A: Yes, wrap tightly and freeze for up to 1 month. Thaw at room temperature before serving.

  • Apple Jam Cake: A Moist and Delectable Dessert

    Apple Jam Cake: A Moist and Delectable Dessert

    Apple Jam Cake: A Moist and Delectable Dessert

    The Story Behind the Dish

    In the world of home baking, some recipes are more than just a collection of ingredients—they’re a narrative of comfort, tradition, and pure joy. This Apple Jam Cake is one such masterpiece, bridging the gap between rustic home cooking and elegant dessert. Inspired by classic European baking, it transforms simple ingredients into a luxurious treat that speaks to the heart of home cuisine.

    Ingredients

    For the Apple Filling

    • Apple: 1 medium (approximately 150 grams / 5.3 oz)
    • Lemon Juice: From half a lemon (about 15 ml / 1 tablespoon)
    • Granulated Sugar: 1 tablespoon (15 grams)
    • Butter: 1 tablespoon (15 grams)
    • Ground Cinnamon: Pinch
    • Apricot Jam: 1 tablespoon (15 grams)

    For the Cake Batter

    • Eggs: 3 large
    • Granulated Sugar: 150 grams (3/4 cup)
    • Salt: Pinch
    • Vanilla Sugar: 8 grams (1 packet or 2 teaspoons vanilla extract)
    • Vegetable Oil: 120 ml (1/2 cup)
    • Milk: 150 ml (2/3 cup)
    • All-Purpose Flour: 250 grams (2 cups)
    • Baking Powder: 16 grams (1 tablespoon)
    • Powdered Sugar: For decoration (to taste)

    Step-by-Step Cooking Instructions

    1. Prepare the Apple Filling
      • Wash and peel the apple
      • Core and dice into small cubes
      • Squeeze lemon juice over apple pieces
      • In a small pan, melt butter
      • Add diced apples, sugar, and cinnamon
      • Sauté for 3-4 minutes until slightly softened
      • Remove from heat and let cool
      • Stir in apricot jam
    2. Make the Cake Batter
      • Preheat oven to 350°F (175°C)
      • Grease a 9×13 inch (23×33 cm) baking pan
      • In a large mixing bowl, crack eggs
      • Add granulated sugar and salt
      • Whisk until light and fluffy
      • Mix in vanilla sugar or extract
      • Gradually pour in vegetable oil while whisking
      • Add milk and continue to mix
    3. Combine Dry Ingredients
      • In a separate bowl, sift flour
      • Add baking powder
      • Gently fold dry ingredients into wet mixture
      • Mix until just combined
      • Be careful not to overmix
    4. Assemble the Cake
      • Pour half the batter into prepared pan
      • Spread cooled apple filling evenly
      • Cover with remaining batter
      • Use a spatula to ensure even distribution
    5. Bake to Perfection
      • Place in preheated oven
      • Bake for 30-35 minutes
      • Check doneness with a toothpick
      • Toothpick should come out clean
      • Top should be golden brown
    6. Finish and Serve
      • Remove from oven
      • Let cool in pan for 10 minutes
      • Transfer to wire rack
      • Once completely cool, dust with powdered sugar
      • Cut into squares

    Nutritional Information

    • Servings: 12-15 pieces
    • Preparation Time: 25 minutes
    • Cooking Time: 35 minutes
    • Total Time: 60 minutes

    Nutritional Values (per serving):

    • Calories: 220-250
    • Protein: 3-4g
    • Carbohydrates: 30-35g
    • Fat: 10-12g
    • Fiber: 1g
    • Vitamin C: 2% Daily Value
    • Calcium: 4% Daily Value

    Cooking Tips and Tricks

    • Use room temperature ingredients
    • Don’t overmix the batter to keep cake tender
    • Ensure apple filling is not too wet
    • Check oven temperature for even baking
    • Let cake cool completely before cutting
    • Use a sharp knife for clean slices

    Variations and Substitutions

    • Gluten-Free Option: Use gluten-free flour blend
    • Dairy-Free Alternative: Replace milk with almond milk
    • Fruit Variations: Substitute apples with pears or peaches
    • Spice Twist: Add nutmeg or cardamom
    • Nut Addition: Sprinkle chopped walnuts on top

    Frequently Asked Questions

    Q1: Can I make this cake ahead of time? A: Yes, it keeps well for 2-3 days in an airtight container.

    Q2: How do I store the cake? A: Store at room temperature, covered. Refrigerate if keeping longer than 2 days.

    Q3: Can I freeze this cake? A: Yes, wrap tightly and freeze for up to 1 month.

    Q4: What if I don’t have vanilla sugar? A: Use vanilla extract or vanilla bean paste.

    Q5: Can I reduce the sugar? A: Slightly, but it may affect texture and browning.

    Storage and Make-Ahead Tips

    • Cool completely before storing
    • Cover with plastic wrap or in airtight container
    • Room temperature: 2-3 days
    • Refrigerator: Up to 5 days
    • Freeze for longer storage
    • Bring to room temperature before serving

    Savor the delightful blend of flavors in this Apple Jam Cake – a true testament to the magic of simple, heartwarming baking!

  • Bread Substitute with 3 Ingredients Prepared in Seconds

    Bread Substitute with 3 Ingredients Prepared in Seconds

    Bread Substitute with 3 Ingredients Prepared in Seconds

    Ingredients

    • 450 grams of flour (16 oz)
    • 2 tablespoons of vegetable oil (30 ml)
    • 240 ml of hot water (1 cup)
    • Salt (to taste)

    Step-by-Step Instructions

    1. Preparing the Dough

    Sift the Flour: Begin by sifting 450 grams of flour into a large mixing bowl. This step ensures that your flour is light and free of lumps, which is crucial for achieving a smooth, pliable dough.

    Add Oil, Salt, and Water: Next, add 2 tablespoons of vegetable oil and a pinch of salt to the flour. Gradually pour in 240 ml of hot water while stirring the mixture with a wooden spoon or your hands. The hot water helps to bind the ingredients and creates a dough that’s easy to work with.

    2. Kneading and Resting the Dough

    Knead the Dough: Once the ingredients are combined, transfer the dough onto a lightly floured surface. Knead it for about 5-7 minutes until it becomes smooth and elastic. The kneading process is essential for developing the gluten, which gives the bread its structure and chewiness.

    Form a Ball: Shape the kneaded dough into a ball and place it in a breakfast bag or wrap it in plastic wrap. Let it rest for 20 minutes. Resting the dough allows the gluten to relax, making it easier to roll out later.

    3. Shaping and Resting the Dough Balls

    Divide the Dough: After the initial rest period, divide the dough into eight equal parts. Shape each part into a small ball.

    Rest Again: Cover the dough balls with a breakfast bag or a damp cloth and let them rest for another 10 minutes. This second rest period ensures that the dough is easy to roll out without springing back.

    4. Rolling Out the Dough

    Roll Thin: On a lightly floured surface, roll each dough ball into a thin sheet. Aim for a diameter of about 6-8 inches, depending on how thick you prefer your bread substitute. The thinner the dough, the crisper the bread will be.

    5. Cooking the Bread Substitute

    Roast in a Dry Pan: Heat a dry, non-stick pan over medium-high heat. Place one rolled-out dough sheet in the pan. Cook for about 1-2 minutes on each side, or until golden brown spots appear. The dough will puff up as it cooks, creating a light, airy texture.

    Cool and Serve: Once cooked, remove the bread from the pan and let it cool slightly on a wire rack. Repeat the process with the remaining dough balls. You can cut the bread sheets in half crosswise and fill them with your favorite ingredients for a delicious snack or meal.

    Tips for the Perfect Bread Substitute

    • Use Hot Water: Hot water is key to making the dough pliable and easy to work with. It also helps the bread puff up nicely when cooked.
    • Resting Time: Don’t skip the resting times. Resting allows the gluten to relax, making it easier to roll out the dough and preventing it from shrinking during cooking.
    • Thin Rolling: Roll the dough as thin as possible without tearing it. Thinner dough results in a crisper bread substitute.
    • Cooking Heat: Ensure your pan is adequately heated before adding the dough. This ensures even cooking and prevents the bread from becoming too dry.

    Versatile Serving Suggestions

    This bread substitute is incredibly versatile and can be used in a variety of ways. Here are a few ideas to get you started:

    • Sandwiches: Use the bread substitute as a base for your favorite sandwich fillings. Its light, airy texture pairs well with meats, cheeses, and vegetables.
    • Wraps: Roll up grilled chicken, fresh veggies, and a drizzle of sauce for a quick and healthy wrap.
    • Dipping: Cut the bread into wedges and serve with hummus, tzatziki, or your favorite dip.
    • Breakfast: Top with scrambled eggs and avocado for a satisfying breakfast option.
    • Pizza Base: Use the bread substitute as a quick pizza base. Add your favorite toppings and bake until the cheese is melted and bubbly.

    Conclusion

    Creating a delicious bread substitute at home has never been easier. With just three simple ingredients and a few minutes of your time, you can enjoy fresh, homemade bread that’s perfect for any meal. Whether you’re making sandwiches, wraps, or simply enjoying it on its own, this versatile recipe is sure to become a favorite in your kitchen.