Category: quick and easy recipe

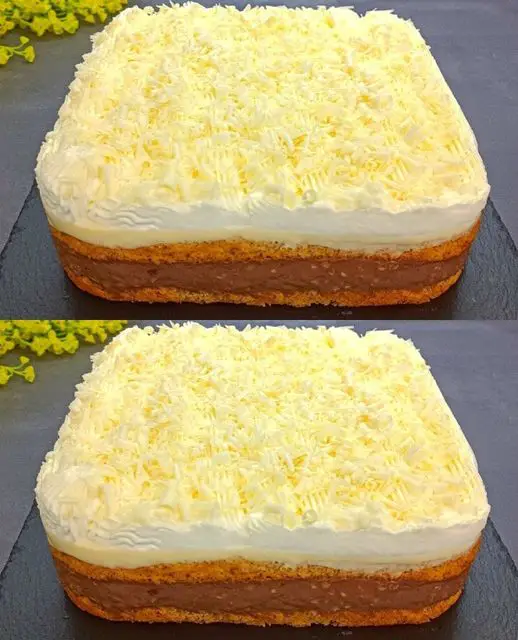
  • No-Bake Dessert in 5 Minutes: Layered Custard and Chocolate Delight

    No-Bake Dessert in 5 Minutes: Layered Custard and Chocolate Delight

    No-Bake Dessert in 5 Minutes: Layered Custard and Chocolate Delight

    Table of Contents

    Ingredients

    For the Custard:

    • 5 eggs (yolks separated from the whites)
    • 200 g (1 cup) sugar (divided into 150 g for the custard and 50 g for the chocolate layer)
    • 1 liter (4 ¼ cups) milk
    • 70 g (½ cup + 1 tbsp) corn starch
    • 200 g (7 oz) cookies (tea biscuits or digestive work best)
    • 40 g (⅓ cup) cocoa powder

    For the  Chocolate Ganache:

    • 100 g (3.5 oz) dark chocolate, finely chopped
    • 50 ml (3.4 tbsp) cream (heavy or whipping cream)

    Step-by-Step Instructions

    1. Prepare the Custard

    Start by making the base of the dessert: a smooth, rich custard. Separate the egg yolks from the whites and place the yolks in a large bowl. Add 150 g of sugar and whisk together until the mixture is pale and creamy. Gradually whisk in the corn starch, ensuring the mixture remains smooth and free of lumps.

    In a separate saucepan, heat 1 liter of milk over medium heat until it just starts to steam, but not boil. Slowly pour the hot milk into the egg mixture while whisking continuously to temper the eggs and prevent them from curdling.

    Once combined, return the mixture to the saucepan and cook over medium heat. Stir constantly until the custard thickens to a creamy consistency, about 5–7 minutes. Be sure to keep stirring to avoid any lumps or scorching on the bottom of the pan. Once the custard has thickened, remove it from heat.

    See also  Lemon cake that melts in your mouth! Cake in 15 minutes!

    2. Divide the Custard

    Divide the custard into two equal portions. Leave one half plain to create a vanilla custard layer.

    For the chocolate custard layer, take the second portion and mix in 40 g of cocoa powder and the remaining 50 g of sugar. Stir well until the cocoa powder is fully incorporated, and the custard is smooth and rich in color. Set both custards aside to cool slightly while you prepare the next step.

    3. Assemble the Dessert Layers

    Now it’s time to layer the dessert. Start by selecting a medium-sized baking dish (a rectangular or square dish works best for even layering).

    Begin by placing a layer of cookies at the bottom of the dish. If desired, you can dip the cookies lightly in milk to soften them, but this step is optional depending on how soft or firm you prefer the cookie layers.

    Next, pour the plain vanilla custard over the cookie layer and spread it evenly to cover all the cookies. Smooth the surface with a spatula for an even layer.

    Add a second layer of cookies on top of the vanilla custard, following the same process.

    After the second layer of cookies, pour the chocolate custard over the top. Spread it evenly, ensuring that the cookies are fully covered. This chocolate layer will add a rich, decadent contrast to the vanilla custard and cookies.

    4. Prepare the Chocolate Ganache

    While the custard layers are cooling slightly, prepare the ganache that will top the dessert.

    In a small saucepan, heat 50 ml of cream until it just starts to simmer. Remove it from the heat and add the chopped 100 g dark chocolate. Stir until the chocolate melts completely, forming a smooth and glossy ganache.

    See also  The Most Delicious Oatmeal Cookies: A Simple and Delicious Recipe

    Pour the chocolate ganache over the top of the chocolate custard layer, spreading it evenly with a spatula to create a shiny, indulgent finish.

    5. Chill the Dessert

    Place the assembled dessert in the refrigerator for at least 3–4 hours, or preferably overnight, to allow the layers to fully set and the flavors to meld together. The cooling process is crucial to achieve the perfect texture, as the custards will firm up, and the cookies will soften slightly.

    6. Serve and Enjoy

    Once the dessert has fully set, remove it from the refrigerator and cut it into squares or slices. Serve chilled for the best texture and flavor. This dessert is creamy, chocolatey, and perfectly satisfying without the need for baking—ideal for any time you need a quick, no-fuss treat.

    Nutrition Information (Per Serving)

    • Serving size: 1 portion (makes 8 servings)
    • Calories: 320 kcal
    • Fat: 16 g
    • Saturated Fat: 9 g
    • Carbohydrates: 40 g
    • Sugar: 28 g
    • Protein: 6 g
    • Fiber: 2 g
    • Cholesterol: 120 mg
    • Sodium: 70 mg
  • Apple Oatmeal Muffins

    Apple Oatmeal Muffins

    Apple Oatmeal Muffins

    Table of Contents

    Ingredients:

      • 1 cup (100 g) oatmeal
      • ½ cup (120 ml) milk of your choice (e.g., almond milk, cow’s milk, etc.)
      • 2 apples, peeled, cored, and chopped
      • 1 tbsp butter
      • 1 tsp vanilla extract
      • A pinch of salt
    • 2 eggs
    • ¼ cup (30 g) walnuts, chopped

    Instructions:

      1. Prepare the Oats:
        • In a bowl, combine the oatmeal with the milk of your choice. Let it sit for about 5-10 minutes, allowing the oats to absorb the milk and soften.
      2. Cook the Apples:
          • In a medium skillet, melt 1 tablespoon of butter over medium heat.


        • Add the chopped apples and sauté for about 10 minutes, or until the apples are soft and slightly caramelized. Stir in a pinch of salt and vanilla extract for added flavor.
      3. Prepare the Muffin Mixture:
          • Preheat your oven to 360°F (180°C).


        • In a large bowl, whisk the eggs. Add the softened oatmeal mixture, cooked apples, and chopped walnuts. Stir everything until well combined.
      4. Bake the Muffins:
          • Grease a muffin tin or line it with paper liners.


        • Evenly divide the muffin mixture among the prepared cups.
        • Bake in the preheated oven for 20-25 minutes, or until the muffins are golden brown and a toothpick inserted into the center comes out clean.
    1. Cool and Serve:
      • Let the muffins cool in the tin for a few minutes before transferring them to a wire rack to cool completely.

    Serving Suggestions:

    • Serve the muffins warm with a pat of butter or drizzle of honey for extra sweetness.
    • They make a great on-the-go breakfast or snack option.

    Cooking Tips:

      • For added flavor, sprinkle cinnamon or nutmeg into the muffin batter.
      • You can substitute walnuts with other nuts like almonds or pecans.
      • Make these muffins dairy-free by using plant-based butter and milk.
    See also  Grandma’s Impressive Chicken Thighs Dinner

    Nutritional Benefits:

      • Oatmeal is a great source of fiber, which aids digestion.
      • Apples are rich in vitamins and antioxidants.
    • Walnuts provide healthy fats and protein, adding a satisfying crunch.

    Dietary Information:

      • This recipe is naturally vegetarian.
    • To make it gluten-free, use certified gluten-free oats.

    Storage Information:

      • Refrigerator: Store any leftover muffins in an airtight container in the fridge for up to 3 days.
    • Freezing: You can freeze these muffins for up to 1 month. Simply reheat in the oven or microwave when ready to eat.
  • Quick No-Knead Wholemeal Bread

    Quick No-Knead Wholemeal Bread

    Quick No-Knead Wholemeal Bread

    Table of Contents

    Ingredients

      • 400 ml warm water
      • 2 tablespoons apple cider vinegar
      • 13 g dry yeast (about 1 tablespoon)
      • 200 g wholemeal flour (1 2/3 cups)
      • 300 g bread flour (2 1/2 cups)
      • 2 teaspoons salt (12 g)
      • 20 ml olive oil (1 1/3 tablespoons)
      • 1 tablespoon sesame seeds (optional)
      • 1 tablespoon black cumin seeds (optional)

    Directions

      1. Prepare the Dough:
        • In a large steel pot or glass bowl, mix warm water, apple cider vinegar, and dry yeast. Stir until the yeast is dissolved.
      2. Add Dry Ingredients:
          • Add the wholemeal flour, bread flour, and salt to the yeast mixture. Stir with a spatula or spoon until combined; no kneading is required.


      3. Incorporate Olive Oil:
        • Pour in the olive oil and mix until the dough absorbs it fully. The dough will be sticky, which is normal.
      1. Shape the Dough:
        • Sprinkle a little flour on top of the dough to make it easier to handle. Transfer the dough to a 24 cm (9.5-inch) pan lined with baking paper. Use a small saucepan to gently press the dough into shape.
      2. Add Toppings:
          • Spray or sprinkle water onto the surface of the dough, which helps create a crispy crust. Spread the dough evenly in the pan and sprinkle with sesame and black cumin seeds if using. Make a few shallow scratches or cuts on the surface for decoration.


      3. Bake:
        • Place the pan in a cold oven (do not preheat) and bake at 200°C (392°F) for 50-55 minutes until the bread is golden brown with a crispy crust.
    1. Cool and Serve:
      • Remove from the oven and let the bread cool slightly before slicing. Enjoy warm or at room temperature.

    Serving Suggestions

      • Pair with soups, salads, or simply enjoy with butter and jam for breakfast.
    • This bread makes excellent sandwiches or toast.

    Cooking Tips

      • Use Fresh Yeast: Ensure your yeast is active by checking the expiration date. If in doubt, let it sit in warm water with a pinch of sugar for 5 minutes to see if it foams.
      • Adjust Flour as Needed: Depending on the humidity and flour type, you might need a bit more or less. The dough should be sticky but manageable.
    • Add Seeds or Nuts: Customize with sunflower seeds, pumpkin seeds, or chopped nuts for added texture.

    Nutritional Benefits

      • Wholemeal Flour: Adds fiber and nutrients, making this bread healthier and more filling.
      • Olive Oil: A source of healthy fats, adding richness and moisture to the bread.

    Dietary Information

    • Vegan-Friendly: This bread contains no animal products.
    • Low-Sugar: Contains only natural sugars from the flour, making it suitable for low-sugar diets.

    Nutritional Facts (per slice, approximately 12 slices per loaf)

      • Calories: 150
      • Protein: 4 g
      • Carbohydrates: 25 g
      • Fat: 4 g

    Storage Tips

    • Room Temperature: Store in a bread box or sealed bag at room temperature for up to 3 days.
    • Freezing: Wrap in plastic wrap and freeze for up to 3 months. Thaw at room temperature before serving.

    Why You’ll Love This Recipe

      • Easy and Quick: No need to knead or wait long hours for rising; perfect for last-minute baking.
    • Crispy and Soft: Achieves the ideal balance of a crispy crust and a soft, airy inside.
    • Versatile: Great for any meal, from breakfast to dinner.
    • Minimal Ingredients: Uses pantry staples, making it accessible and cost-effective.
  • Try this Very Easy Lemon Cake, a daily delight!

    Try this Very Easy Lemon Cake, a daily delight!

    Try this Very Easy Lemon Cake, a daily delight!

    Table of Contents

    Ingredients:
    • 4 eggs
    • 1 cup (200 grams) sugar
    • 1 lemon (juice of 1 lemon and zest)
    • 1 cup (200 milliliters) vegetable oil
    • 4/5 cup (200 milliliters) milk
    • 4 teaspoons baking powder (20 grams)
    • 2+1/2 cups (360 grams) all-purpose flour
    Instructions:
    1. In a bowl, whisk eggs and sugar until creamy.
    2. Add lemon juice, lemon zest, vegetable oil, and milk. Mix well.
    3. Gradually add baking powder and flour, stirring until smooth.
    4. Pour the mixture into a buttered and floured 10-inch (25 centimeters) cake pan.
    5. Preheat the oven to 180°C (356°F) and bake for 30 minutes.
    6. Don’t forget to subscribe and activate the bell for more recipes!
  • Flourless Carrot Cake Recipe: Indulgence Without Guilt

    Flourless Carrot Cake Recipe: Indulgence Without Guilt

    Flourless Carrot Cake Recipe: Indulgence Without Guilt

    Table of Contents

    Carrot cake has always been a beloved treat, but traditional recipes often come loaded with flour and sugar, making them less than ideal for those watching their carb intake. However, this flourless carrot cake recipe offers a healthier alternative without sacrificing taste or satisfaction. By using ground almonds instead of flour and natural sweeteners like honey, this cake is not only low in carbs but also packed with flavor and nutrients.

    Ingredients

    To whip up this delectable flourless carrot cake, you’ll need:

    • 7 ounces of carrots
    • 2 eggs
    • 2-3 tablespoons of honey
    • 1 teaspoon of baking soda
    • 2-3 drops of wine vinegar
    • 7 ounces of ground almonds
    • a pinch of cinnamon powder
    • pinch of salt

    For the cream:

    • 5.3 ounces of cottage cheese, at room temperature
    • 1 ounces of cow butter, at room temperature
    • 1 tablespoon of honey
    Preparation Method

    Let’s dive into the step-by-step process of making this delightful carrot cake:

    Step 1: Prepare the Carrots
    • Wash, peel, and cut the carrots into circles.
    • Put them in the bowl of a blender and grind until you get a smooth puree.
    Step 2: Mix the Ingredients
    • Separate the egg whites from the yolks.
    • Beat the egg yolks with honey until thick foam forms.
    • Mix ground almonds, cinnamon, and carrots with the egg mixture.
    • Dissolve baking soda in vinegar and add to the mixture.
    • In a separate bowl, beat egg whites with a pinch of salt until fluffy.
    • Gently fold egg whites into the carrot mixture.
    See also  Pico de gallo
    4. Baking the Cake
    • Preheat the oven to 160 degrees Celsius.
    • Grease a baking dish and line it with parchment paper.
    • Pour the cake batter into the dish and spread it evenly.
    • Bake for 40-45 minutes or until a toothpick inserted into the center comes out clean.
    • Allow the cake to cool completely before removing it from the dish.
    5. Making the Cream
    • In a bowl, combine cottage cheese, butter, and honey.
    • Mix until smooth and creamy.
    6. Serving Suggestions
    • Once the cake has cooled, spread the cream over the top.
    • For added indulgence, sprinkle grated chocolate or ground nuts on top.
    • Slice and serve with a cup of your favorite hot beverage.
    7. Health Benefits
    • This flourless carrot cake is low in carbs and high in fiber, making it a healthier option for those watching their carb intake.
    • Carrots are rich in beta-carotene, which is converted into vitamin A in the body and supports vision health.
    • Almonds are a good source of healthy fats, protein, and antioxidants, promoting heart health and reducing inflammation.
    8. Tips and Tricks
    • For a vegan version of this cake, you can replace the eggs with flax eggs.
    • Feel free to adjust the sweetness by adding more or less honey according to your taste preference.
    • Get creative with toppings! Try adding shredded coconut, chopped nuts, or a drizzle of maple syrup for extra flavor.
    9. Variations
    • Experiment with different spices like nutmeg or ginger for a unique flavor twist.
    • Add grated zucchini or chopped nuts for added texture and nutrition.
    10. Conclusion

    In conclusion, this flourless carrot cake recipe is a game-changer for anyone looking to enjoy a delicious treat without the guilt. With simple ingredients, easy preparation, and incredible flavor, it’s a win-win for your taste buds and your health. So why wait? Get baking and indulge in a slice of pure bliss today!

  • Only a couple of items needed! Potatoes are very tasty and you will want to cook them repeatedly!

    Only a couple of items needed! Potatoes are very tasty and you will want to cook them repeatedly!

    Only a couple of items needed! Potatoes are very tasty and you will want to cook them repeatedly!

    Table of Contents

    List of ingredients:

    2 big eggs

    200 milliliters of kefir

    180 grams of flour

    7 grams of baking powder

    2 big potatoes

    1 leek stalk

    100 grams of diced ham 100 grams of grated hard mozzarella cheese

    A lot of new dill

    Add salt and pepper according to your preference.

    Directions:

    Before baking: Heat your oven to 180°C (350°F). Grease a rectangular baking dish or cover it with parchment paper.

    Prepare the dough:

    In a big bowl, mix the eggs and kefir well.

    Put the flour and baking powder through a sieve into the egg mixture and mix well until the dough is smooth.

    Get the vegetables and ham ready:

    Peel and shred the potatoes. Cut the leek into thin slices.

    In another bowl, mix the grated potatoes, sliced leeks, and chopped ham. Season with salt and pepper according to your preference.

    Mix the ingredients together.

    Mix the potato mixture into the batter well so that all the ingredients are evenly spread.

    Put the cake together.

    Pour the mix into the baking dish that has been prepared. Distribute evenly.

    Put grated mozzarella cheese on top.

    Cook in the oven for around 40 to 45 minutes until the top is golden and crispy.

    Add a decoration and serve: Take out of the oven and allow to cool a bit. Sprinkle with freshly cut dill.

    See also  The most amazing cake delicious recipe

    Cut the food into square pieces and serve it while it’s still hot.

  • How to Make Broccoli and Cauliflower Delicious: A Spanish Twist

    How to Make Broccoli and Cauliflower Delicious: A Spanish Twist

    How to Make Broccoli and Cauliflower Delicious: A Spanish Twist

    Table of Contents

    In this article, we’ll explore a delicious recipe for broccoli and cauliflower, taught to me by a friend from Spain. This vegetarian dish is not only nutritious but also bursting with flavors that will tantalize your taste buds.

    Ingredients

    • 900 grams of broccoli
    • 450 grams of cauliflower
    • 5 cups of milk
    • Salt, to taste
    • Onion, to taste
    • 1 carrot
    • 1 bell pepper
    • 1 garlic clove
    • 2 tablespoons of olive oil
    • Parsley, to taste
    • 200 grams of red cherry tomatoes

    Preparation

    1. Begin by thoroughly cleaning and washing the broccoli and cauliflower. Then, chop them into small pieces on a cutting board.
    Cooking Process
    1. In a pot, add the broccoli along with boiling water and season with salt. Pour in the milk and cook for approximately 3 minutes.
    2. In another pot, place the cauliflower, add boiling water and milk, season with salt, and cook for about 5 minutes.
    Sautéing Vegetables
    1. Heat a non-stick skillet, drizzle some extra virgin olive oil, and add the chopped onion and carrot. Sauté for a few minutes until golden brown.
    Final Touches
    1. Drain the broccoli and cauliflower and transfer them to a pot. Add the diced bell peppers, chopped cherry tomatoes, and mix well. Then, add seasoning according to your taste.
    Conclusion

    With just a few simple steps, you can create a flavorful and nutritious vegetarian dish that will impress your friends and family. This recipe, learned from a friend in Spain, is a testament to the richness of culinary traditions around the world.

  • Classic Homemade Pound Cake

    Classic Homemade Pound Cake

    Classic Homemade Pound Cake

    Table of Contents

    Pound cake is a timeless dessert that has graced many tables over generations. Known for its dense and rich texture, this classic cake is a delightful treat that is simple to make yet incredibly satisfying. Perfect for any occasion, whether it’s a family gathering, a special celebration, or a casual tea time snack, pound cake remains a favorite. The beauty of pound cake lies in its simplicity and the ability to pair it with various toppings or enjoy it plain.

    Ingredients:
    • 2 cups (4 sticks) unsalted butter, softened
    • 3 cups granulated sugar
    • 6 large eggs, at room temperature
    • 3 cups all-purpose flour
    • 1/2 teaspoon baking powder
    • 1/2 teaspoon salt
    • 1 cup whole milk
    • 2 teaspoons vanilla extract
    Instructions:
    1. Preheat the Oven: Preheat your oven to 325°F (163°C). Grease and flour a 10-inch bundt pan or tube pan to prevent the cake from sticking.
    2. Cream the Butter and Sugar: In a large mixing bowl, cream the softened butter and granulated sugar together until light and fluffy. This process can take about 5 minutes and is crucial for a light texture.
    3. Add the Eggs: Add the eggs one at a time, beating well after each addition. This ensures that each egg is thoroughly incorporated into the batter.
    4. Combine Dry Ingredients: In a separate bowl, whisk together the flour, baking powder, and salt. This step helps to evenly distribute the baking powder and salt throughout the flour.
    5. Alternate Adding Dry Ingredients and Milk: With the mixer on low speed, add the flour mixture to the butter mixture in three parts, alternating with the milk, beginning and ending with the flour. Mix just until combined after each addition to avoid overmixing.
    6. Add Vanilla: Stir in the vanilla extract until just combined. The batter should be smooth and creamy.
    7. Bake the Cake: Pour the batter into the prepared pan, spreading it evenly. Bake in the preheated oven for about 1 hour and 15 minutes, or until a toothpick inserted into the center comes out clean.
    8. Cool the Cake: Allow the cake to cool in the pan for about 10 minutes before turning it out onto a wire rack to cool completely.
    9. Serve: Slice the pound cake and serve it plain or with your favorite toppings, such as whipped cream, fresh berries, or a drizzle of chocolate sauce.
    See also  Unveiling the Magic of a Delectable Chicken Dumpling Recipe

    Conclusion:

    Classic homemade pound cake is a versatile dessert that can be enjoyed in many different ways. Its rich, buttery flavor and dense texture make it a satisfying treat that stands the test of time.


  • Better Than Pizza! Quick, Easy, and Delicious Grated Potato Bake

    Better Than Pizza! Quick, Easy, and Delicious Grated Potato Bake

    Full Recipe

    Ingredients:

    6 potatoes, grated: The star ingredient, providing a satisfying base with a crispy exterior.
    1 carrot, grated: Adds a hint of sweetness and extra color.
    1 onion, finely chopped: For a savory depth of flavor.
    Vegetable oil: For frying the vegetables.
    5-6 fresh spring onions, chopped: Adds a mild onion flavor and freshness.
    3 eggs: Binds the ingredients together.
    1 glass of milk (200 ml): Adds creaminess and moisture.
    80 g wholemeal flour: Helps to thicken and bind the bake.
    2-3 tablespoons olive oil: Enhances flavor and ensures a crispy finish.
    Salt and black pepper, to taste: For seasoning.
    Additional olive oil: For brushing the baking dish.
    4 tomatoes, sliced: Adds a juicy and tangy topping.
    Fresh parsley, chopped: For garnish and a fresh, herbaceous note.
    200 g mozzarella cheese, shredded: The gooey, melty goodness on top.

    Step-by-Step Instructions:
    1. Prepare the Vegetables:

    Start by grating the 6 potatoes and 1 carrot using a coarse grater. This will help them cook evenly and provide the perfect texture for the bake.
    Finely chop 1 onion and place all the grated vegetables in a large bowl. The combination of potatoes, carrots, and onions forms the base of this delicious dish.
    2. Fry the Vegetables:

    Heat a generous amount of vegetable oil in a skillet over medium heat. The oil should be hot enough to sizzle when the vegetables are added but not so hot that it smokes.
    Add the grated potatoes, carrot, and chopped onion to the skillet. Fry them for about 8-10 minutes, stirring occasionally. You want the vegetables to soften and start turning a light golden brown, which brings out their natural sweetness and flavor. Set aside to cool slightly.
    3. Prepare the Batter:

    In a separate bowl, whisk together 3 eggs, 1 glass of milk (200 ml), 80 g of wholemeal flour, and 2-3 tablespoons of olive oil. Season with salt and black pepper to taste. This batter will help bind the grated vegetables and create a cohesive bake.
    Mix until smooth, ensuring there are no lumps. The batter should have a slightly thick but pourable consistency.
    4. Combine Ingredients:

    See also  Brazilian Corn Muffins  A Delightful Sweet Treat

    Add the chopped spring onions to the fried vegetable mixture and stir to combine. The spring onions add a fresh, slightly sweet note that complements the other vegetables.
    Pour the prepared batter over the vegetables and mix until everything is evenly coated. The batter should thoroughly cover the vegetables, helping them bind together during baking.
    5. Assemble the Bake:

    Preheat your oven to 200°C (400°F). A hot oven will help the bake get nice and crispy on top while keeping the inside tender.
    Lightly grease a baking dish with olive oil to prevent sticking and to help achieve a golden, crispy crust.
    Pour the vegetable and batter mixture into the baking dish, spreading it out evenly to ensure even cooking.
    Brush the top with a bit more olive oil for extra crispiness.
    6. Bake the Potato Mixture:

    Place the dish in the preheated oven and bake for about 30 minutes or until the top is golden and crisp. You’ll know it’s ready when the edges are lightly browned, and the center is firm to the touch.
    7. Prepare the Toppings:

    While the potato bake is in the oven, slice the 4 tomatoes and chop a handful of fresh parsley. The tomatoes add a juicy, tangy contrast to the rich potato base, while the parsley provides a burst of freshness.
    8. Add the Toppings:

    After the initial baking time, remove the potato bake from the oven.
    Arrange the sliced tomatoes evenly over the top, sprinkle with chopped parsley, and then generously spread 200 g of shredded mozzarella cheese over the tomatoes. This layer of cheese will melt into a gooey, golden topping that adds flavor and texture.
    9. Final Bake:

    Return the dish to the oven and bake for an additional 15 minutes at 200°C (400°F), or until the cheese is melted and bubbly, with a light golden-brown color on top.
    10. Serve and Enjoy:

    See also  Apple Cinnamon Layer Cake

    Remove from the oven and allow it to cool for a few minutes before slicing. This brief resting time will help the bake set and make it easier to cut.
    Serve warm, garnished with extra parsley if desired, and enjoy this satisfying and delicious potato bake with a salad or on its own

  • Baked Potato and Sausage Casserole with Creamy Dill Sauce

    Baked Potato and Sausage Casserole with Creamy Dill Sauce

    Ingredients:

    For the Casserole:
    4 chicken eggs
    200g (7/8 cup) sour cream
    1 bunch spring onions, chopped
    1 large tomato, sliced
    500g (4 medium) potatoes, peeled and diced
    150g (1 1/2 cups) mushrooms, sliced
    1 medium onion, finely chopped
    2 hunting sausages, sliced
    50g (1/2 cup) grated Parmesan cheese
    Vegetable oil (for cooking)
    Salt and ground black pepper, to taste
    For the Creamy Dill Sauce:
    60g (1/4 cup) sour cream
    40g (3 tablespoons) mayonnaise
    1 bunch fresh dill, finely chopped
    1 cucumber, grated
    3 garlic cloves, minced
    Salt and ground black pepper, to taste

    Directions:

    Prepare the Casserole:
    Preheat the oven to 180°C (355°F). In a large bowl, whisk together eggs and 200g sour cream. Season with salt and pepper. Add chopped spring onions and sliced tomato. Set aside. Heat vegetable oil in a skillet over medium heat. Cook diced potatoes for about 5 minutes, stirring occasionally. Add mushrooms and chopped onion to the skillet. Cook for another 5 minutes until softened. Season with salt and pepper. Transfer the potato and mushroom mixture into a baking dish. Arrange the sausage slices on top. Pour the egg and sour cream mixture over the sausage and vegetables. Sprinkle Parmesan cheese on top. Bake for 35 minutes, or until the top is golden brown and the eggs are fully set….
  • Lemon Cream Delight

    Lemon Cream Delight

    Lemon Cream Delight

    Table of Contents

    Ingredients:

    For the Dough:

      • 4 eggs
      • A pinch of salt
      • 120 g sugar
      • 4 egg yolks
      • 120 g flour
      • 4 g baking powder
      • 1 teaspoon lemon peel (grated)
      • 30 ml water
      • 40 ml lemon juice

    For the Cream:

      • 300 g soft cream cheese
      • 75 g powdered sugar

    For the Lemon Filling:

      • 3 eggs
      • 190 g sugar
      • 1 teaspoon lemon peel (grated)
      • 10 g cornstarch
      • 130 ml lemon juice

    Instructions:

      1. Prepare the Dough:
          • Preheat your oven to 160°C (320°F). This lower temperature allows the cake to rise gently, resulting in a light texture.
          • In a mixing bowl, beat the 4 egg whites with a pinch of salt until stiff peaks form. This step is crucial for adding volume to your dough.
          • Gradually add 120 g of sugar while continuing to beat the mixture. This helps to stabilize the egg whites and maintain their structure.


          • Add the 4 egg yolks one at a time, beating well after each addition to ensure a smooth batter.
          • Gently fold in 120 g of flour and 4 g of baking powder. Be careful not to overmix to keep the batter airy.
          • Add 1 teaspoon of lemon peel, 30 ml of water, and 40 ml of lemon juice, mixing until just combined. The lemon juice and zest will enhance the flavor of the dough.


        • Pour the batter into a 40×29 cm baking tray lined with baking paper. Spread it evenly.
      2. Bake:
          • Bake in the preheated oven for about 25 minutes or until the top is golden brown and a toothpick inserted in the center comes out clean. Keep an eye on it to prevent overbaking.


      3. Prepare the Cream:
          • In a mixing bowl, combine 300 g of soft cream cheese and 75 g of powdered sugar. Make sure the cream cheese is soft for easy mixing.
          • Beat until smooth and creamy. This will be the luscious layer that complements the lemon filling.


        • Refrigerate the cream mixture until ready to use, allowing it to firm up slightly.
      4. Prepare the Lemon Filling:
          • In a saucepan, whisk together 3 eggs, 190 g of sugar, 1 teaspoon of lemon peel, and 10 g of cornstarch. This mixture will create a rich, tangy filling.


        • Gradually add 130 ml of lemon juice while whisking continuously to avoid curdling the eggs.
        • Cook the mixture over medium heat, stirring constantly, until it comes to a boil and thickens. This usually takes about 5-7 minutes. Remove from heat and let it cool slightly, then refrigerate until set.
      1. Assemble the Dessert:
          • Once the dough has cooled completely, spread the prepared cream cheese mixture evenly over the top. This layer should be smooth and inviting.
          • Pour the lemon filling over the cream cheese layer, spreading it gently to create an even surface.
          • Refrigerate the assembled dessert until set, which should take at least 1-2 hours.


      2. Serve:
        • Once set, cut the dessert into squares or slices. Serve chilled for the best flavor and texture.

    Enjoy!

    This Lemon Cream Delight is not only quick to prepare but also bursts with flavor in every bite. The combination of the airy dough, creamy cheese, and zesty lemon is a match made in dessert heaven!

  • Healthy Apple and Walnut Oat Bars

    Healthy Apple and Walnut Oat Bars

    Healthy Apple and Walnut Oat Bars

    Table of Contents

    Ingredients

      • 1 ½ cups (150 g) rolled oats
      • 1 cup (90 g) walnuts, chopped
      • 2 medium apples, peeled and grated
      • ¼ cup (60 ml) water
      • ¼ teaspoon cinnamon
      • 1 teaspoon maple syrup
      • ¼ cup (60 ml) coconut oil or melted butter
    • 1 tablespoon cocoa powder (optional)

    Directions

      1. Preheat the Oven:
        • Preheat your oven to 180°C (360°F). Grease an 8×8-inch baking dish or line it with parchment paper for easy removal.
      1. Prepare the Wet Mixture:
        • In a medium bowl, combine the grated apples, water, cinnamon, and maple syrup. Mix well to combine.
      2. Mix the Dry Ingredients:
          • In a large bowl, combine the rolled oats, chopped walnuts, and cocoa powder (if using). Stir to mix evenly.


      3. Combine Wet and Dry Ingredients:
        • Pour the apple mixture into the dry ingredients, followed by the melted coconut oil or butter. Stir until all the ingredients are well combined.
      1. Transfer to Baking Dish:
        • Spread the mixture evenly into the prepared baking dish, pressing down lightly with a spatula to flatten the top.
      2. Bake:
          • Bake in the preheated oven for 25-30 minutes or until the bars are golden and set.


      3. Cool and Slice:
        • Allow the bars to cool in the pan for 10 minutes before transferring them to a wire rack to cool completely. Cut into bars and enjoy!

    Serving Suggestions

    • Enjoy these bars as a quick breakfast with a cup of coffee or tea.
    • Serve warm with a dollop of Greek yogurt and fresh berries for an extra touch of indulgence.

    Cooking Tips

      • Customize Your Bars: Add dried fruit, such as raisins or cranberries, for extra flavor and texture.
    • Nut-Free Option: Substitute walnuts with sunflower seeds or pumpkin seeds for a nut-free alternative.

    Nutritional Benefits

      • Rich in Fiber: Oats and apples provide a good source of dietary fiber, supporting digestion and keeping you full longer.
      • Heart-Healthy Fats: Walnuts and coconut oil offer healthy fats that support heart health.

    Dietary Information

    • Vegan-Friendly: Use coconut oil and maple syrup to keep these bars vegan.
    • Gluten-Free: Use certified gluten-free oats if needed.

    Storage

      • Room Temperature: Store in an airtight container at room temperature for up to 3 days.
    • Refrigerate: Keep in the fridge for up to 5 days for a longer shelf life.
    • Freeze: Freeze individually wrapped bars for up to 1 month. Thaw at room temperature before serving.

    Why You’ll Love This Recipe

      • Simple and Quick: Easy to make with just a few steps and minimal preparation time.
    • Nutritious Snack: A healthy, satisfying snack that’s perfect for any time of the day.
    • Naturally Sweetened: Contains no refined sugar, with sweetness from apples and maple syrup.
  • Amazing Family Hot Dish

    Amazing Family Hot Dish

    Amazing Family Hot Dish

    Table of Contents

    Ingredients

    For the Dough:

      • 250 g flour
      • 0.5 tsp salt
    • 150 ml boiling water
    • 1 tbsp vegetable oil

    For the Filling:

      • 350 g chicken thighs
      • 350 g turkey thighs
      • 800 g potatoes
      • 1 large onion
      • Salt, to taste
      • Black pepper, to taste
      • Cumin (zira), to taste
    • Paprika, to taste
    • Fresh parsley, chopped

    For the Vegetable Layer:

      • 2 onions, chopped
    • 2 carrots, grated
    • 1 large bell pepper, sliced

    Step-by-Step Instructions

    Step 1: Preparing the Dough

      1. In a mixing bowl, combine 250 g of flour with 0.5 tsp of salt.
      1. Add 1 tbsp of vegetable oil.
      2. Slowly pour in 150 ml of boiling water while stirring the mixture with a spoon or spatula.
      3. Once the mixture begins to come together, knead it by hand until it forms a smooth, elastic dough.
    1. Cover the dough with a kitchen towel and set aside to rest while preparing the filling.

    Step 2: Preparing the Meat and Potatoes

      1. Cut the chicken and turkey thighs into small pieces.
      2. Season the meat with salt, black pepper, cumin, and paprika to taste.
      1. Peel and cut the potatoes into thin slices.
      2. Finely chop one large onion.
      3. In a bowl, mix the potatoes, onions, and seasoned meat together. Add the chopped fresh parsley and mix well to combine all the flavors.
    See also  Chia Pudding in 3 Varieties: Healthy and Tasty Breakfast

    Step 3: Preparing the Vegetables

      1. In a pan, heat a little vegetable oil over medium heat.
      2. Add the chopped onions and sauté until they become translucent.
      3. Add the grated carrots and bell pepper slices, and cook until the vegetables are soft and fragrant. Season with salt and black pepper to taste.
    1. Remove from heat and set aside.

    Step 4: Assembling the Dish

      1. Preheat the oven to 180°C (350°F).
      2. Roll out the prepared dough into a large sheet.
      1. Line the bottom of a greased baking dish with half of the dough, allowing some to overhang the edges.
      2. Layer the meat and potato mixture evenly over the dough.
      3. Spread the sautéed vegetables on top of the meat and potatoes.
    1. Fold the overhanging dough over the filling, and use the remaining dough to cover the top of the dish completely.
    2. Pinch the edges of the dough together to seal the filling inside.

    Step 5: Baking the Dish

      1. Make a few small slits in the dough to allow steam to escape.
      1. Brush the top of the dough with a little oil or melted butter for a golden crust.
      2. Place the dish in the preheated oven and bake for about 60-70 minutes, or until the crust is golden brown and the filling is cooked through.
      3. Let the dish cool slightly before serving.

    Cooking Tips

      • For a more flavorful dough, you can add a pinch of spices such as cumin or paprika to the flour mixture.
      • Ensure the meat is cut into small, even pieces for uniform cooking.
      • You can substitute the turkey with more chicken if desired.
    • To save time, you can prepare the dough and filling ahead of time and assemble the dish just before baking.
    See also  Irresistible Summer Peach Cake

    Storage

    This dish can be stored in the refrigerator for up to 3 days. To reheat, cover with foil and bake in the oven at 180°C (350°F) for about 10-15 minutes until warmed through. Alternatively, individual portions can be reheated in the microwave.

    Nutritional Information (per serving)

      • Calories: 450-500 kcal
      • Protein: 25 g
      • Carbohydrates: 40 g
      • Fat: 20 g
    • Fiber: 5 g
  • Simple Italian Cake with 12 Tablespoons

    Simple Italian Cake with 12 Tablespoons

    Simple Italian Cake with 12 Tablespoons

    Table of Contents

    Ingredients:
    3 eggs
    12 tablespoons of sugar
    12 tablespoons of oil
    12 tablespoons of milk
    12 tablespoons of flour
    Zest and juice of half a lemon
    11g baking powder
    20cm cake pan

    Instructions:

    Preheat your oven to 180°C (356°F).
    In a mixing bowl, crack open 3 eggs.
    Add 12 tablespoons of sugar to the eggs.
    Mix the eggs and sugar together until they are well combined and have a creamy consistency.
    Pour in 12 tablespoons of oil and mix it into the egg and sugar mixture.
    Add 12 tablespoons of milk to the mixture and continue mixing.
    Sift in 12 tablespoons of flour gradually while stirring to avoid lumps.
    Zest and juice half a lemon and add them to the batter for a lovely citrus flavor.
    Finally, add 11g of baking powder and mix it in thoroughly.
    Grease a 20cm cake pan and pour the batter into it.
    Bake in the preheated oven at 180°C (356°F) for approximately 25-30 minutes or until the cake is golden brown and a toothpick inserted into the center comes out clean.
    Once the cake is done, remove it from the oven and let it cool.
    You can optionally dust the top with powdered sugar or add a lemon glaze for extra flavor.
    Slice and enjoy your simple and delicious Italian Cake with 12 Tablespoons!
  • Homemade Digestive Biscuits

    Homemade Digestive Biscuits

    Homemade Digestive Biscuits

    Table of Contents

    Ingredients:

    1 ½ cups wheat flour (240 g)
    ½ cup powdered sugar (75 g)
    ½ cup cold butter (130 g, cubed)
    1 teaspoon baking powder
    5 tablespoons milk
    ¼ teaspoon salt (only if using unsalted butter)

    Directions:

    Prepare the dough:
    In a large mixing bowl, combine the wheat flour, powdered sugar, baking powder, and salt (if using unsalted butter).
    Add the cold, cubed butter to the dry ingredients. Use your fingertips to rub the butter into the flour mixture until it resembles fine breadcrumbs.

    Add milk and form the dough:
    Gradually add milk, one tablespoon at a time, mixing until the dough comes together. It should be soft but not sticky. If the dough is too dry, add a little more milk, a teaspoon at a time.

    Shape and chill the dough:
    Form the dough into a disk, wrap it in plastic wrap, and refrigerate for 15 minutes. This helps the dough firm up and makes it easier to roll out.

    Roll out and cut biscuits:
    Preheat your oven to 350°F (180°C). Line a baking sheet with parchment paper.
    Roll out the chilled dough on a lightly floured surface to about ¼-inch thickness.
    Use a round cookie cutter or the rim of a glass to cut out biscuits. Place them on the prepared baking sheet.

    Bake the biscuits:
    Bake in the preheated oven for 15-18 minutes or until the edges are golden brown.
    Remove from the oven and let the biscuits cool on the baking sheet for 5 minutes before transferring them to a wire rack to cool completely.

    See also  Incredible Chicken Recipe to Amaze Your Guests!

    Serving Suggestions:
    Enjoy with a cup of tea or coffee for a classic pairing.
    Use as a base for no-bake cheesecakes or as a crunchy topping for yogurt and ice cream.
    Dip in melted chocolate for a sweet treat.

    Cooking Tips:
    Ensure the butter is cold to achieve a light, crumbly texture.
    For a smoother dough, avoid overmixing once the milk is added.
    Prick the biscuits with a fork before baking to help them cook evenly and maintain their shape.

    Nutritional Benefits:
    Made with whole wheat flour, these biscuits contain more fiber than traditional cookies.
    Lower in sugar compared to many commercial biscuits, making them a healthier snack option.
    No artificial additives or preservatives, providing a more natural and wholesome treat.

    Dietary Information:
    Vegetarian-friendly.
    Contains gluten and dairy; not suitable for those with allergies to these ingredients.
    Can be made egg-free and suitable for lacto-vegetarians.