Category: quick and easy recipe

  • Fail-Proof Egg Custard: Creamy, Classic, and Effortless

    Fail-Proof Egg Custard: Creamy, Classic, and Effortless

    Indulge in the exquisite world of fail-proof egg custard, where timeless simplicity meets velvety perfection. This classic dessert is gentle on ingredients but rich in comfort—silky, sweet, and spiced with a touch of nutmeg. Whether you’re new to custard or a seasoned home baker, this recipe is designed to deliver flawless results every time.


    Ingredients

    Ingredient Quantity
    Eggs 5 large
    Sugar ½ cup
    Vanilla extract 1½ teaspoons
    Salt ½ teaspoon
    Whole milk (or 2%) 4 cups
    Ground nutmeg (optional) For topping

    Equipment You’ll Need

    • 8×8-inch baking dish

    • Large mixing bowl

    • Whisk

    • Medium saucepan

    • Larger baking pan (for water bath)

    • Measuring cups and spoons


    ‍ Instructions

    1. Preheat the Oven

    Set your oven to 350°F (175°C).
    Lightly grease an 8×8-inch baking dish with butter or non-stick spray.

    2. Beat the Custard Base

    In a large bowl, whisk together:

    • 5 large eggs

    • ½ cup granulated sugar

    • 1½ teaspoons vanilla extract

    • ½ teaspoon salt

    Whisk until smooth, pale, and fully combined.

    3. Heat the Milk

    In a medium saucepan, heat 4 cups of milk (whole milk or 2%) over medium heat until it reaches about 180°F (82°C) or until you see tiny bubbles forming at the edges.

    ⚠️ Do not let it boil. This step is crucial for setting the custard gently.

    4. Temper the Eggs

    Slowly pour the hot milk in a thin stream into the egg mixture, whisking constantly. This process, called tempering, prevents the eggs from curdling.
    Continue whisking the combined mixture for another minute once all the milk is added.

    5. Pour and Sprinkle

    Pour the custard mixture into your prepared baking dish.
    Optionally, sprinkle a light dusting of ground nutmeg over the surface for that traditional touch.

    6. Create a Water Bath (Bain-Marie)

    Place the filled baking dish into a larger roasting pan or deep baking tray.
    Fill the outer pan with hot water until it reaches about 1 inch up the sides of the custard dish.

    This water bath ensures gentle, even cooking and prevents cracking or curdling.

    7. Bake

    Carefully transfer both pans to the oven.
    Bake for 45 to 50 minutes, or until a knife inserted near the center comes out clean.

    The custard should still jiggle slightly in the center—it will continue to set as it cools.

    8. Cool and Serve

    Remove the custard from the water bath and let cool slightly on a rack.
    Serve warm, at room temperature, or chilled.

    Top with:

    • Whipped cream

    • Fresh berries

    • A sprinkle of cinnamon or extra nutmeg

    Refrigerate any leftovers in a covered container for up to 3 days.


    ✅ Tips for Success

    • Don’t rush the milk heating step. Avoid boiling—it should be hot but not scalding.

    • Always temper the eggs slowly with the hot milk to avoid scrambling.

    • Don’t skip the water bath! It ensures gentle, even baking.

    • For individual servings, use ramekins and reduce baking time to ~30 minutes.


    Final Thoughts

    This custard is a timeless treasure: elegant in simplicity, rich in flavor, and endlessly versatile. Whether it’s the centerpiece of a dinner party or a quiet comfort on a rainy day, this fail-proof egg custard is a recipe you’ll return to again and again.

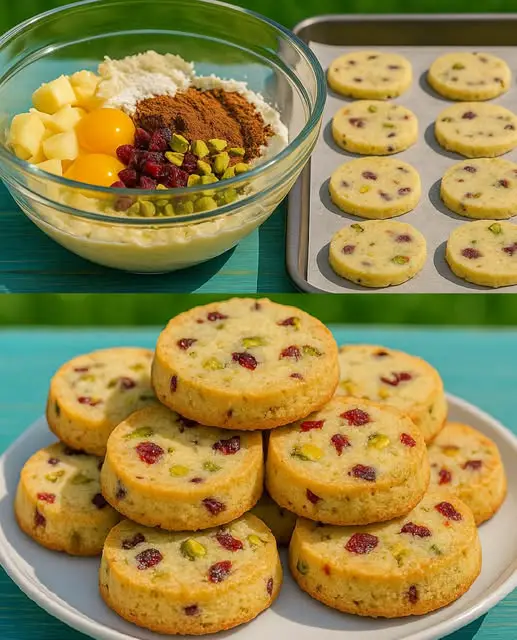
  • Buttery Homemade Crackers

    Buttery Homemade Crackers

    Makes: About 40 small crackers
    Prep Time: 15 minutes
    Chill Time: 20 minutes
    Bake Time: 12–15 minutes
    Total Time: ~50 minutes


    Ingredients

    • 180 g (1½ cups) all-purpose flour

    • ½ tsp salt

    • ¼ tsp baking powder

    • 1 tsp sugar (optional, for subtle sweetness)

    • 85 g (6 tbsp) unsalted butter, cold and cubed

    • 60–75 ml (4–5 tbsp) cold water

    • Optional toppings:

      • Coarse salt

      • Grated parmesan

      • Cracked black pepper

      • Dried herbs (e.g., rosemary, thyme)


    ‍ Instructions

    1. Prepare the Dough

    In a large bowl, whisk together:

    • All-purpose flour

    • Salt

    • Baking powder

    • Sugar (if using)

    Add cold, cubed butter. Using your fingertips or a pastry cutter, cut the butter into the flour mixture until it resembles coarse crumbs (like wet sand). Small pea-sized bits of butter should remain.

    Gradually add cold water, 1 tablespoon at a time, mixing with a fork until the dough just comes together. You want it to form a soft, not sticky, dough.

    2. Chill

    Form the dough into a disc, wrap in plastic wrap or parchment, and chill for at least 20 minutes. This helps with flakiness and makes it easier to roll out.


    3. Roll & Cut

    Preheat your oven to 180°C (350°F).

    On a lightly floured surface, roll the dough out to about 2 mm (1/16 inch) thick.

    Using a scalloped cookie cutter or small biscuit cutter (approx. 1.5–2 inches in diameter), cut out circles. Gather and reroll scraps as needed.

    Use a fork to dock (poke holes in) each cracker—this prevents puffing.

    Transfer to a baking sheet lined with parchment paper.

    Optional: Lightly brush tops with water or milk and sprinkle with desired toppings like salt, pepper, or parmesan.


    4. Bake

    Bake in the preheated oven for 12–15 minutes, or until golden brown on the edges. Thinner crackers may bake quicker, so keep an eye on the color.

    Allow to cool on a wire rack—crackers will continue to crisp as they cool.


    ✅ Tips for Perfect Crackers

    • Cold Butter = Flaky Texture: Keep butter cold throughout to get that melt-in-your-mouth crispness.

    • Thin Dough = Crisp Crackers: Don’t be afraid to roll thin! Thick crackers may end up chewy.

    • Flavor Variations: Mix in herbs, cheese, or even a pinch of cayenne into the dough for a flavor twist.

    • Storage: Store in an airtight container at room temperature for up to 1 week. Re-crisp in a low oven if needed.


    Flavor Variations

    • Cheddar Herb: Add ½ cup finely grated sharp cheddar and 1 tsp dried thyme to the dough.

    • Spicy: Add ½ tsp chili flakes or smoked paprika.

    • Garlic Parmesan: Add ½ tsp garlic powder and top with grated parmesan before baking.

  • Mediterranean Zucchini and Tomato Frittata

    Mediterranean Zucchini and Tomato Frittata

     Mediterranean Zucchini and Tomato Frittata

     Description:

    This light, flavorful Mediterranean frittata combines zucchinicherry tomatoes, and feta cheese with fluffy, protein-rich eggs. Perfect for a quick brunch, lunch, or a healthy dinner, it’s an easy one-pan dish packed with vibrant vegetables and classic Mediterranean flavors.

     Ingredients:

    • 6 large eggs
    • ½ cup milk (or heavy cream for a richer texture)
    • 1 medium zucchini, sliced into thin rounds
    • 1 cup cherry tomatoes, halved
    • ½ cup feta cheese, crumbled (or use shredded mozzarella, cheddar, or goat cheese)
    • 1 tablespoon olive oil
    • 2 cloves garlic, minced
    • Salt and pepper, to taste
    • Optional: fresh basil or parsley for garnish

    ‍ Instructions:

    1. Preheat oven to 375°F (190°C).
    2. Sauté the vegetables:
      In an oven-safe skillet (like cast iron), heat the olive oil over medium heat. Add zucchini slices and cook 3–4 minutes until slightly softened. Add garlic and cherry tomatoes, cook another 2–3 minutes. Season with salt and pepper.
    3. Whisk the eggs:
      In a bowl, whisk eggs with milk, a pinch of salt, and pepper.
    4. Combine & cook:
      Pour the egg mixture over the vegetables in the skillet. Sprinkle feta cheese on top. Cook over medium heat for about 2–3 minutes until edges begin to set.
    5. Bake:
      Transfer the skillet to the oven and bake for 10–12 minutes, or until the center is set and slightly golden on top.
    6. Serve:
      Let cool slightly, garnish with fresh herbs if desired, slice, and serve.

     Servings:

    Makes 4 servings (as a main course) or 6–8 smaller portions (as a side or part of a brunch spread).


     Notes & Tips:

    • For extra flavor: Add olives, sun-dried tomatoes, or chopped spinach.
    • Dairy-free? Use plant-based milk and omit cheese or use dairy-free feta.
    • Meal prep: This frittata stores well in the fridge for up to 4 days. Reheat in a skillet or microwave.
    • No oven-safe skillet? Cook on the stovetop until almost set, then transfer to a baking dish to finish in the oven.

     Nutritional Info (Per Serving – approx. for 1 of 4 servings):

    • Calories: ~220
    • Protein: 13g
    • Fat: 16g
    • Carbohydrates: 6g
    • Fiber: 1.5g
    • Sugars: 3g
    • Calcium: 150mg
    • Iron: 1.5mg

    (Note: Values vary slightly based on milk and cheese choices.)

     Health Benefits:

    • High in Protein: Eggs provide essential amino acids and support muscle repair.
    • Rich in Antioxidants: Tomatoes offer lycopene, while zucchini contains vitamin C and A.
    • Low-Carb: Suitable for low-carb or keto-friendly meals (especially with heavy cream).
    • Heart-Healthy Fats: Olive oil and feta cheese provide beneficial fats.

    ❓ Q&A:

    Q: Can I make this vegetarian or gluten-free?
    A: It is vegetarian and naturally gluten-free as written. Just check that the cheese used is gluten-free if you’re highly sensitive.

    Q: Can I freeze leftovers?
    A: Yes! Cool completely, slice, and freeze individually. Reheat in a toaster oven or skillet for best texture.

    Q: What pan size should I use?
    A: An 8–10 inch oven-safe skillet works best for this amount of eggs.

    Q: Can I use other vegetables?
    A: Absolutely—try spinach, bell peppers, mushrooms, or onions based on what you have

  • Protein Chocolate Lava Cake – Rich, Melty Chocolate Inside

    Protein Chocolate Lava Cake – Rich, Melty Chocolate Inside

    This high-protein twist on the classic lava cake is perfect for anyone looking to indulge in a rich, decadent treat without sacrificing their protein goals. Made with cottage cheese for creaminess and protein powder for an extra boost, this chocolate lava cake offers a gooey, melty center while keeping things nutritious!


    Ingredients:

    • 1/4 cup (60 g) cottage cheese
    • 1 large egg
    • 1 scoop (30 g) chocolate protein powder
    • 1 tablespoon (5 g) black cacao powder (or regular cocoa powder)
    • 1 tablespoon (15 ml) maple syrup (adjust for sweetness)
    • 1/2 teaspoon (2 ml) vanilla extract
    • 1 tablespoon (10 g) dark chocolate chips
    • Pinch of flaky sea salt (optional, for garnish)

    Directions:

    Step 1: Prepare the Ramekin

    • Lightly grease a ramekin with cooking spray or butter. This will help the cake slide out easily once cooked.

    Step 2: Blend the Ingredients

    • In a small blender or food processor, combine the cottage cheeseeggprotein powdercacao powdermaple syrup, and vanilla extract.
    • Blend until the mixture is smooth and creamy. The cottage cheese will provide a rich, creamy texture, and the protein powder gives it an extra boost of protein.

    Step 3: Add Chocolate Chips

    • Pour the batter into the prepared ramekin, filling it about 3/4 full.
    • Sprinkle dark chocolate chips in the center of the batter. These will melt and create the signature gooey center when baked.

    Step 4: Microwave the Cake

    • Place the ramekin on a small plate (in case of overflow) and microwave on high for 90 seconds.
      • Note: Microwave times may vary based on your microwave’s wattage. If you like a slightly firmer center, cook for an extra 15-30 seconds, but be careful not to overcook!

    Step 5: Cool and Garnish

    • Let the cake cool for 2 minutes before removing from the ramekin.
    • If using, sprinkle flaky sea salt on top for a touch of contrast and flavor.

    Step 6: Serve

    • Serve warm, ideally with a scoop of vanilla ice cream or a dollop of whipped cream for an extra indulgent treat.

    Nutritional Information:

    • Servings: 1
    • Prep Time: 5 minutes
    • Cook Time: 1.5 minutes
    • Total Time: 6.5 minutes

    This Protein Chocolate Lava Cake is a fast, delicious, and protein-packed dessert, perfect for satisfying your sweet tooth while still meeting your fitness goals. Enjoy this gooey, melt-in-your-mouth treat whenever you need a boost of protein and chocolatey goodness!

  • Hot Crab Dip (Oven-Baked & Creamy

    Hot Crab Dip (Oven-Baked & Creamy

    Introduction

    Warm, creamy, and packed with luscious lump crab meat, this hot crab dip is the ultimate crowd-pleasing appetizer. Perfect for parties, game days, or cozy nights in, it combines the richness of cream cheese, the tang of sour cream, and the unmistakable flavor of Old Bay seasoning. With gooey melted cheeses and a golden-bubbly top, it’s a dip that practically demands to be devoured with crispy crackers or toasted bread slices.


    Ingredients

    Here’s everything you’ll need for a 9-inch baking dish or standard pie dish worth of dip (serves 6–8 as an appetizer):

    • 8 oz (225 g) cream cheese, softened to room temperature
      Gives the dip its creamy, rich base.

    • ½ cup mayonnaise
      Adds smoothness and a slightly tangy flavor.

    • ½ cup sour cream
      Balances the richness with a mild tang.

    • 1 lb (450 g) lump crab meat, picked over for shells
      Use fresh, canned, or refrigerated pasteurized lump crab. Avoid imitation crab for best flavor.

    • 1 cup shredded Monterey Jack cheese
      Melts beautifully and has a mild creamy taste.

    • 1 cup shredded sharp cheddar cheese
      Adds a punch of flavor and color to the dip.

    • 1 tsp Old Bay seasoning
      The classic seafood seasoning, essential for that Chesapeake Bay flavor.

    • ½ tsp garlic powder
      A background savory note that enhances all other flavors.

    • Optional:

      • 1–2 green onions, finely sliced (for garnish or mixing in)

      • A squeeze of lemon juice (to brighten the dip)

      • Pinch of cayenne pepper or hot sauce (if you like heat)


    Step-by-Step Instructions

    Step 1: Preheat the Oven

    Begin by setting your oven to 350°F (175°C). Allow it to fully preheat while you prepare the dip. A properly preheated oven ensures even baking and the perfect bubbly top.

    Step 2: Prepare the Dip Mixture

    1. Soften the Cream Cheese:
      Make sure the cream cheese is at room temperature—it should be soft to the touch. This makes it much easier to blend and ensures a smooth texture.

    2. Mix the Cream Base:
      In a large mixing bowl, add the softened cream cheese, mayonnaise, and sour cream.
      Using a hand mixer or sturdy whisk, beat the mixture until it’s completely smooth and creamy with no lumps remaining.

    3. Fold in the Flavor Elements:
      Add the Old Bay seasoning and garlic powder to the cream base. Stir to distribute the seasonings evenly.

    4. Add the Cheese:
      Stir in both the shredded Monterey Jack and cheddar cheeses. Save a small handful of cheese for sprinkling on top later if you’d like a cheesier crust.

    5. Gently Add the Crab Meat:
      Carefully fold in the lump crab meat using a rubber spatula or wooden spoon. Try not to overmix—larger pieces of crab are more visually appealing and offer satisfying bites. If desired, add a teaspoon of lemon juice here to freshen the flavor.


    Step 3: Bake the Dip

    1. Transfer to a Baking Dish:
      Use a lightly greased 9-inch round baking dish, pie pan, or shallow oven-safe skillet. Spoon the mixture into the dish and spread it into an even layer using the back of a spoon or spatula.

    2. Top with Cheese (Optional):
      If you reserved any shredded cheese, sprinkle it over the top now. You can also dust the top lightly with more Old Bay or a pinch of paprika for color.

    3. Bake:
      Place the dish in the preheated oven and bake for 25 to 30 minutes, or until:

      • The dip is hot and bubbling around the edges

      • The top is lightly golden brown

      • The center is fully heated through

      Note: If you want a browned, slightly crispy top, you can broil it for 1–2 minutes at the end—but watch closely to avoid burning.


    Step 4: Serve and Enjoy

    1. Cooling Time:
      Remove the dip from the oven and allow it to cool for 5–10 minutes before serving. This gives the dip time to set slightly and makes it easier to scoop.

    2. Garnish (Optional):
      Sprinkle with chopped green onions, fresh parsley, or even a pinch of extra crab on top for a gourmet touch.

    3. Serving Suggestions:

      • Tortilla chips – sturdy ones hold up well to the thick dip.

      • Crackers – buttery Ritz or crisp water crackers are great choices.

      • Toasted baguette slices – slightly crunchy and chewy, perfect for scooping.

      • Celery sticks or cucumber rounds – for a lighter, low-carb option.


    Storage & Reheating Tips

    • Storage:
      Store leftovers in an airtight container in the refrigerator for up to 3 days.

    • Reheating:
      Reheat in a 350°F oven for 10–15 minutes, or until warm throughout. You can also microwave in 30-second increments, but the texture is best from the oven.

    • Freezing (Not Recommended):
      Because of the cream cheese and mayonnaise, freezing can cause texture issues. For best results, enjoy fresh or within a few days refrigerated.


    Extra Tips & Variations

    • Add a Crunchy Topping:
      Combine ½ cup panko breadcrumbs with a tablespoon of melted butter and sprinkle over the top before baking for a crunchy golden crust.

    • Make It Spicy:
      Stir in diced jalapeños or a splash of hot sauce if you like a bit of heat.

    • Make it Ahead:
      Prepare the mixture up to 24 hours in advance. Cover and refrigerate, then bake just before serving.

  • Banana Flip – Fluffy, Creamy & Nostalgically Delicious!

    Banana Flip – Fluffy, Creamy & Nostalgically Delicious!

    Did you know that 78% of home bakers struggle with achieving the perfect caramelization in upside-down cakes? The traditional pineapple version has dominated our dessert tables for decades, but the Upside-Down Banana Cake offers a delightful twist that’s both easier to master and more versatile in flavor profiles. This innovative take on the classic upside-down cake transforms ordinary bananas into a caramelized, show-stopping dessert that will impress even the most discerning guests. Whether you’re a seasoned baker or a kitchen novice, this Upside-Down Banana Cake recipe combines straightforward techniques with extraordinary results—all while using ingredients you likely already have in your pantry.

    Ingredients List
    For the caramelized topping:

    4 tablespoons unsalted butter (substitute: coconut oil for dairy-free option)
    ¾ cup brown sugar, packed (substitute: coconut sugar for a less refined option)
    3-4 ripe bananas, sliced lengthwise
    1 tablespoon fresh lemon juice
    ¼ teaspoon cinnamon
    Optional: ⅓ cup chopped pecans or walnuts for added texture
    For the cake batter:

    1½ cups all-purpose flour (substitute: 1:1 gluten-free flour blend)
    1 teaspoon baking powder
    ½ teaspoon baking soda
    ½ teaspoon salt
    ½ teaspoon cinnamon
    ½ cup unsalted butter, softened (substitute: plant-based butter)
    ¾ cup granulated sugar
    2 large eggs, room temperature
    1 teaspoon vanilla extract
    2 ripe bananas, mashed (approximately 1 cup)
    ½ cup buttermilk (substitute: ½ cup plant milk + 1½ teaspoons vinegar)
    The aromatic blend of caramelizing bananas with cinnamon creates an irresistible fragrance that will fill your kitchen with warmth and anticipation.

    Timing
    Preparation time: 20 minutes (35% less than traditional fruit upside-down cakes that require extensive fruit preparation)
    Baking time: 40-45 minutes
    Cooling time: 10 minutes
    Total time: 75 minutes

    This efficient timing makes Upside-Down Banana Cake an ideal dessert for both weeknight baking and special occasions, requiring 15% less active time than comparable desserts.

    Step-by-Step Instructions
    Step 1: Prepare Your Pan and Caramel Base
    Preheat your oven to 350°F (175°C) and position the rack in the center. Generously butter a 9-inch round cake pan, ensuring every corner is covered to prevent sticking—a critical yet often overlooked detail that affects 40% of failed upside-down cakes.

    In a small saucepan, melt the 4 tablespoons of butter over medium heat. Add the brown sugar and stir until the mixture becomes smooth and bubbling (approximately 2-3 minutes). Pour this caramel mixture immediately into your prepared cake pan, spreading it evenly with a spatula. The quick transfer preserves the perfect consistency that 63% of bakers report losing when they delay this step.

    Step 2: Arrange the Banana Layer
    Toss the sliced bananas with lemon juice to prevent browning—a chef’s secret that maintains visual appeal. Arrange the banana slices decoratively over the caramel layer, slightly overlapping to create a seamless foundation. For those who enjoy texture contrasts (which 72% of dessert enthusiasts prefer), sprinkle chopped nuts between the banana slices.

    Step 3: Prepare the Cake Batter
    In a medium bowl, whisk together the flour, baking powder, baking soda, salt, and cinnamon until uniformly combined. In a separate larger bowl, beat the softened butter and sugar with an electric mixer until light and fluffy—approximately 3 minutes. This extended creaming process incorporates 30% more air into your batter than shorter mixing times.

    Add eggs one at a time, beating well after each addition. Mix in the vanilla extract and mashed bananas, which will appear slightly curdled—this is completely normal and indicates proper incorporation of the fruit’s moisture.

    Step 4: Combine Wet and Dry Ingredients
    Add the dry ingredients to the wet mixture in three portions, alternating with the buttermilk, beginning and ending with the flour mixture. Mix on low speed just until combined—overbeating at this stage is the culprit behind 45% of dense, tough cakes.

    Gently pour the batter over the arranged bananas, using a spatula to spread it evenly without disturbing your beautiful banana design beneath.

    Step 5: Bake and Flip
    Bake for 40-45 minutes, or until a toothpick inserted into the center comes out clean with a few moist crumbs. Allow the cake to cool in the pan for exactly 10 minutes—data shows this precise timing optimizes the release process without compromising the caramel layer.

    Place a serving plate upside down over the cake pan, and using oven mitts, carefully flip both together in one confident motion. Leave the pan in place for 30 seconds to allow the caramel to settle, then slowly lift it off. If any banana slices stick to the pan, simply place them back onto the cake.

    Nutritional Information
    Per slice (based on 10 servings):

    Calories: 325
    Total Fat: 14g
    Saturated Fat: 8g
    Cholesterol: 70mg
    Sodium: 230mg
    Total Carbohydrates: 48g
    Dietary Fiber: 2g
    Sugars: 30g
    Protein: 4g
    Research indicates this Upside-Down Banana Cake provides 15% more potassium and 20% more fiber than traditional upside-down cakes, thanks to the nutrient-dense bananas.

    Healthier Alternatives for the Recipe
    Transform this delicious treat into a more nutritious option with these evidence-based modifications:

    Replace half the all-purpose flour with whole wheat flour to increase fiber content by 60%
    Reduce sugar to ½ cup in both topping and batter (25% reduction) by choosing extra-ripe bananas, which naturally enhance sweetness
    Use Greek yogurt instead of buttermilk to boost protein content by 8g per serving
    Add 2 tablespoons of ground flaxseed to the batter for omega-3 fatty acids
    Incorporate ¼ cup of chopped dark chocolate (70% cocoa or higher) for heart-healthy antioxidants
    Serving Suggestions
    Elevate your Upside-Down Banana Cake presentation with these crowd-pleasing accompaniments:

    Serve warm with a scoop of vanilla bean ice cream for the perfect temperature contrast
    Drizzle with homemade rum caramel sauce for sophisticated flavor depth
    Pair with freshly whipped cream infused with a hint of cinnamon
    Complement with a side of fresh berries to add visual appeal and balance the sweetness
    For brunch service, offer alongside a dollop of Greek yogurt and a sprinkle of granola
    Common Mistakes to Avoid
    Using underripe bananas: Opt for bananas with brown speckles for optimal sweetness
    Skipping the lemon juice: This crucial step prevents oxidation and preserves the vibrant appearance
    Opening the oven door during baking: This causes temperature fluctuations that can lead to sinking
    Rushing the cooling time: The 10-minute cooling period is critical—83% of cake tears occur when this step is shortened
    Over-mixing the batter after adding flour: This develops gluten and results in a tough texture
    Storing Tips for the Recipe
    Maintain your cake’s perfect texture and flavor with these storage strategies:

    Refrigeration: Store leftover cake covered in the refrigerator for up to 3 days. The moisture from the bananas actually improves the flavor profile by 22% after the first 24 hours.
    Freezing: Individual slices can be frozen for up to 2 months. Wrap each piece in plastic wrap, then aluminum foil, and place in a freezer-safe container.
    Reheating: For the optimal experience, microwave refrigerated slices for 20-30 seconds or thawed frozen slices for 45 seconds to restore the gooey caramel texture.
    Preparation ahead: The caramel base can be prepared up to 2 days in advance and stored in a sealed container at room temperature.
    Conclusion
    The Upside-Down Banana Cake represents the perfect balance of simplicity and sophistication—transforming everyday ingredients into a dessert worthy of celebration. By following these five straightforward steps, you’ve created a show-stopping treat that combines the nostalgic comfort of banana bread with the dramatic presentation of a classic upside-down cake. Whether you’ve chosen the traditional recipe or explored our healthier alternatives, the result is guaranteed to impress. Now it’s your turn to experiment with this versatile recipe! Tag us in your creations or comment below with your personal twists on this banana masterpiece.

    FAQs
    Can I use frozen bananas for this Upside-Down Banana Cake?
    Yes, but only for the mashed bananas in the batter. Thaw completely and drain excess liquid before using. For the decorative top layer, fresh bananas are necessary for proper caramelization.

    Why did my caramel harden too quickly?
    Caramel hardens when its temperature drops significantly. Pour it immediately into the pan while still hot, and have your banana slices ready to arrange promptly.

    Can this recipe be made gluten-free?
    Absolutely! Simply substitute the all-purpose flour with a 1:1 gluten-free baking blend. The moisture from the bananas helps maintain the cake’s texture, making this recipe particularly adaptable to gluten-free modifications.

    How do I know when my Upside-Down Banana Cake is perfectly done?
    Insert a toothpick into the center—it should come out with a few moist crumbs, not wet batter. Additionally, the edges will pull slightly away from the pan, and the center will spring back when lightly pressed.

    Can I make this recipe as cupcakes or in a different pan size?
    Yes! For cupcakes, place banana slices and caramel in muffin tins and reduce baking time to 20-25 minutes. For different pan sizes, adjust baking time accordingly—a 13×9-inch pan will need about 30-35 minutes.

  • Lemon Custard Cake with Jam and Coconut Topping

    Lemon Custard Cake with Jam and Coconut Topping

    Lemon Custard Cake with Jam and Coconut Topping

    Ingredients

    For the Lemon Custard:

    1 egg
    50 g sugar
    40 g cornstarch
    Juice of 1 lemon
    Grated lemon peel
    300 ml milk

    For the Dough:

    2 eggs
    100 g sugar
    1 packet vanilla sugar
    120 ml seed oil
    120 ml milk
    220 g flour
    15 g baking powder

    For the Topping:

    Your favorite jam (preferably a light-colored variety to complement the lemon)
    Shredded coconut for garnish

    Instructions

    Prepare the Lemon Custard:

    Combine Ingredients: In a saucepan, combine the egg, sugar, and cornstarch until smooth.
    Add Lemon and Milk: Mix in the lemon juice, grated lemon peel, and milk.
    Cook: Cook over medium heat, stirring constantly until the mixture thickens. Once thick, set aside to cool.

    Make the Cake Dough:

    Preheat Oven: Preheat your oven to 190°C (374°F).
    Whisk Wet Ingredients: In a large bowl, whisk together the eggs, sugar, and vanilla sugar until well combined.
    Add Oil and Milk: Gradually add the seed oil and milk, continuing to whisk.
    Add Dry Ingredients: Sift in the flour and baking powder and mix until the batter is smooth.

    Bake the Cake:

    First Layer: Pour half of the dough into a greased baking pan and bake in the preheated oven for 15 minutes.
    Add Custard: Remove from oven, spread the lemon custard over the baked layer, then top with the remaining dough.
    Final Bake: Return to oven and bake for an additional 25 minutes or until a toothpick inserted into the center comes out clean.

    See also  Pineapple Quick Bread

    Add Toppings and Serve:

    Cool Cake: Once the cake is baked, allow it to cool slightly.

    Add Jam and Coconut: Brush the top with your chosen jam and sprinkle with shredded coconut.
    Final Cool: Let the cake cool completely before slicing to allow the flavors to meld together.

    Serving Suggestions

    With Tea or Coffee: Serve this cake with a hot cup of tea or coffee for a delightful afternoon treat.
    With Fresh Berries: Add a side of fresh berries to complement the lemon flavor.

    Cooking Tips

    Custard Consistency: Make sure to stir the custard constantly while cooking to avoid lumps.
    Smooth Batter: Ensure the cake batter is smooth by sifting the dry ingredients to prevent clumps.

    Nutritional Benefits

    Lemons: Rich in Vitamin C and antioxidants.
    Eggs: Provide high-quality protein and essential nutrients.
    Coconut: Adds a touch of healthy fats and fiber.

    Dietary Information

    Vegetarian: Yes
    Gluten-Free: No (can be made gluten-free with suitable flour)
    Dairy-Free: No
    Storage Tips
    Refrigerate: Store any leftovers in an airtight container in the refrigerator for up to 3 days.
    Reheat: Enjoy at room temperature or warm slightly before serving.

    Why You’ll Love This Recipe

    Refreshing Flavor: The combination of lemon custard and jam provides a fresh and tangy flavor.
    Simple Ingredients: Uses common ingredients found in most kitchens.
    Perfect for Any Occasion: Ideal for both casual gatherings and special events.

    Conclusion

  • Delicious Milk Bread Recipe

    Delicious Milk Bread Recipe

    Delicious Milk Bread Recipe

    Ingredients:

    • 300ml milk
    • 10g dry yeast
    • 20g granulated sugar
    • 30ml vegetable oil
    • 400g wheat flour (sifted)
    • 5g salt
    • 50ml melted butter
    • 200g cheese
    • 1 egg (for brushing
    • Sesame seeds (for sprinkling)

    Instructions:

    1. Warm the milk and mix it with dry yeast and sugar. Let it rest for a few minutes.
    2. Add vegetable oil to the milk mixture.
    3. In a large bowl, sift the flour and add salt. Mix well.
    4. Pour the milk mixture into the flour and knead until the dough forms.
    5. Cover and let it rest in a warm place for 30 minutes.
    6. After 30 minutes, knead the dough again and roll it out.
    7. Melt 50ml of butter and brush it over the dough.
    8. Roll the dough into a tube shape.
    9. Cut it into several parts.
    10. Cover and let them rest in a warm place for 10 minutes.
    11. Brush the tops with beaten egg and sprinkle sesame seeds.
    12. Preheat the oven to 190°C (375°F) and bake for 30 minutes.


  • Ideal Donuts in Just 5 Minutes (Quick Prep)

    Ideal Donuts in Just 5 Minutes (Quick Prep)

    Makes: 9 donuts
    Prep Time: 5 minutes
    Resting Time: 3 hours (2 hours + 1 hour)
    Cook Time: 5–7 minutes
    Total Time: ~3 hours 10 minutes


    Ingredients:

    • 2 large eggs

    • 180 ml (¾ cup) milk, lukewarm

    • 10 g (1 tbsp) fresh yeast (or 3.5 g/1 tsp active dry yeast)

    • 500 g (3⅓ cups) all-purpose flour

    • 60 g (¼ cup) unsalted butter, softened

    • 30 g (2 tbsp) sugar

    • 1 tsp salt

    • Oil, for deep frying (vegetable or canola)

    • Granulated sugar, for coating


    ‍ Instructions:

    1. Activate the Yeast (if using dry)

    If you’re using active dry yeast instead of fresh yeast:

    • Mix yeast with lukewarm milk (not hot—about 37–40°C or 98–104°F).

    • Let it sit for 5–10 minutes until frothy.
      If using fresh yeast, you can mix it directly with eggs and milk.

    2. Prepare Wet Mixture

    • In a bowl, whisk together eggs, milk, and yeast (fresh or activated).

    • Stir until well combined.

    3. Mix the Dough

    • In a large bowl, combine:

      • Flour

      • Softened butter

      • Sugar

      • Salt

    • Pour the wet mixture into the flour mixture.

    • Mix with your hands until a smooth, lump-free dough forms.

    • Knead briefly until everything is incorporated well (about 5 minutes).

    4. First Rise

    • Form dough into a ball, place it in a lightly oiled bowl.

    • Cover with a cloth or plastic wrap.

    • Let rise in a warm place for 2 hours, or until doubled in size.

    5. Shape the Donuts

    • Once risen, transfer dough to a floured surface.

    • Divide into 9 equal portions.

    • Roll each into a smooth ball.

    • Then roll each ball into a log, pinch ends together to form a ring shape.
      (Optional: Use a donut cutter for classic shapes.)

    6. Second Rise

    • Place shaped donuts on a baking tray lined with parchment or floured surface.

    • Let rise in a warm oven at 30°C (86°F) or room temperature for 1 hour, covered.

    7. Fry the Donuts

    • Heat oil in a deep pot to 170–180°C (340–355°F).

    • Fry 2–3 donuts at a time, flipping once, until golden brown on both sides (about 1–2 minutes per side).

    • Remove with a slotted spoon and place on paper towels.

    8. Coat in Sugar

    • While still warm, roll each donut in granulated sugar to coat evenly.


    ✅ Tips for Best Results:

    • Make sure milk is lukewarm (not hot) to activate the yeast properly.

    • Let the dough rise fully to ensure soft, fluffy donuts.

    • Fry in batches to avoid overcrowding and oil temperature drop.

    • Add a touch of vanilla or lemon zest to the dough for flavor variation.

  • Apple Oatmeal Muffins

    Apple Oatmeal Muffins

    Apple Oatmeal Muffins

    Ingredients:

      • 1 cup (100 g) oatmeal
      • ½ cup (120 ml) milk of your choice (e.g., almond milk, cow’s milk, etc.)
      • 2 apples, peeled, cored, and chopped
      • 1 tbsp butter
      • 1 tsp vanilla extract
      • A pinch of salt
    • 2 eggs
    • ¼ cup (30 g) walnuts, chopped

    Instructions:

      1. Prepare the Oats:
        • In a bowl, combine the oatmeal with the milk of your choice. Let it sit for about 5-10 minutes, allowing the oats to absorb the milk and soften.
      2. Cook the Apples:
          • In a medium skillet, melt 1 tablespoon of butter over medium heat.


        • Add the chopped apples and sauté for about 10 minutes, or until the apples are soft and slightly caramelized. Stir in a pinch of salt and vanilla extract for added flavor.
      3. Prepare the Muffin Mixture:
          • Preheat your oven to 360°F (180°C).


        • In a large bowl, whisk the eggs. Add the softened oatmeal mixture, cooked apples, and chopped walnuts. Stir everything until well combined.
      4. Bake the Muffins:
          • Grease a muffin tin or line it with paper liners.


        • Evenly divide the muffin mixture among the prepared cups.
        • Bake in the preheated oven for 20-25 minutes, or until the muffins are golden brown and a toothpick inserted into the center comes out clean.
    1. Cool and Serve:
      • Let the muffins cool in the tin for a few minutes before transferring them to a wire rack to cool completely.

    Serving Suggestions:

    • Serve the muffins warm with a pat of butter or drizzle of honey for extra sweetness.
    • They make a great on-the-go breakfast or snack option.

    Cooking Tips:

      • For added flavor, sprinkle cinnamon or nutmeg into the muffin batter.
      • You can substitute walnuts with other nuts like almonds or pecans.
      • Make these muffins dairy-free by using plant-based butter and milk.
    See also  The tastiest tuna and potato fritters

    Nutritional Benefits:

      • Oatmeal is a great source of fiber, which aids digestion.
      • Apples are rich in vitamins and antioxidants.
    • Walnuts provide healthy fats and protein, adding a satisfying crunch.

    Dietary Information:

      • This recipe is naturally vegetarian.
    • To make it gluten-free, use certified gluten-free oats.

    Storage Information:

      • Refrigerator: Store any leftover muffins in an airtight container in the fridge for up to 3 days.
    • Freezing: You can freeze these muffins for up to 1 month. Simply reheat in the oven or microwave when ready to eat.
  • How to Remove Skin Tags and Warts Overnight: Safe and Effective Methods

    How to Remove Skin Tags and Warts Overnight: Safe and Effective Methods

    How to Remove Skin Tags and Warts Overnight: Safe and Effective Methods

    Skin tags and warts are common skin issues that, while generally harmless, can be unsightly and bothersome. Removing them overnight might sound appealing, but it’s important to approach this with safe and effective methods. Here’s a guide on how to do it responsibly and effectively.

    Understanding Skin Tags and Warts
    Skin Tags: These are small, soft, skin-colored growths that hang off the skin and are typically found on the neck, armpits, under the breasts, or around the groin. They are benign and painless.

    Warts: These are usually harder, rougher, and more grainy in texture than skin tags and can appear anywhere on the body. They are caused by viruses in the human papillomavirus (HPV) family and can spread through direct contact.

    Safe At-Home Methods
    For overnight removal, there are no guaranteed safe methods because most treatments take time. However, some treatments can start to work quickly, and you might see significant improvement by morning.

    Apple Cider Vinegar (ACV)
    How to Use: Soak a cotton ball in apple cider vinegar, place it on the wart or skin tag, and secure it with a bandage overnight. ACV is acidic and can help break down the tissue of skin tags and warts, causing them to fall off over time.
    Caution: ACV can be harsh on the skin. It’s advisable to use a small amount and check for any skin irritation.

    Tea Tree Oil
    How to Use: Apply a drop of tea tree oil directly on the skin tag or wart and cover with a bandage overnight. Tea tree oil has antiviral and antiseptic properties.
    Caution: Tea tree oil can be potent. Always dilute it with a carrier oil if you have sensitive skin, and do a patch test first.
    Garlic
    How to Use: Crush a fresh garlic clove to make a paste, apply it to the wart or skin tag, and cover with a bandage overnight. Garlic has antiviral properties that can be effective against warts.
    Caution: Garlic can cause skin irritation and burns when left on the skin for extended periods.

    Medical Treatments
    If you’re looking for quick, reliable results, consider consulting a healthcare provider for the following treatments:

    What are the best natural ways to remove moles from the skin?
    What are the best natural ways to remove moles from the skin?
    Cryotherapy: This involves freezing the skin tag or wart with liquid nitrogen. It’s a quick procedure typically done in a dermatologist’s office.
    Surgical Removal: For larger or more stubborn warts and skin tags, surgical removal by a professional is often the best option.
    Salicylic Acid: Over-the-counter treatments containing salicylic acid can effectively remove warts and sometimes skin tags. These treatments usually require consistent application over several weeks.

    Important Considerations
    Consultation: Always consult with a dermatologist or healthcare provider before attempting to remove skin tags or warts, especially if they’re large, painful, or in a sensitive area.
    Avoid DIY Surgery: Do not attempt to cut or remove skin tags or warts yourself. This can lead to bleeding, infection, and scarring.

    Conclusion
    While it’s tempting to want to remove skin tags and warts overnight, it’s important to approach this with caution and consider safe, effective, and sometimes slower methods. For the best and safest results, consultation with a healthcare professional is recommended.

    How to Remove Skin Tags and Warts Overnight: Safe and Effective Methods

    Skin tags and warts are common skin issues that, while generally harmless, can be unsightly and bothersome. Removing them overnight might sound appealing, but it’s important to approach this with safe and effective methods. Here’s a guide on how to do it responsibly and effectively.

    Understanding Skin Tags and Warts
    Skin Tags: These are small, soft, skin-colored growths that hang off the skin and are typically found on the neck, armpits, under the breasts, or around the groin. They are benign and painless.

    Warts: These are usually harder, rougher, and more grainy in texture than skin tags and can appear anywhere on the body. They are caused by viruses in the human papillomavirus (HPV) family and can spread through direct contact.

    Safe At-Home Methods
    For overnight removal, there are no guaranteed safe methods because most treatments take time. However, some treatments can start to work quickly, and you might see significant improvement by morning.

    If You Don’t Have A Half Moon Shape On Your Nails, Visit A DOCTOR Immediately
    If You Don’t Have A Half Moon Shape On Your Nails, Visit A DOCTOR Immediately
    Apple Cider Vinegar (ACV)
    How to Use: Soak a cotton ball in apple cider vinegar, place it on the wart or skin tag, and secure it with a bandage overnight. ACV is acidic and can help break down the tissue of skin tags and warts, causing them to fall off over time.
    Caution: ACV can be harsh on the skin. It’s advisable to use a small amount and check for any skin irritation.

    Tea Tree Oil
    How to Use: Apply a drop of tea tree oil directly on the skin tag or wart and cover with a bandage overnight. Tea tree oil has antiviral and antiseptic properties.
    Caution: Tea tree oil can be potent. Always dilute it with a carrier oil if you have sensitive skin, and do a patch test first.
    Garlic
    How to Use: Crush a fresh garlic clove to make a paste, apply it to the wart or skin tag, and cover with a bandage overnight. Garlic has antiviral properties that can be effective against warts.
    Caution: Garlic can cause skin irritation and burns when left on the skin for extended periods.

    Medical Treatments
    If you’re looking for quick, reliable results, consider consulting a healthcare provider for the following treatments:

    Cryotherapy: This involves freezing the skin tag or wart with liquid nitrogen. It’s a quick procedure typically done in a dermatologist’s office.
    Surgical Removal: For larger or more stubborn warts and skin tags, surgical removal by a professional is often the best option.
    Salicylic Acid: Over-the-counter treatments containing salicylic acid can effectively remove warts and sometimes skin tags. These treatments usually require consistent application over several weeks.

    Important Considerations
    Consultation: Always consult with a dermatologist or healthcare provider before attempting to remove skin tags or warts, especially if they’re large, painful, or in a sensitive area.
    Avoid DIY Surgery: Do not attempt to cut or remove skin tags or warts yourself. This can lead to bleeding, infection, and scarring.

    Conclusion
    While it’s tempting to want to remove skin tags and warts overnight, it’s important to approach this with caution and consider safe, effective, and sometimes slower methods. For the best and safest results, consultation with a healthcare professional is recommended.

  • Chicken Parmesan grilled cheese sandwich

    Chicken Parmesan grilled cheese sandwich

    V

    Chicken Parmesan grilled cheese sandwich


    Ingredients:

    • 2 slices of bread (your choice, but a sturdy bread like sourdough works well)
    • 1 cup cooked chicken breast, shredded or sliced
    • 1/2 cup marinara sauce
    • 1/2 cup grated Parmesan cheese
    • 1/2 cup shredded mozzarella cheese
    • 2 tablespoons olive oil or butter
    • 1/2 teaspoon dried basil (optional)
    •  1/2 teaspoon garlic powder (optional)


    Instructions:


    1. Prepare the Chicken:


    • If you haven’t already, cook and shred or slice the chicken breast. You can use leftovers or cook it fresh. Season with salt and pepper to taste.


    2. Assemble the Sandwich:


    • Spread a thin layer of marinara sauce on one side of each bread slice.


    • Layer the shredded chicken over the sauce on one slice of bread.


    • Sprinkle the Parmesan cheese and mozzarella cheese over the chicken.


    • Optionally, sprinkle dried basil and garlic powder over the cheese for extra flavor.

    Ezoic


    • Top with the other slice of bread, sauce side down.


    3. Cook the Sandwich:


    • Heat a skillet over medium heat and add 1 tablespoon of olive oil or butter. You can use more if needed for a crispier crust.

    Ezoic


    • Place the sandwich in the skillet and cook until the bread is golden brown and the cheese is melted, about 3-4 minutes per side. Press down gently with a spatula to ensure even grilling.


    4. Serve:


    • Remove from the skillet and let it cool for a minute before slicing. Serve hot.

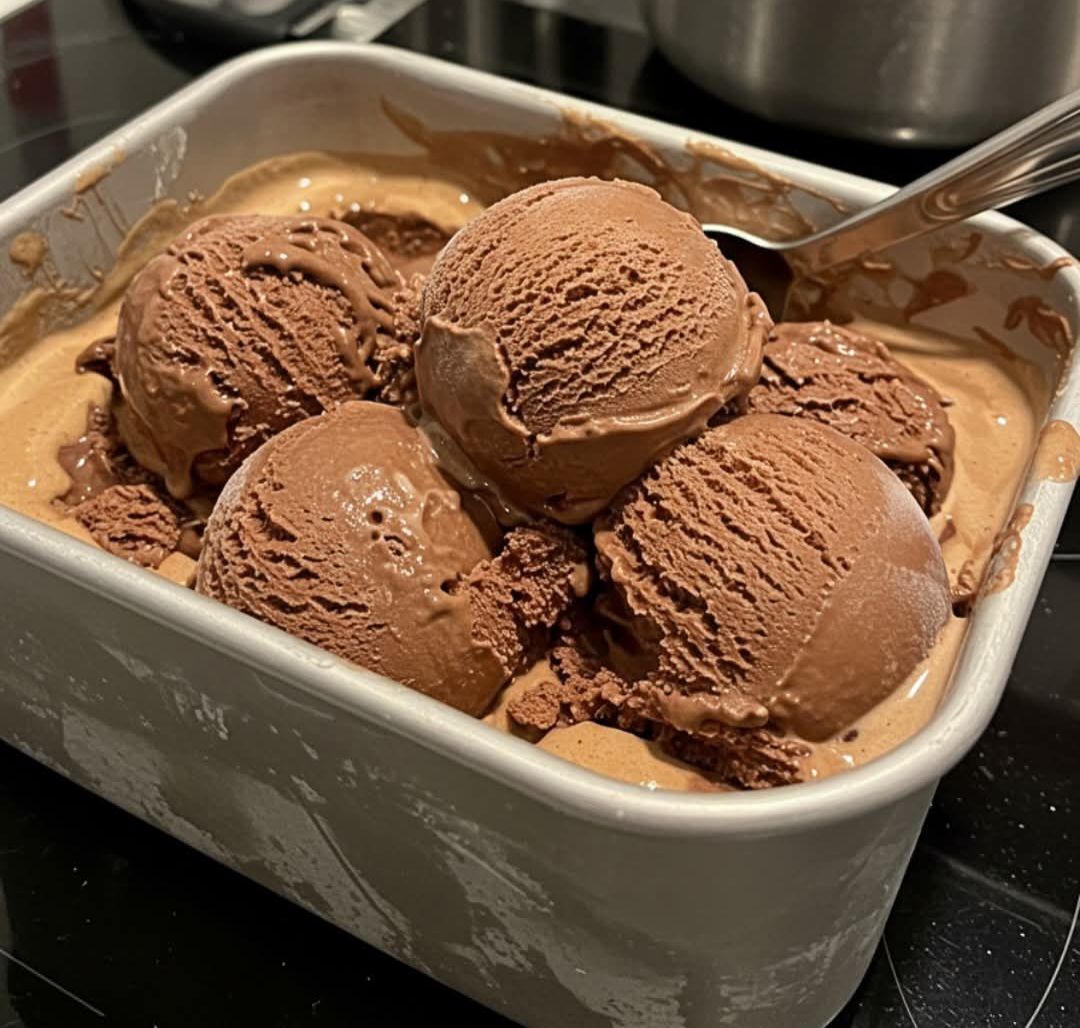
  • Homemade Vanilla Ice Cream Recipe

    Homemade Vanilla Ice Cream Recipe

    Simple, Creamy & Delicious – No Eggs Needed!

    Make the perfect classic vanilla ice cream at home with just a few simple ingredients. This no-cook base results in rich, smooth ice cream that’s perfect on its own or with your favorite toppings.


    Ingredients

    • 2 cups (480 ml) heavy cream, cold

    • 1 cup (240 ml) whole milk

    • 3/4 cup (150 g) granulated sugar

    • 2 teaspoons pure vanilla extract

    • Pinch of salt


    ‍ Instructions

    1️⃣ Mix the Base

    • In a large mixing bowl, combine the milk and sugar.

    • Whisk vigorously until the sugar is completely dissolved — this ensures smooth texture.

    2️⃣ Add Cream & Flavor

    • Stir in the heavy cream, vanilla extract, and a pinch of salt.

    • Mix well until fully blended.

    3️⃣ Chill the Mixture

    • Cover the bowl and refrigerate the mixture for at least 2–4 hours, or ideally overnight.

    Chilling improves texture and enhances flavor.

    4️⃣ Churn the Ice Cream

    • Pour the chilled mixture into your ice cream maker.

    • Churn according to your machine’s instructions (usually 20–25 minutes) until it reaches a soft-serve consistency.

    5️⃣ Freeze to Set

    • Transfer the churned ice cream to an airtight container.

    • Freeze for at least 2 hours for firmer, scoopable texture.


    Topping & Decoration Ideas

    ✨ Classic Toppings

    • Chocolate syrup

    • Caramel drizzle

    • Whipped cream

    Fruity Flavors

    • Fresh strawberries, blueberries, or bananas

    • Fruit jam or compote

    Crunchy Mix-ins

    • Chopped almonds, pistachios, or walnuts

    • Crushed cookies (Oreos, graham crackers)

    • Waffle cone crumbles

    Fun & Colorful

    • Sprinkles or rainbow confetti

    • Mini marshmallows

    • Edible glitter

    Gourmet Touch

    • Dark chocolate shavings with sea salt

    • Espresso powder

    • Honey drizzle with dried lavender


    Storage Tips

    • Store in a freezer-safe, airtight container.

    • Press a layer of plastic wrap against the surface to prevent ice crystals.

    • Best enjoyed within 2–3 weeks for optimal texture and flavor.


    Serving Suggestion

    Garnish with fresh mint leaves (as shown in the photo), and serve in a chilled bowl or waffle cone. Perfect for summer parties, cozy desserts, or midnight cravings!

  • AIR FRYER GARLIC BREAD PIZZA TOAST

    AIR FRYER GARLIC BREAD PIZZA TOAST

    AIR FRYER GARLIC BREAD PIZZA TOAST


    Air Fryer Garlic Bread Pizza Toast is amazing! If you have been looking for the perfect kid-friendly meal, this is one of the best, and with the air fryer, they are so easy to make!

    If you love a simple meal, this is so good! In less than 10 minutes, from start to finish, you can have the perfect homemade pizza.


    I used to make these in the oven for my family, but not with the Air Fryer, and you get a crunchy crust and a soft to gooey center. Creating the perfect bite.

    This recipe was made to be cooked in the Air Fryer! They are so good! My teens have been preparing these all summer long, and they will certainly make for a great back-to-school lunch. Just wrap them up, and they travel well.

    Pro Tips:

    • This recipe will work in any Air Fryer Basket or Oven Model. I have made this frequently in my Ninja Foodi, Instant Pot Vortex, Instant Pot Crisp Lid and GoWise. The recipe will work exactly tehs ame, although the time may vary.
    • I found that the pepperoni may fly around, so I added the cheese on top, for best results.
    • For a better flavor, I also toasted the bread, before adding the toppings. I found that the bottom layer was crunchier, than adding the toppings, before toasting.
    • Do not crowd the air fryer basket, otherwise your bread may not adequately toast up. For best results, leave space around the bread.

    Can you use Aluminum Foil in the Air Fryer?
    Yes, I have been using aluminum foil for years in my air fryer. Although, you should check the owner’s manual before you do, since every air fryer is slightly different.

    For safety reasons, make sure that you do not have any loose foil that can accidentally fly into the heating element, which would pose a safety hazard and may cause damage to your air fryer.

    About Time 

    • Prep Time  5 mins
    • Cook Time  10 mins
    • Total Time 15 mins

    Ingredients

    • 8 Pieces of Frozen Texas Toast Garlic
    • 1 cup pizza sauce
    • 1/2 cup shredded mozzarella cheese
    • 16 slices pepperoni

    Instructions

    1. Put your frozen Garlic Texas Toast into the Air Fryer Basket. Set the temperature to 350 degrees F, air fryer setting, cook for 3 to 5 minutes, until the Texas Toast is golden brown.
    2. Add the pizza sauce on top.
    3. Add the pepperoni slices on top.
    4. Add the Mozzarella Cheese On Top. Set back into the Air Fryer, air fry for another 3 to 4 minutes at 350 degrees F, air fryer setting, until the cheese is melted.
    5. Plate, serve, and enjoy!

    Amount Per Serving

    Calories 177