Category: chicken

  • Turkey Wings !

    Turkey Wings !

    Ingredients:

    • 4–5 large turkey wings, separated at joints

    • 1 tbsp olive oil or melted butter

    • 1 tbsp paprika

    • 2 tsp garlic powder

    • 2 tsp onion powder

    • 1½ tsp dried thyme

    • 1 tsp dried oregano

    • 1 tsp black pepper

    • 1 tsp salt

    • 1 tsp seasoned salt (optional)

    • ½ tsp cayenne pepper (optional for heat)

    • 1 tbsp Worcestershire sauce or soy sauce

    • 1 cup chicken broth (or water with bouillon)


    Instructions:

    1. Preheat & Prep

    • Preheat your oven to 350°F (175°C).

    • Rinse and pat the turkey wings dry with paper towels.

    • Place wings in a large mixing bowl.

    2. Season Well

    • Drizzle olive oil over the wings.

    • In a small bowl, combine all dry seasonings. Sprinkle over the wings.

    • Add Worcestershire sauce and toss everything together to coat evenly.

    3. Arrange in Pan

    • Place wings in a single layer in a deep baking dish or roasting pan.

    • Pour the chicken broth into the pan, around the edges (not directly over wings).

    • Cover tightly with foil to lock in moisture.

    4. Bake Covered

    • Bake covered at 350°F for 1.5 hours, until wings are tender.

    5. Uncover & Brown

    • Remove foil and baste wings with pan juices.

    • Increase heat to 400°F.

    • Bake uncovered for 20–30 minutes until skin is crisp and golden.

    6. Serve

    • Spoon pan drippings over wings for extra flavor.

    • Serve with mashed potatoes, rice, or cornbread.


    Pro Tips:

    • For smoky flavor, add ½ tsp liquid smoke or smoked paprika.

    • For sticky glazed wings, brush with BBQ or honey hot sauce during the last 10 minutes.

    • Leftovers reheat beautifully in the air fryer or oven.

  • AIR FRYER GARLIC BREAD PIZZA TOAST

    AIR FRYER GARLIC BREAD PIZZA TOAST

    AIR FRYER GARLIC BREAD PIZZA TOAST


    Air Fryer Garlic Bread Pizza Toast is amazing! If you have been looking for the perfect kid-friendly meal, this is one of the best, and with the air fryer, they are so easy to make!

    If you love a simple meal, this is so good! In less than 10 minutes, from start to finish, you can have the perfect homemade pizza.


    I used to make these in the oven for my family, but not with the Air Fryer, and you get a crunchy crust and a soft to gooey center. Creating the perfect bite.

    This recipe was made to be cooked in the Air Fryer! They are so good! My teens have been preparing these all summer long, and they will certainly make for a great back-to-school lunch. Just wrap them up, and they travel well.

    Pro Tips:

    • This recipe will work in any Air Fryer Basket or Oven Model. I have made this frequently in my Ninja Foodi, Instant Pot Vortex, Instant Pot Crisp Lid and GoWise. The recipe will work exactly tehs ame, although the time may vary.
    • I found that the pepperoni may fly around, so I added the cheese on top, for best results.
    • For a better flavor, I also toasted the bread, before adding the toppings. I found that the bottom layer was crunchier, than adding the toppings, before toasting.
    • Do not crowd the air fryer basket, otherwise your bread may not adequately toast up. For best results, leave space around the bread.

    Can you use Aluminum Foil in the Air Fryer?
    Yes, I have been using aluminum foil for years in my air fryer. Although, you should check the owner’s manual before you do, since every air fryer is slightly different.

    For safety reasons, make sure that you do not have any loose foil that can accidentally fly into the heating element, which would pose a safety hazard and may cause damage to your air fryer.

    About Time 

    • Prep Time  5 mins
    • Cook Time  10 mins
    • Total Time 15 mins

    Ingredients

    • 8 Pieces of Frozen Texas Toast Garlic
    • 1 cup pizza sauce
    • 1/2 cup shredded mozzarella cheese
    • 16 slices pepperoni

    Instructions

    1. Put your frozen Garlic Texas Toast into the Air Fryer Basket. Set the temperature to 350 degrees F, air fryer setting, cook for 3 to 5 minutes, until the Texas Toast is golden brown.
    2. Add the pizza sauce on top.
    3. Add the pepperoni slices on top.
    4. Add the Mozzarella Cheese On Top. Set back into the Air Fryer, air fry for another 3 to 4 minutes at 350 degrees F, air fryer setting, until the cheese is melted.
    5. Plate, serve, and enjoy!

    Amount Per Serving

    Calories 177

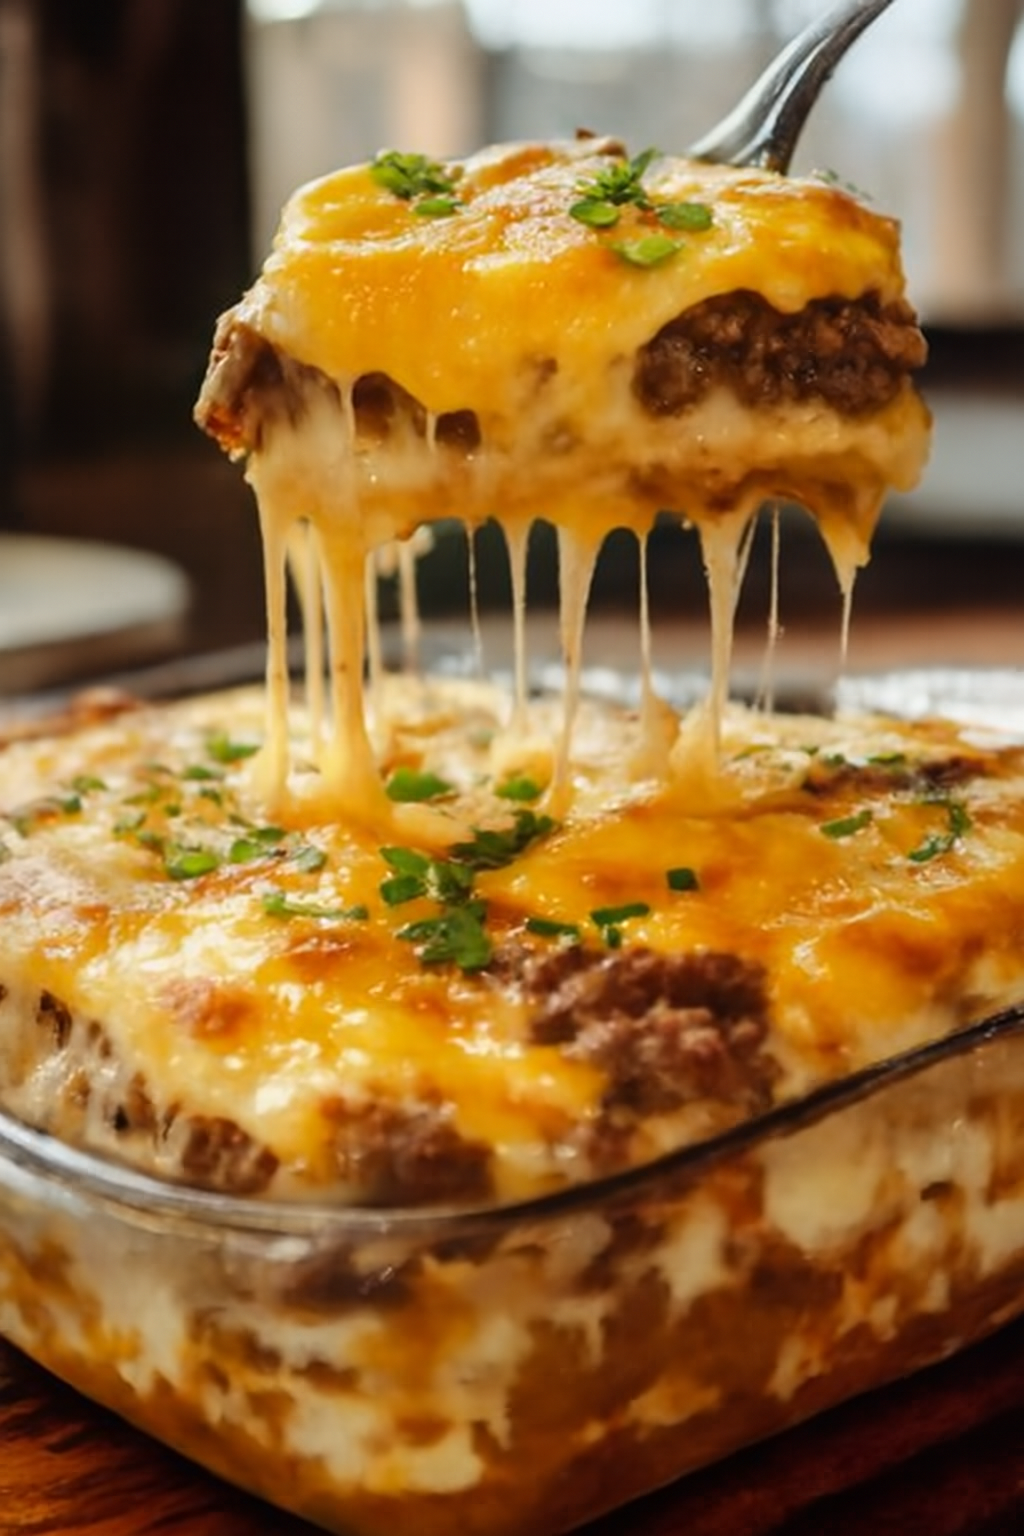
  • Oven-Baked Beef & Potato Casserole Rustic, Cheesy, and Irresistibly Creamy

    Oven-Baked Beef & Potato Casserole Rustic, Cheesy, and Irresistibly Creamy

    Oven-Baked Beef & Potato Casserole

    Rustic, Cheesy, and Irresistibly Creamy

    Ingredients:

    For the casserole:

    • 1.5 lbs (680g) ground beef

    • 1 medium yellow onion, diced

    • 3 cloves garlic, minced

    • 1 tsp kosher salt

    • ½ tsp black pepper

    • 1 tsp smoked paprika (optional but recommended)

    • 4 cups thinly sliced russet or Yukon Gold potatoes (about 3–4 medium potatoes)

    • 1 can (10.5 oz) condensed cream of mushroom soup

    • ½ cup milk (whole preferred, but 2% works)

    • 2 cups shredded cheddar cheese (mild or sharp)

    • 2 tbsp chopped fresh parsley (for garnish)

    • Cooking spray or a little butter for greasing


    Instructions:

    1. Preheat the Oven:

    Set your oven to 375°F (190°C). Lightly grease a 9×13-inch baking dish with butter or cooking spray.

    2. Cook the Beef Mixture:

    • In a large skillet over medium heat, brown the ground beef with the diced onions and minced garlic.

    • Cook until the beef is fully browned and the onions are soft and translucent, about 7–10 minutes.

    • Season the beef with salt, pepper, and paprika.

    • Drain any excess fat, especially if using 80/20 beef.

    3. Layer the Casserole:

    • Arrange half the sliced potatoes in an even layer across the bottom of the prepared dish.

    • Spoon half the cooked beef mixture over the potatoes and spread evenly.

    • Repeat with the remaining potatoes, followed by the rest of the beef.

    4. Make It Creamy:

    • In a medium bowl, whisk together the cream of mushroom soup and milk until smooth.

    • Pour this creamy mixture evenly over the top, letting it seep into the layers.

    5. Add Cheese:

    • Sprinkle the shredded cheddar cheese generously across the top. Use more if you like it extra cheesy.

    6. Bake It:

    • Cover the dish with aluminum foil.

    • Bake for 45 minutes, then remove foil and continue baking for 15–20 minutes more, until the potatoes are tender and the cheese is golden and bubbly.

    7. Garnish & Serve:

    • Let it cool for 5–10 minutes before slicing.

    • Garnish with chopped parsley and serve hot.


    Tips & Variations:

    • Cheese Swap: Try Monterey Jack or a blend of cheddar and mozzarella for different flavors.

    • Veggie Boost: Add a layer of thawed frozen peas, corn, or sautéed mushrooms between the beef and potatoes.

    • Meat Alternatives: Ground turkey or plant-based crumbles work just as well.

    • Soup Substitution: Use cream of chicken, celery, or make your own béchamel sauce for a homemade twist.


    Servings: 6

    Calories: ~400 per serving

    ⏱ Prep Time: 15 minutes

    ⏱ Cook Time: 1 hour

    ⏱ Total Time: 1 hour 15 minutes


    Foil-Packet Campfire Beef & Potato Dinner

    Perfect for Camping, Grilling, or Oven Roasting

    Ingredients (per packet):

    • ⅓ lb (150g) ground beef or pre-cooked crumbles

    • 1 small potato, thinly sliced

    • 2 tbsp diced onion

    • 1 clove garlic, minced

    • Salt & pepper to taste

    • A pinch of paprika or chili flakes (optional)

    • ¼ cup shredded cheddar cheese

    • 2 tbsp cream of mushroom soup OR 1 tbsp mayo + 1 tbsp milk as substitute

    • 1 tbsp water

    • Butter or oil for greasing foil

    • Fresh parsley for garnish (optional)


    Instructions:

    1. Prep the Foil:

    • Tear a 12″x18″ sheet of heavy-duty aluminum foil.

    • Lightly grease the center area with butter or oil to prevent sticking.

    2. Layer the Ingredients:

    • Spread the sliced potatoes over the center of the foil.

    • Top with ground beef, onions, and garlic.

    • Season with salt, pepper, and paprika.

    • Spoon over the soup/mayo mixture and drizzle the water to help steam the potatoes.

    • Sprinkle on the cheese last.

    3. Seal It Tight:

    • Fold the foil over the mixture, then fold and crimp the edges to create a tight seal, leaving space for steam to circulate inside.

    4. Cook Over Heat:

    • Place packets on hot campfire coals, a grill over medium heat, or in a 400°F oven.

    • Cook for 30–35 minutes, flipping once halfway through.

    • Check doneness by carefully opening one packet—potatoes should be tender and cheese melted.

    5. Serve Hot:

    • Let cool for a few minutes.

    • Open and garnish with parsley or hot sauce as desired.

    • Serve straight from the foil or transfer to a plate.


    Make-Ahead & Travel Tips:

    • Pre-cook beef at home for faster camp prep.

    • Slice potatoes thin for quicker cooking.

    • Pack each component in a cooler and assemble packets at the campsite.


    Servings: 1 per packet

    ⏱ Prep Time: 10 minutes

    ⏱ Cook Time: 30–35 minutes

    Perfect for: Camping, backyard grilling, or make-ahead weeknight dinners

  • Tomato Basil Garlic Bread

    Tomato Basil Garlic Bread

    A golden, cheesy bread topped with juicy tomatoes, fresh basil, and rich garlic butter. Perfect for any meal or as a crowd-pleasing appetizer.


    Ingredients

    For the Bread:

    • 1 loaf Italian bread or baguette, preferably fresh

    • 2 tablespoons olive oil or melted butter (for richness and flavor)

    • 2 cloves garlic, minced (for a strong garlicky kick)

    • 1 teaspoon Italian seasoning (optional, but adds depth)

    • 2 large tomatoes, sliced into ¼-inch rounds (ripe and juicy for best flavor)

    • 1½ cups shredded mozzarella cheese (melty, stretchy goodness)

    • ½ cup Parmesan cheese (optional, for a salty, nutty finish)

    • Salt and pepper, to taste

    • Fresh basil leaves, chopped or torn (added after baking for freshness)


    Equipment You’ll Need

    • Baking sheet or tray

    • Parchment paper (optional, for easier cleanup)

    • Small mixing bowl and brush

    • Sharp bread knife

    • Oven preheated to 375°F (190°C)


    Step-by-Step Instructions

    1. Preheat the Oven

    Preheat your oven to 375°F (190°C). If you like extra crispy bread, preheat a baking stone or heavy-duty sheet pan inside the oven for a few minutes before placing the bread on it.


    2. Slice the Bread

    Take your Italian bread or baguette and slice it:

    • For larger pieces, slice the loaf horizontally into two halves (like garlic bread).

    • For individual servings, slice into 1-inch thick pieces.

    Arrange the slices or halves, cut side up, on a baking sheet lined with parchment paper or foil.


    3. Make the Garlic Spread

    In a small bowl, combine:

    • 2 tablespoons olive oil (or melted butter)

    • 2 minced garlic cloves

    • 1 teaspoon Italian seasoning (optional)

    Mix well until the garlic and herbs are evenly distributed.

    Brush the mixture generously over the cut sides of the bread slices, making sure to coat every corner.

    Tip: You can add a pinch of chili flakes to this mix for a spicy variation.


    4. Add the Tomatoes

    Arrange the sliced tomatoes evenly across the bread.

    • For large halves: use about 6–8 slices per half.

    • For individual slices: top each with 1–2 slices of tomato.

    Season the tomatoes lightly with salt and freshly ground black pepper.


    5. Layer the Cheese

    • Sprinkle 1½ cups shredded mozzarella evenly over the tomato-topped bread.

    • If desired, dust with ½ cup of Parmesan cheese for an extra layer of flavor and browning.

    Tip: Use fresh mozzarella for a creamier, richer melt—but be mindful it releases more moisture.


    ⏲️ 6. Bake to Perfection

    Place the bread into the preheated oven and bake for 10–15 minutes or until:

    • The cheese is melted and bubbling

    • The edges of the bread are golden and crisp

    • The tomato juices are slightly roasted into the bread

    For extra crispiness, broil for the last 1–2 minutes—watch closely to avoid burning!


    7. Add Fresh Basil

    Remove the bread from the oven and immediately sprinkle with chopped or torn fresh basil leaves. This keeps the basil bright, fragrant, and flavorful.

    You can also drizzle a little extra olive oil or a few drops of balsamic glaze for a gourmet finish.


    ️ 8. Slice and Serve

    • If baked as halves, slice into strips or squares.

    • If using slices, serve as-is or cut in half for finger food.

    Serve immediately while warm and melty.


    Storage & Reheating Tips

    • Store leftovers in an airtight container in the fridge for up to 2 days.

    • Reheat in the oven at 350°F (175°C) for 5–7 minutes to restore crispness.

    • Avoid the microwave, as it softens the bread and makes it soggy.


    Optional Add-Ons & Variations

    Variation How to Make It
    Caprese Style Add sliced fresh mozzarella and a drizzle of balsamic glaze.
    Spicy Kick Sprinkle with red pepper flakes or add jalapeño slices.
    Pesto Drizzle Swirl on basil pesto before or after baking.
    Vegan Version Use dairy-free cheese and olive oil instead of butter.
    Add Protein Top with thin slices of prosciutto or grilled chicken strips.

    ⏱️ Recipe Summary

    • Prep Time: 10 minutes

    • Bake Time: 10–15 minutes

    • Total Time: 20–25 minutes

    • Servings: 4–6

    • Calories: ~280–320 per serving (varies by toppings)


    ❤️ Chef’s Tips

    • Use day-old bread for slightly drier texture—it crisps up better in the oven.

    • Go for ripe, firm tomatoes—too soft and they’ll release too much moisture.

    • Add a pinch of sugar to balance acidity if tomatoes are overly tart.

    • This recipe works beautifully as party finger food or paired with soup or pasta.

  • I swear this recipe was sent straight from heaven!

    I swear this recipe was sent straight from heaven!

    These crispy, golden-brown mashed potato puffs are the perfect way to use up leftover mashed potatoes. Whether baked or fried, they’re loaded with cheese, chives, and just the right amount of tang from sour cream. Ideal as an appetizer, side dish, or party snack!

    Ingredients

    Ingredient Quantity
    Mashed potatoes 3 cups
    Shredded cheese (cheddar or blend) 1 cup
    All-purpose flour 1/4 cup
    Grated Parmesan cheese 2 tablespoons
    Chopped fresh chives 2 tablespoons
    Sour cream 1/3 cup
    Salt To taste
    Eggs 2, beaten

    Tip: Use cold mashed potatoes for better consistency when shaping the puffs.


    Instructions

    1. Combine Ingredients

    In a large mixing bowl, stir together the mashed potatoes, shredded cheese, flour, Parmesan, chives, sour cream, and salt. Mix well to ensure everything is evenly distributed.

    2. Add the Eggs

    Add the beaten eggs into the potato mixture. Stir thoroughly until the mixture is smooth and cohesive. The eggs will help bind the ingredients.

    3. Shape the Puffs

    Using your hands or a cookie scoop, shape the mixture into small balls (about 1 to 1½ inches in diameter) or flatten slightly into patties if preferred. Set aside on a plate or tray.

    4. Cook the Puffs

    Option A – Bake:

    • Preheat your oven to 400°F (200°C).

    • Line a baking sheet with parchment paper or lightly grease it.

    • Arrange the puffs in a single layer, spacing them slightly apart.

    • Bake for 15–20 minutes, or until golden brown and crisp on the edges.

    Option B – Fry:

    • Heat about ½ inch of oil in a skillet over medium heat.

    • Fry the puffs in batches, turning occasionally, until golden brown and crispy on all sides (about 2–3 minutes per side).

    • Transfer to a paper towel-lined plate to drain excess oil.

    5. Serve

    Serve warm with your favorite dipping sauces like sour cream, ranch, aioli, or spicy ketchup.


    Optional Add-Ins & Variations

    • Add garlic powder or onion powder for extra flavor.

    • Mix in crumbled bacon or diced cooked ham.

    • Swap chives with green onions or parsley.

    • Add a bit of hot sauce or paprika for a spicy kick.

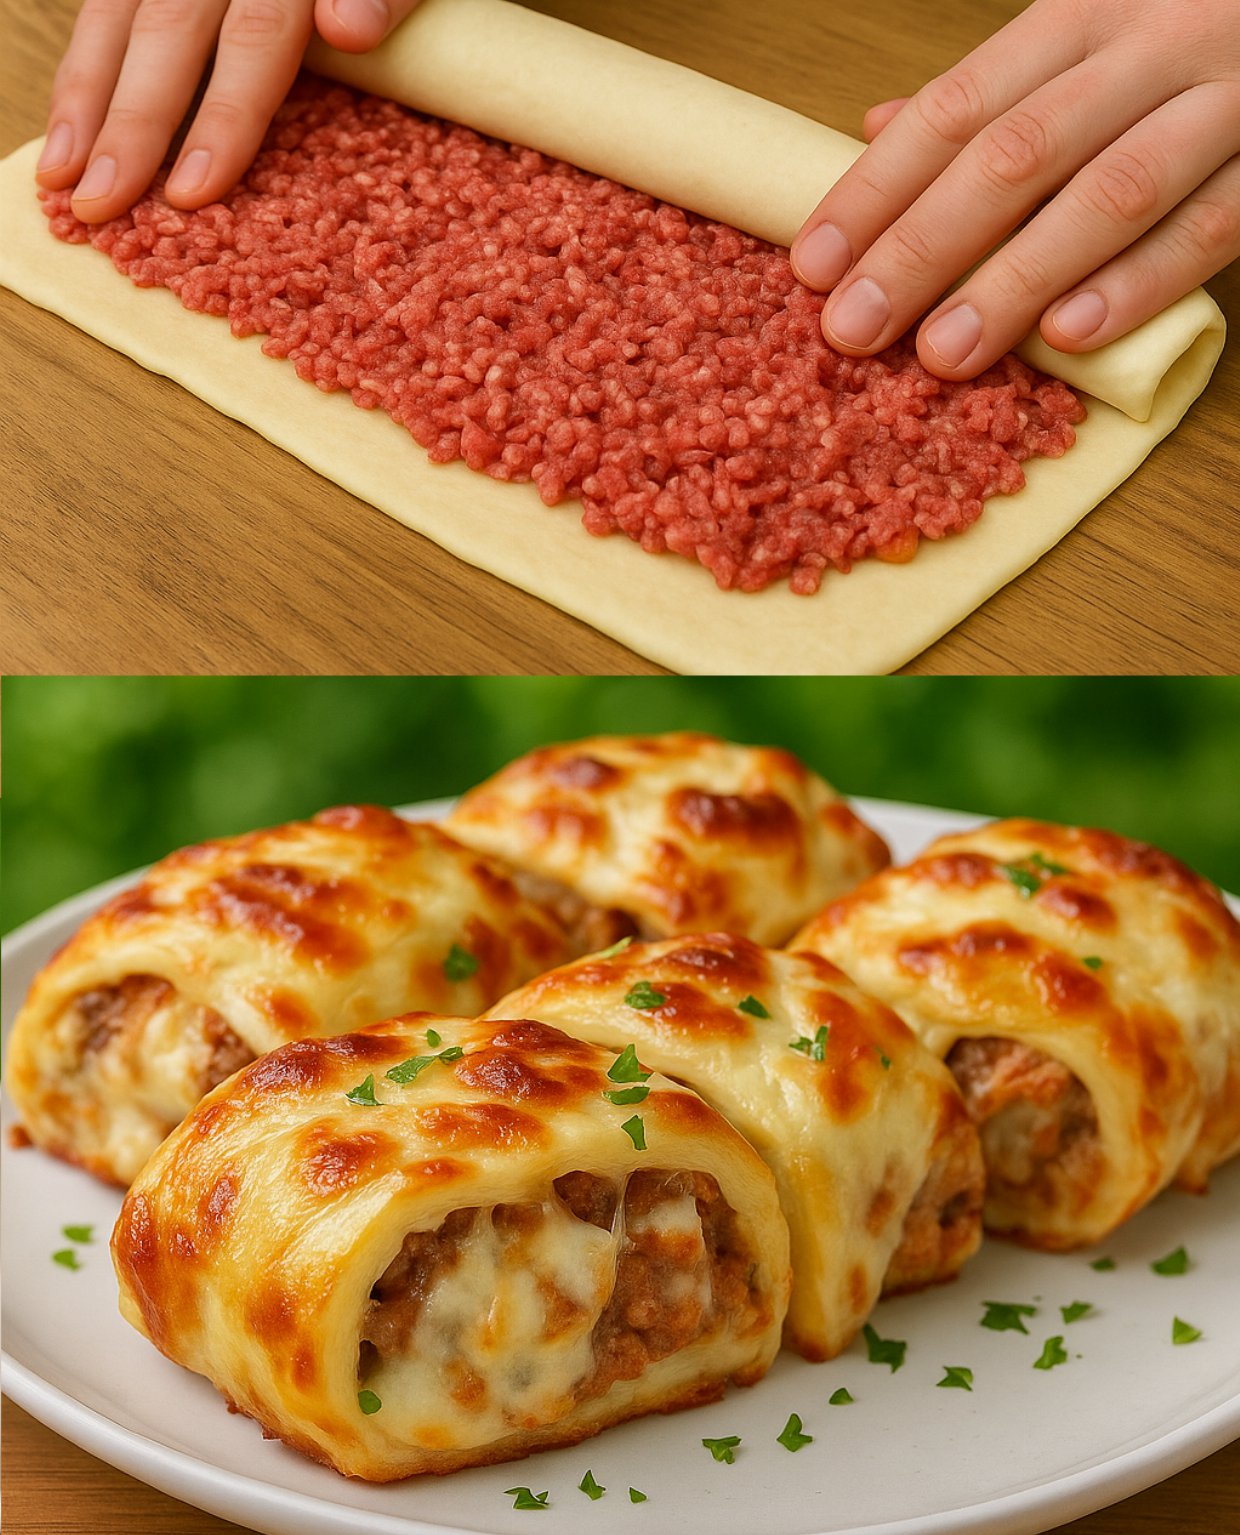
  • Homemade Easy Cheesy Pizza Pockets

    Homemade Easy Cheesy Pizza Pockets

    Here’s a Homemade Easy Cheesy Pizza Pockets recipe — kid-friendly, freezer-friendly, and packed with gooey cheese and your favorite pizza fillings, all wrapped in soft golden dough.


     Homemade Easy Cheesy Pizza Pockets

    Ingredients (Makes 6–8 pockets)

    For the dough (or use store-bought pizza dough):

    • 2 cups all-purpose flour

    • 2 tsp instant yeast

    • 1 tsp sugar

    • 1/2 tsp salt

    • 2 tbsp olive oil

    • 3/4 cup warm water

    For the filling:

    • 1/2 cup pizza sauce (or marinara)

    • 1 cup shredded mozzarella cheese

    • 1/4 cup grated cheddar (optional for extra flavor)

    • Your choice of toppings:

      • chopped pepperoni

      • diced bell peppers

      • mushrooms

      • olives

      • cooked sausage

      • pineapple (optional!)

    For brushing:

    • 1 egg (for egg wash) or a bit of melted butter for a golden top

    • Optional: sprinkle of Italian herbs or garlic powder


    Instructions

    1. Make the Dough (Skip if using store-bought):

    • In a large bowl, mix flour, yeast, sugar, and salt.

    • Add warm water and olive oil. Mix and knead for 5–8 minutes until smooth.

    • Cover and let rise for about 45–60 minutes or until doubled in size.

    2. Preheat Oven:

    • Preheat to 375°F (190°C). Line a baking tray with parchment paper.

    3. Prepare the Pockets:

    • Divide the dough into 6–8 equal pieces.

    • Roll each piece into a circle (about 5–6 inches wide).

    • Add 1 tbsp of pizza sauce, cheese, and your toppings to one half of the circle — leave edges clear.

    • Fold over and press edges to seal (use a fork to crimp the edges tightly).

    4. Bake:

    • Place on a baking sheet. Brush tops with egg wash or butter.

    • Bake for 15–20 minutes, or until golden brown and puffed.

    5. Serve:

    • Let cool slightly and enjoy warm! Great for dipping in extra pizza sauce or ranch.


    ❄️ Freezer Tip:

    • Let them cool completely, then freeze in a single layer.

    • Reheat in oven or air fryer at 350°F (175°C) for 10–15 minutes — no thawing needed.

    Would you like a quick version using sandwich bread or puff pastry instead of dough?

  • Chicken Avocado Ranch Burritos: A Flavor Fiesta!

    Chicken Avocado Ranch Burritos: A Flavor Fiesta!

    Get ready for a taste explosion with these creamy, satisfying Chicken Avocado Ranch Burritos! Tender chicken, smooth avocado, melty cheese, and a zesty Ranch dressing come together in a warm tortilla for a quick and easy meal that’s perfect for lunch, dinner, or even meal prepping. With minimal prep and customizable ingredients, these burritos are sure to become a new family favorite.

    (Yields: 4 burritos)
    (Prep time: 10 minutes)
    (Cook time: 5 minutes (optional grilling))

    Ingredients:

    For the Filling:

    2 cups cooked chicken, shredded or diced: You can use leftover rotisserie chicken for convenience, bake or poach chicken breasts and shred them, or even use seasoned grilled chicken.
    2 ripe avocados, diced: Creamy avocado adds richness and healthy fats to the filling. Make sure your avocados are ripe but still firm enough to dice.
    1 cup shredded cheese: Cheddar, Monterey Jack, Colby Jack, or a Mexican blend all work wonderfully. Choose your favorite for the perfect cheesy pull.
    ½ cup Ranch dressing: A creamy and tangy Ranch dressing ties all the flavors together. Use your favorite store-bought brand or try making a homemade version for an extra touch.
    ¼ cup fresh cilantro, chopped: Fresh cilantro adds a bright, herbaceous note that complements the other ingredients. Adjust the amount to your preference.
    ½ teaspoon garlic powder: Garlic powder provides a subtle savory depth to the filling.
    ½ teaspoon salt: Enhances the overall flavor of the filling. Adjust to your taste.
    ¼ teaspoon black pepper: Adds a touch of spice. Adjust to your taste.
    For the Burritos:

    4 large flour tortillas: Look for burrito-sized tortillas (around 10-12 inches in diameter) that are soft and pliable for easy rolling.
    Optional for Grilling:

    1 tablespoon olive oil or cooking spray: For a golden and slightly crispy exterior.
    Equipment:

    Large mixing bowl
    Cutting board
    Sharp knife
    Measuring cups and spoons
    Skillet or grill pan (optional)
    Spatula (optional)
    Instructions:

    Step 1: Prepare the Filling (10 minutes)

    In a large mixing bowl, combine the shredded or diced cooked chicken, diced ripe avocados, shredded cheese, Ranch dressing, chopped fresh cilantro, garlic powder, salt, and black pepper.
    Gently stir all the ingredients together until they are well combined and the chicken and avocado are evenly coated with the Ranch dressing and cheese. Be careful not to mash the avocado too much; you want to maintain some texture.
    Taste the filling and adjust the seasonings (salt, pepper, garlic powder) according to your preference. You might want to add a little more Ranch dressing for extra creaminess or more cilantro for a brighter flavor.
    Step 2: Warm the Tortillas (2 minutes)

    Warming the tortillas makes them more pliable and prevents them from tearing when you roll the burritos. You have a few options for warming them:
    Microwave: Wrap the tortillas in a damp paper towel and microwave for 15-20 seconds per tortilla, or until softened.
    Skillet: Heat a dry skillet over medium heat. Cook each tortilla for about 10-15 seconds per side, until softened and slightly puffed. Be careful not to overheat them, or they will become crispy.
    Oven: Preheat your oven to 350°F (175°C). Wrap the tortillas in foil and bake for about 5-10 minutes, or until softened.
    Step 3: Assemble the Burritos (5 minutes)

    Lay a warmed tortilla flat on a clean surface.
    Spoon an equal amount of the chicken and avocado filling (approximately ½ cup) down the center of the tortilla, leaving about 2 inches of space on the sides.
    Fold in the two sides of the tortilla towards the center over the filling.
    Starting from the bottom edge closest to you, tightly roll the tortilla up and over the filling until you reach the opposite edge.
    If desired, you can tuck the edge of the tortilla underneath the burrito to help seal it.
    Repeat steps 1-5 with the remaining tortillas and filling.
    Step 4: Optional Grilling for a Golden Finish (5 minutes)

    Heat a skillet or grill pan over medium heat. Lightly brush the pan with olive oil or spray with cooking spray.
    Place the assembled burritos seam-side down in the hot skillet or grill pan.
    Cook for 2-3 minutes per side, or until the tortillas are golden brown and slightly crispy. This step adds a wonderful texture and a touch of extra flavor.
    Remove the grilled burritos from the skillet and let them cool slightly before serving.
    Step 5: Serve and Enjoy!

    Serve the Chicken Avocado Ranch Burritos warm. You can enjoy them as is or with your favorite toppings and sides.
    Tips and Variations:

    Spice it Up: Add a pinch of red pepper flakes to the filling for a little heat. You can also use a spicy Ranch dressing or include some diced jalapeños.
    Add More Veggies: Incorporate other vegetables like diced bell peppers, corn, black beans, or chopped green onions for added flavor and nutrition. Sauté the bell peppers and corn lightly before adding them to the filling.
    Make it Vegetarian: Substitute the chicken with seasoned black beans, crumbled tofu, or sautéed mushrooms for a delicious vegetarian option.
    Different Cheeses: Experiment with different types of cheese like pepper jack for a spicy kick or provolone for a milder, meltier texture.
    Homemade Ranch Dressing: For an extra special touch, try making your own Ranch dressing. There are many easy recipes online that allow you to customize the flavors to your liking.
    Add Some Lime: A squeeze of fresh lime juice into the filling can add a bright and zesty flavor.
    Meal Prep Friendly: These burritos are great for meal prepping! Assemble them (without grilling if desired), wrap them individually in plastic wrap and then foil, and store them in the refrigerator for up to 3 days or in the freezer for up to 3 months. To reheat, thaw in the refrigerator overnight and1 then warm them in a skillet, oven, or microwave.
    1.
    cremumresa.hashnode.dev
    cremumresa.hashnode.dev
    Nutritional Information (per burrito, estimated):

    Calories: Approximately 410
    Protein: Approximately 25 grams
    Carbs: Approximately 28 grams
    Fat: Approximately 22 grams
    (Note: Nutritional information can vary depending on the specific ingredients and portion sizes used.)

    These Chicken Avocado Ranch Burritos are a fantastic and customizable meal that’s sure to satisfy. Whether you’re looking for a quick weeknight dinner or a flavorful lunch, these burritos are a winning choice. Enjoy the delicious combination of creamy avocado, savory chicken, and zesty Ranch!

  • Air Fryer Chili Lime Chicken Strips Recipe*

    Air Fryer Chili Lime Chicken Strips Recipe*


    *Air Fryer Chili Lime Chicken Strips Recipe*


    *Servings:* 4

    *Prep Time:* 10 minutes

    *Cook Time:* 12 minutes

    *Total Time:* 22 minutes


    *Ingredients:*


    – 1 lb chicken breast, cut into strips

    – 2 tablespoons olive oil

    – 2 cloves garlic, minced

    – 1 teaspoon chili powder

    – 1/2 teaspoon cumin

    – 1/2 teaspoon paprika

    – Zest and juice of 1 lime

    – Salt and pepper to taste

    – Optional: cayenne pepper for extra heat


    *Instructions:*


    1. In a bowl, combine olive oil, garlic, chili powder, cumin, paprika, lime zest, lime juice, salt, and pepper.

    2. Add the chicken strips to the bowl and toss to coat evenly.

    3. Preheat the air fryer to 400°F (200°C).

    4. Place the chicken strips in the air fryer basket in a single layer.

    5. Air fry for 10-12 minutes, flipping halfway through, until the chicken is cooked through and crispy.


    *Tips and Variations:*


    1. *Spice it up:* Add a pinch of cayenne pepper for extra heat.

    2. *Marinate:* Marinate the chicken strips for 30 minutes to an hour for more flavor.

    3. *Different seasonings:* Try using fajita seasoning, garlic powder, or smoked paprika for a different flavor profile.

    4. *Serve with:* Serve with your favorite dipping sauce, such as ranch or salsa, or over a salad.


    *Nutrition Information (approximate):*


    – Calories per serving: 250

    – Protein: 30g

    – Fat: 10g

    – Saturated fat: 2.5g

    – Cholesterol: 60mg

    – Sodium: 250mg


    *Benefits of Air Fryer Cooking:*


    1. *Less oil:* Air fryer cooking uses less oil than traditional deep-frying methods.

    2. *Healthier:* Air fryer cooking is a healthier alternative to deep-frying, with fewer calories and less fat.

    3. *Easy cleanup:* Air fryers are easy to clean and maintain.


    I hope this expanded recipe helps! Let me know if you have any questions or if you’d like any further variations or substitutions.

  • Bacon-Wrapped Doritos-Crusted Stuffed Chicken

    Bacon-Wrapped Doritos-Crusted Stuffed Chicken

    Bacon-Wrapped Doritos-Crusted Stuffed Chicken

    Crispy, cheesy, and full of flavor—these stuffed chicken breasts are wrapped in bacon and coated in crushed Doritos for the ultimate crunchy finish.


    Step-by-Step Instructions with Images


    Step 1: Preheat the Oven

    • Preheat oven to 375°F (190°C).

    • Line a baking sheet with parchment paper or lightly grease it with cooking spray.


    Step 2: Prepare the Chicken

    Ingredients for Filling:

    • 4 boneless, skinless chicken breasts

    • 4 oz (½ cup) cream cheese, softened

    • ½ cup shredded cheddar cheese

    • 2 green onions, finely sliced (optional)

    • ½ tsp garlic powder

    • ½ tsp onion powder

    • Salt and pepper, to taste

    Instructions:

    1. Carefully slice a pocket into the side of each chicken breast. Don’t cut all the way through.

    2. In a bowl, combine:

      • Cream cheese

      • Shredded cheddar

      • Green onions (optional)

      • Garlic powder, onion powder

      • Salt & pepper

    3. Stuff each chicken breast with an equal amount of filling.

    4. Press the edges to seal the pocket (toothpicks can help).


    Step 3: Wrap in Bacon

    • Wrap each chicken breast with 2 slices of bacon, overlapping slightly.

    • Use toothpicks to secure the bacon if needed.


    Step 4: Coat with Doritos

    Set up a breading station:

    • Bowl 1: ½ cup all-purpose flour

    • Bowl 2: 2 eggs, beaten

    • Bowl 3: 2 cups crushed Doritos (nacho cheese flavor works best)

    Bread the chicken:

    1. Dredge the bacon-wrapped chicken in flour, shake off excess.

    2. Dip in the egg wash.

    3. Press into crushed Doritos to coat completely.


    Step 5: Bake

    • Place chicken breasts on the prepared baking sheet.

    • Lightly spray tops with cooking spray (helps crisp up the coating).

    • Bake for 30–35 minutes, or until:

      • Chicken reaches 165°F (75°C) internally

      • Bacon is crispy

      • Dorito crust is golden and crunchy


    Step 6: Serve

    • Let rest for 5 minutes before slicing or serving.

    • Garnish with:

      • Extra green onions

      • Fresh parsley (optional)

    • Serve with dipping sauces like:

      • Ranch

      • Honey mustard

      • Salsa


    ✅ Tips for Success:

    • Use thick Dorito coating for maximum crunch.

    • For even baking, place a wire rack on the baking sheet.

    • If bacon isn’t crisping fast enough, broil the last 2–3 minutes carefully.

  • Garlic Parmesan Chicken Pasta Bake

    Garlic Parmesan Chicken Pasta Bake

    Jump to Recipe·Print Recipe
    If you’re in the mood for a comforting, creamy, and cheesy dish that’s also incredibly easy to make, Garlic Parmesan Chicken Pasta is your answer. This dish brings together tender chicken, pasta, and a rich garlic parmesan sauce that’s so flavorful, you might just make it your go-to meal for every weeknight dinner.

    ×
    ×
    Whether you’re a beginner in the kitchen or someone who loves trying out new recipes, this dish will be a hit. Let’s dive into how to make it and why it’s become such a favorite.

    What is Garlic Parmesan Chicken Pasta?
    Garlic Parmesan Chicken Pasta is the kind of meal that’s both rich and comforting, but surprisingly simple to make. The base is a creamy sauce made with garlic, parmesan cheese, and heavy cream, which gives it that perfect balance of savory and cheesy. The pasta soaks up this sauce and becomes just the right amount of creamy. Add in tender, pan-seared chicken, and you have a meal that checks all the boxes—rich, flavorful, and satisfying.

    How to Make Garlic Parmesan Chicken Pasta Bake
    Craving a hearty, cheesy, and comforting meal? Look no further than the Garlic Parmesan Chicken Pasta Bake. This dish combines tender chicken, creamy garlic Parmesan sauce, and pasta, all baked to perfection. It’s a crowd-pleaser that’s perfect for family dinners or meal prepping for the week ahead.

    Ingredients You’ll Need
    Before diving into the cooking process, gather the following ingredients:

    Ezoic
    1 pound rotini pasta (cooked and drained, reserve 1 cup of pasta water)
    3 cups cooked chicken, diced or shredded
    2 (15-ounce) jars Alfredo sauce
    1 cup garlic Parmesan sauce
    2 cups shredded mozzarella cheese
    ½ cup grated Parmesan cheese
    ½ cup pasta water (optional)
    ½ teaspoon salt
    ¼ teaspoon black pepper
    Fresh parsley, chopped (for garnish, optional)
    Step-by-Step Instructions
    Preheat the Oven
    Set your oven to 375°F (190°C). Grease a 9×13-inch baking dish with cooking spray or butter to prevent sticking.

    Cook the Pasta
    Bring a large pot of salted water to a boil. Add the rotini pasta and cook according to the package instructions until al dente. Drain the pasta, reserving 1 cup of the cooking water for later use.

    ×
    Ezoic
    Prepare the Chicken
    While the pasta cooks, dice or shred your cooked chicken. If you don’t have pre-cooked chicken, you can quickly cook chicken breasts in a skillet over medium heat until fully cooked, then dice or shred them.

    Combine Ingredients
    In a large mixing bowl, combine the cooked pasta, chicken, Alfredo sauce, garlic Parmesan sauce, half of the shredded mozzarella cheese, and half of the grated Parmesan cheese. Season with salt and pepper to taste. If the mixture seems too thick, add the reserved pasta water a little at a time until you reach a creamy consistency.

    Assemble the Bake
    Transfer the pasta and chicken mixture into the prepared baking dish. Spread it out evenly to ensure uniform cooking.

    ×
    Ezoic
    Top with Cheese
    Sprinkle the remaining shredded mozzarella and grated Parmesan cheeses evenly over the top of the pasta mixture.

    Bake
    Cover the baking dish with aluminum foil and place it in the preheated oven. Bake for 20-25 minutes, or until the cheese is melted and bubbly, and the dish is heated through.

    Optional: Broil for a Golden Top
    For a golden, crispy top, remove the foil and broil the dish for an additional 2-3 minutes. Keep a close eye on it to prevent burning.

    ×
    Ezoic
    Garnish and Serve
    Remove the dish from the oven and let it sit for a few minutes before serving. Garnish with freshly chopped parsley for a burst of color and freshness.

    Tips for the Best Garlic Parmesan Chicken Pasta Bake
    Use Freshly Grated Cheese: Freshly grated Parmesan and mozzarella melt better and provide a smoother, creamier texture than pre-shredded varieties.
    Add Vegetables: Incorporate vegetables like spinach, broccoli, or mushrooms into the mix for added nutrition and flavor.
    Make It Spicy: If you enjoy a bit of heat, add red pepper flakes to the sauce or sprinkle some on top before serving.
    Customize the Protein: Swap out chicken for turkey, sausage, or even a plant-based protein to suit your dietary preferences.
    easy Garlic Parmesan Chicken Pasta Bake recipe
    this …
    Tips for the Creamiest Garlic Parmesan Sauce
    To make sure your garlic parmesan sauce is creamy and smooth, keep a few tips in mind:

    Use Fresh Parmesan: Don’t use pre-grated parmesan. Freshly grated cheese melts better and creates a much smoother sauce.
    Simmer Slowly: Don’t rush the sauce. Let it simmer gently over low heat to thicken up. If you cook it on high heat, it may break or separate.
    How to Make the Dish Ahead of Time
    If you’re meal prepping or need to get ahead on your dinner plans, you can definitely make Garlic Parmesan Chicken Pasta ahead of time. Here’s how:

    ×
    Ezoic
    Prepare the pasta and sauce separately, then store them in separate containers in the fridge.
    When you’re ready to eat, simply reheat the sauce in a pan. Add a little extra cream if it’s thickened too much, and toss in your pasta and chicken.
    Variations to Try
    Feel like switching things up? Here are a few fun variations to give your Garlic Parmesan Chicken Pasta a unique twist:

    Add Vegetables: Spinach, sun-dried tomatoes, or mushrooms can add texture and additional flavor.
    Change the Cheese: Parmesan is classic, but you could also try adding mozzarella for a gooey, cheesy touch or Asiago for a more tangy flavor.
    Spicy Version: If you like a bit of heat, add red pepper flakes to the sauce for a subtle spicy kick.
    Is Garlic Parmesan Chicken Pasta Healthy?
    While this dish is rich and indulgent, it’s definitely not a daily meal if you’re watching your calorie intake. But, if you’re looking to cut some calories, you can substitute the heavy cream with half-and-half or use a lower-fat cheese. You could also go for lean chicken breasts or use zucchini noodles instead of regular pasta to make it lighter.

    Serving Suggestions
    Garlic Parmesan Chicken Pasta is already a filling meal on its own, but it pairs wonderfully with a few side dishes:

    ×
    Ezoic
    Garlic Bread: Perfect for mopping up any leftover sauce.
    Salad: A simple green salad with a tangy vinaigrette balances out the richness of the pasta.
    Roasted Vegetables: Roasted asparagus, broccoli, or Brussels sprouts make excellent sides.
    Garlic Parmesan Chicken Pasta Bake recipe
    SAVE THIS PIN
    FAQs about Garlic Parmesan Chicken Pasta
    What Can I Substitute for Heavy Cream in Garlic Parmesan Chicken Pasta?
    If you don’t have heavy cream on hand, you can substitute with half-and-half or a dairy-free option like coconut cream. Keep in mind that coconut cream will add a slightly different flavor, but it still creates a creamy texture.

    Can I Use Pre-Cooked Chicken for This Recipe?
    Yes! You can use pre-cooked chicken, but make sure to add it to the sauce at the end, just long enough to warm through without drying it out.

    Can I Make This Dish Spicy?
    Absolutely! Add red pepper flakes or cayenne pepper to the sauce to give it a nice spicy kick.

    ×
    Ezoic
    Can I Freeze Garlic Parmesan Chicken Pasta?
    Yes, you can freeze the pasta and sauce separately. When you’re ready to eat it, just thaw both and reheat them. You might need to add extra cream to make the sauce nice and smooth again.

    How Can I Make Garlic Parmesan Chicken Pasta Vegetarian?
    To make the dish vegetarian, simply swap the chicken for tofu or your favorite plant-based protein. Add more vegetables to fill it out, and you’re all set.

    Conclusion
    Garlic Parmesan Chicken Pasta Bake is a comforting and flavorful dish that’s perfect for any occasion. With its creamy sauce, tender chicken, and cheesy goodness, it’s sure to become a family favorite. Whether you’re making it for a weeknight dinner or serving it at a gathering, this easy-to-make recipe delivers a satisfying meal that everyone will love. Don’t forget to add your personal touch by customizing it with veggies or other proteins! Enjoy this delicious, hearty dish with your loved ones, and watch it disappear in no time. Happy cooking!

    Ezoic
    Garlic Parmesan Chicken Pasta Bake
    Garlic Parmesan Chicken Pasta Bake
    Author: Eliza Nooman Total Time: 25mins
    Print Recipe
    Pin Recipe
    Garlic Parmesan Chicken Pasta Bake combines tender chicken, rotini pasta, and a creamy, cheesy garlic sauce for a comforting and satisfying meal. Baked to golden perfection, it’s a family favorite that’s easy to prepare and full of flavor.

    Ingredients
    Scale
    1x
    2x
    3x
    8 Tablespoons salted butter divided in recipe (you can use less)
    24 ounces chicken breast boneless skinless (about 3 medium size chicken breasts)
    1½ teaspoons fine grind sea salt
    1 teaspoon onion powder
    1 teaspoon garlic powder
    ½ teaspoon black pepper
    ½ Tablespoon minced garlic about 6 cloves
    8 ounces rotini Pasta
    4 bulbs roasted garlic
    ¾ cup chicken stock or broth
    4 ounces parmesan Cheese about 1¼ cups finely grated
    ½ cup heavy cream
    1 Tablespoon dried parsely optional
    8 ounces fresh spinach optional
    Instructions
    Prep
    Roast the garlic if you haven’t already. Let it cool and squeeze the garlic cloves out into a small bowl.
    Trim and cube the chicken breasts into 1″ pieces.
    Mince raw garlic, shred the parmesan cheese, and gather the remaining ingredients.
    Sauté
    Turn the Ninja Foodi or Instant Pot on high sear/sauté. Melt 2-4 Tablespoons of butter and add the chicken pieces and seasonings (except parsley). Stir and brown the chicken on one side.
    Flip the chicken and add in the minced garlic. Stir frequently and sauté for 2-3 minutes. If the garlic is browning too quickly, turn the heat down.
    Add in the pasta, roasted garlic and the chicken broth or stock. Scrape the bottom of the pot to make sure nothing is stuck. Add in the remaining butter.
    Pressure Cook
    Put the pressure lid on turn the valve to seal. Set the pressure on high for 4 minutes. When the time is up, allow the pot to naturally release the pressure for 10 minutes, then manually release any remaining pressure. Remove the lid and stir.
    Finishing Touches
    Add in the grated cheese and stir. Add in ¼ cup of heavy cream and stir. Continue to add the cream until the sauce is the consistency you like. Add in the dried parsley and stir.
    If you want to add in fresh spinach, add it in now and stir. Close the lid and let sit for a few minutes so it can wilt.
    Serve & Enjoy!

  • Creamy Garlic Butter Chicken Dinner

    Creamy Garlic Butter Chicken Dinner


    Creamy Garlic Butter Chicken Dinner

    Overview

    This creamy garlic butter chicken is rich, comforting, and bursting with flavor. Perfect for weeknight dinners or when you want something indulgent but still easy to pull off, this dish features tender slices of seasoned chicken breast simmered in a luscious garlic butter cream sauce with a touch of lemon to balance the richness. It’s a restaurant-style dish you can master at home in under 30 minutes.


    Ingredients (Serves 2-3)

    Chicken & Seasoning

    • 2 large boneless, skinless chicken breasts (about 1–1.5 lbs total), sliced into strips or cutlets

    • ½ teaspoon sea salt

    • ¼ teaspoon freshly ground black pepper

    • Optional: pinch of paprika or Italian seasoning for added flavor

    For the Sauce

    • 2 tablespoons unsalted butter

    • 3 cloves garlic, minced finely or crushed

    • ½ cup heavy cream (or double cream)

    • 1 teaspoon fresh lemon juice (or more to taste)

    • Optional: 1 tablespoon grated Parmesan cheese for added depth

    • Optional: pinch of red pepper flakes for heat

    For Garnish (Optional)

    • Fresh chopped parsley

    • Lemon zest

    • Grated Parmesan


    Preparation Time

    • Prep time: 10 minutes

    • Cook time: 20 minutes

    • Total time: 30 minutes


    Directions

    Step 1: Prepare the Chicken

    1. Slice the chicken into evenly sized pieces—cutlets or strips work well for quick and even cooking.

    2. Season the chicken with salt, pepper, and optionally a pinch of paprika or Italian seasoning for an herby twist.

      • Tip: Let it sit for 5–10 minutes while prepping the rest. This allows the seasoning to slightly penetrate and the meat to relax.


    Step 2: Sauté the Garlic

    1. In a large skillet (preferably non-stick or stainless steel), melt 2 tablespoons of unsalted butter over medium heat.

    2. Once the butter is melted and foaming, add the minced garlic.

    3. Sauté for about 30–60 seconds, or until the garlic becomes fragrant and lightly golden—not brown, as burnt garlic tastes bitter.


    Step 3: Cook the Chicken

    1. Add the seasoned chicken slices to the skillet in a single layer.

    2. Sear the chicken for about 5–7 minutes per side, depending on thickness, until golden brown and cooked through (internal temp of 165°F / 74°C).

      • Avoid overcrowding the pan; cook in batches if necessary.

      • Tip: Let the chicken develop a crust before flipping. This enhances flavor and texture.


    Step 4: Make the Cream Sauce

    1. Once the chicken is cooked, reduce heat to medium-low.

    2. Add the ½ cup of heavy cream directly into the pan with the chicken.

    3. Stir gently to deglaze the pan and incorporate the cream with any fond (brown bits).

    4. Add the lemon juice and stir until the sauce begins to gently bubble and thicken, about 5 minutes.

    5. Optional: Stir in 1 tablespoon of grated Parmesan cheese for more body and flavor, and/or a pinch of red pepper flakes for heat.


    Step 5: Final Touches

    1. Taste and adjust the seasoning—add a splash more lemon if needed for brightness, or salt to balance the richness.

    2. Garnish with chopped parsley and lemon zest right before serving.

    3. Optional: a final sprinkle of Parmesan on top for that irresistible finishing touch.


    Serving Suggestions

    This dish is super versatile and pairs beautifully with:

    • Buttery mashed potatoes or creamy polenta

    • Steamed rice or wild rice pilaf

    • Buttered noodles or al dente pasta (fettuccine or linguine are excellent)

    • Roasted vegetables like broccoli, asparagus, or Brussels sprouts

    • Crusty bread to mop up every last bit of that sauce


    Chef’s Tips for Best Results

    • Don’t overcook the chicken – pull it off the heat as soon as it’s done. Overcooked chicken turns rubbery and dry.

    • Heavy cream vs alternatives: For a slightly lighter sauce, you can use half-and-half, though it won’t be quite as rich. Full-fat coconut milk is a good dairy-free alternative.

    • Lemon juice balance: Add lemon juice gradually—it brightens the sauce but can overpower if too much is used.

    • Make it a one-pan meal: Toss in a few handfuls of baby spinach or cherry tomatoes at the end for extra color and nutrition.


    Pairing Suggestions

    Drinks:

    • A crisp white wine like Sauvignon Blanc or Chardonnay

    • Sparkling water with a lemon wedge

    • A light, citrus-forward cocktail like a lemon spritz


    Storage & Reheating

    Storage:

    • Let leftovers cool, then store in an airtight container in the fridge for up to 3 days.

    Reheating:

    • Warm gently over medium-low heat in a skillet with a splash of milk or cream to loosen the sauce.

    • Microwave in short bursts (30 seconds), stirring in between.


    Why You’ll Love It

    • Rich and satisfying with minimal ingredients

    • Quick enough for busy weeknights

    • Impressive enough for dinner guests

    • Adaptable to low-carb or gluten-free diets

    • That garlic butter cream sauce is the real MVP


    Printable Recipe Card (Summary)

    Creamy Garlic Butter Chicken Dinner
    30 minutes | ️ Serves: 2-3
    Ingredients: Chicken breasts, garlic, butter, cream, lemon juice, salt, pepper
    Instructions: Sauté garlic in butter → Cook chicken until golden → Add cream & lemon → Simmer → Serve with garnish.

  • Cucumber and Cabbage Salad

    Cucumber and Cabbage Salad

    Cucumber and Cabbage Salad

     Cucumber and Cabbage Salad
    Yields: 2-3 servings
    Prep time: 15 minutes
    Ingredients:
    Salad:
    2 cups shredded cabbage (green or Napa), about 1/4 of a medium head
    1/2 cucumber, thinly sliced (English cucumbers work well)
    1/2 red bell pepper, thinly sliced
    2 green onions, thinly sliced
    2 tablespoons fresh dill or parsley, chopped (or a mix of both) – optional
    Dressing:
    2 tablespoons mayonnaise (or Greek yogurt for a lighter version)
    1 tablespoon olive oil
    1 tablespoon apple cider vinegar or lemon juice (adjust to taste)
    1 teaspoon Dijon mustard
    1/2 teaspoon garlic powder
    1/2 teaspoon salt (or to taste)
    1/4 teaspoon black pepper (or to taste)
    Optional: 1/2 teaspoon honey or maple syrup (for a touch of sweetness)

    Instructions:

    Prepare the Vegetables:
    Cabbage: If using a whole head of cabbage, remove any damaged outer leaves. Cut the cabbage in half and then shred it thinly using a sharp knife or a mandoline slicer.
    Cucumber: Wash the cucumber and slice it thinly. If you’re using a regular cucumber, you can peel it partially or entirely if you prefer. English cucumbers have thinner skin and don’t need peeling.
    Red Bell Pepper: Wash the bell pepper, remove the stem and seeds, and slice it thinly.
    Green Onions: Trim the root ends and thinly slice the green onions, including both the white and green parts.
    Herbs: Wash and chop the fresh dill and/or parsley.
    Make the Dressing:
    In a small bowl, whisk together the mayonnaise (or Greek yogurt), olive oil, apple cider vinegar or lemon juice, Dijon mustard, garlic powder, salt, and pepper.
    Taste and adjust the seasonings as needed. Add a touch of honey or maple syrup if you prefer a slightly sweeter dressing.
    Assemble the Salad:
    In a large bowl, combine the shredded cabbage, cucumber slices, red bell pepper slices, and green onions.
    Add the chopped dill and/or parsley, if using.
    Pour the dressing over the salad and toss gently to coat all the ingredients. Be careful not to bruise the vegetables.
    Chill (Optional): The salad can be served immediately, but it’s often more refreshing if chilled for 15-30 minutes to allow the flavors to meld.
    Serve: Serve the salad as a side dish or light meal.
  • BBQ Chicken Tenders in Air Fryer

    BBQ Chicken Tenders in Air Fryer

    The kids will love these crispy air-fried BBQ chicken tenders breaded and dunked in a sweet, fiery BBQ sauce! Serve them with some corn on the cob or a big salad.

    Air Fryer BBQ Chicken Tenders
    Air Fryer BBQ Chicken Tenders
    If you love your air fryer as much as I do, you’ll love this easy chicken recipe! I made these Air Fryer BBQ Chicken Tenders for my family, and they loved them. They have a bit of a kick, are covered with BBQ sauce, and are air fried until crispy with minimal oil. These easy chicken fingers are great for lunch, dinner or a quick family dinner. More chicken tenderloin recipes you may also enjoy are these Air Fryer Chicken Tenders, Chicken Tenders Parmesan, and Buffalo Chicken Strips.

    BBQ Chicken Tenders in Air Fryer
    Why This BBQ Chicken Tenders Works
    Healthy: These chicken fingers are much lighter because they aren’t fried and only require a small amount of oil.
    Delicious: Using shortcut ingredients, like BBQ sauce, seasoned panko, and seasoned breadcrumbs, pack these chicken strips with so much flavor.
    Kid-Friendly: For a kid-friendly dinner, skip the cayenne and serve these chicken fingers with fries for a meal the whole family will enjoy.
    High Protein: 3 chicken tenderloins are 43 grams of protein!
    Featured Comment
    Loved these! Made them into chicken sandwiches for lunch the next day and they were just as good as the night before. New regular recipe for sure!
    – Krystal
    30 More Comments
    Air Fryer BBQ Chicken Fingers ingredients
    BBQ Chicken Finger Ingredients
    BBQ Sauce: I usually try to find a BBQ sauce that’s lower in sugar.
    Chicken Tenders: You’ll need 12 chicken tenders.
    Seasoning: Salt, black pepper, garlic powder, cayenne powder
    Eggs: Use one large egg and one egg white to keep the breadcrumbs on the chicken.
    Breadcrumbs: Combine seasoned breadcrumbs and panko for the crispy coating.
    How to Cook BBQ Chicken Tenders
    BBQ Sauce: Mix the BBQ sauce with some water to thin it.
    Season the chicken with salt, garlic powder, and black pepper.
    Dredging Stations: Next, combine the egg and egg white in a bowl and the breadcrumbs, panko, and cayenne in another.
    Bread the Chicken: Then, dip the chicken strips into the egg wash and then the breadcrumbs, shaking off the excess. Place them in a large dish and spray both sides with oil.
    How Long to Cook Chicken Tenders in Air Fryer: Air fry the chicken fingers at 400°F for five to six minutes on each side, turning halfway. Once they’re cooked through and golden and crispy on the outside, remove them and brush or drizzle the chicken with BBQ sauce until fully coated.
    chicken tenderloins in breadcrumbs
    air fryer chicken tenders
    brushing bbq sauce on chicken fingers
    BBQ Chicken Fingers
    Variations
    Chicken: If you can’t find chicken tenders, buy a package of breasts and cut them into strips.
    BBQ Sauce: You can make homemade BBQ sauce instead of buying it.
    Spiciness: If you prefer chicken fingers with less of a kick, omit the cayenne.
    Breadcrumbs: If you don’t have seasoned breadcrumbs or panko, add spices, like garlic powder, onion powder, salt, and paprika.
    No air fryer? Bake these chicken fingers in the oven at 400°F for 18 to 20 minutes.
    What to Serve with BBQ Chicken Tenders
    Sauce: Serve the chicken fingers with extra BBQ sauce for dipping.
    BBQ Sides: Baked Macaroni and Cheese, Brown Sugar Baked Beans, Coleslaw
    French Fries: Chipotle Sweet Potato Fries, Air Fryer French Fries, Garlic Parmesan Fries
    Salads: BBQ Chicken Salad, Cobb Salad, Corn, Tomato, and Avocado Salad
    Storage
    Store chicken strips in an airtight container for up to four days. To reheat, you can microwave them, but air frying will result in crispier chicken.

    What kind of chicken is used for chicken fingers?
    Chicken tenders are used for chicken fingers. Tenders are cut from the tenderloin muscle, which is underneath the breast, and are more tender than breast meat.

    What is the best temperature to cook chicken tenders at?
    For crispy BBQ chicken tenders, cooking them at a higher temperature, like 400°F, is best.

    BBQ Chicken Fingers
    More Air Fryer Chicken Recipes You’ll Love
    Air Fryer Chicken Bites
    Air Fryer Buffalo Chicken Nuggets
    Pickle-Brined Chicken Tenders
    Air Fryer Popcorn Chicken
    Air Fryer Chicken Nuggets
    Skinnytaste Simple promo banner
    Air Fryer BBQ Chicken Tenders
    5 from 19 votes
    4
    Cals:
    312
    Protein:
    43
    Carbs:
    17.5
    Fat:
    6.5
    Fiber:
    1
    The kids will love these crispy air-fried BBQ chicken tenders breaded and dunked in a sweet, fiery BBQ sauce! Serve them with some corn on the cob or a big salad.
    Course: Dinner, Lunch, main dish
    Cuisine: American
    Air Fryer BBQ Chicken Tenders
    Prep: 10minutes mins
    Cook: 20minutes mins
    Total: 30minutes mins
    Print
    Rate
    Pin
    Save
    WW Points
    Yield: 4 servings
    Serving Size: 3 pieces
    1x
    2x
    3x
    Equipment
    Air Fryer
    Ingredients
    ▢3 tablespoons favorite BBQ sauce
    ▢olive oil spray
    ▢12 chicken tenderloins, 1 1/2 lbs total
    ▢1 teaspoon kosher salt and black pepper
    ▢1/2 teaspoon garlic powder
    ▢1 large egg, beaten
    ▢1 large egg white
    ▢1/2 cup seasoned breadcrumbs*, or gluten-free crumbs
    ▢1/2 cup seasoned panko, plain or gluten-free
    ▢1/4 teaspoon cayenne powder
    ▢olive oil spray

    Instructions
    Combine BBQ sauce in a small bowl with 1 1/2 to 2 tablespoons of water, to thin down.
    Season chicken with salt, garlic powder and 1/8 teaspoon black pepper.
    Combine egg and egg white in a medium bowl. In a shallow bowl, combine the bread crumbs, panko and cayenne pepper.
    Dip chicken in the egg wash, then into the breadcrumb mixture and shake off excess and place on a large dish or cutting board. Spray both sides of the chicken generously with oil.
    In batches, cook the chicken 400F 5 to 6 minutes on each side, turning halfway, until the chicken is cooked through and crispy and golden on the outside. Brush or drizzle chicken with sauce until fully coated. Serve right away.
    Last Step: Please leave a rating and comment letting us know how you liked this recipe! This helps our business to thrive and continue providing free, high-quality recipes for you.
    Notes
    Chicken: If you can’t find chicken tenders, buy a package of breasts and cut them into strips.
    BBQ Sauce: Make homemade BBQ sauce instead of buying it.Spiciness: If you prefer chicken fingers with less of a kick, omit the cayenne.
    Breadcrumbs: If you don’t have seasoned breadcrumbs or panko, add spices, like garlic powder, onion powder, salt, and paprika.
    No air fryer? Bake these chicken fingers in the oven at 400°F for 18 to 20 minutes.

    *1/4 cup of crumb mix gets tossed, it is deducted from n.i.

    Nutrition
    Serving: 3 pieces, Calories: 312 kcal, Carbohydrates: 17.5 g, Protein: 43 g, Fat: 6.5 g, Saturated Fat: 1.5 g, Cholesterol: 171 mg, Sodium: 751.5 mg, Fiber: 1 g, Sugar: 5 g

  • Air Fryer Chicken Wings

    Air Fryer Chicken Wings

    Craving crispy, juicy chicken wings without the grease? My crispy Air Fryer Chicken Wings are a total game-changer! They’re ready in a flash, perfectly golden, and bursting with flavor—no mess, no fuss!

    Air Fryer Chicken Wings
    Air Fryer Chicken Wings
    Air fryer chicken wings are a go-to dinner in my house because my family absolutely loves them! They’re quick to make, delicious, and always perfectly crispy. Plus, they’re a lifesaver on busy nights when we want something tasty without spending too much time in the kitchen. No air fryer? No problem! Bake them in the oven instead. Whether dipping them in ranch, drizzling with BBQ sauce, buffalo sauce or enjoying them plain, these wings are guaranteed to be a hit with the whole family! I also have these baked Buffalo Wings for a spicier version. See all my air fryer recipes here.

    Why You’ll Love This Air Fryer Chicken Wings Recipe
    Gina @ Skinnytaste.com
    I enjoy making wings in the air fryer because it’s a quick way to get that crispy, juicy texture I love! After trying a few different methods, this air fryer chicken wing recipe has become my go-to for basic wings. If you have one of my air fryer cookbooks, you should also try my air fryer buffalo wings, my signature wings, and Korean wings!

    Easy: Make homemade chicken wings in just 2 simple steps!
    Healthy: No deep frying.
    Dietary Restrictions: They’re gluten-free, Weight Watchers-friendly, high- protein, keto, and dairy-free.
    If you make this healthy air fryer chicken wing recipe, I would love to see it. Tag me in your photos or videos on Instagram, TikTok, or Facebook!

    Gina signature
    Featured Comment
    Oh wow, this turned out amazing! My kids and husband demolished all of them and requested that we make this again next week! The spice mix was perfect for all of us. Thank you for another super delicious and extremely easy recipe on a school night!
    – AgiK
    37 More Comments
    What You’ll Need
    Here’s the ingredients to create the most craveable wings. The exact measurements are in the recipe card below.

    Air Fryer Chicken Wings
    Chicken Wingettes and Drumettes are parts of the whole chicken wing. Chicken wings are usually sold already cut into smaller pieces, which makes them easier to cook evenly since the pieces are all the same size.
    Seasoning: Kosher salt, garlic powder, onion powder, sweet paprika
    Dried Herbs: Oregano, thyme, sage
    Baking Powder It works with the chicken skin to raise its pH level, giving you that perfect golden-brown crispiness.
    How to Make Air Fryer Chicken Wings
    This easy air fryer chicken wing recipe only takes a few minutes to prep. Then, they’re ready to cook! Scroll to the bottom for the complete instructions.

    Chicken Wingettes and drummettes
    Chicken Wingettes and drummettes
    Prep the Chicken: Pat the wings dry and season with the herbs, spices, and baking powder.
    How Long to Cook Chicken Wings in the Air Fryer: Spray the air fryer basket with oil and air fry the wings for 16 to 22 minutes at 400°F, shaking the basket halfway through.
    Variations
    There are so many ways to switch up this basic recipe! Just add your favorite wing sauce. Here’s a few ideas:

    Garlic Parmesan: Toss wings in a touch of melted butter, minced garlic, and grated Parmesan cheese, then finish with a sprinkle of parsley.
    Buffalo Wing Sauce: Omit the salt. Once cooked, coat the chicken in a tangy mix of Franks hot sauce and a little melted butter for that classic spicy flavor. See this buffalo wing recipe for seasoning.
    Honey Sriracha: Sweet and spicy! Combine honey, Sriracha, soy sauce, and a bit of lime juice for a sticky glaze during the last minute of air frying.
    Lemon Pepper Wings: Replace the spices with lemon pepper for a zesty, peppery kick.
    Teriyaki: Marinate the wings in soy sauce, brown sugar, ginger, and garlic, then bake until caramelized.
    BBQ: Toss the chicken with your favorite BBQ sauce for a sweet and smoky finish.
    Cajun Spice: Swap the spices out for Cajun seasoning, paprika, garlic powder, and a dash of cayenne for a spicy, bold flavor.
    Korean Gochujang: Glaze the wings at the end with a mix of gochujang (Korean chili paste), soy sauce, sesame oil, and a touch of honey for a savory, spicy, and slightly sweet flavor.
    No air fryer? No problem! Bake them at 425°F for 45 minutes, flipping halfway.

    Air Fryer Chicken Wings
    What to Serve with Air Fryer Chicken Wings
    Party Apps: These crispy chicken wings in the air fryer make a great appetizer if you’re hosting a football-watching party. Serve them with ranch dressing or blue cheese dressing and some carrot and celery sticks. Pair them with other apps such as baked sweet potato skins, deviled eggs, and hot spinach artichoke dip.
    As a Main Dish Dinner: Serve the wings with a green salad, or roasted broccoli to make it a meal.
    Storage
    Refrigerate leftover chicken wings for 4 days.
    Freeze wings for 3 months in an airtight container.
    Thaw the chicken in the fridge and reheat it in the microwave or air fryer.
    FAQs
    Why are my wings not crispy in the air fryer?
    It’s essential to pat the chicken dry with paper towels before seasoning and cooking. The less moisture on the meat, the crispier it’ll get in the air fryer. These wings come together in no time, but one secret ingredient makes all the difference: baking powder! It works with the chicken skin to raise its pH level, giving you that perfect golden-brown crispiness.

    Do you stack chicken wings in the air fryer?
    Keeping them in a single layer is best so that they cook quicker and brown more evenly. However, if your air fryer is smaller, you can do a second layer of wings. Just cook for an extra 10 to 15 minutes and shake the basket 5 or 6 times while cooking.

    Air Fryer Chicken Wings with ranch
    More Air Fryer Chicken Recipes You’ll Love
    BBQ Chicken Tenders in Air Fryer
    Air Fryer Buffalo Chicken Nuggets
    Air Fryer Chicken Thighs
    Air Fryer Chicken Breast
    Air Fryer Rotisserie Chicken

  • Jalapeno Cream Cheese Dip 

    Jalapeno Cream Cheese Dip 

    Full Recipe:
    Jalapeno Cream Cheese Dip 1f3361f9c01f5251f956
    Ingredients:
    – 6 roasted jalapeños 1f336
    – 16 oz of cream cheese 1f9c0
    – 6 oz of white cheddar 1f9c0
    – 1 tbsp of chili powder or smoked paprika
    – 1 tbsp of garlic powder
    – 1 tsp of cumin
    – Salt & pepper, to taste
    – Chili flakes, for topping
    Directions:
    1. Begin by roasting the jalapeños until charred, then remove the skin, seeds, and stems. Chop the roasted jalapeños into small pieces.
    2. In a mixing bowl, combine the cream cheese, white cheddar, chili powder or smoked paprika, garlic powder, cumin, salt, and pepper. Mix until well combined.
    3. Gently fold in the chopped roasted jalapeños into the cream cheese mixture.
    4. Transfer the dip to a serving bowl and sprinkle chili flakes on top for an extra kick of spice.
    5. Refrigerate the dip for at least 30 minutes to allow the flavors to meld together.
    6. Serve with your favorite chips, crackers, or veggies and enjoy!
    Tips:
    – For a milder dip, reduce the amount of jalapeños used.
    – You can also add a squeeze of lime juice for a citrusy twist.
    – Customize the dip by adding cooked and crumbled beef or chicken for a heartier option.
    Prep time: 15 minutes
    Calories: 210 calories per serving (1/4 cup)