Category: cake

  • Cheesy Parmesan Zucchini Casserole

    Cheesy Parmesan Zucchini Casserole

    Cheesy Parmesan Zucchini Casserole
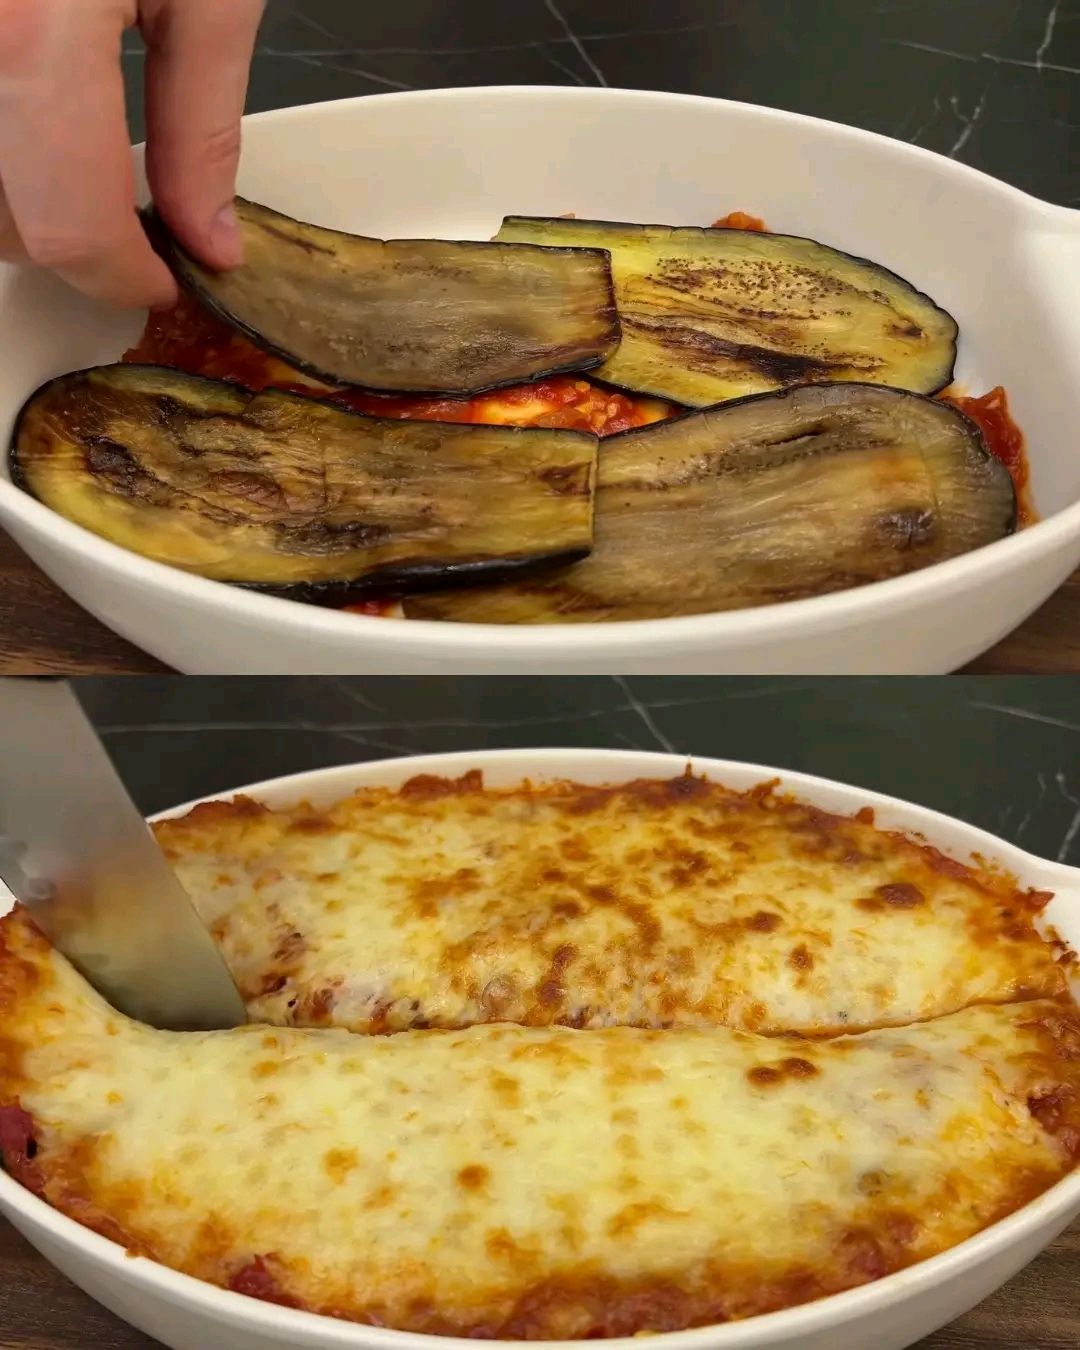
    This Cheesy Parmesan Zucchini Casserole is a creamy, cheesy, and delicious baked dish that’s perfect for using up fresh zucchini. Made with grated zucchini, Parmesan cheese, eggs, and a light, crispy topping, this casserole is a comforting side dish or even a main meal for those who love veggie-packed recipes. Whether you’re serving it for a weeknight dinner or a holiday gathering, this easy-to-make zucchini bake is sure to impress!

    Preparation Time
    Prep Time: 15 minutes
    Cooking Time: 35 minutes
    Total Time: 50 minutes
    Ingredients
    2 zucchinis (grated and drained)
    1 teaspoon salt (for draining zucchini)
    2 eggs
    100ml milk
    20g Parmesan cheese (grated)
    60g flour
    ½ teaspoon black pepper
    1 teaspoon baking powder
    ½ teaspoon garlic powder (optional, for extra flavor)
    ½ teaspoon Italian seasoning (optional)
    2 tablespoons olive oil
    100g shredded mozzarella cheese
    ¼ cup breadcrumbs (for topping)
    1 tablespoon melted butter (for topping)
    Directions
    Prepare the Zucchini:
    Grate the zucchinis and place them in a bowl.
    Sprinkle 1 teaspoon of salt over the zucchini and let it sit for 10 minutes to draw out excess moisture.
    After 10 minutes, squeeze the zucchini using a clean kitchen towel or cheesecloth to remove as much liquid as possible.
    Make the Casserole Mixture:
    In a large mixing bowl, whisk together the eggs and milk.
    Add the Parmesan cheese, flour, black pepper, baking powder, garlic powder, and Italian seasoning. Stir well.
    Mix in the drained zucchini, olive oil, and half of the shredded mozzarella cheese. Stir until everything is evenly combined.
    Assemble the Casserole:
    Preheat the oven to 180°C (350°F) and grease a baking dish with olive oil or butter.
    Pour the zucchini mixture into the greased dish and spread it evenly.
    Sprinkle the remaining mozzarella cheese over the top.
    In a small bowl, mix the breadcrumbs with melted butter and sprinkle evenly over the casserole for a crispy topping.
    Bake:
    Bake in the preheated oven for 30-35 minutes, or until the top is golden brown and crispy.
    Remove from the oven and let it rest for 5 minutes before serving.
    Serve:
    Garnish with fresh herbs like parsley or basil, if desired.
    Serve warm and enjoy this cheesy, crispy, and flavorful zucchini casserole!
    Nutritional Facts (Per Serving)
    Calories: 220 kcal
    Carbohydrates: 18g
    Protein: 10g
    Fat: 12g
    Fiber: 2g
    Sodium: 320mg
    The Origins and Popularity
    Zucchini-based casseroles have been a staple in Mediterranean and European cuisines for generations. In Italy, France, and Greece, zucchini is commonly used in vegetable gratins and baked dishes due to its mild flavor and ability to soak up delicious sauces and cheeses.

    This particular cheesy Parmesan zucchini casserole is inspired by traditional zucchini bakes but with a light and crispy breadcrumb topping for extra texture. It has become increasingly popular as a low-carb, gluten-friendly, and healthier comfort food alternative to pasta-based casseroles.

    Why You’ll Love This Recipe
    This easy zucchini casserole is packed with flavor, texture, and cheesy goodness—making it a go-to dish for any occasion.

    Creamy and cheesy – A delicious mix of mozzarella and Parmesan
    Crispy and golden – The breadcrumb topping adds crunch
    Easy to make – Requires just a few simple steps
    Healthy and low-carb – A great way to enjoy a veggie-based meal
    Great for meal prep – Can be stored and reheated easily
    Health Benefits
    This Parmesan zucchini casserole is not only delicious but also offers several health benefits.

    Rich in fiber – Zucchini promotes good digestion and gut health.
    Packed with vitamins – Contains Vitamin C, potassium, and antioxidants.
    Good source of protein – Eggs and cheese help keep you full.
    Contains healthy fats – Olive oil supports heart health.
    Serving Suggestions
    This cheesy zucchini casserole pairs perfectly with a variety of dishes.

    Serve as a side dish with grilled chicken, steak, or fish.
    Pair with a fresh green salad for a balanced meal.
    Enjoy with a bowl of soup for a cozy dinner.
    Add a dollop of sour cream or Greek yogurt for extra creaminess.
    Tips
    For the best texture and flavor, follow these pro tips:

    Squeeze out as much liquid as possible from the zucchini to prevent a soggy casserole.
    Use freshly grated cheese for better melting and flavor.
    Let it rest for a few minutes before serving to allow the flavors to meld.
    For extra crispiness, broil the casserole for 2-3 minutes at the end of baking.
    For added depth, mix in sautéed garlic or onions before baking.
    Variations to Try
    This zucchini casserole is highly adaptable, so you can make it your own!

    Spicy Version: Add red pepper flakes or diced jalapeños for a kick.
    Meaty Version: Mix in cooked bacon, sausage, or ground beef.
    Extra Cheesy: Use a blend of cheddar, gouda, or feta.
    Gluten-Free Option: Swap the flour for almond or coconut flour.
    Vegan Option: Use plant-based milk, vegan cheese, and flax eggs.
    Conclusion
    This Cheesy Parmesan Zucchini Casserole is the ultimate comfort food that’s easy to make, full of flavor, and packed with nutrition. Whether you’re serving it as a side dish, a vegetarian main course, or even meal prep, this cheesy, crispy, and savory bake is a guaranteed hit. Try it today and enjoy a delicious twist on zucchini!

  • Maria Cookie and Dulce de Leche Layered Dessert

    Maria Cookie and Dulce de Leche Layered Dessert

    Maria Cookie and Dulce de Leche Layered Dessert

    Ingredients

    • 1 ¾ cups (400 ml) heavy whipping cream (very cold)
    • 2 packs of Maria cookies
    • 14 oz (400 g) dulce de leche

    ★Instructions

    Whip the Cream:
    Beat the cold heavy cream in a mixer until firm but without forming peaks.

    Combine with Dulce de Leche:
    Add the dulce de leche to the whipped cream and continue beating until the mixture forms firm peaks.

    Layer the Dessert:

    In a dish, start with a layer of the whipped cream mixture.

    Add a layer of Maria cookies on top.

    Repeat alternating layers of cream and cookies, ending with cream.

    Decorate:
    Sprinkle crushed Maria cookies over the top layer for decoration.

    Chill:
    Refrigerate for at least 3 hours to set and blend the flavors.

    Serving Tip

    Serve chilled for a creamy, rich, and indulgent dessert!

  • Super Moist Chocolate Banana Cake recipe

    Super Moist Chocolate Banana Cake recipe

    Super Moist Chocolate Banana Cake recipe

    Ingredients:

    • Dry Ingredients:
      • 1 1/2 cups (195 grams / 6.8 oz) all-purpose flour
      • 1/4 cup (25 grams / 0.8 oz) unsweetened cocoa powder (Dutch-processed or regular)
      • 1 cup (200 grams / 7 oz) granulated white sugar
      • 1 teaspoon baking powder
      • 1/4 teaspoon baking soda
      • 1/4 teaspoon salt
      • 1 cup (170 grams / 6 oz) white, dark, or milk chocolate chips
    • Wet Ingredients:
      • 2 large eggs, at room temperature
      • 1 1/2 cups (375 grams / 13.2 oz) mashed ripe bananas (about 3 large bananas)
      • 1/2 cup (113 grams / 3.9 oz) unsalted butter, melted and cooled to room temperature
      • 1 teaspoon pure vanilla extract

    Instructions:

    1. Prepare the Pan and Oven:
      • Preheat your oven to 350°F (180°C). Position the oven rack in the center.
      • Butter or spray a 9 x 5 x 3-inch loaf pan with non-stick vegetable spray. Line the bottom with parchment paper for easy removal.
    2. Prepare the Dry Ingredients:
      • In a large bowl, whisk together the flour, cocoa powder, sugar, baking powder, baking soda, and salt.
      • Stir in the chocolate chips to distribute them evenly.
    3. Prepare the Wet Ingredients:
      • In a medium-sized bowl, whisk the eggs until lightly beaten.
      • Add the mashed bananas, melted butter, and vanilla extract to the eggs and mix well.
    4. Combine Wet and Dry Ingredients:
      • Gently fold the wet ingredients into the dry ingredients using a rubber spatula or wooden spoon. Be careful not to over-mix; the batter should be thick and chunky.
    5. Fill the Pan:
      • Scrape the batter into the prepared loaf pan and smooth the top with the back of a spoon or an offset spatula.
    6. Bake:
      • Bake for 55 to 65 minutes, or until the bread rises and a toothpick inserted into the center comes out clean.
    7. Cool the Cake:
      • Remove the cake from the oven and place it on a wire rack. Allow it to cool in the pan for about 15 minutes.
      • After that, invert the cake onto the wire rack to cool completely.
    8. Storage:
      • Once completely cooled, you can cover and store the cake at room temperature for a few days.
      • Alternatively, you can freeze it for up to two months.

    Tips:

    • For a more intense chocolate flavor, use dark chocolate chips.
    • The cake can be served as-is or topped with frosting for extra sweetness.
    • If you like nuts, consider adding chopped walnuts or pecans into the batter.

    Enjoy!

    This moist and flavorful chocolate banana cake is perfect for anytime you crave a sweet and rich treat. Its balance of banana and chocolate makes it a comforting dessert or snack!

  • Natural Collagen Powder For Glowing Skin

    Natural Collagen Powder For Glowing Skin

    Natural Collagen Powder For Glowing Skin

    Collagen is an essential protein that gives shape to the body’s connective tissues, including the skin, joints, muscles, and bones. As we become older, our bodies’ natural collagen production slows, resulting in aging indications like fine lines and wrinkles. To offset this, make your own collagen-boosting powder with natural components that have been shown to increase collagen synthesis.

    Ingredients:

    Amla (Indian Gooseberry) Powder: High in vitamin C, amla promotes collagen formation and skin suppleness.

    Pumpkin Seeds: Loaded with antioxidants, these seeds aid to minimize oxidative stress and promote collagen formation.

    Beetroot powder: Includes vitamin C, antioxidants, and iron, all of which help to improve skin quality and collagen synthesis.

    Flaxseeds: Rich in omega-3 fatty acids, flaxseeds aid to delay the appearance of wrinkles and fine lines.

    Almonds and peanuts: Include vitamins A and E, as well as beneficial fats and proteins that help to maintain collagen levels.

    Oats: Known for their immune-boosting characteristics, which help to maintain healthy skin, hair, and nails.

    Instructions:

    Measure Equal Portions: Use equal amounts of each ingredient. For example, use 2 teaspoons of dry toasted almonds, peanuts, pumpkin seeds, soybeans, oats, sunflower seeds, fennel seeds, flaxseeds, chia seeds, garden cress seeds, poppy seeds, dried Indian gooseberry (amla), dried rose petals, dried mint leaves, moringa powder, and mulethi (licorice) powder.

    Dry Roast Ingredients: Dry roast each item in a pan until it turns slightly golden and has a good scent. This treatment improves both their flavor and nutritional value.

    Grind to a Fine Powder: Once the roasted components have cooled, place them in a blender and process until they are finely ground.

    Store properly: Transfer the produced collagen-boosting powder to an airtight container. Keep it in a cool, dry area where it will stay fresh for up to one month.

    Usage:

    To add this collagen-boosting powder to your everyday regimen:

    Morning Drink:

    • In a cup of warm water, combine one tablespoon of powder and one teaspoon of honey.

    Smoothie or milk:

    • Alternatively, mix 1 tablespoon of the powder into your favorite smoothie or glass of milk. Blend completely, then enjoy.

    Preparing this natural collagen-boosting powder at home allows you to avoid the chemicals found in commercial solutions while also providing your body with important nutrients that support youthful and beautiful skin.

  • Cloud Bread with Greek Yogurt

    Cloud Bread with Greek Yogurt

    Cloud Bread with Greek Yogurt
    Cloud bread is a light, fluffy, and low-carb alternative to traditional bread that’s perfect for those following gluten-free or low-carb diets. This cloud bread recipe uses a combination of whipped egg whites, egg yolks, and Greek yogurt to create a pillowy texture that resembles a soft, airy bread. The addition of Greek yogurt not only enhances the texture but also provides a creamy flavor, making it an excellent choice for sandwiches, burgers, or as a side with soups and salads. With just a few ingredients and a simple baking process, you’ll have this delicious, healthy bread ready in no time.

    Preparation Time

    Prep Time: 10 minutes
    Cook Time: 30 minutes
    Total Time: 40 minutes
    Ingredients

    Nonstick cooking spray
    3 large eggs
    ⅛ teaspoon cream of tartar
    ¼ cup plain Greek yogurt (whole milk)
    ⅛ teaspoon sea salt
    Directions
    Preheat the Oven:

    Preheat your oven to 300°F (150°C). Line two baking sheets with parchment paper and lightly spray them with nonstick spray to prevent sticking.
    Separate the Eggs:

    Separate the eggs into two bowls: egg whites in a medium bowl and egg yolks in a large bowl. Be sure to avoid any egg yolk in the egg whites, as it may prevent them from whipping properly.
    Whip the Egg Whites:

    Using an electric whisk or stand mixer, whip the egg whites and cream of tartar until stiff peaks form. This will help create the light and airy texture of the cloud bread.
    Prepare the Yolk Mixture:

    In a separate bowl, whisk together the egg yolks, Greek yogurt, and sea salt until smooth. The yogurt adds a creamy texture and enhances the flavor of the bread.
    Fold the Mixtures:

    Using a spatula, carefully fold the whipped egg whites into the yolk mixture in batches. Gently place a mound of whipped egg whites on top of the yolk mixture and fold it under and over, working from the outside in. Continue folding until everything is fully incorporated, but be careful not to deflate the egg whites.
    Spoon the Mixture:

    Using a ¼ cup ice cream scoop or measuring cup, spoon 5-6 large mounds of the mixture onto each prepared baking sheet. Space the mounds a few inches apart to allow for spreading as they bake.
    Flatten and Bake:

    Gently press each mound with a spatula to flatten it slightly. Bake in the preheated oven for about 30 minutes, or until the cloud bread is golden brown and set.
    Cool and Serve:

    Cool the bread pieces on the cookie sheet for a few minutes, then gently transfer them to a wire rack to cool completely. Alternatively, you can use them while still warm.
    Serving Suggestions

    Cloud bread can be used as a low-carb substitute for traditional bread. Serve it as a sandwich base for burgers, deli meats, or grilled vegetables.
    It pairs wonderfully with soups and salads, acting as a light side that won’t overpower the other flavors.
    Use it as a base for breakfast, topped with scrambled eggs, avocado, or smoked salmon for a low-carb, satisfying meal.
    Cooking Tips

    Stiff Peaks: Be sure to whip the egg whites to stiff peaks, as this is what gives the bread its light and airy texture. If the peaks don’t hold up, the cloud bread won’t rise properly.
    Folding Gently: When folding the whipped egg whites into the yolk mixture, do so gently to avoid deflating the airiness of the egg whites. This ensures the bread will remain light and fluffy.
    Flavor Variations: Add herbs, garlic powder, or even a bit of cheese to the batter before baking for a savory twist.
    Make Ahead: Cloud bread can be stored in an airtight container at room temperature for 2-3 days, or in the fridge for up to a week. It can also be frozen for longer storage.
    Nutritional Benefits

    Low-Carb and Gluten-Free: Cloud bread is an excellent low-carb, gluten-free alternative to traditional bread, making it suitable for those following keto, paleo, or gluten-free diets.
    High in Protein: Thanks to the eggs, this bread is a good source of protein, which is essential for muscle repair and growth.
    Rich in Healthy Fats: Greek yogurt adds healthy fats and probiotics, promoting gut health while adding a creamy texture to the bread.
    Dietary Information

    Vegetarian: Yes, cloud bread is suitable for vegetarians.
    Gluten-Free: This recipe is naturally gluten-free, making it a great choice for those with gluten sensitivities or celiac disease.
    Low-Carb: Cloud bread is low in carbs, making it an excellent option for low-carb and ketogenic diets.
    Storage Store any leftover cloud bread in an airtight container at room temperature for up to 2-3 days. Alternatively, freeze it for up to 1 month. When ready to eat, you can toast it lightly or enjoy it as-is.

    Conclusion Cloud bread is a light, fluffy, and healthy alternative to regular bread, perfect for anyone looking for a low-carb, gluten-free option. With its versatility and ease of preparation, it can be used in a variety of meals, from sandwiches to sides. Its creamy texture, enhanced by Greek yogurt, makes it a flavorful and satisfying choice for anyone looking to reduce carbs without sacrificing the joy of bread.

  • Savory Hand Pies Recipe

    Savory Hand Pies Recipe

    Savory Hand Pies Recipe

    Ingredients:

    • 2 thawed sheets of puff pastry 
    • 1 tablespoon olive oil 
    • 1 finely chopped onion 
    • 2 minced cloves of garlic 
    • 1 diced carrot 
    • 1 diced celery stalk 
    • 1 cup cooked chicken (shredded or diced) 
    • 1 cup frozen peas 
    • 1 teaspoon dried thyme 
    • Salt and pepper to taste 
    • 1 egg (for the egg wash) 

    Instructions:

    1. Preheat the Oven:

    • Preheat your oven to 400°F (200°C).
    • Line a baking sheet with parchment paper to prevent sticking.

    2. Prepare the Filling:

    • Heat 1 tablespoon of olive oil in a large pan over medium heat.
    • Add the chopped onion and cook until softened and transparent, about 5 minutes.
    • Add the minced garlic and cook for 1 minute more, stirring constantly.
    • Stir in the diced carrot and celery, cooking for another 5-7 minutes, until the vegetables are tender.
    • Add the cooked chickenfrozen peasdried thymesalt, and pepper.
    • Cook everything together for about 2-3 minutes, ensuring it’s heated through.
    • Remove the pan from heat and set the filling aside to cool slightly.

    3. Assemble the Hand Pies:

    • On a lightly floured surface, roll out the thawed puff pastry sheets.
    • Using a knife or circular cutter, cut the pastry into rounds (about 4-5 inches in diameter).
    • Place a generous portion of the chicken and vegetable filling on one half of each pastry round, leaving a small border around the edges.
    • Fold the other half of the pastry over the filling to create a half-moon shape.
    • Press down on the edges to seal the pie, then use a fork to crimp the edges, ensuring they are well sealed.

    4. Prepare for Baking:

    • Place the assembled hand pies onto the prepared baking sheet.
    • In a small bowl, beat the egg and brush it over the tops of the hand pies to give them a golden, crispy finish.

    5. Bake:

    • Bake the hand pies in the preheated oven for 20-25 minutes, or until they are puffed up, golden brown, and crispy.

    6. Serve:

    • Once baked, remove the hand pies from the oven and allow them to cool slightly before serving.
    • Serve warm as a snack, appetizer, or party treat!

    Optional Tips:

    • You can substitute the chicken with pork, beef, or lamb for a different flavor profile.
    • Add a spoonful of liver pâté to the filling for an extra savory, umami boost (as in traditional pâté chaud).
    • These hand pies can be frozen before baking. Just assemble them, freeze, and bake from frozen, adding an extra few minutes to the baking time.

    These Savory Hand Pies are a perfect snack, appetizer, or festive treat. With their flaky puff pastry and savory filling, they’re sure to be a hit at your next gathering! Enjoy! 

  • Cheese Potato Bread in a Frying Pan! No Oven, No Yeast, No Egg

    Cheese Potato Bread in a Frying Pan! No Oven, No Yeast, No Egg

    Cheese Potato Bread in a Frying Pan! No Oven, No Yeast, No Egg

    Ingredients

    For the Bread:

    – 90g strong flour (bread flour)
    – 55g milk
    – 10g melted unsalted butter
    – A pinch of salt 

    For the Filling:

    – 1 medium-sized potato 
    – 2 tablespoons mayonnaise 
    – Mozzarella cheese 

    For the Glaze:

    – Honey 

    Instructions:

    1. Mix the strong flour, milk, melted unsalted butter, and a pinch of salt to form a smooth dough. Knead it for a few minutes.
    2. Roll out the dough into a circle (about 8 inches in diameter).
    3. Thinly slice the potato and blanch the slices in boiling water for a few minutes until slightly tender. Drain and pat dry.
    4. Spread mayonnaise over the dough.
    5. Layer the potato slices on one-half of the dough.
    6. Sprinkle mozzarella cheese generously over the potatoes.
    7. Fold the other half of the dough over the potatoes to create a half-moon shape.
    8. Heat a non-stick frying pan over medium heat and place the stuffed bread in it.
    9. Cook for a few minutes on each side until golden brown and the cheese inside melts.
    10. Drizzle honey over the bread while it’s still warm.
    11. Slice and enjoy your delicious homemade cheese potato bread!

  • Fluffy Banana Cottage Cheese Pancakes

    Fluffy Banana Cottage Cheese Pancakes

    Fluffy Banana Cottage Cheese Pancakes 

    Craving a healthy and delicious breakfast? These pancakes are naturally sweet, protein-packed, and irresistibly fluffy. A perfect start to your day!


    Ingredients:

    • 1 cup rolled oats
    • ½ cup cottage cheese
    • 1 ripe banana
    • 2 large eggs
    • ½ teaspoon baking powder
    • ½ teaspoon cinnamon
    • 1 teaspoon vanilla extract
    • Butter or coconut oil (for cooking)
    • Honey, syrup, or additional cinnamon for serving (optional)

    Instructions:

    1. Prepare the Batter:
      In a blender, combine the rolled oats, cottage cheese, and the ripe banana. Blend until smooth and creamy, creating a thick batter.
    2. Add Remaining Ingredients:
      Add the eggs, baking powder, cinnamon, and vanilla extract to the blender. Blend again until everything is well incorporated and smooth. The batter should be thick but pourable.
    3. Heat the Skillet:
      Heat a non-stick skillet or griddle over medium heat. Add a little butter or coconut oil to coat the surface.
    4. Cook the Pancakes:
      Pour about ¼ cup of the batter into the skillet for each pancake. Cook for about 2-3 minutes on one side, or until small bubbles form on the surface. Flip the pancakes and cook for another 2-3 minutes on the other side, until golden brown and cooked through.
    5. Serve & Enjoy:
      Serve the pancakes warm with your choice of honey, maple syrup, or a sprinkle of cinnamon. You can also top them with fresh fruits, nuts, or yogurt for an extra boost.

    Tips:

    • Consistency: If the batter is too thick, add a splash of milk (or your preferred dairy-free alternative) to loosen it up.
    • Toppings: Get creative with your toppings! Nut butter, berries, or even Greek yogurt can complement the pancakes perfectly.
    • Storage: Leftover pancakes can be stored in the fridge for up to 2-3 days or frozen for later.

    Enjoy your fluffy, protein-rich pancakes! 

  • Chocolate Chip Cookie Dough Bars

    Chocolate Chip Cookie Dough Bars

    Chocolate Chip Cookie Dough Bars

    Ingredients:

    For the Cookie Dough Layer:

    • 1 cup butter, softened
    • 1 cup brown sugar, packed
    • 1/2 cup granulated sugar
    • 1/4 cup milk
    • 1 teaspoon vanilla extract
    • 2 cups all-purpose flour
    • 1/2 teaspoon salt
    • 1 cup chocolate chips

    For the Chocolate Coating:

    • 2 cups semi-sweet chocolate chips
    • 1 tablespoon coconut oil or butter

    Directions:

    1. Prepare the Cookie Dough:
      • In a large mixing bowl, beat together the softened butter, brown sugar, and granulated sugar until light and fluffy.
      • Add the milk and vanilla extract to the bowl and mix until well combined.
    2. Make the Dough:
      • Gradually add the flour and salt to the mixture, stirring until a smooth dough forms.
      • Fold in the chocolate chips until they’re evenly distributed throughout the dough.
    3. Press into the Pan:
      • Line a baking dish (about 8×8 or 9×9 inches) with parchment paper.
      • Press the cookie dough evenly into the bottom of the dish, smoothing out the top with a spatula.
    4. Chill the Dough:
      • Place the baking dish in the refrigerator and chill for about 1 hour, or until the dough becomes firm.
    5. Prepare the Chocolate Coating:
      • While the dough chills, melt the chocolate chips and coconut oil (or butter) in a microwave-safe bowl. Microwave in 30-second intervals, stirring in between, until the mixture is smooth.
    6. Top with Chocolate:
      • Once the dough is firm, pour the melted chocolate over the chilled cookie dough and spread it evenly with a spatula.
    7. Decorate (Optional):
      • Sprinkle extra chocolate chips on top for decoration if desired.
    8. Chill Again:
      • Return the dish to the refrigerator for another 30 minutes, or until the chocolate coating has fully set.
    9. Cut and Serve:
      • Once the chocolate is firm, remove the bars from the dish and cut them into squares or bars.
    10. Enjoy!
    • Indulge in these delicious homemade chocolate chip cookie dough bars!

    Prep Time: 15 minutes

    Chilling Time: 1 hour 30 minutes

    Total Time: 1 hour 45 minutes

    Servings: 12

    Calories: 320 per serving

  • Healthy Chocolate Cake with Apples and Cocoa

    Healthy Chocolate Cake with Apples and Cocoa

    Healthy Chocolate Cake with Apples and Cocoa
    Looking for a guilt-free, delicious chocolate cake that doesn’t compromise on flavor? This healthy chocolate cake is made with fresh apples and cocoa powder, offering a naturally sweet and rich chocolate taste without the need for refined sugars. The apples not only add natural sweetness but also contribute to the moist texture of the cake, making it a perfect option for anyone seeking a wholesome dessert.

    This recipe is gluten-free, dairy-free, and refined-sugar-free, making it an ideal treat for those with dietary restrictions or anyone aiming for a cleaner version of their favorite chocolate indulgence.

    Ingredients
    4 apples, peeled, cored, and pureed (approx. 2 cups or 480 ml of apple puree)
    4 large eggs
    1 cup (70 g) unsweetened cocoa powder
    1 teaspoon (5 g) baking powder
    3 tablespoons (45 ml) coconut oil, melted
    Optional Add-ins:
    1 teaspoon vanilla extract
    ¼ teaspoon ground cinnamon for a hint of spice
    A handful of dark chocolate chips or chopped nuts for added texture (optional)
    Step-by-Step Instructions
    1. Preheat the Oven
    Before starting the cake batter, it’s important to get your oven ready.

    Preheat to 360°F (180°C): Set your oven to this temperature to ensure even cooking throughout the cake.
    Prepare the baking dish: Line an 8-inch (20 cm) round or square baking dish with parchment paper, or grease it lightly with coconut oil. This will make it easy to remove the cake after baking.
    2. Prepare the Batter
    This cake is simple to make, relying on fresh apple puree to provide moisture and natural sweetness.

    Puree the apples: Begin by peeling, coring, and pureeing the apples. You can use a food processor or blender to achieve a smooth, even texture. If your apples are particularly juicy, you may want to strain the puree slightly to remove excess liquid.
    Mix the wet ingredients: In a large mixing bowl, combine the apple puree and eggs. Whisk the mixture thoroughly until it’s smooth and well-blended. The eggs help bind the cake while also giving it structure.
    Add the dry ingredients: Gradually add the unsweetened cocoa powder and baking powder to the apple-egg mixture. The cocoa powder provides a rich, chocolatey flavor, while the baking powder ensures the cake rises properly.
    Incorporate the coconut oil: Finally, pour in the melted coconut oil. Stir the batter well until all the ingredients are fully combined, and the batter is smooth. The coconut oil adds healthy fats and enhances the cake’s moist texture.
    Optional flavors: For added depth of flavor, you can stir in 1 teaspoon of vanilla extract or a pinch of cinnamon. These optional ingredients can elevate the taste without adding calories or unhealthy components.
    3. Bake the Cake
    Now that your batter is ready, it’s time to bake your healthy chocolate cake.

    Pour the batter into the dish: Transfer the batter to your prepared baking dish, smoothing the top with a spatula to ensure even baking.
    Bake for 35-40 minutes: Place the baking dish in the preheated oven and bake for 35-40 minutes. The cake is ready when a toothpick inserted into the center comes out clean, or with only a few moist crumbs clinging to it.
    4. Cool and Serve
    Once baked, allow the cake to cool completely before slicing. Cooling helps the cake set and improves the texture.

    Cool in the pan: Leave the cake in the baking dish for about 10-15 minutes after taking it out of the oven. Then, transfer it to a cooling rack to cool completely.
    Slice and enjoy: Once cooled, slice the cake into squares or wedges. This cake is perfectly delicious on its own but can also be served with fresh berries, a dollop of Greek yogurt, or a drizzle of melted dark chocolate for a bit of indulgence.
    Nutrition Information (Per Serving)
    Servings: 8 slices
    Calories: 170 kcal
    Carbohydrates: 17 g
    Protein: 6 g
    Fat: 9 g
    Saturated Fat: 5 g
    Fiber: 4 g
    Sugars: 12 g (natural sugars from apples)
    Sodium: 60 mg
    Health Benefits
    This healthy chocolate cake is not only delicious but packed with beneficial ingredients:

    Apples: Rich in dietary fiber and vitamins like Vitamin C, apples provide natural sweetness, keeping the need for added sugar to a minimum.
    Cocoa powder: Unsweetened cocoa powder is a powerhouse of antioxidants and offers a rich chocolate flavor without the fat and sugar found in traditional chocolate.
    Coconut oil: Contains healthy medium-chain triglycerides (MCTs), which are metabolized quickly for energy, making it a better choice for baking compared to other fats.
    Eggs: Provide protein and help bind the cake together, offering a source of essential amino acids.
    Conclusion
    This healthy chocolate cake made with apples and cocoa is a fantastic alternative to traditional, calorie-laden chocolate cakes. With its moist texture and rich chocolatey taste, it offers a wholesome and satisfying dessert that can be enjoyed without guilt. Whether you’re following a clean-eating diet or just looking for a lighter dessert, this cake is sure to become a new favorite.

    Enjoy it as a standalone treat, or pair it with fresh fruits and a little whipped coconut cream for a delightful finish to any meal!

  • No-Bake Biscuit Pudding Cake with Vanilla and Chocolate Custard Cream

    No-Bake Biscuit Pudding Cake with Vanilla and Chocolate Custard Cream

    Ingredients

      • For the Biscuit Layers:
          • 2 packs (about 400g) tea biscuits or graham crackers

        • 1 cup milk (for dipping)
      • For the Vanilla Custard Cream:
          • 2 cups milk
          • ½ cup sugar
          • 2 tbsp cornstarch

        Ezoic

          • 2 egg yolks
          • 1 tsp vanilla extract
          • 2 tbsp butter

      • For the Chocolate Custard Cream:
          • 2 cups milk
          • ½ cup sugar

          • 2 tbsp cornstarch
          • 2 egg yolks
          • 2 tbsp cocoa powder

        Ezoic

        • 2 tbsp butter
      • For Garnish (Optional):
          • Grated chocolate

        Ezoic

        • Cocoa powder
        • Chopped nuts

    1. x
      1. gTG60NEidFNH j1698370139017 hsr8ff t1698370241 base.004Now Playing
      2. cgTs0RBydFmc j1698373876740 vgdsy2 t1698373947 base.004
      3. bzr4dC9Pg1j6 j1735583010284 e19q7y t1735583269 base.004
      4. jUUym7hdIFol j1709244306160 7j6r65 t1709244870 base.004
      5. cGwAocWIk HH upload t1739935405 VIZDtZ
      6. 6wIyeZFkNFGb j1709232620372 73yjfv t1709233094 base.004

    Instructions

      1. Prepare the Vanilla Custard Cream:
          • In a saucepan, heat 2 cups of milk over medium heat.
          • In a bowl, whisk sugar, cornstarch, and egg yolks until smooth.
          • Gradually add the warm milk into the egg mixture while stirring.

        • Return to the saucepan and cook over low heat until thickened.
        • Remove from heat, stir in vanilla extract and butter. Let cool slightly.
    1. Prepare the Chocolate Custard Cream:
      • Follow the same steps as the vanilla custard, but add cocoa powder to the sugar and cornstarch mixture.
    2. Assemble the Cake:
        • Dip biscuits in milk and layer them in a dish.

        • Spread a layer of vanilla custard over the biscuits.
        • Add another layer of biscuits, then spread chocolate custard.
        • Repeat layers until all ingredients are used, finishing with custard on top.

    3. Chill and Serve:
        • Refrigerate for at least 4 hours or overnight.
        • Garnish with grated chocolate, cocoa powder, or nuts before serving.

    Enjoy your No-Bake Biscuit Pudding Cake with Vanilla and Chocolate Custard Cream! 


  • Cheesy Chicken and Vegetable Bake

    Cheesy Chicken and Vegetable Bake

    Cheesy Chicken and Vegetable Bake

    I’m excited to share with you a hearty and comforting dish: Cheesy Chicken and Vegetable Bake. This recipe is perfect for family dinners or gatherings with friends, offering a delightful combination of tender chicken, nutritious vegetables, and rich, melty cheese.Not only is this dish incredibly flavorful, but it’s also packed with essential nutrients, making it a wholesome meal that everyone will love. Whether you’re a seasoned cook or just starting in the kitchen, this recipe is straightforward and easy to follow. Plus, I’ll share some handy cooking tips, nutritional benefits, and serving suggestions to make your cooking experience even better.

    Preparation Time

      • Total Preparation Time: 30 minutes
      • Cooking Time: 35 minutes
    • Total Time: 1 hour 5 minutes

    Ingredients:

      • 5 eggs
      • 1 teaspoon salt (divided)
      • 1/2 teaspoon black pepper (divided)
      • 5 potatoes
      • 150g cheese (divided)
      • Spring onion feathers
      • Vegetable oil
      • 1 chicken fillet
      • 1 carrot
      • 1 leek
      • 200g mushrooms
      • 1 tomato
      • 15g butter
      • Dill
    • Sour cream

    Instructions

    1. Prepare the Potatoes:
        • Peel and slice the potatoes thinly.
        • Preheat the oven to 180°C (356°F).
        • Layer the sliced potatoes in a baking dish.
        • Drizzle with vegetable oil and season with 1 teaspoon of salt and 1/2 teaspoon of black pepper.
        • Bake in the oven for 20 minutes.
    2. Prepare the Chicken and Vegetables:
        • Slice the chicken fillet into thin strips.
        • Peel and grate the carrot.
        • Slice the leek and mushrooms.
        • Dice the tomato.
        • Heat a bit of vegetable oil in a pan over medium heat.
        • Add the chicken strips and cook until no longer pink.
        • Add the grated carrot, sliced leek, and mushrooms. Cook for another 5-7 minutes until the vegetables start to soften.
        • Add the diced tomato and cook for an additional 3-5 minutes.
      • Season with the remaining 1 teaspoon of salt and 1/2 teaspoon of black pepper.
    3. Assemble the Bake:
        • Remove the partially baked potatoes from the oven.
        • Layer the cooked chicken and vegetable mixture over the potatoes.
        • Sprinkle 70g of cheese over the top.
        • Dot with 15g of butter.
      • Bake in the oven at 180°C for 5 minutes.
    4. Finish the Dish:
        • Remove the dish from the oven and sprinkle the remaining cheese (approximately 80g) over the top.
      • Bake in the oven for an additional 10 minutes until the cheese is melted and bubbly.
    5. Garnish and Serve:
        • Finely chop the dill and sprinkle over the baked dish.
      • Serve hot with a dollop of sour cream and a garnish of spring onion feathers.

    Serving Suggestions

      • Serve with a fresh green salad to balance the richness of the dish.
    • Pair with a crusty bread to soak up any extra cheesy goodness.

    Cooking Tips

      • For a creamier texture, add a layer of sour cream between the potatoes and chicken mixture.
      • Substitute any preferred cheese for the given cheese types to vary the flavor.
    • To save time, you can pre-cook the chicken and vegetables a day ahead.

    Nutritional Benefits

      • Eggs: Rich in protein and essential vitamins.
      • Chicken: A great source of lean protein.
    • Vegetables: Provide essential vitamins, minerals, and fiber.
    • Cheese: Adds calcium and protein.

    Dietary Information

      • Gluten-Free: Ensure all ingredients, especially the cheese and sour cream, are gluten-free.
    • Low-Carb Option: Use cauliflower instead of potatoes for a low-carb version.

    Why You’ll Love This Recipe

      • Comforting: The combination of cheese and hearty vegetables is perfect for a comforting meal.
      • Nutritious: Packed with protein and vegetables, this dish is a balanced meal.
    • Versatile: Easy to adapt to different tastes and dietary needs.
    • Simple: With straightforward steps and common ingredients, it’s perfect for any home cook.

    Conclusion

    This Cheesy Chicken and Vegetable Bake is a delightful, hearty dish that brings together the best of comforting ingredients and simple preparation. Whether you’re cooking for your family or hosting friends, this recipe is sure to impress. Enjoy the warmth and flavors with every bite!

  • Refreshing Cucumber and Egg Salad with Sweet Corn

    Refreshing Cucumber and Egg Salad with Sweet Corn

    Refreshing Cucumber and Egg Salad with Sweet Corn

    Ingredients

    For the Salad:

    • 3-4 large cucumbers (approximately 500g/18 oz)
    • 3-4 hard-boiled eggs
    • 1 cup sweet corn (150g/5.3 oz)
    • 1 can tuna in water, drained (140g/5 oz)
    • ¼ head young cabbage, finely shredded (200g/7 oz)
    • 3 tablespoons fresh parsley, chopped
    • 2 green onions, finely sliced
    • 1 teaspoon salt (for cabbage preparation)

    For the Dressing:

    • 2 tablespoons plain yogurt (30g/1 oz)
    • 20g mayonnaise (approximately 1.5 tablespoons)
    • ½ teaspoon black pepper
    • Salt to taste

    Instructions

    1. Prepare the Cabbage:
    • Finely shred the cabbage
    • Sprinkle with salt and massage gently
    • Let stand for 10 minutes
    • Squeeze out excess liquid
    1. Cook the Eggs:
    • Place eggs in cold water
    • Bring to a boil
    • Cook for exactly 10 minutes
    • Transfer to ice water
    • Peel and quarter
    1. Prepare Other Ingredients:
    • Slice cucumbers thinly
    • Drain and rinse corn
    • Drain tuna thoroughly
    • Chop parsley and slice green onions
    1. Make the Dressing:
    • Combine yogurt and mayonnaise
    • Add black pepper
    • Mix until smooth
    • Season with salt to taste
    1. Assemble the Salad:
    • In a large bowl, combine prepared cabbage
    • Add cucumber slices
    • Mix in corn and tuna
    • Add quartered eggs
    • Sprinkle with herbs
    • Pour dressing over
    • Toss gently to combine

    Time and Nutritional Information

    Preparation Time:

    • Prep: 15 minutes
    • Cook: 10 minutes
    • Total: 25 minutes

    Nutritional Information (per serving):

    • Calories: 245
    • Protein: 18g
    • Carbohydrates: 15g
    • Fat: 14g
    • Fiber: 4g
    • Sodium: 580mg
    • Serving size: 1.5 cups
    • Servings per recipe: 4

    Tips and Tricks

    1. Salt the cucumbers alongside the cabbage to remove excess moisture and prevent a watery salad
    2. Use English cucumbers for fewer seeds and crispier texture
    3. Prepare hard-boiled eggs the day before for quicker assembly
    4. Chill all ingredients before mixing for the best texture
    5. Pat dry all vegetables thoroughly before combining

    Variations and Substitutions

    • Replace tuna with grilled chicken or chickpeas for a different protein source
    • Swap mayonnaise for Greek yogurt to reduce calories further
    • Add diced avocado for healthy fats
    • Use red cabbage instead of green for extra antioxidants
    • Substitute corn with diced bell peppers for fewer carbs
  • Savory Oatmeal Pancakes with Cheese and Herbs

    Savory Oatmeal Pancakes with Cheese and Herbs

    Savory Oatmeal Pancakes with Cheese and Herbs

    Ingredients

      • 1 cup oatmeal
      • 2 eggs
      • 1 glass (about 240 ml) of milk
      • Fresh parsley, chopped
      • 100 grams cheese, grated (cheddar, mozzarella, or your favorite)
      • Salt, to taste
      • Dry Provençal herbs, to taste
      • Chili flakes, to taste
    • Oil for frying
    • Sesame seeds, for sprinkling

    Directions

    Preparing the Pancake Batter:
      1. Combine Dry Ingredients:
          • In a large mixing bowl, combine 1 cup of oatmeal with a pinch of salt, dry Provençal herbs, and chili flakes to taste. Mix well.


      2. Add Wet Ingredients:
        • Crack 2 eggs into the bowl and add 1 glass of milk. Mix until all ingredients are well combined.
    1. Add Cheese and Parsley:
      • Stir in the grated cheese and chopped parsley until evenly distributed throughout the batter.
    Cooking the Pancakes:
      1. Heat the Oil:
          • Heat a small amount of oil in a non-stick skillet over medium heat.


      2. Cook the Pancakes:
          • Pour a ladleful of the batter into the skillet, spreading it out into a round pancake shape.
          • Sprinkle a few sesame seeds on top of the pancake.


        • Cook for about 2-3 minutes on each side, or until the pancakes are golden brown and cooked through.
        • Repeat with the remaining batter, adding more oil to the skillet as needed.
    Serving:
    1. Serve the Pancakes:
      • Serve the savory oatmeal pancakes hot, garnished with additional parsley if desired.

    Serving Suggestions

      • These savory pancakes are perfect on their own or served with a side salad.
    • For an extra burst of flavor, top with a dollop of sour cream or Greek yogurt.

    Cooking Tips

      • Adjust the amount of chili flakes according to your heat preference.
      • Make sure to cook the pancakes over medium heat to avoid burning them.

    Nutritional Benefits

    • These pancakes are packed with protein from the eggs and cheese.
    • Oatmeal provides a good source of fiber, making this dish both filling and nutritious.

    Dietary Information

      • To make this recipe dairy-free, use a dairy-free milk alternative and cheese substitute.
    • Ensure all ingredients are gluten-free if you have gluten sensitivities.

    Storage Tips

    • Store any leftover pancakes in an airtight container in the refrigerator for up to 2 days.
    • Reheat gently in a skillet or microwave before serving.
  • Oat Cake Without Flour with Banana and Chocolate

    Oat Cake Without Flour with Banana and Chocolate

    Are you ready to tantalize your taste buds with a delightful treat that’s both healthy and indulgent? Say hello to the oat cake without flour, infused with the rich flavors of banana and chocolate. This recipe takes the humble oatmeal to new heights, offering a scrumptious alternative to traditional flour-based cakes. With simple ingredients and easy-to-follow steps, you’ll be whipping up this mouthwatering dessert in no time.

    Ingredients and Preparation
    • Oatmeal – 150 g
    • Milk – 250 ml
    • 2 Bananas
    • 2 Eggs
    • Sugar or other sweetener – 40 g or as needed
    • Salt – 1 pinch
    • Cocoa Powder – 2 tbsp
    • Vanilla Extract – Half a teaspoon
    • Baking Powder – 1 tsp
    • Black Chocolate – 1 tablet or as needed

    Step-by-Step Instructions

    Prepare the Oat Mixture
    • Pour milk over the oatmeal and let it swell for about 10-15 minutes.
    Mash the Bananas
    • Peel ripe bananas and mash them with a fork. Add eggs and continue mixing until well-combined.
    Combine Ingredients
    • Pour the banana and egg mixture over the oatmeal. Add cocoa powder, baking powder, salt, and sweetener. Mix well.
    Bake the Cake
    • Line a baking form with parchment paper and pour the mixture into it. Optionally, decorate with berries or sliced apples. Bake at 180°C for about 1 hour.
    Add Chocolate
    • Chop the chocolate into pieces and sprinkle over the hot cake. Let it cool and refrigerate for a few hours before serving.
    Baking and Serving Tips
    • Check for Doneness: Insert a toothpick into the center of the cake to check if it comes out clean, indicating the cake is fully baked.
    • Serve Chilled: For a refreshing twist, serve the oat cake chilled with a dollop of whipped cream or a scoop of vanilla ice cream.
    • Store Properly: Store leftover cake in an airtight container in the refrigerator for up to 3 days.
    Health Benefits of Oat Cake Without Flour
    • Rich in Fiber: Oats are a great source of fiber, which aids digestion and promotes satiety.
    • Low Glycemic Index: With minimal added sugar and no flour, this cake has a low glycemic index, making it suitable for those watching their blood sugar levels.
    • Nutrient-Dense: Bananas provide potassium and vitamins, while dark chocolate offers antioxidants, making this cake not only delicious but also nutritious.
    Variations and Customizations
    • Nutty Crunch: Add chopped nuts like walnuts or almonds for extra texture and flavor.
    • Fruity Twist: Experiment with different fruits such as berries, peaches, or pineapple for a fruity burst in every bite.
    • Dairy-Free Option: Substitute milk with almond milk or coconut milk for a dairy-free version of this cake.