Category: cake

  • Marble Cake

    Marble Cake

    Marble Cake

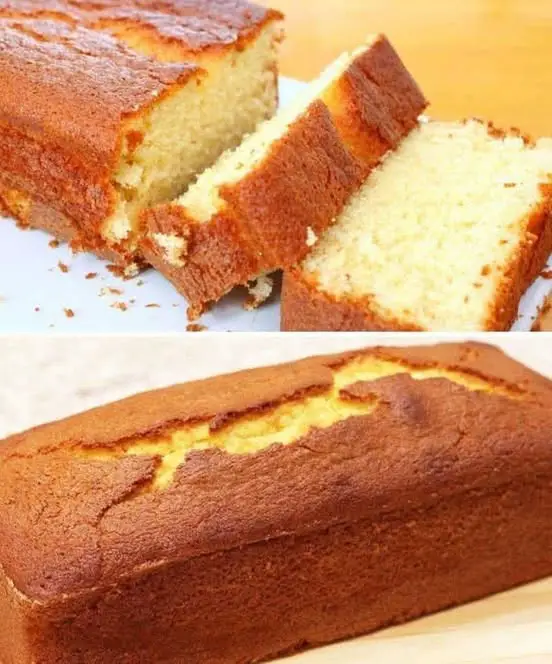
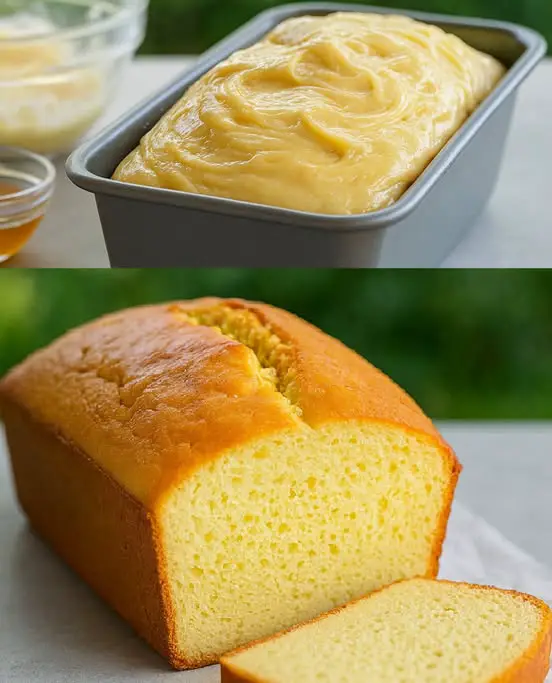
    If you love the contrast between vanilla and chocolate, this marble cake will be your new favorite. Fluffy, soft and perfect for any occasion!

    Ingredients:

    ✅ 200 g sugar
    ✅ 4 large eggs
    ✅ 200 g wheat flour
    ✅ 200 g butter (at room temperature)
    ✅ 1 sachet of baking powder
    ✅ 1 pinch of salt
    ✅ 2 tablespoons of unsweetened cocoa powder
    ✅ 1 teaspoon of vanilla extract
    ✅ 60 ml of milk

    Instructions:

    1️⃣ Preheat and prepare the mold:
    • Heat the oven to 180°C (350°F).
    • Grease and flour a mold or line it with baking paper.

    2️⃣ Prepare the base dough:
    • Beat the butter with the sugar until you get a creamy and fluffy texture.
    • Add the eggs one by one, beating well after each addition.

    3️⃣ Add the dry ingredients:
    • Sift the flour, baking powder and salt.
    • Add little by little to the previous mixture, alternating with the milk and vanilla.

    4️⃣ Divide the dough:
    • Separate the mixture into two equal parts.
    • To one of them, add the sifted cocoa powder and mix until well combined.

    5️⃣ Create the marbled effect:
    • Pour alternately spoonfuls of the vanilla and chocolate mixture into the mold.
    • Using a knife or skewer, make gentle spiral movements to achieve the marbled effect.

    6️⃣ Bake:
    • Bake for 35-45 minutes, or until a toothpick inserted comes out clean.

    7️⃣ Cool and enjoy:
    • Let cool in the pan for 10 minutes, then unmold onto a wire rack.

    Extra tip: Serve this cake with a coffee or a glass of hot milk… pure delight!

    ⏱ Total time: 1h | Servings: 10

    What do you prefer in your marbled cake: more chocolate  or more vanilla ? Tell me in the comments!

     Benefits

    1. Best of both worlds: You get the light sweetness of vanilla and the richness of chocolate in one bite.

    2. Versatile: Works as a tea-time snack, a party dessert, or even as a breakfast treat.

    3. Less intense than full chocolate cake: Great for people who prefer a milder dessert.

    4. Customizable: You can marble in other flavors too—like coffee, matcha, or strawberry!

    5. Kid-friendly and fun: The swirl effect is visually appealing and exciting to slice into.

     Pro Tips for a Great Marble Cake

    1. Separate batters gently: Start with one base batter, then divide and add cocoa to half to keep textures even.

    2. Use good cocoa powder: Unsweetened and high-quality for rich chocolate flavor.

    3. Swirl, don’t mix: Use a knife or skewer to gently swirl the two batters together—don’t overdo it or it’ll blend.

    4. Room temperature ingredients: Ensure eggs, butter, and milk are at room temp for even mixing.

    5. Don’t overbake: Check with a skewer or toothpick—moist crumbs are okay; a dry skewer means it’s overdone.

    6. Add a glaze or dusting: A simple chocolate or vanilla glaze, or even powdered sugar, can elevate presentation.

  • Classic Choux Pastry with Cream Filling and Chocolate Glaze

    Classic Choux Pastry with Cream Filling and Chocolate Glaze

    Classic Choux Pastry with Cream Filling and Chocolate Glaze

    Ingredients:

    For the Choux Pastry:

      • 80g butter
      • 160g water
      • 1 tsp sugar
      • Pinch of salt
    • 120g all-purpose flour
    • 3 eggs

    For the Cream Filling:

      • 250 ml heavy cream (33% fat)
    • 140g cream cheese
    • 3 tbsp powdered sugar

    For the Chocolate Glaze:

      • 100g chocolate
    • 2 tbsp vegetable oil

    Directions:

    Prepare the Choux Pastry:

      1. In a medium saucepan, combine the butter, water, sugar, and a pinch of salt. Bring the mixture to a boil over medium heat.
      2. Once it starts boiling, remove the saucepan from the heat and immediately add the flour all at once.
      1. Stir vigorously with a wooden spoon or spatula until the dough comes together and pulls away from the sides of the pan.
      2. Return the saucepan to low heat and cook the dough for 15-20 seconds, stirring continuously to dry it out slightly.
      3. Transfer the dough to a bowl and let it cool to room temperature.
    1. Once cooled, beat in the eggs one at a time, ensuring each egg is fully incorporated before adding the next. The dough should be smooth and shiny, and when you lift the spatula, it should form a “V” shape.

    Bake the Pastry:

      1. Preheat the oven to 190°C (374°F).
      2. Using a piping bag or spoon, shape the dough into small rounds or éclairs on a baking sheet lined with parchment paper.
    1. Bake for 35 minutes until the pastries are golden brown and puffed up.
    2. Once baked, remove from the oven and let them cool completely.
  • APPLE UPSIDE-DOWN TART

    APPLE UPSIDE-DOWN TART

    APPLE UPSIDE-DOWN TART – CLASSIC AND DELICIOUS

    Juicy, golden brown, and with an irresistible touch of caramel… a recipe that always wins!
    Just 2 magical steps: caramel + sponge cake = guaranteed success.

    Ingredients:

    For the caramel:

    ✔ 4 tbsp sugar
    ✔ 2 tbsp water

    For the tart:

    ✔ 2 apples (red or green)
    ✔ 2 eggs
    ✔ 100 g sugar
    ✔ 100 ml milk
    ✔ 50 ml oil
    ✔ 1 tsp vanilla essence
    ✔ 180 g self-rising flour

    Preparation:

    1️⃣ Caramel:
    Heat the sugar with the water until golden brown. Pour into the mold, swirling it around to cover the bottom.

    2️⃣ Apples:
    Peel and cut into wedges or thin slices. Arrange them on top of the caramel.

    3️⃣ Dough:
    Beat the eggs with the sugar until foamy.  Add milk, oil, vanilla, and then the sifted flour. Mix until combined.

    4️⃣ Baking:
    Pour over the apples and bake at 180°C for 35-40 minutes.
    Let it rest for 5 minutes, remove from the pan, and marvel at the result!

    Tip: Sprinkle cinnamon over the apples before baking for an incredible spicy touch.

     Tips for Making It Perfect

    1. Use firm apples: Granny Smith, Honeycrisp, or Fuji hold their shape and balance the sweetness well.

    2. Caramelize carefully: Don’t burn the sugar—go for golden brown to deep amber for a rich caramel flavor.

    3. Chill your tart base: Cold dough bakes flakier and holds better over the caramel.

    4. Invert while warm: Flip the tart onto a plate soon after baking so the caramel stays liquid and doesn’t harden in the pan.

    5. Spice it up: Add cinnamon, nutmeg, or cardamom for warmth and depth.

    6. Serve with: A scoop of vanilla ice cream or a dollop of whipped cream for contrast.

     Benefits & Importance

    • Seasonal goodness: Uses fresh apples, often in abundance during fall.

    • Minimal waste: A great way to use slightly bruised or imperfect apples.

    • Crowd-pleaser: Elegant presentation and rich flavor make it great for gatherings.

    • Customizable: Easily adapted for vegan, gluten-free, or low-sugar diets.

    • Nostalgic & comforting: Offers that cozy, homemade dessert feel.

     Nutrition Information (per serving – approx. 1/8 of a 9” tart)


    Nutrient Amount
    Calories 250–350 kcal
    Carbs 35–45 g
    Sugars 20–30 g
    Fat 10–18 g
    Saturated Fat 5–10 g
    Protein 2–4 g
    Fiber 2–4 g
    Vitamin C 5–8% DV
    Iron 4–6% DV

     Note: Nutrition will vary depending on ingredients (butter vs. margarine, puff pastry vs. pie dough, sugar quantity, etc.).

     Healthier Alternatives

    • Reduce sugar: Use natural sweeteners like maple syrup or coconut sugar.

    • Whole wheat crust: For added fiber and nutrients.

    • Add nuts: Walnuts or pecans add healthy fats and crunch.

    • Use plant-based butter: For a dairy-free version.

  • This Natural Drink May Help Reduce Bloating and Belly Fat

    This Natural Drink May Help Reduce Bloating and Belly Fat

    This Natural Drink May Help Reduce Bloating and Belly Fat

    This Drink Helps You Get Rid of Bloating & Belly Fat Naturally

    Bloating and stubborn belly fat can be frustrating to deal with. While lifestyle changes like regular exercise and a balanced diet are key to long-term health, certain natural drinks can give you that extra boost to ease bloating and support fat loss. One such drink is a refreshing blend of green tea, lemon, ginger, and a dash of cayenne pepper. Here’s how each ingredient works and a simple guide to making it at home.

    Why This Drink Works

    • Green Tea:
      Rich in antioxidants and catechins, green tea is well known for its metabolism-boosting properties. Studies have shown that regular consumption of green tea can increase fat oxidation and improve overall energy expenditure, helping to target stubborn belly fat.
    • Lemon:
      Lemons are loaded with vitamin C and act as a natural diuretic. This helps reduce water retention—a common cause of bloating. Additionally, lemon water can kick-start your digestion each morning, clearing out toxins and excess sodium that contribute to bloating.
    • Ginger:
      Ginger is a powerful anti-inflammatory and digestive aid. It can help soothe an upset stomach, reduce gas, and stimulate digestion. By calming your digestive system, ginger helps to relieve bloating and may even aid in the breakdown of fats.
    • Cayenne Pepper:
      Cayenne pepper contains capsaicin, which has been shown to boost metabolism and increase the burning of fat. Even a small amount can help your body generate more heat (thermogenesis), which may support weight loss efforts.

    How to Make the Drink

    Ingredients:

    • 1 cup of freshly brewed green tea (cooled to a comfortable temperature)
    • Juice of half a lemon
    • 1/2 teaspoon of freshly grated ginger (or 1/4 teaspoon ginger powder)
    • A pinch of cayenne pepper (adjust based on your tolerance)
    • Optional: A teaspoon of honey (for a touch of natural sweetness)

    Instructions:

    1. Brew Your Green Tea:
      Start by brewing a cup of green tea. Allow it to steep for 3–5 minutes, then remove the tea bag or strain the leaves. Let the tea cool slightly—this helps preserve the potency of the lemon and ginger.
    2. Mix in the Ingredients:
      Squeeze the juice of half a lemon into the tea. Add the grated ginger and a pinch of cayenne pepper. If you prefer a sweeter taste, stir in a teaspoon of honey.
    3. Stir Well:
      Mix all the ingredients thoroughly until well combined. The warm liquid will help blend the flavors together.
    4. Enjoy:
      Drink this concoction in the morning or between meals for the best results. It’s best consumed on an empty stomach to maximize its digestive benefits. If you’re new to the flavors, start with a smaller amount of ginger and cayenne, and adjust to taste over time.

    Additional Tips for Best Results

    • Consistency is Key:
      For the drink to have a noticeable effect on bloating and belly fat, try to make it a daily habit. Over time, the combined effects of these natural ingredients may help improve your digestion and support your weight loss goals.
    • Pair with a Healthy Lifestyle:
      While this drink is a great natural aid, remember that it’s most effective when combined with a balanced diet and regular exercise. Adequate hydration and whole, nutrient-dense foods can further enhance its benefits.
    • Listen to Your Body:
      If you experience any discomfort, such as heartburn or digestive upset from the ginger or cayenne pepper, reduce the amounts gradually until your body adjusts. Everyone’s tolerance varies, so it’s important to personalize the recipe for your needs.

    Final Thoughts

    This green tea, lemon, ginger, and cayenne drink is a simple, natural way to help reduce bloating and support the loss of stubborn belly fat. By combining ingredients that promote detoxification, boost metabolism, and soothe digestion, you create a beverage that not only refreshes you but also supports your overall well-being. Incorporate this drink into your daily routine for a gentle, natural boost, and enjoy the journey toward a healthier, less bloated you.

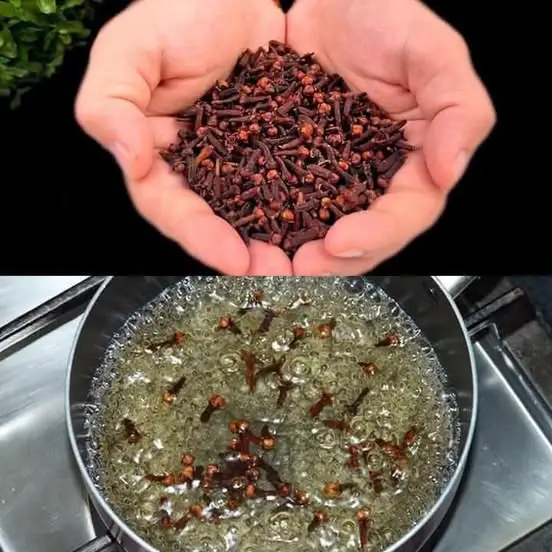
  • Mix Cloves with Vaseline ~ A Secret Nobody Will Ever Tell You ~ Thank Me Later

    Mix Cloves with Vaseline ~ A Secret Nobody Will Ever Tell You ~ Thank Me Later

    Mix Cloves with Vaseline ~ A Secret Nobody Will Ever Tell You ~ Thank Me Later


    You might be familiar with the individual benefits of cloves and Vaseline, but did you know that combining these two can create a powerful and versatile remedy? This simple mixture offers a range of benefits that you’ll be glad you discovered. It’s one of those secrets that, once you know it, you’ll wonder how you ever managed without it!

    Why Cloves and Vaseline?

    Cloves are known for their potent antiseptic and anti-inflammatory properties. They’re often used in traditional remedies to relieve pain, reduce inflammation, and promote healing. On the other hand, Vaseline is a classic moisturizer that creates a protective barrier on the skin, helping to lock in moisture and protect against dryness.

    When combined, these two ingredients create a powerful ointment that can be used for a variety of purposes.

    How to Make the Mixture

    Creating this secret remedy is simple:

    • Ingredients:
      • 1 tablespoon of Vaseline
      • 1 teaspoon of ground cloves or a few drops of clove essential oil
    • Instructions:
      1. Start by melting the Vaseline slightly if it’s too firm. You can do this by placing it in a small bowl and warming it up in the microwave for a few seconds.
      2. Once the Vaseline is softened, mix in the ground cloves or clove oil. Stir well until the two ingredients are thoroughly combined.
      3. Let the mixture cool if necessary, then transfer it to a clean, airtight container for storage.

    Uses for Cloves and Vaseline Mixture

    1. Relieves Muscle and Joint Pain: The anti-inflammatory properties of cloves make this mixture an excellent remedy for soothing sore muscles and aching joints. Simply rub a small amount onto the affected area and let the combination of cloves and Vaseline work its magic.
    2. Soothes Dry, Cracked Skin: If you’re dealing with dry, cracked skin—especially on areas like your hands, feet, or elbows—this mixture can provide relief. The Vaseline helps to moisturize and protect the skin, while the cloves promote healing.
    3. Eases Insect Bites and Stings: The natural antiseptic properties of cloves can help reduce the itching and swelling caused by insect bites or stings. Apply a small amount of the mixture to the affected area for quick relief.
    4. Promotes Healing of Minor Cuts and Scrapes: For minor cuts, scrapes, or other skin irritations, this mixture can help speed up the healing process. The cloves work to prevent infection, while the Vaseline keeps the wound protected and moisturized.
      This simple, natural remedy is a true multitasker. With just two common ingredients, you can create a powerful ointment that’s useful in a variety of situations. Whether you’re dealing with muscle pain, dry skin, or minor injuries, this cloves and Vaseline mixture is a secret you’ll be glad you discovered. Give it a try, and you’ll find yourself reaching for it time and time again—thank me later!

     Why Cloves?

    Cloves are packed with:

    • Eugenol – a natural antiseptic and pain reliever

    • Antioxidants – for skin healing and anti-aging

    • Anti-inflammatory properties – good for soothing irritation

     Why Vaseline?

    Vaseline (petroleum jelly):

    • Locks in moisture

    • Creates a protective barrier

    • Helps deliver active ingredients (like clove oil) deeper into the skin

     Secret Benefits of Mixing Cloves with Vaseline

    1. Natural Lip Plumper

    Clove has a slight “tingle” effect, which boosts circulation. When mixed with Vaseline, it plumps lips while keeping them moisturized.

    Tip: Apply a tiny dab to lips and wait 5–10 minutes. Wipe off if it tingles too much.

    2. Pimple Spot Treatment

    Clove’s antibacterial properties help fight acne, while Vaseline prevents skin from drying out.

    Tip: Use a very small amount on pimples overnight (test on a small area first).

    3. Relieves Toothache (Topical Use)

    Clove oil has numbing properties. Mixing it with Vaseline can make it easier to apply on the gums without irritation.

    Important: This is just for external application, not a long-term solution.

    4. Soothes Minor Burns & Insect Bites

    Clove helps reduce inflammation and pain, while Vaseline protects and promotes healing.

    5. Stimulates Hair Growth (Eyebrows & Beard)

    Clove oil may help improve blood flow to hair follicles, and Vaseline locks in moisture to prevent breakage.

    Tip: Apply gently with a cotton swab — do not overuse.

    ⚠️ Important Notes:

    • Always do a patch test — cloves can be strong and may irritate sensitive skin.

    • Don’t use near eyes or on broken skin.

    • Use clove essential oil, not crushed dry cloves (unless infused into oil first).

  • Creamy Garlic Butter Salmon Pasta

    Creamy Garlic Butter Salmon Pasta

    *Introduction*

    Creamy Garlic Butter Salmon Pasta is a rich and flavorful dish that combines the tender goodness of salmon with the comfort of creamy pasta. This recipe is perfect for a special occasion or a cozy night in.

    *Ingredients*

    – 8 oz (225g) pasta of your choice (e.g., fettuccine, linguine, or penne)
    – 4 salmon fillets (6 oz/170g each)
    – 2 tablespoons unsalted butter
    – 2 cloves garlic, minced
    – 1 cup (250ml) heavy cream
    – 1/2 cup (120g) grated Parmesan cheese
    – 1 teaspoon dried parsley
    – Salt and pepper to taste
    – Fresh parsley, chopped (optional)

    *Instructions*

    1. Bring a large pot of salted water to a boil. Cook the pasta according to the package instructions until al dente. Reserve 1 cup of pasta water before draining.

    2. In a large skillet, melt the butter over medium heat. Add the garlic and cook for 1-2 minutes until fragrant.

    3. Add the salmon fillets to the skillet, skin side up (if they have skin). Cook for 3-4 minutes until the skin is crispy. Flip the salmon over and cook for an additional 3-4 minutes until cooked through.

    4. Remove the salmon from the skillet and set aside. In the same skillet, add the heavy cream and bring to a simmer. Let cook for 2-3 minutes until slightly thickened.

    5. Stir in the Parmesan cheese until melted and smooth. Season with salt, pepper, and parsley.

    6. Add the cooked pasta to the skillet, tossing to coat with the creamy sauce. If the sauce seems too thick, add some of the reserved pasta water.

    7. Serve the pasta hot, topped with the cooked salmon fillets and chopped parsley (if using).

    *Description*

    Creamy Garlic Butter Salmon Pasta is a decadent and flavorful dish that’s sure to impress. The combination of tender salmon, rich creamy sauce, and al dente pasta makes for a truly satisfying meal.

    *Tips*

    – Use high-quality salmon fillets for the best flavor and texture.
    – Don’t overcook the salmon – it should be cooked through but still moist and flaky.
    – Add some steamed vegetables (e.g., asparagus or broccoli) to make the dish more well-rounded.
    – For an extra rich sauce, add some grated Romano or Asiago cheese.

    *Correction*

    If you find that the sauce is too thin, simmer it for a few more minutes to reduce the liquid. If it’s too thick, add a little more heavy cream or pasta water.

    Enjoy your creamy garlic butter salmon pasta!

  • Only a couple of items needed! Potatoes are very tasty and you will want to cook them repeatedly!

    Only a couple of items needed! Potatoes are very tasty and you will want to cook them repeatedly!

    List of ingredients:

    2 big eggs

    200 milliliters of kefir

    180 grams of flour

    7 grams of baking powder

    2 big potatoes

    1 leek stalk

    100 grams of diced ham 100 grams of grated hard mozzarella cheese

    A lot of new dill

    Add salt and pepper according to your preference.

    Directions:

    Before baking: Heat your oven to 180°C (350°F). Grease a rectangular baking dish or cover it with parchment paper.

    Prepare the dough:

    In a big bowl, mix the eggs and kefir well.

    Put the flour and baking powder through a sieve into the egg mixture and mix well until the dough is smooth.

    Get the vegetables and ham ready:

    Peel and shred the potatoes. Cut the leek into thin slices.

    In another bowl, mix the grated potatoes, sliced leeks, and chopped ham. Season with salt and pepper according to your preference.

    Mix the ingredients together.

    Mix the potato mixture into the batter well so that all the ingredients are evenly spread.

    Put the cake together.

    Pour the mix into the baking dish that has been prepared. Distribute evenly.

    Put grated mozzarella cheese on top.

    Cook in the oven for around 40 to 45 minutes until the top is golden and crispy.

    Add a decoration and serve: Take out of the oven and allow to cool a bit. Sprinkle with freshly cut dill.

  • Twisted Doughnuts (Donuts)

    Twisted Doughnuts (Donuts)

    Twisted Doughnuts (Donuts) 1f3691f300
    Ingredients:
    – 1 cup of milk 1f95b
    – 2 teaspoons of active dry yeast 1f9c2
    – 1/3 cup of granulated sugar 1f35a
    – 2 eggs, beaten 1f95a1f95a
    – 1/2 cup of melted butter 1f9c8
    – 4 cups of all-purpose flour 1f33e
    – 1/2 teaspoon of salt 1f9c2
    – Oil for frying 1f33f
    Directions:
    1. Heat the milk until warm, then add the active dry yeast and let it sit for about 5 minutes until foamy.
    2. In a large mixing bowl, combine the sugar, eggs, melted butter, flour, and salt. Mix well.
    3. Pour in the yeast mixture and knead the dough until smooth. Cover and let it rise for about an hour.
    4. Roll out the dough on a floured surface and cut into donut shapes using a donut cutter or two differently sized biscuit cutters.
    5. Heat the oil in a deep fryer or heavy-bottomed pot to 375°F (190°C).
    6. Fry the donuts in batches for about 2-3 minutes per side, until golden brown. Remove and place on a paper towel-lined plate to drain.
    7. Allow the donuts to cool slightly before twisting them into fun shapes.
    8. Serve the twisted doughnuts warm and enjoy!
    Tips:
    – You can dust the twisted doughnuts with powdered sugar or glaze them with a simple sugar glaze for extra sweetness.
    – Be sure to twist the doughnuts while they are still warm and pliable for the best results.
    Prep time: 2 hours
    Calories: 250 per serving (1 twisted doughnut)
  • Homemade Olive Oil Pizza Dough

    Homemade Olive Oil Pizza Dough

    Homemade Olive Oil Pizza Dough
    This Homemade Olive Oil Pizza Dough is the perfect base for a delicious, crispy, and flavorful homemade pizza. Made with simple ingredients like all-purpose flour, yeast, olive oil, and warm water, this dough is easy to prepare and yields a soft, slightly chewy texture with a crispy crust. Whether you’re making a classic margherita pizza, a veggie-loaded creation, or a cheesy garlic bread, this dough is versatile and foolproof. With a touch of oregano and salt, this recipe gives you a beautifully flavored pizza crust that you can customize to your liking.

    Preparation Time

    Total Time: 2 hours
    Prep Time: 20 minutes
    Resting Time: 1 hour 40 minutes
    Cook Time: 20 minutes
    Ingredients

    For the Dough:

    400g (about 3 ¼ cups) all-purpose flour
    1 tablespoon dry yeast (for bread)
    1 teaspoon sugar
    200 ml (about ¾ cup) warm water
    3 tablespoons olive oil
    1 teaspoon salt
    1 teaspoon dried oregano (optional)
    For Topping & Baking:

    Olive oil, for drizzling
    Additional oregano, for sprinkling on top
    1 teaspoon salt, for topping (optional)
    Directions
    Prepare the Dough:

    In a mixing bowl, combine the flour, dry yeast, sugar, and salt.
    Add the warm water and olive oil to the dry ingredients.
    Stir the mixture until a dough forms, then knead it for about 5-7 minutes until smooth and elastic.
    Cover the dough with a damp towel or plastic wrap and let it rise in a warm place for about 1 hour, or until it doubles in size.
    Second Rising:

    Once the dough has risen, punch it down to remove air bubbles.
    Shape the dough into a ball, cover, and let it rise for an additional 40 minutes.
    Prepare the Pizza:

    Preheat your oven to 180°C (350°F).
    After the second rise, roll out the dough into your desired pizza size on a lightly floured surface.
    Transfer the rolled dough to a greased or parchment-lined baking sheet or pizza stone.
    Drizzle the dough with olive oil and sprinkle with oregano and salt.
    Add Toppings:

    Add your favorite toppings, such as peppers, cherry tomatoes, cheese, or any other ingredients you like.
    Bake:

    Bake the pizza in the preheated oven for 20 minutes or until the crust is golden and the cheese is melted and bubbly.
    Serve:

    Slice and enjoy your homemade pizza!
    Serving Suggestions

    Pair with a fresh salad or a side of garlic bread.
    Serve with a dipping sauce like marinara, ranch, or garlic butter.
    Enjoy with a chilled glass of white wine or a refreshing iced tea.
    Make mini pizzas with different toppings for a fun family dinner.
    Cooking Tips

    Use High-Quality Olive Oil: It enhances the flavor of the dough.
    Preheat Your Baking Surface: A pizza stone or a preheated baking sheet helps create a crispy crust.
    Let the Dough Rest: Allowing the dough to rise twice improves texture and flavor.
    Customize Your Toppings: Use fresh mozzarella, basil, and homemade tomato sauce for an authentic pizza experience.
    For a Crispier Crust: Bake at a higher temperature (220°C/425°F) for 12-15 minutes.
    Nutritional Benefits

    Olive Oil: Provides heart-healthy monounsaturated fats.
    Flour: A good source of carbohydrates for energy.
    Yeast: Contains B vitamins and helps with digestion.
    Oregano: Rich in antioxidants and anti-inflammatory properties.
    Dietary Information

    Vegetarian-Friendly (without meat toppings)
    Dairy-Free (if cheese is omitted)
    Vegan-Friendly (if made without cheese and animal-based toppings)
    Can be made Gluten-Free (by using gluten-free flour)
    Nutritional Facts (Per Serving – One Slice)

    Calories: 180 kcal
    Carbohydrates: 30g
    Protein: 5g
    Fat: 5g
    Fiber: 2g
    Sodium: 150mg
    Storage

    Refrigeration: Store leftover pizza in an airtight container in the fridge for up to 3 days.
    Freezing: Freeze the dough before baking for up to 3 months. Thaw overnight in the fridge before using.
    Reheating: Reheat pizza slices in an oven at 180°C (350°F) for 5-7 minutes to keep the crust crispy.
    Why You’ll Love This Recipe

    Easy to Make: Simple ingredients and minimal hands-on time.
    Customizable: Use any toppings of your choice.
    Great Texture: Soft inside with a crispy outer crust.
    Perfect for Any Occasion: Great for casual dinners, parties, or meal prep.
    Recipe Conclusion
    This Homemade Olive Oil Pizza Dough is a must-try for anyone who loves making pizza at home. The olive oil enhances the texture, making the crust light and flavorful. With a balance of softness and crispiness, this dough is versatile and can be topped with your favorite ingredients. Whether you’re making a classic pizza or experimenting with new flavors, this recipe is a reliable base that guarantees delicious results every time!

    Frequently Asked Questions

    Can I use instant yeast instead of dry yeast?

    Yes, instant yeast works the same way and can be mixed directly with the flour.
    Can I make the dough ahead of time?

    Yes, the dough can be stored in the fridge for up to 24 hours.
    How do I make the crust crispier?

    Bake at a higher temperature (220°C/425°F) and use a preheated pizza stone
    What toppings work best for this dough?

    Classic choices include tomato sauce, mozzarella, pepperoni, mushrooms, and bell peppers.
    Can I make this dough gluten-free?

    Yes, substitute all-purpose flour with a gluten-free flour blend.
    What’s the best way to store leftover pizza?

    Keep it in an airtight container in the fridge and reheat in the oven.
    Can I freeze the dough?

    Yes, wrap the dough tightly in plastic wrap and freeze for up to 3 months.
    What can I use instead of olive oil?

    You can use avocado oil or melted butter for a slightly different taste.
    Can I make this without a rolling pin?

    Yes, you can stretch the dough by hand for a rustic look.
    What can I do if my dough doesn’t rise?

    Ensure your yeast is fresh and that the water isn’t too hot or too cold.
    This Homemade Olive Oil Pizza Dough will take your homemade pizza to the next level. Try it today and enjoy a restaurant-quality pizza right from your own kitchen!

  • Apple Cinnamon Cake with Honey Glaze and Pistachios

    Apple Cinnamon Cake with Honey Glaze and Pistachios

    Apple Cinnamon Cake with Honey Glaze and Pistachios

    Apple Cinnamon Cake with Honey Glaze and Pistachios
    This Apple Cinnamon Cake is a light, moist, and comforting dessert made with simple ingredients you likely already have on hand. Infused with the gentle aroma of vanilla and cinnamon, and naturally sweetened with grated apple, this cake is soft, fragrant, and beautifully rustic. A delicate topping of apple slices caramelized during baking adds a charming, homey touch—while the final drizzle of honey and chopped pistachios elevates it into something truly special. Whether you’re hosting guests, enjoying an afternoon tea, or looking for a quick autumn-inspired dessert, this recipe delivers cozy flavor and golden perfection in every slice.

    Preparation Time: 15 minutes
    Cook Time: 35 minutes
    Total Time: 50 minutes
    Yield: 8–10 slices
    Cuisine: European-Inspired Home Baking

    Ingredients

    Wet Ingredients:

    3 large eggs

    A pinch of salt

    A splash of vanilla extract or 1 packet of vanilla sugar

    100g sugar (½ cup)

    80ml oil (⅓ cup; sunflower or vegetable oil recommended)

    1 apple, finely grated

    Dry Ingredients:

    200g all-purpose flour (1⅓ cup)

    10g baking powder (about 2 teaspoons)

    ½ teaspoon cinnamon

    Toppings and Finish:

    1 additional apple, thinly sliced

    1 tablespoon sugar (for apple topping)

    1 tablespoon diluted honey (for brushing)

    1–2 tablespoons chopped pistachios

    Optional Add-Ins:

    Zest of ½ lemon for brightness

    Apple Cinnamon Cake with Strawberry Puree Recipe
    A handful of raisins or chopped nuts

    Step-by-Step Cooking Directions
    1. Prepare the Batter Base
    In a large mixing bowl, crack the eggs and add a pinch of salt. Whisk until slightly frothy. Add the sugar and vanilla, and beat with a hand mixer or whisk until the mixture becomes pale and airy—about 2–3 minutes.

    2. Add Oil and Grated Apple
    Pour in the oil and mix until incorporated. Peel and finely grate one apple using a fine grater. Add the apple to the batter and gently mix to combine. This adds natural moisture and a subtle sweetness to the cake.

    3. Mix the Dry Ingredients
    In a separate bowl, sift together the flour, baking powder, and cinnamon. Sifting in two batches helps prevent clumps and ensures an even rise. Gently fold the dry mixture into the wet mixture, stirring until no dry patches remain. The batter should be smooth but thick.

    4. Prepare the Baking Pan
    Grease a 24 cm (9.5-inch) round baking dish or line it with parchment paper. Pour in the batter and spread it evenly with a spatula.

    5. Add the Apple Topping
    Thinly slice the second apple into even rounds or half-moons. Arrange the slices in a circular pattern on top of the batter. Sprinkle the apple topping with 1 tablespoon of sugar to help it caramelize during baking.

    6. Bake
    Preheat the oven to 180°C (350°F). Bake the cake on the middle rack for 30–35 minutes, or until golden brown and a toothpick inserted in the center comes out clean. If the top is browning too quickly, cover loosely with foil for the last 10 minutes.

    7. Glaze and Garnish
    Once baked, allow the cake to cool for 10–15 minutes. While still warm, brush the top with diluted honey for a glossy finish. Sprinkle generously with chopped pistachios for added crunch and color.

    8. Serve
    Slice and serve the cake warm or at room temperature. Pair with tea, coffee, or a glass of warm milk for a comforting treat.

    Nutritional Information (Per Slice, Based on 10 Slices)
    Calories: 210
    Fat: 9g
    Carbohydrates: 28g
    Sugars: 14g
    Protein: 4g
    Fiber: 1.5g
    Sodium: 80mg

    The Origins and Popularity of the Recipe
    Apple cakes are a staple in many European kitchens, particularly in Central and Eastern Europe. Whether it’s a strudel in Austria, a French tarte tatin, or a rustic German Apfelkuchen, the apple has always been a favorite in home baking. This recipe reflects a more modern, simplified take on traditional apple cake—offering the sweet, spiced flavor with fewer steps and common pantry ingredients. Its popularity today lies in its versatility: it can be rustic or refined, seasonal or everyday.

    Reasons Why You’ll Love This Recipe

    Simple ingredients: No specialty items needed.

    Moist texture: Thanks to grated apple and oil.

    Naturally sweet: Less added sugar due to the fruit.

    Beautiful presentation: Apple slices on top caramelize beautifully.

    Crowd-pleaser: Perfect for brunch, birthdays, or potlucks.

    Health Benefits

    Apples provide fiber, antioxidants, and vitamin C.

    Eggs are a good source of protein and healthy fats.

    Cinnamon can help regulate blood sugar and improve digestion.

    Flaky Butter Bread Recipe
    Pistachios are rich in heart-healthy fats and vitamin B6.

    Using oil instead of butter makes the cake lighter and keeps it moist longer.

    Serving Suggestions
    Dust with powdered sugar before serving.

    Add a scoop of vanilla ice cream for a decadent dessert.

    Serve alongside a drizzle of caramel sauce.

    Enjoy warm with a dollop of whipped cream or Greek yogurt.

    Pack into lunchboxes for a sweet mid-day snack.

    Cooking Tips

    Use a sweet-tart apple like Honeycrisp or Pink Lady for more flavor.

    Grate the apple just before using to prevent browning.

    Don’t overmix the batter—fold gently once flour is added.

    Keep an eye on the oven; ovens may vary, and you want the center just set.

    Store leftovers in an airtight container at room temperature for up to 3 days or refrigerate for up to 5 days.

    Variations to Try

    Add chopped walnuts or hazelnuts for crunch.

    Use pears instead of apples for a twist.

    Make it dairy-free by using plant-based milk and yogurt.

    Add orange zest for a citrusy aroma.

    Make mini cakes using muffin tins—bake for 20–25 minutes.

    Conclusion
    This Apple Cinnamon Cake with Honey Glaze and Pistachios is a gentle, heartwarming treat that brings together wholesome ingredients and sweet autumnal flavors. It’s easy enough for everyday baking but elegant enough to share. From the aroma that fills your kitchen while it bakes to the final bite topped with honey and pistachio, this recipe is a reminder of how little it takes to create something deeply satisfying and memorable.

  • Silky & Decadent Chocolate Mousse Cake

    Silky & Decadent Chocolate Mousse Cake

    Silky & Decadent Chocolate Mousse Cake
    Introduction
    Prepare to embark on a chocolate lover’s dream journey with this exquisite chocolate mousse cake that transforms humble pantry staples into a dessert masterpiece. This show-stopping creation features a moist chocolate cake base topped with a cloud-like chocolate mousse that’s velvety smooth and intensely flavorful. Each forkful delivers the perfect balance of rich cocoa notes and delicate creaminess that simply melts in your mouth. Whether you’re celebrating a special occasion or simply indulging your chocolate cravings, this elegant dessert is guaranteed to impress even the most discerning palates. Best of all, despite its sophisticated appearance, this recipe is surprisingly approachable for home bakers of all skill levels.

    Apple Cinnamon Cake with Strawberry Puree Recipe
    Ingredients
    For the Chocolate Cake Layer:
    1 cup all-purpose flour (115g)
    ½ teaspoon baking powder (2-3g)
    ½ teaspoon baking soda (3g)
    2 heaping tablespoons unsweetened cocoa powder (30g)
    ¾ cup granulated sugar (150g)
    Pinch of salt
    1 large egg
    ¼ cup vegetable oil (60ml)
    ½ cup buttermilk or milk + ½ tablespoon lemon juice/vinegar (120ml)
    ½ cup hot water (120ml)
    For the Coffee Syrup:
    ¼ cup water (60ml)
    2 tablespoons sugar (25g)
    1 teaspoon instant coffee
    For the Chocolate Mousse:
    7 oz dark chocolate, 70% cocoa content (200g)
    1⅓ cups heavy cream, for ganache (320ml)
    1 cup cold heavy cream, for whipping separately (240ml)
    1 tablespoon sugar (12g)
    For the Optional Chocolate Glaze:
    3.5 oz dark chocolate (100g)
    1 tablespoon vegetable oil (15ml)
    Optional for Decoration:
    Unsweetened cocoa powder for dusting
    Instructions
    Preparing the Chocolate Cake Base:
    Preheat your oven to 350°F (175°C). Line the bottom of an 8-inch (20cm) springform pan with parchment paper and grease the sides.
    In a large mixing bowl, sift together the flour, baking powder, baking soda, cocoa powder, and salt.
    Add the sugar and whisk until well combined.
    In a separate bowl, beat the egg lightly, then add the vegetable oil and buttermilk (or milk with lemon juice/vinegar). Mix well.
    Pour the wet ingredients into the dry ingredients and mix until just combined.
    Slowly add the hot water while stirring gently. The batter will be quite thin – this is normal.
    Pour the batter into the prepared springform pan.
    Bake for approximately 30 minutes, or until a toothpick inserted into the center comes out clean with a few moist crumbs.
    Allow the cake to cool in the pan for at least 10 minutes before releasing the springform sides.
    Let the cake cool completely on a wire rack while preparing the coffee syrup and mousse.
    Preparing the Coffee Syrup:
    In a small saucepan, combine water and sugar.
    Heat over medium heat, stirring until the sugar dissolves completely.
    Remove from heat, add the instant coffee, and stir until dissolved.
    Allow the syrup to cool to room temperature.
    Brush the cooled cake layer generously with the coffee syrup, ensuring even coverage.
    Preparing the Chocolate Mousse:
    Chop the dark chocolate into small pieces and place in a heatproof bowl.
    Heat 1⅓ cups of heavy cream in a saucepan until it reaches 160-170°F (70-75°C). Do not let it boil.
    Pour the hot cream over the chopped chocolate and let it stand for 2 minutes.
    Stir gently until the chocolate is completely melted and the mixture is smooth and glossy.
    Allow the ganache to cool to room temperature, then refrigerate for 30-40 minutes until chilled but not set.
    In a separate bowl, whip the remaining 1 cup of cold heavy cream with 1 tablespoon of sugar until soft peaks form.
    Gently fold the whipped cream into the cooled chocolate ganache in three additions, maintaining as much air as possible for a light, fluffy mousse.
    Assembling the Cake:
    Place the cooled, syrup-soaked cake back into the clean springform pan.
    Pour the chocolate mousse over the cake layer, smoothing the top with an offset spatula.
    Refrigerate for at least 4 hours, preferably overnight, until the mousse is completely set.
    Preparing the Optional Chocolate Glaze:
    Chop the dark chocolate into small pieces.
    Melt the chocolate using a double boiler or in the microwave in 20-second intervals, stirring between each interval.
    Once melted, stir in the vegetable oil until the mixture is smooth and glossy.
    Allow the glaze to cool slightly but remain pourable.
    Remove the set cake from the refrigerator and carefully release the springform.
    Place the cake on a wire rack set over a baking sheet to catch drips.
    Pour the glaze over the top of the cake, allowing it to drip slightly down the sides.
    Return the cake to the refrigerator for 15-20 minutes to set the glaze.
    Final Presentation:
    Just before serving, dust the top of the cake lightly with cocoa powder using a fine-mesh sieve.
    Carefully transfer to a serving plate.
    For clean slices, dip a sharp knife in hot water, wipe dry, and cut. Repeat between each slice.
    Nutritional Information and Timing
    Prep Time: 40 minutes Baking Time: 30 minutes Chilling Time: 4 hours (minimum) Total Time: 5 hours 10 minutes (including chilling) Servings: 10-12 slices

    Nutritional Information (per slice, based on 12 servings):

    Flaky Butter Bread Recipe
    Calories: 380
    Protein: 4g
    Carbohydrates: 30g
    Fat: 28g
    Saturated Fat: 16g
    Cholesterol: 75mg
    Fiber: 3g
    Sugar: 22g
    Sodium: 120mg
    Cooking Tips and Tricks
    Chocolate selection: The quality of chocolate significantly impacts the final flavor. Use the best quality dark chocolate you can afford, preferably with 70% cocoa content for a rich, not-too-sweet mousse.
    Room temperature ingredients: Ensure your eggs and milk are at room temperature for the cake batter to mix more evenly and rise better during baking.
    Don’t overmix: Once you add the flour to the wet ingredients, mix just until combined. Overmixing develops gluten, resulting in a tougher cake.
    Cream temperature control: When heating cream for the ganache, use a thermometer if possible. The ideal temperature range (160-170°F/70-75°C) helps the chocolate melt smoothly without separating.
    Folding technique: When incorporating whipped cream into the ganache, use a gentle cutting and folding motion with a spatula rather than stirring to preserve air bubbles and maintain a light texture.
    Clean-cut slices: For picture-perfect slices, dip a long knife in hot water, wipe it clean, and slice in one smooth motion. Clean and reheat the knife between each cut.
    Variations and Substitutions
    Flavor enhancements: Add 1 teaspoon of vanilla extract to the cake batter or ½ teaspoon of espresso powder to intensify the chocolate flavor without adding coffee taste.
    Dairy alternatives: Substitute coconut cream for heavy cream to create a dairy-free version (note that the texture will be slightly different).
    Liqueur option: Replace 2 tablespoons of the coffee syrup with your favorite liqueur (Kahlúa, Grand Marnier, or Amaretto work beautifully) for an adult version.
    Layered delight: Create a triple-chocolate effect by dividing the mousse and adding white chocolate to one portion and milk chocolate to another, layering them for a stunning visual effect.
    Fruit addition: Add a layer of raspberry or cherry preserves between the cake and mousse for a fruity contrast to the rich chocolate.
    Gluten-free adaptation: Substitute the all-purpose flour with a gluten-free flour blend (plus ¼ teaspoon xanthan gum) for a gluten-free version.

  • Discover the Easy Homemade Puff Pastry Secret

    Discover the Easy Homemade Puff Pastry Secret

    Discover the Easy Homemade Puff Pastry Secret

    1f4dd Ingredients:

    • 100 grams of unsalted butter 1f9c8
    • 1 and 1/2 tsp salt 1f9c2
    • 500 grams of bread flour 1f35e
    • 200 grams of water 1f4a7
    • 250 grams of margarine or special butter for making puff pastry (available online) 1f9c8

    ‍ Instructions:

    1. Mix unsalted butter and salt with the bread flour.
    2. Gradually add water to the mixture while kneading until you have a smooth dough.
    3. Roll out the dough into a rectangle shape, about 1/4 inch thick.
    4. Spread a layer of margarine or special puff pastry butter evenly over two-thirds of the dough.
    5. Fold the uncovered third of the dough over the buttered section, then fold the remaining third over the top (similar to folding a letter).
    6. Roll out the folded dough into a rectangle again.
    7. Repeat the folding process and then chill the dough in the refrigerator for about 30 minutes.
    8. Roll and fold the dough twice more, chilling for 30 minutes between each fold.
    9. Your puff pastry is now ready to be used in your favorite pastry recipes!
    10. Enjoy your homemade puff pastry, and you’ll wonder why you didn’t try this method sooner!
  • Homemade Delight Easy Recipe for Soft and Scrumptious Cinnamon Rolls

    Homemade Delight Easy Recipe for Soft and Scrumptious Cinnamon Rolls

    Homemade Delight Easy Recipe for Soft and Scrumptious Cinnamon Rolls

    Gathering the Ingredients

    • 230ml warm milk
    • 1 and 1/2 tablespoons of sugar
    • 2 teaspoons of dry yeast (8g)
    • 1 egg
    • 1 teaspoon of vanilla sugar (8g)
    • 1 teaspoon of salt
    • 2 cups and 3/4 of wheat flour (360g)
    • 2 tablespoons butter (at room temperature)
    • Sugar and cinnamon for sprinkling
    Mixing the Dough

    In a large bowl, combine the warm milk, sugar, dry yeast, egg, vanilla sugar, and salt. Mix until all the ingredients are fully incorporated. As the mixture comes together, gradually add the wheat flour, stirring until a smooth dough forms. Once the dough becomes too heavy to stir, it’s time to roll up your sleeves and knead it by hand until it reaches the perfect consistency.

    Letting the Dough Rest

    After kneading, shape the dough into a ball and place it in a bowl. Cover the bowl with plastic wrap and let the dough rest for about 30 minutes. This allows the yeast to work its magic, resulting in a light and fluffy texture.

    Shaping the Rolls

    Once the dough has rested, gently press it to release any air bubbles. Divide the dough into 12 equal portions and roll each portion into a ball. Place the dough balls on a floured surface and cover them with plastic wrap to prevent them from drying out.

    Preparing for Baking

    Preheat your oven to 180ºC to ensure it’s nice and toasty for baking. Roll out each dough ball into a disc shape and make three parallel cuts in the center of each disc with a knife. Arrange the prepared dough on a baking sheet, leaving some space between each roll to allow for expansion during baking.

    Baking to Perfection

    Slide the baking sheet into the preheated oven and bake the rolls until they turn a glorious golden brown, typically around 15-20 minutes. Keep an eye on them to prevent over-browning and ensure they come out perfectly tender and moist.

    Adding the Final Touch

    Once the rolls are baked to perfection, remove them from the oven and sprinkle them with a mixture of sugar and cinnamon. This final touch adds an extra layer of sweetness and warmth to your cinnamon rolls, elevating them to irresistible heights of deliciousness.

    Serving and Enjoying

    Now comes the best part – serving and enjoying your freshly baked cinnamon rolls! Whether you’re indulging in them for breakfast, brunch, or dessert, these soft and fragrant treats are guaranteed to bring smiles to faces and warmth to hearts. Gather your loved ones around, pour a cup of coffee or tea, and savor every blissful bite.

  • Everyday Delight Cupcakes the Timplicity and Scrumptiousness

    Everyday Delight Cupcakes the Timplicity and Scrumptiousness

    Everyday Delight Cupcakes the Timplicity and Scrumptiousness

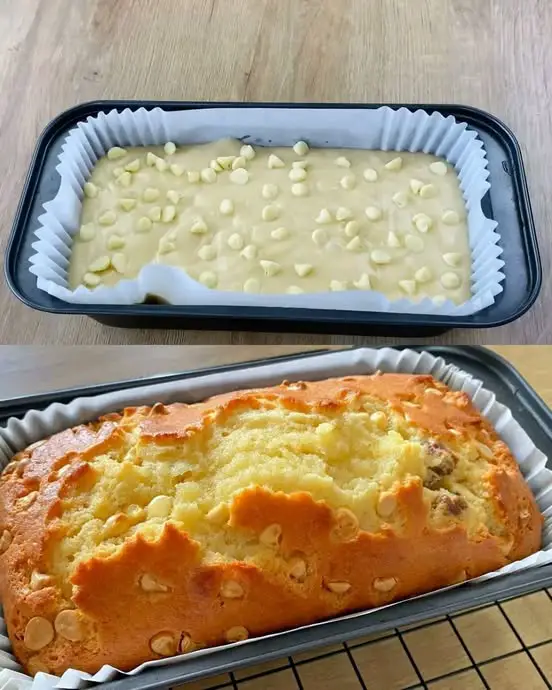
    Ingredients:

    • 2 eggs 1f95a
    • 100 grams sugar (4 tablespoons) 1f36c
    • 1 tsp vanilla sugar 1f36f
    • Pinch of salt 1f9c2
    • 80 grams butter 1f9c8
    • 130 grams cottage cheese 1f9c0
    • 150 grams flour (0.90 cups or 5 tablespoons) 1f35e
    • 1 tsp baking powder 1f944
    • 80 grams raisins 1f347
    ‍ Instructions:
    1. In a bowl, beat eggs with sugar and vanilla sugar until fluffy.
    2. Add a pinch of salt, softened butter, and cottage cheese. Mix well.
    3. Gradually add flour and baking powder. Combine until smooth.
    4. Fold in raisins.
    5. Pour the batter into a 23x11cm form.
    6. Bake at 180°C (356°F) for 35-40 minutes or until a toothpick comes out clean.


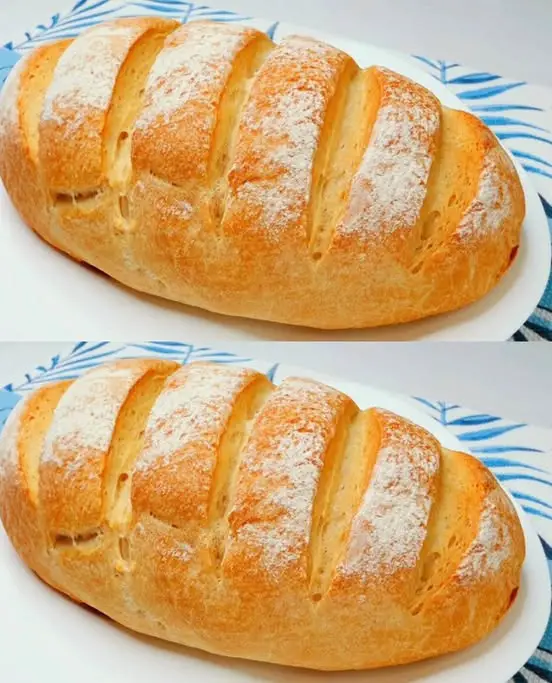
  • Flaky Butter Bread Recipe

    Flaky Butter Bread Recipe

    Flaky Butter Bread Recipe

    Ingredients:

    • Dry yeast: 5 g (0.17 oz)
    • Sugar: 10 g (2 teaspoons)
    • Water: 125 ml (1/2 cup)
    • Milk: 125 ml (1/2 cup)
    • Flour: 480 g (3 3/4 cups)
    • Salt: 6 g (1 teaspoon)
    • Butter: 125 g (1/2 cup), softened
    • Egg yolk: 1
    • Vegetable oil: 1 teaspoon
    • Sesame seeds: for sprinkling

    Directions:

    Activate yeast:
    In a bowl, combine yeast, sugar, water, and milk. Stir until the yeast and sugar dissolve. Let it rest for 5-10 minutes.
    Mix the dough:
    Add flour and salt to the yeast mixture. Stir with a spoon until combined.
    Gradually knead the dough by hand until it becomes soft and smooth.
    Rest the dough:
    Divide the dough into two equal parts. Roll each into a ball, cover, and let them rest for 10 minutes.
    Prepare the butter dough:
    Roll out the dough into a large circle, brush generously with softened butter, and fold as shown in the video.
    Repeat the folding process to create layers. Set the dough aside and prepare the second dough in the same manner.
    Chill the dough:
    Place both folded doughs in the freezer for 20 minutes to firm up.
    Shape the dough:
    Roll out each dough to the size of a serving plate. Stack them carefully on a baking tray.
    Egg wash and bake:
    Brush the top with a mixture of egg yolk and oil. Sprinkle sesame seeds on top.
    Bake in a preheated oven at 190°C (375°F) for 20-25 minutes, or until golden brown.
    Serve:
    Let the bread cool slightly before serving. Enjoy warm with butter or your favorite spread.
    Serving Suggestions:
    Serve this bread warm with butter, honey, or jam for a delicious breakfast treat.
    Pair it with soups or stews for a comforting meal.
    Cooking Tips:
    Ensure the butter is soft enough to spread evenly over the dough for perfect flakiness.
    Be gentle when folding to avoid tearing the dough, and chill to help maintain the layers.
    Nutritional Benefits:
    Milk and butter provide a good source of calcium and healthy fats.
    This bread is rich in carbohydrates, giving energy and a feeling of satiety.