Author: Admin

  • Cheese Twist Bread

    Cheese Twist Bread

    Cheese Twist Bread

    Table of Contents

    Ingredients

    1 ⅝ cup flour
    • 7g dry yeast
    • 3g salt
    • 180ml hot milk
    • 45g butter
    • 1 egg
    • 125 g grated cheese
    • 3 tablespoons chopped parsley
    • Softened butter
    • Wash the eggs

    Preparation

    Mix the flour with the salt, make a well in the center and add the yeast, salt, milk, butter and egg. Whisk to combine all the liquids, then start adding the flour from the sides.
    When the dough comes together in lumps, knead well until smooth, form a ball, then let rest for 1 hour. Cut the dough into quarters, roll each into a ball and roll out into a rectangle. Brush two rectangles with butter, add cheese and parsley on top and cover with two more layers of dough.
    Roll lightly with a rolling pin, then cut into strips. Gather the strips in pairs, sandwiching a little more butter in between. Place on a baking sheet lined with parchment paper and let rest for 20 minutes. Brush with egg yolk and bake at 180C/350F for 25 minutes.
    Enjoy !
  • Zucchini Oatmeal Bread Recipe

    Zucchini Oatmeal Bread Recipe

    Zucchini Oatmeal Bread Recipe

    Table of Contents

    Ingredients

    For the Bread:

    • 300 g zucchini (1 medium zucchini)
    • 200 ml water (about 7 fl oz)
    • 5 g dry yeast (about 1 teaspoon)
    • 150 g oatmeal (first portion, about 1 1/4 cups)
    • 150-200 g oatmeal (second portion, about 1 1/4 to 1 3/4 cups)
    • Salt, to taste
    • Black pepper, to taste
    • Favorite spices (such as curry), to taste
    • Dry garlic, to taste
    • 1 teaspoon dried tomatoes, finely chopped
    • 30 ml olive oil (about 2 tablespoons)
    • 20 g pumpkin seeds (about 2 tablespoons)
    • 20 g sunflower seeds (about 2 tablespoons)
    • A handful of cumin seeds, for sprinkling on top

    Nutrition Information

    • Servings: 10 slices
    • Calories per serving: Approximately 180 kcal
    • Fat: 8g
    • Carbohydrates: 23g
    • Protein: 5g

    Instructions

    1. Prepare the Zucchini

    Start by grating the zucchini using a medium grater. Place the grated zucchini in a large mixing bowl. Zucchini adds moisture to the bread, keeping it tender while contributing a mild, earthy flavor.

    2. Activate the Yeast

    In a small bowl, mix 5 g of dry yeast with 200 ml of warm water. Make sure the water is warm but not hot, as too high a temperature can kill the yeast. Let the mixture sit for about 5-10 minutes, until it becomes frothy. This indicates that the yeast is active and ready to be used.

    3. Mix the Dry Ingredients

    In the bowl with the grated zucchini, add 150 g of oatmeal (about 1 1/4 cups), saltblack pepperyour favorite spices (such as curry), dry garlic, and 1 teaspoon of finely chopped dried tomatoes. Stir the ingredients together until well combined. The dried tomatoes and spices add depth and complexity to the bread, enhancing its flavor.

    4. Add the Wet Ingredients

    Pour the activated yeast mixture and 30 ml of olive oil into the zucchini mixture. Stir well to ensure all ingredients are fully incorporated. The olive oil adds richness and helps bind the dough together.

    5. Incorporate the Seeds

    Add 20 g of pumpkin seeds and 20 g of sunflower seeds to the mixture. Stir to distribute the seeds evenly throughout the dough. These seeds not only add a pleasant crunch but also boost the nutritional value of the bread.

    6. Add More Oatmeal

    Gradually add another 150-200 g of oatmeal (about 1 1/4 to 1 3/4 cups) to the mixture. Stir as you go, adding enough oatmeal until the dough comes together and is not too sticky. The amount of oatmeal needed may vary depending on the moisture content of the zucchini, so add it slowly until the dough reaches a manageable consistency.

    7. Let the Dough Rise

    Cover the mixing bowl with a clean kitchen towel and let the dough rise in a warm place for about 1 hour, or until it has doubled in size. This step is crucial for developing the bread’s texture, making it light and airy.

    8. Prepare the Bread

    Preheat your oven to 180°C (350°F). Grease a loaf pan with a little olive oil or line it with parchment paper to prevent the bread from sticking.

    Once the dough has risen, transfer it to the prepared loaf pan, smoothing the top with a spatula. Sprinkle a handful of cumin seeds on top of the dough for added flavor and texture. The cumin seeds provide a subtle, aromatic touch that complements the bread’s savory profile.

    9. Bake the Bread

    Place the loaf pan in the preheated oven and bake for 40-50 minutes. The bread is done when the top is golden brown and a toothpick inserted into the center comes out clean. Baking at this temperature allows the bread to cook through evenly without becoming too dry.

    10. Cool and Serve

    Once the bread is baked, remove it from the oven and let it cool in the pan for about 10 minutes. This resting time allows the bread to firm up slightly, making it easier to slice. Afterward, transfer the bread to a wire rack to cool completely.

    Serving Suggestions

    • On its Own: This zucchini oatmeal bread is delicious on its own, offering a wholesome snack with a satisfying texture.
    • With Spreads: Spread with a bit of butter, vegan margarine, or your favorite nut butter for a quick and tasty treat.
    • As a Base for Sandwiches: Use it as a base for sandwiches, pairing well with fresh  vegetables, hummus, or slices of avocado.

    Cooking Tips

    • Oatmeal Variation: You can use rolled oats or quick oats depending on your preference. Rolled oats will give a slightly chewier texture, while quick oats will result in a finer crumb.
    • Spice Customization: Feel free to customize the spices based on your taste. Add a pinch of chili flakes for heat or rosemary for an herbal note.
    • Storage: Store the bread in an airtight container at room temperature for up to three days, or refrigerate it to extend its freshness. It also freezes well; slice the bread before freezing so you can thaw individual portions as needed.

    This Zucchini Oatmeal Bread is a versatile and nutritious addition to your baking repertoire. Whether you’re looking for a healthy snack or a flavorful base for sandwiches, this bread offers the perfect balance of taste and texture, making it a go-to recipe for any occasion.

  • Mary Berry’s Boiled Fruit Cake

    Mary Berry’s Boiled Fruit Cake

    Mary Berry’s Boiled Fruit Cake

    Table of Contents

    Ingredients
    1 cup water
    1 cup sugar
    375g mixed dried fruit
    200g butter
    1 tsp mixed spice
    1 tsp bicarbonate of soda
    2 eggs beaten
    2 cups self-raising flour
    Instructions
    Preheat the oven to 160-180°C (320-356°F).
    Grease a cake tin.
    In a large saucepan, combine water, sugar, mixed dried fruit, butter, mixed spice, and bicarbonate of soda.
    Bring the mixture to a boil and let it simmer for 5 minutes. Stir occasionally.
    Allow the boiled mixture to cool down.
    Once cooled, gradually add the beaten eggs and self-raising flour.
    Mix well until all ingredients are fully combined.
    Pour the batter into the prepared greased cake tin.
    Place the tin in the preheated oven.
    Bake for approximately 1 hour or until a skewer inserted into the center comes out clean.
  • LEMON CAKE Preheat the oven

    LEMON CAKE Preheat the oven

    LEMON CAKE Preheat the oven

    Table of Contents

    Ingredients:
    • 4 eggs
    • 100 ml of extra virgin olive oil or butter
    • 180g of sugar
    • 280g of flour
    • 15 g baking powder
    • 150 g plain yogurt NOT Greek yogurt
    • 60ml lemon juice
    • The grated zest of 2 lemons
    Preparation:

    1. Preheat the oven. Grease a round mold with butter and sprinkle it with flour. Eliminate excess flour (instead of flour and butter you can use baking paper). Mold diameter: 20 cm.
    2. Beat the egg with the sugar until creamy and whitish. Keep beating and add the oil little by little.
    3. Add the grated lemon peel, lemon juice and yogurt. Beat a little more so that the mixture is homogeneous.
    4. Add flour and baking powder. Beat a little more until smooth.
    5. Pour the lemon cake batter into the mold and smooth it out. Bake for about 45 minutes. Oven: 180ºC.
    6. When you take the cake out of the oven, leave it in the pan for 10 minutes, then remove the pan and transfer it to a wire rack to cool completely.

  • Khachapuri in 10 Minutes on Kefir

    Khachapuri in 10 Minutes on Kefir

    Khachapuri in 10 Minutes on Kefir

    Table of Contents

    Ingredients:

    For the Dough:
    300 ml kefir
    1 tsp salt
    1 tsp sugar
    1 egg
    3 tbsp melted butter
    450 g flour
    10 g baking powder
    For the Filling:
    350 g hard cheese (Suluguni, Adyghe, or any hard cheese), grated
    1 egg
    Salt to taste
    Optional: creamy cottage cheese for extra richness

    Directions:

    Preheat your oven to 200°C (390°F).
    In a mixing bowl, combine the kefir, salt, sugar, and egg. Mix well.
    Add the melted butter and mix again.
    Sift in the flour and baking powder, and mix until a soft dough forms. If the dough is too sticky, add a little more flour.
    Divide the dough into equal portions, depending on the size of khachapuri you want.
    Roll out each portion into a circle, about 5mm thick.
    In a separate bowl, mix the grated cheese, egg, and salt for the filling. If using, add the creamy cottage cheese.
    Place a generous amount of the cheese filling in the center of each dough circle.
    Fold the edges of the dough over the filling, leaving the center open, to create a boat shape.
    Place the khachapuri on a baking sheet lined with parchment paper.
    Bake in the preheated oven for about 10-12 minutes, or until the khachapuri are golden brown and the cheese is melted and bubbly.
    Serve hot and enjoy!
  • Grandma’s Scrambled Egg and Cheese Breakfast Sandwich

    Grandma’s Scrambled Egg and Cheese Breakfast Sandwich

    Grandma’s Scrambled Egg and Cheese Breakfast Sandwich

    Table of Contents

    Ingredients:

    3 eggs
    Salt, pepper, and paprika to taste
    A handful of parsley, finely chopped
    A bunch of spring onions, finely chopped
    100g mozzarella cheese, grated or sliced
    Butter, for spreading
    Bread slices (your choice of bread

    Directions:
    Beat the Eggs: In a bowl, beat the eggs with salt, pepper, and paprika until well combined.
    Cook the Eggs: Heat a non-stick pan over medium heat. Pour the beaten eggs into the pan and cook, stirring gently, until the eggs are softly scrambled. Remove from heat.
    Prepare the Bread: Spread butter on one side of each bread slice. Toast the bread slices in a toaster or on a pan until golden brown.
    Assemble the Sandwiches: On one slice of toasted bread, layer the scrambled eggs, a sprinkle of chopped parsley, a generous amount of spring onions, and mozzarella cheese. Top with another slice of toasted bread.
    Optional – Melt the Cheese: If you prefer melted cheese, you can place the assembled sandwich in a preheated oven or a sandwich press for a few minutes until the cheese is melted and gooey.
    Serve: Cut the sandwiches in half and serve hot. Enjoy a delightful breakfast that brings back cherished memories of your grandmother’s cooking!
    Prep Time: 10 minutes | Cooking Time: 10 minutes | Total Time: 20 minutes
    Kcal: 350 kcal | Servings: 2 servings
  • Everyone loved it after trying it – easy, economical and tasty dish.

    Everyone loved it after trying it – easy, economical and tasty dish.

    Everyone loved it after trying it – easy, economical and tasty dish.

    Table of Contents

    Ingredients

    200 ml of lukewarm milk
    1 egg
    3 tablespoons of oil
    1 tablespoon of sugar
    1 teaspoon salt
    1 sachet of dried yeast
    300 g of flour
    Grated cheese
    Feta cheese
    1 egg yolk for glazing

    Preparation

    Knead the dough for 5 minutes, then let it rise in a warm place for 1 hour, or until doubled in volume.
    Meanwhile, prepare the stuffing by mixing the grated cheese and feta cheese.
    Once the dough has risen, degas it and roll it out into a circle 30 cm in diameter.
    Spread the stuffing on the dough.
    Fold the edges of the dough towards the center, making sure to enclose the stuffing.
    Place the dough on a baking sheet lined with parchment paper.
    Bake the bread in a preheated oven at 180°C for 20 to 25 minutes, or until golden brown.
    Allow the bread to cool before eating.
    Advice
    For a softer dough, add 1 tablespoon of powdered milk.
    For a more fragrant paste, add 1 teaspoon of dried basil or dried thyme.
    For a spicier paste, add 1 teaspoon of paprika.
    Variants
    For a more indulgent cheese bread, add bacon, mushrooms or olives to the stuffing.
    For a more original cheese bread, replace the grated cheese with goat cheese, blue cheese or sheep’s cheese.
    Taste
    Cheese bread is a tasty and easy to prepare dish. It is ideal for a picnic, an appetizer or a dinner.
  • Bread rolls: the recipe for fried and baked rolls

    Bread rolls: the recipe for fried and baked rolls

    Bread rolls: the recipe for fried and baked rolls

    Table of Contents

    Ingredients

    WHITE BREAD
    8 slices
    BAKED HAM
    8 thin slices
    EMMENTAL
    8 thin slices
    EGG
    2
    BREAD CRUMBS
    to taste
    SALT
    to taste
    EXTRA VIRGIN OLIVE OIL
    to taste
    FOR FRYING
    PEANUT SEED OIL
    to taste

    instruction

    1. Bread rolls are filled rolls, characterized by a tasty and stringy centre, ideal to bring to the table as an appetizer or second course to accompany your favorite side dish. In our recipe we offer them both fried , for an ultra-delicious version, and cooked in the oven, for a lighter but equally tasty version, suitable for those who pay attention to their figure.
    2. Making them at home is very simple. Simply remove the crust from the bread, gently crush the slices with a rolling pin and then fill them with thinly sliced ​​cooked ham and Emmental . At this point all you have to do is wrap the bread on itself, let the resulting cylinders harden in the fridge for half an hour and finally dip them in the egg, previously beaten with a pinch of salt, and in the breadcrumbs . Once ready, you can decide whether to dip the rolls in boiling seed oil until they are golden and fragrant, or whether to arrange them on a baking tray with a drizzle of olive oil and place them in a preheated oven at 200°C for about 20 minutes: in both cases they will be delicious.
    3. Also excellent to serve at aperitif time , as a tasty finger food, or for a party buffet , together with other savory appetizers, these delicious morsels can be customized to your liking with your favorite ingredients. Instead of Emmental you can use scamorza, provola, dry mozzarella for pizza or other stretched curd cheese, or you can replace the cooked cheese with speck, well-drained anchovy fillets , chopped dried cherry tomatoes or with grilled vegetables .
    4. To optimize time, you can package the rolls in advance and then store them in the fridge, wrapped in cling film, until ready for service: the important thing, to appreciate them in all their goodness, will be to cook them when the guests arrive and consume them immediately, very hot.
    5. Find out how to prepare bread rolls following the step-by-step procedure and advice. If you liked this recipe, also try the mozzarella skewers in carrozza or try your hand at other delicious appetizers with pancarré .

      How to prepare bread rolls

      Step 1 Remove the crust from the bread 1.
      Step 2 Gently crush the bread slices with a rolling pin2.
      Step 3 Place the thinly sliced ​​cooked ham in the center3.
      Step 4 Cover with a slice of cheese4.
      Step 5 Roll the bread on itself
      5in order to obtain many rolls.
      Step 6 Arrange the bread rolls on a cutting board 6, wrap them with a sheet of cling film and leave them to harden in the fridge for half an hour.
      Step 7 Once the time has passed, dip the rolls in the egg 7, previously beaten with a pinch of salt.
      Step 8 Roll them in breadcrumbs8.
      Step 9 Arrange half the rolls on a baking tray, drizzle them with a drizzle of extra virgin olive oil 9and put them in a preheated oven at 200°C for about 20 minutes.
      Step 10 Once cooked, take the rolls out of the oven and fry the remaining ones in boiling seed oil10.
      Step 11 When they are golden and fragrant, remove them with a slotted spoon and let them drain on a sheet of absorbent kitchen paper11.
      Step 12 Arrange the bread rolls, fried and baked, on a serving plate 12, bring to the table and serve
  • If you have 1 egg, flour and milk prepare this delicious easy recipe

    If you have 1 egg, flour and milk prepare this delicious easy recipe

    If you have 1 egg, flour and milk prepare this delicious easy recipe.

    Table of Contents

    Ingredients :

    80 ml of lukewarm water
    80 ml of lukewarm milk
    1 tablespoon dry yeast
    3 tablespoons of sugar
    2 tablespoons flour
    Orange zest
    60 ml orange juice
    1 egg white
    60g melted butter
    8g vanilla sugar or vanillin
    400g flour
    1 teaspoon salt
    1 teaspoon baking powder
    Chocolate spread
    1 egg yolk
    Slivered almonds
    Icing sugar

    Instructions :

    Add the orange zest, orange juice, egg white, melted butter, vanilla sugar, flour, salt and baking powder to the yeast mixture. Mix until smooth. Let it sit until it doubles in size.
    Roll out the dough into a rectangle, spread a layer of chocolate spread, then roll it into a sausage. Cut it into slices.
    Place the slices on a baking sheet lined with parchment paper. Let them rest for an additional 15 minutes.
    Preheat the oven to 180°C (350°F).
    Brush the buns with the egg yolk, sprinkle with flaked almonds and bake for about 20 minutes until golden brown.
    Once cooked, let them cool slightly, then sprinkle them with icing sugar.
    These delicious sweet orange buns are now ready to enjoy!
  • Strawberry Dole Whip: A Refreshing Treat You Can Make at Home

    Strawberry Dole Whip: A Refreshing Treat You Can Make at Home

    Nothing beats the refreshing taste of a Strawberry Dole Whip on a warm day. This sweet and tangy frozen treat, inspired by the famous Disney parks’ Dole Whip, is a perfect blend of strawberries and creamy goodness. While the original Dole Whip might be synonymous with pineapple, this strawberry version offers a delightful twist that’s just as satisfying. The best part? You can easily make it at home with just a few simple ingredients.

    Strawberry Dole Whip combines the natural sweetness of ripe strawberries with the creaminess of coconut milk or another non-dairy alternative, resulting in a treat that’s not only delicious but also dairy-free. It’s light, refreshing, and full of vibrant strawberry flavor, making it a great dessert or snack for any occasion.

    Ingredients You’ll Need

    To whip up your own Strawberry Dole Whip, you’ll need the following ingredients:

    • Frozen Strawberries: 2 cups of frozen strawberries give the Dole Whip its rich strawberry flavor and refreshing chill.
    • Coconut Milk: 1/2 cup of full-fat coconut milk adds creaminess and a hint of tropical flavor. You can also use almond milk or any other non-dairy milk if you prefer.
    • Honey or Maple Syrup: 1-2 tablespoons of honey or maple syrup (optional) to sweeten the whip to your liking.
    • Lemon Juice: 1 tablespoon of fresh lemon juice to brighten the flavor and add a bit of tanginess.
    • Vanilla Extract: 1 teaspoon of vanilla extract to enhance the overall flavor.

    INSTRUCTIONS:

    How to Make Strawberry Dole Whip

    Making Strawberry Dole Whip at home is incredibly simple and only takes a few minutes. Here’s how to do it:

    Step 1: Prepare Your Ingredients

    Make sure your strawberries are fully frozen before starting. If you’re using fresh strawberries, wash and hull them, then freeze them for at least a few hours until they’re solid.

    Step 2: Blend the Ingredients

    In a high-powered blender or food processor, combine the frozen strawberries, coconut milk, honey or maple syrup (if using), lemon juice, and vanilla extract.

    Step 3: Blend Until Smooth

    Blend the mixture on high speed until it becomes smooth and creamy. You may need to stop and scrape down the sides of the blender a few times to ensure everything is evenly mixed. If the mixture is too thick, you can add a little more coconut milk, one tablespoon at a time, until you reach your desired consistency.

    Step 4: Serve Immediately

    Once the mixture is smooth and creamy, it’s ready to be served. Scoop the Strawberry Dole Whip into bowls or glasses, and enjoy it right away. For a more traditional Dole Whip experience, you can pipe the mixture into swirls using a piping bag with a star tip.

    Step 5: Add Toppings (Optional)

    For a little extra flair, you can top your Strawberry Dole Whip with fresh strawberries, a drizzle of honey, or even a sprinkle of granola for some crunch.

    Tips for the Perfect Strawberry Dole Whip

    • Adjust the Sweetness: Depending on the sweetness of your strawberries, you may not need to add any sweetener. Taste the mixture before adding honey or maple syrup and adjust according to your preference.
    • Experiment with Flavors: While this recipe focuses on strawberries, feel free to experiment with other frozen fruits like mangoes, raspberries, or blueberries for a different flavor profile.
    • Make It Creamier: For an even creamier texture, you can add a banana to the mix. This will also make the whip slightly sweeter.
    • Serve in Style: If you want to recreate the Disney park experience, serve your Strawberry Dole Whip in a tall glass and garnish with a pineapple slice or a cherry.
  • Plum and Cocoa Cake Recipe

    Plum and Cocoa Cake Recipe

    Plum and Cocoa Cake Recipe

    Table of Contents

    Ingredients

    Wet Ingredients:

    • 1 large egg
    • 50 g sugar (about 1/4 cup)
    • 1 tablespoon yogurt
    • 30 ml vegetable oil (about 2 tablespoons)

    Dry Ingredients:

    • 150 g all-purpose flour (about 1 1/4 cups)
    • 1 teaspoon baking powder
    • 1 tablespoon cocoa powder

    Fruit:

    • 4 plums, halved and pitted

    Optional:

    • Powdered sugar, for dusting

    Nutrition Information

    • Servings: 8 slices
    • Calories per serving: Approximately 150 kcal
    • Fat: 7g
    • Carbohydrates: 20g
    • Protein: 3g

    Instructions

    1. Prepare the Plums

    Start by preheating your oven to 180°C (350°F). As the oven warms up, halve and pit the 4 plums, setting them aside once prepared. The plums will serve as the star of the cake, providing both flavor and texture.

    2. Mix the Wet Ingredients

    In a medium-sized mixing bowl, beat the egg and sugar together until the mixture becomes pale and slightly frothy. This step is crucial as it incorporates air into the mixture, which will help give the cake a light texture. Next, add the yogurt and vegetable oil to the egg mixture, stirring until everything is well combined. The yogurt not only adds moisture but also contributes a slight tang that balances the sweetness of the sugar and richness of the cocoa.

    3. Combine the Dry Ingredients

    In a separate bowl, sift together the flour, baking powder, and cocoa powder. Sifting ensures that there are no lumps in the dry ingredients and helps to evenly distribute the baking powder, which is key for even rising. Gradually add the dry ingredients to the wet mixture, stirring gently until just combined. It’s important not to overmix the batter; doing so can result in a dense cake. The batter should be smooth and slightly thick.

    4. Assemble the Cake

    Prepare a 20 cm (8-inch) round cake pan by either greasing it with a bit of vegetable oil or lining it with parchment paper. Pour the cake batter into the prepared pan, spreading it evenly with a spatula. Once the batter is evenly distributed, arrange the plum halves on top, cut side down. The plums will slightly sink into the batter as it bakes, creating a beautiful marbled effect and ensuring each bite has a bit of fruit.

    5. Bake the Cake

    Place the cake in the preheated oven and bake for 25-30 minutes. To check for doneness, insert a toothpick into the center of the cake; if it comes out clean, the cake is ready. If there’s a bit of batter clinging to the toothpick, give it a few more minutes in the oven. The cake should be set, with a slightly springy top when gently pressed.

    6. Cool and Serve

    Once baked, remove the cake from the oven and let it cool in the pan for 10 minutes. Afterward, transfer the cake to a wire rack to cool completely. This cooling period allows the flavors to meld and the cake to set, making it easier to slice. If desired, dust the top with a light layer of powdered sugar for an elegant finish.

    7. Slice and Enjoy

    Once the cake is completely cooled, slice it into portions and serve. The Plum and Cocoa Cake is perfect on its own, but it pairs wonderfully with a dollop of whipped cream or a scoop of vanilla ice cream for an extra indulgent treat. The cake keeps well at room temperature for a couple of days, making it an ideal option for a make-ahead dessert.

    Tips for Success

    • Plum Variations: Experiment with different types of plums to see which variety you prefer. Red or black plums can offer varying levels of sweetness and tartness.
    • Chocolate Boost: If you’re a chocolate lover, consider adding some chocolate chips to the batter for extra richness.
    • Storing the Cake: Keep the cake in an airtight container at room temperature for up to three days. If you live in a warmer climate, it’s best to store it in the refrigerator to prevent the plums from spoiling.This Plum and Cocoa Cake is a simple yet sophisticated dessert that showcases the best of seasonal fruits combined with the timeless appeal of cocoa. It’s a perfect recipe to enjoy with family and friends, offering a harmonious blend of flavors and textures in every bite.
  • Oatmeal and Apple Muffins: A Quick, Healthy Dessert for Weight Loss

    Oatmeal and Apple Muffins: A Quick, Healthy Dessert for Weight Loss

    Oatmeal and Apple Muffins: A Quick, Healthy Dessert for Weight Loss

    Table of Contents

    Ingredients

    For the Muffins:

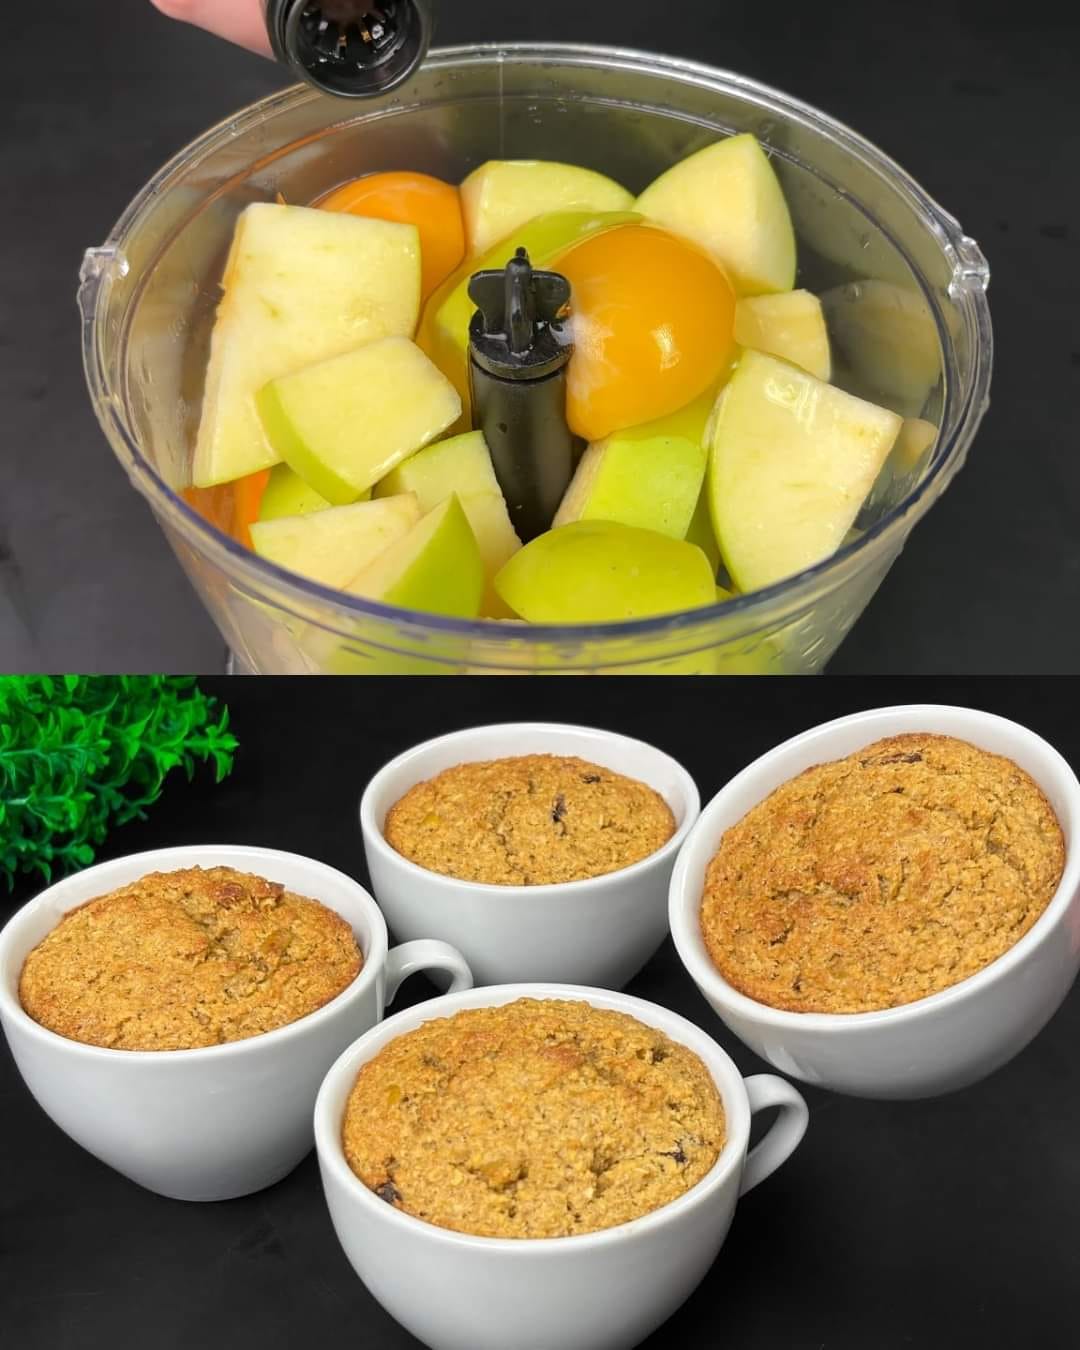
    • 1 cup oatmeal (rolled oats or quick oats)
    • 150 ml warm milk (about 2/3 cup)
    • 2 apples, peeled, cored, and chopped
    • 20 g butter (about 1 1/2 tablespoons)
    • 1 large egg
    • 50 g nuts (about 1/2 cup), chopped (e.g., walnuts, almonds, or pecans)
    • Avocado oil (for greasing the muffin tin)

    Nutrition Information

    • Servings: 6 muffins
    • Calories per serving: Approximately 150 kcal
    • Fat: 7g
    • Carbohydrates: 19g
    • Protein: 4g

    Instructions

    1. Soak the Oatmeal

    Start by combining 1 cup of oatmeal with 150 ml of warm milk in a medium-sized bowl. Stir the mixture well to ensure that the oats are fully soaked in the milk. Allow it to sit for 10 minutes. This step softens the oats, making them more digestible and giving the muffins a tender texture.

    2. Cook the Apples

    While the oats are soaking, prepare the apples. In a small pan, melt 20 g of butter over medium heat. Once the butter is melted and slightly bubbly, add the 2 chopped apples. Cook the apples for 5-7 minutes, stirring occasionally, until they become soft and slightly caramelized. This cooking process enhances the natural sweetness of the apples and adds a rich, buttery flavor to the muffins. Once done, set the apples aside to cool slightly.

    3. Prepare the Muffin Batter

    Preheat your oven to 180°C (360°F). This temperature ensures that the muffins bake evenly and develop a golden-brown crust.

    In a large mixing bowl, lightly beat 1 large egg. This will help to bind the ingredients together and give the muffins structure. To the beaten egg, add the soaked oatmeal, the cooked apples, and 50 g of chopped nuts. Mix everything together until well combined. The nuts add a satisfying crunch and a dose of healthy fats, making the muffins more filling and nutritious.

    4. Prepare the Muffin Tin

    To prevent the muffins from sticking, grease a muffin tin with a small amount of avocado oil. Avocado oil is a healthy, high-heat oil that won’t break down in the oven, making it a great choice for baking. Spoon the batter evenly into the muffin cups, filling each about two-thirds full. This allows the muffins room to rise without overflowing.

    5. Bake the Muffins

    Place the muffin tin in the preheated oven and bake for 25-30 minutes. The muffins are done when they are golden brown on top and a toothpick inserted into the center comes out clean. Baking them at this temperature and time ensures that they cook through without drying out.

    6. Serve

    Once the muffins are baked, remove them from the oven and allow them to cool in the tin for a few minutes. This cooling period helps the muffins firm up, making them easier to remove from the tin. Afterward, transfer the muffins to a wire rack to cool completely.

    Enjoy these Oatmeal and Apple Muffins warm or at room temperature. They are perfect for a quick breakfast, a healthy snack, or a guilt-free dessert. The natural sweetness from the apples and the wholesome goodness of oats make them a satisfying and nutritious choice.

    Storage Tips

    • Refrigeration: Store the muffins in an airtight container in the refrigerator for up to five days. This helps maintain their freshness and prevents spoilage.
    • Freezing: For longer storage, freeze the muffins individually wrapped in plastic wrap or placed in a freezer-safe bag. They can be stored in the freezer for up to three months. To enjoy, simply thaw at room temperature or warm them in the microwave for a quick snack.

    Recipe Variations

    • Spice It Up: Add a teaspoon of cinnamon or nutmeg to the batter for a warm, spiced flavor that pairs beautifully with the apples.
    • Fruit Swap: Try replacing the apples with pears or bananas for a different flavor profile. Both fruits work well with oatmeal and add natural sweetness.
    • Sweetener Addition: If you prefer a sweeter muffin, add a tablespoon of honey or maple syrup to the batter before baking.

    These Oatmeal and Apple Muffins are not only quick and easy to make but also a healthy option that can support your weight loss journey. With minimal ingredients and maximum flavor, they’re a great way to enjoy a sweet treat without any guilt.

  • Meyer Lemon Drizzle Cakes

    Meyer Lemon Drizzle Cakes

    Meyer Lemon Drizzle Cakes

    Table of Contents

    Ingredients:

    2 cups all-purpose flour
    2 teaspoons baking powder
    1/2 teaspoon salt
    1/2 cup unsalted butter, at room temperature
    1 cup granulated sugar
    2 large eggs
    1/2 cup milk
    1 teaspoon vanilla extract
    1/4 cup Meyer lemon juice
    1/2 cup confectioners’ sugar

    Instruction:

    1. Preheat the oven to 350°F (175°C). Grease a bundt cake pan or muffin tin with cooking spray or butter.
    2. In a large bowl, whisk together the flour, baking powder, and salt until well combined.
    3. In a separate bowl, cream the butter and sugar together until light and fluffy. Add the eggs, one at a time, mixing well after each addition.
    4. Stir in the milk and vanilla extract until well combined.
    5. Gradually add the dry ingredients to the wet ingredients, mixing until just combined.
    6. Stir in the Meyer lemon juice, making sure to incorporate it evenly throughout the batter.
    7. Pour the batter into the prepared pan and bake for 35-40 minutes (or until a toothpick inserted into the center of the cake comes out clean).
    8. While the cake is baking, prepare the Meyer lemon drizzle by mixing together the confectioners’ sugar and Meyer lemon juice in a small bowl.
    9. Once the cake is finished baking, remove it from the oven and let it cool in the pan for 10 minutes.
    10. Carefully remove the cake from the pan and place it on a wire rack set over a sheet of parchment paper.
    11. Drizzle the Meyer lemon glaze over the top of the cake, allowing it to soak in and coat the cake evenly.
    12. Serve the Meyer Lemon Drizzle Cake warm or at room temperature, garnished with fresh slices of Meyer lemon and a dusting of confectioners’ sugar, if desired.
  • Chocolate sticks

    Chocolate sticks

    Chocolate sticks

    Table of Contents


    Ingredients:

    1 egg
    100g sugar
    240g flour
    4g baking powder
    90g butter
    400g melted chocolate

    Preparation:

    1. In a bowl, add the egg and sugar and mix until the sugar dissolves. Sift the flour and baking powder, add the butter and knead until you obtain a soft, homogeneous and compact dough.

    2. Wrap the dough in plastic wrap and place in the refrigerator for about 40 minutes to harden.

    3. After the time has passed, cut a short piece of dough and make a long, thick loaf just below a little finger. Cut the bread into sticks about 8-10 cm long.

    4. Place the sticks inside a baking sheet lined with parchment paper and bake in the oven at 180°C/356°F for about 12 minutes.

    5. Melt the chocolate and, with the help of tongs, completely immerse the cookies, one at a time, in the chocolate.

    6. Place the togo on parchment paper and allow to cool completely before serving
  • Puff Pastry Wrapped Baked Apples with Cinnamon Cream

    Puff Pastry Wrapped Baked Apples with Cinnamon Cream

    Puff Pastry Wrapped Baked Apples with Cinnamon Cream

    Table of Contents

    Ingredients

    For the Puff Pastry Wrapped Apples:

    • 200 g puff pastry (7.1 oz)
    • 4 medium-sized apples, cored
    • 20 g butter (0.7 oz)
    • 10 g cinnamon (0.4 oz)
    • 30 g brown sugar (1.1 oz)

    For the Caramel Sauce:

    • 200 g sugar (7.1 oz)
    • 100 ml water (3.4 fl oz)
    • 7 g salt (0.2 oz)
    • 500 ml whipping cream, divided (16.8 fl oz)
    • 20 ml lemon juice (0.7 fl oz)

    For the Cinnamon Cream:

    • 300 ml whipping cream (11 fl oz)
    • 80 g powdered sugar (2.8 oz)
    • Pinch of cinnamon

    Nutrition Information

    • Servings: 4
    • Calories per serving: Approximately 500 kcal
    • Fat: 30g
    • Carbohydrates: 55g
    • Protein: 4g

    Instructions

    1. Prepare the Apples

    Begin by preheating your oven to 180°C (350°F). This temperature will ensure the puff pastry bakes to a perfect golden brown while the apples become tender.

    Core the 4 medium-sized apples, removing the seeds but leaving the apples whole. Set the apples aside while you prepare the filling.

    In a small pan, melt 20 g of butter over medium heat. Once the butter is melted, add 30 g of brown sugar and 10 g of cinnamon. Stir the mixture and let it cook for 1-2 minutes, until the sugar has fully dissolved and the mixture is bubbling slightly. Remove the pan from heat and allow the mixture to cool slightly.

    2. Wrap the Apples in Puff Pastry

    Roll out the 200 g of puff pastry on a lightly floured surface to about 1/4-inch thickness. Cut the pastry into 4 squares, each large enough to completely encase one of the apples.

    Place one apple in the center of each pastry square. Spoon a small amount of the cinnamon-butter mixture into the hollow center of each apple. This will infuse the apple with warm, sweet flavors as it bakes.

    Carefully wrap the puff pastry around the apple, gathering and sealing the edges at the top. If you have any leftover pastry, use it to create decorative leaves or strips to adorn the top of each wrapped apple. This adds a touch of elegance to the presentation.

    Place the wrapped apples on a baking sheet lined with parchment paper to prevent sticking and ensure even baking.

    3. Bake the Apples

    Transfer the baking sheet to the preheated oven and bake the apples for 25-30 minutes. The pastry should be golden brown and crispy, and the apples should be tender when pierced with a knife. If the pastry browns too quickly, you can cover the apples loosely with foil to prevent burning while the apples finish baking.

    4. Prepare the Caramel Sauce

    While the apples are baking, make the caramel sauce. In a medium saucepan, combine 200 g of sugar100 ml of water, and 7 g of salt. Cook over medium heat, stirring until the sugar has dissolved.

    Once the sugar is dissolved, increase the heat to medium-high and bring the mixture to a boil. Do not stir the mixture while it is boiling. Let it cook until it turns a deep amber color, which should take about 8-10 minutes. Be sure to watch the caramel closely, as it can go from perfect to burnt quickly.

    Once the caramel reaches the desired color, remove the saucepan from the heat. Carefully whisk in 200 ml of whipping cream (6.8 fl oz). The mixture will bubble vigorously, so add the cream slowly while whisking constantly to avoid splattering. Once smooth, stir in 20 ml of lemon juice for a slight tang that balances the sweetness of the caramel.

    5. Make the Cinnamon Cream

    In a chilled bowl, combine the remaining 300 ml of whipping cream (11 fl oz) with 80 g of powdered sugar. Whip the cream until soft peaks form, indicating that the cream is light and airy but still holds its shape.

    Gently fold in a pinch of cinnamon to the whipped cream, adding a subtle spiced note that complements the apples and caramel.

    6. Serve

    Once the puff pastry-wrapped apples are baked, remove them from the oven and let them cool slightly on the baking sheet.

    To serve, place each baked apple on a dessert plate. Drizzle generously with the warm caramel sauce, allowing it to pool around the apple. Add a dollop of the cinnamon cream to the side or top of the apple. The combination of the crisp pastry, tender apple, rich caramel, and creamy cinnamon-infused whipped cream is truly irresistible.

    Serving Suggestions

    • Ice Cream: For an extra indulgent dessert, serve the baked apples with a scoop of vanilla ice cream alongside the cinnamon cream.
    • Nuts: Sprinkle chopped toasted nuts, such as pecans or walnuts, over the caramel sauce for added texture and flavor.
    • Spices: For a spicier twist, you can add a pinch of nutmeg or ginger to the cinnamon cream.This Puff Pastry Wrapped Baked Apples with Cinnamon Cream is a delightful dessert that is sure to impress with its elegant presentation and rich flavors. Whether you’re serving it at a dinner party or enjoying it as a special treat at home, this dish is a perfect way to savor the comforting taste of apples and cinnamon wrapped in buttery pastry.