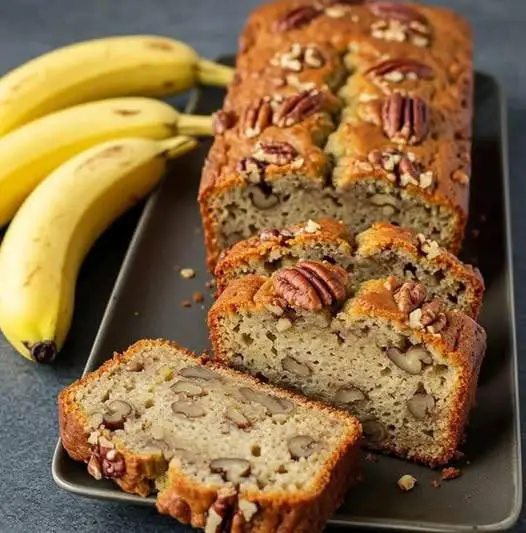
7 large eggs
200g (1 cup) granulated sugar
200g (1½ cups) bread flour (sifted)
3 tbsp honey
3 tbsp warm water
Optional: 1 tsp vanilla extract (for added aroma)
Prepare the Pan
Line a loaf or square cake pan with parchment paper.
Preheat oven to 160°C (320°F).
Beat the Eggs & Sugar
In a large mixing bowl, beat the eggs using an electric mixer on high speed.
Gradually add the sugar while beating until the mixture is pale, thick, and tripled in volume (about 8–10 minutes).
Add Honey Mixture
In a small bowl, mix the honey and warm water until dissolved.
Add the honey-water mixture (and vanilla if using) to the eggs and mix gently.
Incorporate the Flour
Sift the bread flour again as you gradually fold it into the egg mixture using a spatula.
Do not overmix to avoid deflating the batter.
Pour & Tap
Pour the batter into the prepared pan.
Tap the pan on the counter to release large air bubbles.
Bake
Bake in the preheated oven for 50–60 minutes, or until the top is dark golden and a skewer comes out clean.
Cool Upside Down
Once baked, remove from oven and cover the top with parchment paper.
Flip the cake upside down on a flat surface and let it cool in the pan for 10–15 minutes to keep it moist and flat.
Wrap & Rest (Optional but Traditional)
Once cool, wrap the cake tightly in plastic wrap and let it rest overnight at room temperature for best flavor and texture.
Slice & Serve
Trim the edges for clean presentation and slice into neat squares or rectangles.
Are you looking for a tasty and nutritious treat to kickstart your day? A pineapple-banana smoothie might just be the answer! This tropical delight is not only refreshing but also packed with vitamins, fiber, and natural sugars to give you a steady energy boost. Whether you enjoy it for breakfast, after a workout, or as a midday snack, this smoothie is sure to hit the spot. Let’s explore this simple yet satisfying smoothie recipe together!
Here’s why this pineapple-banana smoothie is a fantastic choice for your health and well-being:
Feeling adventurous? Here are some optional add-ins to elevate the nutritional value of your smoothie:
To ensure your pineapple-banana smoothie turns out just right, consider these helpful tips:
In conclusion, this pineapple-banana smoothie offers a delicious way to boost your energy, stay hydrated, and nourish your body with essential nutrients. Embrace the tropical flavors, feel refreshed, rejuvenated, and ready to conquer your day with this delightful concoction!
Delicate, crumbly, and buttery — shortbread cookies are a beloved classic made with just a few pantry staples. Perfect for tea time, gifting, or holiday trays.
1 cup (226g) unsalted butter, at room temperature
1/2 cup (100g) granulated sugar
1/4 teaspoon salt
2 cups (240g) all-purpose flour
1 teaspoon pure vanilla extract (optional, but adds flavor)
Optional Add-ins:
1–2 tablespoons cornstarch (for an extra tender texture)
1 tablespoon lemon zest or orange zest
Dipped in or drizzled with melted chocolate
Mixing bowls
Electric mixer or wooden spoon
Measuring cups and spoons
Rolling pin
Cookie cutters or sharp knife
Baking sheet
Parchment paper
Cooling rack
Set your oven to 325°F (165°C).
Line a baking sheet with parchment paper or a silicone baking mat for even baking.
In a large bowl, beat the butter and sugar together using a mixer or wooden spoon until it’s light, pale, and fluffy (about 2–3 minutes).
This step ensures a tender texture.
Mix in salt and vanilla extract (if using).
Stir just until combined.
Gradually add in the flour, mixing slowly.
The dough will look crumbly, but that’s perfect.
Mix just until it starts to clump together. Do not overmix.
Turn the crumbly dough out onto a lightly floured surface.
Gently knead it with your hands a few times until it holds together.
If it’s too dry, let it rest for 5 minutes — the butter softens and helps bind it.
Roll out the dough to about 1/4 inch (0.6 cm) thickness.
Use cookie cutters or a knife to cut into classic rectangles, rounds, or shapes of your choice.
Traditional Scottish shortbread is often cut into rectangles (also called “fingers”).
Place the cut cookies on the prepared baking sheet.
Chill them in the fridge for 10–15 minutes. This helps prevent spreading.
Bake in preheated oven for 15–20 minutes, depending on size and thickness.
Look for lightly golden edges — not browned tops. Overbaking will dry them out.
Let cookies rest on the baking sheet for 5 minutes before transferring to a wire rack to cool completely.
Serve with tea or coffee.
Dust with powdered sugar for a classic touch.
Drizzle or dip in chocolate, or sandwich with jam or lemon curd for a twist.
Store cooled shortbread in an airtight container at room temperature for up to 1 week.
Freeze baked cookies or unbaked dough for up to 3 months. Thaw before baking or serving.
Room temp butter is key. Cold butter won’t cream properly, and melted butter will make the dough greasy.
Don’t overbake. The cookies should look pale with barely golden edges.
Chill the dough before baking for sharper shapes and less spreading.
Chocolate Chip Shortbread – Add 1/2 cup mini chocolate chips to the dough.
Lemon Shortbread – Add 1 tbsp lemon zest and drizzle with lemon glaze.
Espresso Shortbread – Add 1 tsp instant espresso to the dough for a mocha vibe.
Spiced Shortbread – Add a pinch of cinnamon or nutmeg for warmth.
Total Time:
Prep: 15 minutes
Chill (optional): 15 minutes
Bake: 15–20 minutes
Total: ~45 minutes
This classic chocolate cake is soft, moist, and deeply chocolatey — layered with a smooth and fluffy chocolate buttercream that melts in your mouth. Whether for birthdays, celebrations, or just because, this cake never disappoints!
1 and 3/4 cups (220g) all-purpose flour
1 and 1/2 cups (300g) granulated sugar
3/4 cup (65g) unsweetened cocoa powder
1 and 1/2 teaspoons baking powder
1 and 1/2 teaspoons baking soda
1/2 teaspoon salt
2 large eggs
1 cup (240ml) whole milk
1/2 cup (120ml) vegetable oil
2 teaspoons vanilla extract
1 cup (240ml) boiling water
1 cup (230g) unsalted butter, softened to room temperature
3 and 1/2 cups (440g) powdered sugar (sifted for smoothness)
1/2 cup (45g) unsweetened cocoa powder
1/4 cup (60ml) whole milk (plus more if needed)
2 teaspoons vanilla extract
Two 9-inch round cake pans
Electric mixer or hand whisk
Mixing bowls
Rubber spatula
Wire cooling racks
Offset spatula or butter knife (for frosting)
Preheat your oven to 350°F (175°C).
Grease two 9-inch round cake pans with butter or nonstick spray, then dust with flour or line the bottoms with parchment paper circles to ensure easy release.
In a large mixing bowl, whisk together the flour, sugar, cocoa powder, baking powder, baking soda, and salt.
This ensures even distribution of leavening agents and prevents lumps.
Add the eggs, milk, vegetable oil, and vanilla extract to the dry mixture.
Using an electric mixer (or whisk), beat the mixture on medium speed for about 1–2 minutes until smooth and well-combined.
Slowly stir in the boiling water. The batter will be thin — this is normal and key to a moist, soft texture.
Why boiling water? It “blooms” the cocoa, intensifying the chocolate flavor and helping the cake stay moist.
Divide the batter evenly between the two prepared pans.
Tap the pans lightly on the counter to remove air bubbles.
Bake for 30–35 minutes, or until a toothpick inserted in the center comes out with just a few moist crumbs.
Let the cakes cool in their pans for 10 minutes, then run a knife around the edges and carefully invert onto wire racks.
Allow them to cool completely before frosting — at least 30–40 minutes.
In a large bowl, beat the softened butter on medium-high speed for 3–4 minutes until it’s creamy, pale, and fluffy.
Gradually sift in the cocoa powder and powdered sugar, mixing on low to avoid a dust cloud.
Once incorporated, beat on medium speed. Add the milk 1 tablespoon at a time until you reach your desired consistency.
Mix in the vanilla extract.
Beat the frosting for another 2–3 minutes until it’s smooth, spreadable, and airy.
Too thick? Add more milk, 1 tsp at a time.
Too thin? Add a little more powdered sugar.
Place one cooled cake layer on your serving plate.
Spread about 1 cup of frosting evenly across the top.
Place the second layer on top and frost the top and sides of the cake using the remaining buttercream.
✨ Optional: Decorate with chocolate shavings, sprinkles, or a dusting of cocoa powder.
Serve as-is or with a scoop of vanilla ice cream or whipped cream.
Perfect for birthdays, holidays, or any celebration!
Store: Covered at room temperature for up to 2 days, or in the fridge for up to 5 days. Let it come to room temp before serving for best texture.
Freeze Cake Layers (Unfrosted): Wrap cooled layers in plastic wrap and freeze up to 2 months.
Make Frosting Ahead: Store in an airtight container in the fridge for up to 1 week. Bring to room temp and beat before using.
Mocha Twist: Add 1 tablespoon of instant espresso to the boiling water.
Chocolate Chip Layer: Fold mini chocolate chips into the batter before baking.
Layered Ganache: Use chocolate ganache between layers for an ultra-decadent version.
⏰ Total Time:
Prep: 25 minutes
Bake: 30–35 minutes
Cool + Frost: 20–30 minutes
≈ 1 hour 15 minutes total
Golden, cheesy, and packed with flavor—this easy meat and cheese Stromboli is a crowd-pleaser!
1 sheet of pizza dough or refrigerated crescent dough (store-bought or homemade)
6–8 slices of Italian deli meats (such as salami, pepperoni, ham, or capicola)
1–1½ cups of shredded mozzarella cheese (or provolone slices)
2 tablespoons of grated Parmesan cheese
1 teaspoon of Italian seasoning (or a mix of oregano, basil, garlic powder)
1 egg, beaten (for egg wash) – optional: substitute with olive oil
All-purpose flour (for dusting surface)
1 cup of warm marinara sauce or pizza sauce
Preheat your oven to 400°F (200°C) or follow the specific instructions if using store-bought dough.
Line a baking sheet with parchment paper or lightly grease it.
Lightly flour your work surface and unroll or stretch the pizza dough into a large rectangle, about 10×14 inches.
If the dough is sticky or too elastic, let it rest at room temperature for 5 minutes to make it easier to roll out.
Leave a 1-inch border around all edges to help with sealing.
Start layering your deli meats evenly over the dough – you can slightly overlap the slices.
Sprinkle or layer the mozzarella cheese (or use sliced provolone or a combo of cheeses).
Add Parmesan cheese and Italian seasoning evenly over the top for extra flavor.
Starting from the long side, tightly roll up the dough like a jelly roll, pressing gently as you go to keep it firm.
When finished, pinch the ends and the seam closed tightly so the fillings don’t spill out during baking.
Place the rolled Stromboli seam-side down onto the prepared baking sheet.
Using a sharp knife, score 3–4 shallow diagonal slits across the top. This lets steam escape and prevents the dough from puffing unevenly.
Brush the top of the Stromboli with beaten egg for a shiny, golden crust.
If you don’t want to use egg, a light brushing of olive oil also works well and gives a slightly more rustic look.
Bake in the preheated oven for 20 to 25 minutes, or until the Stromboli is golden brown, crisp on the outside, and cooked through.
If the top is browning too fast, you can tent it lightly with foil for the last few minutes.
Let the Stromboli cool for 5–10 minutes before slicing. This allows the cheese to set slightly and prevents everything from spilling out.
Slice into 1–2 inch portions using a serrated knife for cleaner cuts.
Serve warm with a side of marinara or pizza sauce for dipping.
Add vegetables: Sautéed mushrooms, spinach, or roasted red peppers can be added for more variety.
Spicy version: Add red pepper flakes or hot soppressata for extra heat.
Make it ahead: Assemble the Stromboli up to a few hours in advance and refrigerate until ready to bake.
Freezing: You can freeze unbaked Stromboli. Wrap tightly in plastic wrap and foil. When ready to bake, thaw in the fridge overnight and bake as instructed.
Fridge: Store leftovers in an airtight container in the fridge for up to 3 days.
Reheat: Bake at 350°F for 10–12 minutes or reheat slices in the microwave for about 30–45 second
Homemade Creamy Cream Cheese Recipe
(Perfect for bread, toast, crackers, and more!)
If you love cream cheese and want to make a simple, creamy alternative at home, this recipe is perfect for you. Using just mozzarella cheese and heavy cream, this recipe is straightforward, and with just a few minutes of prep, you can enjoy a creamy, delicious spread. Follow these detailed instructions for the best result.
Ingredients:
4 slices of mozzarella cheese (about 1 ounce per slice)
200 grams (7.05 oz) of heavy cream
Salt (optional, to taste) – This is for seasoning, so adjust depending on your preference.
Preparation:
Step 1: Organize the Ingredients
To begin, it’s always best to have everything ready to go. Since this is a very quick recipe, you won’t have to prep for long, but having everything on hand helps streamline the process.
Mozzarella cheese: Using slices makes it easy to break down and melt, but if you have block mozzarella, you can also shred it.
Heavy cream: Use full-fat heavy cream for the best texture. Avoid lighter versions, as they may not give you the same richness.
Salt (optional): You can choose to leave it out, but salt enhances the flavor of the cream cheese.
Step 2: Prepare the Cheese
Chop the Mozzarella:
Start by chopping the mozzarella cheese into smaller, more manageable pieces. Cutting it into small chunks (about 1-inch pieces) allows it to melt more quickly and evenly in the microwave. The smaller the pieces, the faster and smoother the mixture will come together.
Step 3: Combine the Ingredients
Microwave-Safe Bowl:
Choose a microwave-safe bowl large enough to hold the mozzarella and heavy cream without overflowing. It should be wide enough to allow you to stir and blend easily as the mixture heats.
Add the Ingredients:
Place the chopped mozzarella slices into the bowl. Then pour the heavy cream on top. Stir gently to combine the cheese and cream, but don’t worry about getting everything perfectly mixed just yet. You’ll be microwaving it and stirring as it melts.
Step 4: Microwave and Stir
This step is crucial because the key to smooth cream cheese is ensuring the cheese melts properly into the cream. The microwave is an easy way to heat the mixture without making it too difficult.
Start Heating:
Microwave the cheese and cream mixture on high for 30 seconds. This initial heating helps the mozzarella start to soften and melt.
Stir and Check:
After 30 seconds, remove the bowl from the microwave. Stir the mixture well with a spoon or a spatula. At this point, the cheese should be starting to melt, but it may still be a bit clumpy.
Repeat the Process:
Microwave the mixture again for another 30 seconds. Stir and check the consistency after each 30-second cycle. Repeat this process 5 more times, for a total of 6 times, ensuring to stir well after each cycle. The goal is to melt the mozzarella completely into the heavy cream until you achieve a smooth, creamy texture.
Why This Works:
Mozzarella cheese has a high moisture content and can be stringy if melted too fast. The repeated short bursts of microwaving help gradually break down the cheese without making it too tough or rubbery.
Step 5: Adjust Seasoning (Optional)
Taste the Mixture:
Once the cheese has fully melted into the cream, taste the mixture. At this point, you can decide whether or not to add salt. The salt is optional, but it helps balance the richness of the cream and enhances the flavor of the cheese.
Add Salt:
If you prefer a savory spread, sprinkle a pinch of salt and stir well to incorporate. Adjust to your personal preference. You can also add a little garlic powder, onion powder, or herbs like chives for extra flavor, but this is optional.
Step 6: Chill the Mixture
Transfer to a Container:
Once the cheese and cream are fully blended and seasoned to taste, transfer the mixture to a clean container or jar. This will allow the cream cheese to cool and set properly.
Refrigerate:
Place the container in the refrigerator and let it chill for 5 to 6 hours. The cooling process is essential to firming up the cream cheese and allowing the flavors to meld together. The longer it sits, the thicker it will become, so make sure to give it ample time to set.
Texture Tip:
After the chilling process, the mixture will thicken to a more spreadable consistency. If you prefer a softer texture, you can take it out of the fridge about 10 minutes before serving.
Step 7: Serve and Enjoy!
After the cream cheese has chilled, it’s ready to be enjoyed! Here are some fun ideas for serving:
Spread on Bread or Toast: Perfect for a quick breakfast or snack.
Pair with Crackers or Biscuits: Makes a great dip for salty snacks.
Add to Bagels: A fantastic alternative to traditional cream cheese for bagels.
Top with Herbs or Honey: For extra flavor, sprinkle fresh herbs like dill or chives, or drizzle some honey for a sweet twist.
Additional Tips & Variations:
Herbed Cream Cheese: Add fresh herbs such as chives, dill, parsley, or thyme during the seasoning step for a savory variation.
Garlic Cream Cheese: Add garlic powder or finely minced fresh garlic for an extra kick.
Cheese Variations: You can also experiment by mixing in other cheeses like cheddar or parmesan for a different flavor profile.
Storage:
How to Store:
Keep any leftover cream cheese in an airtight container in the refrigerator. It will last for about 5 to 7 days.
Freezing:
You can freeze the cream cheese if you need to keep it longer. Just make sure to store it in a freezer-safe container. To use it later, thaw in the fridge overnight before serving. The texture may change slightly after freezing, but it will still be spreadable.
This creamy, homemade alternative to traditional cream cheese is not only easy to make but also customizable to suit your taste. Enjoy it on bread, crackers, or as a dip for fresh vegetables – you’re sure to love it!
450 g minced meat (beef, pork, or a mix)
Salt to taste
Pepper to taste
1 small onion, finely chopped
1 egg
2–3 tablespoons breadcrumbs
2–3 tablespoons grated Parmesan cheese (optional)
100 g mortadella slices
100 g diced cheese (like provolone, scamorza, or mozzarella)
A handful of shelled pistachios (unsalted, coarsely chopped)
Olive oil for brushing
Preheat the oven:
Set your oven to 180°C (350°F).
Prepare the meat mixture:
In a large bowl, mix the minced meat with salt, pepper, finely chopped onion, egg, breadcrumbs, and Parmesan if using. Combine until smooth and cohesive. Let it rest for 10 minutes to let the flavors meld.
Shape and stuff the meatloaf:
Place a sheet of parchment paper or plastic wrap on your work surface.
Flatten the meat mixture into a rectangle, about 1.5 cm thick.
Lay the mortadella slices evenly across the surface.
Sprinkle the cheese cubes over the mortadella.
Add chopped pistachios on top.
Roll it up:
Using the parchment or plastic wrap to help, gently roll the meatloaf from one short end to the other, tucking it tightly as you go. Seal the edges and ends well so the filling stays in during baking.
Bake the meatloaf:
Transfer the loaf to a baking sheet lined with parchment paper.
Brush the top with a little olive oil.
Bake for about 40–50 minutes, or until golden brown and cooked through. (Internal temp should reach about 70–75°C or 160–165°F).
Rest and serve:
Let the meatloaf rest for 10 minutes before slicing to allow the juices to redistribute. Slice and serve warm.
The Cottage Cheese Chocolate Bliss Balls are an exquisite treat that strikes the perfect balance between simplicity and indulgence. This recipe exemplifies the beauty of using wholesome ingredients to create something truly delightful, showing that even the simplest components can transform into a sophisticated dessert. With the creamy richness of cottage cheese paired with the smoothness of milk chocolate, these bliss balls are perfect for anyone craving a dessert that is light, creamy, and undeniably satisfying. The best part? The preparation process is straightforward, making it suitable for both seasoned bakers and those just starting out in the kitchen.
The Cottage Cheese Chocolate Bliss Balls celebrate the concept of slow food—a reminder that some recipes are worth the wait. Allowing the mixture to rest for 12 hours not only stabilizes the dough but enhances the flavor, resulting in a unique and elevated experience. Whether you’re making these for a special occasion, a family gathering, or simply as a treat for yourself, this recipe is sure to impress.
Full Recipe:
Ingredients
Cottage cheese – 600 g
Egg yolks – 3
Sugar – 40 g
Flour – 60 g
Milk chocolate – For dipping and decoration
Preparation Steps
Prep Time: 20 minutes (plus 12 hours resting time)
Cooking Time: 6 minutes
Total Time: 12 hours 26 minutes
Servings: 12 balls (approximately 90 g each)
Kcal per serving: Approx. 220 kcal
Step-by-Step Instructions
1. Mix the Ingredients:
Exclusive Recipes, Delivered to Your Inbox!
Subscribe to receive delicious recipes, cooking tips, and easy meal ideas every week!
EMAIL
See your email address to register.
SIGN ME UP!
In a large mixing bowl, add the cottage cheese, egg yolks, sugar, and flour. Use a wooden spoon or spatula to mix thoroughly until the mixture is smooth and uniform. The consistency should be thick and cohesive.
2. Important Resting Period:
Cover the bowl with plastic wrap or a clean kitchen towel and let the mixture rest in the refrigerator for 12 hours. This step is essential as it allows the mixture to stabilize and develop a firmer texture, which helps when shaping the balls and enhances the flavor profile.
3. Shaping the Balls:
After 12 hours, remove the mixture from the refrigerator. Scoop out portions of approximately 90 g each and shape them into smooth balls using your hands. If the mixture feels a bit sticky, lightly dust your hands with flour to make handling easier.
4. Prepare the Chocolate
Melt the milk chocolate using a double boiler or in the microwave in 20-second intervals, stirring between each interval to avoid burning. The chocolate should be smooth and glossy.
5. Bake the Balls:
Preheat your oven to 180°C (350°F). Place the balls on a parchment-lined baking tray, ensuring they are spaced evenly.
Bake for 6 minutes. The balls should be lightly golden but not overly brown.
6. Dip in Chocolate:
Allow the baked balls to cool for a few minutes. Once they are cool enough to handle, dip each ball into the melted milk chocolate, coating it evenly. Place them on a wire rack or parchment paper to set.
Explanation of the Recipe: Why It’s Timeless
The Cottage Cheese Chocolate Bliss Balls are timeless because they embody the essence of simple, homemade goodness. This recipe harks back to traditional European desserts that feature cottage cheese as a primary ingredient, known for their creamy texture and subtle tang. The addition of milk chocolate elevates the dessert from a humble snack to a luxurious treat, creating a harmonious combination that delights the palate.
The recipe’s slow preparation process, involving a 12-hour resting period, emphasizes patience and attention to detail—virtues celebrated in traditional baking. It’s a dessert that embraces the philosophy that good things take time. By allowing the mixture to stabilize, you achieve the perfect texture: a soft, melt-in-your-mouth center that contrasts with the crisp, smooth coating of chocolate. This marriage of flavors and textures makes it a dessert that can stand the test of time.
Nutrition Facts (per serving)
Calories: 220 kcal
Protein: 8g
Carbohydrates: 22g
Fat: 12g
Fiber: 1g
Sugars: 15g
Cholesterol: 90mg
FAQs
1. Can I use low-fat cottage cheese? Yes, low-fat cottage cheese can be used, but the texture may be slightly less rich and creamy. Full-fat cottage cheese is recommended for the best results.
2. How do I store the bliss balls? Store the chocolate-coated balls in an airtight container in the refrigerator for up to 5 days. They can also be frozen for up to 2 months; just thaw them in the fridge before serving.
3. Can I use dark chocolate instead of milk chocolate? Absolutely! Dark chocolate will add a richer, more intense flavor. Adjust the sugar content in the batter if you prefer a less sweet result.
4. Is the 12-hour resting period necessary? Yes, the 12-hour rest is crucial for allowing the mixture to stabilize, which improves both the texture and the ease of forming the balls.
Tips for Making
Room Temperature Ingredients: Ensure your eggs are at room temperature when mixing to help blend more smoothly with the cottage cheese.
Blending Option: For a smoother texture, blend the cottage cheese in a food processor before mixing it with the other ingredients.
Flavor Variations: Add a touch of lemon zest or a teaspoon of vanilla extract to enhance the flavor of the batter.
Chocolate Drizzle: For an extra decorative touch, drizzle white chocolate over the milk chocolate-coated balls once they have set.
Storage Tips
Short-Term Storage: Keep the bliss balls in an airtight container in the refrigerator. They taste best when consumed within 2-3 days, as this is when the flavor and texture are at their peak.
Long-Term Storage: For longer storage, freeze the balls in a freezer-safe container. Place parchment paper between the layers to prevent sticking. When ready to enjoy, thaw in the refrigerator overnight.
Conclusion
Cottage Cheese Chocolate Bliss Balls are more than just a dessert—they’re a celebration of tradition, patience, and the simple joy of home baking. This recipe takes basic, familiar ingredients and transforms them into a treat that’s perfect for any occasion. The process of allowing the mixture to rest for 12 hours may seem long, but it’s a reminder that great things take time. This step is what sets these bliss balls apart, ensuring that each bite is tender, smooth, and bursting with flavor.
The use of cottage cheese as the main component makes these bliss balls unique and gives them a tangy undertone that contrasts beautifully with the sweetness of milk chocolate. Whether served as a sweet finale to a dinner or as a snack to accompany an afternoon coffee, these bliss balls bring a touch of homemade charm to your table.
The timelessness of this recipe lies in its adaptability and its ability to evoke feelings of comfort and warmth. Passed down or rediscovered, recipes like these remind us that sometimes, the best treats are the ones that require a little extra love and time. This is a dessert that transcends trends, remaining as delightful and comforting as it was generations ago. Whether you’re sharing them with family or indulging in a quiet moment of self-care, these bliss balls are sure to bring a smile and satisfy the sweetest of cravings.
This cucumber and corn salad is a perfect blend of crisp cucumbers, sweet corn, and vibrant vegetables, all tossed in a creamy yogurt and mustard dressing. The combination of textures and flavors makes this salad incredibly satisfying and refreshing. It’s an excellent choice for those hot summer days when you want something light yet fulfilling. With hard-boiled eggs adding a boost of protein, this salad can stand alone as a complete meal or serve as a delightful side dish.
Preparation Time: 15 minutes
Cook Time: 8-9 minutes
Total Time: 25 minutes
Servings: 4
Ingredients:
2 cucumbers
1/3 teaspoon salt
3 eggs
1-2 carrots
80g cooked corn
Green onion, chopped
Parsley, chopped
3-4 tablespoons thick yogurt
1 tablespoon mustard
Directions:
Prepare the Cucumbers:
Peel and slice 2 cucumbers. Place them in a bowl and sprinkle with 1/3 teaspoon salt. Set aside to let them release some water.
Cook the Eggs:
Place 3 eggs in a saucepan, cover with water, and bring to a boil. Let cook for 8-9 minutes until hard-boiled. Once cooked, cool the eggs in cold water, peel, and chop them.
Prepare the Carrots:
Peel and grate 1-2 carrots.
Combine the Vegetables:
In a large bowl, combine the sliced cucumbers, chopped eggs, grated carrots, and 80g cooked corn.
Chop some green onions and parsley and add them to the bowl.
Prepare the Dressing:
In a small bowl, mix 3-4 tablespoons of thick yogurt with 1 tablespoon of mustard until well combined.
Assemble the Salad:
Pour the yogurt-mustard dressing over the vegetable mixture and toss everything together until well coated.
Serve:
Serve immediately or refrigerate for a bit to let the flavors meld together.
Serving Suggestions:
This salad pairs well with grilled chicken or fish.
Serve it as a refreshing side dish at a barbecue or picnic.
Cooking Tips:
Make sure to let the cucumbers sit with salt to draw out excess water, which keeps the salad from becoming too watery.
For added flavor, you can sprinkle a bit of black pepper or a squeeze of lemon juice.
Nutritional Benefits:
Cucumbers: Hydrating and low in calories, great for weight management.
Eggs: Provide high-quality protein and essential vitamins.
Carrots: Rich in beta-carotene, which is good for your eyesight.
Dietary Information:
This salad is vegetarian and gluten-free.
Can be made dairy-free by using a plant-based yogurt alternative.
Why You’ll Love This Recipe:
It’s quick and easy to prepare.
Refreshing and light, perfect for warm days.
Packed with fresh, nutritious ingredients.
Conclusion:
I hope you enjoy this refreshing cucumber and corn salad as much as I do. It’s a delightful way to incorporate more vegetables into your diet while enjoying a tasty and satisfying dish. Don’t forget to share your thoughts in the comments and let me know how you like it. Bon Appetit, friends!
For the Crust:
1 ball homemade or store-bought pizza dough
1 tbsp olive oil
½ tsp dried oregano
½ tsp garlic powder
For the Burger Layer:
1 lb (450 g) lean ground beef
1 tsp kosher salt
½ tsp black pepper
½ tsp smoked paprika
1 small onion, finely chopped
2 cloves garlic, minced
½ cup caramelized onions (optional, for extra flavor)
½ cup shredded sharp cheddar cheese
For the Toppings:
¾ cup fire-roasted tomato sauce or pizza sauce
1 cup shredded mozzarella
¼ cup crumbled feta or goat cheese
6-8 slices turkey pepperoni or veggie slices
¼ cup roasted red peppers or cherry tomatoes
1 tbsp chopped fresh basil or parsley
Prep the Dough:
Preheat oven to 425°F (220°C).
Lightly oil a 9-inch pie dish. Roll out the dough to cover the base and sides.
Brush with olive oil and sprinkle with oregano and garlic powder. Parbaked for 5 minutes.
Cook the Burger Layer:
In a skillet, heat a little oil and sauté chopped onion and garlic until soft.
Add ground beef, salt, pepper, and paprika. Cook until browned. Stir in cheddar cheese and optional caramelized onions.
Assemble the Pie:
Spread the beef mixture into the crust.
Spoon over the pizza sauce evenly.
Top with mozzarella, crumbled feta, pepperoni, and red peppers.
Bake:
Bake for 20–25 minutes, until the crust is golden and cheese is bubbling.
Garnish and Serve:
Let cool slightly. Sprinkle with fresh basil or parsley before serving.
Turn taco night into a fun, easy, and delicious experience with this Walking Taco Casserole! Perfect for family dinners or parties, this dish combines all the flavors of your favorite taco in a convenient, shareable casserole.
Ingredients:
Instructions:
Preheat Oven:
Preheat your oven to 350°F (175°C).
Cook the Beef:
In a large skillet, cook the ground beef over medium heat until browned. Drain any excess fat.
Add Seasoning:
Add the taco seasoning and water to the skillet. Stir to combine and let simmer for about 5 minutes.
Combine Ingredients:
Stir in the corn, diced tomatoes with green chilies, and black beans. Mix until everything is well combined.
Layer the Casserole:
In a 9×13 inch baking dish, spread half of the crushed Fritos or tortilla chips on the bottom. Top with half of the beef mixture and sprinkle with 1 cup of shredded cheddar cheese. Repeat the layers with the remaining chips, beef mixture, and cheese.
Bake:
Bake in the preheated oven for 20-25 minutes, or until the cheese is melted and bubbly.
Top and Serve:
Remove the casserole from the oven and let it cool for a few minutes. Spread the sour cream evenly over the top, and then sprinkle with diced tomatoes, green onions, and cilantro.
Enjoy:
Serve warm and enjoy your delicious Walking Taco Casserole! Perfect for sharing with friends and family.
This Walking Taco Casserole is a fun twist on traditional tacos, bringing all the flavors and excitement of taco night into a convenient and crowd-pleasing dish. Enjoy!
Ingredients:
Instructions:
Prepare the cucumbers:
Slice the cucumbers thinly. Sprinkle with salt and let them sit for about 10-15 minutes to draw out moisture. This step helps to enhance the crunchiness of the cucumbers.
After they have sweated, rinse the cucumbers under cold water and drain well. Squeeze out any excess water with your hands or a clean towel.
Make the dressing:
In a small bowl, mix together the minced garlic, Korean red pepper flakes, sesame oil, soy sauce, sugar, and rice vinegar. Stir until the sugar is dissolved.
Combine and marinate:
In a larger mixing bowl, combine the drained cucumbers and green onions.
Pour the dressing over the cucumbers and toss well to ensure all slices are evenly coated.
Let the salad marinate for at least 10 minutes before serving to allow the flavors to meld.
Finish and serve:
Just before serving, sprinkle toasted sesame seeds over the salad.
If desired, garnish with fresh cilantro for an extra layer of flavor.
Ingredients:
Fresh parsley for garnish
Instructions:
1. Combine cucumber, tomatoes, onion, and olives on a plate.
2. Place the feta slice on top.
3. Drizzle with olive oil, sprinkle oregano and pepper.
4. Garnish with parsley and serve fresh.