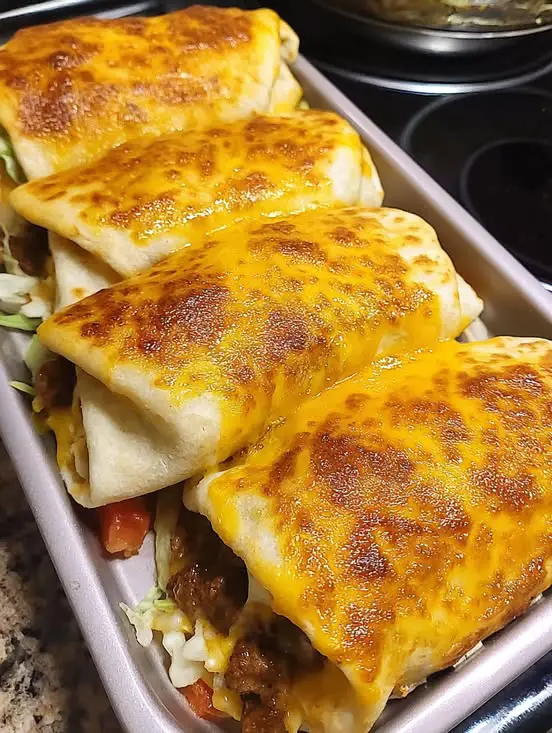
Loaded Cheesy Pocket Tacos
Course: Dinner
Cuisine: American-Mexican Fusion
Prep Time: 15 minutes
Cook Time: 25 minutes
Total Time: 40 minutes
Servings: 12–16 taco pockets
Skill Level: Easy
Perfect For: Family dinners, potlucks, casual entertaining, or freezer meals
⭐ Why You’ll Love These
-
Kid-friendly & crowd-pleasing
-
Quick & easy — 40 minutes from start to finish
-
Highly customizable with endless filling options
-
Freezer-friendly — perfect for make-ahead meals
-
Cheesy, melty, handheld goodness that satisfies every craving
Ingredients
Main:
-
1 pound ground beef
-
1 packet taco seasoning (or 2 tbsp homemade blend)
-
8 oz cream cheese, softened
-
½ cup salsa (mild, medium, or spicy—your choice)
-
1 cup shredded cheddar cheese
-
12 small flour tortillas
-
2 tablespoons melted butter
Optional Garnishes:
-
Sour cream
-
Diced tomatoes
-
Extra salsa
-
Green onions
-
Fresh cilantro
-
Jalapeños
Instructions
Step 1: Brown the Beef
-
In a large skillet over medium-high heat, cook the ground beef until fully browned, breaking it up as it cooks.
-
Drain excess fat.
-
Add taco seasoning and ½ cup water (or according to packet directions). Simmer for a few minutes until thickened. Set aside.
Variation: You can use ground turkey, chicken, or a plant-based substitute instead of beef.
Step 2: Make the Cheese-Salsa Filling
-
In a medium bowl, beat the softened cream cheese until smooth and creamy.
-
Gradually mix in the salsa until the mixture is uniform and spreadable.
-
Set aside for assembly.
Tip: Room-temperature cream cheese is easier to blend and gives a silkier texture.
Step 3: Assemble the Pocket Tacos
-
Lay a tortilla flat on a clean surface.
-
Place 1 tablespoon of the cream cheese-salsa mixture slightly off-center.
-
Add a generous spoonful of seasoned ground beef.
-
Sprinkle shredded cheddar over the top.
-
Fold the tortilla into a burrito-style pocket: fold in the sides, then roll tightly.
Pro Tip: Don’t overfill! This helps avoid bursting during baking.
Step 4: Bake to Perfection
-
Preheat oven to 350°F (175°C).
-
Arrange the folded pockets seam-side down on a greased or parchment-lined baking sheet.
-
Brush the tops with melted butter for a golden finish.
-
Bake for 15–20 minutes, or until golden brown and slightly crisp.
Optional: For extra crispiness, pop them under the broiler for the last 2–3 minutes. Watch closely!
Step 5: Garnish and Serve
-
Let the pockets cool for 5 minutes.
-
Garnish with your favorite toppings and serve hot.
These tacos are a party on a plate — ideal with salsa verde, guacamole, or a squeeze of lime!
Storage & Reheating Tips
Refrigerator:
-
Store in an airtight container for up to 4 days.
-
Reheat in a 350°F oven for 10 minutes or in the microwave for 1–2 minutes.
Freezer:
-
Wrap each pocket in foil or plastic wrap and freeze in a zip-top bag.
-
Freeze for up to 1 month.
-
Reheat from frozen in a 375°F oven for 20–25 minutes.
Variations & Add-Ins
-
Vegetarian: Use black beans, corn, sautéed peppers, and onions instead of meat.
-
Breakfast Style: Scrambled eggs, bacon or sausage, and shredded cheese.
-
Spicy Kick: Add jalapeños or pepper jack cheese.
-
Tex-Mex Fusion: Add cooked rice or refried beans to the filling.
-
Keto/Low Carb: Use low-carb tortillas or large lettuce leaves for wrapping.
Notes
Loaded Cheesy Pocket Tacos are more than a recipe — they’re a solution to weeknight chaos, a savior for indecisive eaters, and a deliciously cheesy way to elevate taco night. With crunchy outsides, gooey insides, and bold flavors in every bite, these pockets are guaranteed to impress.
Jump to Recipe / Print-Friendly Version
Would you like me to create a one-page printable version or visual step-by-step guide for easier cooking and sharing? Let me know and I can format it perfectly for your kitchen or to send to friends and family!

Leave a Reply