Table of Contents
hide
Homemade Fresh Cheese (Paneer or Ricotta Style)
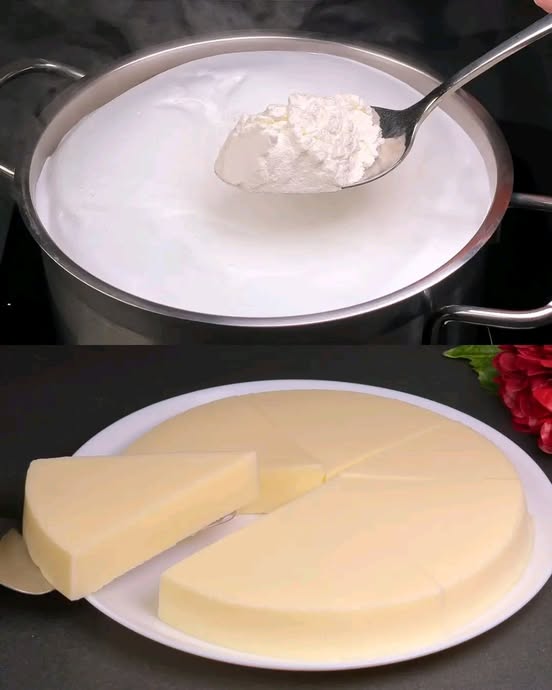
This homemade fresh cheese is incredibly easy to make using just three main ingredients: milk, lemon juice (or vinegar), and salt. It’s creamy, mild, and can be used in both savory and sweet dishes. Whether you want a soft, spreadable cheese or a firmer block for slicing, this recipe is perfect for you!
Preparation Time
-
- Prep Time: 5 minutes
- Cook Time: 15 minutes
- Resting Time: 30 minutes – 2 hours (depending on texture)
- Total Time: 45 minutes – 2 hours
Ingredients (Cups and Grams)
-
- 4 cups (1 liter) whole milk
-
- 2 tablespoons lemon juice (or white vinegar)
- ½ teaspoon salt
- 10g (2 tsp) butter (optional, for creaminess)
- Herbs or spices (optional, for flavoring: garlic, chives, black pepper, etc.)
Directions
Step 1: Heat the Milk
-
- Pour 1 liter of milk into a large saucepan.
- Slowly heat it over medium heat, stirring occasionally to prevent scorching.
- Heat until the milk reaches 85°C (185°F), just below boiling.
Step 2: Add Lemon Juice or Vinegar
-
- Once the milk is hot, remove it from the heat.
- Stir in 2 tablespoons of lemon juice or vinegar.
- The milk will start to curdle, separating into curds (solids) and whey (liquid).
Step 3: Let It Sit
-
- Gently stir for a few seconds.
- Cover the pot and let the mixture sit for 10-15 minutes to allow the curds to form completely.
Step 4: Drain the Curds
-
- Line a colander with cheesecloth or a clean kitchen towel.
- Pour the curdled milk through it to drain the whey.
- Let the curds drain for about 30 minutes for a soft cheese or longer for a firmer texture.
Step 5: Season and Mix
-
- Transfer the drained curds to a bowl.
- Stir in ½ teaspoon salt and 10g butter (optional) for extra creaminess.
- Mix in herbs or spices if desired (e.g., chopped chives, garlic powder, black pepper).
Step 6: Shape and Chill
-
- For soft cheese: Store the cheese in an airtight container.
- For firm cheese: Wrap the curds in cheesecloth and gently squeeze out any excess whey.
- Shape it into a ball or log, cover with cling film, and refrigerate for 2-3 hours until set.
Serving Suggestions
-
- Spread on crackers or toast with honey or jam.
- Use in salads, sandwiches, or wraps.
- Add to pasta, pizza, or soups for a creamy texture.
- Crumble over roasted vegetables or grilled meats.
Cooking Tips
-
- Use fresh whole milk for the best flavor and texture.
- Don’t overheat the milk—keeping it just below boiling ensures the best curds.
- For a firmer cheese, press the curds under a weight for a few hours.
- Save the whey! It’s great for baking, smoothies, or soups.
Nutritional Benefits
-
- High in protein – great for muscle repair and growth.
-
- Rich in calcium – supports strong bones and teeth.
- Lower in fat than many store-bought cheeses.
- No preservatives – a fresh, homemade alternative.
Dietary Information
-
- Vegetarian
- Gluten-Free
- Low-carb & Keto-friendly
Nutritional Facts (Per Serving – Approximate)
-
- Calories: 120
- Protein: 7g
- Carbohydrates: 1g
- Fat: 9g
- Calcium: 15% DV
Storage
-
- Refrigerator: Store in an airtight container for up to 5 days.
- Freezer: Not recommended, as fresh cheese loses texture when frozen.
Why You’ll Love This Recipe
-
- Easy to make with just 3 ingredients!
- Healthier and fresher than store-bought cheese.
- Customizable with herbs, spices, or different textures.
- Versatile – use in sweet or savory dishes.
Conclusion
Making fresh cheese at home is easier than you think! This quick and foolproof recipe yields a creamy, delicious cheese perfect for spreading, crumbling, or slicing. No preservatives, no artificial ingredients—just pure homemade goodness. Once you try it, you’ll never go back to store-bought cheese again!

Leave a Reply