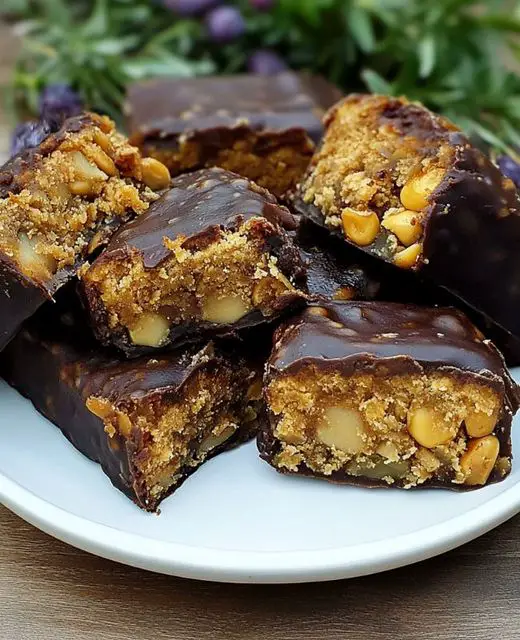
Tastier than Snickers! Sugar-Free Healthy Dessert!
Tastier than Snickers! Sugar-Free Healthy Dessert!
Table of Contents
Ingredients (Makes 10 Bars)
- 6 oz (170 g) pitted dates
- 2 tablespoons peanut butter (natural, no added sugar)
- Pinch of salt
- 1 cup (90 g) chopped oatmeal
- 2.1 oz (60 g) salted peanuts
For the Glaze:
- 3.5 oz (100 g) melted chocolate (sugar-free or dark chocolate with high cocoa content)
Nutritional Information (Per Bar)
- Calories: 150
- Protein: 4 g
- Carbohydrates: 19 g
- Dietary Fiber: 3 g
- Sugars: 12 g (natural from dates)
- Fat: 8 g
- Saturated Fat: 2 g
- Cholesterol: 0 mg
- Sodium: 50 mg
Step-by-Step Preparation
Step 1: Soak the Dates
- Place the pitted dates in a bowl, cover them with water, and let them soak for 2-4 minutes. This softens the dates, making them easier to blend into a smooth paste.
Step 2: Blend the Dates
- Transfer the soaked dates to a blender. Add 2 tablespoons of peanut butter and a pinch of salt.
- Blend until smooth, scraping down the sides as needed to ensure everything is well combined. The date mixture will act as the sweet and sticky base for the bars, replacing the caramel layer in traditional Snickers.
Step 3: Add Oatmeal
- Divide the blended date mixture into two parts: one larger portion (about 60%) and a smaller portion (about 40%).
- Add the 1 cup (90 g) of chopped oatmeal to the larger portion (60%) in the blender.
- Blend until well combined. The oats will provide a chewy, satisfying texture and help bind the base layer.
See also Easy Potato & Egg Delight Recipe
Step 4: Form the Base
- Prepare a piece of baking paper on a flat surface.
- Spread the oatmeal-date mixture on the baking paper, forming a rectangular shape. Press it down evenly with your hands or a spatula to create a compact base layer.
Step 5: Add the Peanut Layer
- Spread the remaining date mixture (without oatmeal) evenly over the oatmeal layer.
- Top with 2.1 ounces (60 g) of salted peanuts, pressing them gently into the date mixture to ensure they stick. The salted peanuts add a delightful crunch and balance the sweetness of the dates.
Step 6: Freeze
- Place the layered mixture in the freezer for 30-40 minutes. This helps to firm up the layers, making it easier to cut into bars.
Step 7: Prepare the Bars
- After freezing, remove the mixture from the freezer.
- Cut into bars of your desired size, using a sharp knife. For uniform bars, you can cut them into rectangles about 1 inch wide and 3 inches long.
Step 8: Coat with Chocolate
- Melt 3.5 ounces (100 g) of chocolate in a microwave-safe bowl in 30-second intervals, stirring between each interval until fully melted and smooth. Alternatively, you can melt the chocolate using a double boiler.
- Dip each bar into the melted chocolate, using a fork to roll them around and coat all sides. Let the excess chocolate drip off before placing the bars on a parchment-lined tray.
- Place the bars in the fridge for 5 minutes to set the chocolate. This step ensures a perfect, glossy finish and keeps the bars from melting at room temperature.
Step 9: Serve
- Enjoy your homemade, healthy Snickers bars! Serve them chilled for the best texture, or let them sit at room temperature for a few minutes if you prefer a softer bite.
See also Delicious Melt-in-Your-Mouth Cookies
Tips for Perfect Healthy Snickers Bars
- Storage: Store the bars in an airtight container in the refrigerator for up to a week. They can also be frozen for up to a month; just thaw them in the fridge before eating.
- Customization: Feel free to experiment with other nuts or nut butters for variety. Almond butter, cashew butter, or even tahini can add a unique twist to the recipe.
- Chocolate Options: For a dairy-free or vegan option, use dairy-free dark chocolate. You can also sprinkle some sea salt on top of the chocolate coating for an extra burst of flavor.

Leave a Reply