Ingredients
2 cups broccoli florets
2 cups Brussels sprouts halved
1 medium-large sweet potato cut into 1-inch pieces (about 2 cups)
15 ounces chickpeas canned, drained and rinsed
Drizzle of olive oil or lemon juice
Dash of garlic powder
Salt and freshly ground black pepper to taste
For the dressing:
½ cup Dijon mustard
½ cup tahini
½ cup water
¼ cup apple cider vinegar
2 tablespoons lemon juice
Salt and freshly ground black pepper to taste
Instructions
Preheat the oven to 400°F.
Line a large baking sheet with parchment paper or use a non-stick sheet. Set aside.
Season veggies: Transfer the broccoli, Brussels sprouts, sweet potato, and chickpeas to a medium bowl. Toss with just enough olive oil (or lemon juice) to give the vegetables a slick, glossy coating. Add the garlic powder, salt, and freshly ground black pepper and use your hands to rub the vegetables with the oil and seasonings.
Roast: Transfer the vegetables to the prepared baking sheet. Roast for 15 minutes before tossing the vegetables. Roast for about 5 minutes more, or until the sweet potato is just tender. Change the oven setting to broil and cook for about 2 minutes more, or until the Brussels sprouts are slightly charred. Transfer the roasted vegetables to a large bowl.
Make dressing: In a medium bowl, whisk the Dijon mustard, tahini, water, apple cider vinegar and lemon juice until combined. Add salt and freshly ground black pepper.
For serving: Add the desired amount of dressing to the roasted vegetables and stir to coat.
6 servings. Approximate 230 Calories
Blog
-
Roasted Chickpea & Veggie Bowl
-
Chicken Alfredo Lasagna
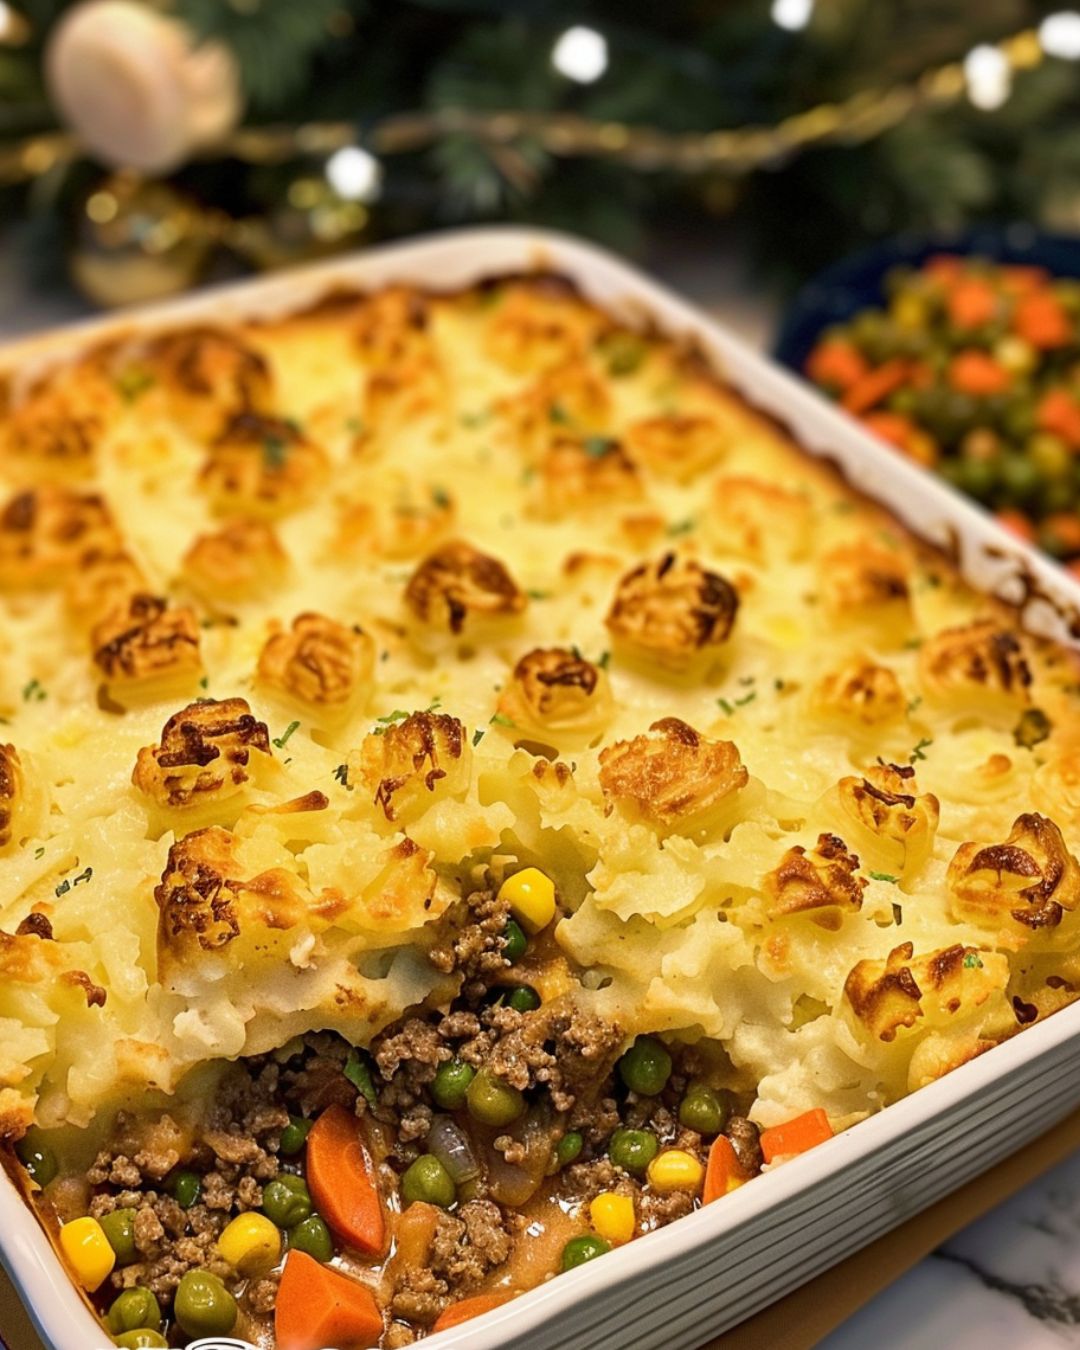
Think of the rich, creamy, indulgent joy of Fettucine Alfredo. Good. Now, imagine you have layers upon layers of it and some melty mozzarella, chicken, and spinach to round things out. That’s our Chicken Alfredo Lasagna for you.
INGREDIENTS
- 12-15 lasagna noodles
- 2 tablespoons unsalted butter
- 4 cloves garlic, minced
- 1 small onion, finely chopped
- 10 oz fresh baby spinach
- 4 cups heavy cream
- 1 1/2 cups Parmesan cheese, freshly grated
- 15 oz ricotta cheese
- 1 teaspoon dried basil
- 3 cups cooked and shredded chicken
- 4 cups mozzarella cheese, grated
- Kosher salt and freshly ground black pepper, to taste
- Fresh parsley, minced, for serving (optional)
How To Make Chicken Alfredo Lasagna
- Preheat oven to 350°F and grease a 9×13-inch baking dish with butter or nonstick spray. Set aside.
- In a separate 9×13-inch pan or other long and shallow dish, arrange the uncooked lasagna noodles. Pour hot water over them until noodles are submerged and set aside to soak while you work on the rest of the lasagna. Let sit at least 30 minutes, agitate occasionally with your hands to prevent sticking.
- Heat a large skillet over medium-high heat. Add butter, followed by onion. Cook until onion becomes translucent, about 10 minutes. Add garlic and cook 2 minutes more.
- Stir in spinach and cook briefly until spinach wilts.
- Add heavy cream, basil, and a generous amount of salt and pepper. Bring to a simmer, then stir in Parmesan and ricotta until melted. Stir in chicken and remove from heat. (If mixture is too liquidy, you can simmer for a few minutes to thicken.)
- Add a spoonful of the Alfredo mixture to the bottom of your prepared baking dish and spread out evenly. Arrange a layer of noodles over the sauce.
- Top first layer of noodles with about a third of the Alfredo mixture, followed by a third of the mozzarella cheese. Repeat the layers until you’ve used up your ingredients, mozzarella should be your top layer.
- Cover dish with foil and bake 45 minutes. Uncover and broil to brown cheese, if desired, 2-3 minutes.
- Let rest 10 minutes before serving. Sprinkle with fresh parsley, if desired. Enjoy!
-
Homemade Cheesy Garlic Breadsticks
These cheesy garlic breadsticks are so easy to make and they taste SO GOOD! They take less than 20 minutes from start to finish and go really well with your favorite soups and salads. You can even serve them on their own with a little bowl of marinara sauce.
Ingredients:
- 1 (10 ounce) can prepared pizza crust
- 1 tablespoon butter, melted
- 1 cloves garlic, finely minced
- 1/2 cup mozzarella cheese, grated
- 1 tablespoon parmesan cheese
- 1 tablespoon dried basil
- salt & pepper to taste
How To Make Homemade Cheesy Garlic Breadsticks Recipe:
- Preheat oven to 425.
Mix butter and garlic in a small bowl and set aside.
Unroll pizza dough onto a parchment paper lined baking sheet and brush with butter and garlic mixture. - Sprinkle cheeses and spices evenly over the dough.
Use a pizza cutter and cut dough into stick shapes (Lengthwise into 7 long strips and crosswise into 3 strips). Do not separate strips. - Bake for 10-12 minutes or until light golden brown.
Recut along each strip and remove from cooking sheet.
Serve sticks warm with marinara sauce.
-
4 Ingredients Lemon Cream Cheese Dump Cake
4 Ingredients Lemon Cream Cheese Dump Cake – Imagine yourself on a hot summer afternoon, enjoying a piece of this wonderful cake. Vibrant yellow colors and an enticing lemon scent fill the air as you take your first bite.
As the moist cake crumbles and melts in your mouth, you are instantly transported to a sunny citrus grove. The refreshing lemon zest dances on your taste buds, perfectly balanced by the smoothness of cream cheese.
This simple yet captivating recipe is a testament to the joy of simple desserts that provide comfort and enjoyment.
Ingredients
- 1 (16 oz.) can lemon pie filling
- 1 (15 oz.) package yellow cake
- 4 oz. cream cheese, cubed
- 1/2 cup (1 stick) unsalted butter, thinly sliced
How To Make 4 Ingredients Lemon Cream Cheese Dump Cake
- Preheat oven to 350º F and lightly grease a square baking dish with butter or non-stick spray.
- Pour lemon pie filling into the bottom of greased baking dish, making sure to spread it into the corners.
- Top with 1/2 cake mix, place cubed cream cheese evenly on top, then sprinkle remaining cake mix.
- Take butter pats (as thinly sliced as possible) and place them in a single layer on top of the cake mix, trying to cover as much of the surface of the cake as possible.
- Place baking dish in oven and bake for 35-40 minutes, or until toothpick inserted in center comes out clean.
- Remove from oven and let cool 15-20 minutes before serving.
-
Chocolate-Coated Peanut and Cookie Balls: A Delightful No-Bake Treat
Table of Contents
Ingredients
For the Filling:
- 500g (17.6 oz) cookies, crushed
- 120g (4.2 oz) peanuts, crushed
- 120g (½ cup) sugar
- 60g (½ cup) cocoa powder
- 250ml (1 cup) milk
- 150g (⅔ cup) butter
- A pinch of vanillin (or a few drops of vanilla extract)
For the Glaze:
- 80g (2.8 oz) dark chocolate
- 80g (2.8 oz) milk chocolate
- 20ml (1 ½ tbsp) vegetable oil
- 50g (1.8 oz) peanuts, chopped
Step-by-Step Instructions
1. Prepare the Filling
- Crush the Cookies and Peanuts: Begin by crushing 500g of cookies into small pieces. You can do this using a food processor or by placing the cookies in a plastic bag and crushing them with a rolling pin. Once crushed, transfer them to a large mixing bowl. Then, crush 120g of peanuts until they are roughly chopped, and add them to the bowl with the cookies. Stir them together to ensure even distribution.
- Make the Chocolate Mixture: In a medium-sized saucepan, combine 250ml of milk, 120g of sugar, 60g of cocoa powder, and a pinch of vanillin or a few drops of vanilla extract. Place the saucepan over medium heat, stirring continuously until the sugar is completely dissolved.
- Add the Butter: Once the sugar has dissolved, add 150g of butter to the saucepan. Stir until the butter has melted and the mixture is smooth and well combined.
- Combine with Cookie-Peanut Mixture: Pour the warm chocolate mixture over the crushed cookies and peanuts in the mixing bowl. Stir thoroughly until all the dry ingredients are evenly coated with the chocolate mixture, and the consistency is thick and sticky enough to form into balls.
See also Zucchini Delight: A Family Favorite Recipe2. Shape the Balls
- Form the Balls: Using your hands, scoop out small portions of the mixture and roll them into balls, about the size of a walnut. Place each ball on a tray lined with parchment paper or a silicone mat.
- Chill the Balls: Once all the balls are shaped, place the tray in the refrigerator or freezer for about 30 minutes. This helps firm up the balls, making them easier to coat with the chocolate glaze.
3. Prepare the Chocolate Glaze
- Melt the Chocolate: In a heatproof bowl, combine 80g of dark chocolate and 80g of milk chocolate. Add 20ml of vegetable oil to the mixture, which will help the chocolate glaze remain smooth and shiny once set. Melt the chocolate and oil together using a double boiler or in the microwave in 20-30 second intervals, stirring in between until completely melted and smooth.
- Add the Peanuts: Stir in 50g of chopped peanuts into the melted chocolate. This adds extra texture and enhances the nutty flavor of the coating.
4. Coat the Balls
- Dip the Balls: Remove the chilled cookie-peanut balls from the fridge. Using a fork or a skewer, dip each ball into the melted chocolate glaze, making sure it is fully coated. Let any excess chocolate drip off before placing the ball back on the tray.
- Set the Coated Balls: Once all the balls are coated, place them back in the fridge for the chocolate glaze to harden. This should take about 20-30 minutes.
5. Serve and Enjoy
Once the chocolate coating has firmed up, your delicious chocolate-coated peanut and cookie balls are ready to be served! You can arrange them on a platter for a party, pack them in a gift box for a homemade present, or store them in an airtight container in the fridge for a delightful snack whenever you crave something sweet and crunchy.
Nutritional Information (Per Serving)
- Servings: Makes about 30 balls
- Calories: 150 kcal per ball
- Total Fat: 10g
- Saturated Fat: 5g
- Cholesterol: 15mg
- Sodium: 50mg
- Carbohydrates: 14g
- Sugars: 10g
- Protein: 3g
See also Lemon and Jam Cake RecipeTips for Success:
- Customizing the Nuts: Feel free to substitute peanuts with other nuts like almonds, hazelnuts, or walnuts for different flavor variations.
- Adding Texture: The crushed cookies add a nice texture to the filling. If you want a chunkier consistency, leave the cookie pieces slightly larger.
- Storing: These no-bake balls can be stored in the refrigerator for up to a week. If you want to store them longer, freeze them in an airtight container for up to a month.
-
Meatloaf with mortadella and pistachios: the delicious recipe to try
Table of Contents
Ingredients:
450 g minced meat
Salt to taste.
Pepper if necessary.
1 onion
1 egg
6 slices of bread
milk to taste
50g grated cheese
oil to taste
150 g Emmental cheese
150g mortadella
100 g pistachiosPreparation:
In a bowl, combine meat, chopped onions, grated cheese, salt, pepper, soaked bread and an egg.
Form a homogeneous dough. Then mix in the coarsely chopped pistachios.
Depending on the consistency of the dough, add some breadcrumbs.
Spread the meat mixture on the baking paper, then fill with the mortadella and the diced Emmental cheese.
Roll up into a meatloaf.
Cook in the oven at 180° for 45 minutes. -
Oat-Chocolate Mug Cake (Microwave or Oven)
Table of Contents
Ingredients (for 2 low cups)
- 40g (½ cup) oat flakes
- 120ml (½ cup) milk (dairy or plant-based)
- 1 egg
- Pinch of salt
- 1 banana, mashed
- 7g (1 tbsp) cocoa powder
- 4g (1 tsp) baking powder
Topping:
- 30g (about ⅓ cup) chocolate, melted (sugar-free or regular, depending on preference)
Step-by-Step Instructions
1. Prepare the Batter
- Mix the Ingredients: In a medium mixing bowl, combine 40g of oat flakes, 120ml of milk, 1 egg, a pinch of salt, 1 mashed banana, 7g of cocoa powder, and 4g of baking powder. Stir everything together until the mixture is well combined and smooth. The mashed banana will act as a natural sweetener and help keep the mug cake moist.
2. Microwave Method (5-6 minutes)
- Divide the Batter: Pour the batter equally into two microwave-safe low cups or mugs, ensuring each is only half-full to allow room for rising.
- Microwave: Microwave each cup separately on medium-high power for 5-6 minutes, or until the cake has risen and is firm to the touch. Keep an eye on the cakes as microwaves can vary in power, and cooking times may differ slightly.
3. Oven Method (30 minutes)
- Preheat the Oven: If you prefer baking in the oven, preheat it to 180°C (350°F).
- Bake: Pour the batter into two oven-safe cups or ramekins. Place them in the preheated oven and bake for about 30 minutes, or until the cakes are firm and a toothpick inserted into the center comes out clean.
See also The Sweet Sensation: No-Oven Dessert Delight!4. Prepare the Topping
- Melt the Chocolate: While the mug cakes are cooking, melt 30g of chocolate either in the microwave in 20-30 second intervals, stirring in between, or on the stovetop using a double boiler. The melted chocolate will be used to drizzle over the finished cakes.
5. Glaze and Serve
- Pour the Chocolate: Once the mug cakes are done, pour the melted chocolate over the top of each cake. Let it set for a few minutes to cool slightly, or enjoy it warm for an extra gooey experience.
- Serve: Serve the oat-chocolate mug cakes immediately while warm, and enjoy the soft, rich flavors with the luscious chocolate topping.
Nutritional Information (Per Mug Cake)
- Servings: 2 cakes
- Calories: 250 kcal
- Total Fat: 10g
- Saturated Fat: 4g
- Carbohydrates: 33g
- Sugars: 10g (from banana and chocolate)
- Protein: 7g
- Fiber: 5g
Tips for Success:
- Customizable Toppings: Add a spoonful of peanut butter, crushed nuts, or fresh berries on top of the melted chocolate for extra flavor and texture.
- Sweetness Control: If you prefer a sweeter cake, you can add a teaspoon of honey or maple syrup to the batter.
- Plant-Based Option: To make this recipe vegan, use a plant-based milk and a flax egg (1 tbsp ground flaxseed + 3 tbsp water) instead of the egg.
-
The Softest 5-Minute Cake in the World
Discover the magic of this incredibly delicious and quick cake!
Ingredients:
- 3 medium eggs
- Pinch of salt
- 8g vanilla sugar or vanillin
- 150g of sugar
- Zest of a lemon
- 120ml sunflower seed oil
- 150ml of milk
- 250g of 00 flour
- 16g of sweet yeast
Decorations:
Apricot jam
Grated coconutInstructions:
- In a bowl, beat eggs with a pinch of salt, vanilla sugar, and sugar until creamy.
- Add lemon zest, sunflower seed oil, and milk. Mix well.
- Gradually add flour and sweet yeast. Mix until smooth.
- Pour the batter into a 27×28 cm mould.
- Microwave on high for 5 minutes (microwave power may vary, so adjust accordingly). Check with a toothpick – it should come out clean.
- Let the cake cool.
- Spread apricot jam on top and sprinkle with grated coconut.
- Enjoy the softest, most delicious cake ever in just 5 minutes!
See also Everyday Delight Cookies Good and Easy Cookies - 3 medium eggs
-
The most amazing cake delicious recipe
Ingredients
For dough:
- 4 eggs
- 150g (3/4 cup) sugar
- A pinch of salt
- 120g (3/4 cup) flour
- 30g (3 tbsp) cocoa powder
- 30g (3 tbsp) cornstarch
- 1 teaspoon Baking powder
- Baking tin 28x18cm
- Bake in a preheated oven at 180℃ (356℉) for 30 minutes
Instructions:
- Whisk eggs, sugar, and a pinch of salt until fluffy.
- In a separate bowl, sift flour, cocoa powder, cornstarch, and baking powder.
- Gently fold dry mixture into the egg mixture.
- Pour into a 28x18cm baking tin.
- Bake in a preheated oven at 180℃ (356℉) for 30 minutes.
Enjoy your delicious cake!
-
Fluffy and Delicious Recipe with Only 1 Egg, Flour, and Milk
Table of Contents
Are you ready to embark on a culinary adventure with just a handful of ingredients? Let’s explore how you can transform simple flour, an egg, and milk into a delectable treat that will tantalize your taste buds. Get ready to indulge in fluffy, mouthwatering pastries that are sure to impress!
Ingredients
To create these delightful pastries, gather the following ingredients:
- 2 3/4 cups (350 g) of flour
- 1 egg
- 2 tablespoons of sugar
- 2 tablespoons of oil
- 6 tablespoons (90 ml) of freshly squeezed orange juice (for light pastries)
- 1/2 cup (120 ml) of warm milk
- A pinch of salt
- 2 1/2 teaspoons (8 g) of dry yeast
- 1 tablespoon of melted butter
- Powdered sugar (for sprinkling light pastries)
- A little oil
Procedure
Kneading the Dough
- Activate the Yeast: In a deep bowl, combine 2 tablespoons of sugar and 8 g of dry yeast. Stir in 120 ml of warm milk and allow the yeast to activate.
- Incorporate Wet Ingredients: Mix in a room temperature egg, 2 tablespoons of oil, and freshly squeezed orange juice.
- Add Flour: Gradually add flour mixed with a pinch of salt until you achieve a fine, soft dough.
Shaping the Pastries
- Preparing the Dough: Press the dough into a bowl and make a well in the middle. Pour in melted butter and combine until absorbed.
- Let it Rise: Cover the dough and let it rise for about 30 minutes until doubled in size.
- Divide and Shape: Divide the dough into portions, shape them into balls, and let them rest.
- Create Flower Shapes: Roll out each ball into a thin roll, then shape them into flowers.
See also Quick Honey Almond DessertBaking or Frying?
- Frying the Pastries: Heat oil in a pan and fry until golden for a quicker preparation.
- Baking the Pastries: Alternatively, bake the pastries at 180 degrees until golden and soft.
Final Touch
After preparation, sprinkle the pastries with powdered sugar for an added touch of sweetness.
Conclusion
With just a few simple ingredients and easy steps, you can create fluffy and delicious pastries that will impress your friends and family. Whether you choose to fry or bake them, these treats are sure to satisfy your cravings and leave you wanting more. So, roll up your sleeves and get ready to indulge in homemade goodness!
-
lemon dessert (aka lemon lush) -Don’t Lose This
INGREDIENTS
1 1/4 cup flour
3/4 cup butter
1/4 cup pecans + extra for top
8 oz cream cheese, softened
16 oz cool whip
1 cup powdered sugar
4 small (3.4 oz) boxes lemon instant pudding
5 cups milk
INSTRUCTIONS
FIRST LAYER
Preheat oven to 350° F.
Cut butter into flour. Mix well and add pecans. Pat into the bottom of a 9×13 pan and bake for 20 minutes or until golden brown. Let cool completely.
SECOND LAYER
Whip together softened cream cheese and powdered sugar. Fold in half of the cool whip (about 8 oz.). Spread over crust.
THIRD LAYER
Combine lemon pudding and milk. Beat until thick. Spread over cream cheese layer.
FOURTH LAYER
Spoon and swirl the remaining cool whip on top. Sprinkle with pecans.
Refrigerate until ready to serve. -
Recipe for fluffy Japanese pancakes
Because of its lightness and fluffiness, fluffy Japanese pancakes have become very famous all over. Mostly, this pancake is an egg-based recipe. A few pointers help to explain souffle pancake fluffiness. One cooks at low heat steadily and slowly. Moreover, covering the pan helps to retain moisture within. Another advice is on correctly beating the egg whites. Neither over nor underbeat the egg whites. Although some go through trial and error trying to get the pancake flawless, it is all well worth it.
Parts:
Two egg yolks, one tablespoons milk, one half teaspoon vanilla essence, one half teaspoon baking powder
One half cup cake flour; three egg whites; one fourth tsp cream of tartar; two tablespoons granulated sugar; vegetable oilDirections:
In a mixing dish add two egg yolks, one tablespoon milk, and one half teaspoon vanilla essence.
Whisk until mixture thickens.
Into the basin sift baking powder and cake flour.
Whisk the ingredients until well blended.
Sort aside.Add one fourth teaspoon cream of tartar and three egg whites.
Whisk steadily until it becomes light white.
Add the grained sugar gradually while still whirling the mixture.
Whisk until stiff peaks form.
Add gradually to the egg yolk mixture from past.
Turn some of the egg white mixture to the egg yolk mixture.
Mix gently until completely blended.
Slide mixture into a piping bag.Over low heat, preheat pan for two to three minutes.
grease using vegetable oil.
On the pan, pipe three inches tall and three inches wide from the mixture three times.
Cook the pan covered for six to seven minutes.
Six to seven minutes later, gently raise the pancake to see if the bottom got golden brown. Then very softly turn on the opposite side.
Once again cover the pan and simmer for 4 to 5 minutes.
Look on the opposite side; have they become golden brown?
Present on a platter.
Display and savor!Suggestions and advice:
Present among recently cut fruits such blueberries, kiwis, and strawberries.
Drizzle with maple or honey syrup; sprinkle with powdered sugar.
-
CINNAMON SUGAR DONUT SWEET BREAD
The cinnamon sugar donut sweet bread is a recipe that is so easy to make and will be a hit with people of all ages.
Ingredients
Bread Ingredients:
- 1/4 C canola oil
- 1/4 C unsalted butter (softened)
- 1 C sugar
- 2 large eggs (room temp)
- 1 tsp vanilla
- 1 1/2 C flour
- 1 tsp baking powder
- 1/2 tsp salt
- 1/2 C buttermilk *
- 1/2 tsp cinnamon
- 1/2 tsp molasses
Coating Ingredients:
- 1/2 C unsalted butter (melted)
- 1/4 C sugar
- 1/4 C brown sugar (packed)
- 1/2 tsp cinnamon
- * I use 1/2 C whole milk mixed with 1/2 tsp white vinegar as a substitute for buttermilk.
Instructions
- Preheat oven to 350 degrees.
- Mix oil, butter, and sugar in a bowl until combined.
- Stir in eggs and vanilla until the mixture is smooth.
- Gently begin adding the dry ingredients and the buttermilk*,bstirring until the batter has formed.
- Scrape sides of the bowl so those ingredients can also be included in the batter.
- Make sure that there are no lumps.
- Remove 1/2 cup of the batter. Add it to a smaller bowl. Set aside. Now add the cinnamon and molasses. Stir to mix well.
- Prepped the loaf pan by spraying it with a baking spray.
- Begin by scooping in half of the bread batter into the loaf pan. Smooth this out in the bottom of the pan.
- Spoon half of the cinnamon/molasses batter on top of the bread batter.
- Scoop the remaining bread batter on top of the cinnamon/molasses batter carefully.
- Spoon the remaining cinnamon/molasses batter on top of the bread batter.
- Using a butter knife or a toothpick swirl the batters together.
- Bake at 350 degrees for 45-50 minutes.
- Remove from oven and allow to cool for 10 minutes while still in the loaf.
- Gently loosen the edges and the sides of the loaf from the pan.
- Using your hands carefully remove the loaf from the pan.
- Prepare the coating for the loaf while it is cooling.
- Pour the melted butter in a large shallow dish. Add both sugars and cinnamon stirring to mix well.
- Dip each side of the loaf into the melted butter until coated.
- Spoon the melted butter on the edges.
- Carefully take the bread out of the melted butter and place each side into the sugar cinnamon mix ensuring that the side is well coated. Sprinkle the sugar-cinnamon mixture on top of the bread.
-
The Perfect Baked Potato Recipe: A Step-by-Step Guide
There’s something incredibly satisfying about a perfectly baked potato. With its crispy skin and fluffy, tender interior, a baked potato can serve as a versatile side dish or even a hearty main course. Achieving that ideal texture and flavor isn’t difficult, but it does require some attention to detail.
The Perfect Baked Potato is more than just a side dish; it’s a blank canvas for culinary creativity. Whether you prefer them simple with a pat of butter or loaded with all the fixings, this recipe guarantees a delicious result every time. So, the next time you crave comfort food, remember that perfection is just a baked potato away.
Here’s how to make the perfect baked potato that will impress your family and friends every time.
INGREDIENTS:
- 4 large russet potatoes
- 2 tablespoons olive oil
- Kosher salt
- Freshly ground black pepper
- Optional toppings: butter, sour cream, chives, bacon bits, shredded cheese, etc.
INSTRUCTIONS:
- Choose the Right Potatoes:
- Start with large, high-starch potatoes like russets. They have the right texture to turn fluffy inside while maintaining a crispy skin.
- Preheat the Oven:
- Preheat your oven to 425°F (220°C). A hot oven is essential for achieving that perfect crispy skin.
- Clean and Prepare the Potatoes:
- Rinse the potatoes thoroughly under cold water to remove any dirt. Use a brush if needed to scrub the skins. Pat the potatoes dry with a clean towel.
- Poke Holes in the Potatoes:
- Using a fork, poke several holes all over each potato. This allows steam to escape during baking and prevents the potatoes from bursting.
- Coat with Olive Oil:
- Rub each potato with a bit of olive oil. This helps the skin become crispy and flavorful. Make sure each potato is evenly coated.
- Season Generously:
- Sprinkle the potatoes generously with kosher salt and freshly ground black pepper. This simple seasoning enhances the natural flavor of the potatoes.
- Bake the Potatoes:
- Place the potatoes directly on the middle oven rack. For easier cleanup, you can place a baking sheet on the rack below to catch any drips. Bake for about 45-60 minutes, depending on the size of the potatoes. They are done when the skins are crispy and a fork or skewer can be easily inserted into the center.
- Test for Doneness:
- To ensure your potatoes are perfectly cooked, give them a gentle squeeze with an oven mitt or kitchen towel. They should feel soft and tender inside.
- Serve Hot with Toppings:
- Once baked, remove the potatoes from the oven and let them cool slightly. Cut a slit down the middle of each potato and fluff the insides with a fork. Serve with your favorite toppings such as butter, sour cream, chives, bacon bits, and shredded cheese.
Tips and Variations:
- For Extra Crispy Skin: After baking, turn off the oven and let the potatoes sit inside for an additional 10-15 minutes. This helps the skin become even crispier.
- Microwave Shortcut: If you’re short on time, you can start the potatoes in the microwave. Cook them on high for 5-6 minutes, then transfer to the oven to finish baking and crisp up the skin.
- Herb Infusion: Add an extra layer of flavor by rubbing the potatoes with a mix of olive oil and your favorite herbs such as rosemary, thyme, or garlic powder.
- Loaded Baked Potatoes: Transform your baked potatoes into a meal by adding hearty toppings like chili, pulled pork, or sautéed vegetables.
Why This Recipe Works:
- High Heat: Baking at 425°F ensures the skin becomes wonderfully crispy while the inside remains fluffy.
- Oil and Seasoning: Olive oil helps achieve the perfect texture and flavor, while salt and pepper enhance the natural taste of the potatoes.
- Direct Baking: Placing the potatoes directly on the oven rack allows for even heat distribution, ensuring they bake evenly all around.
Enjoy!!
-
Homemade Cheese in Just 5 Minutes
Table of Contents
Why buy cheese when you can make it at home in no time? Here’s how:
Ingredients:
- Empty plastic bottle
- 2 liters of milk
- Salt
- 50 milliliters of white vinegar
- 100 grams of butter
- 200 grams of mozzarella cheese
To Serve:
- Bread
- Tomato
- Balsamic sauce
Instructions:
- Pour 2 liters of milk into a large pot and heat it until it’s almost boiling.
- Add a pinch of salt and 50 milliliters of white vinegar to the milk. Stir gently.
- Turn off the heat and let the mixture sit for about 5 minutes. It should curdle during this time.
- Place a cheesecloth or clean kitchen towel over the top of a plastic bottle and secure it with a rubber band.
- Carefully pour the curdled milk into the bottle, allowing the whey to drain out. This can take a few minutes.
- Once most of the whey has drained, remove the cheese from the bottle. It should be firm and ready to use.
- In a separate pan, melt 100 grams of butter and add 200 grams of mozzarella cheese. Stir until the cheese is melted and well combined.
- Serve your homemade cheese with bread, sliced tomatoes, and a drizzle of balsamic sauce.
Enjoy your quick and delicious homemade cheese!