Category: Recipes

  • Quick and Delicious Air Fryer Chicken Nuggets Recipe

    Quick and Delicious Air Fryer Chicken Nuggets Recipe

    Unlock the secret to making irresistibly crispy chicken nuggets in the comfort of your own kitchen with this Air Fryer Chicken Nuggets recipe. This dish offers a healthier alternative to the traditional deep-fried nuggets, without sacrificing any of the crunch or flavor that makes them a universally loved treat. Perfect for families, these nuggets are made with simple, wholesome ingredients, ensuring that you’re serving up a meal that’s not only delicious but also nutritious. Whether you’re catering to picky eaters, looking for a quick and satisfying snack, or adding a protein-packed option to your meal, these air fryer chicken nuggets are sure to delight everyone at the table.

    Why You’ll Love Air Fryer Chicken Nuggets:

    • Healthier Option: Enjoy the deep-fried taste without the excess oil, thanks to the air fryer’s magic.
    • Kid-Friendly: A surefire hit with children, making mealtime a breeze.
    • Quick and Convenient: Ready in under 30 minutes, perfect for busy schedules.
    • Versatile: Easily adaptable with different seasonings or dipping sauces to suit any palate.

    Ingredients Notes For Air Fryer Chicken Nuggets:

    • Chicken Breast: Lean and high in protein, chicken breast is cut into bite-sized pieces for the perfect nugget.
    • Breadcrumbs: Panko breadcrumbs ensure a lighter, crunchier coating, but traditional breadcrumbs can also be used.
    • Parmesan Cheese: Adds a savory depth of flavor to the breadcrumb mixture.
    • Eggs: Help the breadcrumb mixture adhere to the chicken, ensuring a crispy exterior.
    • Seasonings: A blend of garlic powder, paprika, salt, and pepper enhances the flavor, making each bite a delight.

    Recipe Steps:

    1. Prep the Chicken: Cut chicken breast into nugget-sized pieces, aiming for even sizes for consistent cooking.
    2. Season: Lightly season the chicken pieces with salt and pepper.
    3. Dredge: Set up a dredging station with beaten eggs in one bowl and a mixture of breadcrumbs, grated Parmesan, garlic powder, and paprika in another. Dip each chicken piece in the egg, then coat in the breadcrumb mixture.
    4. Air Fry: Preheat the air fryer to 400°F (200°C). Place the nuggets in a single layer in the air fryer basket, ensuring they don’t touch. Cook for about 8-10 minutes, flipping halfway through, until golden and cooked through.
    5. Serve: Enjoy hot with your favorite dipping sauces.

    Storage Options:

    • Refrigerate: Store leftovers in an airtight container for up to 3 days. Reheat in the air fryer for best results.
    • Freeze: Freeze cooked and cooled nuggets on a baking sheet, then transfer to a freezer bag. Reheat from frozen in the air fryer
    • INGREDIENTS

      • 1 lb (450g) boneless, skinless chicken breasts, cut into bite-sized pieces
      • 1 cup buttermilk (optional, for marinating)
      • 1 cup all-purpose flour
      • 1 teaspoon paprika
      • 1 teaspoon garlic powder
      • 1/2 teaspoon salt
      • 1/2 teaspoon black pepper
      • 2 eggs, beaten
      • 2 cups breadcrumbs (panko or regular)
      • Cooking spray (olive oil or canola oil)

      INSTRUCTIONS

      1. Marinate the Chicken (Optional):
        • If time allows, soak the chicken pieces in buttermilk for at least 30 minutes (or up to overnight in the refrigerator). This step helps tenderize the chicken and adds flavor.
      2. Prepare the Coating:
        • In a shallow dish, mix together the flour, paprika, garlic powder, salt, and pepper.
        • Place the beaten eggs in a second shallow dish.
        • Place the breadcrumbs in a third shallow dish.
      3. Coat the Chicken:
        • If you marinated the chicken, drain off the excess buttermilk. Dredge each chicken piece in the flour mixture, shaking off any excess. Then, dip it into the beaten eggs, and finally, coat it well with the breadcrumbs.
      4. Preheat the Air Fryer:
        • Preheat the air fryer to 400°F (200°C) for about 3 minutes.
      5. Arrange the Chicken in the Air Fryer:
        • Spray the air fryer basket with cooking spray. Arrange the breaded chicken pieces in a single layer in the basket, making sure they are not touching. You may need to work in batches depending on the size of your air fryer. Lightly spray the top of the chicken with cooking spray.
      6. Cook:
        • Air fry the chicken nuggets for 8-10 minutes, flipping them halfway through the cooking time, until they are golden brown and the internal temperature reaches 165°F (74°C).
      7. Serve:
        • Serve the chicken nuggets hot with your favorite dipping sauces, such as ketchup, barbecue sauce, honey mustard, or ranch dressing.
  • Quick and Simple Broccoli Chicken Divan At Home

    Quick and Simple Broccoli Chicken Divan At Home

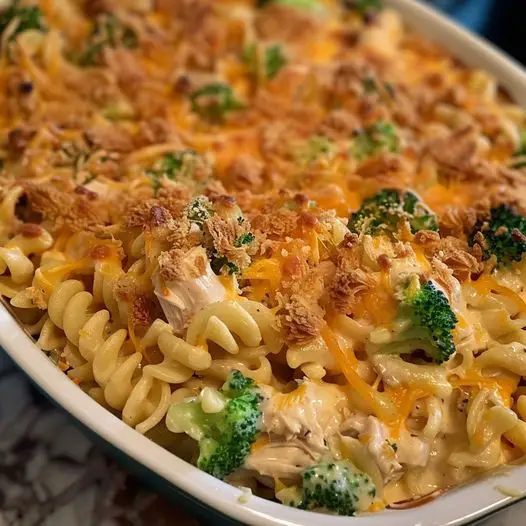
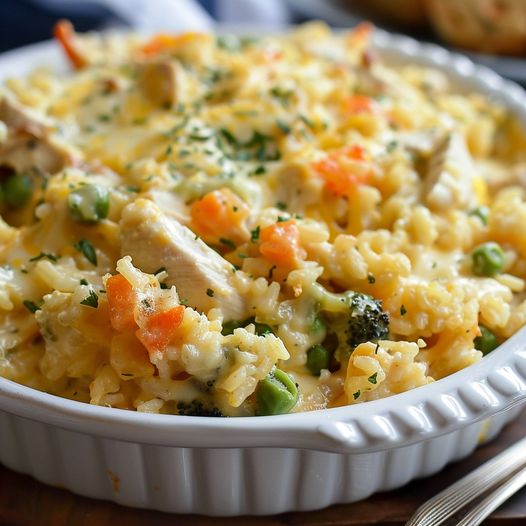
    Classic Elegance: Broccoli Chicken Divan is a cherished dish that blends the wholesome goodness of broccoli with tender chicken, all draped in a creamy, cheesy sauce and baked to golden perfection. This casserole is a quintessential comfort food, perfect for family dinners, potlucks, or any occasion that calls for a hearty and satisfying meal. It’s a traditional recipe that has stood the test of time, offering both nutrition and great taste in every bite.

    Why You’ll Love Broccoli Chicken Divan:

    • Nutritious and Delicious: Combines protein-rich chicken and nutrient-packed broccoli in a tasty way.
    • Comfort Food Classic: Known for its creamy texture and comforting flavors.
    • Versatile: Easy to adapt with various ingredients according to your taste preferences or dietary needs.
    • Simple Preparation: Requires minimal prep time and can be assembled ahead of time, making it convenient for busy schedules.

    Ingredients Notes For Broccoli Chicken Divan:

    • Chicken: Cooked and diced or shredded, chicken breasts are commonly used, but leftover or rotisserie chicken works well too.
    • Broccoli: Fresh broccoli florets, blanched or steamed until just tender, add color, texture, and essential nutrients.
    • Cream of Mushroom or Chicken Soup: Acts as a base for the sauce, providing richness and depth. You can also use a homemade white sauce for a less processed alternative.
    • Cheese: Shredded cheddar or a mix of cheddar and Parmesan gives the dish its cheesy goodness.
    • Breadcrumbs or Ritz Crackers: Sprinkled on top for a crunchy finish.
    • Mayonnaise and Mustard: Enhance the sauce with their tangy and creamy qualities.
    • Lemon Juice: Adds a hint of brightness to balance the rich flavors.

    Recipe Steps:

    1. Prep the Ingredients: Preheat your oven to 350°F (175°C). Arrange the blanched broccoli florets in a baking dish and layer the cooked chicken on top.
    2. Make the Sauce: In a bowl, mix the cream soup, mayonnaise, lemon juice, and mustard until smooth. Stir in half the cheese.
    3. Assemble the Dish: Spread the sauce mixture evenly over the chicken and broccoli. Sprinkle the remaining cheese on top, followed by breadcrumbs or crushed crackers for added crunch.
    4. Bake: Place the dish in the oven and bake for 25-30 minutes, or until the sauce is bubbly and the top is golden brown.
    5. Serve: Let it cool slightly before serving to allow the sauce to set a bit, making it easier to serve.

    Storage Options:

    • Refrigerate: Store leftovers in an airtight container in the fridge for up to 3 days.
    • Freeze: Freeze portions in suitable containers for up to 2 months. Thaw in the fridge overnight and reheat in the oven or microwave.

    INGREDIENTS

    • 2 cups cooked chicken, shredded or chopped
    • 4 cups broccoli florets, steamed until just tender
    • 2 tablespoons butter
    • 2 tablespoons all-purpose flour
    • 1 cup chicken broth
    • 1 cup milk
    • 1/2 cup sour cream
    • 1 teaspoon Dijon mustard
    • 1 cup shredded cheddar cheese
    • Salt and pepper, to taste
    • 1/2 cup breadcrumbs
    • 2 tablespoons melted butter (for the topping)
    • 1/4 cup grated Parmesan cheese (optional for topping)

    INSTRUCTIONS

    1. Preheat Oven and Prepare Ingredients:
      • Preheat your oven to 350°F (175°C).
      • Grease a 9×13 inch baking dish or similar size casserole dish.
    2. Layer Broccoli and Chicken:
      • Arrange the steamed broccoli evenly at the bottom of the prepared baking dish.
      • Layer the cooked chicken over the broccoli.
    3. Make the Sauce:
      • In a saucepan, melt 2 tablespoons of butter over medium heat.
      • Stir in the flour and cook for about 1 minute, until bubbly.
      • Gradually whisk in the chicken broth and milk, and bring the mixture to a boil. Cook, stirring, until the sauce thickens.
      • Remove from heat and stir in the sour cream, Dijon mustard, and half of the cheddar cheese. Season with salt and pepper to taste.
    4. Combine and Bake:
      • Pour the sauce evenly over the chicken and broccoli in the dish.
      • Sprinkle the remaining cheddar cheese over the sauce.
      • In a small bowl, mix the breadcrumbs with melted butter and Parmesan cheese, if using. Sprinkle this mixture over the cheese.
      • Bake in the preheated oven for 25-30 minutes, or until the topping is golden brown and the sauce is bubbly.
    5. Serve:
      • Let the casserole cool for a few minutes before serving to set the sauce a bit.
      • Serve warm, ideally with a side of rice or crusty bread to complete the meal.
  • Dive into Deliciousness: Mastering the Art of Shrimp Fried Rice

    Dive into Deliciousness: Mastering the Art of Shrimp Fried Rice

    Shrimp fried rice—a symphony of flavors, textures, and aromas that captivates the senses with each mouthwatering bite. This beloved dish is a testament to the culinary prowess of Asian cuisine, offering a tantalizing combination of tender shrimp, fluffy rice, crisp vegetables, and savory seasonings. Join us on a culinary journey as we unravel the secrets of creating the perfect shrimp fried rice and elevate your home cooking to new heights.

    Shrimp fried rice holds a special place in the hearts of food enthusiasts around the world, cherished for its versatility, simplicity, and irresistible taste. Whether enjoyed as a satisfying meal on its own or served as a side dish alongside other Asian-inspired favorites, this classic recipe never fails to delight both the palate and the soul.

    Shrimp fried rice is a culinary masterpiece that embodies the essence of Asian cuisine—bold flavors, vibrant colors, and exquisite textures all coming together in perfect harmony. With this foolproof recipe and a few simple techniques, you can recreate the magic of this beloved dish in the comfort of your own kitchen. So why wait? Grab your ingredients, fire up the stove, and embark on a flavorful journey that is sure to delight your taste buds and impress your guests. Happy cooking!!

    INGREDIENTS:

    • 2 cups cooked jasmine rice, chilled (day-old rice works best)
    • 8 ounces shrimp, peeled and deveined
    • 2 tablespoons soy sauce
    • 1 tablespoon oyster sauce
    • 1 tablespoon sesame oil
    • 2 eggs, lightly beaten
    • 2 cloves garlic, minced
    • 1 small onion, finely diced
    • 1 cup mixed vegetables (such as peas, carrots, and bell peppers)
    • 2 green onions, thinly sliced
    • Salt and pepper to taste
    • Cooking oil (such as vegetable or peanut oil)
    INSTRUCTIONS:
    1. Prepare the Ingredients: Ensure all ingredients are prepped and ready to go before starting the cooking process. Cook the jasmine rice ahead of time and allow it to chill in the refrigerator to prevent it from becoming mushy when fried.
    2. Marinate the Shrimp: In a small bowl, combine the shrimp with 1 tablespoon of soy sauce and a pinch of black pepper. Let the shrimp marinate for 10-15 minutes to allow the flavors to meld.
    3. Heat the Pan: Heat a large skillet or wok over medium-high heat and add a tablespoon of cooking oil. Once the oil is hot, add the beaten eggs and scramble them until just set. Remove the scrambled eggs from the pan and set aside.
    4. Cook the Shrimp: In the same pan, add another tablespoon of oil if needed, then add the marinated shrimp in a single layer. Cook for 1-2 minutes on each side until pink and opaque. Remove the shrimp from the pan and set aside.
    5. Sauté Aromatics and Vegetables: In the same pan, add a bit more oil if needed, then add the minced garlic and diced onion. Sauté for 2-3 minutes until fragrant and translucent. Add the mixed vegetables and cook for an additional 3-4 minutes until tender-crisp.
    6. Add Rice and Sauce: Increase the heat to high and add the chilled cooked rice to the pan. Use a spatula to break up any clumps and spread the rice evenly in the pan. Drizzle the remaining soy sauce and oyster sauce over the rice, then add the sesame oil for added flavor.
    7. Stir-Fry Everything Together: Stir-fry the rice and vegetables together, ensuring that the sauce is evenly distributed. Cook for 2-3 minutes until the rice is heated through and starting to crisp up slightly.
    8. Incorporate Shrimp and Eggs: Add the cooked shrimp and scrambled eggs back to the pan, stirring to combine with the rice and vegetables. Cook for an additional 1-2 minutes until everything is heated through and well combined.
    9. Season and Serve: Taste the shrimp fried rice and adjust the seasoning with salt and pepper as needed. Garnish with sliced green onions for a pop of color and freshness.
    10. Enjoy Your Culinary Masterpiece: Serve the shrimp fried rice hot as a delicious main course or side dish, alongside your favorite Asian-inspired accompaniments such as stir-fried vegetables, spring rolls, or dumplings.

    Tips for Success:

    • Use day-old rice for the best texture and flavor, as freshly cooked rice can be too moist and sticky for frying.
    • Customize the recipe by adding additional ingredients such as diced ham, chopped pineapple, or sliced mushrooms for extra flavor and variety.
    • Don’t overcrowd the pan when cooking the shrimp or vegetables to ensure even cooking and optimal flavor development.
  • Easy Cabbage Soup

    Easy Cabbage Soup

    Embracing Comfort with a Classic: Easy Cabbage Soup

    In the heart of homestyle cooking lies a timeless classic – the Easy Cabbage Soup. This dish, steeped in simplicity, is more than just a recipe; it’s a warm embrace on a cool, rainy day, a nostalgic journey to the comforting meals of yesteryears. Each spoonful of this soup is like a heartfelt conversation around the family table, filled with stories and laughter. The Easy Cabbage Soup, with its humble ingredients and straightforward preparation, is a testament to the beauty of minimalism in cooking. It reminds us that sometimes, the simplest recipes are the ones that resonate the most deeply with our souls.

    A Symphony of Rustic Flavors

    At the core of this soup lies the unassuming cabbage – a vegetable often overlooked, yet capable of transforming into something truly extraordinary with just the right companions. Joined by the mellow sweetness of onions, the robust tang of stewed tomatoes, and the rich, savory undertones of ground beef, this soup is a symphony of rustic flavors. Each ingredient, while simple, plays an integral role in crafting the overall experience. The optional addition of spices like thyme, bay leaf, and smoked paprika elevates the dish, introducing a subtle complexity that dances on the palate. The Easy Cabbage Soup is not just food; it’s a celebration of flavors, textures, and aromas, coming together in perfect harmony.

    A Recipe for All Seasons

    While particularly delightful on a rainy day, the Easy Cabbage Soup transcends seasons, offering comfort and satisfaction year-round. It’s a versatile dish that welcomes variations and personal touches, making it a perfect canvas for culinary creativity. Whether you’re a seasoned chef or a beginner in the kitchen, this recipe promises a delightful experience both in its making and its tasting. It’s a reminder of the joy and warmth that cooking can bring into our lives, a dish that nourishes both the body and the soul. So, gather your ingredients, and let’s embark on this culinary adventure, creating a pot of Easy Cabbage Soup that’s sure to become a cherished recipe in your collection.

    Ingredients:

    1. 1 large cabbage, roughly chopped
    2. 2 small onions, finely diced
    3. 2 cans of stewed tomatoes
    4. 1 pouch of Lipton Onion Soup Mix (your preferred flavor)
    5. 1 large stalk of celery, finely chopped
    6. 1-2 pounds of ground beef
    7. Optional spices: bay leaf, thyme, black pepper, and a pinch of smoked paprika for a subtle smoky note

    Instructions:

    1. Prepare the Vegetables: In a large saucepan, fill halfway with water and bring to a boil. Add the chopped cabbage, diced onions, and chopped celery. Bring the mixture back to a gentle simmer.
    2. Cook the Beef: In a separate pan, cook the ground beef over medium heat until browned. Be sure to drain any excess fat for a lighter soup.
    3. Combine and Simmer: Add the stewed tomatoes, Lipton Onion Soup Mix, and your choice of optional spices to the saucepan with the vegetables. Stir in the cooked ground beef.
    4. Let the Flavors Meld: Allow the soup to simmer for about 20-30 minutes. This slow simmering helps the flavors to blend beautifully. Taste and adjust the seasoning as desired.
    5. Serve Warm: Ladle the soup into bowls. It’s wonderful on its own or with a slice of crusty bread for dipping.
  • Easy Steps to Make Philly Cheesesteak Casserole At Home

    Easy Steps to Make Philly Cheesesteak Casserole At Home

    Dive into the hearty flavors of “Urban Comfort: Philly Cheesesteak Casserole,” a creative spin on the classic Philadelphia cheesesteak sandwich. This casserole combines tender slices of beef, sautéed onions and peppers, and gooey melted cheese, all layered with soft, oven-baked bread. It’s a dish that encapsulates the essence of the beloved street food in a form that’s perfect for family dinners, game day gatherings, or any occasion that calls for a filling, comforting meal.

    Why You’ll Love Philly Cheesesteak Casserole:

    • Hearty and Filling: Packed with protein and savory vegetables, it’s a satisfying meal that will fill you up and warm you up.
    • Easy to Serve: Casserole form makes it simple to serve and share, ideal for potlucks or family-style dining.
    • All the Flavors of a Cheesesteak: Enjoy the iconic taste of a Philly cheesesteak without the need for a bun.
    • Customizable: Easily adaptable to include your favorite cheesesteak additions like mushrooms or different types of cheese.

    Ingredients Notes For Philly Cheesesteak Casserole:

    • Thinly Sliced Beef: Sirloin or ribeye works best for tenderness and flavor.
    • Bell Peppers and Onions: Sliced and sautéed until they are just soft, adding sweetness and depth.
    • Provolone Cheese: Offers a mild, creamy flavor that melts well over the beef and veggies.
    • Hoagie Rolls: Chopped into cubes and used as a base to absorb all the delicious juices and flavors.
    • Seasonings: Garlic powder, salt, and pepper enhance the natural flavors of the meat and vegetables.

    Recipe Steps:

    1. Preheat Oven and Prepare Ingredients: Set your oven to 350°F (175°C). Lightly grease a casserole dish.
    2. Cook the Beef: In a skillet, cook the sliced beef over medium-high heat until browned. Remove and set aside.
    3. Sauté Vegetables: In the same skillet, add a bit more oil and sauté the onions and bell peppers until tender.
    4. Prepare Bread Base: Cut hoagie rolls into cubes and lay them in the bottom of the casserole dish, creating a bed for the toppings.
    5. Layer the Casserole: Spread the cooked beef over the bread cubes, then layer the sautéed onions and peppers. Top with slices or shredded Provolone cheese.
    6. Bake: Cover with foil and bake in the preheated oven for about 20 minutes, then uncover and bake for an additional 10 minutes or until the cheese is bubbly and golden.
    7. Serve: Allow to cool slightly before serving to let the layers set up for easy slicing.

    Storage Options:

    • Refrigerate: Keep leftovers in an airtight container in the fridge for up to 3 days.
    • Reheat: Best reheated in the oven to maintain the textures, though a microwave will work in a pinch.

    INGREDIENTS

    • 1 pound ribeye steak, thinly sliced
    • 2 tablespoons olive oil
    • 1 large onion, sliced
    • 1 green bell pepper, sliced
    • 1 red bell pepper, sliced
    • 2 cloves garlic, minced
    • Salt and pepper, to taste
    • 1 teaspoon Worcestershire sauce
    • 6 ounces provolone cheese, sliced or shredded
    • 4 large eggs
    • 1 cup milk
    • 1/2 cup heavy cream
    • 1/2 teaspoon paprika
    • Optional: sliced mushrooms, sautéed

    INSTRUCTIONS

    1. Preheat the Oven and Prepare the Ingredients:
      • Preheat your oven to 350°F (175°C).
      • If the steak isn’t already thinly sliced, place it in the freezer for about 30 minutes to firm up, which makes slicing easier. Slice the steak into thin strips.
    2. Cook the Steak and Vegetables:
      • Heat olive oil in a large skillet over medium-high heat. Add the sliced steak and cook until browned, about 3-4 minutes. Remove the steak from the skillet and set aside.
      • In the same skillet, add the onions, bell peppers, and garlic. Season with salt and pepper. Cook until the vegetables are softened, about 5-7 minutes. Add the Worcestershire sauce and stir to combine.
    3. Combine Steak and Vegetables:
      • Return the cooked steak to the skillet with the vegetables and mix well. If using, add the sautéed mushrooms.
    4. Prepare the Egg Mixture:
      • In a bowl, whisk together the eggs, milk, heavy cream, and paprika.
    5. Assemble the Casserole:
      • Spread the steak and vegetable mixture evenly in a greased 9×13 inch baking dish.
      • Layer the provolone cheese over the steak and vegetables.
      • Pour the egg mixture evenly over the cheese.
    6. Bake:
      • Bake in the preheated oven for 25-30 minutes, or until the egg mixture is set and the top is lightly browned.
    7. Serve:
      • Let the casserole cool for a few minutes before slicing. Serve hot.
  • Cooking Blackened Steak and Shrimp Alfredo

    Cooking Blackened Steak and Shrimp Alfredo

    Surf & Turf Sensation: Blackened Steak and Shrimp Alfredo brings a gourmet twist to the classic comfort food, combining the bold flavors of blackened steak with the delicate taste of succulent shrimp, all smothered in a creamy Alfredo sauce. This dish is a harmonious blend of land and sea, perfect for those who crave a luxurious dining experience at home. Whether you’re planning a romantic dinner, a special family meal, or simply want to indulge in a decadent pasta dish, this recipe promises to deliver an unforgettable taste adventure.

    Why You’ll Love Blackened Steak and Shrimp Alfredo:

    • Rich and Flavorful: A perfect combination of spicy, smoky steak and tender, juicy shrimp.
    • Creamy Alfredo Sauce: Homemade Alfredo sauce adds a touch of elegance and comfort to the dish.
    • Impressive yet Easy: While it feels gourmet, this dish is surprisingly simple to prepare.
    • Perfect for Any Occasion: Ideal for a special evening at home or entertaining guests.

    Ingredients Notes For Blackened Steak and Shrimp Alfredo:

    • Steak: A tender cut like ribeye or sirloin, seasoned with blackening spices for a spicy crust.
    • Shrimp: Medium to large shrimp, peeled and deveined, for the best texture and flavor.
    • Alfredo Sauce: Made with butter, heavy cream, garlic, and Parmesan cheese for a rich and indulgent sauce.
    • Pasta: Fettuccine or linguine works best to hold the creamy sauce.
    • Seasonings: Blackening seasoning for the steak and shrimp, along with salt and pepper to taste.

    Recipe Steps:

    1. Prepare the Pasta: Cook pasta according to package instructions until al dente, then drain and set aside.
    2. Blacken the Steak: Season the steak with blackening spices and sear in a hot skillet to your desired doneness. Let it rest before slicing into strips.
    3. Cook the Shrimp: In the same skillet, cook the shrimp with a bit of blackening seasoning until pink and opaque.
    4. Make the Alfredo Sauce: In a saucepan, melt butter and sauté garlic, then add heavy cream and simmer. Stir in grated Parmesan cheese until melted and smooth.
    5. Combine: Toss the cooked pasta in the Alfredo sauce, adding the sliced steak and shrimp on top.
    6. Serve: Garnish with additional Parmesan and fresh parsley or basil if desired.

    Storage Options:

    • Refrigerate: Store leftovers in an airtight container for up to 3 days.
    • Reheat: Gently warm in a skillet or microwave, adding a splash of cream or milk to refresh the sauce.

    INGREDIENTS

    For the Blackening Seasoning:

    • 1 tablespoon paprika
    • 1 teaspoon garlic powder
    • 1 teaspoon onion powder
    • 1 teaspoon ground thyme
    • 1 teaspoon ground oregano
    • 1 teaspoon cayenne pepper (adjust according to heat preference)
    • Salt and black pepper, to taste

    For the Steak and Shrimp:

    • 2 steaks (such as ribeye or sirloin), about 68 ounces each
    • 12 large shrimp, peeled and deveined
    • Olive oil

    For the Alfredo Sauce:

    • 1 cup heavy cream
    • 1/2 cup unsalted butter
    • 1 cup grated Parmesan cheese
    • 2 cloves garlic, minced
    • Salt and pepper, to taste

    For the Pasta:

    • 8 ounces fettuccine or your choice of pasta

    INSTRUCTIONS

    1. Prepare the Blackening Seasoning:
      • In a small bowl, combine paprika, garlic powder, onion powder, thyme, oregano, cayenne pepper, salt, and black pepper.
    2. Season and Cook the Steak and Shrimp:
      • Rub the steaks and shrimp generously with the blackening seasoning.
      • Heat a little olive oil in a skillet over high heat. Sear the steaks for about 4-5 minutes per side (or to desired doneness), then remove and let them rest.
      • In the same skillet, cook the shrimp for about 2 minutes per side, or until opaque and cooked through. Remove and set aside.
    3. Cook the Pasta:
      • Cook the fettuccine according to package instructions until al dente, then drain.
    4. Make the Alfredo Sauce:
      • In a saucepan, melt the butter over medium heat. Add the minced garlic and sauté until fragrant.
      • Add the heavy cream, bring to a simmer, then reduce the heat to low.
      • Stir in the grated Parmesan cheese until melted and smooth. Season with salt and pepper.
    5. Combine:
      • Toss the cooked pasta with the Alfredo sauce until well coated.
      • Slice the rested steak into thin strips.
    6. Serve:
      • Plate the Alfredo pasta, top with sliced steak and shrimp. Garnish with additional Parmesan cheese, fresh parsley, or a squeeze of lemon if desired.
  • How to Prepare a Delicious Shrimp Boil

    How to Prepare a Delicious Shrimp Boil

    A Shrimp Boil is a festive and flavorful way to bring people together around a communal pot of simmering seafood, spices, and vegetables. This traditional Southern dish is perfect for backyard parties, family gatherings, or any occasion that calls for a casual yet delicious feast. Featuring succulent shrimp, hearty potatoes, corn on the cob, and smoky sausage, all infused with a blend of aromatic seasonings, a shrimp boil is a one-pot wonder that promises a fun and interactive dining experience. Dive into this classic recipe to create a memorable meal that’s as enjoyable to prepare as it is to eat.

    Why You’ll Love This Shrimp Boil

    • Full of Flavor: A rich blend of spices and ingredients ensures every bite is packed with savory goodness.
    • Easy to Make: Despite its impressive presentation, a shrimp boil is surprisingly simple to prepare.
    • Customizable: Easily adjust the level of spice, the choice of seafood, or the variety of vegetables to suit your taste.
    • Perfect for Gatherings: Designed to feed a crowd, it’s a communal meal that encourages sharing and enjoyment.

    Ingredients Notes

    • Shrimp: Large, shell-on shrimp are ideal for flavor and ease of eating. Fresh or frozen both work well.
    • Sausage: Andouille sausage adds a classic, Cajun-inspired flavor, but you can use any smoked sausage you prefer.
    • Corn: Fresh corn on the cob, broken into halves or thirds, adds sweetness and crunch.
    • Potatoes: Small, red or yellow potatoes are preferred for their quick cooking time and tender texture.
    • Seasonings: Old Bay seasoning, along with garlic, lemon, and bay leaves, creates the signature spice blend.
    • Extras: Feel free to add other seafood like crab legs or mussels for a more luxurious boil.

    Recipe Steps

    1. Prepare the Pot: Fill a large pot with water, add lemon halves, garlic, bay leaves, and a generous amount of Old Bay seasoning. Bring to a boil.
    2. Cook the Potatoes: Add the potatoes to the pot and cook until they start to become tender.
    3. Add the Sausage and Corn: Add the sausage pieces and corn on the cob to the pot. Continue boiling until almost cooked through.
    4. Add the Shrimp: Lastly, add the shrimp to the pot. Cook until the shrimp are pink and opaque, which should only take a few minutes.
    5. Serve: Drain the water and pour the contents of the pot onto a large table covered with newspaper or a disposable tablecloth for easy cleanup. Alternatively, serve in a large platter for a less traditional presentation.

    Storage and Leftovers

    • Refrigerate: Store any leftovers in an airtight container in the refrigerator for up to 2 days.
    • Reheat: Gently reheat in the microwave or briefly steam over the stove to preserve the texture of the shrimp and vegetables.

    INGREDIENTS

    • Water: Enough to fill a large pot about halfway
    • Old Bay seasoning: 1/2 cup (adjust according to taste)
    • Garlic: 4 cloves, smashed
    • Lemon: 2, halved
    • Bay leaves: 2
    • Small red potatoes: 1.5 lbs, halved if large
    • Smoked sausage: 1 lb, sliced into 1-inch pieces (andouille or your favorite kind)
    • Corn on the cob: 4, husked and broken into halves
    • Large shrimp: 2 lbs, shell-on and deveined
    • Butter: 1/2 cup, melted (for serving)
    • Fresh parsley: Chopped (for garnish)
    • Additional lemon wedges: for serving
    • Cocktail sauce: for serving

    INSTRUCTIONS

    1. Prepare the Cooking Liquid:
      • Fill a large pot with enough water to cover all the ingredients. Add the Old Bay seasoning, smashed garlic, halved lemons, and bay leaves. Bring the water to a boil over high heat.
    2. Cook the Potatoes:
      • Add the red potatoes to the boiling water and cook for about 10 minutes, or until they start to become tender.
    3. Add Sausage and Corn:
      • Add the sliced sausage to the pot and cook for another 5 minutes. Then, add the corn on the cob pieces and cook for an additional 5 minutes.
    4. Add the Shrimp:
      • Lastly, add the shrimp to the pot. Cook for about 2-3 minutes, or just until the shrimp turn pink and opaque. Be careful not to overcook.
    5. Drain and Serve:
      • Carefully drain the water from the pot and discard the lemon halves and bay leaves. You can serve the shrimp boil directly on a large table covered with newspaper or a tablecloth for a rustic feel, or transfer everything to a large serving platter.
    6. Garnish and Accompaniments:
      • Drizzle the melted butter over the shrimp boil and sprinkle with chopped parsley. Serve with additional lemon wedges and cocktail sauce on the side.
  • Quick and Simple Peach Dessert Salad Recipe to Try Today

    Quick and Simple Peach Dessert Salad Recipe to Try Today

    Embrace the essence of summer with a Peach Dessert Salad, a delightful concoction that marries the juiciness of fresh peaches with the lightness of a salad, all while delivering the satisfaction of a dessert. This dish is a perfect finale to any meal, especially during the warm months when peaches are at their peak. Combining ripe, succulent peaches with a mix of complementary textures and flavors, this dessert salad is not just a treat for the palate but also a feast for the eyes. Whether you’re hosting a summer barbecue, a formal dinner, or simply enjoying a quiet meal at home, this Peach Dessert Salad is sure to leave everyone refreshed and impressed.

    Why You’ll Love Peach Dessert Salad:

    • Fresh and Fruity: Takes full advantage of summer’s bounty with ripe, flavorful peaches.
    • Light and Refreshing: A perfect choice for a dessert that won’t weigh you down.
    • Easy to Prepare: Minimal ingredients and simple steps make this an effortless dish.
    • Versatile: Ideal as a dessert, side dish, or even a brunch feature.

    Ingredients Notes For Peach Dessert Salad:

    • Peaches: Choose ripe but firm peaches for the best flavor and texture. Can be used fresh or grilled for a smoky sweetness.
    • Mixed Greens: A bed of mixed baby greens or arugula adds a fresh and slightly peppery taste that contrasts beautifully with the sweet peaches.
    • Nuts: Toasted pecans or almonds offer a crunchy texture and nutty flavor.
    • Cheese: Soft cheeses like burrata, goat cheese, or feta add creaminess and a touch of tang.
    • Dressing: A simple honey-lime vinaigrette or balsamic reduction complements the peaches and greens without overpowering them.
    • Herbs: Fresh mint or basil leaves bring a vibrant, aromatic finish.

    Recipe Steps:

    1. Prepare the Peaches: Slice the peaches into wedges. For a grilled option, lightly brush with oil and grill on each side until char marks appear.
    2. Toast the Nuts: In a dry pan, toast the nuts over medium heat until fragrant and golden. Let cool, then roughly chop.
    3. Make the Dressing: Whisk together honey, lime juice, olive oil, salt, and pepper to create the vinaigrette. Alternatively, reduce balsamic vinegar over low heat until thickened for a balsamic reduction.
    4. Assemble the Salad: Arrange the mixed greens on a platter. Top with peach slices, scattered cheese, and toasted nuts. Drizzle with the dressing and garnish with fresh herbs.
    5. Serve: Enjoy immediately, offering an exquisite balance of sweet, tangy, and savory flavors in every bite.

    Storage Options:

    • Best Enjoyed Fresh: This salad is best enjoyed immediately after assembly to maintain the freshness and texture of the ingredients.

    INGREDIENTS

    • 45 ripe peaches, peeled and sliced
      • 1 cup mini marshmallows
      • 1 cup vanilla yogurt (Greek or regular, depending on preference)
      • 1/2 cup whipped cream or whipped topping
      • 1/2 cup toasted pecans or almonds, chopped (optional for crunch)
      • 1 tablespoon honey or maple syrup (adjust to taste)
      • 1 teaspoon lemon juice
      • 1/2 teaspoon vanilla extract
      • Fresh mint leaves for garnish (optional)

      INSTRUCTIONS

      1. Prepare the Peaches:
        • Wash the peaches, then peel and slice them into bite-sized pieces. To prevent browning, you can toss the peach slices with lemon juice.
      2. Mix the Salad:
        • In a large bowl, combine the sliced peaches and mini marshmallows.
        • In a separate bowl, mix together the vanilla yogurt, whipped cream, honey (or maple syrup), and vanilla extract until smooth. Adjust the sweetness according to your taste.
      3. Combine and Chill:
        • Gently fold the yogurt mixture into the peaches and marshmallows until everything is well coated.
        • If using, add the chopped pecans or almonds and fold them into the salad as well.
        • Cover the bowl with plastic wrap and chill in the refrigerator for at least 1 hour before serving. This allows the flavors to meld together and the salad to become more cohesive.
      4. Serve:
        • Once chilled, give the salad a gentle stir. Serve in individual bowls or glasses.
        • Garnish with fresh mint leaves for a refreshing aroma and a pop of color.
  • MELT IN YOUR MOUTH CHICKEN

    MELT IN YOUR MOUTH CHICKEN

    This is one of those recipes I make over and over again. On those days when I get home late to start dinner, this is my go-to recipe. Melt in your mouth chicken is just that. It melts in your mouth.

    Melt in Your Mouth Chicken is a classic recipe that’s been around for ages. Its origins are unclear, but I’m glad whoever came up with it did.

    The idea of topping chicken breast with mayo and parmesan is pure genius! The mixture turns beautifully golden post-baking, and it smells phenomenal, too.

    The flavor is so rich, so creamy, and so addictive!

    More importantly… OMG… the chicken is insanely tender and moist! That’s something that’s hard to come by with baked chicken breast.

    Best of all, this recipe is impossible to mess up. Even if you’re a newbie in the kitchen, you can easily pull it off.

    If you’re looking for a dish to shock and impress your family and friends, this is the one.

    Ingredients:

    • 4 boneless, skinless chicken breasts
    • 1 Cup mayonnaise
    • 1/2 Cup Shredded Parmesan cheese
    • 1 tsp salt
    • 1/2 tsp black pepper
    • 1 tsp minced garlic
    • 1 tsp garlic powder

    How To Make Melt in your mouth Chicken:

    1. Preheat the oven to 375 degrees.
    2. In a small bowl, add the mayonnaise, parmesan cheese, and seasonings.
    3. Mix to combine.
    4. Place the chicken in a baking dish, sprayed with a non-sticking baking spray.
    5. Spread the mixture on top of the chicken breasts.
    6. Bake the chicken for 45 minutes, or until cooked through.
    7. Serve warm!
  • How to Make Apple Slab Pie from Scratch

    How to Make Apple Slab Pie from Scratch

    Apple Slab Pie is a delightful twist on the classic apple pie, baked in a large, shallow pan to create a thinner pie with a higher crust-to-filling ratio. This format is perfect for serving a crowd, offering the same warm, spiced apple filling and flaky pastry in a more accessible and shareable form. Whether you’re hosting a holiday gathering, a picnic, or any event that calls for a delicious dessert, Apple Slab Pie ensures that every guest gets a piece of this comforting, classic treat. It’s a versatile dessert that can be customized with different types of apples and spices to suit your taste.

    The decision to bake an Apple Slab Pie for the first time came as I was looking for a dessert that could feed a large family reunion without the hassle of multiple pies. The experiment was a resounding success, not only for its practicality but also for how it turned the traditional apple pie into a fun, communal experience. Cutting into the large pie and sharing it among loved ones brought a sense of togetherness and joy that only added to the rich, spiced flavors of the dessert.

    This Apple Slab Pie quickly became a requested favorite at gatherings, symbolizing not just a delicious treat but also the warmth of shared moments and memories created around the dessert table. It’s a testament to the idea that sometimes, reinventing a classic can lead to new traditions and cherished experiences.

    Why You’ll Love Apple Slab Pie

    • Perfect for a Crowd: Easily serves more guests than a traditional pie.
    • Customizable: Experiment with different apple varieties and spices for a unique twist.
    • Convenient: Ideal for potlucks, picnics, and parties, thanks to its easy-to-serve format.
    • Deliciously Comforting: Offers the classic taste of apple pie with a fun and practical twist.

    Ingredients Notes For Apple Slab Pie

    • Apples: A mix of tart and sweet apples like Granny Smith and Honeycrisp offers the best flavor complexity.
    • Pie Crust: Homemade or store-bought crusts work well. You’ll need enough dough for a bottom and top layer.
    • Spices: Cinnamon, nutmeg, and allspice add warmth and depth to the filling.
    • Thickener: Flour or cornstarch helps to thicken the apple filling, ensuring it’s not too runny.
    • Sugar: Adjust the amount based on the sweetness of the apples and personal preference.

    Recipe Steps

    1. Prepare the Crust: Roll out the pie dough and fit it into the bottom of a rimmed baking sheet, leaving enough dough for the top crust.
    2. Make the Filling: Toss sliced apples with sugar, spices, and thickener until well coated.
    3. Assemble the Pie: Spread the apple filling evenly over the crust. Cover with the second rolled-out dough and seal the edges. Cut slits in the top crust for steam to escape.
    4. Bake: Bake in a preheated oven until the crust is golden and the filling is bubbly.
    5. Cool and Serve: Let the pie cool before cutting into squares. Serve as is or with a scoop of vanilla ice cream.

    Storage Options

    • Room Temperature: Keep covered for up to 2 days.
    • Refrigerate: For longer storage, refrigerate for up to 5 days.
    • Freeze: Freeze portions for up to 3 months. Thaw and reheat in the oven for best texture.

    INGREDIENTS

    For the Crust:

    • All-purpose flour: 4 cups
    • Salt: 1 teaspoon
    • Unsalted butter: 1 1/2 cups (cold and cubed)
    • Shortening: 1/2 cup (cold)
    • Ice water: 8-10 tablespoons

    For the Filling:

    • Apples: 8-10 medium, peeled, cored, and thinly sliced (a mix of Granny Smith and Honeycrisp works well)
    • Granulated sugar: 3/4 cup to 1 cup (adjust based on the sweetness of the apples and preference)
    • Brown sugar: 1/2 cup
    • Cinnamon: 2 teaspoons
    • Nutmeg: 1/4 teaspoon
    • All-purpose flour: 1/4 cup (for thickening)
    • Lemon juice: 1 tablespoon

    For Assembly and Topping:

    • Egg wash: 1 egg beaten with 1 tablespoon water
    • Coarse sugar: for sprinkling on top (optional)
    • Milk or cream: for brushing the crust

    INSTRUCTIONS

    1. Prepare the Crust:
      • In a large bowl, mix together the flour and salt. Cut in the cold butter and shortening using a pastry blender or two forks until the mixture resembles coarse crumbs.
      • Gradually add ice water, a tablespoon at a time, until the dough just comes together. Divide the dough in half, form into rectangles, wrap in plastic, and chill for at least 1 hour.
    2. Make the Filling:
      • In a large bowl, combine the sliced apples, granulated sugar, brown sugar, cinnamon, nutmeg, flour, and lemon juice. Toss until the apples are evenly coated. Let it sit for about 30 minutes to macerate and draw out some of the juices.
    3. Assemble the Pie:
      • Preheat your oven to 375°F (190°C). Grease a 15×10-inch rimmed baking sheet or jelly roll pan.
      • On a floured surface, roll out one piece of the dough into a rectangle about 18×13 inches, then transfer it to the prepared baking sheet, pressing it into the corners and up the sides.
      • Spread the apple filling evenly over the crust. Roll out the second piece of dough and place it over the filling, sealing the edges by crimping with a fork or your fingers.
      • Cut slits in the top crust to allow steam to escape. Brush the top with the egg wash or milk/cream and sprinkle with coarse sugar if desired.
    4. Bake:
      • Bake in the preheated oven for 45-50 minutes, or until the crust is golden brown and the filling is bubbly. Check halfway through; if the edges are browning too quickly, cover them with foil.
    5. Cool and Serve:
      • Let the pie cool on a wire rack for at least an hour before slicing and serving. This allows the filling to set, making it easier to cut.
  • How to Make Philly Cheesesteak Sloppy Joes At Home

    How to Make Philly Cheesesteak Sloppy Joes At Home

    Dive into the bold and savory world of “City Fusion Delight: Philly Cheesesteak Sloppy Joes,” where the iconic elements of a classic Philly cheesesteak meet the hearty, comforting appeal of a sloppy Joe. This innovative dish combines tender sautéed beef with bell peppers, onions, and a cheesy sauce, all piled high on toasted buns for a messy yet irresistible meal. Perfect for a casual dinner, game day, or whenever you need a quick and satisfying dish, these sloppy Joes bring a fun twist to traditional flavors.

    Why You’ll Love Philly Cheesesteak Sloppy Joes:

    • Flavorful Combination: Merges the beloved tastes of Philly cheesesteak with the ease and casual style of sloppy Joes.
    • Quick and Easy: Comes together in about 30 minutes, making it ideal for busy weeknights.
    • Kid-Friendly: A sure hit with kids and adults alike, thanks to its familiar flavors and fun presentation.
    • Customizable: Easily adaptable to include your favorite veggies or adjust the level of cheesiness.

    Ingredients Notes For Philly Cheesesteak Sloppy Joes:

    • Ground Beef: The base of the dish, providing rich, meaty flavors. Alternatively, ground turkey can be used for a lighter version.
    • Bell Peppers and Onions: Sliced for a classic Philly cheesesteak touch, adding sweetness and crunch.
    • Provolone Cheese: Melts beautifully, adding a smooth, mild flavor that’s authentic to Philly cheesesteak.
    • Beef Broth: Enhances the meaty flavor and helps create a saucy consistency.
    • Worcestershire Sauce and Soy Sauce: Add depth and umami to the meat mixture.
    • Buns: Use sturdy buns that can hold up to the juicy filling, lightly toasted for extra flavor and texture.

    Recipe Steps:

    1. Brown the Meat: In a large skillet, cook the ground beef over medium heat until no longer pink. Drain any excess grease.
    2. Sauté Vegetables: Add sliced onions and bell peppers to the skillet. Cook until they are soft and slightly caramelized.
    3. Create the Sauce: Stir in Worcestershire sauce, soy sauce, and beef broth. Bring the mixture to a simmer and let it thicken slightly.
    4. Add Cheese: Reduce heat, and stir in shredded Provolone cheese until melted and well combined with the meat.
    5. Assemble and Serve: Spoon the beef and cheese mixture onto toasted buns and serve immediately.

    Storage Options:

    • Refrigerate: Keep any leftovers in an airtight container in the refrigerator for up to 3 days.
    • Reheat: Warm the meat mixture in a skillet over medium heat, adding a little broth if needed to keep it moist.
    • INGREDIENTS

      • 1 tablespoon olive oil
      • 1 pound ground beef
      • 1 onion, finely chopped
      • 1 green bell pepper, finely chopped
      • 2 cloves garlic, minced
      • 1 teaspoon salt
      • 1/2 teaspoon black pepper
      • 1 tablespoon Worcestershire sauce
      • 1/2 cup beef broth
      • 1 tablespoon cornstarch
      • 1/4 cup steak sauce (like A1 or similar)
      • 1/2 cup shredded provolone cheese (or mozzarella if preferred)
      • 4 hamburger buns
      • Optional for serving: extra cheese, pickled jalapeños, or sautéed mushrooms

      INSTRUCTIONS

      1. Cook the Meat and Veggies:
        • Heat the olive oil in a large skillet over medium-high heat.
        • Add the ground beef and cook until browned, breaking it up with a spoon as it cooks.
        • Drain any excess fat and return the skillet to the heat.
        • Add the chopped onion, green bell pepper, and garlic to the skillet with the beef. Cook, stirring, until the vegetables are tender, about 5-7 minutes.
        • Season with salt and pepper.
      2. Make the Sauce:
        • In a small bowl, whisk together the beef broth and cornstarch until smooth.
        • Add this mixture to the skillet along with the Worcestershire sauce and steak sauce.
        • Stir to combine and bring the mixture to a simmer. Cook for 2-3 minutes, or until the sauce has thickened slightly.
      3. Add Cheese:
        • Reduce the heat to low and stir in the shredded cheese until melted and well incorporated into the meat mixture.
      4. Prepare the Buns:
        • Toast the hamburger buns lightly if desired for extra texture and flavor.
      5. Assemble the Sloppy Joes:
        • Spoon the meat mixture generously onto the bottom halves of the hamburger buns. If desired, top with additional cheese, pickled jalapeños, or sautéed mushrooms.
      6. Serve:
        • Cap the sandwiches with the top halves of the buns and serve immediately.
  • Strawberry Cream Cheese Rolls

    Strawberry Cream Cheese Rolls

    Strawberry Cream Cheese Rolls: A delightful treat that perfectly marries the sweetness of strawberries with the creamy richness of cream cheese. These rolls are soft, fluffy, and filled with a luscious strawberry cream cheese mixture, making them the ideal dessert or breakfast indulgence. Whether you’re serving them at a brunch gathering or simply enjoying them with a cup of tea, these rolls promise a burst of flavor in every bite. Drizzle them with a sweet glaze for an added touch of decadence!

    INGREDIENTS

    For the Dough:

    2 cups all-purpose flour

    1/4 cup granulated sugar

    1 tsp baking powder

    1/2 tsp baking soda

    1/4 tsp salt

    3/4 cup milk

    1/4 cup unsalted butter, melted

    For the Filling:

    1 cup strawberries, finely chopped

    1/2 cup cream cheese, softened

    1/4 cup granulated sugar

    1 tsp vanilla extract

    For the Glaze (optional):

    1/2 cup powdered sugar

    12 tbsp milk

    1/2 tsp vanilla extract


    INSTRUCTIONS

    Prepare the Dough:

    In a large mixing bowl, combine the flour, sugar, baking powder, baking soda, and salt.

    Add in the milk and melted butter. Stir until a soft dough forms.

    Turn the dough out onto a floured surface and knead it a few times until it comes together. Roll the dough into a rectangle, about 1/4-inch thick.

    Prepare the Filling:

    In a separate bowl, mix together the chopped strawberries, softened cream cheese, sugar, and vanilla extract until smooth.

    Spread the filling evenly over the rolled-out dough, leaving about a 1-inch border around the edges.

    Form the Rolls:

    Starting from the long side, carefully roll the dough into a log.

    Slice the log into 6 equal pieces using a sharp knife.

    Place the rolls into a greased baking dish, leaving some space between each roll.

    Bake:

    Preheat your oven to 375°F (190°C).

    Bake the rolls for 20-25 minutes, or until they are golden brown and cooked through.

    Glaze (optional):

    While the rolls are baking, prepare the glaze by whisking together the powdered sugar, milk, and vanilla extract in a small bowl until smooth.

    Once the rolls are out of the oven and slightly cooled, drizzle the glaze over the top.

    Serve and Enjoy!

    Serve the Strawberry Cream Cheese Rolls warm and enjoy the delightful combination of creamy and fruity flavors!

    I hope you enjoy making and eating these delicious rolls!

  • Discover Hot Spinach Artichoke Dip: A Classic Party Favorite

    Discover Hot Spinach Artichoke Dip: A Classic Party Favorite

    Dive into the warm, creamy embrace of Hot Spinach Artichoke Dip, a crowd-pleasing appetizer that’s perfect for any gathering or a cozy night in. This beloved dip combines tender artichoke hearts, nutritious spinach, and a rich, cheesy blend, all baked to bubbly perfection. It’s a flavor-packed dish that’s not only irresistible but also easy to whip up, making it an ideal choice for last-minute entertaining or as a luxurious treat to enjoy with your favorite crunchy accompaniments. Whether you’re hosting a party, looking for the perfect potluck dish, or simply craving a comforting snack, this hot spinach artichoke dip promises to deliver satisfaction in every scoop.

    The first time I made Hot Spinach Artichoke Dip was for a casual game night with friends. Seeking something simple yet indulgent, I stumbled upon this recipe and decided to give it a try. As the dip baked, filling the kitchen with its tantalizing aroma, anticipation grew. The moment it hit the table, it became the star of the night. Friends gathered around, eager for a taste, and with each bite, the room filled with compliments and requests for the recipe.

    This dip quickly became my go-to dish for gatherings, earning a reputation as a must-have at every event. It’s more than just an appetizer; it’s a catalyst for laughter, conversation, and shared enjoyment, a reminder of the joy that good food can bring to any occasion.


    Why You’ll Love Hot Spinach Artichoke Dip

    • Decadently Creamy: A luxurious blend of cheeses and creamy ingredients creates an irresistible texture.
    • Flavorful: The combination of artichokes, spinach, and seasonings offers a depth of flavor that’s both rich and satisfying.
    • Versatile: Perfect with a variety of dippers, from tortilla chips and bread to fresh veggies.
    • Easy to Make: Simple ingredients and straightforward preparation make this dip a stress-free addition to any menu.

    Ingredients Notes For Hot Spinach Artichoke Dip

    • Artichoke Hearts: Canned or frozen and thawed, chopped into bite-sized pieces.
    • Spinach: Fresh spinach wilted and chopped, or frozen spinach thawed and squeezed dry.
    • Cream Cheese: The base of the dip, providing a creamy texture.
    • Sour Cream and Mayonnaise: Add richness and tanginess to the dip.
    • Cheeses: A mix of mozzarella and Parmesan for meltiness and flavor.
    • Garlic: Fresh minced garlic for a punch of flavor.
    • Seasonings: Adjust to taste with salt, pepper, and optional red pepper flakes for a bit of heat.

    Recipe Steps

    1. Prep Ingredients: Preheat your oven. Wilt fresh spinach if using, and chop artichokes.
    2. Mix Dip Base: In a large bowl, combine cream cheese, sour cream, mayonnaise, garlic, and seasonings until smooth.
    3. Add Veggies and Cheese: Fold in the spinach, artichokes, and half of the cheeses.
    4. Bake: Transfer the mixture to a baking dish, top with remaining cheese, and bake until golden and bubbly.
    5. Serve: Let it cool slightly before serving warm with your choice of dippers.

    Storage Options

    • Refrigerate: Store leftovers in an airtight container for up to 3 days. Reheat in the oven or microwave until warm.
    • INGREDIENTS

      • Frozen spinach: 10 oz (about 280g), thawed and squeezed dry
      • Canned artichoke hearts: 14 oz (about 400g), drained and chopped
      • Cream cheese: 8 oz (225g), softened
      • Sour cream: 1/2 cup
      • Mayonnaise: 1/2 cup
      • Garlic: 2 cloves, minced
      • Grated Parmesan cheese: 1/2 cup
      • Shredded mozzarella cheese: 1 cup, divided
      • Salt and pepper: to taste
      • Crushed red pepper flakes: a pinch (optional, for a bit of heat)
      • Fresh parsley: chopped, for garnish (optional)

      INSTRUCTIONS

      1. Preheat the Oven:
        • Preheat your oven to 375°F (190°C).
      2. Mix the Dip Ingredients:
        • In a large bowl, combine the thawed and squeezed dry spinach, chopped artichoke hearts, softened cream cheese, sour cream, mayonnaise, minced garlic, grated Parmesan cheese, half of the shredded mozzarella cheese, salt, pepper, and crushed red pepper flakes (if using). Mix well until all ingredients are evenly distributed.
      3. Transfer to a Baking Dish:
        • Transfer the mixture to a baking dish (a 9-inch pie dish or a similar sized baking dish works well). Smooth the top with a spatula.
      4. Add More Cheese:
        • Sprinkle the remaining shredded mozzarella cheese evenly over the top of the dip.
      5. Bake:
        • Bake in the preheated oven for about 20-25 minutes, or until the dip is bubbly and the cheese on top is golden brown.
      6. Garnish and Serve:
        • Remove the dip from the oven and let it cool for a few minutes. Garnish with chopped fresh parsley if desired.
        • Serve hot with tortilla chips, sliced baguette, vegetable sticks, or crackers for dipping.
  • How to Make Cowboy Spaghetti

    How to Make Cowboy Spaghetti

    Cowboy Spaghetti is a robust and hearty dish that combines the classic comfort of spaghetti with the bold flavors of the American West. This unique twist on traditional spaghetti features a smoky, spicy tomato sauce loaded with ground beef, bacon, and a kick of jalapeños, all topped with a generous sprinkle of cheddar cheese. Perfect for a filling family dinner, a casual get-together with friends, or simply when you’re in the mood for a flavorful pasta dish with a bit of a twist, Cowboy Spaghetti is sure to satisfy your hunger and spice up your mealtime routine.

    The adventure of creating Cowboy Spaghetti began on a chilly evening when the craving for something different from the usual pasta fare struck. Inspired by the bold flavors of the Southwest and the comforting familiarity of spaghetti, I decided to merge the two into a dish that was both familiar and excitingly new. The result was a deliciously hearty meal that warmed us from the inside out and brought a taste of cowboy culture to our dinner table.

    This dish quickly became a favorite in our home, cherished for its ability to bring together diverse flavors in a comforting and satisfying way. It’s a reminder of the joy of culinary exploration and the endless possibilities that come from combining different culinary traditions to create something truly special.


    Why You’ll Love Cowboy Spaghetti

    • Bold and Flavorful: Packed with smoky, spicy flavors that elevate the traditional spaghetti experience.
    • Hearty and Satisfying: A filling meal that combines pasta, meat, and cheese for a complete and comforting dish.
    • Versatile: Easy to customize with your favorite ingredients or adjust the spice level to suit your taste.
    • Crowd-Pleaser: Ideal for feeding a hungry crowd, pleasing both adults and kids alike.

    Ingredients Notes For Cowboy Spaghetti

    • Ground Beef: The base of the sauce, providing richness and protein.
    • Bacon: Adds a smoky depth of flavor to the dish.
    • Jalapeños: Bring a spicy kick, which can be adjusted according to your heat preference.
    • Tomato Sauce: The foundation of the sauce, enriched with spices and seasonings.
    • Spices: A blend of chili powder, cumin, and smoked paprika adds complexity to the sauce.
    • Cheddar Cheese: A sharp, melty topping that complements the spicy and smoky flavors.
    • Spaghetti: The classic pasta choice, but feel free to substitute with your preferred type.

    Recipe Steps

    1. Cook the Bacon: Start by frying bacon pieces until crisp. Remove from the pan and set aside.
    2. Brown the Beef: In the same pan, cook the ground beef, adding onions, garlic, and jalapeños until the meat is browned.
    3. Simmer the Sauce: Add the tomato sauce, cooked bacon, and spices to the pan. Let the sauce simmer to meld the flavors together.
    4. Boil the Pasta: Cook the spaghetti according to package instructions until al dente.
    5. Combine and Serve: Toss the cooked spaghetti with the sauce, top with shredded cheddar cheese, and serve hot.

    Storage Options

    • Refrigerate: Store leftovers in an airtight container for up to 3 days.
    • Freeze: Freeze the sauce separately from the pasta for longer storage. Thaw and reheat, then mix with freshly cooked pasta.
    • INSTRUCTIONS


      1. Cook the Bacon:
        • In a large skillet or Dutch oven, cook the chopped bacon over medium heat until crispy. Remove the bacon with a slotted spoon and set aside on paper towels to drain. Leave the bacon grease in the pan.
      2. Brown the Ground Beef:
        • Increase the heat to medium-high. Add the ground beef to the skillet with the bacon grease. Cook, breaking it apart with a spoon, until browned and no longer pink. Drain excess fat if necessary.
      3. Sauté the Vegetables:
        • Reduce the heat to medium. Add the diced onion, minced garlic, and diced green bell pepper (if using) to the skillet. Sauté until the vegetables are soft and fragrant, about 5 minutes.
      4. Add the Sauces:
        • Stir in the diced tomatoes (with juice), tomato sauce, barbecue sauce, Worcestershire sauce, and red pepper flakes. Season with salt and pepper to taste. Bring the mixture to a simmer.
      5. Combine with Spaghetti:
        • Add the cooked spaghetti to the sauce, tossing to combine. Let it simmer for a few more minutes so the spaghetti absorbs some of the sauce flavors.
      6. Add Bacon and Cheese:
        • Stir in the cooked bacon. Sprinkle the shredded cheddar cheese over the top of the spaghetti and cover the skillet with a lid. Let it sit on low heat until the cheese is melted, about 3-5 minutes.
      7. Serve:
        • Serve the Cowboy Spaghetti hot, garnished with sliced green onions on top
  • Cheese Shrimp Penne Pasta & Spinach

    Cheese Shrimp Penne Pasta & Spinach

    Indulge in a creamy and savory fusion of penne pasta, succulent shrimp, and fresh spinach, all brought together with a rich Parmesan cheese sauce. This dish offers a delightful blend of flavors and textures, making it a perfect choice for a cozy dinner or a special occasion. Garnished with fresh herbs and a hint of spice, it’s a culinary experience that’s sure to impress!

    INGREDIENTS

    8 oz (1/2 pound) penne pasta

    7 oz (about 1/2 pound) large shrimp, peeled and deveined

    2 cups fresh spinach, washed and roughly chopped

    2 cloves garlic, minced

    1 cup heavy cream or half-and-half

    1 cup grated Parmesan cheese

    1/2 cup cherry tomatoes, halved (optional)

    2 tbsp olive oil or butter

    Salt and pepper, to taste

    Red pepper flakes (optional, for a bit of heat)

    Fresh basil or parsley, for garnish


    INSTRUCTIONS

    Pasta Preparation: In a large pot of boiling salted water, cook the penne pasta according to the package instructions until al dente. Drain and set aside.

    Shrimp Preparation: In a large skillet or pan, heat the olive oil or butter over medium heat. Add the minced garlic and sauté until fragrant. Add the shrimp to the pan and cook until they turn pink on both sides. Remove the shrimp and set them aside.

    Sauce Preparation: In the same skillet, add the heavy cream or half-and-half. Bring it to a gentle simmer, then stir in the grated Parmesan cheese until the sauce thickens. Season with salt, pepper, and red pepper flakes (if using).

    Combining Ingredients: Add the cooked penne pasta, shrimp, and chopped spinach to the skillet. Toss everything together until the pasta is well-coated with the sauce and the spinach has wilted. If you’re using cherry tomatoes, add them now and give everything another gentle stir.

    Serving: Transfer the pasta to serving dishes. Garnish with fresh basil or parsley. Serve immediately.

    NOTES

    You can add other vegetables like bell peppers or mushrooms for added flavor and texture.

    If you prefer a spicier dish, increase the amount of red pepper flakes or add a dash of cayenne pepper.

    For a richer flavor, consider adding a splash of white wine to the sauce.