Category: quick and easy recipe

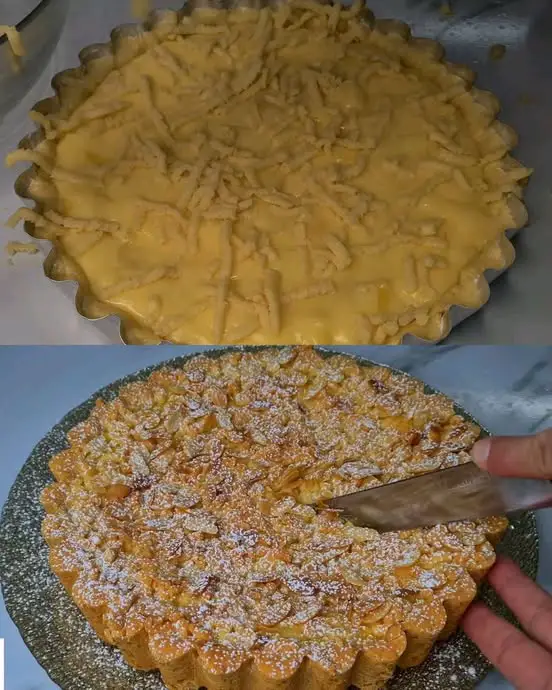
  • Peach Cake with Pastry Cream and Almond Flakes

    Peach Cake with Pastry Cream and Almond Flakes

    Peach Cake with Pastry Cream and Almond Flakes
    This Peach Cake with Pastry Cream and Almond Flakes is a delightful, tender, and aromatic dessert that combines fresh, juicy peaches with a smooth, creamy custard topping and a subtle crunch from toasted almond flakes. Its soft crumb, light sweetness, and fresh fruit make it a perfect choice for any occasion—from a cozy family dessert to an elegant tea party centerpiece. The blend of buttery cake, fragrant vanilla, and luscious pastry cream provides layers of flavor and texture that keep you coming back for more.

    The recipe is straightforward and approachable, making it an excellent baking project for beginners and seasoned home cooks alike. With a moist crumb, a delicate peach topping, and a creamy filling, this cake perfectly balances simplicity with sophistication.

    Cooking Time
    Preparation Time: 20 minutes

    Baking Time: 40-45 minutes

    Total Time: Approximately 1 hour

    Ingredients
    For the Cake Batter:

    2 eggs

    5 tablespoons (100g) sugar

    8g vanilla sugar

    2½ tablespoons (50g) butter, softened

    5 tablespoons (50ml) vegetable oil

    8g baking powder

    340-360g all-purpose flour

    For the Peach Topping:

    4 ripe peaches, peeled and diced

    For the Pastry Cream:

    1 egg

    3 tablespoons (60g) sugar

    8g vanilla sugar

    2 tablespoons (30g) pastry cream powder

    Lemon Mascarpone Cream Cake – Soft, Fragrant, and Irresistible
    Lemon Mascarpone Cream Cake – Soft, Fragrant, and Irresistible
    500ml milk

    1 tablespoon (20g) butter

    For the Finish:

    Almond flakes

    Powdered sugar for dusting

    Step-by-Step Cooking Directions
    Prepare the cake batter:
    Begin by cracking 2 eggs into a large mixing bowl. Add 5 tablespoons of sugar and 8g of vanilla sugar. Using a whisk or an electric mixer, beat the eggs and sugars until the mixture is pale and fluffy, indicating that air has been incorporated, which will help the cake rise and achieve a light texture.

    Add fats:
    Next, add the softened butter and vegetable oil. Mix until fully combined. The butter adds richness and flavor, while the oil ensures moisture and softness in the crumb.

    Combine dry ingredients:
    In a separate bowl, sift together the flour and baking powder. This ensures the baking powder is evenly distributed, preventing any uneven rising or dense spots.

    Incorporate dry ingredients:
    Gradually add the dry ingredients to the wet mixture, folding gently to combine without deflating the batter. The batter should be smooth and slightly thick but still pourable.

    Prepare the cake pan:
    Grease a 26cm diameter cake mold with butter. This prevents sticking and helps achieve a golden crust.

    Add batter to mold:
    Pour the batter into the prepared mold, spreading it evenly.

    Add peaches:
    Distribute the peeled and diced peaches evenly over the top of the batter. The peaches will sink slightly during baking, infusing the cake with their juice and aroma.

    Bake:
    Place the cake in a preheated oven at 180°C (350°F) and bake for 40 to 45 minutes. Test doneness by inserting a toothpick into the center of the cake. If it comes out clean or with a few crumbs, the cake is ready.

    Prepare pastry cream:
    While the cake bakes, start making the pastry cream. In a saucepan, whisk together 1 egg, 3 tablespoons sugar, 8g vanilla sugar, and pastry cream powder until smooth. Slowly add 500ml milk while whisking to avoid lumps.

    Cook pastry cream:
    Place the saucepan over medium heat. Stir continuously until the mixture thickens to a creamy custard consistency. Remove from heat and stir in 1 tablespoon of butter until melted and smooth. Allow the cream to cool slightly.

    Add almond flakes:
    When the cake is nearing completion, sprinkle almond flakes generously on top. Return the cake to the oven for 3 to 5 minutes to toast the almonds until golden and fragrant.

    Cool and serve:
    Remove the cake from the oven and allow it to cool in the pan for 10 minutes before transferring it to a cooling rack. Once cooled, dust with powdered sugar and serve slices topped with the fresh pastry cream.

    Nutritional Information
    (Approximate per slice, based on 8 servings)

    Calories: 320 kcal

    Protein: 5g

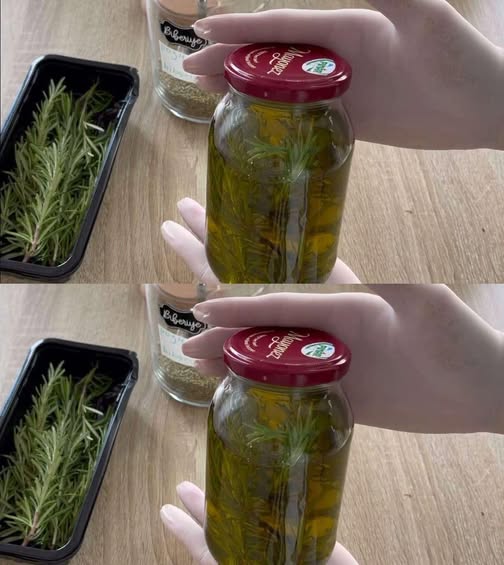
    Put rosemary and olive oil in a jar: you’ll want to do this every night
    Fat: 15g

    Saturated Fat: 6g

    Carbohydrates: 40g

    Sugars: 25g

    Fiber: 2g

    The Origins and Popularity of the Recipe
    This cake draws inspiration from classic European fruit cakes and custard tarts, especially those popular in Central and Eastern Europe. The combination of fresh fruit baked into a buttery cake base is a traditional way to showcase seasonal fruit, while the creamy pastry custard topping adds a luxurious texture reminiscent of French patisserie. Cakes that combine fruit and custard have enjoyed popularity for centuries because of their balance of sweetness, freshness, and richness.

    Peach cakes like this are especially popular in summer months when fresh peaches are in season, providing a refreshing but indulgent treat. The use of almond flakes as a crunchy topping is a nod to Mediterranean baking traditions, where nuts frequently enhance desserts.

    Reasons Why You’ll Love This Recipe
    Simple yet elegant: This cake combines easy-to-find ingredients with straightforward steps to create a dessert that looks and tastes impressive.

    Moist and tender: The addition of both butter and oil ensures the cake stays moist and soft for days.

    Fresh fruit flavor: Juicy peaches baked into the cake provide natural sweetness and acidity.

    Creamy custard layer: The pastry cream adds a smooth, velvety contrast to the cake’s texture.

    Nutty crunch: Toasted almond flakes give a delightful finish and texture contrast.

    Perfect for all occasions: Whether for casual family dessert or festive gatherings, this cake fits perfectly.

    Health Benefits
    While this cake is a treat, it includes fresh fruit—peaches are an excellent source of vitamins A and C, potassium, and dietary fiber, which supports digestion and immune health. Using eggs provides protein, and the moderate use of fats like butter and oil provides essential fatty acids needed for energy. Baking at home allows control over sugar quantity, enabling you to make it lighter or richer depending on your preference.

    Serving Suggestions
    Serve this peach cake slightly warm or at room temperature. Top individual slices with an extra spoonful of chilled pastry cream or a dollop of whipped cream for added indulgence. A scoop of vanilla ice cream pairs beautifully during warmer months. Fresh mint leaves or a sprinkle of cinnamon also complement the peach flavor nicely.

    Common Mistakes to Avoid
    Overmixing the batter: Mix just until combined to avoid tough cake texture.

    Not preparing the pan correctly: Butter your pan generously to prevent sticking.

    Overbaking: Keep an eye on the cake towards the end of baking to avoid dryness.

    Pastry cream lumps: Whisk the pastry cream continuously while adding milk to avoid lumps.

    Undertoasting almonds: Watch the almonds carefully to prevent burning.

    Stuffing Balls
    Stuffing Balls are a must-make recipe
    Pairing Recommendations
    This cake pairs wonderfully with a cup of Earl Grey or chamomile tea. For wine lovers, a chilled glass of Moscato or a light Riesling complements the fruity sweetness. For a richer experience, a cappuccino or latte works well, especially with the creamy custard topping.

    Cooking Tips
    Use ripe but firm peaches to avoid too much juice leaking into the cake batter.

    If fresh peaches aren’t available, canned or frozen peaches (drained) work well too.

    Let the pastry cream cool in the fridge before using if you want it thicker.

    For extra flavor, add a teaspoon of cinnamon or nutmeg to the batter.

    Toast almond flakes on a dry skillet before sprinkling on the cake for more intense flavor.

    Similar Recipes to Try
    Classic French Clafoutis with cherries

    Apple custard tart with a shortcrust pastry

    Almond and peach upside-down cake

    Vanilla sponge cake with mixed berry compote

    Italian ricotta and peach crostata

    Variations to Try
    Substitute peaches with other stone fruits like nectarines or plums.

    Add a tablespoon of lemon zest to the batter for a citrusy twist.

    Use coconut milk in the pastry cream for a dairy-free option.

    Top with toasted walnuts or pistachios instead of almonds.

    Add a splash of amaretto or peach liqueur to the batter for an adult version.
  • Grandma’s Must-Make Stuffing Balls

    Grandma’s Must-Make Stuffing Balls

    Crispy on the outside, tender and flavorful inside—these stuffing balls are a beloved Thanksgiving tradition. Passed down through generations, they’re a rustic twist on classic stuffing, made portable and irresistibly golden-brown. Perfect as a holiday side or served alongside roast chicken or pork year-round.


    Ingredients:

    • 1 cup celery, finely chopped

    • ½ cup fresh parsley, chopped

    • ½ tbsp ground sage

    • 1½ tsp dried thyme leaves

    • 1 tsp kosher salt

    • 1 tsp black pepper

    • 6 cups low-carb bread, toasted and chopped (use day-old or oven-toasted cubes)

    • 6 cups cornbread stuffing, dried mix or homemade cubes

    • 1 large egg, slightly beaten

    • 1 can (14.5 oz) chicken broth, divided

    • 3 tbsp butter

    • 1 medium onion, finely chopped

    • Nonstick spray, for greasing pan


    Instructions:

    1. Prep & Sauté Aromatics

    • Preheat your oven to 375°F (190°C).

    • Lightly grease a baking sheet with nonstick spray.

    • In a large skillet, melt 3 tablespoons of butter over medium heat.

    • Add the chopped onion and sauté for 10 minutes until soft and translucent.

    • Stir in the celery, cooking for another 5 minutes.

    • Add parsley, sage, thyme, salt, and pepper, stirring to combine.

    • Remove from heat and set aside.

    2. Combine Bread & Stuffing

    • In a large mixing bowl, combine the toasted low-carb bread and cornbread stuffing mix.

    • Toss to evenly distribute the two types of bread.

    3. Mix & Moisten

    • Add the beaten egg and ¾ cup of chicken broth to the bread mixture.

    • Stir until the bread is evenly moistened.

    • Fold in the sautéed vegetable and herb mixture until thoroughly combined.

    4. Shape into Balls

    • Using clean hands, shape the mixture into balls about the size of a golf ball (approx. 2 inches in diameter).

    • Place them spaced apart on the prepared baking sheet.

    5. Bake – First Round

    • Bake in the preheated oven for 20 minutes, until the tops begin to crisp and lightly brown.

    6. Add Broth & Finish Baking

    • Carefully pour the remaining chicken broth over the stuffing balls (this keeps them moist inside).

    • Return to the oven and bake for an additional 15 minutes, or until golden and firm.


    ️ Serving Suggestions:

    • Holiday Dinner: Serve alongside turkey, cranberry sauce, gravy, and roasted vegetables.

    • Anytime Meal: Pair with roast chicken, pork chops, or a veggie-based main dish.

    • Leftover Idea: Reheat and serve with a fried egg for a savory breakfast twist.


    Tips & Variations:

    • Make-Ahead Friendly: Assemble the stuffing balls a day ahead and refrigerate. Add a few minutes to the baking time if chilled.

    • Texture Tip: For crispier edges, use a wire rack on the baking sheet so air circulates underneath.

    • Flavor Boost: Add sautéed mushrooms or cooked crumbled sausage to the mix before shaping.

    • Low-Sodium: Use low-sodium broth to control salt levels.


    Storage & Reheating:

    • Refrigerate: Store leftovers in an airtight container for up to 4 days.

    • Freeze: Cool completely, then freeze in a zip-top bag for up to 2 months. Thaw in fridge overnight.

    • Reheat: Warm in a 350°F oven for 10–12 minutes or air fry at 350°F for 6–8 minutes for a crisp finish.

  • Tasty! My Amish neighbor taught me this, and it’s simply delightful!

    Tasty! My Amish neighbor taught me this, and it’s simply delightful!

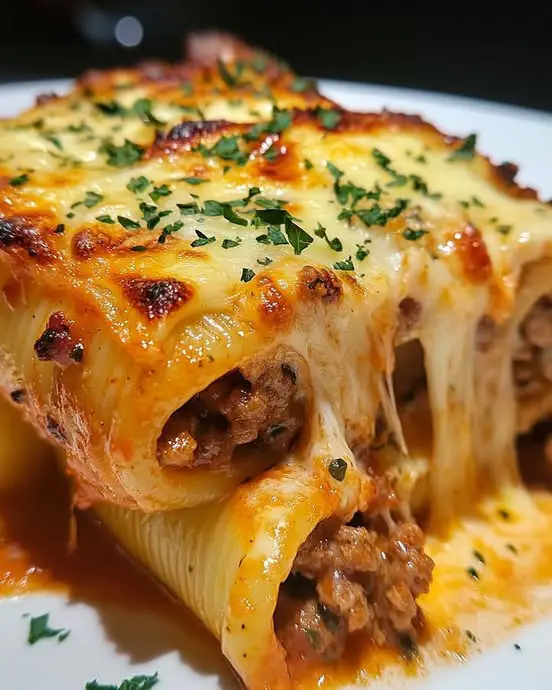
    Stuffed shells are a delightful Italian-American classic that combines the comforting flavors of pasta, cheese, and savory sausage. This dish is perfect for family gatherings or a cozy dinner at home. The origins of stuffed shells can be traced back to Italy, where pasta is often filled with a variety of ingredients. This version, featuring sausage and cheese, is particularly popular in the United States. It’s a dish that brings warmth and satisfaction, making it a favorite for many home cooks.
    This hearty dish pairs wonderfully with a simple green salad dressed with a light vinaigrette, which helps balance the richness of the cheese and sausage. A side of garlic bread or a crusty baguette is perfect for soaking up any extra sauce. For a complete meal, consider serving with a glass of Chianti or another medium-bodied red wine.
    Advertisement

    Oven Baked Sausage and Cheese Stuffed Shells
    Servings: 4-6 servings
    25655307f04d50cb8d7f46a75e24ce4f

    Ingredients
    20 large pasta shells
    1 pound ground Italian sausage
    1 cup ricotta cheese
    1 cup shredded mozzarella cheese, divided
    1/2 cup grated Parmesan cheese
    1 egg
    2 cups marinara sauce
    1 tablespoon olive oil
    1 teaspoon dried oregano
    1 teaspoon dried basil
    Salt and pepper to taste
    Fresh parsley or basil for garnish
    Directions
    Preheat your oven to 375°F (190°C).
    Cook the pasta shells according to package instructions until al dente. Drain and set aside.
    In a skillet, heat olive oil over medium heat. Add the ground sausage and cook until browned, breaking it up with a spoon as it cooks. Drain excess fat.
    In a large bowl, combine the cooked sausage, ricotta cheese, 1/2 cup of mozzarella cheese, Parmesan cheese, egg, oregano, basil, salt, and pepper. Mix until well combined.
    Spread 1 cup of marinara sauce on the bottom of a 9×13 inch baking dish.
    Stuff each pasta shell with the sausage and cheese mixture and place them in the baking dish.
    Pour the remaining marinara sauce over the stuffed shells.
    Sprinkle the remaining 1/2 cup of mozzarella cheese over the top.
    Cover the dish with foil and bake for 25 minutes. Remove the foil and bake for an additional 10 minutes, or until the cheese is bubbly and golden brown.
    Remove from oven and let cool for a few minutes. Garnish with fresh parsley or basil before serving.


    Variations & Tips
    For a vegetarian version, replace the sausage with sautéed mushrooms or spinach. You can also experiment with different cheeses, such as adding goat cheese for a tangy twist. If you prefer a spicier dish, use hot Italian sausage or add a pinch of red pepper flakes to the filling. For a creamier sauce, mix some heavy cream into the marinara sauce before pouring it over the shells.
  • Whenever I make these, my hubby can down 4 all by himself!

    Whenever I make these, my hubby can down 4 all by himself!

    In the heart of the Midwest, where fields stretch as far as the eye can see and the air is filled with the scent of fresh earth, comfort food is more than just a meal—it’s a way of life. These Easy Ham and Cheese Calzones are a nod to the simple, hearty meals that have graced our family tables for generations. Perfect for a cozy evening or a family gathering, these calzones bring together the familiar flavors of ham and cheese in a warm, flaky crust. Whether you’re reminiscing about Sunday dinners at Grandma’s or looking for a quick and satisfying dish, these calzones are sure to hit the spot.
    These calzones pair beautifully with a crisp garden salad, drizzled with a tangy vinaigrette to balance the richness of the cheese and ham. For a touch of nostalgia, serve them with a side of homemade applesauce or a bowl of hearty tomato soup. And of course, a glass of iced tea or lemonade makes for a refreshing accompaniment.
    Advertisement

    Easy Ham and Cheese Calzones
    Servings: 4
    63abfe48e2c0b39893ae1f890a193b3e

    Ingredients
    1 pound pizza dough
    1 cup cooked ham, diced
    1 cup shredded mozzarella cheese
    1/2 cup ricotta cheese
    1/4 cup grated Parmesan cheese
    1 teaspoon dried oregano
    1/2 teaspoon garlic powder
    1 egg, beaten
    1 tablespoon olive oil
    Directions
    Preheat your oven to 425°F (220°C).
    On a floured surface, divide the pizza dough into four equal portions and roll each into a circle about 8 inches in diameter.
    In a bowl, combine the diced ham, mozzarella, ricotta, Parmesan, oregano, and garlic powder.
    Place a quarter of the filling on one half of each dough circle, leaving a border around the edge.
    Brush the edges of the dough with the beaten egg, then fold the dough over the filling to create a half-moon shape. Press the edges with a fork to seal.
    Transfer the calzones to a baking sheet lined with parchment paper.
    Brush the tops with olive oil and make a small slit in the top of each calzone to allow steam to escape. Top with more cheese if desired.
    Bake in the preheated oven for 15-20 minutes, or until golden brown.
    Allow to cool slightly before serving.


    Variations & Tips
    For a bit of a kick, try adding a pinch of red pepper flakes to the filling. You can also swap out the ham for turkey or cooked sausage for a different flavor. If you have some fresh herbs on hand, like basil or parsley, chop them up and mix them into the filling for an extra burst of freshness. And if you’re feeling adventurous, a spoonful of marinara sauce inside each calzone can add a delightful twist.
  • Crispy Air Fryer Potatoes

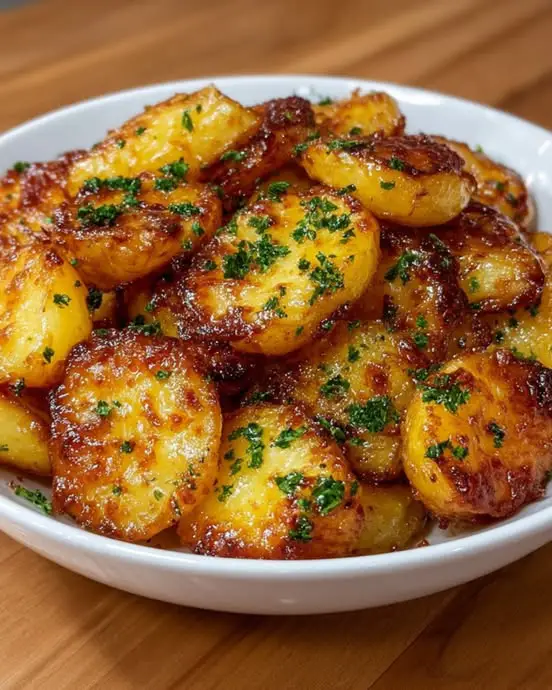
    Crispy Air Fryer Potatoes

    Golden, crispy, and packed with flavor—these air fryer potatoes are the perfect side dish or snack, ready in under 30 minutes. With just a handful of pantry spices and baby potatoes, you get a deliciously crunchy outside and fluffy inside without deep frying.


    Ingredients:

    • 1½ lbs (680g) baby potatoes, halved

    • 1 tbsp olive oil

    • 1 tsp garlic powder

    • 1 tsp paprika (smoked or sweet, your choice)

    • Salt and freshly ground black pepper, to taste


    Preparation Instructions:

    1. Prep the Potatoes:
      Wash and dry the baby potatoes. Cut them in half. For larger ones, quarter them to ensure even cooking.

    2. Season:
      In a large bowl, toss the halved potatoes with olive oil, garlic powder, paprika, salt, and pepper. Mix well to coat each piece evenly.

    3. Arrange in Air Fryer:
      Place the seasoned potatoes in the air fryer basket in a single layer for the crispiest results. You may need to cook in batches depending on the size of your air fryer.

    4. Air Fry:
      Cook at 400°F (200°C) for 15–20 minutes, shaking or flipping the potatoes halfway through.
      They’re ready when golden, crispy on the outside, and fork-tender inside.

    5. Serve:
      Transfer to a serving plate and enjoy them hot, garnished with fresh herbs (optional) like parsley, rosemary, or chives.


    ️ Serving Suggestions:

    • As a side to roasted meats, burgers, sandwiches, or grilled vegetables.

    • As a snack with dipping sauces: try garlic aioli, ketchup, spicy mayo, ranch, or tzatziki.

    • Top with grated Parmesan and fresh thyme for an herby, cheesy twist.


    Optional Add-Ins & Variations:

    • Add chili flakes or cayenne for heat.

    • Toss with lemon zest and chopped rosemary before serving for a Mediterranean touch.

    • Use sweet potatoes for a sweeter variation—cut into cubes and follow the same steps.


    Storage & Reheating:

    • Storage: Let leftovers cool and store in an airtight container in the fridge for up to 3 days.

    • Reheating: Pop back in the air fryer at 375°F (190°C) for 5–7 minutes to re-crisp.

  • Natural Remedies with Rosemary and Olive Oil for Muscle Pain & Inflammation

    Natural Remedies with Rosemary and Olive Oil for Muscle Pain & Inflammation

    Rosemary and olive oil are well-loved staples in kitchens worldwide—but beyond enhancing flavor, they also offer powerful natural healing properties. Used together, they create gentle, effective remedies for muscle pain, inflammation, and even sciatic nerve discomfort—without needing to rely on medications.


    1. Quick Muscle Pain Remedy

    Ingredients:

    • 4 tablespoons of extra virgin olive oil

    • 1 handful of fresh rosemary
      (or 2 tablespoons dried rosemary if fresh is unavailable)

    Instructions:

    1. In a bowl, combine rosemary with olive oil.

    2. Heat the mixture gently using a double boiler for 10–15 minutes. This extracts the rosemary’s essential oils without burning the herbs.

    3. Allow the oil to cool until warm.

    4. Apply generously to affected muscles or joints.

    5. Massage gently in circular motions for a few minutes.

    6. Leave on for at least 20 minutes, or overnight if possible (cover with a warm towel or wrap).

    7. Rinse off if desired.

    Repeat daily or as needed until symptoms improve.

    Benefits:
    This method delivers the anti-inflammatory and antispasmodic properties of rosemary directly to sore tissues, providing localized relief.


    2. Long-Term Infused Rosemary Oil (10-Day Preparation)

    For ongoing use, you can prepare an infused oil that keeps well and is ready whenever needed.

    Ingredients:

    • A small dark glass jar (250 ml)

    • 1 tablespoon dried rosemary or 2–3 sprigs fresh rosemary

    • Extra virgin olive oil (enough to fully submerge the herbs)

    Instructions:

    1. Place rosemary in the jar.

    2. Cover completely with olive oil.

    3. Seal the jar tightly and wrap in a dark cloth.

    4. Store in a cool, dark place for 10 days.

    5. After steeping, strain the oil through cheesecloth or a fine mesh.

    ‍♀️ Use for massage on sore muscles, joints, or inflamed areas as needed.

    Shelf life: Up to 3–4 months when stored in a cool, dark place.


    3. Rosemary Tea for Relaxation & Mild Pain

    This simple tea offers internal relief for headaches, tension, and mild inflammatory conditions.

    Ingredients:

    • 1 sprig of fresh rosemary (or 1 tsp dried rosemary)

    • 300 ml water

    Instructions:

    1. Bring the water to a boil.

    2. Add rosemary and simmer gently for 10 minutes.

    3. Strain the tea and serve warm—or chill for a refreshing version.

    How to Use:

    • Drink twice daily, ideally morning and evening.

    • For best results, continue for at least 3 months.

    Benefits:
    Rich in antioxidants and rosmarinic acid, this tea supports brain health, digestion, and circulation, and helps relieve minor headaches and general discomfort.


    Key Therapeutic Benefits of Rosemary & Olive Oil

    Property Rosemary Olive Oil
    Anti-inflammatory Reduces swelling, soothes muscle pain Protects cells, reduces joint inflammation
    Analgesic Eases aches and muscle soreness Carries active ingredients into the skin
    Antioxidant-rich Supports immunity, brain & nerve function Protects against oxidative stress
    Circulatory booster Improves blood flow to affected areas Helps deliver nutrients deep into tissues

    Tips for Best Results

    • Use organic or wild rosemary when possible for maximum potency.

    • Warm the oil slightly before each application to enhance absorption.

    • Combine topical use with daily tea consumption for inside-out benefits.

    • Store infused oils in amber or cobalt bottles to protect from light.

    • Always do a patch test before applying to large areas of skin.


    ⚠️ Cautions

    • Avoid rosemary oil during pregnancy or if you suffer from seizure disorders, unless advised by a professional.

    • If symptoms persist or worsen, seek guidance from a healthcare provider.


    Final Thoughts

    Incorporating these natural remedies with rosemary and olive oil into your routine is a simple yet powerful way to support your body’s healing processes. Whether you need quick relief from muscle pain or want a gentle long-term solution to inflammation, these plant-based tools offer time-tested, holistic care—straight from your kitchen.

  • Easy Spinach Feta Quiche Recipe

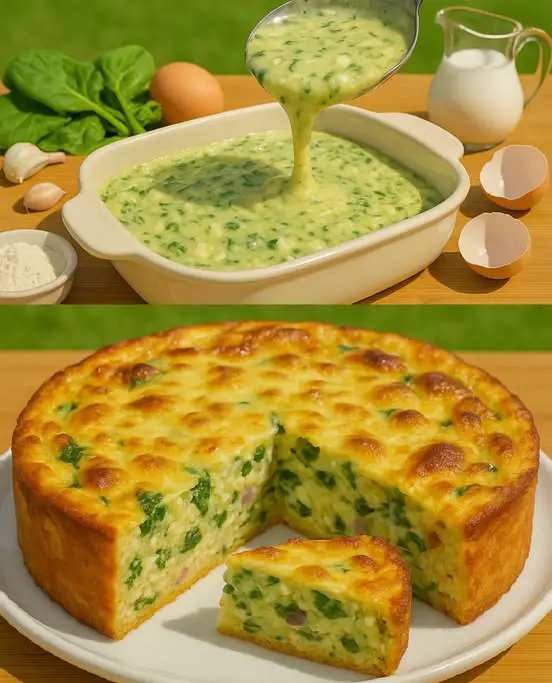
    Easy Spinach Feta Quiche Recipe

    Prep Time: 15 minutes
    Cook Time: 35–40 minutes
    Total Time: 50–55 minutes
    Servings: 6–8
    Calories per Serving: ~250

    This Spinach Feta Quiche is a delightful, protein-packed dish that’s perfect for any meal of the day—from a quick weekday breakfast to an elegant weekend brunch. It features a buttery crust, a savory egg custard, and a flavor-rich mix of spinach, feta, and vibrant vegetables.


    Why This Recipe Works

    • Quick and Easy: Uses store-bought or homemade pie crust for convenience.

    • Versatile: Easily customizable with your favorite vegetables, cheeses, or proteins.

    • Elegant Yet Simple: Looks fancy but is beginner-friendly.

    • Perfect for Make-Ahead: Great warm, cold, or reheated.


    Ingredients

    For the Crust:

    • 1 pie crust (store-bought or homemade quick blitz puff pastry)

    For the Filling:

    • 6 large eggs

    • 1 cup milk (whole or 2%)

    • 1 cup baby spinach, chopped

    • 1 cup feta cheese, crumbled

    • ½ cup red bell pepper, diced

    • ¼ cup onion, finely chopped

    • ½ tsp salt

    • ¼ tsp black pepper


    Step-by-Step Instructions

    1. Prepare the Crust

    1. Preheat oven to 375°F (190°C).

    2. Roll out your pie crust and press it into a 9-inch pie dish.

    3. Blind bake: Line with parchment paper and fill with pie weights or dry beans. Bake for 10 minutes, then remove weights and set aside.

    2. Make the Filling

    1. In a medium skillet, sauté onions and red bell pepper over medium heat until soft (about 3 minutes). Add chopped spinach and cook until wilted. Let cool slightly.

    2. In a large bowl, whisk together eggs, milk, salt, and pepper.

    3. Stir in the sautéed vegetables and crumbled feta cheese.

    3. Assemble and Bake

    1. Pour the filling into the pre-baked pie crust.

    2. Bake for 35–40 minutes, or until the center is set and the top is lightly golden.

    3. Let cool for 5–10 minutes before slicing.


    Ingredient Tips

    • Spinach: Fresh is best, but you can use frozen (thawed and squeezed dry).

    • Feta: Opt for a block of feta for better texture and flavor than pre-crumbled.

    • Milk: Whole milk makes the custard creamier, but 2% also works well.

    • Onions: Red onions or shallots offer a sweeter flavor if preferred.


    Serving Suggestions

    • Side Dishes: Fresh green salad, roasted potatoes, or zucchini fritters.

    • For Brunch: Pair with Homemade Chocolate Filled Crêpes or Mini Lemon Pies.

    • Presentation: Top slices with fresh herbs, cherry tomato halves, or a few microgreens for an elegant touch.


    Variations & Substitutions

    Variations:

    • Mediterranean: Add sun-dried tomatoes and swap feta for goat cheese.

    • Protein Boost: Mix in diced cooked bacon, ham, or shredded chicken.

    • Greens Swap: Use kale, Swiss chard, or arugula instead of spinach.

    Substitutions:

    • Cheese: Try Gruyère, sharp cheddar, or mozzarella for different flavor profiles.

    • Vegetables: Mushrooms, zucchini, or leeks work well in place of spinach or peppers.

    • Gluten-Free: Use a gluten-free crust or bake it crustless (just grease your pan).


    Storage & Reheating

    Storage:

    • Cool completely before wrapping.

    • Store tightly wrapped in plastic or foil or in an airtight container.

    • Keeps in the refrigerator for up to 4 days.

    Reheating:

    • Oven: Preheat to 350°F, cover loosely with foil, and heat for 15–20 minutes.

    • Microwave: Heat individual slices for 1–2 minutes on medium power.


    Nutrition (Per Serving)

    Nutrient Amount
    Calories 250
    Protein 15g
    Carbs 20g
    Fiber 3g
    Fat 12g

    Flavor Pairings

    Herb Cheese
    Basil Mozzarella
    Rosemary Goat Cheese
    Vegetable Protein
    Tomato Grilled Chicken
    Spinach Quinoa

    ✨ Final Touches

    Elevate your quiche with these ideas:

    • Garnish with fresh parsley, dill, or basil.

    • Use ring molds or cut-outs for elegant single servings.

    • Serve with edible flowers or microgreens for a high-end look.


    More Recipes You’ll Love

    • Vanilla Oatmeal Pancakes – comforting and wholesome.

    • Quick Pizza Rolls – a fun and savory snack.

    • Soft Butter Cake with Vanilla Extract – a moist dessert dream.

    • Cranberry Pistachio Shortbread Cookies – festive and flavorful.

    • Zucchini Fritters – light, crispy, and perfect on the side.

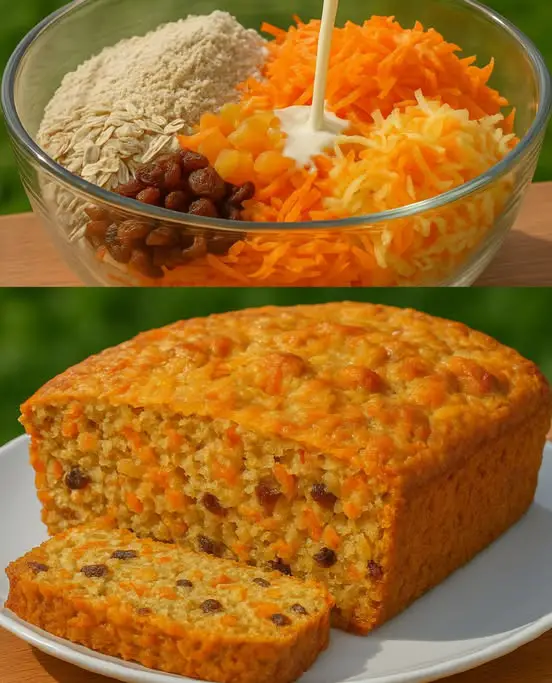
  • Sugar-free Oatmeal Recipe With Apples And Carrots

    Sugar-free Oatmeal Recipe With Apples And Carrots

    Sugar-Free Apple Carrot Oatmeal (Naturally Sweetened)

    A wholesome, hearty bowl of oatmeal made with fresh apples, shredded carrots, and warm spices. Think of it as a carrot cake–inspired oatmeal — without the sugar crash!


    Ingredients (Serves 2)

    • 1 cup rolled oats (old-fashioned, not quick-cooking)

    • 2 cups water or unsweetened almond milk (or half and half for extra creaminess)

    • 1 medium apple, peeled or unpeeled, grated or finely chopped

    • ½ cup grated carrots (about 1 small carrot)

    • ¼ tsp ground cinnamon

    • ⅛ tsp ground nutmeg (optional)

    • Pinch of salt

    • 1 tsp vanilla extract (optional, but lovely)

    • 1–2 tbsp raisins or chopped dates (optional, for extra natural sweetness)

    Optional Toppings:

    • Chopped nuts (walnuts, pecans, almonds)

    • Extra grated apple or carrots

    • Unsweetened yogurt or a splash of milk

    • Chia seeds or flaxseeds

    • Drizzle of almond butter or peanut butter


    Instructions

    1. Combine Ingredients

    In a small saucepan, add:

    • 1 cup oats

    • 2 cups liquid (water or milk)

    • Grated apple and carrot

    • Cinnamon, nutmeg, salt

    • Raisins or dates (if using)
      Bring to a gentle simmer over medium heat.


    2. Simmer & Stir

    Reduce the heat to low and cook for 8–10 minutes, stirring occasionally, until the oats are tender and the mixture is thick and creamy. Add more liquid as needed to reach desired consistency.


    3. Flavor & Serve

    Once the oatmeal is cooked, stir in the vanilla extract (if using). Taste and adjust:

    • Add more cinnamon if you like

    • A splash of milk can mellow out the spice

    • Want it sweeter without sugar? Add mashed banana, more apple, or a few extra raisins

    Serve hot with your favorite toppings.


    Nutritional Highlights (Per Serving – approx.)

    • Calories: 220

    • Fiber: 5–6g

    • Protein: 5g

    • Sugars: 0g added sugar, 9–12g natural sugar from fruit

    • Fat: 3g


    Tips & Variations

    • Make it Creamier: Use half milk and half water, or stir in 1 tbsp Greek yogurt at the end.

    • Overnight Version: Mix all ingredients in a jar and refrigerate overnight. Eat cold or warm up in the morning.

    • Spice it Up: Add ground ginger or a pinch of cardamom for a more chai-like flavor.

    • Protein Boost: Stir in 1 scoop of plain or vanilla protein powder at the end or add a spoonful of almond butter.


    Storage

    • Store leftovers in an airtight container in the fridge for up to 4 days.

    • Reheat with a splash of milk or water to loosen the texture.

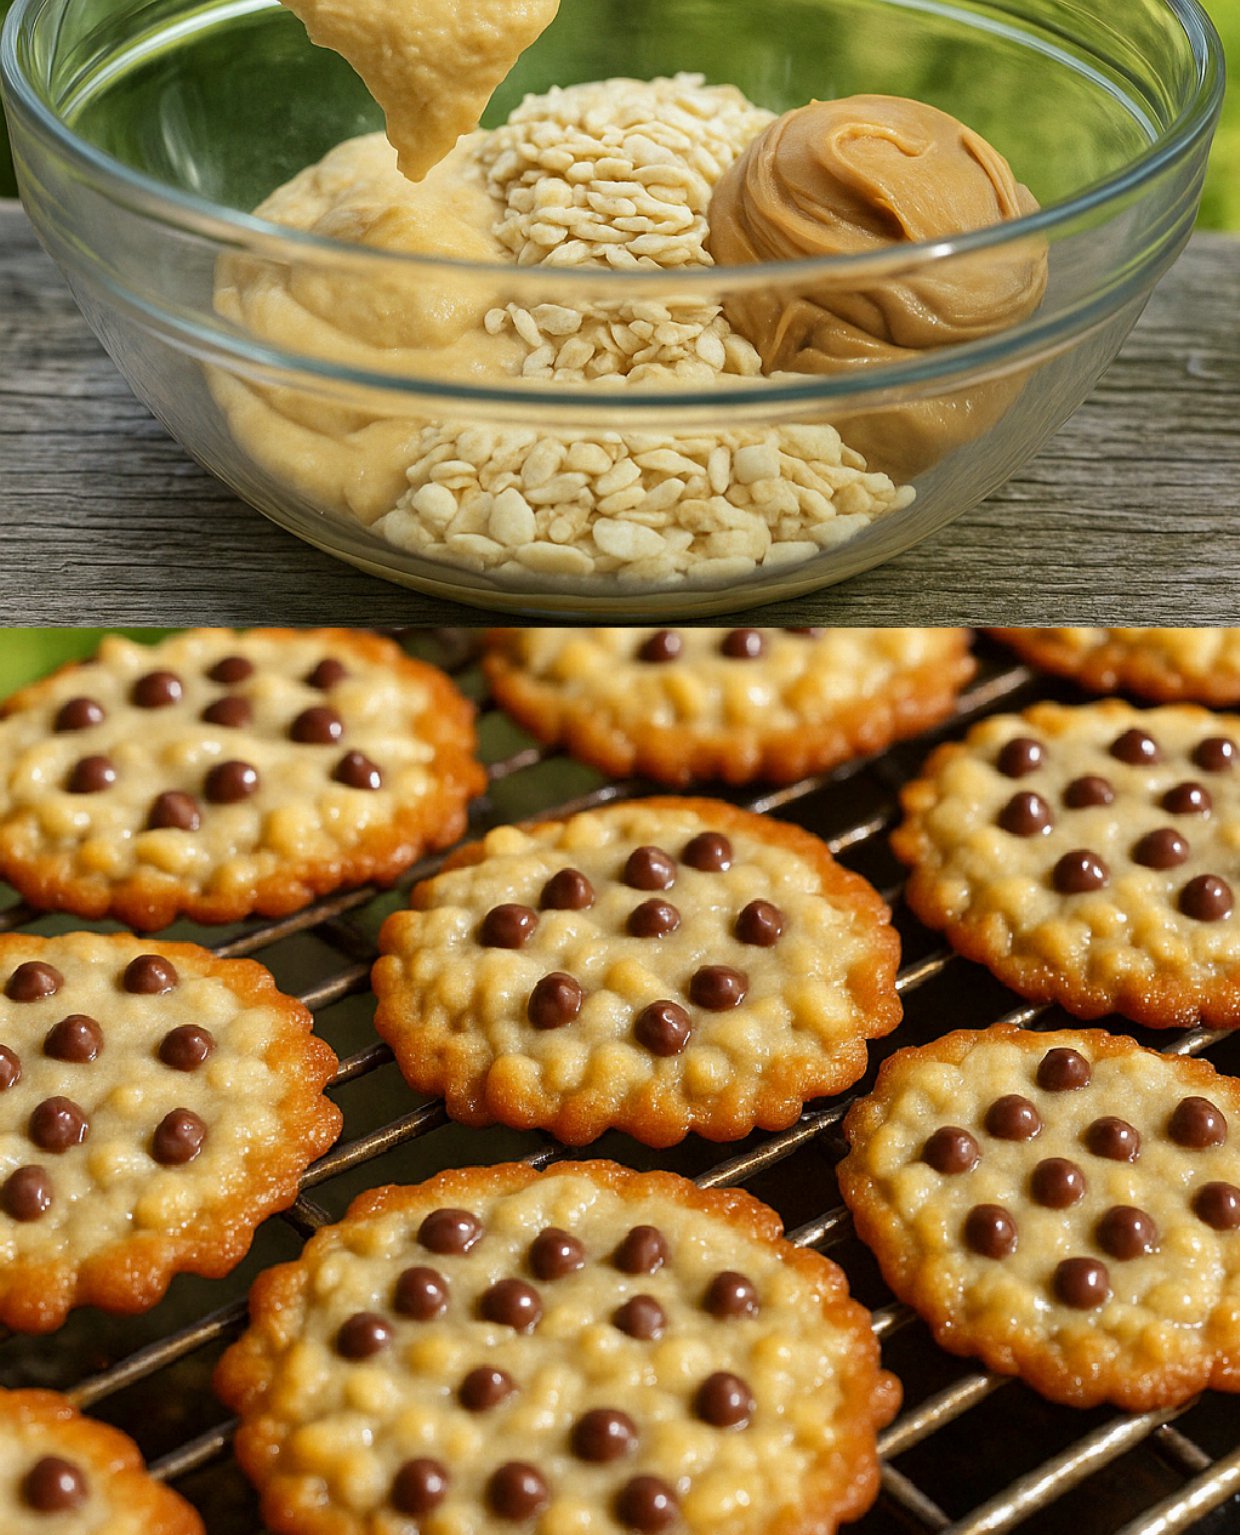
  • ❤️ Crispy Rice Krispies Chocolate Chip Cookies

    ❤️ Crispy Rice Krispies Chocolate Chip Cookies

    These cookies are a perfect blend of soft, chewy, and crispy — thanks to the surprise addition of Rice Krispies cereal! Each bite delivers a delicious crunch along with the rich flavor of chocolate chips and buttery cookie goodness.


    Ingredients

    Wet Ingredients:

    • 1 cup (2 sticks) unsalted butter, softened

    • 1 cup granulated sugar

    • ½ cup packed brown sugar

    • 2 large eggs

    • 1 teaspoon vanilla extract

    Dry Ingredients:

    • 2½ cups all-purpose flour

    • 1 teaspoon baking soda

    • ½ teaspoon salt

    Mix-ins:

    • 1 cup Rice Krispies cereal

    • 1 cup chocolate chips (or chocolate chunks for a richer bite)


    ‍ Directions

    1. Preheat & Prepare

    Preheat your oven to 350°F (180°C). Line two baking sheets with parchment paper or lightly grease them.


    2. Cream Butter & Sugars

    In a large bowl, use a hand mixer or stand mixer to cream the butter, granulated sugar, and brown sugar until light, fluffy, and pale — about 2–3 minutes.


    3. Add Eggs & Vanilla

    Add the eggs one at a time, mixing well after each addition. Stir in the vanilla extract.


    4. Combine Dry Ingredients

    In a separate bowl, whisk together flour, baking soda, and salt.


    5. Mix Wet & Dry

    Gradually add the dry ingredients to the wet ingredients, mixing on low speed until just combined. Don’t overmix — this keeps your cookies tender.


    6. Fold in the Good Stuff

    Using a spatula, gently fold in the Rice Krispies and chocolate chips until evenly distributed.


    7. Scoop & Space

    Scoop the dough using a cookie scoop or tablespoon onto the prepared baking sheets. Leave 2 inches of space between each cookie to allow for spreading.


    8. Bake

    Bake in the preheated oven for 10–12 minutes, or until the edges are golden but the centers are still soft.


    9. Cool

    Let the cookies rest on the baking sheet for 3–5 minutes, then transfer them to a wire rack to cool completely.


    Tips & Variations

    • Extra Gooey? Add an extra ¼ cup chocolate chips on top of the scooped dough for picture-perfect cookies.

    • Nutty Crunch: Stir in ½ cup chopped pecans, walnuts, or macadamia nuts.

    • Flavor Twist: Swap vanilla for almond extract for a nutty background.

    • Dried Fruit: Add ⅓ cup dried cranberries or cherries for a sweet tang.


    ⏲️ Prep & Baking Time

    • Prep Time: 20 minutes

    • Bake Time: 10–12 minutes per batch

    • Total Time: ~30–35 minutes


    Yield & Nutrition

    • Makes: About 24–30 cookies

    • Calories: ~180 per cookie (approx., depending on size and add-ins)


    Storage

    • Room Temp: Store in an airtight container for up to 5 days.

    • Freezer (Unbaked Dough): Freeze scooped dough on a tray, then transfer to a zip-top bag. Bake from frozen, adding 1–2 minutes to baking time.

    • Freezer (Baked Cookies): Cool completely and freeze in layers between parchment for up to 2 months.


    Serving Ideas

    • Enjoy warm with a glass of milk

    • Crumble over vanilla ice cream

    • Stack with marshmallow fluff for a fun cookie sandwich!

  • Easy Loaded Cheesy Pocket Tacos

    Easy Loaded Cheesy Pocket Tacos

    These cheesy biscuit tacos are the ultimate crowd-pleaser — crispy on the outside, melty and meaty on the inside! Perfect for quick weeknight dinners, after-school snacks, or even game-day bites.


    Ingredients

    • 1 lb ground beef

    • 1 packet taco seasoning (or 2–3 tbsp homemade)

    • ¼ cup water

    • 1 cup shredded cheddar cheese (or Mexican blend)

    • ½ cup salsa (chunky or smooth, your choice)

    • 1 can (8-count) refrigerated biscuit dough (like Pillsbury Grands or similar)

    Optional Toppings (for serving):

    • Sour cream

    • Shredded lettuce

    • Diced tomatoes

    • Jalapeños

    • Avocado or guacamole

    • Hot sauce


    Instructions

    1. Preheat Oven

    Preheat your oven to 375°F (190°C). Line a baking sheet with parchment paper or lightly grease it.

    2. Cook the Beef

    • In a skillet over medium heat, brown 1 lb ground beef until fully cooked.

    • Drain any excess grease.

    • Stir in the taco seasoning and ¼ cup water.

    • Simmer for 2–3 minutes until thickened. Remove from heat and let cool slightly.

    3. Flatten the Biscuits

    • Open the can of refrigerated biscuits and separate them.

    • Using your hands or a rolling pin, flatten each biscuit into a 5-inch round on a floured surface or parchment.

    4. Fill and Fold

    • In the center of each dough round, spoon about 2 tbsp of the seasoned beef, then sprinkle with cheese and a little salsa.

    • Fold over to form a half-moon shape.

    • Press edges with a fork to seal tightly.

    5. Bake

    • Place sealed pockets on the prepared baking sheet.

    • Optional: Brush tops with beaten egg or melted butter for golden color.

    • Bake for 12–15 minutes, or until golden brown and puffed.

    6. Serve

    Serve warm with your favorite taco toppings like sour cream, lettuce, tomatoes, or guac. These are great as a grab-and-go meal or plated up taco-night style.


    Tips & Variations

    • Cheesy Upgrade: Add a small cube of cream cheese or a spoonful of queso for extra creaminess.

    • Spicy Kick: Use pepper jack cheese, hot salsa, or add chopped jalapeños to the filling.

    • Make it Veggie: Swap ground beef for black beans, corn, and sautéed peppers.

    • Freezer Friendly: Bake, cool, and freeze extras. Reheat in a toaster oven or air fryer.


    Storage

    • Fridge: Store leftovers in an airtight container up to 3 days.

    • Freezer: Freeze individually wrapped in foil or plastic wrap for up to 2 months.

    • Reheat: Warm in a 350°F oven for 8–10 minutes or air fry at 350°F for 4–6 minutes for a crispier finish.


    ❓FAQ

    Can I use crescent rolls instead of biscuits?
    Yes! Just pinch the seams together to form full rounds before filling and folding.

    Can I prepare these ahead of time?
    Absolutely — fill and seal them ahead, then refrigerate unbaked for up to 24 hours before baking fresh.

    Do they get soggy with salsa inside?
    Use thicker salsa or drain excess liquid to prevent sogginess.

  • Instant Pot Spaghetti and Meatballs

    Instant Pot Spaghetti and Meatballs

    If you’re craving hearty, comforting Italian food without spending hours in the kitchen, this Instant Pot Spaghetti and Meatballs recipe is a must-try! It’s a one-pot meal that comes together in under an hour, with minimal cleanup and maximum flavor.


    ⭐ Why You’ll Love It

    • One-pot convenience — no need to boil pasta separately.

    • Fast — ready in under 1 hour.

    • Customizable — make it with store-bought or homemade meatballs, or substitute ground turkey or plant-based meat.

    • Family-friendly — picky eaters love it!


    Ingredients

    For the Meat Mixture:

    • 1 tbsp olive oil

    • ½ medium onion, finely chopped

    • 1 lb ground beef (can sub ground turkey or plant-based meat)

    • 2 tsp garlic powder

    • 3 tsp minced garlic (or about 3 cloves)

    • 1 tbsp Italian seasoning

    • Salt and black pepper, to taste

    For the Pasta:

    • 1 jar (24 oz) pasta sauce (marinara or your favorite variety)

    • 1 can (14.5 oz) diced tomatoes, undrained

    • 3 cups water, divided

    • 1 lb dry spaghetti pasta, broken in half


    Instructions

    1. Sauté the Aromatics and Meat

    • Set your Instant Pot to ‘Sauté’ mode and heat the olive oil.

    • Add the chopped onion and cook for 2–3 minutes until softened.

    • Stir in the ground beef, garlic powder, minced garlic, Italian seasoning, and salt & pepper.

    • Cook until meat is browned and fully cooked, about 6–8 minutes.

    • Drain excess grease if needed, then remove the meat mixture from the pot and set it aside.

    2. Layer the Pasta and Sauce

    • Turn off ‘Sauté’ mode.

    • Pour 1½ cups of water into the pot and deglaze the bottom with a wooden spoon to prevent the burn warning.

    • Break the spaghetti in half and scatter it in a crisscross “X” pattern to prevent sticking.

    • Pour the pasta sauce and diced tomatoes evenly over the pasta — do not stir.

    • Pour in the remaining 1½ cups of water, making sure the pasta is just covered with liquid. Gently press down if needed.

    3. Pressure Cook

    • Secure the lid and set the valve to Sealing.

    • Press Manual or Pressure Cook and set to High Pressure for 5 minutes.

    • Once the cooking time is up, allow a Natural Pressure Release (NPR) for 5 minutes, then carefully do a Quick Release to let out any remaining pressure.

    4. Finish and Serve

    • Open the lid and return the cooked meat mixture to the pot.

    • Gently stir everything together until well combined and the pasta is coated in sauce.

    • Let it sit for 2–3 minutes to thicken and allow flavors to meld.


    ️ Serving Suggestions

    • Sprinkle with grated Parmesan or shredded mozzarella.

    • Garnish with fresh basil or parsley.

    • Serve with garlic bread and a simple green salad for a complete meal.


    Variations & Tips

    • Add Meatballs: Substitute ground beef with frozen or homemade meatballs. Sauté or brown separately and add them during the pressure cook step.

    • Extra Veggies: Add finely chopped bell peppers, mushrooms, or zucchini when sautéing the onions.

    • Creamy Version: Stir in a splash of heavy cream or a spoonful of cream cheese after pressure cooking for a creamy twist.

    • Gluten-Free: Use gluten-free pasta, but reduce the cook time by 1 minute and monitor for sticking.


    Storage

    • Refrigerator: Store in an airtight container for up to 4 days.

    • Freezer: Freeze in portioned containers for up to 2 months. Reheat with a splash of water or extra sauce.


    ❓FAQ

    Can I use whole wheat pasta?
    Yes, but it may require an extra minute of cooking and slightly more liquid. Monitor closely.

    Why do I layer the ingredients without stirring?
    Stirring can cause pasta to stick to the bottom and trigger a “burn” warning on the Instant Pot.

    Can I double this recipe?
    Yes — just ensure not to overfill past the “Max Fill” line and increase the water slightly.


    Enjoy your rich, saucy, satisfying Instant Pot spaghetti and meatballs — all in one pot, with no mess and no fuss!

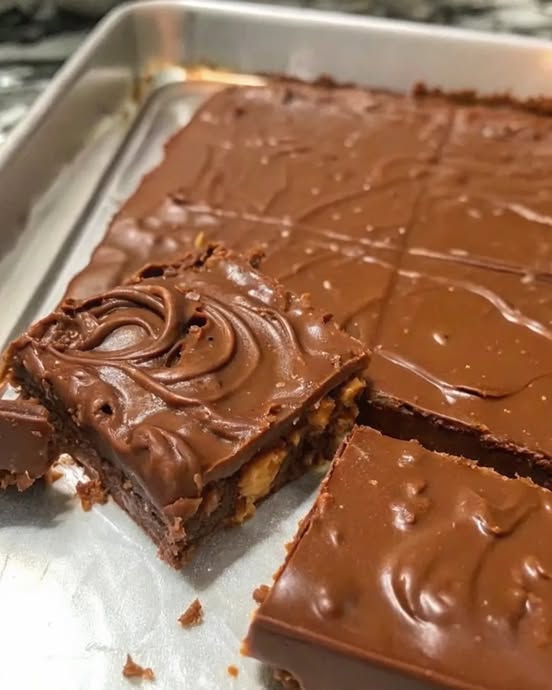
  • My Mom’s Fudge

    My Mom’s Fudge

    My Mom’s Fudge

    Ingredients

    • ½ cup  Butter (unsalted) (1 stick)
    • 2 cups Granulated  sugar
    • ⅔ cup Evaporated milk
    • 1¾ cups Semi-sweet chocolate chips (10-12 ounces)
    • 7 ounces Marshmallow fluff (1 jar)
    • 1 tbsp Vanilla extract
    How To Make My Mom’s Fudge
    1. Combine butter, sugar, and milk in a saucepan, bring to a boil, and whisk to combine.
    2. Reduce heat and boil for five minutes.
    3. Remove from heat and melt in chocolate chips.
    4. Add marshmallow fluff and vanilla extract, whisking until smooth.
    5. Pour the mixture into a prepared dish and refrigerate until firm.
    What to Serve With Mom’s Fudge
    • Hot Cocoa: Pair this creamy treat with a warm cup of cocoa for a delightful combination.
    • Vanilla Ice Cream: Create a decadent dessert by serving fudge over a scoop of vanilla ice cream.
    • Fresh Berries: Balance the richness with the freshness of berries for a vibrant contrast.
    • Dark Roast Coffee: Enjoy a slice of fudge with a bold coffee to awaken your senses.

    Frequently Asked Questions

    • Can I double this recipe?
      Yes, simply double the ingredients and use a 9×13 pan for a larger batch.
    • How do you keep fudge from crumbling?
      Avoid overcooking, use fresh ingredients, and store it in an airtight container to prevent drying.
    • What’s the shelf life of Mom’s Fudge?
      Properly refrigerated, the fudge can last for several weeks, though it’s unlikely to stay uneaten that long!
    • Can I freeze Mom’s Fudge?
      Yes, you can freeze the fudge for longer storage. Thaw in the refrigerator before serving.

    After crafting Mom’s Fudge, expect an indulgent experience that tantalizes your taste buds with its smooth, velvety texture and rich chocolate flavor. Each bite is a journey back to cherished family moments filled with love and joy.

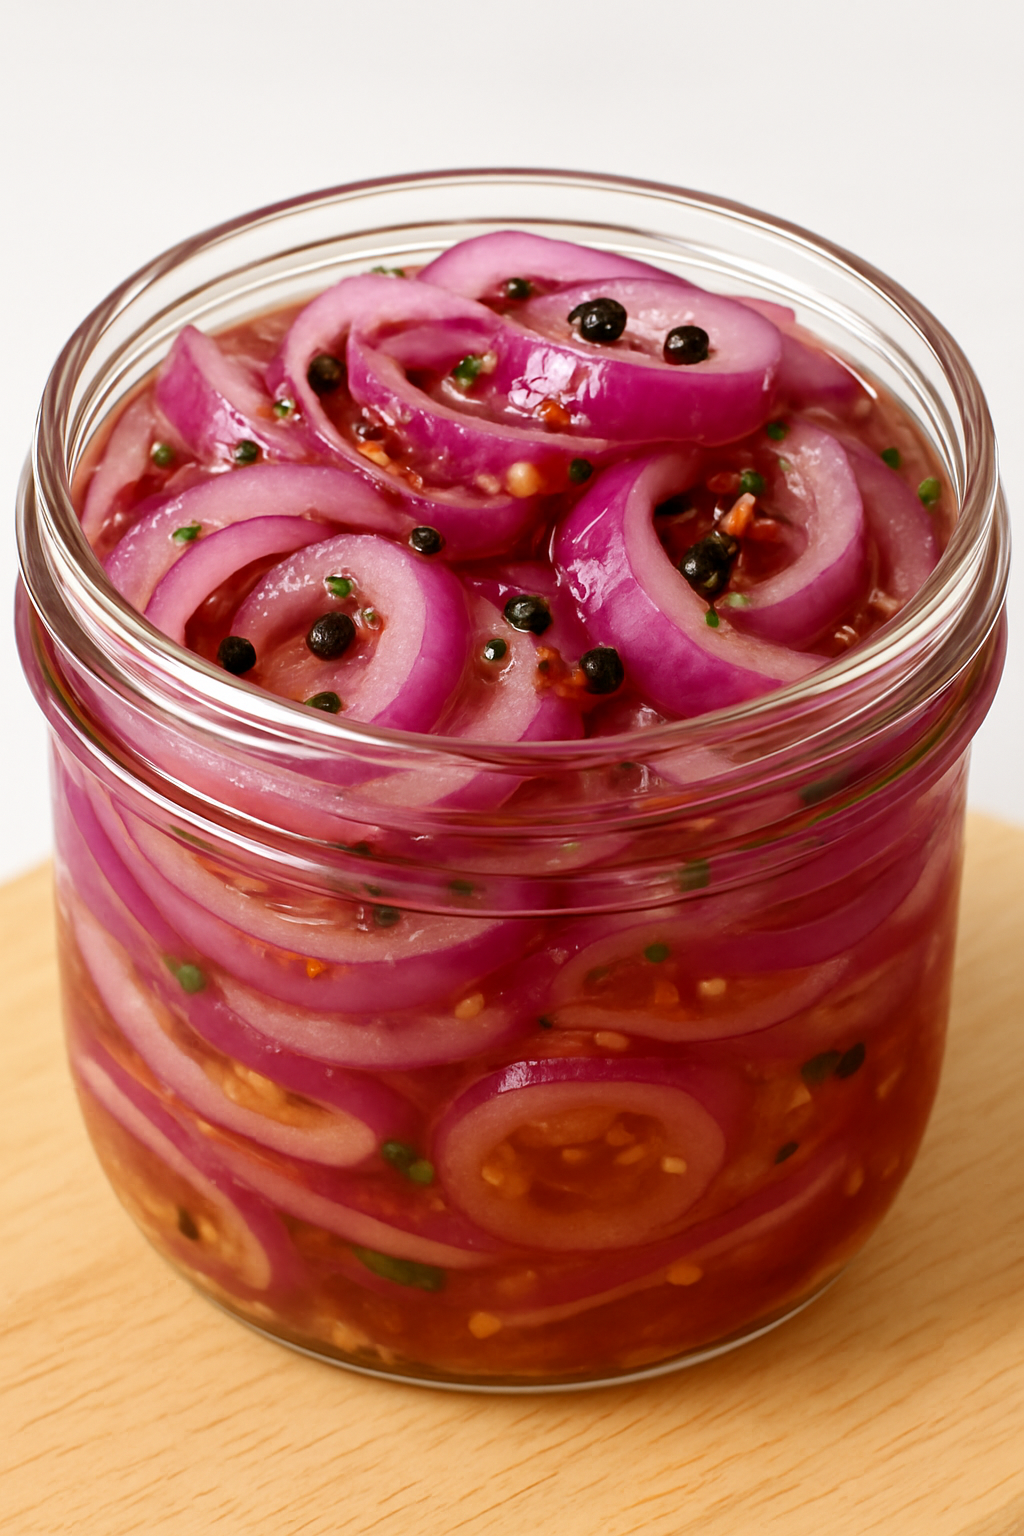
  • Quick Pickled Red Onions

    Quick Pickled Red Onions

    Bright, Zesty, and Addictively Delicious – A Must-Have Pantry Staple


    Introduction

    Pickled red onions are a vibrant, tangy, and sweet condiment that elevates almost any dish. With their bold magenta hue and crunchy texture, they add not just flavor but color and contrast to your meals. This classic preparation is easy, requires just a few basic ingredients, and takes only minutes to prepare.

    Whether you’re topping tacos, burgers, grilled meats, or fresh salads, these pickled onions are the perfect zesty touch. They also make excellent gifts when packed in mason jars!


    Ingredients – Makes One 16 oz (500 ml) Jar

    Ingredient Amount Notes
    Red onion 1 large Thinly sliced into rings or half-moons
    Vinegar 1 cup (240 ml) White vinegar, apple cider, or red wine vinegar work well
    Water 1 cup (240 ml) Helps mellow the sharpness of the vinegar
    Sugar 1–2 tbsp (15–30 ml) Use less for tangier, more for sweeter
    Salt 1½ tsp (7.5 ml) Kosher or sea salt preferred

    Optional Add-ins:

    • ½ tsp black peppercorns

    • ½ tsp mustard seeds

    • 1 garlic clove, smashed

    • Few sprigs of thyme, dill, or rosemary

    • 1 dried chili or pinch of red pepper flakes (for heat)


    Preparation Instructions – Step by Step

    Step 1: Make the Pickling Brine

    • In a small saucepan, combine vinegar, water, sugar, and salt.

    • Bring to a gentle simmer over medium heat, stirring until the sugar and salt fully dissolve (about 2–3 minutes).

    • Optional: Add peppercorns, mustard seeds, or herbs for additional flavor.

    • Turn off the heat and set the brine aside while you prepare the onions.


    Step 2: Slice the Onions

    • Peel and thinly slice the red onion into rings or half-moons, depending on your preference.

    • A mandoline slicer can help achieve even thickness, but a sharp knife works fine.

    • Place the sliced onions into a clean glass jar or heatproof bowl.


    Step 3: Combine and Cool

    • Carefully pour the hot brine over the onions, making sure all pieces are submerged.

    • If needed, press down the onions with a spoon or fork.

    • Let the mixture sit uncovered at room temperature for about 30–60 minutes, allowing the onions to soften and take on the beautiful pink color.


    ❄️ Step 4: Refrigerate and Store

    • Once cooled, seal the jar with a tight-fitting lid and refrigerate.

    • The pickled onions will keep well for up to 2 weeks in the fridge.

    • The flavor deepens after the first few hours and is best after 1–2 days.


    Tips & Variations

    • For Sugar-Free Option: Substitute sugar with stevia or skip it entirely for a tart, savory version.

    • Vinegar Choices: Each vinegar brings its own flavor. Try rice vinegar for a mild version or malt vinegar for a richer taste.

    • Color Enhancement: Red wine vinegar enhances the magenta hue; white vinegar gives a lighter pink tone.

    • Make It Spicy: Add jalapeño slices or a pinch of chili flakes to give the onions a kick.


    ️ Serving Suggestions

    • Tacos & Burritos – The tang cuts through rich meats beautifully.

    • Burgers & Sandwiches – Adds crunch and brightness.

    • Grain Bowls & Salads – Perfect for Mediterranean or Middle Eastern-style dishes.

    • Charcuterie Boards – Pairs well with cheeses and cured meats.

    • Egg Dishes – Try with scrambled eggs or shakshuka.


    Storage & Shelf Life

    • Store in the refrigerator in a tightly sealed jar.

    • Best used within 2 weeks for maximum flavor and crunch.

    • Avoid storing at room temperature long-term, as this is a quick pickle and not shelf-stable.


    ❓ FAQ

    Q: Can I use white onions or yellow onions?

    A: Yes, but red onions are preferred for their color and natural sweetness. White onions result in a sharper flavor, while yellow onions give a deeper, more mellow note.

    Q: Is it safe to can these?

    A: No. This recipe is for refrigerator pickles only. It’s not intended for shelf-stable canning. For long-term storage, follow USDA-approved canning methods.

    Q: Can I reuse the brine?

    A: You can reuse the brine once more, but its flavor and acidity will be milder. Always refrigerate reused brine and use within a week.


    Final Thoughts

    Pickled red onions are one of those simple pleasures in the kitchen. They’re quick to make, endlessly adaptable, and deliver a powerful burst of flavor and color to any dish. Once you start making them at home, you’ll never go back to store-bought.

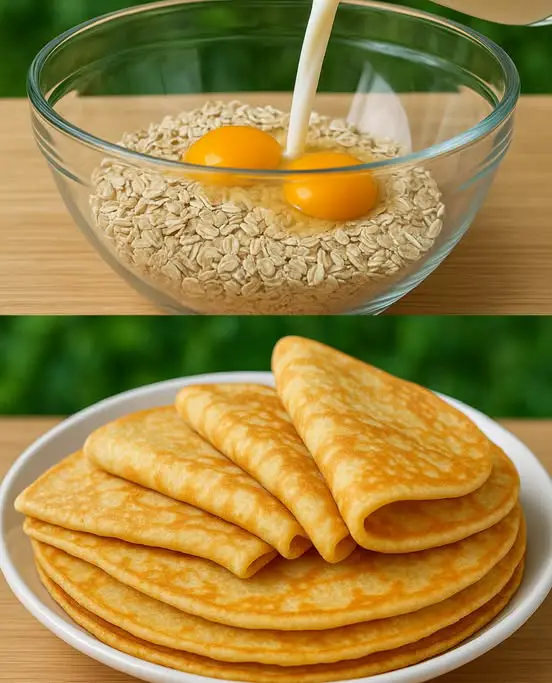
  • Healthy Oat Pancakes Recipe in 5 Minutes

    Healthy Oat Pancakes Recipe in 5 Minutes

    When I need something quick, filling, and healthy to kickstart my day, I turn to this Healthy Oat Pancake Recipe. It’s my go to when I want pancakes without the guilt no sugar, no refined flour, and absolutely no fuss. Just blend, pour, flip, and enjoy. As a chef who believes in wholesome comfort food, these oat pancakes tick all the boxes without sacrificing texture or flavor.

    ×
    “Five minutes. One blender. Zero guilt. That’s how healthy pancakes should be.” – @CleanPlatePro

    No
    video of: Top 5 Air Fryers for Busy WeeknightsPlay Video
    Top 5 Air Fryers for Busy Weeknights

    Share
    Watch onHumix
    Top 5 Air Fryers for Busy Weeknights
    Why These Oat Pancakes Are My Weekday Hero
    These pancakes are fast, flexible, and made entirely from pantry staples. They’re naturally gluten friendly if you use certified gluten free oats, and they’re incredibly forgiving no whipping, folding, or special tools required. I make them often after morning workouts or when I need breakfast on the table before the coffee’s done brewing.

    No flour needed: Oats give you a hearty base without the crash of white flour.
    No sugar added: You control the sweetness with natural toppings like fruit or yogurt.
    Only one blender: Toss it all in and blitz no mixing bowls, no extra dishes.
    Ready in 5 minutes: From blend to bite, these are as fast as it gets.
    If you’re a fan of simple, wholesome breakfasts, you’ll also love our no sugar energy bits and oats and milk breakfast cups for easy, nourishing options.

    Step by Step to Make These 5 Minute Oat Pancakes
    Ingredients
    2 cups oatmeal (220g)
    ½ tsp salt (3g)
    4 eggs
    1 cup warm milk (250ml)
    3½ tbsp butter, melted (50g)
    1 tbsp vanilla extract or vanillin
    1 cup water (250ml)
    Instructions
    1. Blend the Batter
    Add oatmeal, salt, eggs, warm milk, melted butter, vanilla, and water to a blender.
    Blend until completely smooth. The batter will look pourable and creamy.
    2. Let It Sit
    Let the batter rest for a few minutes while you heat your pan. This thickens the texture slightly.
    3. Cook the Pancakes
    Heat a nonstick skillet over medium heat. Lightly grease if needed.
    Pour a ladleful of batter into the skillet and tilt to spread evenly.
    Cook for 2-3 minutes per side, or until golden and firm in the center.
    4. Serve and Enjoy
    Serve warm with toppings like fruit, yogurt, nut butter, or maple syrup.
    “Oats, eggs, and a blender the breakfast trinity for a better morning.” – @FuelFastKitchen

    Stack of healthy oat pancakes topped with fresh berries and yogurt on a white plate
    Quick and easy oat pancakes made without flour or sugar, ready in 5 minutes
    Flavor Variations for Every Mood
    Sweet Pancake Twists
    Because this oat pancake base is neutral, I often adjust the batter to suit my mood sometimes I want warm, cinnamon comfort and other days I need a bright fruity twist. These ideas below are some of my go to variations when I want a fresh spin on the same reliable recipe.

    Banana cinnamon: Blend in ½ a ripe banana and ½ tsp cinnamon for a naturally sweet, warming flavor.
    Berry burst: Fold in a handful of blueberries or chopped strawberries into the blended batter right before cooking.
    Choco oat: Add 1 tbsp unsweetened cocoa powder and a few sugar free chocolate chips on top while cooking.
    Apple spice: Stir in ½ tsp apple pie spice and serve with sautéed apples on top.
    If you love flexible recipes like this, you’ll probably also enjoy our fluffy Japanese pancakes or condensed milk cake both of which adapt beautifully to seasonal flavors.

    ×
    Ezoic
    Savory Twists for Brunch or Dinner
    Not every pancake needs syrup. In fact, I often lean toward savory oat pancakes when I want a higher protein meal or something to serve with soup or salad. These savory add ins give the batter an entirely new personality:

    Herb garlic: Add 1 tsp garlic powder and 1 tbsp chopped parsley or dill to the blender mix.
    Cheddar onion: Stir in ¼ cup shredded cheese and finely diced green onions before cooking.
    Smoked paprika: Add ½ tsp for a smoky flavor, great with eggs on top.
    Zucchini blend: Grate and drain ½ cup zucchini and stir into the batter adds moisture and nutrition.
    “Oat pancakes don’t just belong at breakfast fill them, fold them, and turn them into full meals.” – @OatGeniusChef

    Freezing, Reheating, and Meal Prepping
    These pancakes freeze like a dream. And when I’m prepping for a busy week, I double the batch on Sunday, freeze the extras, and reheat them in minutes all week long. They’re soft, never dry, and retain their texture beautifully even from frozen.

    ×
    Ezoic
    Cool completely: Before storing, let the pancakes cool on a wire rack so moisture doesn’t make them soggy.
    Freeze in layers: Stack pancakes with parchment paper between and seal in a freezer safe zip bag.
    Label and date: Always mark the batch so you know when they were made.
    To reheat: Microwave for 30 seconds or reheat in a pan on low heat with a lid to keep moisture in.
    This method works for other freezer friendly recipes too I do the same with our homemade naan and fluffy bread loaf both thaw and toast like they were fresh.

    Oat Pancake Troubleshooting Table
    Despite how simple this recipe is, there are a few things that can go wrong if you rush the process or tweak the ingredients too much. Here’s a quick table to help you spot and solve common issues based on my kitchen tests.

    Problem Likely Cause Fix
    Pancakes too dry Batter too thick or pan too hot Add 1-2 tbsp extra water or reduce heat slightly
    Pancakes fall apart Batter too thin or not rested Let the batter sit for 5-10 minutes before cooking
    Undercooked inside Flipped too soon or heat too high Wait for bubbles to appear before flipping and lower heat
    Bitter taste Too much baking powder or low quality oats Stick to the recipe’s balance and use rolled or instant oats
    Blender struggles Oats clumping or blades stuck Add liquid first, then oats and pause to stir halfway through
    “If your pancakes aren’t working, it’s rarely the oats it’s usually the pan, the rest, or the rush.” – @FixYourFlapjack

    Perfect Toppings and Pairings
    The best part about oat pancakes is the blank canvas they give you. You can top them for energy, flavor, or indulgence and they hold their shape well under fruit, syrup, sauces, or spreads. Below are my go to combinations that I serve for different moods and meals.

    ×
    Ezoic
    Nutty breakfast: Top with almond butter, chia seeds, and fresh banana slices.
    High protein: Spread with Greek yogurt, a drizzle of honey, and hemp seeds.
    Brunch ready: Stack with cottage cheese and sautéed spinach for a savory spin.
    Indulgent weekend: Top with whipped coconut cream, berries, and shaved dark chocolate.
    Want more creative breakfast pairings? Try them with a side of zucchini patties or spinach quiche to round out your plate with protein and veggies.

    “What you put on top of pancakes says a lot about your day. Choose wisely, stack kindly.” – @ToppingMoodChef

    Chef Tips for Consistently Great Oat Pancakes
    My Daily Prep Routine
    Over the years, I’ve made this recipe hundreds of times for early shoots, retreats, family mornings, and solo breakfasts. What I’ve learned is that consistency comes down to just a few small details that most home cooks overlook. If you want perfect oat pancakes every single time, here’s exactly how I prep mine behind the scenes.

    Warm ingredients blend better: I let the milk and melted butter sit at room temperature for 5 minutes. Cold dairy straight from the fridge thickens the batter too quickly in the blender.
    Oats matter: Rolled oats blend into a creamier batter than steel cut or quick oats. If you want uniformity, go for rolled or instant oats only.
    Let the batter rest: I never skip the 5-10 minute rest after blending. It allows the oats to hydrate and gives the batter a better pour and cook.
    Thin with water last: If the batter is too thick, I thin it after resting not before. This avoids a watery result or uneven cooking.
    Signs Your Batter Is Just Right
    Even with measuring, every batch reacts slightly differently depending on humidity, oat grind, and even blender strength. Here’s how I know when the batter is ready to go:

    ×
    Ezoic
    Consistency: It should pour like pancake batter, not like smoothie or yogurt. If it flows slowly but smoothly from a ladle, it’s ready.
    Texture: It should look slightly creamy but not gritty. You shouldn’t see whole oat pieces after blending.
    Rested feel: After resting, it thickens just a bit like thick cake batter which makes it easy to control in the pan.
    “Your blender isn’t just mixing it’s unlocking the oats. Get the texture right, and the pancakes flip themselves.” – @BatterWhisperer

    Visual Clues for Cooking the Perfect Flip
    Even with the right batter, oat pancakes cook a little differently than flour based ones. They don’t bubble as aggressively, and their edges take slightly longer to set. Here’s what I look for to flip them with confidence and avoid breaking or tearing:

    Edge lift: The edge of the pancake should begin to slightly lift or curl away from the pan after 2-3 minutes.
    Steam release: You’ll see small bursts of steam escaping a sign that the interior is cooking through.
    Firm surface: Gently press the top it should feel set and not leave batter on your finger.
    I always use a thin silicone spatula to flip. Metal tools are too harsh and often damage the pancake’s edges. One clean motion, low and slow, does the trick.

    Balanced Serving Ideas for Any Time of Day
    One of the reasons I always recommend this oat pancake recipe is because of its adaptability. It’s naturally nutritious, and with the right pairings, it works beautifully for breakfast, lunch, or even post workout meals. Here are my top combos for different needs:

    ×
    Ezoic
    Power breakfast: Stack pancakes with peanut butter, chia seeds, and banana slices for protein, fat, and fiber.
    Light lunch: Serve savory oat pancakes with a poached egg and sautéed spinach on top.
    Snack plate: Pair 2 mini pancakes with cottage cheese and cucumber slices for a quick, refreshing snack.
    Sweet craving: Top with date syrup, crushed nuts, and cinnamon for a naturally sweet, refined sugar free treat.
    These pancakes even work well as a base for “pancake sandwiches” I’ve filled them with egg salad, herbed cream cheese, and thinly sliced cucumbers for picnic style lunches. If you want more light and wholesome pairings, you can match them with our egg muffins or crispy lentil patties.

    Quick Reference for Cooking and Adjusting
    This table below summarizes key decision points you can refer to if your batter or cooking feels off. I use these markers to adapt on the fly, especially when making larger batches for events or clients.

    Scenario Visual Sign Adjustment Needed
    Batter too thick Clumps in the blender or won’t pour easily Add 1-2 tbsp water and reblend lightly
    Won’t hold shape Spreads too far or breaks when flipped Let batter rest longer and reduce water slightly
    Edges burn before center sets Dark ring but soft middle Lower heat and cover pan with lid for even cooking
    Pancakes taste bland Flat flavor, especially if eaten plain Add cinnamon, nutmeg, or a pinch of cardamom to batter
    Too eggy texture Feels spongy or custard like Reduce eggs by one and increase oats slightly
    “Every great pancake teaches you something even the ones that stick to the pan.” – @StackAndLearnChef

    Frequently Asked Questions About Healthy Oat Pancakes
    Can I make the batter ahead of time?
    Yes! You can blend the batter and refrigerate it for up to 24 hours. Stir before using as it may thicken while resting.

    ×
    Ezoic
    Can I replace the milk with a non dairy option?
    Absolutely. Almond milk, oat milk, or soy milk all work well in this recipe.

    Are these pancakes gluten free?
    If you use certified gluten free oats, then yes this recipe is completely gluten free.

    Can I use quick oats or steel cut oats?
    Quick oats work, but steel cut oats won’t blend smoothly and are not recommended.

    ×
    Ezoic
    What can I use instead of butter?
    You can substitute melted coconut oil, avocado oil, or even unsweetened applesauce for a lighter version.

    Can I freeze these pancakes?
    Yes. Freeze them in a single layer with parchment between each, then reheat in a toaster or microwave.

    Why is my batter too thick or too thin?
    Batter thickness depends on oat type and resting time. Adjust with water or let it rest longer as needed.

    ×
    Ezoic
    How do I get evenly round pancakes?
    Use a ladle or measuring cup and pour slowly into the center of the pan, allowing it to spread naturally.

    Can I make these eggless?
    This recipe relies on eggs for structure, but you can try flax eggs or mashed banana results may vary.

    What’s the best topping for oat pancakes?
    Try Greek yogurt, fresh fruit, nut butters, or even savory toppings like hummus and avocado.

  • Chicken Bubble Biscuit Bake Casserole

    Chicken Bubble Biscuit Bake Casserole

    Cheesy • Creamy • Comforting • Family Favorite


    Why You’ll Love This Recipe

    This recipe comes straight from the heart of home cooking—simple, hearty, and oh-so-satisfying. Passed down from Grandma’s kitchen, it’s a cozy one-pan dish loaded with creamy chicken, ranch-seasoned goodness, and fluffy biscuits that bake into golden, cheesy bubbles. Easy to prepare and always a crowd-pleaser!


    Ingredients

    Serves: 8

    • 2 cups shredded cheddar cheese, divided

    • 3 cups cooked, shredded chicken (rotisserie chicken works great!)

    • 2 tablespoons ranch seasoning mix (like Hidden Valley)

    • 2 cans (10.5 oz each) cream of chicken soup

    • ¼ cup cooked bacon, crumbled (optional but adds great flavor)

    • 1½ cups sour cream

    • 1 can (12 oz) refrigerated biscuits (standard or jumbo size)


    Optional Add-ins:

    • ½ cup chopped green onions or chives

    • ½ teaspoon garlic powder or black pepper

    • ½ cup frozen peas or corn (for added texture and color)


    Instructions

    1. Preheat Oven

    • Preheat your oven to 350°F (175°C).

    • Grease a 9×13-inch baking dish with butter or non-stick spray.


    2. Make the Creamy Chicken Mixture

    In a large mixing bowl, combine the following:

    • Sour cream

    • Cream of chicken soup

    • Shredded chicken

    • Ranch seasoning mix

    • 1 cup of the shredded cheddar cheese

    • Crumbled bacon (if using)

    Stir everything together until well blended.


    3. Prepare the Biscuits

    • Open the can of refrigerated biscuits.

    • Cut each biscuit into 4 small pieces (quarters).

    • Gently fold the biscuit pieces into the chicken mixture.

    Be careful not to overmix—the biscuits should be well coated but not mashed.


    4. Assemble the Casserole

    • Pour the mixture into your prepared 9×13 dish.

    • Use a spatula to spread it out evenly.

    • Sprinkle the remaining 1 cup of cheddar cheese evenly over the top.


    5. Bake

    • Bake uncovered at 350°F (175°C) for 25 to 35 minutes, or until:

      • The biscuits are puffed and golden.

      • The cheese is melted and bubbly.

      • A toothpick inserted into a biscuit comes out clean.

    Check at 25 minutes and cover loosely with foil if the top is browning too fast.


    6. Serve

    • Let the casserole cool for 5–10 minutes before serving.

    • Scoop into portions and serve warm.


    Serving Suggestions

    • Pair with a simple green salad or steamed veggies for a balanced meal.

    • Great with a side of garlic green beans or roasted broccoli.

    • Add a splash of hot sauce or BBQ drizzle for a flavor twist.


    Tips & Variations

    • Make it spicy: Add chopped jalapeños or a sprinkle of cayenne.

    • Vegetarian option: Use a meatless chicken substitute and cream of mushroom soup.

    • Gluten-free version: Substitute gluten-free biscuits and soups if needed.

    • Make ahead: Assemble the casserole a few hours ahead and refrigerate until ready to bake.


    Storage & Reheating

    • Refrigerator: Store leftovers in an airtight container for up to 4 days.

    • Freezer: Freeze baked casserole in portions for up to 2 months.

    • To Reheat: Warm in the microwave or cover with foil and bake at 325°F until heated through.


    A Note from the Kitchen

    “This dish brings back such warm memories of my Grandma’s kitchen—cozy evenings filled with laughter, full plates, and second helpings. Sharing it with you means sharing a piece of home. Hope it brings just as much joy to your table as it has to ours.”