Category: Recipes

  • Crispy Chicken Fritters Recipe – A Perfect Snack or Appetizer

    Crispy Chicken Fritters Recipe – A Perfect Snack or Appetizer

    Ingredients:

    • 25 ounces leftover shredded chicken or drained canned chicken
    • 1 teaspoon Dijon mustard
    • 1 large egg
    • 1/8 teaspoon dried thyme
    • 1/4 cup breadcrumbs
    • 1/4 teaspoon onion powder
    • 1/4 teaspoon garlic powder
    • Salt and black pepper, to taste
    • Vegetable or olive oil, enough to cover the bottom of the skillet

    Directions:

    1. Combine the Chicken Mixture: In a large bowl, mix together the shredded chicken, Dijon mustard, egg, breadcrumbs, thyme, onion powder, garlic powder, salt, and pepper until well combined.
    2. Form the Fritters: Shape the chicken mixture into small patties, pressing firmly to help them hold together.
    3. Heat the Oil: Heat enough oil in a skillet over medium heat to cover the bottom.
    4. Fry the Fritters: Place the patties in the skillet and cook for 3-4 minutes per side, or until golden brown and crispy. Remove and drain on paper towels.
    5. Serve and Enjoy: Serve the fritters warm with your favorite dipping sauce, such as ranch, honey mustard, or a spicy aioli.

    Prep Time: 10 minutes
    Cook Time: 8-10 minutes
    Total Time: 20 minutes
    Serves: 4-6
    Calories: Approximately 150 kcal per fritter

    Why You’ll Love These Chicken Fritters

    These chicken fritters are:

    • Quick and Easy: Simple to make with ingredients you likely have on hand.
    • Versatile: Great for snacks, appetizers, or a quick dinner.
    • Customizable: Add chopped herbs, cheese, or spices for extra flavor.

    Tips and Variations

    1. Add Cheese: For a cheesy twist, mix in shredded cheddar or mozzarella.
    2. Use Different Seasonings: Try smoked paprika or Italian seasoning to change up the flavor.
    3. Make It Gluten-Free: Use gluten-free breadcrumbs if needed.

    FAQ

    Q: Can I bake these chicken fritters instead of frying?
    A: Yes! Bake at 375°F (190°C) for 15-20 minutes, flipping halfway, until golden and crispy.

    Q: Can I freeze the fritters?
    A: Yes, cook them first, then freeze in an airtight container for up to 3 months. Reheat in the oven or on the stovetop.

    Q: What dipping sauce pairs well with these fritters?
    A: Ranch, honey mustard, or garlic aioli are great choices for dipping.

    Conclusion

    These crispy chicken fritters are a crowd-pleaser that’s easy to make and packed with flavor. Whether you’re using leftover chicken or canned chicken, this recipe transforms simple ingredients into a delicious treat. Enjoy them with your favorite sauce for a satisfying meal or snack!

    Enjoy!

  • Restaurant-Style Creamy Tuscan Chicken

    Restaurant-Style Creamy Tuscan Chicken

    Restaurant-Style Creamy Tuscan Chicken

    Ingredients

    For the Chicken

    • 4 chicken breasts (about 150-170g each)
    • 1 teaspoon sea salt
    • ½ teaspoon freshly ground black pepper
    • 1 teaspoon sweet paprika
    • 2 tablespoons (30ml) extra virgin olive oil

    For the Tuscan Cream Sauce

    • 3 large cloves garlic, finely minced
    • 240ml (1 cup) heavy cream
    • 120ml (½ cup) chicken broth
    • 40g (⅓ cup) freshly grated Parmesan cheese
    • 1 teaspoon Italian seasoning
    • 100g (1 cup) sun-dried tomatoes, julienned
    • 60g (2 cups) fresh baby spinach
    • Fresh basil leaves for garnish (optional)

    Detailed Instructions

    Step 1: Prepare and Season the Chicken

    1. Pat chicken breasts dry with paper towels
    2. If breasts are very thick, butterfly or pound to even thickness
    3. Mix salt, pepper, and paprika in a small bowl
    4. Season chicken evenly on both sides

    Step 2: Sear the Chicken

    1. Heat olive oil in a large skillet over medium-high heat
    2. Once oil is shimmering, add chicken breasts
    3. Sear for 5-6 minutes on first side until golden brown
    4. Flip and cook 4-5 minutes on second side
    5. Remove to a plate and tent with foil

    Step 3: Create the Sauce Base

    1. Reduce heat to medium
    2. Add minced garlic to the same skillet
    3. Sauté for 30-60 seconds until fragrant
    4. Pour in chicken broth
    5. Scrape pan bottom with wooden spoon to release fond
    6. Simmer until broth reduces by half (about 2 minutes)

    Step 4: Build the Cream Sauce

    1. Pour in heavy cream
    2. Add Parmesan cheese and Italian seasoning
    3. Stir continuously until cheese melts
    4. Simmer 2-3 minutes until sauce begins to thicken
    5. Add sun-dried tomatoes
    6. Stir in fresh spinach until wilted

    Step 5: Finish the Dish

    1. Return chicken and accumulated juices to pan
    2. Spoon sauce over chicken
    3. Simmer 4-5 minutes until chicken reaches 165°F (74°C)
    4. Adjust seasoning to taste

    Pro Tips

    • Choose chicken breasts of similar size for even cooking
    • Don’t move chicken while searing for better crust formation
    • If sauce becomes too thick, thin with additional chicken broth
    • Use oil-packed sun-dried tomatoes for better flavor

    Variations

    • Substitute chicken thighs for more flavorful results
    • Add mushrooms with the garlic for extra umami
    • Use kale or Swiss chard instead of spinach
    • Add artichoke hearts for authentic Tuscan flavor

    Serving Suggestions

    • Over al dente pasta
    • With crusty Italian bread
    • Alongside roasted potatoes
    • With zucchini noodles for low-carb option

    Storage

    • Refrigerate in airtight container up to 3 days
    • Reheat gently to prevent sauce separation
    • Not recommended for freezing due to cream sauce

    Nutritional Information

    Per serving (¼ recipe):

    • Calories: 520
    • Total Fat: 35g
    • Saturated Fat: 18g
    • Cholesterol: 155mg
    • Sodium: 890mg
    • Total Carbohydrates: 12g
    • Dietary Fiber: 3g
    • Sugar: 5g
    • Protein: 45g

    Yield: 4 servings
    Prep Time: 10 minutes
    Cook Time: 25 minutes
    Total Time: 35 minutes

    This Creamy Tuscan Chicken has become my signature dish for both family dinners and entertaining guests. The rich, velvety sauce paired with perfectly cooked chicken creates an impressive meal that looks and tastes like it came from a high-end Italian restaurant. The combination of sun-dried tomatoes and fresh spinach not only adds beautiful color but also provides a perfect balance of flavors that will have everyone asking for seconds.

  • Heavenly Cream-Filled Pastry Squares: A Delectable Dessert Delight

    Heavenly Cream-Filled Pastry Squares: A Delectable Dessert Delight

    Heavenly Cream-Filled Pastry Squares: A Delectable Dessert Delight

    The Sweet Story Behind These Irresistible Pastry Squares

    Imagine biting into a delicate pastry that melts in your mouth, revealing a luscious creamy filling and a perfectly golden exterior dusted with a snow-like layer of powdered sugar. These Cream-Filled Pastry Squares are more than just a dessert—they’re a culinary experience that bridges tradition and modern baking, offering a taste of pure comfort and joy in every single bite.

    Originating from a time-honored recipe that has been passed down through generations, these pastry squares combine the simplicity of home baking with an elegant touch that makes them perfect for both casual family gatherings and sophisticated dinner parties. Whether you’re a seasoned baker or a novice in the kitchen, this recipe promises to deliver a show-stopping dessert that will have everyone asking for seconds.

    Ingredients: Precise Measurements for Perfect Pastries

    For the Pastry Dough

    • 200 g (1½ cups) all-purpose flour
    • 100 ml (½ cup) vegetable oil
    • 75 g (⅓ cup) powdered sweetener or 150 g (¾ cup) granulated sugar
    • 70 ml (¼ cup) milk
    • 8 g (2 tsp) baking powder
    • 8 g (2 tsp) vanilla sugar
    • 3 large eggs
    • 1 pinch of salt
    • Powdered sugar for dusting

    For the Creamy Filling

    • 250 g (1 cup) light cream cheese
    • 5 g (1 tsp) vanilla sugar
    • 2 tsp powdered sweetener or 2 tbsp granulated sugar
    • 1 tbsp cornstarch
    • 1 large egg

    Step-by-Step Preparation Instructions

    1. Prepare the Pastry Base
      • In a large mixing bowl, combine the flour, baking powder, and salt.
      • In a separate bowl, whisk together the eggs, oil, milk, and sweetener until well combined.
      • Gradually add the wet ingredients to the dry ingredients, mixing until a smooth dough forms.
    2. Create the Creamy Filling
      • In another bowl, mix the cream cheese, vanilla sugar, sweetener, cornstarch, and egg.
      • Whisk until the mixture is smooth and free of lumps.
      • Set aside while preparing the pastry dough.
    3. Assemble the Pastry Squares
      • Preheat the oven to 180°C (350°F).
      • Roll out the dough on a floured surface to about ½ cm (¼ inch) thickness.
      • Cut the dough into equal-sized squares.
      • Place a spoonful of cream filling in the center of half of the squares.
      • Cover with the remaining squares, gently pressing the edges to seal.
    4. Baking to Golden Perfection
      • Transfer the pastry squares to a baking sheet lined with parchment paper.
      • Bake for 20-25 minutes or until the edges are golden brown.
      • Remove from the oven and let cool for 10 minutes.
    5. Final Touch
      • Dust generously with powdered sugar using a fine-mesh sieve.
      • Serve warm or at room temperature.

    Nutritional Information

    Per Serving (approximate):

    • Calories: 250-300
    • Protein: 5-7 g
    • Carbohydrates: 25-30 g
    • Fat: 15-18 g
    • Sugar: 10-15 g

    Preparation Time: 20 minutes Cooking Time: 25 minutes Total Time: 45 minutes Servings: 8-10 pastry squares

    Expert Baking Tips and Tricks

    • Dough Consistency: The key to perfect pastry is not overmixing. Mix just until the ingredients are combined to keep the texture light and flaky.
    • Filling Distribution: Use a piping bag or spoon to ensure even cream distribution.
    • Temperature Matters: Ensure all ingredients are at room temperature for better mixing.
    • Preventing Soggy Bottoms: Place the baking sheet on the middle rack and avoid opening the oven door too frequently.

    Delicious Variations and Substitutions

    • Fruit Twist: Add a layer of fruit preserves alongside the cream cheese filling.
    • Chocolate Lovers: Mix cocoa powder into the cream cheese for a chocolatey variation.
    • Gluten-Free Option: Substitute all-purpose flour with a gluten-free blend.
    • Dairy-Free Alternative: Use coconut cream cheese and plant-based milk.

    Frequently Asked Questions

    Q1: Can I make these pastry squares in advance? Yes! You can prepare the dough and filling a day ahead and assemble just before baking.

    Q2: How long will these pastry squares stay fresh? Store in an airtight container at room temperature for 2-3 days, or refrigerate for up to 5 days.

    Q3: Can I freeze these pastry squares? Absolutely! Freeze unbaked squares between layers of parchment paper for up to 1 month.

    Q4: What if I don’t have vanilla sugar? Replace with an equal amount of granulated sugar and add ½ tsp vanilla extract.

    Q5: Are these pastry squares suitable for vegetarians? Yes, this recipe is vegetarian-friendly.

    Storage and Make-Ahead Tips

    • Room Temperature: Store in an airtight container for 2-3 days.
    • Refrigeration: Will keep fresh for up to 5 days when refrigerated.
    • Freezing: Can be frozen for up to 1 month. Thaw at room temperature before serving.
    • Reheating: Warm in the oven at 160°C (320°F) for 5-7 minutes to restore crisp texture.

    Indulge in these Cream-Filled Pastry Squares and let each bite transport you to a world of sweet, creamy bliss. Perfect for afternoon tea, dessert, or any moment that calls for a special treat!

  • Date and Peanut Energy Bars

    Date and Peanut Energy Bars

    Date and Peanut Energy Bars

    These date and peanut energy bars are a fantastic snack option for when you’re on the go or need a quick energy boost. Made with only a few wholesome ingredients, these bars are naturally sweetened by dates and have a satisfying crunch from roasted peanuts. They’re rich in protein, fiber, and healthy fats, making them a guilt-free treat that’s easy to prepare. With no added sugar or artificial ingredients, they’re a perfect snack for both adults and kids!

    Preparation Time:

      • Prep Time: 15 minutes
      • Chill Time: 2 hours
    • Total Time: 2 hours and 15 minutes

    Ingredients:

      • Dates: 3 ½ cups (500 g), pitted
      • Roasted peanuts: 2 cups (300 g), unsalted
    • Unsweetened cocoa powder: 2 tbsp (14 g)

    Directions:

      • Step 1: Remove the pits from the dates and place them in a food processor.
      • Step 2: Process the dates until they form a smooth, sticky dough.
      • Step 3: In a separate food processor or using a knife, chop the roasted peanuts to your desired size (chunky or finely chopped).
      • Step 4: Mix the chopped peanuts into the date mixture.
      • Step 5: Add 2 tablespoons of unsweetened cocoa powder to the mixture and combine well.
      • Step 6: Line a mold or a shallow tray with parchment paper. Choose the mold based on how thick you want the bars to be.
      • Step 7: Press the mixture firmly into the mold using your hands, then smooth the surface with the back of a spoon.
      • Step 8: Cover the mold and chill in the fridge for at least 2 hours.
    • Step 9: After 2 hours, remove the mold from the fridge and cut the mixture into bars or squares.
    • Step 10: Enjoy your homemade date and peanut energy bars!

    Serving Suggestions:

      • Serve these bars as a quick snack, a pre- or post-workout bite, or pack them in lunch boxes.
    • For an indulgent twist, drizzle them with a bit of melted dark chocolate.

    Cooking Tips:

      • If your dates are too dry, soak them in warm water for 10 minutes before processing.
      • You can replace peanuts with any other roasted nuts like almonds, walnuts, or cashews.
    • Adjust the thickness of the bars by choosing a deeper or shallower mold.

    Nutritional Benefits:

      • Dates are rich in fiber and natural sugars, providing a quick energy boost.
      • Peanuts add a healthy dose of protein, heart-healthy fats, and essential vitamins.
    • Cocoa powder provides antioxidants and a rich chocolate flavor without added sugar.

    Dietary Information:

      • Vegan
      • Gluten-Free
    • Dairy-Free
    • Contains nuts (peanuts).

    Nutritional Facts (Per Serving):

      • Calories: 200
      • Protein: 6g
      • Fat: 10g
      • Carbohydrates: 25g
      • Fiber: 4g
      • Sugar: 20g
      • Sodium: 2mg

    Storage Tips:

    • Store the bars in an airtight container in the fridge for up to 2 weeks.
    • They can also be frozen for up to 3 months. Defrost at room temperature or in the fridge before eating.

    Why You’ll Love This Recipe:

      • These bars are quick and easy to make, requiring only 3 ingredients.
      • Naturally sweetened and free from processed sugars.
      • Perfect for meal prepping—make a batch and have snacks ready for the week.
      • Customizable—you can swap in different nuts or add ingredients like coconut or chia seeds.

    Conclusion:

    These date and peanut energy bars are a must-try for anyone looking for a simple, healthy, and delicious snack. With minimal effort, you can whip up a batch of nutrient-dense bars that will keep you fueled throughout the day. Perfect for busy mornings, workouts, or when you just need a sweet pick-me-up, these bars are a versatile addition to your kitchen. Once you try them, they’ll become a go-to recipe in your household!

  • Wholesome Carrot-Apple Oatmeal Cookies

    Wholesome Carrot-Apple Oatmeal Cookies

    Wholesome Carrot-Apple Oatmeal Cookies

    Ingredients

    Dry Ingredients

    • 1½ cups (150g) rolled oats
    • ½ cup (120g) almond flour
    • 1 teaspoon ground cinnamon
    • ½ teaspoon baking powder
    • ¼ teaspoon salt

    Wet Ingredients

    • ⅓ cup (80ml) honey
    • ¼ cup (60ml) coconut oil, melted
    • 1 large egg
    • ½ cup (120g) carrots, freshly grated
    • ½ cup (120g) apples, freshly grated

    For Serving

    • Greek yogurt
    • Additional honey for drizzling

    Instructions

    1. Prepare Your Workspace
    • Preheat the oven to 350°F (175°C)
    • Line a large baking sheet with parchment paper
    • Set out all ingredients to ensure they’re at room temperature
    1. Prepare Fresh Ingredients
    • Peel and grate the carrots using the fine side of a box grater
    • Grate the apple, leaving the skin on for extra fiber and nutrients
    • Pat both grated carrot and apple gently with paper towels to remove excess moisture
    1. Mix Dry Ingredients
    • In a large mixing bowl, combine the rolled oats, almond flour, cinnamon, baking powder, and salt
    • Whisk thoroughly to ensure even distribution of the leavening agents and spices
    1. Combine Wet Ingredients
    • In a separate medium bowl, whisk together the melted coconut oil and honey
    • Add the egg and whisk until well combined
    • Fold in the grated carrots and apples
    1. Form Cookie Dough
    • Pour the wet ingredients into the dry ingredients
    • Fold everything together until just combined, being careful not to overmix
    • Let the mixture rest for 5 minutes to allow the oats to absorb some moisture
    1. Shape and Bake
    • Using a cookie scoop or two tablespoons, portion the dough onto the prepared baking sheet
    • Gently flatten each cookie with the back of a spoon, as they won’t spread much during baking
    • Leave about 2 inches of space between each cookie
    1. Bake to Perfection
    • Bake for 12-15 minutes, or until the edges are lightly golden brown
    • The centers should still feel slightly soft but not wet
    • Allow cookies to cool on the baking sheet for 5 minutes
    1. Cool and Serve
    • Transfer cookies to a wire rack to cool completely
    • Once cooled, top each cookie with a dollop of Greek yogurt
    • Finish with a light drizzle of honey

    Storage Tips

    These cookies keep well in an airtight container at room temperature for up to 3 days. For longer storage, refrigerate for up to a week or freeze for up to 3 months. If freezing, layer with parchment paper between cookies to prevent sticking.

    Nutrition Information

    Per cookie (without toppings):

    • Calories: 120
    • Total Fat: 6g
    • Saturated Fat: 3g
    • Cholesterol: 15mg
    • Sodium: 65mg
    • Total Carbohydrates: 15g
    • Dietary Fiber: 2g
    • Sugar: 7g
    • Protein: 3g

    Yield: 12 cookies
    Serving Size: 1 cookie
    Prep Time: 15 minutes
    Cook Time: 12-15 minutes
    Total Time: 30 minutes

    Recipe Notes

    • Choose old-fashioned rolled oats rather than quick oats for the best texture
    • For best results, use fresh, crisp apples and carrots
    • Make sure your egg is at room temperature for better incorporation
    • These cookies are naturally gluten-free (ensure your oats are certified gluten-free if necessary)
    • The coconut oil should be melted but not hot when mixing

    These wholesome cookies make an excellent breakfast on-the-go, post-workout snack, or healthy dessert option. They’re packed with fiber from the oats, protein from the almond flour, and vitamins from the fresh carrots and apples.

  • No-Knead Olive Artisan Bread

    No-Knead Olive Artisan Bread

    No-Knead Olive Artisan Bread

    Ingredients

    • 3 cups all-purpose flour
    • 1/4 teaspoon instant yeast
    • 1 teaspoon salt
    • 1 1/2 cups warm water
    • 1/3 cup chopped olives

    Preparation

    1. In a large mixing bowl, combine flour, yeast, and salt. Add water and olives, stirring until a shaggy dough forms.
    2. Cover the bowl with plastic wrap and let it sit at room temperature for 12-18 hours.
    3. Preheat oven to 450 degrees F (230 degrees C) with a Dutch oven or heavy pot with a lid inside.
    4. Once the oven is preheated, carefully remove the pot from the oven and remove the lid. Sprinkle flour or cornmeal on the bottom of the pot to prevent sticking.
    5. Gently shape the dough into a ball and place it in the pot. Cover the pot and return it to the oven.
    6. Bake for 30 minutes with the lid on, then remove the lid and bake for an additional 15-30 minutes, until the bread is golden brown.
    7. Remove the bread from the pot and let it cool on a wire rack before slicing and serving.

    Enjoy!

    Tips for Making No-Knead Olive Artisan Bread

    1. Use High-Quality Olives – Kalamata or green olives add the best flavor. Drain and pat them dry before adding to the dough to prevent excess moisture.

    2. Chop Olives Evenly – Slice or roughly chop them to distribute flavor throughout the bread.

    3. Use Bread Flour – Bread flour provides better structure, but all-purpose flour works too.

    4. Hydration Matters – The dough is very wet, which helps create an airy crumb. Don’t add extra flour unless absolutely necessary.

    5. Let It Rest Long Enough – A 12-18 hour rise at room temperature enhances flavor and gluten development.

    6. Use a Dutch Oven – It traps steam for a crisp, golden crust. Preheat it before baking for best results.

    7. Bake with the Lid On First – Covering the bread for the first 30 minutes allows it to rise properly before finishing uncovered for a crispy crust.

    8. Check Internal Temperature – The bread is fully baked when it reaches about 200-210°F (93-99°C) inside.

    9. Let It Cool Completely – Slicing too soon releases steam, making the bread gummy instead of airy.

    10. Experiment with Add-ins – Try adding herbs (like rosemary or thyme), roasted garlic, or a sprinkle of sea salt on top before baking.

    Benefits of No-Knead Olive Artisan Bread

    ✔ Easy & Hands-Off – No kneading required; just mix, rest, and bake.
    ✔ Delicious Flavor – Olives add a tangy, savory bite that pairs well with soups, cheeses, or dips.
    ✔ Crunchy Crust & Soft Interior – The long fermentation and Dutch oven baking create the perfect texture.
    ✔ Healthier Option – No preservatives, artificial ingredients, or unnecessary sugar.
    ✔ Customizable – You can tweak the recipe with different olives, herbs, or flours.

    Would you like a simple recipe to follow? 

  • The Versatile Mint: Health Benefits, Uses, and How to Incorporate It into Your Daily Routine

    The Versatile Mint: Health Benefits, Uses, and How to Incorporate It into Your Daily Routine

    Mint, renowned for its refreshing aroma and invigorating flavor, is a versatile herb cherished across the globe. Its applications span centuries, from ancient medicinal uses to modern culinary delights. Whether you cultivate it in your garden or purchase it fresh from the market, mint offers a host of health benefits and practical uses. In this article, we’ll delve into ten health benefits of mint, explore five unique ways to use it, and provide step-by-step instructions on how to incorporate this remarkable herb into your everyday life.

    xshare
    10 Health Benefits of Mint
    1. Aids Digestion

    Mint is well-known for its ability to soothe the digestive system. It alleviates indigestion and bloating by relaxing the stomach muscles, enabling better food movement through the digestive tract.

    2. Relieves Respiratory Issues

    The menthol in mint acts as a natural decongestant, helping to clear respiratory passages and making breathing easier. Mint tea or steam inhalation with mint can be particularly beneficial for colds or allergies.

    3. Promotes Oral Health

    Mint’s antibacterial properties make it a common ingredient in toothpaste and mouthwash. It helps eliminate bacteria that cause bad breath while leaving your mouth feeling fresh.

    4. Boosts Immune System

    Rich in antioxidants, mint helps protect the body from oxidative stress and supports the immune system in fighting infections and diseases.

    5. Reduces Stress and Anxiety

    The calming effect of mint makes it a natural remedy for stress and anxiety. The aroma of mint has been shown to reduce fatigue and enhance mood, making it perfect for your relaxation routine.

    6. Improves Skin Health

    Mint’s anti-inflammatory and antibacterial properties can help treat acne and other skin conditions. Its cooling effect also soothes irritation and itching.

    7. Supports Weight Loss

    Mint aids in weight loss by stimulating digestive enzymes that help absorb nutrients and convert fat into usable energy. Adding mint to your diet can help control appetite and curb cravings.

    8. Enhances Memory and Cognitive Function

    Studies suggest that mint’s aroma can enhance memory and cognitive function. Chewing mint gum or using mint essential oil can improve concentration and alertness.

    9. Alleviates Headaches

    Applying mint oil to the temples or inhaling its aroma can relieve headaches, especially tension headaches and migraines, thanks to its relaxing and cooling properties.

    10. Acts as a Natural Insect Repellent

    The strong scent of mint deters mosquitoes, ants, and other insects. Planting mint in your garden or using mint oil in your home can help keep pests away.

    5 Unique Uses of Mint and How to Incorporate Them
    1. Mint Tea

    Mint tea is a simple yet powerful way to enjoy the benefits of mint. To prepare, steep fresh or dried mint leaves in boiling water for 5-10 minutes. Enjoy it hot or cold, and sweeten with honey or enhance with a slice of lemon for added flavor. If you’re looking to make your own dried mint, learn how to dry mint naturally at home.

    2. Mint Sugar

    Mint sugar adds a refreshing twist to desserts and beverages. Wash and dry fresh mint leaves, then blend them with sugar until finely chopped. Spread the mixture on parchment paper to dry completely. Store in an airtight container and use to sweeten tea, sprinkle over fruit, or add to baked goods.

    3. Mint Syrup for Beverages

    mint syrup for beverages
    Create a refreshing mint syrup by washing and drying five large bunches of fresh mint. Chop the mint finely, then combine 3 cups of sugar with 1.5 cups of water in a pot. Heat until the sugar dissolves, then add the chopped mint and simmer for 15 minutes. Allow the mixture to cool, strain it, and store the syrup in a sterilized bottle. Use it to flavor lemonade, cocktails, or soda water.

    4. Mint-Infused Oil

    Mint-infused oil is great for cooking or as a massage oil to relieve muscle pain. Fill a jar with fresh mint leaves and cover them with a neutral oil like olive or grapeseed oil. Seal the jar and let it infuse in a warm, dark place for 1-2 weeks, shaking occasionally. After the infusion period, strain the oil and store it in a clean jar. Use this oil to add a subtle mint flavor to dishes or for a soothing massage. To ensure your mint grows lush and healthy, check out these natural methods for growing lush mint.

    5. Mint-Enhanced Skincare

    Incorporate mint into your skincare routine for a refreshing effect. To make a mint facial toner, boil a handful of fresh mint leaves in 2 cups of water for 10 minutes. Let it cool, strain, and transfer the liquid to a spray bottle. Use this toner to refresh your face throughout the day or after cleansing.

    Disclaimer

    While mint is generally safe for most people, it can cause allergic reactions in some individuals. Those with gastroesophageal reflux disease (GERD) should use mint cautiously, as it may exacerbate symptoms. Pregnant and breastfeeding women should consult their healthcare provider before consuming large amounts of mint or using mint essential oils. Always perform a patch test before applying mint-infused products to the skin to ensure there is no allergic reaction.

    Mint is a versatile herb with numerous health benefits and practical uses. Whether you’re sipping on mint tea, sweetening your desserts with mint sugar, or incorporating mint-infused oil into your skincare routine, this remarkable herb can enhance your daily life in countless ways. With its refreshing flavor and aroma, mint is a must-have in every home, offering both health benefits and culinary delights. Explore these uses and integrate mint into your lifestyle for a refreshing and health-boosting experience.

  • Chocolate Yogurt Cake

    Chocolate Yogurt Cake

    Chocolate Yogurt Cake

    This Chocolate Yogurt Cake is a moist and delicious treat perfect for any occasion. The combination of cocoa and yogurt creates a rich, flavorful cake that’s easy to make and sure to please everyone. Ideal for a quick dessert or a special treat, this cake is both satisfying and simple to prepare.

    Preparation Time: 15 minutes
    Cooking Time: 35-40 minutes
    Total Time: 50-55 minutes
    Servings: 8

    Ingredients:

    For the Cake:

      • 3 eggs
      • A pinch of salt
      • A little vanilla extract
      • 150 grams sugar (3/4 cup)
      • 110 ml oil
      • 110 ml milk
      • 250 grams flour (1 2/3 cups)
      • 15 grams baking powder
    • 20 grams cocoa powder
    • 2 tablespoons milk

    For the Yogurt Filling:

      • 1 egg
      • 100 grams yogurt
      • 1 tablespoon sugar
      • 1 tablespoon cornstarch
      • A little vanilla extract
      • 50 grams chocolate chips

    Instructions:

    1. Prepare the Cake Batter:
        • Preheat the oven to 175°C (350°F).
        • In a mixing bowl, whisk together the eggs, salt, and vanilla extract.
        • Add the sugar, oil, and milk, and mix until well combined.
        • Sift in the flour, baking powder, and cocoa powder, and stir until smooth.
        • Mix in the additional 2 tablespoons of milk to achieve a smooth batter.
    2. Prepare the Yogurt Filling:
        • In a separate bowl, whisk together the egg, yogurt, sugar, cornstarch, and vanilla extract until smooth.
        • Fold in the chocolate chips.
    3. Assemble the Cake:
        • Pour half of the chocolate cake batter into a greased 26 cm casserole dish.
        • Spread the yogurt filling evenly over the batter.
      • Top with the remaining chocolate cake batter.
    4. Bake the Cake:
        • Bake in the preheated oven for 35-40 minutes, or until a toothpick inserted into the center comes out clean.
      • Let cool before serving.

    Serving Suggestions:

    • Serve the cake warm with a scoop of vanilla ice cream.
    • Garnish with powdered sugar or a drizzle of chocolate sauce for extra flair.

    Cooking Tips:

    • Ensure all ingredients are at room temperature for the best texture.
    • Use a toothpick to check doneness to avoid overbaking.

    Nutritional Benefits:

    • Yogurt adds a boost of protein and calcium.
    • Cocoa powder provides antioxidants and a rich chocolate flavor.

    Dietary Information:

    • Contains dairy and eggs.
    • For a dairy-free version, use non-dairy yogurt and milk alternatives.

    Storage:

    Just drop your email here and I’ll send it right away! Plus you’ll get new recipes from me every week. Yes please!

    Why You’ll Love This Recipe:

      • Moist and flavorful with a rich chocolate taste.
      • Simple to make with easily accessible ingredients.
      • The yogurt filling adds a creamy texture and extra sweetness.

    Conclusion: This Chocolate Yogurt Cake is a delightful dessert that combines rich chocolate flavor with a creamy yogurt filling. It’s easy to prepare and perfect for any occasion, whether as a casual treat or a special dessert. Enjoy this tasty cake with your family and friends for a satisfying sweet treat!

    Frequently Asked Questions:

      1. Can I use a different type of flour?
        Yes, you can use whole wheat flour or a gluten-free flour blend.
      1. Can I substitute the oil with butter?
        Yes, you can use melted butter instead of oil.
      2. Can I make this cake ahead of time?
        Yes, you can bake it a day in advance and store it in an airtight container.
      3. How do I know when the cake is done?
        A toothpick inserted into the center should come out clean when the cake is done.
      1. Can I use low-fat yogurt instead?
        Yes, low-fat yogurt can be used as a substitute.
      2. Can I add nuts to the batter?
        Yes, chopped nuts can be added for extra texture.
      3. Can I freeze this cake?
        Yes, you can freeze the cake for up to 2 months. Thaw before serving.
    1. What can I use instead of chocolate chips?
      You can use chopped chocolate or leave them out if preferred.
    2. Can I use a different type of extract?
      Yes, you can use almond or orange extract for a different flavor.
    3. How should I store leftover cake?
      Store leftovers in an airtight container at room temperature or refrigerate for longer storage.
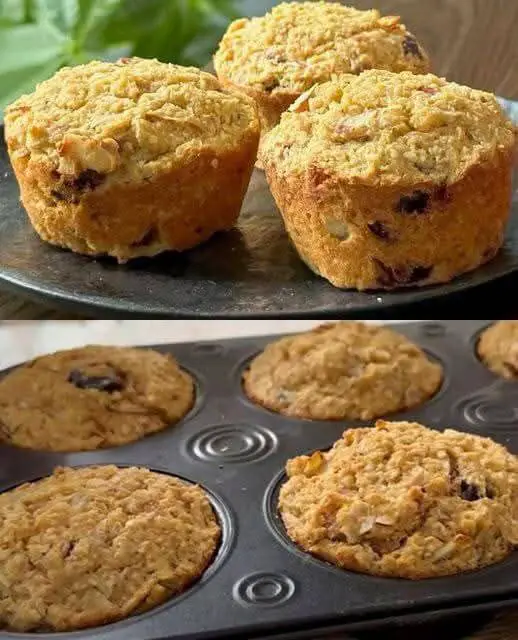
  • Healthy Oatmeal Apple Carrot Cake

    Healthy Oatmeal Apple Carrot Cake

    Healthy Oatmeal Apple Carrot Cake

    Ingredients

    Dry Base:

    • 200g (2 cups) rolled oats
    • 1 teaspoon baking powder
    • 1 pinch of salt
    • Cinnamon powder to taste

    Wet Ingredients:

    • 240ml (1 cup) milk
    • 3 large eggs
    • 2 tablespoons olive oil
    • 1 teaspoon vanilla extract
    • 2 tablespoons stevia sweetener

    Fruits and Vegetables:

    • 1 medium carrot (approximately 100g), grated
    • 1 large apple (approximately 180g), grated
    • 6 dried apricots
    • 2 tablespoons raisins

    Essential Equipment

    • Food processor or blender
    • Large mixing bowl
    • Grater
    • Electric mixer
    • 9-inch baking pan
    • Parchment paper
    • Measuring cups and spoons

    Detailed Instructions

    1. Preparation Phase

    1. I always start by preheating my oven to 180°C (350°F). Proper temperature is crucial for even baking.
    2. I prepare my pan by either:
    • Lining with parchment paper
    • Lightly greasing with olive oil

    2. Creating the Oat Base

    1. I process the oats until they reach a flour-like consistency, which usually takes about 1-2 minutes.
    2. I combine this with baking powder and salt in a large bowl.

    3. Preparing the Fruit and Vegetable Components

    1. For the carrot:
    • Peel and grate finely
    • Press between paper towels to remove excess moisture
    1. For the apple:
    • Grate with skin on for extra nutrition
    • Drain excess liquid if very juicy
    1. For dried fruits:
    • Soak apricots and raisins in warm water for 5 minutes
    • Drain and chop apricots finely

    4. Mixing Process

    1. I combine wet ingredients:
    • Beat eggs until frothy
    • Add stevia, vanilla, and milk
    • Stream in olive oil while mixing
    1. I fold together:
    • Processed oat mixture
    • Grated fruits and vegetables
    • Wet ingredients
    • Soaked dried fruits

    5. Baking

    1. Pour batter into prepared pan, smoothing the top.
    2. Bake for 45-50 minutes, or until:
    • Top is golden brown
    • Edges start to pull away from pan
    • Toothpick comes out clean

    Storage Guidelines

    • Room temperature: 2 days in airtight container
    • Refrigerated: Up to 1 week
    • Frozen: Up to 3 months (wrap individual slices)

    Nutritional Information

    Per slice (1/12 of cake):

    • Calories: 165
    • Protein: 6g
    • Carbohydrates: 24g
    • Fiber: 4g
    • Natural Sugars: 8g
    • Fat: 6g
    • Iron: 1.2mg
    • Calcium: 85mg

    Pro Tips for Success

    • Use old-fashioned rolled oats, not quick oats
    • Don’t skip soaking the dried fruits
    • Let batter rest for 5 minutes before baking
    • Cool completely before slicing

    Troubleshooting Common Issues

    If your cake is:

    • Too dense: Process oats more finely
    • Too dry: Add an extra tablespoon of oil
    • Not sweet enough: Increase stevia or add more dried fruit

    Serving Suggestions

    I love serving this cake:

    • Warm with Greek yogurt
    • With sugar-free apple butter
    • Topped with chopped nuts
    • As a healthy breakfast with coffee

    Variations

    I’ve successfully tested these modifications:

    • Add chopped walnuts or pecans
    • Include grated zucchini
    • Use different dried fruits
    • Add pumpkin pie spice mix

    This cake proves that healthy, sugar-free baking can be delicious and satisfying. It’s perfect for anyone following a sugar-free lifestyle or simply looking for a more nutritious treat option.

  • Cheese, Potato and Onion Tortilla Rolls

    Cheese, Potato and Onion Tortilla Rolls

    These cheese, potato, and onion tortillas make a delicious and satisfying snack or appetizer. With a creamy potato filling and a crispy tortilla shell, they’re sure to be a hit with the whole family.

    Ingredients:

    • 2 medium potatoes, peeled
    • 1 teaspoon of salt (for boiling potatoes)
    • 10 g butter or 1 teaspoon olive oil
    • 140 g chopped onion
    • 1 chopped pepper
    • 1/2 teaspoon paprika
    • 1/4 teaspoon black pepper
    • 2 pinches of salt
    • 2 teaspoons of water
    • 2 teaspoons of grated Parmesan cheese (20g)
    • Grated mozzarella cheese
    • Tomato Pizza Sauce
    • 7 tortilla breads (15 cm)
    • 2-3 tablespoons of vegetable oil (for frying)
    • Fresh or dried parsley, for garnish

    Instructions:

    1. Boil the potatoes:
      • Place the peeled potatoes in a saucepan and cover with water.
      • Add 1 teaspoon of salt and bring to a boil.
      • Cook until the potatoes are tender. Drain and mash the potatoes while they are still hot.
    2. Prepare the onion and pepper mixture:
      • In a frying pan, heat the butter or olive oil over low heat.
      • Add the chopped onion and cook for about 3 minutes until it begins to soften.
      • Add the chopped pepper and cook for another 3 minutes.
      • Add the paprika, black pepper, and 2 pinches of salt. Mix well.
      • Add 2 teaspoons of water, cover the pan and cook for 5 to 7 minutes until the vegetables are tender.
    3. Mix the potato and onion mixture:
      • Add the cooked onion and pepper mixture to the mashed potatoes.
      • Stir in the grated Parmesan cheese.
    4. Assemble the tortillas:
      • Arrange the tortilla breads.
      • Spread a thin layer of tomato pizza sauce on each tortilla.
      • Add a generous spoonful of the potato and onion mixture to each tortilla.
      • Sprinkle grated mozzarella cheese over the potato mixture.
    5. Cook the tortillas:
      • Heat vegetable oil in a large skillet over medium heat.
      • Fry the stuffed tortillas until golden brown and crispy on both sides, about 2-3 minutes per side.
      • Alternatively, you can brush the tortillas with olive oil and bake or fry them until crispy.
    6. Garnish and serve:
      • Garnish the tortillas with fresh or dried parsley.
      • Serve hot and enjoy!

    Serving suggestions:

    • Serve with a side of salsa or sour cream for dipping.
    • Serve with a fresh salad for a complete meal.

    Cooking tips:

    • Make sure the potatoes are well mashed for a smooth topping.
    • Adjust the seasoning to your taste preferences.
    • For a spicier version, add some chili flakes to the potato mixture.

    Nutritional Benefits:

    • Potatoes provide essential vitamins and minerals like vitamin C and potassium.
    • Onions and peppers add fiber and antioxidants.
    • Cheese provides protein and calcium.

    Dietary Information:

    • This recipe can be made vegetarian by ensuring that the cheese and tortilla bread used are vegetarian.
    • To make it gluten-free, use gluten-free tortillas.

    Storage:

    • Store leftover wraps in an airtight container in the refrigerator for up to 2 days.
    • Reheat in a pan or in the oven before serving.

    Why you’ll love this recipe:

    • This is a quick and easy recipe, perfect for snacks or appetizers.
    • The combination of a creamy potato filling and a crispy tortilla is irresistible.
    • It is versatile and can be customized with your favorite ingredients.

    Conclusion:

    These cheese, potato, and onion tortillas are a delicious and savory treat that everyone will love. With their crispy exterior and savory filling, they’re perfect for any occasion. Enjoy this easy and delicious recipe with your family and friends! Enjoy!

  • Oatmeal and Guava: A Natural Remedy for Leg Cramps, Diabetes, and High Blood Pressure

    Oatmeal and Guava: A Natural Remedy for Leg Cramps, Diabetes, and High Blood Pressure

    Ingredients:

    • 8 guava leaves
    • 2 ripe guavas, chopped
    • Peel of 1 ripe banana, chopped
    • 4 tablespoons of whole oats
    • 500ml (half a liter) of water

    Instructions:

    1. Add all ingredients to a saucepan.
    2. Pour in 500ml of water and bring to a boil.
    3. Let it simmer for about 15 minutes.
    4. Strain the mixture to remove solids.
    5. Serve warm and enjoy!

    How to Take This Drink for Maximum Benefits

    Drink one cup every morning for 15 consecutive days to help:

    • Relieve leg numbness and muscle cramps
    • Improve circulation
    • Reduce high blood pressure
    • Stabilize blood sugar levels

    This simple yet powerful drink can be a great addition to your daily routine, helping you feel more energized and improving overall health naturally.

    Final Thoughts

    While this natural remedy is beneficial, it’s always best to consult with a healthcare provider before making significant changes to your diet, especially if you have underlying health conditions. Give this oatmeal and guava drink a try, and experience the benefits for yourself!

  • Easy and tasty Ham and Cheese Egg Cups

    Easy and tasty Ham and Cheese Egg Cups

    If you’re looking for a quick, healthy, and flavorful breakfast or snack, these Ham and Cheese Egg Cups are a fantastic choice. They are low-carb, packed with protein, and can be easily customized to suit your tastes. The combination of savory ham, melty cheese, and baked eggs makes for a delightful and filling meal, whether you’re enjoying them in the morning, as a snack, or even as part of a brunch spread.

    These egg cups are incredibly easy to make and require minimal ingredients. Plus, they’re a great make-ahead option if you want a grab-and-go breakfast throughout the week. You can mix and match different fillings, such as veggies or herbs, to create your perfect flavor profile.

    Table of Contents

    Ingredients:

    • 6 large eggs
    • 6 slices of ham (preferably deli ham or thicker cut)
    • 1 cup (100g) shredded cheese (cheddar, Swiss, mozzarella, or a blend)
    • Salt and pepper, to taste
    • Optional add-ins:
      • 1/4 cup chopped onions or green onions
      • 1/4 cup bell peppers (diced)
      • 1/4 cup spinach or kale (chopped)
      • 1 tablespoon chopped fresh herbs (such as parsley, chives, or thyme)
      • A pinch of red pepper flakes or hot sauce (for some heat)

    Equipment:

    • Muffin tin (12-cup or 6-cup)
    • Whisk or fork
    • Measuring cups and spoons
    • Knife and cutting board
    • Baking spray or butter (for greasing)

    Preparation:

    1. Preheat the Oven:

    Time: 1 minute

    • Preheat your oven to 375°F (190°C). This is the ideal temperature to bake the eggs to perfection, resulting in a soft but fully set center.

    2. Prepare the Muffin Tin:

    Time: 2 minutes

    • Lightly grease the muffin tin with cooking spray, butter, or oil to prevent the egg cups from sticking.
    • Place a slice of ham into each muffin cup, forming a “cup” shape. The ham will act as a base and sides for the egg mixture, helping to hold everything together.

    3. Prepare the Egg Mixture:

    Time: 3 minutes

    • In a medium bowl, crack the 6 eggs and whisk them together until the yolks and whites are fully blended.
    • Season the eggs with salt and pepper, and mix in any additional ingredients you want, such as diced onions, bell peppers, spinach, or herbs.
    • If you’re adding cheese directly into the eggs, stir it in now to evenly distribute it.

    4. Assemble the Ham and Cheese Egg Cups:

    Time: 2 minutes

    • Pour the egg mixture into the ham cups, filling each muffin cup about 2/3 full. If you want more cheese, sprinkle a little extra cheese on top of the eggs in each cup.
    • Add any optional ingredients you like at this point, such as a sprinkle of red pepper flakes for spice or a dollop of hot sauce.

    5. Bake the Egg Cups:

    Time: 12-15 minutes

    • Place the muffin tin in the preheated oven and bake the egg cups for 12-15 minutes, or until the eggs are set and slightly puffed. If you prefer a softer, runnier egg yolk, aim for the 12-minute mark. For a firmer yolk, bake for the full 15 minutes.
    • Keep an eye on them as they bake to ensure they don’t overcook. The eggs will continue to set slightly after they’re out of the oven.

    6. Cool and Serve:

    Time: 2 minutes

    • Once the egg cups are done, remove the muffin tin from the oven and allow them to cool for a couple of minutes.
    • Use a small spoon or knife to carefully remove the ham and cheese egg cups from the muffin tin. They should come out easily if the tin is well-greased.

    Serving Suggestions:

    • With Toast: Serve the egg cups with a side of buttered toast or whole-grain toast for a more filling breakfast.
    • Avocado: Add a few slices of avocado on the side for extra creaminess and healthy fats.
    • Side Salad: Pair the egg cups with a simple green salad or roasted vegetables for a complete meal.
    • Hot Sauce or Salsa: Drizzle with your favorite hot sauce or salsa for added flavor and spice.

    Notes:

    • Make-Ahead: These egg cups are great for meal prep. After they cool, store them in an airtight container in the fridge for up to 4 days. Reheat in the microwave for about 30-45 seconds for a quick breakfast or snack.
    • Freezing: You can freeze the egg cups for longer storage. Wrap each egg cup individually in plastic wrap or foil and store them in a freezer-safe bag for up to 2 months. To reheat, microwave from frozen for 1-2 minutes or until warmed through.
    • Customizing: Feel free to swap out the ham for bacon, sausage, or turkey. You can also experiment with different cheeses, such as feta, pepper jack, or goat cheese, for unique flavors.
    • Dairy-Free Version: If you’re looking to make this recipe dairy-free, simply omit the cheese or use dairy-free cheese alternatives. The egg cups will still be delicious without it.

    Conclusion:

    These Ham and Cheese Egg Cups are an easy, customizable, and healthy breakfast or snack option that can be prepared in under 30 minutes. They are protein-packed and perfect for meal prep, making them a great go-to choice for busy mornings or whenever you need a satisfying bite. Whether you keep them simple with just ham and cheese or add extra veggies and seasonings, these egg cups are sure to become a favorite in your kitchen. Enjoy!

  • Classic Shepherd’s Pie

    Classic Shepherd’s Pie

    Ingredients:
    For the Mashed Potato Topping:
    2 lbs russet potatoes, peeled and cut into chunks
    ¼ cup half-and-half
    4 tbsp unsalted butter
    Salt and freshly ground black pepper, to taste
    For the Meat Filling:
    2 tbsp canola oil
    1 cup chopped onion
    2 carrots, peeled and diced
    2 cloves garlic, minced
    1½ lbs ground lamb
    1 tsp salt
    ½ tsp freshly ground black pepper
    2 tbsp all-purpose flour
    2 tsp tomato paste
    1 cup chicken broth
    1 tsp Worcestershire sauce
    ½ cup frozen peas
    ½ cup frozen corn

    Directions:
    1️⃣ Prepare the Mashed Potatoes:

    Boil the potatoes in salted water until fork-tender.
    Drain, then mash with half-and-half, butter, salt, and pepper.
    2️⃣ Cook the Meat Filling:

    Heat oil in a skillet over medium heat. Sauté onions, carrots, and garlic.
    Add ground lamb, season with salt and pepper, and cook until browned.
    Stir in flour and tomato paste, cooking for 1 minute.
    Pour in chicken broth and Worcestershire sauce, simmering until thickened.
    Mix in peas and corn, then remove from heat.
    3️⃣ Assemble and Bake:

    Preheat oven to 400°F (200°C).
    Spread the meat mixture into a baking dish.
    Top evenly with mashed potatoes, smoothing with a spatula.
    Bake for 25 minutes or until golden brown on top.
    ⏳ Prep Time: 20 min | Cook Time: 40 min | Total Time: 1 hr
    1f525 Calories: ~450 kcal per serving

    ⭐ Tips:
    ✅ For a richer taste, mix Parmesan cheese into the mashed potatoes.
    ✅ Substitute ground beef for lamb if preferred.
    ✅ Let the pie rest for 10 minutes before serving for the best texture.

  • HEAVENLY LEMON OREO DESSERT

    HEAVENLY LEMON OREO DESSERT

    Introduction

    Are you hungry for a dessert that combines the tangy taste of lemons with the smoothness of Oreos? Then, our Heavenly Lemon Oreo Dessert is just what you need. This delicacy is bound to be a favorite among your guests and will definitely cater for your cravings. Whether you are organizing a party or in the mood of having a sweet home treat, this mouthwatering desert will serve all purposes.

    What makes a dessert truly heavenly? For many, it’s the mixture of tastes that carries you to a paradise-like condition. This is where the Heavenly Lemon Oreo Dessert comes in. It combines the zesty flavor of lemons with the creamy-crunchy goodness of Oreos to produce a medley of flavors that will keep your taste buds dancing.


    What Makes Lemon Oreo Dessert Heavenly?

    This dessert stands out because it balances sweetness and sourness immaculately. The lemon pops up as refreshing, while the Oreo feels like a familiar crunch. Together they make a light but indulgent ending to any meal.


    Brief History of Lemon Desserts

    Lemon desserts have been loved since time immemorial, dating back from Europe where lemons were used in pastries and custards. Lemons’ acidity and brightness served as great palate cleansers after heavy meals. And Oreos have been cherished cookie since their inception back in 1912, which means this combination is both traditional and new-fangled.


    Ingredients Required

    Main Ingredients:

    Lemon Oreo cookies

    Unsalted butter

    Fresh lemons

    Sugar

    Eggs

    Heavy cream

    Cream cheese

    Optional Ingredients:

    Vanilla extract/essence

    Grated lemon skin

    Mint leaves (for garnishing)


    Preparation Steps

    Procedural Steps for Creating Heavenly Lemon Oreo Dessert. It sounds complicated, but it’s not.

    Chop the ingredients into tiny sizes.

    Start by accumulating all items necessitated in this recipe. This will guarantee that you have everything you need for easy flow of events.

    The Layered Desserts.

    It is through a crust, a lemon curd filling and a creamy topping that you are going to do justice to this dessert.


    Crust Formation

    How To Select The Right Oreos For The Crusts?

    The major ingredient here is Lemon Oreos which have an understated tartness that makes this dessert tastier on the whole.

    Tips For A Flawless Crust.

    Smash the Oreos and mix them with molten butter then press firmly down on the bottom of your serving dish as a solid base layering until they become firm.

    What Lemon Filling Does?

    How To Make A Lemon Curd?

    This involves heating fresh lemon juice, sugar, and eggs together in a saucepan and continuously stirring them until thickened.

    Tips for Thickening

    Ensure that the curd is cooked until it can coat the back of a spoon. This will make it thick enough to hold up in the dessert layers.


    Creamy Dreamy Layer

    Whipping Some Cream

    Whip some heavy cream until it has stiff peaks. This will be combined with cream cheese to create a rich, creamy layer.

    Combining with Other Ingredients

    Gently fold whipped cream into softened cream cheese. A little vanilla extract helps too.

    Assembling the Dessert

    Layering Process

    Start with Oreo crust and add lemon curd on top. Add a creamy layer at the top then repeat if it’s multilayered.

    Chilling Time

    Refrigerate the assembled dessert for at least 4 hours. This allows for setting and melding of layers.


    Serving Suggestions

    Ideal Garnishes

    Garnish with crushed Oreos, lemon zest or fresh mint leaves which give color and flavor to your dish.

    Pairing with Other Dishes

    This dessert should be served after eating something light like salad or grilled fish so as to not overpower its flavors.


    Variants of the Sweet

    Alternative for Gluten-Free Diets

    Use lemon flavoured biscuits that are gluten-free as a crust. Ensure you also get other ingredients without this protein.

    Vegan Substitute

    Replace cow’s milk, sour cream and butter with vegan substitutes like coconut cream and vegan margarine. Use plant-based cream cheese instead.


    What not to do?

    Mixing too much

    While making the creamy layer, ensure that you do not mix it too much as it may make the cream lose its lightness and airiness.

    Incorrect Measures

    The accurate measures are crucial especially in preparing lemon curd; too much or little ingredient can affect the flavor balance.


    Tips for Storing It

    How to Store Properly

    It is good to store this dessert in an airtight container inside the fridge. So doing preserves its freshness while preventing absorption of any odd smells.

    How Long Can I Keep It?

    Ideally, one should eat this dish three days after cooking since beyond this time frame there might be issues with texture quality.


    Nutritional Facts

    Calories Content

    Each serving has around 350-400 calories depending on size of portions and specific products.

    Breakdown of Macronutrients

    One serving will give about 20 gms fat, 40 gms carbohydrates and 5 grams of protein.


    Reasons This Dessert Is Good For Any Occasions

    This dessert is appropriate whether it’s a family occasion, a potluck or just a casual night snack.

    Appeal to the Crowd

    Apart from kids, everyone loves its mix of flavors and textures which makes it unique.

    Interesting Information about Lemon and Oreo Desserts

    History of Oreos

    The National Biscuit Company (Nabisco) introduced oreos in 1912. Subsequently, they came to be the best-selling cookies in America.

    Lemon in Cooking

    For many centuries, cooks have been using lemon due to its flavor enhancement qualities and ability to cut through rich ingredients.


    Conclusion

    Among other desserts available on the market Heavenly Lemon Oreo Dessert is distinctive. It can be made quickly but impressively so, and it is fit for any event. So why not give it a try? Your taste buds will thank you.

    FAQs

    Can I Use Regular Oreos Instead of Lemon Oreos? Yes though the lemon taste will not come out clearly add some extra lemon zest or juice into it if desired.

    How Long Does It Take to Make? Preparation time requires 30 minutes; refrigeration takes at least 4 hours.

    Can I Freeze This Dessert? You are free to freeze this dessert; just defrost it before serving.

    What Can I Use Instead of Lemon Curd? In case you don’t have one, use lemon pudding or lemon-flavored yogurt instead.

    What Are the Substitutes for Lemon Curd? If you are in a hurry, you can use lemon pudding or lemon flavored yoghurt instead.

    Is This Dessert Suitable for Children? For sure, as kids enjoy the sweet tang of it.

  • *Emerald Green Fiber Smoothie Recipe

    *Emerald Green Fiber Smoothie Recipe

    *Ingredients:*
    – 2 cups fresh spinach or kale (packed)
    – 1 ripe banana (plus extra slices for garnish)
    – 1 cup unsweetened almond milk (or any milk of choice)
    – 1/2 cup frozen pineapple chunks
    – 1/2 avocado (optional, for creaminess)
    – 1 tbsp ground flax seeds (plus extra for garnish)
    – 1 tbsp chia seeds
    – 1/2 cup plain Greek yogurt (or plant-based alternative)
    – Ice cubes (optional, for thickness)
    – 1 tsp honey or maple syrup (optional, for sweetness)

    *Instructions:*

    1. *Blend the Greens:*
    – Add the spinach or kale to the blender with the almond milk. Blend until smooth and no leafy chunks remain.

    2. *Add the Fruits and Seeds:*
    – Add the banana, frozen pineapple, avocado (if using), flax seeds, and chia seeds. Blend again until fully incorporated.

    3. *Adjust Texture:*
    – Add ice cubes if you prefer a thicker smoothie or more almond milk if it’s too thick. Blend again briefly.

    4. *Sweeten If Necessary:*
    – Taste the smoothie. If you prefer it sweeter, add honey or maple syrup and blend again.

    5. *Serve:*
    – Pour into an extra-large glass. Garnish with banana slices and sprinkle with flax seeds. Insert a black straw for sipping.

    *Nutritional Highlights (Per Serving):*
    – Calories: ~250-300 (varies based on sweeteners and optional ingredients)
    – Protein: ~8-10g
    – Fiber: ~7-9g
    – Healthy Fats: From avocado