Category: Recipes

  • Fresh Vegetable Salad with Tangy Yogurt-Mustard Dressing

    Fresh Vegetable Salad with Tangy Yogurt-Mustard Dressing

    This fresh vegetable salad is a delightful mix of crunchy vegetables and a tangy yogurt-mustard dressing. It’s perfect for a healthy meal or side dish. Packed with vibrant flavors and a satisfying crunch, this salad is both nutritious and delicious.


    Preparation Time

    • Prep Time: 15 minutes
    • Total Time: 15 minutes
    • Servings: 4
    • Ingredients

      • For the Salad:
        • 1/2 cabbage, shredded
        • 2 carrots, grated (using a special grater if you have one)
        • 1 cucumber, sliced
        • 1 apple, grated
      • For the Dressing:
        • 75g Greek yogurt
        • 1 tablespoon mustard
        • 1 teaspoon honey
        • Juice of 1/2 lemon
        • 2 tablespoons olive oil

      Instructions

      1. Prepare the Vegetables:

      • Shred the Cabbage: Shred 1/2 cabbage.
      • Grate the Carrots: Grate 2 carrots using a special grater for a finer texture.
      • Slice the Cucumber: Slice 1 cucumber into thin rounds.
      • Grate the Apple: Grate 1 apple, leaving the skin on for added nutrients.

      2. Prepare the Dressing:

      • Mix the Dressing: In a small bowl, whisk together 75g Greek yogurt, 1 tablespoon mustard, 1 teaspoon honey, the juice of 1/2 lemon, and 2 tablespoons olive oil until well combined.

      3. Combine:

      • Mix Salad and Dressing: In a large bowl, combine the shredded cabbage, grated carrots, sliced cucumber, and grated apple. Pour the dressing over the vegetables and toss gently to coat everything evenly.

      4. Serve:

    • Serve Immediately: Serve the salad immediately for the freshest taste, or chill for at least 30 minutes to let the flavors meld together.

    Serving Suggestions

    • Pairs Well With: This salad pairs wonderfully with grilled chicken or fish.
    • Side Dish: Serve as a side dish at a barbecue, picnic, or family dinner.
    • Extra Crunch: Add some nuts or seeds for extra crunch and nutrition.

    Cooking Tips

    • Grate for Finer Texture: Use a special grater for the carrots to achieve a finer texture and better consistency.
    • Adjust Seasoning:

      Taste the dressing and adjust the seasoning if needed, adding more honey for sweetness or more mustard for a tangy kick.

    • Chill for Better Flavor: For enhanced flavor, chill the salad for at least 30 minutes before serving to allow the dressing to fully integrate with the vegetables.
    • Nutritional Benefits

      • Rich in Vitamins and Fiber: The fresh vegetables provide essential vitamins and dietary fiber, supporting overall health.
      • Good Source of Protein and Probiotics: Greek yogurt adds protein and probiotics, beneficial for digestion and immune function.
      • Low-Calorie Dressing: The dressing is flavorful and low in calories, making it a healthy choice for adding taste without extra calories.

      Dietary Information

      • Vegetarian and Gluten-Free: This recipe is suitable for both vegetarian and gluten-free diets.
      • Vegan Option: To make this salad vegan, substitute Greek yogurt with a plant-based yogurt alternative, and ensure the mustard and honey are vegan-friendly.

      Storage

      • Refrigerate Leftovers: Store any leftovers in an airtight container in the refrigerator for up to 2 days. The salad may release some liquid over time, so give it a good stir before serving again.

      Why You’ll Love This Recipe

      • Quick and Easy: It’s quick and easy to prepare, making it perfect for busy days.
      • Packed with Fresh Ingredients: Full of fresh, healthy ingredients that provide great flavor and nutrition.
      • Versatile: Versatile enough to be enjoyed as a main dish or as a refreshing side.
      • Delicious Dressing: The tangy yogurt-mustard dressing adds a unique and delicious twist to traditional vegetable salads.

      Conclusion

      Enjoy this fresh vegetable salad as a nutritious and delicious addition to your meal. It’s perfect for any occasion, offering a satisfying crunch and vibrant flavors that are sure to be a hit with family and friends. Bon appétit!

      Frequently Asked Questions

      1. Can I use a different type of yogurt for the dressing?
        • Yes, you can use any type of yogurt, including low-fat or non-dairy alternatives, depending on your dietary preferences.
      2. Can I add other vegetables to the salad?
        • Absolutely! Feel free to add other vegetables like bell peppers, radishes, or tomatoes for additional variety and flavor.
      3. How can I make this salad spicier?
        • Add a pinch of cayenne pepper or a few dashes of hot sauce to the dressing for a spicy kick.
      4. Can I use apple cider vinegar instead of lemon juice?
        • Yes, apple cider vinegar can be used as a substitute for lemon juice in the dressing.
      5. How long can I store this salad in the refrigerator?
        • The salad can be stored in the refrigerator for up to 2 days. It may release some liquid over time, so stir well before serving.
      6. Can I make the dressing in advance?
        • Yes, you can prepare the dressing ahead of time and store it in the refrigerator for up to a week.
      7. Is this salad suitable for a picnic or potluck?
        • Yes, this salad is perfect for picnics and potlucks, as it holds up well and can be served chilled.
      8. Can I add protein to this salad?
        • Yes, you can add grilled chicken, tofu, or beans to make the salad a more substantial meal.
      9. What kind of mustard should I use?
        • Use any type of mustard you prefer, such as Dijon or yellow mustard, depending on your taste preference.
      10. Can I use pre-grated carrots or apples?
        • Yes, pre-grated carrots or apples can be used for convenience, but freshly grated options usually have better texture and flavor.
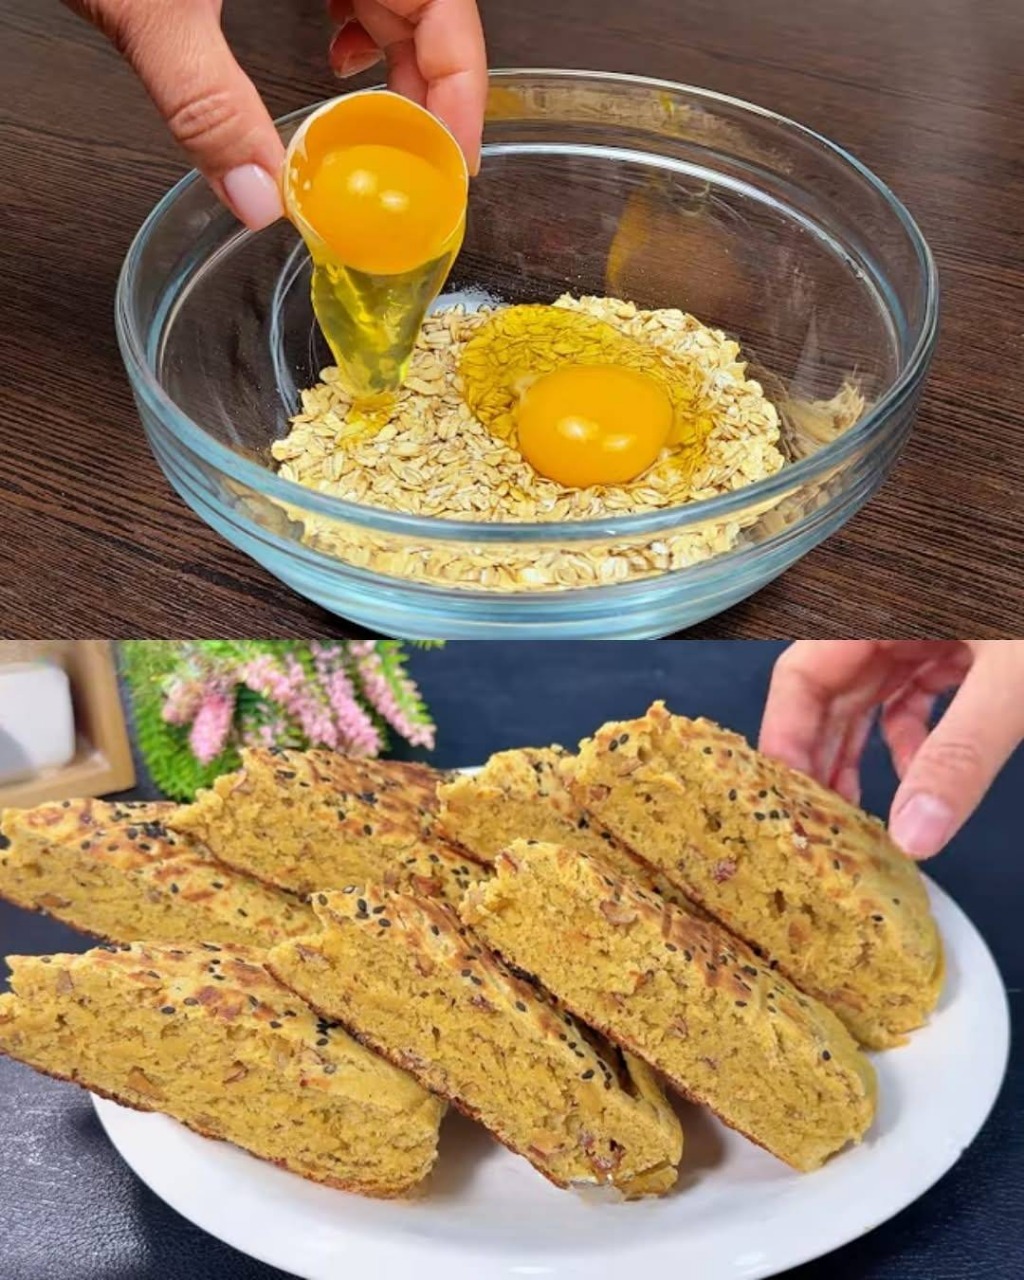
  • Baked Oatmeal with Fruits and Nuts

    Baked Oatmeal with Fruits and Nuts

    Preparation Time:


    Prep Time: 10 minutes
    Cook Time: 30 minutes
    Total Time: 40 minutes
    Ingredients:
    1 cup oatmeal
    50 g cranberries
    50 g dried apricots
    60 g nuts (your choice)
    1 banana
    1 apple
    50 g oat flakes
    Instructions:
    Preheat Oven: Preheat your oven to 180°C (360°F).
    Prepare Ingredients:
    Slice the banana and apple into small pieces.
    Chop the dried apricots into smaller bits.
    Roughly chop the nuts.
    Mix Ingredients: In a large bowl, combine the oatmeal, cranberries, dried apricots, nuts, banana slices, and apple pieces. Mix well.
    Add Oat Flakes: Add the oat flakes to the mixture and stir until everything is well combined.
    Bake: Transfer the mixture into a baking dish and spread it out evenly. Bake in the for 30 minutes.

    Cool and Serve: Let it cool slightly before serving. Enjoy your delicious and healthy baked oatmeal!
    Serving Suggestions:
    Serve warm with a dollop of Greek or a splash of milk.
    Top with fresh berries or a drizzle of honey for extra sweetness.
    Enjoy as a snack on its own or paired with a hot cup of tea or coffee.
    Cooking Tips:
    Use ripe bananas for added natural sweetness.
    Feel free to substitute the dried fruits and nuts with your favorites. For a vegan version, use plant-based milk and alternatives.
    Nutritional Benefits:
    Oats: High in fiber, can help lower cholesterol levels and stabilize blood sugar.
    Fruits: Provide essential vitamins and antioxidants.
    Nuts: A good source of healthy fats and protein.
    Dietary Information:
    Vegetarian: Yes
    Vegan: Yes, if using plant-based substitutes
    Gluten-Free: Use gluten-free oats
    Dairy-Free: Yes, if using plant-based substitutes
    Storage:

    Store leftovers in an in the for up to 5 days.
    Reheat individual servings in the microwave or enjoy cold.
    Why You’ll Love This Recipe:
    It’s a versatile and easy-to-make recipe.
    Packed with wholesome ingredients, making it a nutritious option.
    Perfect for meal prep and can be enjoyed throughout the week.
    Adaptable to various dietary needs and preferences.
    Conclusion:
    This baked oatmeal with fruits and nuts is a fantastic way to start your day or enjoy as a nutritious snack. Its delightful combination of flavors and textures will leave you satisfied and energized. Try it out and make it a staple in your meal rotation!

    Enjoy!

  • Tuna Pie

    Tuna Pie

    Ingredients:

      • 800 g potatoes, peeled and chopped
      • 70 g butter
      • 3/4 cup milk, plus 1 1/2 cups extra
      • 1 large leek, light part only, cut in half lengthwise, thinly sliced
      • 1/3 cup plain flour
      • 1/2 cup low-fat cream
      • 150 grams frozen mixed vegetables
      • 2 cans of tuna, drained and mashed
      • 2 tablespoons chopped parsley
      • 2 frozen hard-crust pastry sheets, thawed

    Instructions:

    1. Place the potatoes in a large bowl and cover with cold water. Bring to a boil and cook for 10 minutes or until tender. Drain and return to the pan.
    2. Place the pan on low heat. Add 30g of butter and ¾ cup of milk; mash the potatoes until almost smooth. Season to taste.
    3. Meanwhile, melt the remaining butter in a saucepan over medium heat.
    4. Add the sliced leeks and cook, stirring, for 3 minutes or until tender.
    5. Add the flour and cook, stirring, for 1 minute or until the mixture starts to bubble.
    6. Slowly add the extra milk, stirring constantly until the mixture is smooth. Stir in the cream and continue cooking for 3 minutes or until the sauce boils and thickens.
    7. Add the frozen vegetables, tuna, and parsley. Remove from heat and set aside to cool slightly.
    8. Preheat the oven to 180°C (350°F).
    9. Gently press the pastry sheets into a 20 cm round pie dish. Use a fork to crimp the edges of the dough and prick the bottom all over. Bake for 10 minutes.
    10. Pour the cooled tuna mixture into the pastry shell and top with the mashed potatoes.
    11. Bake for 25 minutes or until the top is golden brown. Let the pie rest in the dish for 10 minutes before slicing and serving hot.

    ENJOY AND PLEASE SHARE THIS RECIPE WITH YOUR FAMILY AND FRIENDS FOR MORE EASY RECIPES.

    THANK YOU SO MUCH!

  • Black Forest Hunter Sauce with Mushrooms

    Black Forest Hunter Sauce with Mushrooms

    Black Forest Hunter Sauce with Mushrooms

    Ingredients

    • 100 to 150 g (3.5 to 5.3 ounces) bacon (Black Forest bacon)
    • 250 g (8.8 ounces) mushrooms
    • 2 leveled tablespoons tomato sauce or tomato paste
    • 1 leveled tablespoon flour
    • 2 splashes dry white wine
    • 1 splash oil or a little butter
    • 1 medium to large onion
    • 220 ml (1 cup) whipping cream or cooking cream
    • 1 heaped tablespoon beef broth or frying sauce
    • 2 pinches salt and pepper

    Nutrition Information

    • Servings: 4
    • Calories: 250 per serving

    Preparation Time

    • Total time: 15 minutes

    Instructions

    Preparing the Ingredients

    1. Chop Onion and Bacon: Finely chop the onion and cut the bacon into small pieces.
    2. Slice the Mushrooms: Clean and slice the mushrooms into thin slices and slightly larger pieces to add texture.

    Cooking the Sauce

    1. Sauté Onion and Bacon: In a medium-sized pan, heat a splash of oil or a little butter over medium heat. Add the chopped onion and bacon, and sauté until the onion becomes translucent and the bacon starts to crisp.
    2. Add Mushrooms: Add the sliced mushrooms to the pan. Cook until the mushrooms start to release their moisture and begin to brown, about 3-4 minutes.
    3. Add Tomato Paste: Stir in the tomato sauce or tomato paste. Let it simmer with the mushrooms, onion, and bacon for about 4-5 minutes, allowing the flavors to meld together.
    4. Incorporate Flour: Sprinkle the flour over the mixture and stir well to combine. Continue to simmer for another 2-3 minutes to cook off the raw flour taste.
    5. Deglaze with White Wine: Pour in the dry white wine to deglaze the pan, scraping up any browned bits from the bottom. Let it cook for a minute to reduce slightly.
    6. Add Cream and Broth: Stir in the whipping cream or cooking cream and the heaped tablespoon of beef broth or frying sauce. Mix well and bring the sauce to a simmer.

    Final Seasoning

    1. Season: Season the sauce with salt and pepper to taste. Continue to simmer for about 10 minutes, allowing the sauce to thicken and the flavors to develop.

    Serving

    1. Serve and Enjoy: Once the sauce has thickened to your desired consistency, remove it from the heat. Serve immediately over your favorite dishes, such as grilled meats, pasta, or roasted vegetables.

    This Black Forest Hunter Sauce with Mushrooms is a rich, flavorful addition to any meal. Its quick preparation and simple ingredients make it an excellent choice for a delicious, homemade sauce. Enjoy the taste of the Black Forest in just 15 minutes!

  • Refreshing Fruit Jelly Milk Cake Recipe

    Refreshing Fruit Jelly Milk Cake Recipe

    This Refreshing Fruit Jelly Milk Cake is a delicious, light, and refreshing dessert that combines the creamy goodness of milk with the burst of fresh fruits and the fun texture of jelly.

    It’s a perfect treat for hot summer days, family gatherings, or even special occasions. The combination.

    of smooth milk pudding and fruity jelly layers offers a delightful contrast in flavor and texture, making each bite a refreshing experience.

    The cake is easy to make and doesn’t require many ingredients. It’s a delightful way to incorporate fresh, vibrant fruits into a dessert.

    and the creamy milk base pairs perfectly with the natural sweetness and tang of the fruits. This dessert is sure to please both children and adults, making it a great addition to any dessert table.

    Ingredients:

    Ingredients

    1/2 cup of sugar

    2 cups of milk

    3 tablespoons of cornstarch

    1 packet of unflavored gelatin

    Assorted fresh fruits (kiwi, strawberries,

    oranges, pomegranate seeds, etc.)

    1/4 cup of warm water (to dissolve the gelatin)

    1 teaspoon of vanilla extract

    Tablespoon measuring tool

    Instructions:

    Begin by preparing the milk mixture. In a saucepan, combine the milk and sugar. Stir the mixture over medium heat until the sugar dissolves completely.

    Once the sugar is dissolved, add the cornstarch and whisk continuously until the mixture thickens to a smooth consistency.

    This will form the creamy base of your cake. Remove from heat and let it cool slightly.

    Next, dissolve the unflavored gelatin in warm water. Pour the gelatin into the milk mixture and stir gently to incorporate.

    This will give the dessert its jelly-like texture. Add a teaspoon of vanilla extract to enhance the flavor of the milk pudding, then set this aside to cool completely.

    Prepare the fruits for the cake. Wash and peel any fruits as needed, and cut them into small bite-sized pieces.

    For example, peel and slice the kiwi, hull and slice the strawberries, and segment the oranges. You can mix and match the fruits based on your preference or what’s in season.

    Ensure that the fruits are fresh and vibrant to make the dessert visually appealing.

    Once the milk mixture has cooled down but is still slightly warm, layer the bottom of a baking dish or a serving container with your prepared fruits.

    This will form the base layer of your fruit jelly milk cake. Arrange the fruits evenly across the surface.

    making sure to leave some space between them to allow the jelly to set around them.

    Now, pour the cooled milk mixture gently over the arranged fruits. Try to cover the fruits evenly so that they are partially submerged in the creamy milk pudding.

    The milk mixture will slowly settle around the fruits, creating a smooth and uniform layer. Let it cool at room temperature for a while before transferring the dish to the refrigerator.

    Refrigerate the dessert for a few hours, or ideally overnight, to allow the jelly to set completely. The gelatin will firm up and hold everything together.

    creating a firm, jelly-like texture around the creamy milk base and fruits. The dessert should be fully chilled before serving.

    Before serving, you can garnish the top with extra fresh fruit or even a drizzle of honey or syrup for extra sweetness.

    Slice the cake into squares or serve it in individual portions, and enjoy this cool, creamy, and fruity dessert.

    How to Make:

    Making this fruit jelly milk cake is relatively simple, but it does require some patience while the dessert sets. Start by carefully preparing each component and giving enough.

    time for the gelatin to firm up. The milk pudding base needs to be smooth and thickened just right, so keep an eye on the heat and avoid overheating.

    Once everything is combined and set in layers, the dish is practically ready to serve after chilling.

    Be sure to take your time when arranging the fruit to create a beautiful, colorful look that will make the cake more visually appealing.

    The choice of fruits is entirely up to your preferences, so don’t hesitate to experiment with different combinations.

    Just remember to cut the fruits into small pieces to ensure they are easily incorporated into the milk mixture.

    The gelatin will bind everything together, so be sure to dissolve it properly and incorporate it evenly into the milk pudding.

    If the gelatin is not dissolved well, the texture of the dessert might not set correctly. If you’d like a firmer texture, feel free to add a little more gelatin to the mix.

    Once the dessert has been refrigerated and set, you can cut it into square portions or serve it in small cups for individual servings.

    Be sure to serve it chilled, as this dessert is best enjoyed cold. You can also add extra toppings or sauces.

    such as whipped cream, chocolate sauce, or caramel syrup, depending on your preferences.

    While the recipe calls for fresh fruit, you can also use canned or frozen fruit if needed, though fresh fruit will offer the best flavor and texture.

    Just make sure to drain any excess syrup from canned fruit before adding it to the cake. Fresh, vibrant fruits will really make this dessert pop!

    If you have any leftovers, store them in an airtight container in the refrigerator for up to a few days.

    The dessert will maintain its texture, but the fruit might release some juice over time, so it’s best to consume it sooner rather than later for the freshest taste.

    Consider pairing this fruit jelly milk cake with a light beverage, such as iced tea or sparkling water.

    for a refreshing and balanced treat. It’s a perfect dessert to serve during a warm-weather gathering or casual get-together.

    Tips:

    Make sure to dissolve the gelatin thoroughly in warm water to avoid any clumps in the dessert. If the gelatin is not dissolved properly, it might not set correctly, and the texture could be uneven.

    To make sure the milk pudding thickens properly, whisk the cornstarch in thoroughly as it heats. This will prevent any lumps from forming, giving you a smooth, creamy base.

    Choose fruits that are in season for the best flavor and texture. Seasonal fruits not only taste better.

    but they also tend to be more affordable and readily available. You can mix and match different fruits to create a visually stunning dessert.

    You can add a splash of citrus juice, such as lemon or orange juice, to the milk mixture to give the dessert an extra burst of freshness.

    The acidity will balance the sweetness of the milk and fruits, enhancing the overall flavor.

    If you prefer a less sweet dessert, you can adjust the sugar quantity in the milk mixture to your taste.

    Reducing the sugar slightly will allow the natural sweetness of the fruits to shine through more.

    For a more indulgent version, you can top the finished dessert with whipped cream or a light dusting of powdered sugar just before serving.

    This will add an extra touch of sweetness and elegance to the presentation.

    If you’re looking to make the cake even more luxurious, you can add a layer of sponge cake or ladyfingers.

    at the bottom of the dish before adding the fruit and milk mixture. This will give the dessert more structure and a satisfying texture.

    Conclusion:

    This Refreshing Fruit Jelly Milk Cake is a versatile and delightful dessert that combines the creamy goodness of milk with the vibrant freshness of fruits.

    It’s easy to prepare, and the result is a visually stunning and deliciously refreshing treat that’s perfect for any occasion.

    With the option to customize the fruit selection and add extra toppings or flavors, this dessert is sure to become a favorite.

    Whether you’re making it for a summer gathering or a cozy family dinner, it’s a dish that will impress and satisfy every time.

  • Oatmeal Banana Muffins with Cocoa and Coconut

    Oatmeal Banana Muffins with Cocoa and Coconut

    Oatmeal Banana Muffins with Cocoa and Coconut
    These Oatmeal Banana Muffins are a delicious and healthy treat perfect for breakfast or a snack. Made with wholesome ingredients like oats, bananas, and coconut flakes, they provide a naturally sweet and satisfying flavor. With the addition of cocoa powder, these muffins have a rich chocolatey taste without any added sugar. The almonds and no-sugar chocolate syrup on top add a delightful crunch and extra flavor, making them a hit for everyone, especially those looking for a guilt-free dessert.

    Preparation Time: 10 minutes
    Cooking Time: 30 minutes
    Servings: 6 muffins

    Ingredients
    1 cup (90g) oatmeal
    1 cup (240ml) water
    2 eggs
    A pinch of salt
    1 tablespoon stevia sweetener
    1 teaspoon vanilla extract
    2 ripe bananas, mashed
    1 tablespoon (7g) cocoa powder
    1 teaspoon (5g) baking powder
    1 tablespoon (6g) coconut flakes
    Almonds, chopped (for topping)
    No-sugar chocolate syrup (for topping)
    Directions
    Preheat the Oven: Preheat your oven to 180°C (350°F).
    Mix Ingredients: In a large bowl, combine oatmeal, water, eggs, salt, stevia, vanilla, mashed bananas, cocoa powder, and baking powder. Mix until well combined.
    Add Coconut Flakes: Stir in the coconut flakes.
    Pour into Muffin Tin: Grease a muffin tin or use muffin liners. Pour the batter into the tin, filling each cup about 3/4 full.
    Bake: Bake in the preheated oven for 30 minutes, or until a toothpick inserted into the center comes out clean.
    Add Toppings: Let the muffins cool for a few minutes, then top with chopped almonds and drizzle with no-sugar chocolate syrup.
    Serving Suggestions
    Serve warm with a glass of plant-based milk, tea, or coffee.
    Enjoy as a quick breakfast, mid-day snack, or healthy dessert.
    Pair with fresh berries or a dollop of dairy-free yogurt for added flavor.
    Cooking Tips
    For extra moisture, add a tablespoon of Greek yogurt or dairy-free yogurt to the batter.
    Swap the cocoa powder for a tablespoon of peanut butter or almond butter for a different flavor.
    Use silicone muffin liners to prevent sticking and make cleanup easier.
    Nutritional Benefits
    Rich in fiber from oats and bananas.
    Low in added sugars due to stevia and natural sweeteners.
    Provides a good source of protein from eggs and almonds.
    Contains healthy fats from coconut flakes and almonds.
    Dietary Information
    Vegetarian: Suitable for a vegetarian diet.
    Gluten-Free: Ensure oats are certified gluten-free for those with gluten intolerance.
    Low-Sugar: Made with stevia and no-sugar chocolate syrup.
    Nutritional Facts (per muffin, estimated)
    Calories: 120
    Protein: 4g
    Carbohydrates: 15g
    Fiber: 3g
    Sugars: 3g
    Fat: 5g
    Storage Tips
    Room Temperature: Store in an airtight container for up to 2 days.
    Refrigeration: Keep in the fridge for up to a week.
    Freezing: Freeze in a freezer-safe bag for up to 3 months. Thaw at room temperature or reheat in the oven.
    Why You’ll Love This Recipe
    Quick and easy to make with pantry staples.
    Naturally sweetened and lower in calories.
    Versatile – perfect for breakfast, snacks, or dessert.
    Freezer-friendly and great for meal prep.
    Conclusion
    These Oatmeal Banana Muffins with Cocoa and Coconut are a delicious, healthy, and satisfying option for any time of the day. With their rich chocolatey flavor and added crunch from almonds, they offer a unique twist on classic banana muffins. Packed with wholesome ingredients, they’re perfect for those looking for a nutritious, low-sugar treat. Whether you’re on the go or enjoying a cozy breakfast, these muffins are sure to become a favorite.

    10 Frequently Asked Questions
    Can I use rolled oats instead of oatmeal?
    Yes, you can use rolled oats, but blend them into a finer consistency before mixing them into the batter.
    Can I replace stevia with another sweetener?
    Yes, you can use honey, maple syrup, or any other preferred sweetener. Adjust the quantity according to sweetness.
    What can I use instead of eggs?
    You can replace eggs with flaxseed meal (1 tablespoon flaxseed meal + 3 tablespoons water per egg) or a mashed banana for a vegan option.
    Can I add other mix-ins to the batter?
    Absolutely! Add chocolate chips, dried fruits, nuts, or seeds to the batter for extra texture and flavor.
    How do I make these muffins vegan?
    Replace the eggs with flaxseed eggs, use plant-based milk instead of water, and ensure all other ingredients are vegan.
    Can I use another type of flour?
    Yes, you can use almond flour, coconut flour, or whole wheat flour. However, the texture might vary, so adjust the liquid ingredients accordingly.
    Are these muffins suitable for kids?
    Yes, they are kid-friendly and a great way to sneak in healthy ingredients like oats and bananas.
    Can I double the recipe?
    Yes, you can double or triple the recipe. Just make sure to adjust the baking time if needed.
    What’s the best way to reheat these muffins?
    Reheat in a preheated oven at 150°C (300°F) for about 5 minutes, or microwave for 10-15 seconds.
    Can I omit the cocoa powder?
    Yes, you can omit the cocoa powder if you prefer a plain banana muffin. Add a bit more vanilla extract for extra flavor.

  • Japanese Water To Burn All The Fat From Your Stomach, Back And

    Japanese Water To Burn All The Fat From Your Stomach, Back And

    Japanese Water To Burn All The Fat From Your Stomach, Back And

    japanese Water to Burn All the Fat from Your Stomach, Back, and More!

    Looking for a natural and effective way to shed stubborn fat from your stomach, back, and other trouble areas? The secret may lie in an ancient Japanese method known as Japanese Water, a simple yet powerful drink that helps detoxify the body, boost metabolism, and promote fat loss naturally. This traditional beverage has been used for centuries and is now gaining popularity worldwide for its incredible health benefits.

    Why Japanese Water Works for Fat Loss
    The key to Japanese Water’s effectiveness lies in its natural ingredients, which work together to enhance digestion, reduce bloating, and accelerate the body’s ability to burn fat. The primary benefits include:

    Boosts metabolism – Helps the body burn calories more efficiently.
    Aids digestion – Prevents bloating and promotes gut health.
    Flushes out toxins – Detoxifies the body for improved liver function.
    Reduces water retention – Helps eliminate excess water weight.
    Increases hydration – Supports overall wellness and skin health.

    Ingredients You Need:

    1 liter of warm water (not boiling)
    1 tablespoon of grated fresh ginger
    1 medium lemon (sliced)
    1 teaspoon of honey (optional)
    1 teaspoon of chia seeds (optional, for extra fiber)
    1 teaspoon of apple cider vinegar (optional, for added fat-burning benefits)

    Step-by-Step Preparation Method:

    Warm the Water – Heat one liter of water until it’s warm but not boiling. Too much heat can destroy the beneficial properties of some ingredients.
    Add the Ginger – Grate fresh ginger and add one tablespoon to the warm water. Ginger boosts metabolism and improves digestion.
    Squeeze the Lemon – Cut a lemon into slices or squeeze the juice directly into the water. Lemon helps detoxify the body and supports weight loss.
    Stir in the Honey – If you prefer a slightly sweet taste, add a teaspoon of honey. This also provides antibacterial and digestive benefits.
    Optional Boosters – Add chia seeds for fiber or a teaspoon of apple cider vinegar for an extra metabolism kick.
    Mix Well and Let It Sit – Allow the mixture to sit for 5-10 minutes before drinking.
    Drink and Enjoy – For best results, drink a glass of Japanese Water first thing in the morning on an empty stomach. You can also sip it throughout the day.
    How Often Should You Drink It?
    To maximize fat-burning benefits, drink at least one liter per day for a few weeks. Combining it with a balanced diet and regular physical activity will yield even better results.

    Additional Tips for Faster Results:
    Reduce processed foods and sugar in your diet.
    Engage in at least 30 minutes of physical activity daily.
    Get enough sleep, as rest plays a crucial role in metabolism.
    Stay hydrated with plenty of water throughout the day.

    Final Thoughts
    Japanese Water is a simple yet powerful remedy that can help you burn stubborn fat naturally. By incorporating this drink into your daily routine, along with a healthy lifestyle, you’ll start noticing a leaner, more energized body. Give it a try, and experience the benefits for yourself!

    Enjoy!

  • Grandma’s Classic Flourless Vanilla Pudding Cake: A Treasured Family Recipe

    Grandma’s Classic Flourless Vanilla Pudding Cake: A Treasured Family Recipe

    Grandma’s Classic Flourless Vanilla Pudding Cake: A Treasured Family Recipe

    Ingredients

    Wet Ingredients

    • 200ml (1 cup) vegetable oil
    • 4 large eggs, room temperature
    • 200g (1 cup) granulated sugar

    Dry Ingredients

    • 4 packets (approximately 100g) vanilla pudding powder
    • 2.5 teaspoons pure vanilla extract or vanilla paste
    • 1 teaspoon baking powder

    Detailed Instructions

    Preparation Phase (10 minutes)

    1. Preheat oven to 180°C (350°F)
    2. Prepare a standard loaf tin (23x13cm/9×5 inch):
    • Grease thoroughly with oil or butter
    • Line with parchment paper
    • Grease the parchment paper

    Creating the Perfect Batter (15 minutes)

    Step 1: Egg Mixture

    1. In a large mixing bowl:
    • Crack 4 room temperature eggs
    • Add 1 cup sugar
    1. Beat with electric mixer on medium-high speed:
    • Continue for 5-7 minutes
    • Stop when mixture is pale yellow
    • Texture should be thick and fluffy
    • When lifted, batter should fall in ribbons

    Step 2: Adding Oil

    1. While mixer is running on low speed:
    • Gradually drizzle in oil
    • Add in a thin, steady stream
    • This creates an emulsion
    1. Continue mixing until fully incorporated
    2. Scrape down bowl sides as needed

    Step 3: Dry Ingredients

    1. Add to the bowl:
    • 4 packets vanilla pudding powder
    • 2.5 teaspoons vanilla extract
    • 1 teaspoon baking powder
    1. Mix on low speed until just combined
    2. Scrape down sides and bottom of bowl
    3. Give final gentle stir by hand

    Baking Process (50 minutes)

    1. Pour batter into prepared loaf tin
    2. Smooth top with spatula
    3. Tap pan gently on counter to remove air bubbles
    4. Place in preheated oven
    5. Bake for 50 minutes or until:
    • Top is golden brown
    • Toothpick inserted comes out clean
    • Cake springs back when touched

    Cooling Process (1 hour)

    1. Remove from oven
    2. Let cool in tin for 10 minutes
    3. Remove from tin carefully
    4. Transfer to wire rack
    5. Cool completely before slicing

    Expert Tips

    • Use room temperature eggs for maximum volume
    • Don’t rush the egg-beating process
    • Add oil very slowly to maintain emulsion
    • Don’t open oven door during first 40 minutes
    • Let cake cool completely before cutting

    Nutrition Information

    Per slice (serves 12):

    • Calories: 285
    • Protein: 3g
    • Carbohydrates: 32g
    • Fat: 17g
    • Sugar: 24g
    • Sodium: 180mg

    Serving Suggestions

    Serve with:

    • Fresh berries
    • Whipped cream
    • Vanilla ice cream
    • Dusting of powdered sugar
    • Fresh mint leaves

    Storage Instructions

    • Room temperature: 3-4 days in airtight container
    • Refrigerated: Up to 1 week
    • Freezer: Up to 3 months (wrap well)

    This unique flourless cake has been cherished through generations for good reason. Its incredibly moist texture and rich vanilla flavor make it perfect for any occasion, from casual afternoon tea to special celebrations. The simplicity of ingredients belies the complexity of flavor and texture you’ll achieve by following these detailed instructions carefully.

  • Bahama Mama

    Bahama Mama

    A delicious tropical-flavored rum cocktail that’s perfect for summer!

    Ingredients:

    1 oz dark rum
    1 oz coconut rum
    ½ oz coffee liqueur
    2 oz pineapple juice
    2 oz orange juice
    ½ oz grenadine
    Ice cubes
    Pineapple slice and cherry, for garnish
    Instructions:

    Mix the Cocktail:
    Fill a shaker with ice cubes. Add the dark rum, coconut rum, coffee liqueur, pineapple juice, orange juice, and grenadine.

    Shake Well:
    Secure the lid on the shaker and shake vigorously for about 15 seconds to combine all the flavors.

    Serve:
    Strain the mixture into a tall glass filled with ice.

    Garnish and Enjoy:
    Garnish with a pineapple slice and cherry on top. Serve immediately and enjoy this refreshing tropical cocktail!

    1f379 Perfect for a beach getaway or a summer party!

  • Garlic Parmesan Chicken and Potatoes Skillet

    Garlic Parmesan Chicken and Potatoes Skillet

    This Garlic Parmesan Chicken and Potatoes Skillet is a one-pan wonder that combines crispy potatoes, tender chicken, and a rich garlic parmesan sauce for a meal that’s both hearty and delicious. Perfect for busy weeknights or cozy dinners, it’s a crowd-pleaser with minimal cleanup!

    Ingredients
    2 chicken breasts

    4-5 small/medium-sized potatoes

    2 tbsp olive oil

    Salt, pepper, garlic powder, and paprika (for potatoes)

    2 tbsp butter

    ½ tsp salt

    ½ tsp pepper

    1 tsp paprika

    1 tsp onion powder

    1 tsp Italian seasoning

    2 tbsp minced garlic

    ½ cup Buffalo Wild Wings Garlic Parmesan Sauce (or homemade garlic parmesan sauce)

    1 cup shredded mozzarella cheese

    Instructions
    1️⃣ Prepare the Potatoes:

    Wash, peel, and cut the potatoes into small cubes.

    Toss the potatoes with olive oil, salt, pepper, garlic powder, and paprika.

    2️⃣ Cook the Potatoes:

    Cook the seasoned potatoes in an air fryer at 400°F for about 20 minutes, shaking the basket a couple of times during cooking to ensure even crisping.
    (Alternatively, roast the potatoes in the oven at 400°F for 25-30 minutes, flipping halfway through.)

    3️⃣ Prepare the Chicken:

    Cut the chicken breasts into small cubes.

    Season the chicken with salt, pepper, paprika, onion powder, and Italian seasoning.

    4️⃣ Cook the Chicken:

    Melt butter in a large skillet over medium-high heat.

    Add the seasoned chicken and cook for 7-10 minutes, or until the internal temperature reaches 165°F.

    5️⃣ Add the Garlic Sauce:

    Add the minced garlic and Buffalo Wild Wings Garlic Parmesan Sauce to the skillet.

    Stir to coat the chicken in the sauce.

    6️⃣ Combine the Potatoes:

    Once the potatoes are crispy and golden, add them to the skillet with the chicken.

    Toss everything together to coat in the sauce.

    7️⃣ Add the Cheese:

    Sprinkle shredded mozzarella cheese over the top of the chicken and potatoes.

    Cover the skillet with a lid and let it sit for 2-3 minutes, or until the cheese melts.
    (Alternatively, broil in the oven for 2-3 minutes to melt and brown the cheese.)

    8️⃣ Serve and Enjoy:

    Serve hot and enjoy this flavorful, cheesy, and satisfying skillet meal!

    Tips for Success
    1f31f Homemade Garlic Parmesan Sauce: If you don’t have Buffalo Wild Wings sauce, mix ½ cup mayonnaise, 2 tbsp grated parmesan, 1 tsp garlic powder, 1 tsp lemon juice, and a pinch of salt and pepper.
    1f31f Add Veggies: Toss in some broccoli, spinach, or bell peppers for extra nutrition.
    1f31f Storage: Store leftovers in an airtight container in the refrigerator for up to 3 days. Reheat in the skillet or microwave.

    This Garlic Parmesan Chicken and Potatoes Skillet is a complete meal that’s packed with flavor and sure to become a family favorite. Enjoy! 1f3571f954

  • Banana Chocolate Chip Muffins

    Banana Chocolate Chip Muffins

    These Banana Chocolate Chip Muffins are the perfect treat for breakfast or a snack. They are moist, flavorful, and packed with chocolate chips, making them a delightful way to use up ripe bananas. Made with almond flour, they are also a great gluten-free option.

    Preparation Time
    Prep Time: 15 minutes
    Cook Time: 20-25 minutes
    Total Time: 35-40 minutes
    Ingredients
    170g mashed bananas (about 3/4 cup)
    2 whole eggs (about 55g each)
    50g dark brown sugar (about 1/4 cup)
    1/2 tsp vanilla extract
    200g almond flour (about 2 cups)
    1 tsp baking soda
    1/2 tsp baking powder
    5g salt (about 1 tsp)
    50g chocolate chips (about 1/3 cup)
    Instructions

    Preheat the Oven: Preheat your oven to 350°F (175°C). Line a muffin tin with paper liners or grease with non-stick spray.
    Prepare the Batter:


    In a large mixing bowl, mash the bananas until smooth.
    Add the eggs, dark brown sugar, and vanilla extract. Mix well until fully combined.
    In a separate bowl, combine the almond flour, baking soda, baking powder, and salt. Mix well.
    Gradually add the dry ingredients to the banana mixture, stirring until just combined.
    Fold in the chocolate chips.
    Fill the Muffin Tin:
    Divide the batter evenly among the muffin cups, filling each about 3/4 full.
    Bake:
    Bake in the preheated oven for 20-25 minutes, or until a toothpick inserted into the center of a muffin comes out clean.
    Allow the muffins to cool in the tin for about 5 minutes before transferring to a wire rack to cool completely.
    Serving Suggestions
    Enjoy these muffins warm or at room temperature.
    Serve with a glass of milk or a cup of coffee for a delightful breakfast or snack.
    Cooking Tips
    Ensure the bananas are well-mashed to avoid large chunks in the batter.
    Use ripe bananas for the best flavor and sweetness.
    Nutritional Benefits
    Bananas provide dietary fiber, potassium, and natural sweetness.
    Almond flour is a good source of protein and healthy fats, making these muffins a nutritious choice.
    Dietary Information
    These muffins are gluten-free and can be made dairy-free by using dairy-free chocolate chips.
    Storage Tips
    Store any leftover muffins in an airtight container at room temperature for up to 3 days.
    Muffins can also be frozen for up to 3 months. Wrap them individually in plastic wrap and store in a freezer-safe bag.
    Why You’ll Love This Recipe
    These muffins are easy to make and perfect for using up ripe bananas.
    The combination of bananas and chocolate chips makes them irresistibly delicious.
    They are a healthy and satisfying snack or breakfast option.
    Conclusion
    Banana Chocolate Chip Muffins are a delicious and easy way to enjoy a sweet treat while also getting some nutritional benefits. With their moist texture and rich flavor, they are sure to become a favorite in your household.

  • Oatmeal and Cheese Pancakes

    Oatmeal and Cheese Pancakes

    Ingredients

    • 1 cup (100 g) oatmeal
    • 2 eggs
    • 1 cup (240 ml) milk
    • 2 tablespoons parsley, chopped
    • 3.5 oz (100 g) cheese, grated
    • Salt, to taste
    • 1 teaspoon dry Provençal herbs
    • 1/2 teaspoon chili flakes (adjust to taste)
    • Oil for frying
    • 1 tablespoon sesame seeds

    Directions

    • Prepare the Oatmeal:
      • Blend the oatmeal in a blender until it reaches a coarse flour consistency.
    • Mix the Batter:
      • In a large mixing bowl, whisk the eggs and milk until well combined.
      • Add the ground oatmeal, chopped parsley, grated cheese, salt, Provençal herbs, and chili flakes. Stir until all ingredients are evenly mixed.
    • Cook the Pancakes:
      • Heat a small amount of oil in a large skillet over medium heat.
      • Pour portions of the batter into the skillet to form pancakes. Sprinkle sesame seeds on top of each pancake.
      • Cook for 3-4 minutes on each side or until golden brown and fully cooked.
    • Serve:
      • Remove pancakes from the skillet and place them on a plate lined with paper towels to absorb excess oil.
      • Serve warm and enjoy!

    Serving Suggestions

    • Serve with a dollop of sour cream or yogurt for added creaminess.
    • Pair with a fresh green salad for a complete meal.
    • Drizzle with a spicy dipping sauce for a flavorful kick.
    • Enjoy with a side of scrambled eggs for a hearty breakfast.
    • Serve alongside grilled vegetables for a light dinner.

    Cooking Tips

    • Adjust the batter consistency with a little more milk if it’s too thick.
    • Use a non-stick skillet for easy flipping and even cooking.
    • Swap parsley with other herbs like cilantro or dill for variety.
    • Grate the cheese finely to ensure it melts evenly throughout the pancakes.
    • Keep cooked pancakes warm in a low oven while finishing the rest.

    Nutritional Benefits

    • Oatmeal: High in fiber and promotes heart health.
    • Eggs: Provide quality protein and essential nutrients.
    • Cheese: Adds calcium and protein for strong bones.
    • Parsley: Rich in vitamins A, C, and K.

    Dietary Information

    • Vegetarian-friendly
    • Can be made gluten-free by using certified gluten-free oats
    • Adjust spices and cheese for dietary preferences

    Nutritional Facts (Per Pancake, Approximate)

    • Calories: 150
    • Protein: 8 g
    • Fat: 8 g
    • Carbohydrates: 12 g
    • Fiber: 2 g

    Storage

    • Refrigerate leftovers in an airtight container for up to 3 days.
    • Reheat in a skillet or microwave before serving.
    • Freeze for up to 1 month; thaw and reheat as needed.

    Why You’ll Love This Recipe

    • Quick and easy to prepare with simple ingredients.
    • Packed with protein and fiber for a satisfying meal.
    • Versatile enough for breakfast, lunch, or dinner.
    • Easily customizable to suit your taste preferences.

    Conclusion Oatmeal and cheese pancakes are a savory delight that combines the wholesomeness of oatmeal with the indulgent creaminess of cheese. Perfectly spiced and versatile, these pancakes are a great addition to your meal rotation. Whether you enjoy them fresh off the skillet or reheated as a quick snack, they’re sure to become a family favorite.

  • Easy German Apple Pie (5-Minute No-Mix Recipe)

    Easy German Apple Pie (5-Minute No-Mix Recipe)

    Easy German Apple Pie (5-Minute No-Mix Recipe)

    This German Apple Pie is a delightful, fuss-free dessert that you can whip up in just 5 minutes! With no mixing required, the layers of juicy apples, sweet raisins, and warm cinnamon create a delicious and aromatic treat. It’s perfect for a quick dessert, family gatherings, or whenever you crave something sweet. The result is a moist and flavorful pie that tastes like it took hours to make!

    Preparation Time: 5 minutes
    Cooking Time: 45 minutes
    Total Time: 50 minutes

    Ingredients:

      • Apples: 3 large, peeled and cut into pieces
      • Raisins: ½ cup (75g)
      • Cinnamon powder: 2 teaspoons
      • Wheat flour: 1 cup (130g)
      • Sugar: ½ cup (100g)
      • Baking powder: 1 teaspoon
      • Eggs: 3 large
    • Extra sugar: 1 tablespoon (for beating with eggs)
    • Butter: 100g, melted

    Directions:

      1. Preheat the Oven:
        Preheat your oven to 180°C (350°F) with both upper and lower heat.
      1. Prepare the Apples:
        Peel and cut three large apples into bite-sized pieces. Place them evenly in the bottom of your baking dish.
      2. Add the Raisins and Cinnamon:
        Sprinkle the raisins and cinnamon powder over the apples, distributing them evenly.
      3. Layer the Dry Ingredients:
        In a bowl, combine the wheat flour, half a cup of sugar, and baking powder. Spread this dry mixture evenly over the apple layer.
      1. Beat the Eggs:
        In a separate bowl, beat the eggs with a tablespoon of sugar using a fork until well combined. Pour the beaten egg mixture over the dry ingredients in the baking dish.
      2. Add the Melted Butter:
        Pour the melted butter evenly over the top of the mixture. This will help create a crispy, golden crust.
      3. Bake:
        Place the pie in the preheated oven and bake for 45 minutes, or until the top is golden and set.
    1. Serve:
      Let the pie cool slightly before serving. Enjoy warm or at room temperature!

    Serving Suggestions:

      • Serve with a scoop of vanilla ice cream or a dollop of whipped cream for an extra treat.
      • Dust with powdered sugar for a pretty presentation.
    • Pair with a warm cup of coffee or tea.

    Cooking Tips:

      • Use different apples: Granny Smith, Honeycrisp, or any tart-sweet apples work well in this recipe.
      • Add nuts: Sprinkle chopped walnuts or pecans on top for added crunch and flavor.
    • Flavor variations: Add a pinch of nutmeg or ground cloves to the cinnamon for extra spice.Nutritional Benefits:
      • Rich in fiber: Apples provide dietary fiber, aiding digestion and overall gut health.
      • Source of antioxidants: Cinnamon and raisins are packed with antioxidants that support overall health.
    • Simple ingredients: This recipe uses basic pantry staples, making it easy and accessible.

    Dietary Information:

      • Vegetarian: Suitable for a vegetarian diet.
      • Nut-free: This recipe is naturally nut-free, but always check labels to ensure all ingredients are safe if you have allergies.

    Nutritional Facts (per serving, approx. 8 servings):

      • Calories: 230
      • Protein: 4g
      • Fat: 12g
      • Carbohydrates: 28g
      • Fiber: 2g
      • Sugar: 18g

    Storage:

    • Refrigerator: Store leftover apple pie in an airtight container in the refrigerator for up to 3 days. Reheat in the oven or microwave before serving.
    • Freezer: This pie can be frozen for up to 2 months. Wrap individual slices tightly in plastic wrap and place them in a freezer-safe container.

    Why You’ll Love This Recipe:

      • Quick and easy: No mixing required, just layer the ingredients and bake!
      • Delicious flavor: Sweet apples and warm cinnamon create a comforting dessert.
      • Perfect for any occasion: Great for a quick dessert, potlucks, or family dinners.
      • Customizable: Easily adapt with your favorite nuts, spices, or dried fruits.

    Conclusion:
    This Easy German Apple Pie is a no-fuss recipe that delivers maximum flavor with minimal effort. The combination of tender apples, sweet raisins, and cinnamon with a buttery crust makes this pie a crowd-pleaser. Whether you’re new to baking or need a quick dessert, this apple pie is a fantastic choice that everyone will love!

    Frequently Asked Questions:

      1. Can I use different fruits?
        Yes, you can substitute apples with pears, peaches, or a mix of your favorite fruits.
      2. Can I make this recipe gluten-free?
        Substitute the wheat flour with a gluten-free flour blend to make it gluten-free.
      1. Can I add nuts to the pie?
        Yes, chopped nuts like walnuts or pecans add a nice crunch and extra flavor.
      2. Can I use a sugar substitute?
        You can use a sugar substitute like stevia or monk fruit sweetener for a lower sugar option.
      3. Can I use margarine instead of butter?
        Margarine can be used, but the flavor may differ slightly.
      1. Do I need to pre-cook the apples?
        No, the apples cook perfectly in the oven with the other ingredients.
      2. What type of baking dish should I use?
        A standard 9-inch round or square baking dish works well for this recipe.
      3. Can I make this pie in advance?
        Yes, you can prepare the pie ahead of time and reheat it in the oven before serving.
    1. What if I don’t have raisins?
      You can omit them or replace them with other dried fruits like cranberries or chopped dates.
    2. Can I reduce the sugar in the recipe?
      Yes, you can adjust the sugar to your taste or replace it with a natural sweetener.
  • Carrot Pineapple Smoothie Recipe

    Carrot Pineapple Smoothie Recipe

    Ingredients:
    1 large carrot, peeled and chopped 1f955
    1/2 cup pineapple chunks (fresh or frozen) 1f34d
    1/2 banana 1f34c (for added creaminess)
    1/2 cup Greek yogurt (for creaminess and protein) ‍
    1/2 cup orange juice 1f34a
    1/2 cup water (or coconut water for extra hydration) 1f4a7
    1 tablespoon honey or maple syrup (optional, for sweetness) 1f36f
    Ice cubes (optional, if you want a colder smoothie) 1f9ca
    Instructions:
    1. Prepare the Ingredients:

    Peel and chop the carrot into small pieces to make it easier to blend. 1f955
    If you’re using fresh pineapple, cut it into chunks 1f34d.
    2. Blend the Smoothie:

    In a blender, combine the chopped carrot, pineapple chunks, banana, Greek yogurt, orange juice, and water.
    Add honey or maple syrup if you prefer a sweeter taste.
    Blend until smooth and creamy. If you like a thicker smoothie, add a few ice cubes and blend again.
    3. Taste and Adjust:

    Taste the smoothie, and if you want it sweeter, add a little more honey or syrup. If it’s too thick, add a bit more water or juice to reach your desired consistency.
    4. Serve:

    Pour the smoothie into a glass and enjoy this healthy, tropical blend of flavors! 1f9551f34d1f379
    Optional Add-ins:
    A pinch of turmeric for an anti-inflammatory boost 1f33f
    A handful of spinach for extra greens 1f343
    A splash of coconut milk for a creamy texture 1f965
    This Carrot Pineapple Smoothie is not only delicious but also full of vitamins and antioxidants. Perfect for a nutritious

  • Paris-Brest: A Classic French Pastry Ring That Never Fails to Impress

    Paris-Brest: A Classic French Pastry Ring That Never Fails to Impress

    Paris-Brest: A Classic French Pastry Ring That Never Fails to Impress

    Ingredients

    For the Choux Pastry Ring:

    • 100ml (⅓ cup + 1 tablespoon) water
    • 100ml (⅓ cup + 1 tablespoon) whole milk
    • 80g (5¾ tablespoons) unsalted butter
    • ¼ teaspoon salt
    • 1 teaspoon granulated sugar
    • 120g (1 cup) all-purpose flour, sifted
    • 4 large eggs, room temperature

    For the Praline Cream Filling:

    • 2 large eggs
    • 150g (¾ cup) vanilla sugar
    • 70g (⅓ cup) cornstarch
    • 500ml (2 cups) whole milk
    • 160g (11 tablespoons) unsalted butter, softened

    For Finishing:

    • 1 egg, beaten (for egg wash)
    • Sliced almonds
    • Powdered sugar for dusting

    Instructions

    Preparing the Praline Cream (Make Ahead)

    1. In a medium saucepan, I whisk together eggs, vanilla sugar, and cornstarch until smooth.
    2. I gradually stream in the milk while whisking constantly to prevent lumps.
    3. Over medium heat, I cook the mixture, whisking continuously, until it thickens and begins to bubble (about 5-7 minutes).
    4. Once thickened, I immediately transfer to a bowl and cover with plastic wrap directly on the surface.
    5. I let it cool completely at room temperature, then refrigerate for at least 20 minutes.

    Making the Choux Pastry

    1. I preheat my oven to 180°C (356°F) and line a baking sheet with parchment paper.
    2. Using a 20cm (8-inch) plate as a guide, I draw a circle on the parchment paper and flip it over.
    3. In a medium saucepan, I combine water, milk, butter, salt, and sugar.
    4. I bring this mixture to a rolling boil over medium heat, ensuring the butter is completely melted.
    5. I remove from heat and add all the flour at once, stirring vigorously with a wooden spoon.
    6. Back over medium heat, I cook the mixture for 1-2 minutes, stirring constantly until it forms a smooth ball and leaves a film on the bottom of the pan.
    7. I transfer to a stand mixer bowl and let cool for 5 minutes.
    8. Using the paddle attachment, I beat in eggs one at a time, ensuring each is fully incorporated before adding the next.

    Shaping and Baking

    1. I transfer the choux pastry to a piping bag fitted with a large open star tip.
    2. Following my traced circle, I pipe two concentric rings of pastry, one slightly overlapping the other.
    3. I pipe a third ring on top of where the first two meet.
    4. With remaining dough, I pipe small balls around the top of the ring.
    5. I brush carefully with beaten egg and sprinkle generously with sliced almonds.
    6. I bake for 35-40 minutes until deeply golden brown, rotating halfway through.
    7. Once done, I turn off the oven and let it cool inside with the door slightly ajar for 10 minutes.

    Assembly

    1. Once completely cool, I slice the ring horizontally into two layers.
    2. I beat the softened butter until light and fluffy, then gradually incorporate the cooled custard.
    3. I transfer this praline cream to a piping bag and pipe generous rosettes onto the bottom half.
    4. I carefully place the top layer and dust with powdered sugar just before serving.

    Storage and Make-Ahead Tips

    The unfilled pastry can be stored in an airtight container for 24 hours. Once filled, it’s best enjoyed within 4-6 hours but can be refrigerated for up to 2 days.

    Nutritional Information

    (Per serving, serves 8)

    • Calories: 485
    • Total Fat: 32g
    • Saturated Fat: 19g
    • Cholesterol: 215mg
    • Sodium: 185mg
    • Total Carbohydrates: 42g
    • Dietary Fiber: 1g
    • Sugar: 22g
    • Protein: 10g

    Pro Tips

    • Room temperature eggs are crucial for proper pastry puff
    • The pastry is done when it sounds hollow when tapped
    • Don’t open the oven door during the first 25 minutes of baking
    • Let the cream filling chill thoroughly before whipping with butter

    This Paris-Brest is perfect for special occasions or when you want to impress guests with your French pastry skills. The combination of light choux pastry and rich praline cream makes it an unforgettable dessert that’s worth every minute of preparation.