Category: Recipes

  • Healthy Oatmeal Bread with Pumpkin Seeds and Tahini

    Healthy Oatmeal Bread with Pumpkin Seeds and Tahini

    Healthy Oatmeal Bread with Pumpkin Seeds and Tahini

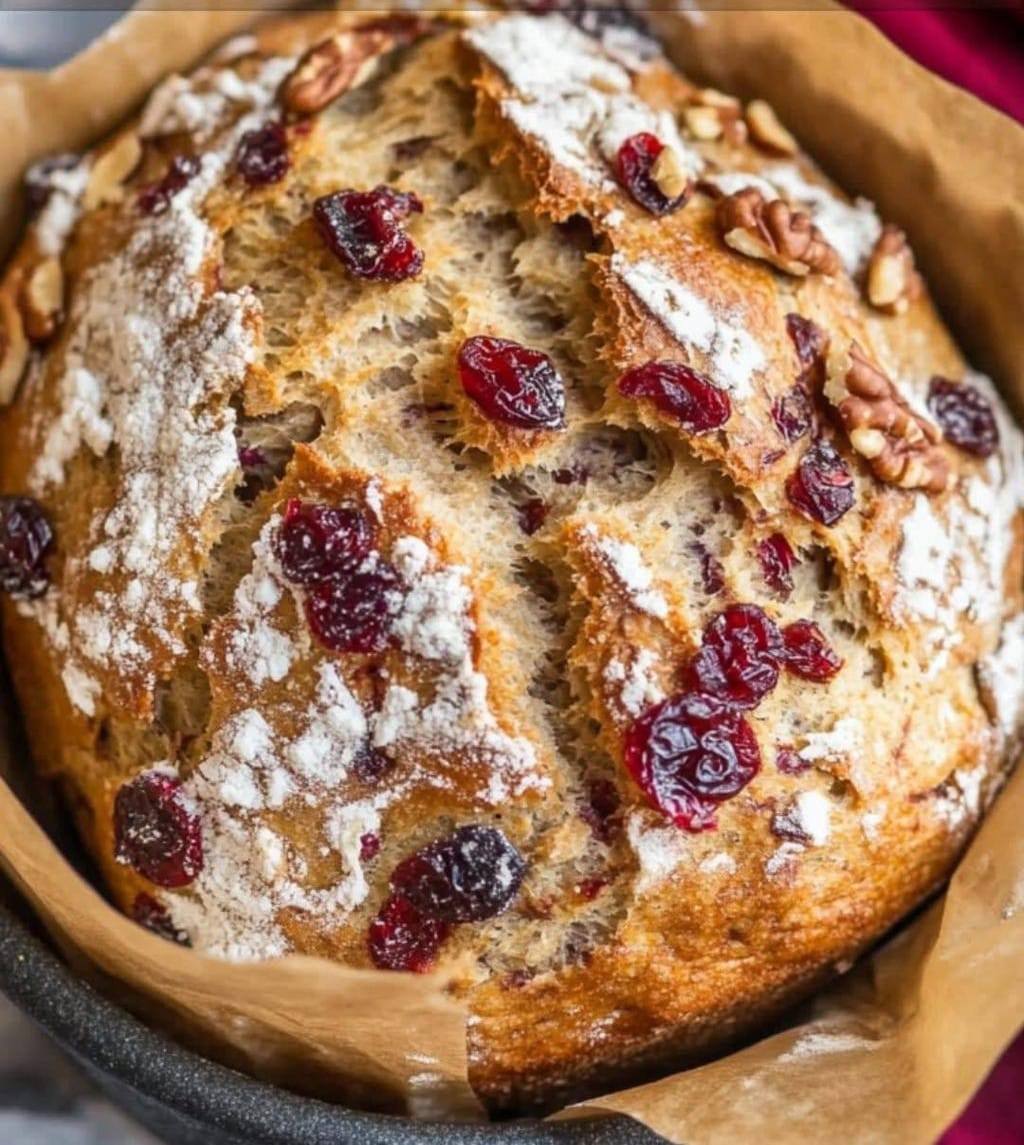
    This Healthy Oatmeal Bread with Pumpkin Seeds and Tahini is a nutrient-packed loaf that’s perfect for anyone looking to enjoy a wholesome, fiber-rich, and satisfying bread option. With ingredients like oats, flaxseeds, psyllium, and a hint of dried tomatoes and oregano, this bread is full of texture and flavor. Topped with sesame seeds and baked to perfection, it makes for a great breakfast, snack, or side dish for any meal.

    Preparation, Cook, and Total Times

      • Preparation Time: 15 minutes

      • Cooking Time: 45 minutes

      • Total Time: 1 hour

      • Yield: 1 loaf

    • Cuisine: Healthy, Baked Goods

    Full List of Ingredients

      • 70 grams oatmeal

      • 80 grams pumpkin seeds

      • 2 tablespoons flaxseed

      • 2 tablespoons psyllium

      • A little salt

      • 10 grams leavening agent (baking powder)

      • Dried tomatoes (to taste)

      • Oregano (to taste)

      • 3 eggs

      • 1 cup kefir or liquid yogurt

      • Vegetable oil (for greasing)

      • Sesame seeds (for topping)

      • 100 grams beets, cooked and grated

      • 2 tablespoons canned beans (drained)

      • 1 tablespoon tahini

        • Fresh coriander (to taste)

        • A pinch of salt

      • 1 garlic clove, minced

      • Juice of 1/2 lime

      Step-by-Step Cooking Directions

      1. Prepare the Dry Ingredients

      Start by preparing all the dry ingredients. In a large mixing bowl, combine the oatmeal, pumpkin seeds, flaxseeds, psyllium, salt, leavening agent, dried tomatoes, and oregano. Stir the mixture well to evenly distribute all the dry ingredients.

      2. Prepare the Wet Ingredients

      In a separate bowl, whisk the 3 eggs and then add the kefir (or liquid yogurt). Mix the ingredients together until smooth. This mixture will help bind the dry ingredients and give the bread its moist texture.

      3. Combine Wet and Dry Ingredients

      Slowly add the wet ingredients to the dry ingredients, mixing well as you go. Once the mixture is well combined, let the dough stand for about 15 minutes. This allows the psyllium and flaxseeds to absorb the moisture and thicken the mixture.

      4. Prepare the Beetroot Mixture

      While the dough is resting, prepare the beetroot mixture. In a blender or food processor, combine the cooked and grated beets, canned beans, tahini, coriander, a pinch of salt, minced garlic, and lime juice. Blend until smooth.

      5. Mix the Beetroot Mixture with the Dough

      Add the beetroot mixture to the dough and mix well to combine. This will not only add flavor and nutrition but also give the bread a vibrant color.

      6. Shape and Prepare the Bread for Baking

      Grease a baking pan with vegetable oil and transfer the dough into the pan. Smooth the top of the dough evenly. Sprinkle sesame seeds on top for added texture and flavor.

      7. Bake the Bread

      Preheat your oven to 180°C (350°F). Place the bread in the oven and bake for about 45 minutes or until a toothpick inserted in the center comes out clean, and the bread is golden brown.

      8. Cool the Bread

      Once baked, remove the bread from the oven and let it cool in the pan for about 10 minutes. Then, transfer it to a wire rack to cool completely.

      9. Serve

      Once the bread has cooled, slice it and serve. This bread is perfect for a healthy breakfast, served with butter, avocado, or your favorite spread. It also pairs well with soups and salads.

      Nutritional Information (Per Serving)

        • Calories: 180

        • Fat: 10g

        • Saturated Fat: 1g

        • Cholesterol: 40mg

        • Sodium: 300mg

        • Carbohydrates: 22g

        • Fiber: 7g

      • Sugars: 3g

      • Protein: 6g

      Note: Nutritional information may vary depending on specific ingredients used.

      The Origins and Popularity of the Recipe

      This Oatmeal Bread with Pumpkin Seeds and Tahini is inspired by a blend of healthy baking traditions and a desire to create a flavorful, nutritious bread alternative. The use of oats, flaxseeds, and psyllium is common in health-conscious baking, and the addition of beets and tahini gives the bread a unique, wholesome twist. This bread is gaining popularity among those looking for gluten-free, high-fiber options that are also delicious.

      Reasons Why You’ll Love the Recipe

        1. Healthy and Nutritious: Packed with fiber, healthy fats, and protein, this bread is a great addition to a balanced diet.

        2. Full of Flavor: The combination of beets, tahini, and dried tomatoes creates a savory, rich flavor that makes this bread more than just a side dish.

        3. Gluten-Free Option: Perfect for those who are gluten-sensitive or looking for a gluten-free bread option.

      Health Benefits

        • Oats are rich in soluble fiber, which helps lower cholesterol and supports heart health.

        • Pumpkin Seeds provide a good source of magnesium, zinc, and omega-3 fatty acids, which support immunity and heart health.

        • Beets are packed with antioxidants and nitrates, which improve blood flow and help lower blood pressure.

      • Flaxseeds and Psyllium are high in fiber, promoting healthy digestion and weight management.

      Serving Suggestions

        • With Avocado: Top slices of this bread with mashed avocado, a sprinkle of salt, and a dash of chili flakes for a healthy snack or breakfast.

        • With Hummus: Serve with hummus or your favorite spread for an easy and nutritious snack.

      • As a Side: Pair with a light soup or salad for a well-rounded meal.

      Cooking Tips

        1. Don’t Skip the Resting Time: Letting the dough sit for 15 minutes helps the psyllium and flaxseeds absorb the moisture, which improves the texture.

        2. Check for Doneness: Since oven temperatures vary, check the bread with a toothpick around 40 minutes to ensure it’s baked all the way through.

      1. Add More Toppings: Feel free to experiment with different toppings, like sunflower seeds, walnuts, or herbs, to make the bread even more delicious.

      Variations to Try

        1. Add More Veggies: You can add more grated vegetables like zucchini or carrots to increase the nutritional value.

        2. Make it Spicy: Add chili flakes or diced jalapeños for a spicy twist.

      1. Sweet Version: Omit the savory ingredients like dried tomatoes and garlic and add dried fruits or cinnamon for a sweeter version of this bread.

      Conclusion

      This Healthy Oatmeal Bread with Pumpkin Seeds and Tahini is not only a nutrient-packed option but also a delicious, hearty bread that can be enjoyed in many ways. With its vibrant color from the beets and its delicious flavor from the tahini and pumpkin seeds, this bread is sure to become a staple in your kitchen. Whether you enjoy it with spreads, as a side dish, or just on its own, this bread is as satisfying as it is healthy.

  • Garlic Butter Steak Bites in 10 Minutes

    Garlic Butter Steak Bites in 10 Minutes

    Ingredients
    500g (1 lb) rump steak (or sirloin/flank steak), cut into 2.5cm (1-inch) cubes

    100g (3.5 oz) garlic & parsley butter (or make your own: mix 4 tbsp butter + 3 minced garlic cloves + 1 tbsp chopped parsley)

    1 tbsp garlic powder

    1 tbsp olive oil

    ½ red onion, thinly sliced

    1 tbsp Worcestershire sauce

    ½ tsp salt

    ½ tsp black pepper

    Fresh parsley, chopped (for garnish)

    (Serves 2-3 as a main, 4 as an appetizer)

    Step-by-Step Instructions
    1. Prep the Steak
    Pat steak cubes dry with paper towels (this ensures a good sear).

    Toss with olive oil, garlic powder, salt, and pepper.

    2. Sear the Steak
    Heat a cast-iron skillet or heavy pan over medium-high heat.

    Melt half the garlic butter, then add steak in a single layer (work in batches if needed).

    Sear 1-2 minutes per side for medium-rare (adjust time for desired doneness). Transfer to a plate.

    3. Sauté the Onions
    In the same pan, melt the remaining garlic butter.

    Add red onion and cook 2 minutes until softened.

    Stir in Worcestershire sauce and cook 30 seconds.

    4. Combine & Serve
    Return steak to the pan and toss with the onions.

    Garnish with parsley and serve hot.

    Serving Suggestions
    ️ As a main: Serve over mashed potatoes, rice, or crusty bread to soak up the garlic butter.
    1f377 As an appetizer: Skewer steak bites with toothpicks for easy sharing.
    1f957 With sides: Pair with a crisp green salad or roasted veggies.

    Pro Tips
    1f525 For perfect searing: Don’t overcrowd the pan—this steams the meat instead of browning it.
    1f9c8 Extra flavor: Add a splash of balsamic glaze or red wine to the onions.
    ⏱️ Quick prep: Buy pre-cut steak at the butcher counter to save time.

    Prep Time: 5 mins | Cook Time: 5 mins | Total Time: 10 mins
    Calories: ~350 per serving

    Ideal for date nights, quick dinners, or impressing guests! 1f4ab

  • Cookies Made From Brownie Mix

    Cookies Made From Brownie Mix

    Cookies Made From Brownie Mix 

    Ingredients:
    – 1 box of brownie mix
    – 1/4 cup of vegetable oil 1f33f
    – 2 eggs 1f95a
    – 1/2 cup of chocolate chips 1f36b
    – 1/4 cup of chopped nuts (optional) 1f330

    Directions:

    1. Preheat the oven to 350°F (175°C) and line a baking sheet with parchment paper.
    2. In a mixing bowl, combine the brownie mix, vegetable oil, and eggs. Mix until well combined.
    3. Fold in the chocolate chips and nuts, if using.
    4. Use a cookie scoop or spoon to drop dough onto the prepared baking sheet, leaving space between each cookie.
    5. Bake for 8-10 minutes, or until the edges are set but the centers are still soft.
    6. Allow the cookies to cool on the baking sheet for a few minutes before transferring them to a wire rack to cool completely.

    Tips:

    – You can customize these cookies by adding different mix-ins, such as dried fruit or additional chocolate chips.
    – Be careful not to overbake the cookies, as they will continue to cook slightly once removed from the oven.
    Prep time: 15 minutes
    Calories: Approximately 150 calories per cookie

     Tips for Making Cookies from Brownie Mix

    1. Use Less Liquid
      Brownie mix is meant to be pourable for pans, so to turn it into cookie dough, use less water or oil than the box calls for. Example:

      • 1 box brownie mix

      • 1 egg (instead of 2)

      • 1/4 cup oil

      • No water (or just 1 tbsp if needed)

    2. Chill the Dough
      Let the dough chill for 15–30 minutes before baking. This helps prevent spreading and gives thicker, chewier cookies.

    3. Add Mix-Ins
      Elevate the flavor and texture with:

      • Chocolate chips or chunks

      • Nuts (walnuts or pecans work great)

      • M&Ms, peanut butter chips, or toffee bits

    4. Watch the Bake Time
      Bake at 350°F (175°C) for 8–10 minutes. Don’t overbake! They’ll set more as they cool.

    5. Use a Cookie Scoop
      For even cookies that bake uniformly, scoop dough into balls before baking.

    6. Customize the Texture

      • For chewy cookies: Use more brown sugar or a bit of honey/maple syrup.

      • For cakey cookies: Add an extra egg white.

    ✅ Benefits of Using Brownie Mix for Cookies

    • Super Convenient
      You skip the measuring and dry ingredient prep—just add a couple things and bake.

    • Consistent Flavor
      Brownie mix is pre-balanced for rich, chocolatey goodness—no guesswork needed.

    • Foolproof for Beginners
      Great for new bakers, kids, or quick dessert cravings.

    • Customizable
      You can make them chewy, cakey, filled, or frosted with little effort.

    • Time-Saving
      Perfect for last-minute gatherings, bake sales, or weeknight treats.

  • Baked Eggplant with Cheddar and Herbs

    Baked Eggplant with Cheddar and Herbs

    Baked Eggplant with Cheddar and Herbs
    This delicious baked eggplant dish is a perfect blend of flavors and textures. The eggplant is first salted to draw out excess moisture, then layered with tomatoes, peppers, and a mix of savory spices. Topped with a generous layer of melted cheddar cheese, it’s a satisfying and hearty dish. The combination of fresh herbs like parsley and green onions adds a burst of freshness, while sesame seeds give a delightful crunch. Whether served as a main or a side dish, this baked eggplant is sure to become a favorite!

    Preparation Time

    Preparation time: 15 minutes
    Cooking time: 35 minutes
    Total time: 50 minutes
    Ingredients

    1 eggplant
    1 tomato, sliced
    4 eggs
    1 pepper, chopped
    2 cloves of garlic, minced
    Salt, to taste
    Ground red pepper, to taste
    Black pepper, to taste
    A bunch of parsley, chopped
    5-6 sprigs of green onions, chopped
    Butter, for greasing the pan
    Sesame seeds, for topping
    100 grams cheddar cheese, grated
    Method
    Prepare the eggplant:
    Slice the eggplant into rounds or lengthwise, depending on your preference. Sprinkle the slices with salt and let them sit for 10 minutes. This helps to draw out excess moisture and reduce bitterness. After 10 minutes, rinse the eggplant slices under cold water and pat them dry with a paper towel.

    Prepare the filling:
    While the eggplant is resting, chop the tomato, pepper, garlic, parsley, and green onions. In a bowl, combine the tomato, chopped pepper, garlic, parsley, and green onions. Season the mixture with salt, ground red pepper, and black pepper to taste.

    Assemble the dish:
    Preheat your oven to 180°C (350°F). Grease a baking dish with butter. Arrange the eggplant slices in the dish, layering them neatly. Spoon the prepared vegetable mixture on top of the eggplant slices, spreading it evenly.

    Bake the dish:
    Bake in the preheated oven for 25 minutes. This will soften the eggplant and allow the flavors to meld.

    Add cheese and sesame:
    After 25 minutes, remove the dish from the oven and sprinkle the grated cheddar cheese on top of the baked vegetables. Add sesame seeds for a bit of crunch. Return the dish to the oven and bake for an additional 7 minutes, or until the cheese is melted and bubbly.

    Serve:
    Remove the dish from the oven and let it cool for a few minutes. Serve warm, garnished with extra fresh parsley if desired. Enjoy this flavorful, cheesy baked eggplant dish!

    Nutritional Facts (Per Serving)

    Calories: 220
    Protein: 12g
    Fat: 15g
    Carbohydrates: 18g
    Fiber: 6g
    Sugar: 8g
    Sodium: 500mg
    The Origins and Popularity of Eggplant Dishes
    Eggplant, also known as aubergine in many parts of the world, is a staple in Mediterranean, Middle Eastern, and Asian cuisines. Its ability to absorb flavors and its versatility make it a favorite in various dishes, from stews and curries to bakes and fries. The combination of eggplant with cheese and fresh herbs is popular in Mediterranean cooking, where ingredients like olive oil, garlic, and fresh vegetables come together to create dishes that are both satisfying and full of flavor. The popularity of baked eggplant dishes has spread worldwide, as the vegetable is a great alternative to meat in vegetarian meals. It is loved for its savory, umami flavor and soft texture when cooked.

    Why You’ll Love This Recipe
    This baked eggplant dish is comforting and full of flavor. The eggplant becomes tender and creamy, while the vegetables add freshness and richness. The cheese melts beautifully on top, creating a satisfying, golden crust. The addition of sesame seeds adds texture and depth, making this dish a complete and balanced meal. It’s easy to make, healthy, and perfect for any occasion. Whether you enjoy it as a main dish or as a side, you’ll love how simple yet flavorful it is.

    Health Benefits of this Recipe
    Eggplant is low in calories and packed with fiber, making it great for digestion and heart health. It also contains antioxidants like anthocyanins, which help protect the body from free radicals. Tomatoes, peppers, and garlic add additional health benefits, such as vitamin C and anti-inflammatory properties. The fresh herbs like parsley are rich in vitamins A and K, while sesame seeds provide healthy fats and minerals like calcium and magnesium. With the combination of these wholesome ingredients, this dish is as nutritious as it is delicious.

    Serving Suggestions of Baked Eggplant with Cheddar and Herbs
    This baked eggplant pairs wonderfully with a variety of side dishes. Serve it with a simple green salad, roasted potatoes, or couscous for a more filling meal. You could also serve it with a side of rice or quinoa to round out the dish. For a complete Mediterranean-inspired meal, serve it alongside hummus and pita bread.

    Tips

    Make it vegan: To make this dish vegan, simply swap the cheddar cheese for a plant-based cheese and use olive oil instead of butter to grease the pan.
    Add other vegetables: You can customize the recipe by adding other vegetables like zucchini, bell peppers, or mushrooms to the dish.
    Make it spicier: If you enjoy a bit of heat, add some chili flakes or fresh chopped chili to the vegetable mixture for an extra kick.
    Prepare in advance: You can assemble the dish ahead of time and bake it when you’re ready to serve.
    Variations to Try

    Stuffed eggplant: Instead of layering the eggplant, you can hollow out the centers and stuff them with the vegetable mixture and cheese. Bake the stuffed eggplants until the filling is golden and bubbly.
    Herb variations: Try using fresh basil, oregano, or thyme in place of parsley for a different flavor profile.
    Meat version: Add cooked ground beef, lamb, or chicken to the vegetable mixture for a more filling, meaty version of this dish.
    Conclusion
    This baked eggplant with cheddar and herbs is a simple yet flavorful dish that’s perfect for any occasion. It’s easy to prepare, packed with healthy vegetables, and topped with a creamy, cheesy glaze that makes every bite satisfying. Whether served for a weeknight dinner or at a gathering, this dish is sure to be a crowd-pleaser. With endless variations and customization options, it’s a versatile recipe that you’ll enjoy again and again.

  • Cheesy Baked Broccoli and Vegetable Casserole

    Cheesy Baked Broccoli and Vegetable Casserole

    Cheesy Baked Broccoli and Vegetable Casserole
    Looking for a wholesome, delicious dish that combines vibrant vegetables with cheesy, savory goodness? This Cheesy Baked Broccoli and Vegetable Casserole is the perfect comfort food that’s also loaded with nutrients. Made with a base of blended broccoli, eggs, and flour, and topped with a sautéed medley of colorful vegetables and golden cheese, this recipe is hearty enough to serve as a main course or a satisfying side. Whether you’re cooking for your family or meal prepping for the week, this broccoli casserole is sure to become a regular in your kitchen.

    Prep Time: 30 minutes
    Cook Time: 20 minutes
    Total Time: 50 minutes
    Yield: 6–8 servings
    Cuisine: Mediterranean-inspired Vegetarian

    Ingredients

    1 kg broccoli, cut into florets

    1.5 liters water

    1 teaspoon salt (for boiling broccoli)

    3 eggs

    3 tablespoons all-purpose flour

    100 grams mushrooms, chopped

    1 sweet red bell pepper, chopped

    1 sweet yellow bell pepper, chopped

    1 carrot, chopped

    1 onion, chopped

    2 tomatoes, chopped

    Vegetable oil or fat (for frying)

    Olive oil (for greasing the dish)

    150 grams cheese, grated (cheddar, mozzarella, or a mix)

    Salt, black pepper, red pepper flakes, and dry mint (to taste)

    Step-by-Step Cooking Directions
    Preheat the Oven
    Start by setting your oven to preheat at 180°C (360°F). This ensures it’s ready when your casserole is assembled and ready to bake.

    Prepare the Broccoli
    Bring 1.5 liters of water to a boil in a large pot. Add 1 teaspoon of salt and the broccoli florets. Cook the broccoli for 3–5 minutes—just enough to make it tender while keeping a slight crunch. Overcooking will make the base too watery, so be sure to keep it crisp-tender. Drain the broccoli in a colander and let it cool slightly.

    Create the Broccoli Base
    Once cooled, transfer the broccoli to a blender or food processor. Add 3 eggs and 3 tablespoons of flour. Blend the mixture until smooth and well combined. This green mixture will serve as the nutritious and flavorful base layer of your casserole. If needed, season it with a little salt and pepper.

    Cook the Vegetables
    In a large skillet, heat 2–3 tablespoons of vegetable oil or your preferred fat over medium heat. Add the chopped onion and sauté for about 5 minutes until golden and fragrant.
    Next, stir in the chopped carrots and mushrooms. Cook for 7–8 minutes, stirring occasionally, until they begin to soften and brown.
    Add the chopped tomatoes and cook for another 5 minutes, allowing their juices to simmer down.
    Finally, stir in the chopped red and yellow bell peppers. Season the vegetable mixture with salt, black pepper, red pepper flakes, and a generous pinch of dried mint. Cook everything for another minute, just to blend the flavors, then remove from heat.

    Assemble the Casserole
    Grease a large baking dish with olive oil to prevent sticking and add a subtle richness to the final dish. Pour the broccoli base mixture into the dish, spreading it out evenly with a spatula.
    Next, spoon the cooked vegetable mixture over the top of the broccoli layer, covering it completely.
    Sprinkle the grated cheese generously over the top. You can use cheddar for a sharp bite, mozzarella for that melty stretch, or a blend of both for extra flavor.

    Bake
    Place the casserole into your preheated oven and bake for about 20 minutes, or until the cheese is melted, bubbly, and golden brown on top. You can broil for the final 1–2 minutes for an even crispier topping.

    Serve
    Remove the dish from the oven and allow it to rest for 5–10 minutes before slicing. Serve warm as a standalone vegetarian main or a hearty side alongside meat, rice, or salad. This dish also tastes amazing cold the next day.

    Cookies Made From Brownie Mix
    Cookies Made From Brownie Mix
    Nutritional Information (per serving – based on 6 servings)

    Calories: 230

    Protein: 10g

    Carbohydrates: 15g

    Fats: 14g

    Fiber: 4g

    Sugar: 5g

    Sodium: 300mg

    Vitamin C: 100% DV

    Vitamin A: 60% DV

    Calcium: 15% DV

    The Origins and Popularity of the Recipe

    Casseroles have been a staple in kitchens across the world, from American baked dishes to Mediterranean vegetable gratins. This particular recipe takes its inspiration from Turkish and Middle Eastern vegetable pies, where eggs and vegetables are bound together to form a nutritious, budget-friendly meal. Using broccoli as a base is a modern twist—both gluten-free friendly (when using an alternate flour) and nutrient-dense. The addition of sautéed vegetables and herbs elevates this humble bake into a colorful and satisfying meal that is becoming increasingly popular among plant-based and healthy eating communities.

    Reasons Why You’ll Love the Recipe

    Nutrient-rich and colorful – packed with broccoli, peppers, and other veggies

    Cheesy and satisfying – the topping melts into a golden, bubbly layer

    Flexible and family-friendly – can be customized with your favorite ingredients

    Perfect for leftovers – stores well and tastes even better the next day

    Vegetarian and healthy – a complete, balanced dish with no meat

    Comfort food without guilt – warm, hearty, and nourishing

    Health Benefits

    Broccoli is high in vitamins K, C, and fiber, supporting immune health and digestion

    Bell peppers are rich in antioxidants and vitamin A, great for skin and eye health

    Carrots and onions bring anti-inflammatory benefits and blood sugar regulation

    Mushrooms support immune function and offer plant-based protein

    Stuffed Cabbage with Rice and Minced Meat
    Stuffed Cabbage with Rice and Minced Meat
    Cheese provides calcium, protein, and essential fats for energy and bone strength

    Olive oil and herbs are heart-healthy and rich in flavor-enhancing compounds

    Combined, these ingredients offer a balanced mix of protein, fiber, vitamins, and minerals in every serving.

    Serving Suggestions

    Pair with a side salad – crisp greens with lemon dressing work perfectly

    Serve with grains – rice, bulgur, or quinoa add extra texture and make it more filling

    Add a dollop of yogurt or tzatziki – for a refreshing contrast

    Top with chili flakes or sriracha – if you like a little heat

    Slice and pack – for a great lunchbox or picnic option

    Cooking Tips

    Don’t overcook the broccoli – blanching for just 3–5 minutes keeps it bright and nutrient-rich

    Use a food processor – for smoother broccoli base texture

    Adjust seasoning – always taste your vegetable mixture before baking

    Use parchment paper – if you want an easier cleanup

    Let it rest – after baking to allow the layers to set and slice more cleanly

    Variations to Try

    Add grains – stir cooked quinoa or bulgur into the vegetable layer for a heartier bake

    Go spicy – add jalapeños, hot sauce, or spicy sausage if you’re not vegetarian

    Make it vegan – substitute eggs with flax eggs, and use vegan cheese

    Try different herbs – thyme, parsley, or basil can be used instead of mint

    Add protein – crumbled tofu, lentils, or chickpeas boost the protein content

    Conclusion

    This Cheesy Baked Broccoli and Vegetable Casserole is a wholesome, vibrant, and nourishing dish that’s as comforting as it is healthy. The broccoli-egg base is soft yet sturdy, the colorful vegetables bring depth and sweetness, and the cheese ties it all together with indulgent flair. Whether you’re looking for a meatless dinner, a dish to feed a crowd, or a make-ahead lunch that keeps you full and energized, this casserole checks all the boxes. Serve it once and it’s guaranteed to become a regular on your weekly menu.


  • Stuffed Cabbage with Rice and Minced Meat

    Stuffed Cabbage with Rice and Minced Meat

    Stuffed Cabbage with Rice and Minced Meat
    Stuffed cabbage is a classic dish, popular in many cultures, that combines tender cabbage leaves with a savory filling of rice, minced meat, and vegetables. The filling is well-seasoned with herbs and spices, which give it a rich and satisfying flavor. A delicious sauce made with eggs and flour is poured over the dish before baking, giving it a creamy texture, while the surface is topped with parsley, red pepper, mint, and cheddar cheese for an extra burst of flavor. This hearty and nutritious meal is perfect for family gatherings or a comforting dinner at home.

    Full Recipe:
    Ingredients
    For the Filling:
    Cabbage: 1 large cabbage (1.5 kilograms)
    Rice: 1 cup (125 grams)
    Olive Oil: 3 tablespoons (30 ml)
    Onion: 1, finely chopped
    Carrot: 1, grated
    Green Pepper: 1, chopped
    Red Pepper: 1, chopped
    Minced Meat: 400 grams (can be beef, lamb, or a mix)
    Parsley: To taste, chopped
    Salt: 1 teaspoon (8 grams)
    Red Pepper Flakes: 1 teaspoon
    Black Pepper: 1 teaspoon
    Mint: 1 teaspoon, dried
    Allspice: 1 teaspoo
    For the Sauce:
    Eggs: 4
    Salt: 1 teaspoon
    Flour: 2 tablespoons (40 grams)
    For the Surface:
    Parsley: Fresh, chopped (for garnish)
    Red Pepper: For garnish
    Mint: Dried, for garnish
    Cheddar Cheese: Grated (to taste)
    Step-by-Step Instructions
    Step 1: Prepare the Cabbage
    Blanch the Cabbage:
    Bring a large pot of water to a boil and carefully immerse the whole cabbage. Blanch the cabbage for 5-7 minutes, until the leaves start to soften. This will make it easier to separate the leaves for stuffing.
    Drain the cabbage and allow it to cool slightly. Carefully remove the outer leaves, ensuring they remain whole. You will use these for wrapping the filling.
    Cut and Remove the Core:
    Once the cabbage has softened, cut out the core at the base and discard it. Gently peel off the leaves, trying to keep them as intact as possible.
    Step 2: Prepare the Filling
    Sauté the Vegetables:
    In a large pan, heat the olive oil over medium heat. Add the finely chopped onion, grated carrot, and chopped green and red peppers. Sauté for about 5 minutes, until the vegetables soften and the onion turns translucent.
    Cook the Meat:
    Add the minced meat to the vegetables and cook until browned. Use a spatula to break up the meat into smaller pieces as it cooks.
    Mix in the Rice:
    Stir in the rice, allowing it to toast slightly for about 2 minutes. This step will give the rice a nice texture when it’s stuffed inside the cabbage.
    Season the Filling:
    Add salt, red pepper flakes, black pepper, mint, and allspice to the mixture. Stir well to combine, then remove from the heat. Allow the mixture to cool slightly before adding the fresh parsley.
    Step 3: Stuff the Cabbage
    Prepare the Cabbage Leaves:
    Lay a cabbage leaf flat on a clean surface. Place about 1-2 tablespoons of the filling in the center of the leaf, depending on the size of the leaf.
    Roll the Cabbage:
    Fold the sides of the cabbage leaf over the filling and roll it up tightly, similar to how you would roll a burrito. Repeat the process with the remaining leaves and filling.
    Layer in a Baking Dish:
    Grease a large baking dish with olive oil and arrange the stuffed cabbage rolls snugly in the dish, seam side down.
    Step 4: Prepare the Sauce
    Whisk the Sauce:
    In a small bowl, whisk together the eggs, salt, and flour until smooth. This will create a creamy, custard-like topping for the cabbage rolls.
    Pour the Sauce Over the Cabbage Rolls:
    Pour the sauce evenly over the cabbage rolls, making sure each one is well-coated.
    Step 5: Bake
    Preheat the Oven:
    Preheat your oven to 180°C (350°F).
    Bake the Cabbage Rolls:
    Cover the baking dish with aluminum foil and bake for 45-50 minutes, until the cabbage is tender and the sauce has set.
    Step 6: Garnish and Serve
    Add the Toppings:
    Once the cabbage rolls are baked, remove the dish from the oven and sprinkle the top with chopped parsley, red pepper, dried mint, and grated cheddar cheese.
    Serve:
    Serve the cabbage rolls warm, garnished with extra parsley if desired.
    Cooking Tips
    Cabbage Choice:
    Choose a large, firm cabbage with vibrant green leaves. Blanching the cabbage leaves will help soften them, making them easier to work with and roll.
    Seasoning Adjustments:
    Feel free to adjust the seasonings in the filling to suit your taste. You can add more or less red pepper flakes for heat, or experiment with herbs like thyme or rosemary.
    Rice Alternatives:
    For a healthier twist, you can substitute white rice with brown rice or quinoa.
    Meat Choices:
    This recipe works well with a variety of meats, including beef, pork, or a combination. You can also make it vegetarian by replacing the meat with lentils or mushrooms.
    Cheese Options:
    If cheddar cheese isn’t your favorite, you can use mozzarella or parmesan for a different flavor profile.
    Storage
    Leftovers:
    Refrigerator: Store leftover stuffed cabbage in an airtight container in the refrigerator for up to 3 days. Reheat in the oven or microwave before serving.
    Freezing:
    Freezer: These stuffed cabbage rolls freeze well. Once cooled, place them in a freezer-safe container and freeze for up to 3 months. Thaw in the fridge overnight and reheat in the oven.
    Nutritional Facts (Per Serving – Approximation)
    Calories: 350
    Protein: 20 g
    Carbohydrates: 32 g
    Fat: 15 g
    Fiber: 6 g
    Sodium: 600 mg
    Note: Nutritional values may vary depending on the specific ingredients used.

    FAQs
    1. Can I make this dish vegetarian?
    Yes, you can substitute the minced meat with plant-based options like lentils, mushrooms, or textured vegetable protein (TVP) to create a vegetarian version of this dish.

    Cheesy Baked Broccoli and Vegetable Casserole
    Cheesy Baked Broccoli and Vegetable Casserole
    2. How can I prevent the cabbage from tearing?
    Blanching the cabbage leaves will soften them and make them easier to roll. Be gentle when handling the leaves to avoid tearing. If a leaf does tear, you can overlap another piece of cabbage to patch it.

    3. Can I use a different grain instead of rice?
    Yes, you can use other grains such as quinoa, bulgur, or even couscous. Just be sure to adjust the cooking time as needed to ensure the grains are cooked through.

    4. How do I know when the cabbage rolls are done?
    The cabbage rolls are done when the cabbage is tender, the filling is cooked through, and the sauce has set and slightly browned on top.

    The Secret in Your Pantry: Why Bay Leaves Deserve a Spot in Every Kitchen
    The Secret in Your Pantry: Why Bay Leaves Deserve a Spot in Every Kitchen
    5. Can I prepare this dish in advance?
    Yes, you can prepare the cabbage rolls a day in advance and store them in the fridge. When ready to bake, pour the sauce over and bake as directed.

    Conclusion
    Stuffed cabbage with rice and minced meat is a comforting and delicious meal that’s sure to impress your family and friends. The combination of tender cabbage leaves, savory filling, and creamy sauce makes this dish a winner for any occasion. Plus, it’s versatile and can be easily adapted to suit your taste preferences. Whether you enjoy it fresh out of the oven or reheated as leftovers, these stuffed cabbage rolls are a wholesome, hearty, and satisfying dish that everyone will love.

  • Chicken and Dumplings

    Chicken and Dumplings

    Ingredients:
    – 2 tablespoons of olive oil
    – 1 medium onion, finely diced
    – 2 stalks of celery, finely diced
    – 3 cloves of garlic, minced
    – 2 medium carrots, peeled and finely diced
    – 6 cups of chicken broth (low sodium)
    – 1 and 1/2 pounds of boneless, skinless chicken breasts, cut into bite-sized pieces
    – 1 teaspoon of dried thyme
    – 1 teaspoon of dried parsley
    – Salt and pepper to taste
    – 1 cup of all-purpose flour
    – 1 and 1/2 teaspoons of baking powder
    – 1/2 teaspoon of salt
    – 1/2 cup of milk
    – 2 tablespoons of chopped fresh parsley for garnish
    Directions:
    1. In a large pot, heat the olive oil over medium heat. Add the onion, celery, garlic, and carrots. Cook until the vegetables are tender, about 5 minutes.
    2. Add the chicken broth, chicken pieces, thyme, parsley, salt, and pepper to the pot. Bring to a boil, then reduce heat and let simmer for 20 minutes.
    3. In a mixing bowl, combine the flour, baking powder, salt, and milk to form a dough. Drop spoonfuls of the dough into the pot to form dumplings. Cover and cook for an additional 10 minutes, or until the dumplings are cooked through.
    4. Serve the chicken and dumplings hot, garnished with fresh parsley.
    Tips:
    – For a thicker broth, mix 1/4 cup of cold water with 2 tablespoons of cornstarch and stir it into the simmering broth.
    – Feel free to add your favorite vegetables such as peas or corn for extra flavor and nutrition.
    – Leftovers can be stored in an airtight container in the refrigerator for up to 3 days.
    Prep time: 15 minutes
    Cook time: 35 minutes
    Total time: 50 minutes
    Calories: 350 calories per serving (serves 6)
  • Milk Cupcakes

    Milk Cupcakes

    Ingredients:
    – 50g of cake flour
    – 30g of condensed milk
    – 35g of sugar
    – 1/4 tsp of baking powder
    – 1/8 tsp of salt
    – 1/4 cup of milk
    – 1/4 cup of vegetable oil
    – 1/2 tsp of vanilla extract
    Directions:
    1. Preheat the oven to 350°F (180°C) and line a cupcake tin with liners.
    2. In a bowl, sift together the cake flour, baking powder, and salt.
    3. In a separate bowl, mix the condensed milk, sugar, milk, vegetable oil, and vanilla extract until well combined.
    4. Slowly add the dry ingredients to the wet ingredients, stirring until just combined.
    5. Divide the batter evenly among the cupcake liners, filling each about 2/3 full.
    6. Bake in the preheated oven for 15-18 minutes, or until a toothpick inserted into the center comes out clean.
    7. Allow the cupcakes to cool in the tin for a few minutes before transferring to a wire rack to cool completely.
    Tips:
    – Be careful not to overmix the batter, as this can result in dense cupcakes.
    – Feel free to top the cupcakes with your favorite frosting or enjoy them plain.
    Prep time: 15 minutes
    Calories: 120 per cupcake
  • Soft Apple Cookies! They will disappear in 1 minute! Incredibly delicious and easy recipe!

    Soft Apple Cookies! They will disappear in 1 minute! Incredibly delicious and easy recipe!

    Ingredients 1f95a1f34e1f33e:
    – 2 eggs, at room temperature
    – 100g of sugar (equivalent to 1/2 cup or 3.5 oz)
    – Pinch of salt
    – 100g of butter, softened (equivalent to 1/2 cup or 3.5 oz)
    – 320-340g of plain flour (equivalent to 2 1/4 – 2 1/2 cups), added gradually (about 11oz)
    – 14g of baking powder
    – 2 apples
    – Powdered (icing) sugar
    Optional: add cinnamon to the icing sugar
    Directions 1f9441f52a:
    1. Preheat the oven to 180°C and line a baking tray with parchment paper.
    2. In a mixing bowl, beat the eggs, sugar, and salt together until well combined.
    3. Add the softened butter and mix until smooth.
    4. Gradually add the flour and baking powder to the wet ingredients, mixing until a dough forms.
    5. Peel and dice the apples into small pieces, then fold them into the cookie dough.
    6. Use a cookie scoop or spoon to portion out the dough onto the prepared baking tray.
    7. Bake in the preheated oven for 20 minutes or until the cookies are golden brown.
    8. Remove from the oven and let them cool slightly before dusting with powdered sugar (and cinnamon, if desired).
    Tips 1f4a1:
    – Make sure to use room temperature eggs for the best texture.
    – You can customize these cookies by adding nuts or raisins to the dough.
    – Store any leftovers in an airtight container for up to a week.
    Prep time ⏱️: 15 minutes
    Calories 1f4aa: Approximately 120 calories per cookie
  • Carrot Walnut Cake! You will make this cake every day. Quick and easy.

    Carrot Walnut Cake! You will make this cake every day. Quick and easy.

    Ingredients:
    – 4 large eggs
    – 1 and a half cups of granulated sugar (225 grams)
    – 1 cup of milk (200 milliliters)
    – 1 cup of vegetable oil (200 milliliters)
    – 2 and a half cups of all-purpose flour (300 grams)
    – 2 packets of baking powder (20 grams)
    – 1 packet of vanilla extract (5 grams)
    – 2 cups of grated carrots (about 3-4 carrots)
    – 1 cup of chopped walnuts
    Directions:
    1. Preheat the oven to 350°F (180°C) and grease a 9×13 inch baking pan.
    2. In a large mixing bowl, beat the eggs and sugar together until light and fluffy.
    3. Add in the milk and oil, and mix until well combined.
    4. Gradually stir in the flour, baking powder, and vanilla extract until a smooth batter forms.
    5. Fold in the grated carrots and chopped walnuts until evenly distributed.
    6. Pour the batter into the prepared baking pan and spread it out evenly.
    7. Bake in the preheated oven for 35-40 minutes, or until a toothpick inserted into the center comes out clean.
    8. Allow the cake to cool in the pan for 10 minutes before transferring to a wire rack to cool completely.
    Tips:
    – For extra moisture, you can add a half cup of crushed pineapple to the batter.
    – Feel free to top the cake with cream cheese frosting or a dusting of powdered sugar for added sweetness.
    Prep time: 20 minutes
    Calories: 320 per serving (serves 12)
  • This Golden Raspberry Cheesecake Milkshake

    This Golden Raspberry Cheesecake Milkshake

    1f4cb Ingredients
    ● 2 cups vanilla ice cream
    ● 1 cup milk
    ● 1/2 cup softened cream cheese
    ● 1/4 cup raspberry puree
    ● 1/4 cup granulated sugar
    ● Whipped cream, for topping
    ● Crushed graham crackers, for garnish
    ● Fresh raspberries, for garnish

    1f4dd Instructions
    1: In a blender, combine the vanilla ice cream, milk, softened cream cheese, raspberry puree, and granulated sugar; blend until the mixture is velvety smooth.
    2: Pour the milkshake into a chilled glass and top with a generous swirl of whipped cream.
    3: Sprinkle with crushed graham crackers and fresh raspberries, then serve with a straw and indulge in this rich, fruity delight!

    1f552 Preparation Time: 5 minutes | Servings: 2

  • Chocolate Royale Mini Cakes

    Chocolate Royale Mini Cakes

    Ingredients:

    For the chocolate cakes:

    1 ½ cups all-purpose flour 1f33e
    1 tsp baking powder 1f9c1
    ½ tsp baking soda 1f9c2
    ¼ tsp salt 1f9c2
    1 cup granulated sugar 1f36c
    ¾ cup unsweetened cocoa powder 1f36b
    2 large eggs 1f95a
    1 cup buttermilk 1f376
    ½ cup unsalted butter, melted 1f9c8
    1 tsp vanilla extract ✨
    ½ cup boiling water 1f4a7
    For the chocolate ganache:

    1 cup heavy cream 1f95b
    8 oz dark chocolate, chopped 1f36b
    2 tbsp unsalted butter 1f9c8
    For the whipped cream filling:

    1 cup heavy cream 1f95b
    2 tbsp powdered sugar 1f36c
    1 tsp vanilla extract ✨

    Instructions:

    Preheat the oven:
    Preheat your oven to 350°F (175°C). Grease and flour a mini cake pan or line it with parchment paper. 1f3701f525

    Make the chocolate cake batter:
    In a large bowl, whisk together the flour, baking powder, baking soda, salt, sugar, and cocoa powder. 1f33e1f36c1f36b
    In a separate bowl, beat the eggs, buttermilk, melted butter, and vanilla extract until smooth. 1f95a1f3761f9c8
    Gradually add the wet ingredients to the dry ingredients, mixing until just combined. Then, stir in the boiling water until the batter is smooth (it will be thin). 1f4a71f370

    Bake the mini cakes:
    Pour the batter into the prepared mini cake pans, filling each about 2/3 full. 1f370
    Bake for 18-20 minutes or until a toothpick inserted into the center comes out clean. Let the cakes cool completely in the pan before transferring them to a wire rack. ⏳

    Make the chocolate ganache:
    In a small saucepan, heat the heavy cream over medium heat until it just begins to simmer. 1f95b1f525
    Remove from the heat and pour the hot cream over the chopped chocolate. Stir until the chocolate is completely melted and smooth. 1f36b1f9c8
    Let the ganache cool for a few minutes to thicken slightly.

    Make the whipped cream filling:
    In a chilled mixing bowl, beat the heavy cream with powdered sugar and vanilla extract until stiff peaks form. 1f95b1f36c✨

    Assemble the mini cakes:
    Once the cakes are cool, slice each cake in half horizontally to create two layers. 1f370
    Spread a layer of whipped cream on the bottom half of each cake. Then, place the top layer of the cake back on. 1f370
    Spoon the chocolate ganache over the top of each mini cake, allowing it to drizzle down the sides. 1f36b1f370

    Serve and enjoy:
    Garnish with extra whipped cream or chocolate shavings if desired. Serve the Chocolate Royale Mini Cakes and enjoy a rich, indulgent treat! 1f60b

  • Cherry Vanilla Ice Cream

    Cherry Vanilla Ice Cream

    1f4dd Ingredients:

    1 cup granulated sugar
    2 cups heavy cream
    1 cup whole milk
    2 cups fresh or frozen cherries
    1 vanilla bean, split and seeds scraped (or 1 tablespoon vanilla extract)
    Pinch of salt
    1f514 Preparation:

    Step 1: In a saucepan over medium heat, combine the cherries and sugar. Cook, stirring occasionally, until the cherries release their juices and the sugar dissolves, about 5-7 minutes.

    Step 2: Remove from heat and let the cherry mixture cool slightly. Then, transfer to a blender or food processor and blend until smooth.

    Step 3: In a separate saucepan, heat the heavy cream, whole milk, vanilla (including the scraped seeds), and salt over medium-low heat until it begins to simmer. Remove from heat.

    Step 4: Sift the cream mixture to remove the vanilla bean.

    Step 5: Gradually whisk the cherry puree into the strained cream mixture until well combined.

    Step 6: Refrigerate the mixture until completely chilled, preferably overnight.

    Step 7: Add the chilled mixture to an ice cream maker according to the manufacturer’s instructions.

    Step 8: Transfer the churned ice cream to a freezer-safe container and freeze for a few hours until hardened.

    Step 9: Serve with scoops of delicious homemade cherry vanilla ice cream and enjoy.

    Enjoy this delicious homemade cherry vanilla ice cream! 1f3521f366

  • Strawberry Chia Smoothie

    Strawberry Chia Smoothie

    Ingredients:

    1 cup strawberries 1f353 (fresh or frozen)
    1 tbsp chia seeds 1f331
    1/2 cup almond milk 1f95b (or any milk of your choice)
    1 tbsp agave syrup 1f36f or honey
    1/2 banana 1f34c (optional, for extra creaminess)
    Instructions:

    Blend the strawberries, chia seeds, almond milk, honey, and banana until smooth.
    Let it sit for about 5 minutes to allow the chia seeds to expand, then stir before drinking

  • Passion Fruit Cream Dream – Ooh, A Tropical Bliss Escape!

    Passion Fruit Cream Dream – Ooh, A Tropical Bliss Escape!

    1f4cb Ingredients
    ● 2 cups heavy cream
    ● 1 cup whole milk
    ● 3/4 cup granulated sugar
    ● 1 teaspoon vanilla extract
    ● 1/2 cup passion fruit pulp (fresh or thawed frozen)
    ● A pinch of salt (optional)

    1f4dd Instructions
    1: Whisk together heavy cream, whole milk, granulated sugar, vanilla extract, and a pinch of salt until the sugar is fully dissolved.
    2: Stir in the passion fruit pulp until evenly combined.
    3: Cover and chill the mixture in the refrigerator for at least 2 hours (or overnight) until thoroughly cold.
    4: Pour the chilled mixture into your ice cream maker and churn for 20–25 minutes until it reaches a soft-serve consistency.
    5: Transfer the churned ice cream into an airtight container and freeze for at least 4 hours until firm.
    6: Scoop and serve your Passion Fruit Cream Dream for a luscious tropical escape in every bite!

    1f552 Preparation Time: About 10 minutes
    1f373 Cooking Time: 20–25 minutes in the ice cream maker plus 4 hours to freeze
    Nutritional Info: Approximately 250 calories per serving (20g fat, 15g carbohydrates, 3g protein)