Category: Recipes

  • Homemade Bread with Mussels Recipe

    Homemade Bread with Mussels Recipe

    Homemade Bread with Mussels Recipe

    Table of Contents

    Ingredients:
    • 80 grams of melted butter
    • 400 milliliters of warm milk
    • 10 grams (1 tablespoon) of dry yeast
    • 10 grams (1 tablespoon) of sugar
    • 2 eggs
    • 850 grams of tender wheat flour
    • 6 grams (1 teaspoon) of salt

    Preparation:

    1. In a large bowl, combine the melted butter, warm milk, dry yeast, sugar, and one egg. Mix thoroughly.
    2. Gradually add the tender wheat flour in two portions, incorporating the salt with the second portion.
    3. Mix and knead the dough until it becomes smooth and homogenous. Cover the bowl and let the dough rise for about an hour or until it has doubled in size.
    4. Punch down the dough to release the air and divide it into two equal parts.
    5. Roll out each portion, then shape and place them in greased molds. Cover and let them rise for an additional 30 minutes or until they have tripled in volume.
    6. Brush the dough with an egg yolk mixed with a teaspoon of milk. Bake in a preheated oven at 200°C (392°F) for 25 minutes.

    Enjoy your freshly baked homemade bread!

  • No-Bake Chocolate Peanut Biscuit Balls

    No-Bake Chocolate Peanut Biscuit Balls

    No-Bake Chocolate Peanut Biscuit Balls

    Table of Contents

    Ingredients

      • 1/2 cup peanuts (70 g)
      • 4 leftover biscuits (about 60 g, any type)
      • 4 tbsp melted chocolate (60 g)
      • 1/2 cup melted chocolate (120 g) for coating

    Directions

      1. Prepare the Mixture:
        • Place the peanuts in a food processor and pulse until they are coarsely ground.
        • Break the leftover biscuits into small pieces and add them to the food processor. Pulse until the mixture resembles fine crumbs and the peanuts are well combined.
      1. Add the Chocolate:
        • Pour 4 tablespoons of melted chocolate into the peanut and biscuit mixture. Stir until everything is evenly coated and you have a sticky mixture that can be rolled into balls.
      2. Shape the Balls:
          • Using your hands, scoop out portions of the mixture and roll them into balls about 1 inch in diameter. You should get about 10-12 balls depending on the size.


      3. Coat with Chocolate:
        • Dip each ball into the remaining 1/2 cup of melted chocolate, ensuring it is fully coated. Place the coated balls on a lined baking sheet or tray.
    1. Chill:
      • Place the tray in the refrigerator and chill the chocolate balls for about 30 minutes or until the chocolate has hardened.
    2. Serve and Enjoy:
        • Once set, the chocolate balls are ready to enjoy. Store any leftovers in an airtight container in the refrigerator.


    Serving Suggestions

      • Serve these chocolate balls as a quick dessert or snack with a cup of coffee or tea.
      • You can also add a sprinkle of sea salt on top before the chocolate sets for a sweet and salty twist.

    Cooking Tips

    • For extra flavor, you can toast the peanuts before grinding them.
    • If the mixture is too dry to roll, add a little more melted chocolate or a teaspoon of honey to help bind it.

    Nutritional Benefits

      • Peanuts are a great source of protein and healthy fats.
    • This recipe is quick and perfect for a small energy boost when needed.

    Dietary Information

    • Contains peanuts and dairy (if using regular chocolate). Can be adapted to be dairy-free with vegan chocolate.

    Storage

    • Store in an airtight container in the fridge for up to one week. These can also be frozen for up to 2 months.
  • Authentic Spanish Churros with Rich Chocolate Sauce

    Authentic Spanish Churros with Rich Chocolate Sauce

    Authentic Spanish Churros with Rich Chocolate Sauce

    Table of Contents

    Ingredients

    For the Churros

    • 1 cup (240ml) water
    • 2 tablespoons (28g) unsalted butter
    • 1 tablespoon (13g) granulated sugar
    • ⅛ teaspoon salt
    • 1 cup (120g) all-purpose flour
    • 1 large egg (50g)
    • 1 teaspoon vanilla extract
    • Vegetable oil for frying

    For the Cinnamon Sugar Coating

    • ½ cup (100g) granulated sugar
    • 1 teaspoon ground cinnamon

    For the Chocolate Sauce

    • 3 oz (85g) bittersweet chocolate, chopped
    • ½ cup (120g) heavy cream

    Instructions

    1. Prepare the Dough
    • In a medium saucepan, combine water, butter, sugar, and salt
    • Bring to a boil over medium heat
    • Remove from heat and add flour all at once
    • Stir vigorously until mixture forms a smooth ball
    • Let cool for 5 minutes
    1. Finish the Dough
    • Add egg and vanilla to cooled mixture
    • Beat until fully incorporated and dough is smooth
    • Transfer to a piping bag fitted with a large star tip
    1. Heat the Oil
    • Fill a heavy-bottomed pot with 2 inches of oil
    • Heat to 375°F (190°C)
    • Line a plate with paper towels
    1. Prepare Coating
    • Mix sugar and cinnamon in a shallow dish
    • Set aside
    1. Make the Chocolate Sauce
    • Heat heavy cream until simmering
    • Pour over chopped chocolate
    • Let stand 1 minute
    • Stir until smooth
    1. Frying Process
    • Pipe 4-inch lengths of dough into hot oil
    • Cut end with scissors
    • Fry 2-3 minutes per side until golden
    • Transfer to paper towels
    • Roll in cinnamon sugar while warm

    Pro Tips for Perfect Churros

    • Maintain oil temperature at 375°F
    • Don’t overcrowd the pot
    • Pat off excess oil before coating
    • Serve immediately for best texture
    • Keep chocolate sauce warm for dipping
    See also  Herb-Infused Zucchini Delight

    Nutrition Information (per churro)

    • Calories: 165
    • Protein: 2g
    • Fat: 8g
    • Carbohydrates: 22g
    • Fiber: 1g
    • Sugar: 12g

    Storage Instructions

    • Best served immediately
    • Can be stored in airtight container for 24 hours
    • Reheat in oven at 350°F (175°C) for 5 minutes
    • Chocolate sauce can be refrigerated for up to 5 days

    Variations

    • Mexican Style: Add a pinch of cayenne to chocolate
    • Filled Churros: Pipe with dulce de leche
    • Chocolate Churros: Add cocoa powder to dough
    • Coffee Dip: Add espresso to chocolate sauce
  • No-Bake Chocolate Custard Delight

    No-Bake Chocolate Custard Delight

    No-Bake Chocolate Custard Delight

    Table of Contents

    Ingredients

      • 5 chicken eggs
      • 200 g sugar
      • 1 l milk
      • 70 g corn starch
      • 200 g cookies
      • 40 g cocoa powder
      • 100 g dark chocolate
      • 50 ml cream

    Instructions

      1. In a large mixing bowl, whisk together the eggs and sugar until well combined.
      2. In a saucepan, heat the milk over medium heat until warm, then gradually add the corn starch, stirring constantly to avoid lumps.
      3. Slowly pour the egg mixture into the milk, continuing to stir until it thickens to a custard-like consistency.
      1. Remove from heat and add the cocoa powder, stirring until fully incorporated.
      2. Crush the cookies into small pieces and distribute them evenly into serving bowls or glasses.
      3. Pour the chocolate custard over the cookies, filling the bowls or glasses.
    1. Melt the dark chocolate with the cream in a microwave or over a double boiler, then drizzle over the top of the desserts.
    2. Allow to cool slightly before serving.

    Cooking Tips

      • Use a whisk to ensure a smooth custard without lumps.
    • For a richer flavor, use high-quality dark chocolate.
    • Customize with your favorite cookies or add a splash of vanilla extract for extra depth.

    Nutritional Benefits

    This dessert provides a good source of protein from the eggs and milk, while the dark chocolate adds antioxidants. It’s a delightful way to enjoy a sweet treat with some nutritional benefits.

    Why You’ll Love This Recipe

    You’ll love this No-Bake Chocolate Custard Delight because it’s incredibly easy to make, requires no baking, and is ready in just 5 minutes. The combination of creamy custard, crunchy cookies, and rich chocolate makes it an irresistible dessert for any occasion.

    Dietary Information

      • Contains eggs, dairy, and gluten (from the cookies).
      • Not suitable for those with egg or dairy allergies.
    • Can be adapted for gluten-free diets by using gluten-free cookies.
  • Fluffy Chiffon Cake

    Fluffy Chiffon Cake

    Fluffy Chiffon Cake

    Table of Contents

    Ingredients

    For the Dough

      • Eggs: 5 pcs (weight without shell: 290-300 g)
      • Sugar: 150 g (about 3/4 cup)
      • Salt: a pinch
      • Butter: 50 g (melted)
      • Vanilla extract: 1 tsp (optional for flavor)
      • Starch: 30 g (about 1/4 cup)
      • Baking powder: 6 g (about 1.5 tsp)
      • Flour: 150 g (about 1 1/4 cups)

    For Baking

    • Baking dish: 20 cm round cake pan
    • Oven: Preheat to 170°C (340°F)

    Steps on How to Do It

    Step 1: Prepare the Baking Dish

      1. Preheat the oven: Set your oven to 170°C (340°F) so it can reach the right temperature while you prepare the batter.
    1. Prepare the cake pan: Grease the 20 cm round cake pan with a little butter or line it with parchment paper to prevent sticking. If you’re using a non-stick pan, this step may be optional, but it’s always a good practice.

    Step 2: Prepare the Dough

      1. Separate the eggs: In a mixing bowl, separate the egg whites from the yolks. Place the egg whites in a clean, dry bowl (preferably metal or glass), and the yolks in a separate bowl.
      2. Mix the yolks: Add the sugar (150 g) and a pinch of salt to the egg yolks. Whisk until the mixture becomes light and creamy. This process usually takes about 2-3 minutes.
      1. Add melted butter: Pour in the melted butter (50 g) and vanilla extract (if using) into the yolk mixture. Mix well until fully combined.
      2. Combine dry ingredients: In another bowl, sift together the flour (150 g), starch (30 g), and baking powder (6 g). Gradually add this dry mixture to the egg yolk mixture. Mix until you achieve a smooth batter, but be careful not to overmix.
      3. Beat the egg whites: Using a hand mixer or stand mixer, beat the egg whites until soft peaks form. This means that when you lift the beaters, the egg whites should form peaks that slightly bend over.
    1. Fold in the egg whites: Gently fold the beaten egg whites into the yolk batter. Use a spatula to fold them in slowly, being careful not to deflate the air bubbles. This is crucial for achieving the light, fluffy texture characteristic of chiffon cake.
    See also  A Clean, Sugar-Free Cookie Recipe with Few Ingredients

    Step 3: Baking the Cake

      1. Transfer the batter: Pour the batter into the prepared cake pan, smoothing the top with a spatula.
      2. Bake: Place the pan in the preheated oven. Bake at 170°C (340°F) for 40-50 minutes. The cake is done when it is golden brown on top, and a toothpick inserted into the center comes out clean.
    1. Cool the cake: Once baked, remove the cake from the oven. Let it cool in the pan for about 10 minutes, then gently remove it from the pan and transfer it to a wire rack to cool completely.

    Step 4: Serve and Enjoy

      1. Serve the cake: Once cooled, slice the chiffon cake into pieces. You can enjoy it plain, dusted with powdered sugar, or served with fresh fruit and whipped cream for a delightful dessert.
      2. Bon Appetit!: Take a moment to appreciate your creation. This chiffon cake is not only visually appealing but also deliciously fluffy and light.

    Nutrition Facts (Per Slice, Based on 10 Servings)

      • Calories: Approximately 160 kcal
      • Protein: 4 g
      • Fat: 6 g
      • Carbohydrates: 22 g
      • Fiber: 0.5 g
      • Sugar: 10 g
    • Sodium: 150 mg
  • Soft and Easy White Bread Recipe

    Soft and Easy White Bread Recipe

    Soft and Easy White Bread Recipe

    Table of Contents

    Ingredients

      • Wheat Flour: 700 g (5 1/2 cups)
      • Dry Yeast: 11 g (1 tablespoon)
      • Salt: 3 teaspoons
      • Warm Water: 350 ml (1 1/2 cups)
    • Olive Oil: 4 tablespoons
    • Flour: For dusting

    Directions

      • Mix the Dry Ingredients: In a large mixing bowl, combine wheat flour, dry yeast, and salt. Mix well.
      • Add Wet Ingredients: Gradually add warm water and olive oil to the dry ingredients, mixing until a dough forms.
      • Knead the Dough: Knead the dough for about 10 minutes until smooth and elastic.
      • First Rise: Place the dough in a greased bowl, cover with a cloth, and let rise in a warm place for 1 hour.
      • Shape the Dough: Punch down the dough, divide into 2 parts, shape into rolls, and place in a lined baking pan.
      • Second Rise: Cover and let the dough rise again for 1 hour until doubled in size.
      • Bake: Preheat the oven to 200°C (392°F) and bake for 30-40 minutes until golden brown.
    • Cool and Serve: Allow the bread to cool in the pan for 10 minutes before transferring to a wire rack to cool completely.

    Additional Information

    • Serving Suggestions:
        • Enjoy warm with butter or jam.
        • Perfect for sandwiches or as a side with soups and stews.


    • Cooking Tips:
        • For a softer crust, brush the top of the loaf with olive oil immediately after baking.
        • If the dough is too sticky, add a little more flour while kneading.


    • Nutritional Benefits:
        • Wheat Flour: Provides fiber and essential nutrients.
        • Olive Oil: Adds healthy fats and a rich flavor.


    • Dietary Information:
        • Vegetarian
        • Dairy-Free


      • Can be made vegan by using vegan butter instead of olive oil.
    • Nutritional Facts (per slice):
        • Calories: 120


        • Protein: 4g
        • Carbohydrates: 22g
        • Fat: 2g


      • Fiber: 1g
    • Storage:
        • Store in an airtight container at room temperature for up to 3 days.


      • Can be frozen for up to 3 months; thaw at room temperature before serving.
    • Why You’ll Love This Recipe:
        • Simple and easy to make with minimal ingredients.


      • Produces a soft, tender loaf that’s versatile and delicious.
      • Perfect for beginners looking to bake homemade bread.
      • The aroma of fresh-baked bread will make your kitchen feel warm and inviting.
  • Creamy Garlic Chicken

    Creamy Garlic Chicken

    Ingredients:
    4 boneless, skinless chicken breasts
    1 tsp garlic powder
    Salt and pepper, to taste
    2 tbsp olive oil
    4 cloves garlic, minced
    1 cup heavy cream
    1/2 cup chicken broth
    1 tsp fresh thyme, chopped
    1 tbsp fresh parsley, chopped for garnish
    Instructions:

    Season the Chicken: Sprinkle the chicken breasts evenly with garlic powder, salt, and pepper.
    Cook the Chicken: In a skillet, heat olive oil over medium heat. Add the chicken breasts and cook until golden on each side and cooked through, about 6-7 minutes per side. Remove chicken and set aside.
    Make the Sauce: In the same skillet, add minced garlic and sauté for about 1 minute until fragrant. Pour in the heavy cream and chicken broth, bringing to a simmer. Add the thyme and reduce the sauce for about 5 minutes until it thickens slightly.
    Combine and Serve: Return the chicken to the skillet, spooning the sauce over the chicken. Cook for an additional 2-3 minutes to reheat the chicken. Garnish with chopped parsley before serving.
    Prep Time: 10 minutes | Cook Time: 20 minutes | Servings: 4

  • Melt-in-Your-Mouth Chicken Recipe

    Melt-in-Your-Mouth Chicken Recipe

    Four skinless, boneless chicken breasts
    1 cup of sour cream or Greek yogurt
    Parmesan cheese, half a cup grated
    For a more decadent taste, add 1/4 cup of shredded Asiago cheese.
    1/8 teaspoon of garlic powder.
    3/4 teaspoon of paprika that has been smoked
    For a tangier kick, add 1 teaspoon of Dijon mustard.
    1 teaspoon of freshly grated lemon zest (for a zesty, citrusy kick)
    fresh, chopped parsley, 1 tablespoon
    Add salt and pepper according to your preference.
    To brush the chicken, use 1 tablespoon of olive oil.
    For an optional crunch, you may add 1/2 cup of panko breadcrumbs.
    Here are the steps:

    Preheat the oven to 375 degrees Fahrenheit (190 degrees Celsius). Preheat a baking pan or line it with parchment paper and lightly oil it.

    To get the chicken ready, use paper towels to pat dry the breasts. Sprinkle smoked paprika, salt, and pepper on both sides. For better taste and browning, brush a little olive oil over each piece.

    To make the topping, mix together the Greek yogurt, Parmesan cheese, Asiago cheese, garlic powder, Dijon mustard, lemon zest, and half of the chopped parsley in a medium-sized bowl. Thoroughly blend all ingredients.

    Coat the Chicken: Divide the yogurt mixture among the chicken breasts and spread it out evenly. To add a crispy finish to the yogurt mixture, sprinkle panko breadcrumbs on top.

    Cook: Preheat oven to 375 degrees Fahrenheit. Bake coated chicken breasts for 25 to 30 minutes, or until meat is opaque throughout and top is browned. Use a thin layer of aluminum foil to gently cover the dish if the topping is browning too rapidly.

    After taking the chicken out of the oven, let it aside for a few minutes to rest before garnishing. Serve with a garnish of the remaining chopped parsley.

    As a side dish, you may have roasted veggies, salad, or garlic mashed potatoes with the chicken.

    Notes: The dish’s signature taste characteristic is achieved by using Asiago cheese and lemon zest.

    For those who want a more textural topping, Panko breadcrumbs provide a delightful crunch.

    The mild sourness of the dijon mustard cuts through the cheesiness and acidity of the yogurt and cheese.

    The traditional “Melt-in-Your-Mouth Chicken” recipe is about to get a modern makeover.

  • Crispy Baked Potato Wedges with Smoky Chipotle Ketchup

    Crispy Baked Potato Wedges with Smoky Chipotle Ketchup

    Crispy Baked Potato Wedges with Smoky Chipotle Ketchup are a perfect snack, side dish, or party appetizer. These wedges are seasoned to perfection with a blend of spices and baked until crispy, served with a smoky and spicy chipotle ketchup that will keep you coming back for more.

    Total Preparation Time: 45-50 minutes

    Ingredients:
    3-4 medium-sized Russet potatoes, scrubbed clean
    2-3 tablespoons of olive oil
    1 teaspoon paprika (smoked or regular)
    1 teaspoon garlic powder
    1 teaspoon onion powder
    Sea salt to taste
    Black pepper to taste
    For the Smoky Chipotle Ketchup:

    1 cup ketchup
    1 chipotle pepper in adobo sauce, finely minced

    Directions:

    1. Prep the Potatoes:

    Preheat your oven to 425 degrees Fahrenheit (220 degrees Celsius). Cut the potatoes in half, then each half into quarters, aiming for 8 wedges per potato. Rinse the potato wedges under cold water, then dry them thoroughly with a kitchen towel. Ensuring they are dry is crucial for achieving maximum crispiness.

    2. Seasoning:

    Toss the dried potato wedges in a large bowl with olive oil, paprika, garlic powder, onion powder, salt, and pepper until evenly coated.

    3. Baking:

    Line a baking sheet with aluminum foil and arrange the potato wedges in a single layer, making sure they aren’t overcrowded (use two trays if necessary). Bake in the preheated oven for 20 minutes, then flip the wedges and continue baking for another 10-15 minutes until they are golden and crispy.

    4. Prepare the Smoky Chipotle Ketchup:

    While the potatoes are baking, mix the ketchup and minced chipotle pepper in a small bowl. Adjust the amount of chipotle based on your preference for heat.

    5. Serving:

    Serve the hot, crispy potato wedges with the smoky chipotle ketchup for dipping. Enjoy as a delicious snack, a side dish, or even as a party appetizer.

    Serving Suggestions:
    Pair with a fresh green salad for a balanced meal.
    Serve alongside grilled meats or burgers for a hearty dinner.
    Enjoy with a variety of dipping sauces for a fun appetizer platter.
    Cooking Tips:
    For extra crispy wedges, soak the cut potatoes in cold water for 30 minutes before drying and seasoning.
    Ensure the potato wedges are spread out on the baking sheet to allow for even cooking and crispiness.
    Use parchment paper instead of foil for easier cleanup and to prevent sticking.
    Nutritional Benefits:
    Potatoes are a good source of vitamins C and B6, potassium, and fiber.
    Baking instead of frying reduces the fat content, making these wedges a healthier option.
    The chipotle pepper adds a dose of capsaicin, which has anti-inflammatory properties.
    Dietary Information:
    This recipe is naturally gluten-free.
    To make it vegan, ensure that the ketchup used is vegan-friendly.
    Why You’ll Love This Recipe:
    It’s a healthier alternative to traditional fried potato wedges.
    The smoky, spicy chipotle ketchup adds a unique and delicious twist.
    Easy to prepare and perfect for any occasion, from casual snacking to entertaining guests.
    Conclusion:
    Enjoy your homemade Crispy Baked Potato Wedges with Smoky Chipotle Ketchup as a flavorful and satisfying treat. These wedges are sure to become a favorite in your household, loved for their crispy texture and bold flavors. Happy cooking!

  • Baked Oatmeal Delight

    Baked Oatmeal Delight

    Ingredients

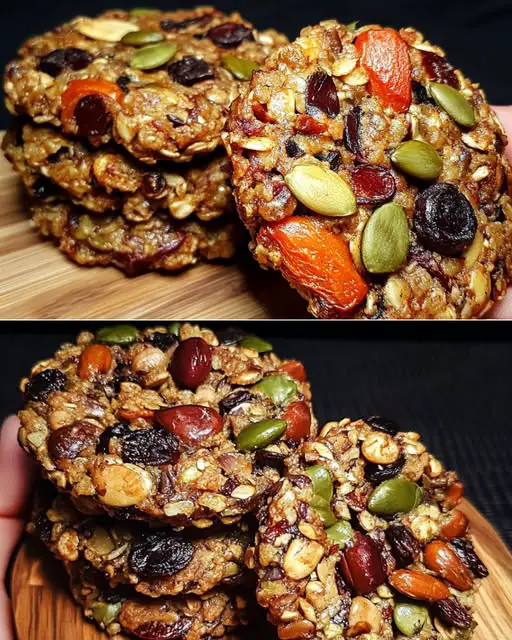
      • 1 cup oatmeal
      • 50 g raisins
      • 50 g walnuts, chopped
      • 50 g dried apricots, chopped
      • 1 banana, mashed
    • 1 apple, grated
    • 50 g oat flakes

    Directions

      1. Preheat the Oven: Preheat your oven to 180°C (360°F).
      1. Prepare the Ingredients: In a large mixing bowl, combine the oatmeal, raisins, chopped walnuts, chopped dried apricots, mashed banana, grated apple, and oat flakes. Mix well to ensure all ingredients are evenly distributed.
      2. Bake the Mixture: Transfer the mixture to a greased baking dish. Spread it out evenly.
      3. Bake: Place the dish in the preheated oven and bake for 30 minutes or until the top is golden brown and the oatmeal is set.
    1. Cool and Serve: Allow the baked oatmeal to cool slightly before serving. Cut into squares and enjoy warm or at room temperature.

    Serving Suggestions

      • Serve with a dollop of yogurt and fresh berries for a complete breakfast.
      • Drizzle with honey or maple syrup for added sweetness.

    Cooking Tips

    • For a richer flavor, toast the walnuts lightly before adding them to the mixture.
    • You can substitute the dried fruits with your favorites like cranberries or dates.

    Nutritional Benefits

      • Oatmeal: High in fiber, which aids digestion and helps maintain healthy cholesterol levels.
      • Raisins and Dried Apricots: Provide natural sweetness and are rich in vitamins and minerals.
      • Walnuts: A good source of omega-3 fatty acids, which are beneficial for heart health.
      • Banana and Apple: Add natural sweetness and moisture, along with essential vitamins and minerals.

    Dietary Information

    • This recipe is vegetarian and can be made vegan by ensuring no animal products are used in the baking dish.

    Storage Tips

    • Store leftovers in an airtight container in the refrigerator for up to 4 days. Reheat in the oven or microwave before serving.
  • No-Bake Chocolate Peanut Biscuit Balls

    No-Bake Chocolate Peanut Biscuit Balls

    Ingredients

      • 1/2 cup peanuts (70 g)
      • 4 leftover biscuits (about 60 g, any type)
      • 4 tbsp melted chocolate (60 g)
      • 1/2 cup melted chocolate (120 g) for coating

    Directions

      1. Prepare the Mixture:
        • Place the peanuts in a food processor and pulse until they are coarsely ground.
        • Break the leftover biscuits into small pieces and add them to the food processor. Pulse until the mixture resembles fine crumbs and the peanuts are well combined.
      1. Add the Chocolate:
        • Pour 4 tablespoons of melted chocolate into the peanut and biscuit mixture. Stir until everything is evenly coated and you have a sticky mixture that can be rolled into balls.
      2. Shape the Balls:
          • Using your hands, scoop out portions of the mixture and roll them into balls about 1 inch in diameter. You should get about 10-12 balls depending on the size.


      3. Coat with Chocolate:
        • Dip each ball into the remaining 1/2 cup of melted chocolate, ensuring it is fully coated. Place the coated balls on a lined baking sheet or tray.
    1. Chill:
      • Place the tray in the refrigerator and chill the chocolate balls for about 30 minutes or until the chocolate has hardened.
    2. Serve and Enjoy:
        • Once set, the chocolate balls are ready to enjoy. Store any leftovers in an airtight container in the refrigerator.


    Serving Suggestions

      • Serve these chocolate balls as a quick dessert or snack with a cup of coffee or tea.
      • You can also add a sprinkle of sea salt on top before the chocolate sets for a sweet and salty twist.

    Cooking Tips

    • For extra flavor, you can toast the peanuts before grinding them.
    • If the mixture is too dry to roll, add a little more melted chocolate or a teaspoon of honey to help bind it.

    Nutritional Benefits

      • Peanuts are a great source of protein and healthy fats.
    • This recipe is quick and perfect for a small energy boost when needed.

    Dietary Information

    • Contains peanuts and dairy (if using regular chocolate). Can be adapted to be dairy-free with vegan chocolate.

    Storage

    • Store in an airtight container in the fridge for up to one week. These can also be frozen for up to 2 months.
  • Simple and Easy Savory Snacks: 3 Ingredients in a Few Minutes

    Simple and Easy Savory Snacks: 3 Ingredients in a Few Minutes

    Hi everyone, today we’re going to learn how to make Simple and Easy Savory Snacks using simple ingredients. So grab your pen and paper to jot down the ingredients, then follow the complete preparation method.

    How to Make Savory Snacks

    It takes 3 ingredients and has excellent yield. See below the list of all ingredients and required quantities. And then, a very complete preparation method with details of the recipe.

    Recipe Ingredients:

    • 500 grams/17.6 oz  of ground beef
    • 1 cup of cold water
    • ½ cup of cornstarch

    Instructions:

    First, sauté the meat with oil, onion, and tomato (to taste). Then, dissolve the cornstarch in water and pour it over the sautéed meat.

    After that, heat it, stirring constantly until the mixture thickens and forms a moldable dough.

    Next, take portions of the dough, shape them into croquettes, coat them with cornstarch, and fry in hot oil.

    Finally, remove all the savory snacks from the, and they are ready to be served.

  • Creamy Rice Pudding: Simple, Easy and Full of Flavor

    Creamy Rice Pudding: Simple, Easy and Full of Flavor

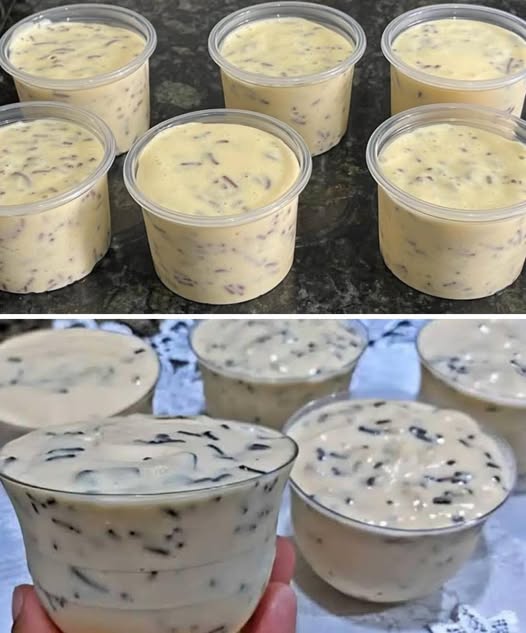
    Hi everyone, today we’re going to learn how to make Rice Pudding using simple ingredients. So grab your pen and paper to jot down the ingredients, then follow the complete preparation method.

    How to Make Creamy Rice Pudding

    This is one of the best desserts I’ve ever made. The creamy texture is impeccable, and the flavor is incredibly delicious, making every bite irresistible. See below the list of all ingredients and required quantities. And then, a very complete preparation method with details of the recipe.

    Recipe Ingredients:

    • 1 cinnamon stick
    • 4 cups of milk
    • 2 cups of water
    • 1 cup white rice
    • 1 can condensed milk
    • 1 pinch of salt
    • Lemon peel
    • Cinnamon powder for sprinkling
  • Tropical Strawberry Mango Smoothie

    Tropical Strawberry Mango Smoothie

    Ingredients:

    1 cup fresh strawberries

    1 cup mango chunks (fresh or frozen)

    1/2 banana

    1/2 cup Greek yogurt

    1/2 cup coconut water

    1 tablespoon honey (optional)

    Ice cubes (optional)

    Enjoy !!

  • Mocha Layer Cake with Chocolate Rum Cream Filling

    Mocha Layer Cake with Chocolate Rum Cream Filling

    Serves: 8+ people
    Ingredients:

    1 pack of tea biscuits
    125g softened butter
    125g dark chocolate spread
    60g sugar
    3 espresso shots
    1 egg
    Instructions:

    1. Prepare the Chocolate Buttercream:

    Begin by melting the dark chocolate spread and allowing it to cool slightly. While it cools, beat the softened butter together with the egg and sugar until you achieve a smooth, creamy consistency. Gradually incorporate the melted chocolate into the butter mixture, stirring continuously. Once fully combined, the chocolate buttercream is ready for use.
    2. Assemble the Cake:

    To assemble, dip each tea biscuit into cold espresso, ensuring not to soak it for too long. Place the dipped biscuits side by side in a serving dish of your choice (as this dish will be used for presentation). After arranging the first layer of biscuits, spread a generous layer of chocolate buttercream on top. Use a knife to gently spread the buttercream, taking care not to break the biscuits.
    3. Layering:

    Continue alternating layers of espresso-soaked biscuits and chocolate buttercream until you run out of ingredients. Finish the cake by completely covering the top layer of biscuits with the remaining buttercream.
    4. Chill and Serve:

    Once the cake is fully assembled, cover it with aluminum foil and refrigerate for at least 24 hours (48 hours is ideal for best results). Before serving, let the cake sit at room temperature for about 30 minutes to soften slightly.

    Enjoy your indulgent Mocha Layer Cake with Chocolate Rum Cream Filling!