Category: Recipes

  • Chocolate-Coated Peanut and Cookie Balls: A Delightful No-Bake Treat

    Chocolate-Coated Peanut and Cookie Balls: A Delightful No-Bake Treat

    Chocolate-Coated Peanut and Cookie Balls: A Delightful No-Bake Treat

    Table of Contents

    Ingredients

    For the Filling:

    • 500g (17.6 oz) cookies, crushed
    • 120g (4.2 oz) peanuts, crushed
    • 120g (½ cup) sugar
    • 60g (½ cup) cocoa powder
    • 250ml (1 cup) milk
    • 150g (⅔ cup) butter
    • A pinch of vanillin (or a few drops of vanilla extract)

    For the Glaze:

    • 80g (2.8 oz) dark chocolate
    • 80g (2.8 oz) milk chocolate
    • 20ml (1 ½ tbsp) vegetable oil
    • 50g (1.8 oz) peanuts, chopped

    Step-by-Step Instructions

    1. Prepare the Filling

    • Crush the Cookies and Peanuts: Begin by crushing 500g of cookies into small pieces. You can do this using a food processor or by placing the cookies in a plastic bag and crushing them with a rolling pin. Once crushed, transfer them to a large mixing bowl. Then, crush 120g of peanuts until they are roughly chopped, and add them to the bowl with the cookies. Stir them together to ensure even distribution.
    • Make the Chocolate Mixture: In a medium-sized saucepan, combine 250ml of milk, 120g of sugar, 60g of cocoa powder, and a pinch of vanillin or a few drops of vanilla extract. Place the saucepan over medium heat, stirring continuously until the sugar is completely dissolved.
    • Add the Butter: Once the sugar has dissolved, add 150g of butter to the saucepan. Stir until the butter has melted and the mixture is smooth and well combined.
    • Combine with Cookie-Peanut Mixture: Pour the warm chocolate mixture over the crushed cookies and peanuts in the mixing bowl. Stir thoroughly until all the dry ingredients are evenly coated with the chocolate mixture, and the consistency is thick and sticky enough to form into balls.
    See also  No-Bake Walnut Chocolate Dessert

    2. Shape the Balls

    • Form the Balls: Using your hands, scoop out small portions of the mixture and roll them into balls, about the size of a walnut. Place each ball on a tray lined with parchment paper or a silicone mat.
    • Chill the Balls: Once all the balls are shaped, place the tray in the refrigerator or freezer for about 30 minutes. This helps firm up the balls, making them easier to coat with the chocolate glaze.

    3. Prepare the Chocolate Glaze

    • Melt the Chocolate: In a heatproof bowl, combine 80g of dark chocolate and 80g of milk chocolate. Add 20ml of vegetable oil to the mixture, which will help the chocolate glaze remain smooth and shiny once set. Melt the chocolate and oil together using a double boiler or in the microwave in 20-30 second intervals, stirring in between until completely melted and smooth.
    • Add the Peanuts: Stir in 50g of chopped peanuts into the melted chocolate. This adds extra texture and enhances the nutty flavor of the coating.

    4. Coat the Balls

    • Dip the Balls: Remove the chilled cookie-peanut balls from the fridge. Using a fork or a skewer, dip each ball into the melted  chocolate glaze, making sure it is fully coated. Let any excess chocolate drip off before placing the ball back on the tray.
    • Set the Coated Balls: Once all the balls are coated, place them back in the fridge for the chocolate glaze to harden. This should take about 20-30 minutes.

    5. Serve and Enjoy

    Once the chocolate coating has firmed up, your delicious chocolate-coated peanut and  cookie balls are ready to be served! You can arrange them on a platter for a party, pack them in a gift box for a homemade present, or store them in an airtight container in the fridge for a delightful snack whenever you crave something sweet and crunchy.

    Nutritional Information (Per Serving)

    • Servings: Makes about 30 balls
    • Calories: 150 kcal per ball
    • Total Fat: 10g
    • Saturated Fat: 5g
    • Cholesterol: 15mg
    • Sodium: 50mg
    • Carbohydrates: 14g
    • Sugars: 10g
    • Protein: 3g
    See also  Creamy Banana Dessert

    Tips for Success:

    • Customizing the Nuts: Feel free to substitute peanuts with other nuts like almonds, hazelnuts, or walnuts for different flavor variations.
    • Adding Texture: The crushed cookies add a nice texture to the filling. If you want a chunkier consistency, leave the cookie pieces slightly larger.
    • Storing: These no-bake balls can be stored in the refrigerator for up to a week. If you want to store them longer, freeze them in an airtight container for up to a month.
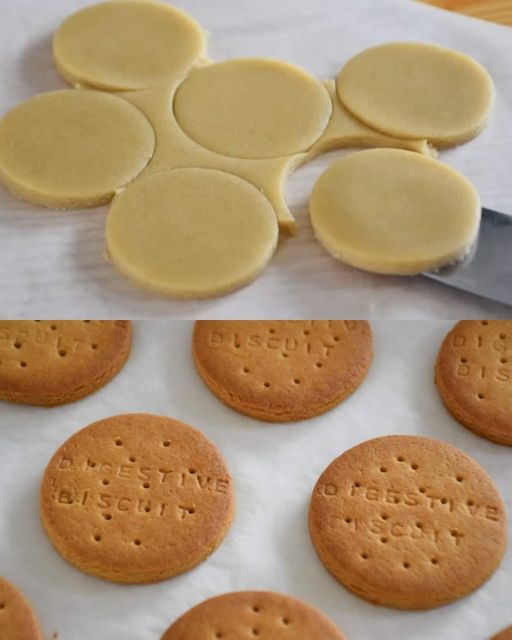
  • Homemade Digestive Biscuits

    Homemade Digestive Biscuits

    Homemade Digestive Biscuits

    Table of Contents

    Ingredients:

    1 ½ cups wheat flour (240 g)
    ½ cup powdered sugar (75 g)
    ½ cup cold butter (130 g, cubed)
    1 teaspoon baking powder
    5 tablespoons milk
    ¼ teaspoon salt (only if using unsalted butter)

    Directions:

    Prepare the dough:
    In a large mixing bowl, combine the wheat flour, powdered sugar, baking powder, and salt (if using unsalted butter).
    Add the cold, cubed butter to the dry ingredients. Use your fingertips to rub the butter into the flour mixture until it resembles fine breadcrumbs.

    Add milk and form the dough:
    Gradually add milk, one tablespoon at a time, mixing until the dough comes together. It should be soft but not sticky. If the dough is too dry, add a little more milk, a teaspoon at a time.

    Shape and chill the dough:
    Form the dough into a disk, wrap it in plastic wrap, and refrigerate for 15 minutes. This helps the dough firm up and makes it easier to roll out.

    Roll out and cut biscuits:
    Preheat your oven to 350°F (180°C). Line a baking sheet with parchment paper.
    Roll out the chilled dough on a lightly floured surface to about ¼-inch thickness.
    Use a round cookie cutter or the rim of a glass to cut out biscuits. Place them on the prepared baking sheet.

    Bake the biscuits:
    Bake in the preheated oven for 15-18 minutes or until the edges are golden brown.
    Remove from the oven and let the biscuits cool on the baking sheet for 5 minutes before transferring them to a wire rack to cool completely.

    See also  Crispy Oatmeal Snacks: A Healthier Alternative to French Fries

    Serving Suggestions:
    Enjoy with a cup of tea or coffee for a classic pairing.
    Use as a base for no-bake cheesecakes or as a crunchy topping for yogurt and ice cream.
    Dip in melted chocolate for a sweet treat.

    Cooking Tips:
    Ensure the butter is cold to achieve a light, crumbly texture.
    For a smoother dough, avoid overmixing once the milk is added.
    Prick the biscuits with a fork before baking to help them cook evenly and maintain their shape.

    Nutritional Benefits:
    Made with whole wheat flour, these biscuits contain more fiber than traditional cookies.
    Lower in sugar compared to many commercial biscuits, making them a healthier snack option.
    No artificial additives or preservatives, providing a more natural and wholesome treat.

    Dietary Information:
    Vegetarian-friendly.
    Contains gluten and dairy; not suitable for those with allergies to these ingredients.
    Can be made egg-free and suitable for lacto-vegetarians.

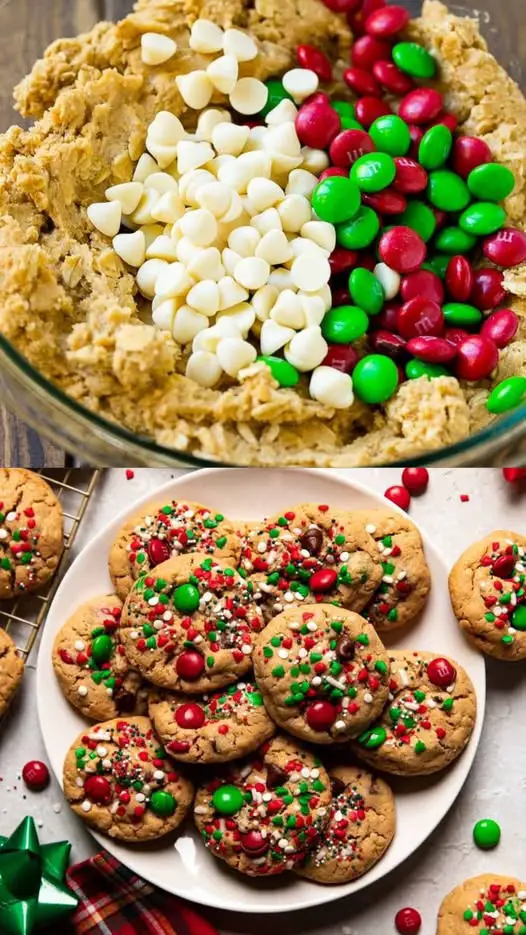
  • Christmas Monster Cookies:

    Christmas Monster Cookies:

    Christmas Monster Cookies:

    1. SE1GDRQq3vzH j1718130523278
      x
      1. SE1GDRQq3vzH j1718130523278Now Playing
      2. RuugViCbR6HI upload t1733259561 TjNKHM
      3. 4KyuxceQMQZJ upload t1732875873 wUZygi
      4. nyIk9Yg 1a upload t1733041326 DRZGdN
      5. VOaY AOckcmd j1732186980408 pjpogt t1732187082 base.004
      6. 4KucckvakWsI j1733055117518 bl5hrf t1733055193 base.004
    x

    Ingredients

    1 1/2 cups peanut butter
    1 cup unsalted butter, softened
    1 cup granulated sugar
    1 cup brown sugar
    2 large eggs
    2 teaspoons vanilla extract
    2 1/4 cups all-purpose flour
    1 teaspoon baking soda
    1 teaspoon salt
    1 cup rolled oats
    1 cup chopped M&M’s
    1 cup chopped peanut butter cups
    1/2 cup chopped candy canes (optional)

    Step-by-Step Instructions:

    1. Preheat oven to 375°F (190°C). Line a baking sheet with parchment paper.
    2. In a large bowl, cream peanut butter and butter until smooth.
    3. Gradually add sugars and mix until combined.
    4. Beat in eggs and vanilla extract.
    5. In a separate bowl, whisk together flour, baking soda, and salt.
    6. Gradually add dry ingredients to wet ingredients and mix until just combined.
    7. Stir in oats, M&M’s, peanut butter cups, and candy canes (if using).
    8. Scoop tablespoon-sized balls of dough onto prepared baking sheet, leaving 2 inches of space between each cookie.
    9. Bake for 10-12 minutes or until lightly golden.
    10. Remove from oven and let cool on baking sheet for 5 minutes before transferring to a wire rack to cool completely.

    ##Tips & Variations:

    – Use holiday-themed M&M’s for a festive touch.
    – Add a sprinkle of sea salt on top of cookies before baking.
    – Substitute chopped nuts or dried cranberries for added texture and flavor.
    – Make ahead and freeze dough balls for up to 2 months.

  • Easy Air Fryer Roasted Potatoes

    Easy Air Fryer Roasted Potatoes

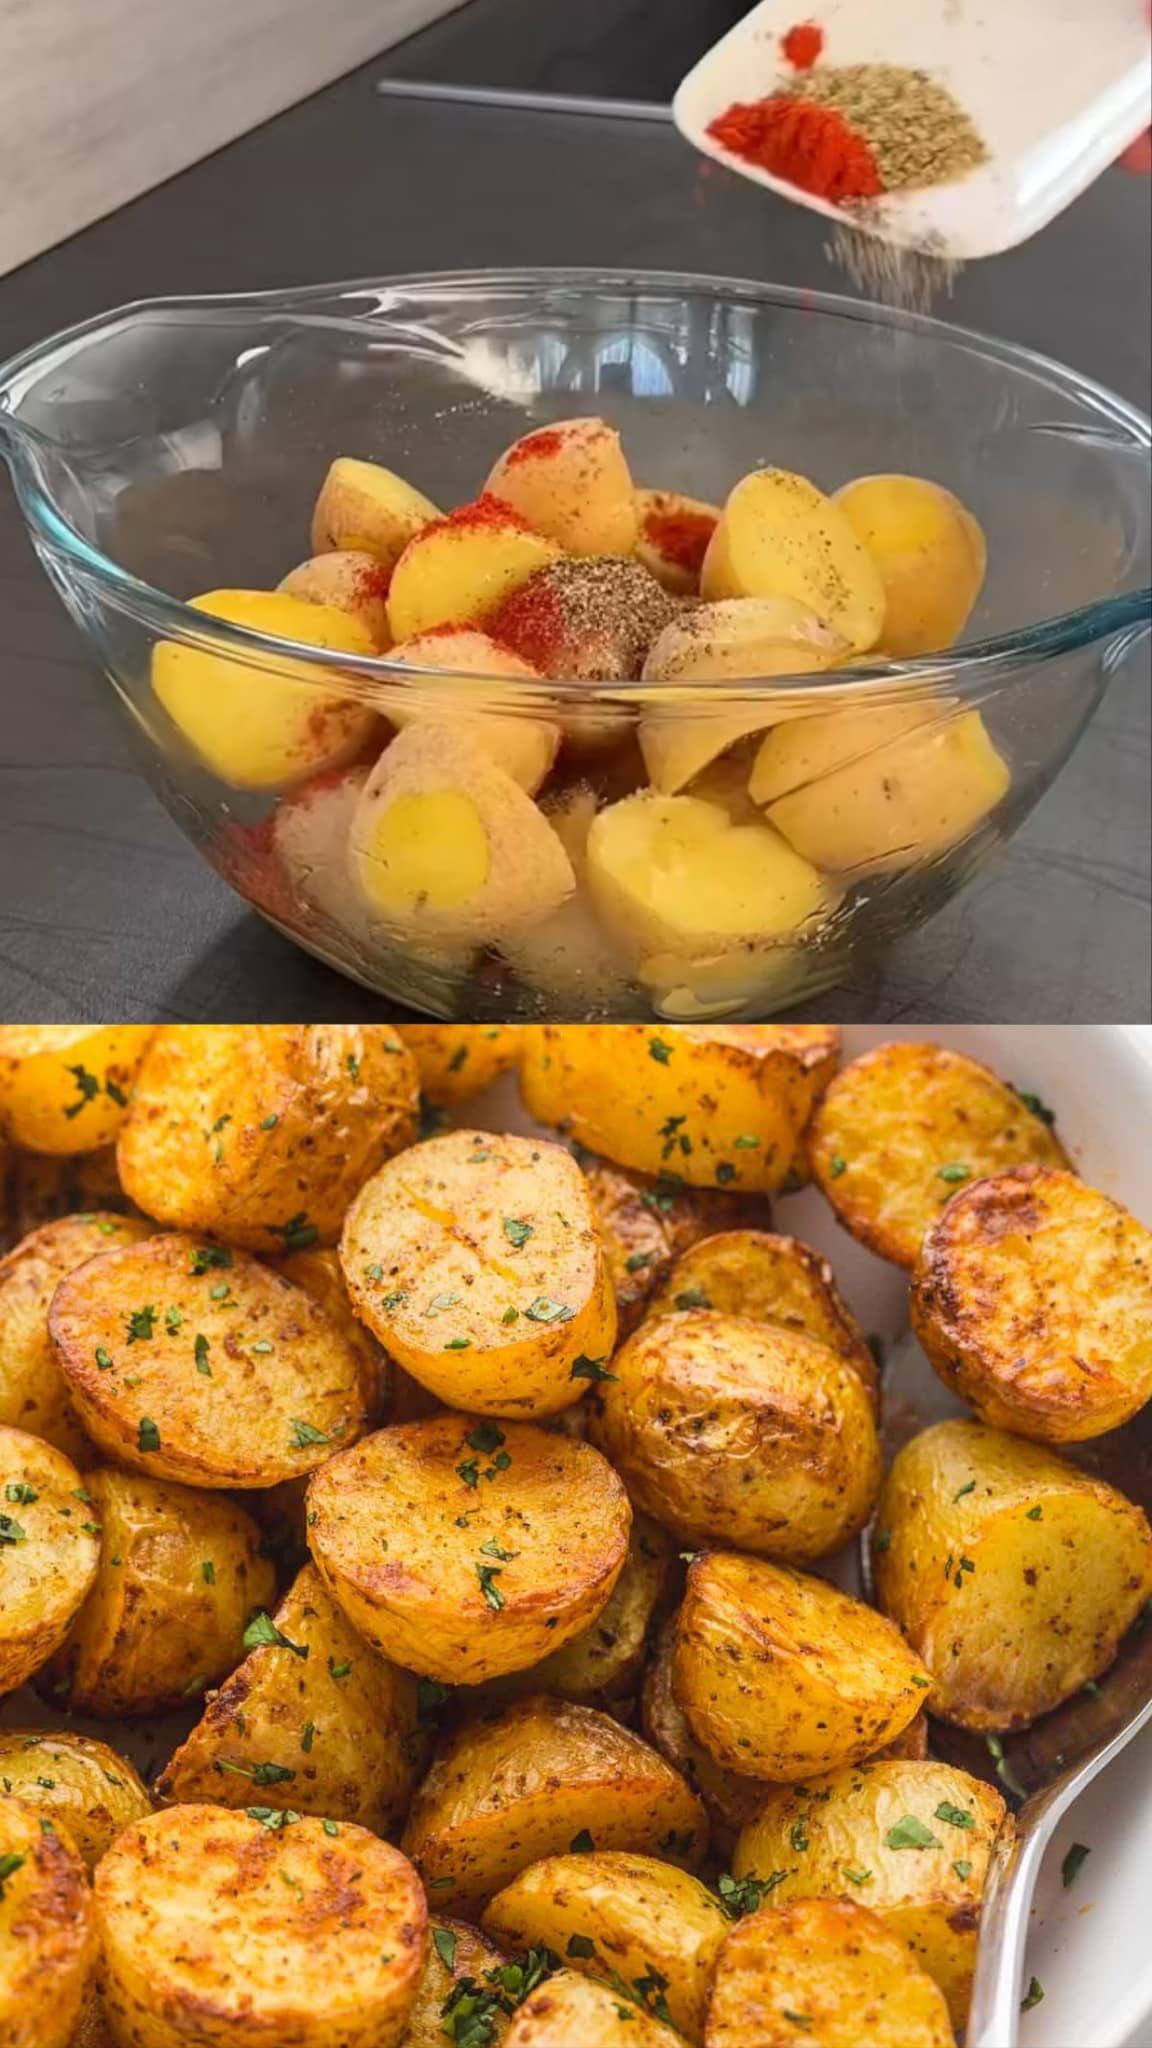
    Easy Air fryer Roasted Potatoes

    Ingredients


    • 500g (about 1 lb) baby potatoes (or regular potatoes, diced into 1-inch pieces)

    • 2 tablespoons olive oil

    • 1 teaspoon garlic powder

    • 1 teaspoon paprika

    • 1/2 teaspoon dried oregano or rosemary

    • Salt and pepper, to taste

    • Optional: Fresh parsley for garnish


    Step-by-Step Recipe


    Step 1: Prepare the Potatoes


    1. Wash and scrub the potatoes thoroughly.

    2. If using baby potatoes, cut them in half. If using larger potatoes, dice them into 1-inch cubes for even cooking.


    Step 2: Season the Potatoes


    1. In a large bowl, combine the potatoes with olive oil.

    2. Sprinkle garlic powder, paprika, oregano (or rosemary), salt, and pepper over the potatoes.

    3. Toss well to ensure the potatoes are evenly coated with the seasoning.

    Ezoic


    Step 3: Preheat the Air Fryer


    1. Preheat your air fryer to 200°C (400°F) for about 3 minutes.


    Step 4: Cook the Potatoes


    1. Arrange the seasoned potatoes in a single layer in the air fryer basket. Avoid overcrowding to ensure even cooking.

    Ezoic

    2. Cook for 15-20 minutes, shaking the basket halfway through to flip the potatoes for even crispiness.

    3. Check for doneness by piercing a potato with a fork; it should be tender on the inside and crispy on the outside.


    Step 5: Serve


    1. Transfer the roasted potatoes to a serving dish.

    2. Optionally, garnish with fresh parsley or extra seasoning to taste.

    3. Serve hot as a side dish or snack!


    Enjoy your crispy and flavorful air fryer roasted potatoes!

  • Bomb Recipe: This Dessert Drives the World Crazy!

    Bomb Recipe: This Dessert Drives the World Crazy!

    Bomb Recipe: This Dessert Drives the World Crazy!

    Table of Contents

    Are you ready to embark on a culinary adventure that will tantalize your taste buds and leave you craving for more? Well, get ready to discover the magic behind a dessert that’s been passed down through generations—Grandma’s secret bomb recipe! In this article, we’ll delve into the delectable world of bomb dessert, uncovering its tantalizing ingredients, and unraveling the simple yet enchanting method to create this heavenly treat.

    Introduction

    Are you ready to indulge in a dessert that’s both heavenly and nostalgic? Join us as we explore the enchanting world of bomb dessert—a timeless delicacy that has captured hearts and taste buds around the globe. From its humble origins in Grandma’s kitchen to its status as a beloved treat for all ages, this dessert is more than just a sweet treat—it’s a culinary masterpiece waiting to be discovered.

    Unveiling the Ingredients

    Let’s start our journey by gathering the essential ingredients for this mouthwatering dessert:

    • 4 peaches
    • 50g sugar (about 0.2 cups)
    • 100ml water (about 0.4 cups)
    • 1 tbsp cornstarch + 3 tbsp water
    • 2 eggs
    • 100g sugar (about 0.5 cups)
    • 100ml sunflower oil (about 0.4 cups)
    • 300g plain flour (about 2.1 cups)
    • 12g baking powder (about 1 tbsp)
    Preparing the Peach Mixture

    Now that we have our ingredients assembled, it’s time to start cooking! Follow these simple steps to prepare the peach mixture:

    1. Peel and chop the peaches: Start by peeling the peaches and cutting them into small pieces.
    2. Blend the peaches: Use a hand blender to puree the peaches until smooth.
    3. Cook the peach mixture: In a pot, combine the blended peaches with sugar and water. Cook until thickened.
    4. Add cornstarch mixture: In a separate bowl, mix cornstarch with water, then add it to the pot with the peach mixture. Cook until thickened.
    See also  Say Goodbye to Sugar: Enjoy Healthy Cookies Without Flour and Sugar!
    Crafting the Dough

    With our peach mixture ready, it’s time to prepare the dough for our bomb dessert:

    1. Mix eggs, sugar, and oil: In a bowl, combine eggs, sugar, and sunflower oil until well mixed.
    2. Gradually add flour and baking powder: Slowly incorporate the flour and baking powder into the egg mixture, stirring until a smooth dough forms.
    Assembling the Bomb

    Now comes the fun part—putting everything together to create our bomb dessert:

    1. Divide the dough: Split the dough into two equal parts.
    2. Layer the dough in a mold: Place one part of the dough in the bottom of a mold, spreading it out evenly.
    3. Spread the peach mixture: Pour the prepared peach mixture over the dough, spreading it out evenly.
    4. Top with remaining dough: Cover the peach mixture with the remaining dough, creating a top layer for our bomb.
    5. Decorate with peach mixture: Create a grid pattern on top of the dough using the remaining peach mixture.
    Baking to Perfection

    With our bomb assembled, it’s time to bake it to golden perfection:

    1. Preheat the oven: Set your oven to 200°C to preheat.
    2. Bake the bomb: Place the assembled bomb in the preheated oven and bake for 25-30 minutes, or until golden brown.
    3. Sprinkle with powdered sugar: After baking, remove the bomb from the oven and sprinkle with powdered sugar for a sweet finishing touch.
    Serving Up a Sweet Surprise

    Now that our bomb dessert is ready, it’s time to slice, serve, and savor every delicious bite! Whether enjoyed warm or chilled, this decadent treat is sure to delight your taste buds and leave you craving for more.

  • Cabbage Patties Recipe

    Cabbage Patties Recipe

    Cabbage Patties Recipe

    Table of Contents

    Ingredients:

      • Cabbage: 2 cups (150g), finely shredded
      • Egg: 1 large
      • All-purpose flour: 1/2 cup (60g)
      • Grated cheese (optional): 1/4 cup (30g)
      • Onion: 1 small (50g), finely chopped
      • Garlic: 2 cloves, minced
      • Salt: To taste
    • Pepper: To taste
    • Olive oil or vegetable oil: For frying

    Directions:

      1. Mix Ingredients:
          • In a large bowl, combine the shredded cabbage, egg, flour, grated cheese, onion, garlic, salt, and pepper. Mix until well combined.


      2. Form Patties:
        • Shape the mixture into palm-sized patties. Add a bit more flour if the mixture is too loose.
      1. Heat Oil:
        • Preheat a skillet over medium heat with oil.
      2. Fry Patties:
          • Fry the patties for 2-3 minutes on each side until golden brown. Drain on paper towels.


      3. Serve:
        • Serve with a yogurt dip, sour cream, or your favorite sauce.

    Serving Suggestions:

    • Serve with a fresh green salad and a yogurt dip for a complete meal.
    • Add a dash of chili sauce for some extra spice.

    Cooking Tips:

      • If your mixture is too loose, add an extra tablespoon of flour to help bind the patties.
    • Use a non-stick skillet to prevent sticking.

    Nutritional Benefits:

      • Cabbage is rich in vitamins C and K.
      • Eggs and cheese (optional) provide protein, while olive oil adds healthy fats.

    Dietary Information:

    • This recipe can be made vegetarian by omitting meat-based cheese.
    • For a gluten-free version, use almond or chickpea flour instead of all-purpose flour.
    » MORE:  Homemade Chicken Strips 3 Ways

    Nutritional Facts (per patty):

      • Calories: 120
      • Fat: 7g
      • Carbohydrates: 10g
      • Protein: 5g

    Storage:

    • Store any leftover patties in an airtight container in the refrigerator for up to 3 days. Reheat in a skillet or the oven to maintain crispiness.

    Why You’ll Love This Recipe:

      • It’s quick, easy, and made with simple, everyday ingredients.
      • Versatile – you can modify the recipe by adding your favorite veggies.
    • Crispy on the outside, soft and flavorful on the inside.
    • Great for meal prepping or using up leftover cabbage.
  • Lemon Cream Pastry Delights

    Lemon Cream Pastry Delights

    emon Cream Pastry Delights

    INGRIANTS 

    • 1 of rectangular puff pastry
    • Zest of one lemon
    • 90 g (1/3 cup) sugar
    • 30 g (2 tablespoons) cornstarchFor the cream:
      • 400 ml (2 cups) milk
      • 4 egg yolks
    • 200 ml (1 cup) pre-sweetened whipping cream

    • Directions:

      • Prep Time: 20 minutes | Cooking Time: 15 minutes | Total Time: 35 minutes
      • Preheat your oven to 200°C (390°F).
      • Roll out the puff pastry and cut it into squares.
      • Place the pastry squares on a baking sheet lined with parchment paper and bake for about 10-15 minutes, or until golden brown. Remove from the oven and let cool.
      • In a saucepan, heat the milk with the lemon zest until it begins to boil. Remove from heat and let it cool slightly.
      • In a bowl, whisk the egg yolks with the sugar until pale and creamy. Add the cornstarch and mix well.
      • Slowly pour the warm milk into the egg yolk mixture, whisking constantly.
      • Return the mixture to the saucepan and cook over medium heat, stirring constantly, until it thickens.
      • Remove from heat and let cool completely.
      • In a separate bowl, whip the whipping cream until stiff peaks form.
      • Gently fold the whipped cream into the cooled lemon mixture until well combined.
      • Cut the baked puff pastry squares in half horizontally.
    • Spread a generous amount of the lemon cream mixture onto the bottom half of each pastry square.
    • Place the top half of the pastry square over the cream to create a sandwich.

    Kcal: 320 kcal per serving | Servings: 8 servings

    Why You’ll Love This Recipe

      1. Quick and Easy: With a preparation time of about 20 minutes and a cooking time of 15 minutes, these pastries can be ready in under an hour. This makes them ideal for last-minute guests or when you need a quick dessert that doesn’t compromise on taste.
      2. Versatile: These pastries are customizable. While lemon zest is used here, you could easily substitute orange or lime zest for a different twist. Additionally, the cream can be flavored with vanilla or almond extract to suit different palates.
    1. Perfect for All Occasions: Whether it’s a festive celebration, a family dinner, or just a sweet treat to end the day, these pastries fit perfectly. They’re as suitable for a formal event as they are for a cozy family dessert.
    See also  Greek Yogurt Smoothie Recipe

    Health Considerations

    While Lemon Cream Pastry Delights are undoubtedly a treat, there are ways to adapt the recipe to fit dietary needs:

    • Reduced Sugar: You can decrease the amount of sugar in the cream or use a sugar substitute to cater to those with sugar sensitivities or who are watching their caloric intake.
    • Gluten-Free Option: For those who avoid gluten, gluten-free puff pastry can be used as an alternative. Ensure that the other ingredients are gluten-free by checking labels, especially the cornstarch, as some brands may include additives that contain gluten.

    Serving Suggestions

      • Serving Temperature: These pastries are delicious whether served warm or at room temperature. Serving them slightly warm enhances the creaminess of the filling and the flaky texture of the pastry.
      • Accompaniments: Pair these delights with a dollop of whipped cream or a drizzle of raspberry coulis for an extra touch of elegance. For a refreshing complement, serve alongside a scoop of lemon sorbet or vanilla bean ice cream.
      • Presentation: For an impressive presentation, dust the pastries lightly with powdered sugar or garnish with a thin slice of lemon and a sprig of mint.

    Storing Tips

    Lemon Cream Pastry Delights are best enjoyed the day they are made, but they can be stored in an airtight container in the refrigerator for up to two days. For the best texture, reheat briefly in the oven before serving to crisp up the pastry.

  • Best Easy Home-made Bread

    Best Easy Home-made Bread

    Best Easy Home-made Bread

    Table of Contents

    Key Ingredients:

    Wheat Flour: Forms the base structure of the bread.
    Yeast, Sugar, and Warm Water: Essential for fermentation and rising.
    Vegetable Oil: Adds moisture and keeps the bread soft.
    Sesame Seeds: Provides a nutty, crunchy topping.

    Steps to Make:

    Prepare Yeast Mixture: Activate yeast in warm water with sugar.

    Mix Dough: Combine the yeast mixture with oil, flour, and salt; knead to develop gluten.

    Shape Dough: Form into preferred shapes after the first rise.

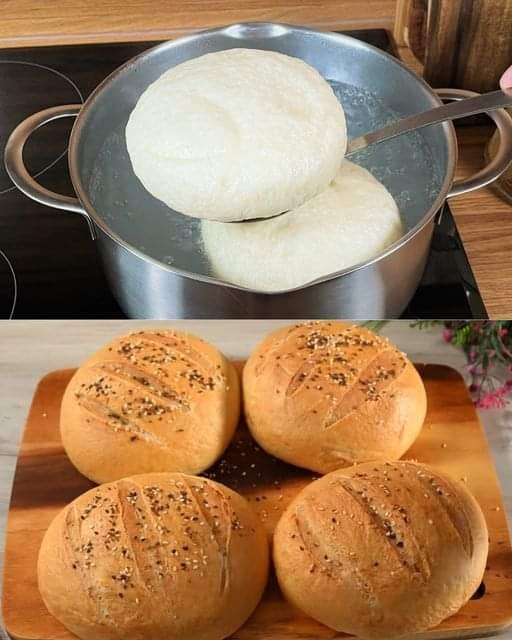
    Boil Dough: A crucial step for creating a chewy crust.

    Top and Bake: Brush with water or milk, add sesame seeds, and bake until golden brown.

    Serve and Enjoy: Let cool slightly before serving warm.

    Tips and Variations:
    Texture Adjustments: Control dough consistency by adjusting flour and water.
    Flavor Enhancements: Use herbs or different seeds for diverse flavors.
    Storage Suggestions: Store at room temperature or freeze for later use.

    Nutrition Benefits:
    This bread is relatively low in calories per serving (180 kcal), with a balance of carbohydrates and some protein and fiber, making it suitable as a daily staple or part of a balanced diet.

    Conclusion:
    With straightforward steps and common ingredients, this homemade bread is both beginner-friendly and versatile. Whether you’re serving it as a side, using it for sandwiches, or enjoying it fresh out of the oven with butter, it’s bound to impress. The boiling step is a unique twist that sets this bread apart, giving it that desirable chewiness similar to bagels but with the soft interior we all love in freshly baked bread.

    See also  Making Mouthwatering Lemon Cake
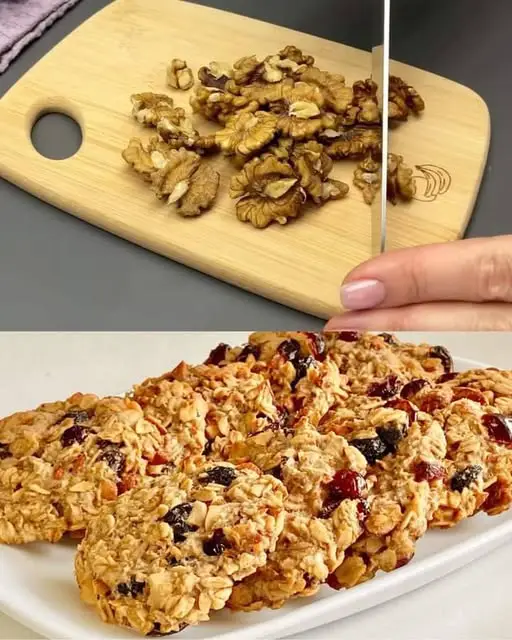
  • Nutty Fruit Oatmeal Bars

    Nutty Fruit Oatmeal Bars

    Nutty Fruit Oatmeal Bars

    Table of Contents

    Ingredients

      • 1 cup (250 ml) oatmeal
      • 240 g apple puree


      • 50 g almonds (chopped)
      • 50 g walnuts (chopped)
      • 50 g dried cranberries


    • 50 g raisins
    • 2 tablespoons olive oil

    Steps How to Do It

    1. Prepare the Dry Ingredients

    In a large bowl, combine the oatmeal, chopped almonds, chopped walnuts, dried cranberries, and raisins. Stir gently to ensure that all the dry ingredients are evenly mixed. The nuts will add a delightful crunch, while the dried fruits will provide bursts of sweetness in every bite.


    2. Mix the Wet Ingredients

    In a separate bowl, mix the apple puree with the olive oil. Stir them together until smooth. Apple puree acts as a natural sweetener and binder, making the bars moist and flavorful. Olive oil adds a healthy fat, ensuring the bars remain tender without compromising on taste.

    3. Combine Wet and Dry Ingredients

    Pour the wet mixture into the dry ingredients and stir well to combine. The apple puree and olive oil should coat the oats and nuts, binding everything together. If the mixture seems too dry, you can add a small splash of water or additional apple puree to reach the desired consistency. The mixture should be thick but slightly moist.


    4. Bake the Mixture

    Preheat the oven to 180°C (350°F). Line a baking dish (around 8×8 inches) with parchment paper or lightly grease it. Spread the oatmeal mixture evenly in the dish, pressing it down gently to compact it into a uniform layer. Bake the bars for 20-25 minutes or until they turn golden brown on top and a toothpick inserted into the center comes out clean.

    See also  Nutella Milk Pudding – No-Bake, Eggless, and Gelatin-Free


    5. Cool and Slice

    Once the bars are baked, remove them from the oven and let them cool in the dish for about 10 minutes. Once slightly cooled, transfer the bars to a cutting board and cut them into squares or rectangles, depending on your preferred size. Allow them to cool completely before serving. This ensures that the bars hold together nicely.


    6. Serve and Enjoy

    Once the bars have cooled completely, they are ready to be enjoyed! Serve them for breakfast, as a snack, or pack them for lunch. Store them in an airtight container for up to a week, or freeze them for longer storage.

  • Soft Kefir Sugar Cookies

    Soft Kefir Sugar Cookies

    Soft Kefir Sugar Cookies

    Table of Contents

    Ingredients

      • 1 egg


      • 3 tablespoons sugar
      • A pinch of salt
      • 1 teaspoon vanilla sugar


      • 150 ml kefir
      • 80 ml vegetable oil
      • 350 grams flour (about 2 ¾ cups)


    • 1 teaspoon baking powder
    • 3 tablespoons cane sugar (for sprinkling)

    Directions

      1. Preheat the Oven:
          • Preheat your oven to 180°C (350°F) and line a baking sheet with parchment paper.


      2. Mix Wet Ingredients:
        • In a large bowl, beat the egg with the sugar, vanilla sugar, and a pinch of salt until well combined and slightly frothy.


      1. Add Kefir and Oil:
        • Stir in the kefir and vegetable oil, mixing until smooth.
      2. Combine Dry Ingredients:
          • In a separate bowl, sift together the flour and baking powder. Gradually add the dry mixture to the wet ingredients, stirring until a soft dough forms. The dough should be slightly sticky but manageable.


      3. Shape the Cookies:
        • Scoop tablespoons of dough onto the prepared baking sheet, spacing them about 2 inches apart. Gently flatten the tops with your fingers.


      1. Sprinkle with Cane Sugar:
        • Sprinkle the tops of each cookie with a little cane sugar for added sweetness and crunch.
      2. Bake:
          • Bake in the preheated oven for 12-15 minutes, or until the edges are lightly golden. The cookies should be soft and slightly springy to the touch.


      3. Cool:
        • Let the cookies cool on the baking sheet for a few minutes before transferring them to a wire rack to cool completely.


    Serving Suggestions

    • Enjoy with a hot cup of tea or coffee.
    • Serve with a dollop of whipped cream or a scoop of ice cream for a special treat.

    Cooking Tips

      • Use Fresh Kefir: Fresh kefir will give the best rise and flavor. If kefir is not available, you can substitute it with buttermilk or plain yogurt.


    • Adjust Dough Consistency: If the dough feels too sticky, add a tablespoon of flour at a time until it reaches a manageable consistency.

    Nutritional Benefits

      • Probiotics from Kefir: Kefir is rich in probiotics that are great for gut health.
      • Lower Sugar Option: You can reduce the sugar content or use alternative sweeteners for a healthier version.


    Dietary Information

    • Vegetarian-Friendly: This recipe is suitable for vegetarians.
    • Nut-Free: No nuts are used, making it safe for those with nut allergies.
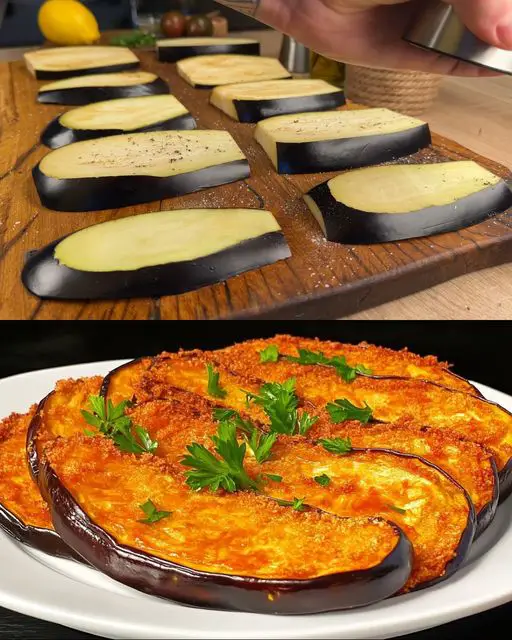
  • Eggplant and Cucumber Fritters with Cheese Recipe

    Eggplant and Cucumber Fritters with Cheese Recipe

    Eggplant and Cucumber Fritters with Cheese Recipe

    Table of Contents

    Ingredients:

    • 3 eggs
    • 2 eggplants, diced
    • 3 cucumbers, grated
    • 1 teaspoon salt
    • 1/2 teaspoon sweet paprika
    • Salt and black pepper, to taste
    • 1 lemon (juice and grated peel)
    • 100g Dutch cheese, grated
    • 100g breadcrumbs
    • 50g flour
    • Mint leaves, chopped
    • Italian herb mixture, to taste
    • Vegetable oil, for frying

    Directions:

    1. Prepare the eggplants: Dice the eggplants, sprinkle with salt, and let them stand for 15 minutes to release excess moisture. Pat dry with a paper towel.
    2. Prepare the cucumbers: Grate the cucumbers and mix with 1 teaspoon of salt. Let stand for 15 minutes, then squeeze out the excess water.
    3. Mix the eggs: In a bowl, beat the eggs and season with sweet paprika, salt, black pepper, and grated lemon peel.
    4. Add the cheese and cucumbers: Stir the grated Dutch cheese and squeezed cucumbers into the egg mixture. Mix well.
    5. Prepare the coating: In a separate dish, combine breadcrumbs, flour, and Italian herbs.
    6. Shape the fritters: Take small portions of the mixture, shape into patties, and coat in the breadcrumb-flour mixture.
    7. Fry the fritters: Heat vegetable oil in a pan over medium heat. Fry the fritters on both sides until golden brown (about 3-5 minutes per side).
    8. Finish cooking: Cover the pan with a lid and cook for an additional 3-5 minutes to ensure they are cooked through.
    9. Serve: Garnish with chopped mint leaves and a drizzle of lemon juice. Serve warm.
    See also  No-Bake Chocolate Roll

    Serving Suggestions:

    • Serve with a side of yogurt or tzatziki sauce for a refreshing dip.
    • Pair with a simple salad or roasted vegetables for a light meal.
    • Add a sprinkle of parmesan cheese or more herbs on top for extra flavor.

    Cooking Tips:

    • Let the eggplants and cucumbers rest with salt to draw out moisture, ensuring crispier fritters.
    • Adjust the seasoning to your taste by adding more Italian herbs or lemon zest.
    • For extra crispiness, fry the fritters in batches and avoid overcrowding the pan.

    Nutritional Benefits:

    • Rich in Fiber: Eggplants and cucumbers provide a good source of dietary fiber.
    • High in Protein: The eggs and cheese add protein, making this dish more filling.
    • Vitamins & Antioxidants: Eggplants are packed with antioxidants, while cucumbers offer hydration and essential vitamins.

    Dietary Information:

    • Vegetarian
    • Gluten-Free option: Use gluten-free breadcrumbs and flour.
    • Low Carb: Skip the breadcrumbs and use almond flour instead for a low-carb version.

    Nutritional Facts (per serving):

    • Calories: 280
    • Protein: 12g
    • Carbohydrates: 30g
    • Fat: 15g
    • Fiber: 5g
    • Sugars: 4g

    Storage:

    • Store leftover fritters in an airtight container in the fridge for up to 3 days.
    • Reheat in the oven or on a pan for a crispy texture.
    • Freeze uncooked fritters for up to 3 months; thaw before frying.
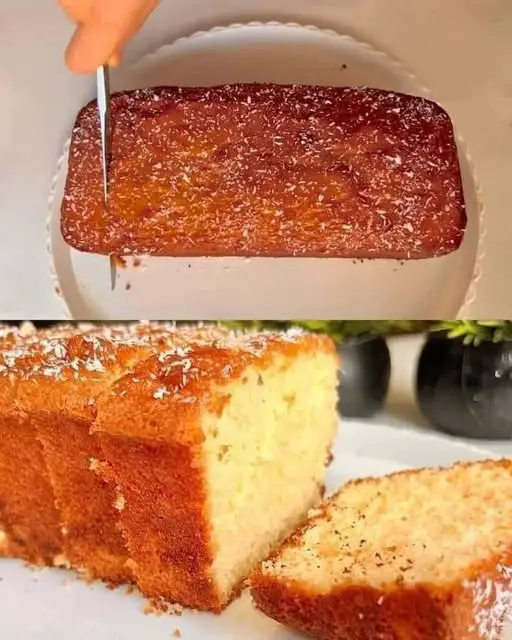
  • Orange Cake with Honey and Coconut

    Orange Cake with Honey and Coconut

    Ingredients
    1 ½ tsp baking powder

    ¼ tsp baking soda

    1 ½ cups all-purpose flour

    ¼ tsp salt

    ½ cup honey

    ½ cup unsalted butter (room temperature)

    ¾ cup granulated sugar

    2 large eggs

    2 tsp orange zest (from about 2 oranges)

    ½ cup freshly squeezed orange juice

    ½ cup full-fat coconut milk

    For the Glaze:

    ¼ cup honey

    ¼ cup freshly squeezed orange juice

    2 tbsp unsweetened shredded coconut (for topping)

    Preparation
    Preheat Oven:
    Preheat your oven to 350°F (175°C). Grease and flour an 8-inch round cake pan or line it with parchment paper.

    Dry Ingredients:
    In a bowl, whisk together the flour, baking powder, baking soda, salt, and shredded coconut. Set aside.

    Cream the Butter and Sugar:
    In another large bowl, beat together the butter, honey, and sugar until light and fluffy (about 3-4 minutes).

    Add Eggs and Orange Zest:
    Add the eggs one at a time, beating well after each addition. Stir in the orange zest.

    Mix Wet and Dry Ingredients:
    Alternate adding the dry flour mixture and the orange juice + coconut milk to the butter mixture. Start and end with the dry ingredients, mixing just until combined (don’t overmix).

    Bake:

    our the batter into the prepared pan and smooth the top. Bake for 30-35 minutes or until a toothpick inserted in the center comes out clean. Let the cake cool in the pan for 10 minutes, then transfer it to a wire rack to cool completely.

    Make the Glaze:
    In a small saucepan, heat the honey and orange juice over low heat until warm and combined. Remove from heat.

    Glaze the Cake:

  • Bang Bang Chicken Recipe: Crispy, Spicy, and Sweet Delight

    Bang Bang Chicken Recipe: Crispy, Spicy, and Sweet Delight

    Hello food lovers! Ready to elevate your meal game? Today, we are diving into the world of Bang Bang Chicken, a dish that’s both spicy and sweet, crispy and juicy. Whether you’re a fan of quick 30-minute meals or just looking to try something new, Bang Bang Chicken promises to satisfy your cravings in the most delicious way possible. Let’s get started on this easy-to-make dish that will soon become a favorite in your household.

    Introduction

    Bang Bang Chicken has roots in Chinese cuisine but has taken on a modern twist in many American kitchens. This recipe transforms a traditional dish into a crispy, flavorful experience by combining the magic of fried chicken with a luscious sauce. It’s a dish that’s perfect for those nights when you want something quick, tasty, and full of bold flavors. The sauce, a combination of mayonnaise, sweet chili, and Sriracha, gives this dish its signature “bang bang” taste—sweet with a spicy kick!

    Ingredients for Bang Bang Chicken

    Here’s what you’ll need to make this Bang Bang Chicken:

    For the Sauce:

    • ½ cup mayonnaise
    • ¼ cup sweet chili sauce (I used Frank’s)
    • 1 tablespoon hot sauce (Sriracha works great)
    • 2 tablespoons honey
    • Salt and pepper to taste

    For the Chicken:

    • 4 chicken breasts (boneless, skinless, cut into bite-sized pieces)
    • ½ cup all-purpose flour
    • ½ cup cornstarch
    • 1 cup buttermilk (adjust if batter is too thick)
    • 1 tablespoon garlic powder
    • 1 teaspoon smoked paprika
    • ½ teaspoon salt (or to taste)
    • ½ teaspoon pepper (or to taste)
    • 1 tablespoon hot sauce (Sriracha)
    • 1 large egg
    • 1 cup Panko breadcrumbs
    • Vegetable oil (for frying)

    Optional Substitutions:

    • For a lighter version, bake the chicken instead of frying.
    • Use gluten-free flour and breadcrumbs for a gluten-free option.
    • For a dairy-free version, replace buttermilk with almond milk mixed with a bit of vinegar.

    How to Make Bang Bang Chicken – Step by Step

    Step 1: Prepare the Sauce

    In a bowl, mix together mayonnaise, sweet chili sauce, Sriracha, honey, salt, and pepper. Stir until smooth and refrigerate until needed.

    Step 2: Make the Batter

    In a separate medium bowl, whisk together flour, cornstarch, garlic powder, smoked paprika, salt, and pepper. Add buttermilk, egg, and hot sauce. Whisk until you achieve a smooth, thick batter.

    Step 3: Coat the Chicken

    Add the chicken pieces to the batter, ensuring each piece is fully coated. In another bowl, pour Panko breadcrumbs. Roll each piece of chicken in the breadcrumbs to coat thoroughly.

    Step 4: Fry the Chicken

    Heat vegetable oil in a skillet over medium-high heat. Fry the chicken pieces for 3 minutes on each side, or until golden and crispy. Place the cooked chicken on a paper towel-lined plate to absorb excess oil.

    Step 5: Serve with Sauce

    Once all the chicken is fried, drizzle it generously with the prepared sauce and serve immediately.

    Helpful Tips for Bang Bang Chicken

    • Tip 1: Use a thermometer to ensure the oil is at the right temperature (around 350°F). This helps the chicken cook evenly and prevents sogginess.
    • Tip 2: For extra crispiness, double coat the chicken by dipping it in the batter, rolling it in breadcrumbs, and repeating the process.
    • Tip 3: Serve the sauce on the side if you prefer a less saucy chicken or want to dip.

    Cooking Tips for the Best Bang Bang Chicken

    • Tip 1: Make sure not to overcrowd the pan when frying. Fry in batches to maintain a crisp outer layer.
    • Tip 2: Use fresh oil for frying to ensure the chicken tastes clean and crisp.
    • Tip 3: For a healthier version, use an air fryer instead of deep frying. Set the air fryer to 400°F and cook for 15 minutes, shaking halfway through.

    Serving Suggestions for Bang Bang Chicken

    • Serve Bang Bang Chicken over a bed of rice or alongside a fresh salad for a balanced meal.
    • Pair this dish with a refreshing iced tea or a zesty lemonade to balance the spiciness.
    • Garnish with chopped scallions and a sprinkle of sesame seeds for added flavor and presentation.

    Nutritional Information

    Each serving of Bang Bang Chicken provides a delightful balance of protein, fats, and carbohydrates, making it a filling meal.

    Nutritional info for Bang Bang Chicken:

    • Calories: 497 kcal
    • Fat: 25g
    • Carbohydrates: 35g
    • Protein: 31g

    Storage and Leftovers for Bang Bang Chicken

    • Storage: Keep leftover Bang Bang Chicken in an airtight container in the refrigerator for up to 3 days.
    • Reheating: To keep the chicken crispy, reheat it in the oven at 350°F for 10 minutes or in an air fryer for 5 minutes. Avoid microwaving as it may make the chicken soggy.

    Frequently Asked Questions (FAQs) for Bang Bang Chicken

    1. Can I bake the chicken instead of frying?

    Yes! To make a healthier version of Bang Bang Chicken, bake it in the oven at 400°F for 20-25 minutes or until crispy and golden.

    2. What can I substitute for buttermilk?

    If you’re out of buttermilk, you can use regular milk with 1 tablespoon of vinegar or lemon juice mixed in.

    3. How spicy is Bang Bang Chicken?

    The dish has a mild kick from the Sriracha, but you can adjust the spiciness by adding more or less hot sauce according to your taste.

    4. Can I make this dish gluten-free?

    Absolutely! Use gluten-free flour and Panko breadcrumbs for a gluten-free version of Bang Bang Chicken.

    Related Recipes for Bang Bang Chicken Lovers

    For those who enjoyed this recipe, here are two more tasty treats to explore from Optimal Recipes:

    Conclusion

    That’s it for our Bang Bang Chicken recipe! With its crispy coating and tantalizing sauce, this dish is a surefire winner for any meal. Try it out, and feel free to experiment with your own variations. Don’t forget to share your feedback in the comments below—I’d love to hear how it turned out for you!

    Enjoy the bang and crunch in every bite!

  • Cheddar Ranch Chicken Burgers

    Cheddar Ranch Chicken Burgers

    Cheddar Ranch Chicken Burgers

    Ingredients:

    • 1 lb ground chicken
    • 1/2 cup shredded cheddar cheese
    • 1/4 cup ranch dressing
    • 1/4 cup bread crumbs
    • 1/4 cup chopped green onions
    • 1 teaspoon garlic powder
    • 1/2 teaspoon onion powder
    • 1/2 teaspoon salt
    • 1/4 teaspoon black pepper
    • 4 hamburger buns
    • Lettuce, tomato slices, and additional ranch dressing for serving

    Directions:

    1. In a large bowl, combine the ground chicken, shredded cheddar cheese, ranch dressing, bread crumbs, green onions, garlic powder, onion powder, salt, and black pepper. Mix until well combined.
    2. Divide the mixture into 4 equal portions and shape each portion into a patty.
    3. Preheat a grill or grill pan over medium-high heat. Lightly oil the grill grates.
    4. Grill the chicken patties for 5-7 minutes per side, or until fully cooked and the internal temperature reaches 165°F (74°C).
    5. Toast the hamburger buns on the grill during the last few minutes of cooking, if desired.
    6. Assemble the burgers by placing each chicken patty on a bun and topping with lettuce, tomato slices, and additional ranch dressing.
    7. Serve immediately.

    Prep Time: 15 minutes | Cooking Time: 15 minutes | Total Time: 30 minutes

    Kcal: 350 kcal | Servings: 4 servings

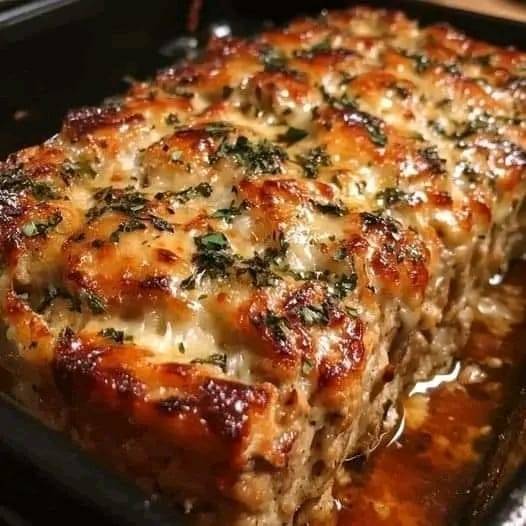
  • Classic Baked Meatloaf

    Classic Baked Meatloaf

    Here’s a simple and delicious recipe for a Classic Baked Meatloaf—perfectly seasoned, tender, and topped with a tangy glaze. This classic comfort food is sure to be a family favorite!

    Classic Baked Meatloaf

    Ingredients:

    For the Meatloaf:

    • 1 1/2 pounds ground beef (80% lean is best for flavor and moisture)
    • 1/2 pound ground pork (optional, but adds richness)
    • 1 small onion, finely chopped
    • 2 cloves garlic, minced
    • 1 cup breadcrumbs (preferably fresh, but dry works too)
    • 1/4 cup milk
    • 1 large egg
    • 2 tablespoons Worcestershire sauce
    • 1 tablespoon ketchup
    • 1 teaspoon dried thyme
    • 1 teaspoon dried parsley
    • Salt and pepper to taste

    For the Glaze:

    • 1/4 cup ketchup
    • 2 tablespoons brown sugar
    • 1 tablespoon Dijon mustard (optional for a tangy kick)

    Instructions:

    1. Preheat the Oven:
      • Preheat your oven to 350°F (175°C). Line a baking sheet with parchment paper or lightly grease a loaf pan.
    2. Prepare the Meatloaf Mixture:
      • In a large mixing bowl, combine the ground beef, ground pork (if using), chopped onion, minced garlic, breadcrumbs, milk, egg, Worcestershire sauce, ketchup, thyme, parsley, salt, and pepper.
      • Mix everything together gently with your hands or a spoon, just until combined. Be careful not to overwork the meat, as this can make the loaf dense.
    3. Shape the Meatloaf:
      • Transfer the meat mixture to the prepared baking sheet and form it into a loaf shape (about 9×5 inches). If you’re using a loaf pan, simply press the mixture into the pan.
    4. Prepare the Glaze:
      • In a small bowl, combine the ketchup, brown sugar, and Dijon mustard (if using). Stir until smooth.
    5. Bake the Meatloaf:
      • Brush half of the glaze over the top of the meatloaf.
      • Place the meatloaf in the preheated oven and bake for 45-55 minutes, or until the internal temperature reaches 160°F (71°C) and the meatloaf is cooked through.
      • About 10 minutes before the meatloaf is finished baking, brush the remaining glaze over the top for a nice shiny finish.
    6. Rest the Meatloaf:
      • Remove the meatloaf from the oven and let it rest for 10 minutes before slicing. This helps the juices redistribute and keeps the meatloaf moist.
    7. Serve:
      • Slice and serve the meatloaf with your favorite sides like mashed potatoes, green beans, or roasted vegetables.

    Tips:

    • Add Veggies: For extra flavor and moisture, finely chop vegetables like bell peppers, carrots, or zucchini and mix them into the meatloaf.
    • Cheese Option: Add shredded cheese to the meat mixture for a cheesy surprise in each bite!
    • Leftovers: Meatloaf leftovers are great for sandwiches the next day!

    This Classic Baked Meatloaf is hearty, flavorful, and comforting—perfect for a family dinner. The tangy glaze adds a touch of sweetness, balancing out the savory meat, making it a dish everyone will love! Enjoy!