Category: Recipes

  • Easy Spinach Feta Quiche Recipe

    Easy Spinach Feta Quiche Recipe

    Prep Time: 15 minutes
    Cook Time: 35–40 minutes
    Total Time: 50–55 minutes
    Servings: 6–8
    Calories per Serving: ~250

    This Spinach Feta Quiche is a delightful, protein-packed dish that’s perfect for any meal of the day—from a quick weekday breakfast to an elegant weekend brunch. It features a buttery crust, a savory egg custard, and a flavor-rich mix of spinach, feta, and vibrant vegetables.


    Why This Recipe Works

    • Quick and Easy: Uses store-bought or homemade pie crust for convenience.

    • Versatile: Easily customizable with your favorite vegetables, cheeses, or proteins.

    • Elegant Yet Simple: Looks fancy but is beginner-friendly.

    • Perfect for Make-Ahead: Great warm, cold, or reheated.


    Ingredients

    For the Crust:

    • 1 pie crust (store-bought or homemade quick blitz puff pastry)

    For the Filling:

    • 6 large eggs

    • 1 cup milk (whole or 2%)

    • 1 cup baby spinach, chopped

    • 1 cup feta cheese, crumbled

    • ½ cup red bell pepper, diced

    • ¼ cup onion, finely chopped

    • ½ tsp salt

    • ¼ tsp black pepper


    Step-by-Step Instructions

    1. Prepare the Crust

    1. Preheat oven to 375°F (190°C).

    2. Roll out your pie crust and press it into a 9-inch pie dish.

    3. Blind bake: Line with parchment paper and fill with pie weights or dry beans. Bake for 10 minutes, then remove weights and set aside.

    2. Make the Filling

    1. In a medium skillet, sauté onions and red bell pepper over medium heat until soft (about 3 minutes). Add chopped spinach and cook until wilted. Let cool slightly.

    2. In a large bowl, whisk together eggs, milk, salt, and pepper.

    3. Stir in the sautéed vegetables and crumbled feta cheese.

    3. Assemble and Bake

    1. Pour the filling into the pre-baked pie crust.

    2. Bake for 35–40 minutes, or until the center is set and the top is lightly golden.

    3. Let cool for 5–10 minutes before slicing.


    Ingredient Tips

    • Spinach: Fresh is best, but you can use frozen (thawed and squeezed dry).

    • Feta: Opt for a block of feta for better texture and flavor than pre-crumbled.

    • Milk: Whole milk makes the custard creamier, but 2% also works well.

    • Onions: Red onions or shallots offer a sweeter flavor if preferred.


    Serving Suggestions

    • Side Dishes: Fresh green salad, roasted potatoes, or zucchini fritters.

    • For Brunch: Pair with Homemade Chocolate Filled Crêpes or Mini Lemon Pies.

    • Presentation: Top slices with fresh herbs, cherry tomato halves, or a few microgreens for an elegant touch.


    Variations & Substitutions

    Variations:

    • Mediterranean: Add sun-dried tomatoes and swap feta for goat cheese.

    • Protein Boost: Mix in diced cooked bacon, ham, or shredded chicken.

    • Greens Swap: Use kale, Swiss chard, or arugula instead of spinach.

    Substitutions:

    • Cheese: Try Gruyère, sharp cheddar, or mozzarella for different flavor profiles.

    • Vegetables: Mushrooms, zucchini, or leeks work well in place of spinach or peppers.

    • Gluten-Free: Use a gluten-free crust or bake it crustless (just grease your pan).


    Storage & Reheating

    Storage:

    • Cool completely before wrapping.

    • Store tightly wrapped in plastic or foil or in an airtight container.

    • Keeps in the refrigerator for up to 4 days.

    Reheating:

    • Oven: Preheat to 350°F, cover loosely with foil, and heat for 15–20 minutes.

    • Microwave: Heat individual slices for 1–2 minutes on medium power.


    Nutrition (Per Serving)

    Nutrient Amount
    Calories 250
    Protein 15g
    Carbs 20g
    Fiber 3g
    Fat 12g

    Flavor Pairings

    Herb Cheese
    Basil Mozzarella
    Rosemary Goat Cheese
    Vegetable Protein
    Tomato Grilled Chicken
    Spinach Quinoa

    ✨ Final Touches

    Elevate your quiche with these ideas:

    • Garnish with fresh parsley, dill, or basil.

    • Use ring molds or cut-outs for elegant single servings.

    • Serve with edible flowers or microgreens for a high-end look.


    More Recipes You’ll Love

    • Vanilla Oatmeal Pancakes – comforting and wholesome.

    • Quick Pizza Rolls – a fun and savory snack.

    • Soft Butter Cake with Vanilla Extract – a moist dessert dream.

    • Cranberry Pistachio Shortbread Cookies – festive and flavorful.

    • Zucchini Fritters – light, crispy, and perfect on the side.

  • Cauliflower Vegetable Bake Recipe

    Cauliflower Vegetable Bake Recipe

    This Cauliflower and Vegetable Bake is a wholesome and satisfying dish packed with flavor. Featuring a creamy cauliflower base topped with sautéed vegetables and melted cheese, it’s a perfect comfort food that’s also nutritious.

    Prep Time: 20 minutes

    Cook Time: 30 minutes

    Total Time: 50 minutes

    Servings: 6

    INGREDIENTS:
    For the Cauliflower Puree:

    Cauliflower: 3.5 lbs (about 1.6 kg)

    Water: 6.5 cups (1.5 liters)

    Salt: 1 tsp (for boiling)

    Milk: 2 tbsp

    Eggs: 3

    Oil: 3 tbsp (for blending)

    For the Vegetables:

    Mushrooms: 3.5 oz (100 g), diced

    Green peppers: 4, diced

    Red peppers: 2, diced

    Carrot: 1, diced

    Onion: 1, diced

    Tomatoes: 2, diced

    Salt: 1 tsp (for seasoning)

    Mint: 1 tsp

    Red pepper: 1 tsp

    Pepper: 1 tsp

    Olive Oil: 4 tbsp (for sauteing)

    Topping:

    Cheese: 5.5 oz (155 g), grated

    INSTRUCTIONS:
    Step 1: Prepare the Cauliflower\

    Cut and Boil: Cut the cauliflower into florets and simmer in water with 1 tsp of salt and 2 tbsp of milk until soft.

    Blend: Blend the softened cauliflower with the eggs and 3 tbsp of oil until smooth and creamy.

    Step 2: Prepare the Vegetables

    Dice: Dice the mushrooms, green peppers, red peppers, carrot, onion, and tomatoes.

    Saute: Heat 4 tbsp of oil in a pan. Sauté the onions, carrots, and mushrooms until tender.

    Add and Cook: Add the diced tomatoes, 1 tsp of salt, mint, red pepper, and pepper. Cook until the mixture is well combined and the flavors meld.

    Step 3: Assemble and Bake

    Grease the Dish: Grease a baking dish with 3 tbsp of oil.

    Layer: Spread the cauliflower puree evenly in the dish.

    Top: Top with the sautéed vegetable mixture and sprinkle with grated cheese.

    Bake: Bake in a preheated oven at 375°F (190°C) for 25-30 minutes, or until the top is golden and bubbly.

    Serving Suggestions:

    As a Main: Serve as a main dish with a side salad.

    With Grain: Pair with rice or quinoa for a complete meal.

    For Lunch: Enjoy as a hearty and filling lunch option.

    Tips for Perfect Bake:

    Consistency: Ensure the cauliflower puree is smooth for the best texture.

    Veggie Saute: Saute vegetables until tender to enhance flavor.

    Cheese: Use your favorite cheese for topping to customize flavor.

    Nutritional Benefits:

    Cauliflower: Rich in vitamins C and K, and a good source of fiber.

    Vegetables: Provide essential nutrients and antioxidants.

    Cheese: Adds protein and calcium.

    Dietary Information:

    Contains: Dairy and eggs.

    Not Suitable For: Vegan or dairy-free diets.

    Nutritional Info (per serving):

    Calories: 280 kcal

    Carbohydrates: 20g

    Protein: 10g

    Fat: 18g

    Fiber: 5g

    Sodium: 800mg

    Storage:

    Refrigerator: Store leftovers in an airtight container for up to 4 days.

    Freezer: Freeze in portions for up to 3 months. Reheat in the oven or microwave before serving.

    Why You’ll Love This Recipe:

    Comforting: Combines creamy cauliflower and savory vegetables.

    Easy to Make: Simple steps with common ingredients.

    Versatile: Enjoy as a main dish or side.

    Healthy: Packed with veggies and nutrients.

    This Cauliflower and Vegetable Bake is a delicious and nutritious option that brings together creamy cauliflower and a medley of vegetables, topped with melted cheese. It’s perfect for a cozy meal and easy to prepare, making it a great addition to your recipe collection.

  • Gourmet Chocolate Peanut Butter Cups

    Gourmet Chocolate Peanut Butter Cups

    Hey there!
    Try these delectable Gourmet Chocolate Peanut Butter Cups prepared at home. They’re the ideal combination of smooth peanut butter and decadent chocolate. If you’re looking for an upgrade beyond the standard store-bought goodies, go no further; they are much more decadent and delicious. This dish is sure to please any chocolate or peanut butter fan and leave a lasting impression.

    Recipe Items
    Chips, milk or dark, 2 cups
    An ounce of coconut oil
    Peanut butter, 1 cup creamy
    1/4 cup of powdered sugar
    An teaspoon of vanilla flavoring
    Sea salt, if desired, for garnishing
    Instructions

    HomeDelightful Peanut Butter and Chocolate Cups

    Delightful Peanut Butter and Chocolate Cups

    Mold Preparation: Separate paper muffin liners and set them aside.
    Melt the chocolate by mixing the chips and oil in a basin that may be heated in the microwave. Stir occasionally and cook for 30 seconds at a time in the microwave until melted and smooth.
    Place a spoonful of melted chocolate into the base of each paper liner to create the bottom layer. Make a cup shape with the chocolate by gently drawing it up the sides with the back of the spoon. Ten minutes in the freezer should do the trick.
    Be ready Pour the peanut butter, powdered sugar, and vanilla extract into a separate dish and stir until smooth. This will make the filling.
    Add Before filling, take the baking sheet out of the freezer. Make a little space in the bottom of each chocolate cup and spoon a little peanut butter mixture on top.

    If the leftover chocolate has solidified, re-melt it before sealing the cups. Spread it out evenly over the peanut butter filling. To eliminate any air bubbles and level the surface, lightly tap the tray on the counter.
    As a finishing touch, you may add a pinch of sea salt to each cup for an added burst of flavor. To set, return to the freezer and continue freezing for another 15 to 20 minutes.
    Put away or serve: When the peanut butter cups are solid, take them out of the paper liners. They are best enjoyed right away, although they keep well in the fridge if sealed.
    In summary
    Whether you’re celebrating a special event or just want to treat yourself, these homemade gourmet chocolate peanut butter cups are sure to be a hit. The combination of the chocolate’s bitterness and the peanut butter’s sweetness creates a perfect harmony, making these treats impossible to refuse. They are lovingly crafted and will delight everyone who gives them a try.

    Make these delicious treats to your heart’s content, and feel free to experiment with other chocolates or add some chopped nuts to the filling for a little crunch!

  • Refreshing Green Apple and Spinach Smoothie

    Refreshing Green Apple and Spinach Smoothie

    Refreshing Green Apple and Spinach Smoothie

    This smoothie is packed with vitamins, minerals, and fiber, making it a great way to kickstart your day or enjoy a healthy snack. The tartness of the green apple and lemon perfectly balances the earthiness of the spinach.

    Yields: 1 serving Prep time: 5 minutes

    Ingredients:

    • 1 medium green apple, cored and roughly chopped (you can leave the skin on for extra fiber, just make sure to wash it well)
    • 1 cup (about 30g) fresh baby spinach
    • 1/2 medium lemon, juiced (about 1-2 tablespoons)
    • 1/2 cup (120ml) cold water or unsweetened almond milk (for a creamier texture)
    • 3-4 ice cubes (optional, for extra chill and thickness)
    • Optional additions for enhanced flavor/nutrition:
      • 1/2 inch fresh ginger, peeled (for a zesty kick)
      • 1/4 cup fresh cucumber, peeled and chopped (for extra hydration)
      • 1 tablespoon chia seeds or flax seeds (for omega-3s and fiber)
      • 1/2 ripe banana (for natural sweetness and creaminess, if you prefer less tartness)
      • 1 scoop protein powder (vanilla or unflavored, for a more filling smoothie)

    Equipment:

    • Blender
    • Measuring cups and spoons
    • Cutting board
    • Knife

    Instructions:

    1. Prepare your ingredients:

      • Wash the green apple thoroughly and chop it into smaller pieces. Remember to remove the core.
      • Wash the spinach thoroughly.
      • Cut the lemon in half and squeeze out the juice, making sure to remove any seeds.
      • If using ginger or cucumber, peel and chop them.
    2. Add to the blender:

      • Start by adding the liquid (water or almond milk) to your blender first. This helps with blending.
      • Next, add the spinach.
      • Then, add the chopped green apple and lemon juice.
      • Add any optional ingredients you’ve chosen (ginger, cucumber, chia seeds, banana, protein powder).
      • Finally, add the ice cubes if you’re using them.
    3. Blend until smooth:

      • Secure the lid on your blender.
      • Start blending on a low speed, then gradually increase to high.
      • Blend for 1-2 minutes, or until the smoothie is completely smooth and no chunks of spinach or apple remain. If it’s too thick, add a tablespoon or two more of water or almond milk until you reach your desired consistency.
    4. Serve immediately:

      • Pour the freshly blended smoothie into a glass and enjoy!

    Tips for Success:

    • Adjust sweetness/tartness: If you find the smoothie too tart, add a small piece of ripe banana, a few dates, or a teaspoon of honey/maple syrup. If you prefer it more tart, add a little more lemon juice.
    • Consistency: For a thicker smoothie, use less liquid or add more ice cubes. For a thinner smoothie, add more liquid.
    • Make it colder: Use frozen green apple chunks or frozen spinach to make the smoothie even colder and thicker without diluting the flavor.
    • Storage: While best enjoyed immediately, you can store any leftover smoothie in an airtight container in the refrigerator for up to 24 hours. Stir well before drinking as separation may occur.
    • Experiment: Don’t be afraid to adjust the ratios or add other greens like kale, or different fruits like pineapple or mango, to find your perfect green smoothie blend!

    Enjoy your refreshing and healthy green apple and spinach smoothie!

  • Homemade Chocolate Ice Cream Without Condensed Milk With 3 Easy Ingredients

    Homemade Chocolate Ice Cream Without Condensed Milk With 3 Easy Ingredients

    Hi everyone, today we’re going to learn how to make Homemade Chocolate Ice using simple ingredients. So grab your pen and paper to jot down the ingredients, then follow the complete preparation method.

    How to Make Homemade Chocolate Ice

    chocolate ice cream without milk and without condensed milk. See below the list of all ingredients and required quantities. And then, a very complete preparation method with details of the recipe.

    Recipe Ingredients:

    • 4 bananas, peeled and sliced
    • 200 grams (7 oz) heavy cream
    • 3 tbsp unsweetened 50% cocoa powder

    Instructions:

    Place the banana slices in the freezer until firm. Meanwhile, chill the heavy cream in the refrigerator until it begins to crystallize.

    Using a mixer, beat the heavy cream until it doubles in volume.

    In a blender, blend the frozen banana slices until smooth and creamy.

    Fold the banana puree into the whipped cream and blend until well combined. Add the cocoa powder and mix thoroughly.

    Transfer the mixture to a glass dish and refrigerate for about 3 hours, or until set. Decorate as desired and serve your easy, homemade dessert!

  • Sugar-free Oatmeal Recipe With Apples And Carrots

    Sugar-free Oatmeal Recipe With Apples And Carrots

    Sugar-Free Apple Carrot Oatmeal (Naturally Sweetened)

    A wholesome, hearty bowl of oatmeal made with fresh apples, shredded carrots, and warm spices. Think of it as a carrot cake–inspired oatmeal — without the sugar crash!


    Ingredients (Serves 2)

    • 1 cup rolled oats (old-fashioned, not quick-cooking)

    • 2 cups water or unsweetened almond milk (or half and half for extra creaminess)

    • 1 medium apple, peeled or unpeeled, grated or finely chopped

    • ½ cup grated carrots (about 1 small carrot)

    • ¼ tsp ground cinnamon

    • ⅛ tsp ground nutmeg (optional)

    • Pinch of salt

    • 1 tsp vanilla extract (optional, but lovely)

    • 1–2 tbsp raisins or chopped dates (optional, for extra natural sweetness)

    Optional Toppings:

    • Chopped nuts (walnuts, pecans, almonds)

    • Extra grated apple or carrots

    • Unsweetened yogurt or a splash of milk

    • Chia seeds or flaxseeds

    • Drizzle of almond butter or peanut butter


    Instructions

    1. Combine Ingredients

    In a small saucepan, add:

    • 1 cup oats

    • 2 cups liquid (water or milk)

    • Grated apple and carrot

    • Cinnamon, nutmeg, salt

    • Raisins or dates (if using)
      Bring to a gentle simmer over medium heat.


    2. Simmer & Stir

    Reduce the heat to low and cook for 8–10 minutes, stirring occasionally, until the oats are tender and the mixture is thick and creamy. Add more liquid as needed to reach desired consistency.


    3. Flavor & Serve

    Once the oatmeal is cooked, stir in the vanilla extract (if using). Taste and adjust:

    • Add more cinnamon if you like

    • A splash of milk can mellow out the spice

    • Want it sweeter without sugar? Add mashed banana, more apple, or a few extra raisins

    Serve hot with your favorite toppings.


    Nutritional Highlights (Per Serving – approx.)

    • Calories: 220

    • Fiber: 5–6g

    • Protein: 5g

    • Sugars: 0g added sugar, 9–12g natural sugar from fruit

    • Fat: 3g


    Tips & Variations

    • Make it Creamier: Use half milk and half water, or stir in 1 tbsp Greek yogurt at the end.

    • Overnight Version: Mix all ingredients in a jar and refrigerate overnight. Eat cold or warm up in the morning.

    • Spice it Up: Add ground ginger or a pinch of cardamom for a more chai-like flavor.

    • Protein Boost: Stir in 1 scoop of plain or vanilla protein powder at the end or add a spoonful of almond butter.


    Storage

    • Store leftovers in an airtight container in the fridge for up to 4 days.

    • Reheat with a splash of milk or water to loosen the texture.

  • ❤️ Crispy Rice Krispies Chocolate Chip Cookies

    ❤️ Crispy Rice Krispies Chocolate Chip Cookies

    These cookies are a perfect blend of soft, chewy, and crispy — thanks to the surprise addition of Rice Krispies cereal! Each bite delivers a delicious crunch along with the rich flavor of chocolate chips and buttery cookie goodness.


    Ingredients

    Wet Ingredients:

    • 1 cup (2 sticks) unsalted butter, softened

    • 1 cup granulated sugar

    • ½ cup packed brown sugar

    • 2 large eggs

    • 1 teaspoon vanilla extract

    Dry Ingredients:

    • 2½ cups all-purpose flour

    • 1 teaspoon baking soda

    • ½ teaspoon salt

    Mix-ins:

    • 1 cup Rice Krispies cereal

    • 1 cup chocolate chips (or chocolate chunks for a richer bite)


    ‍ Directions

    1. Preheat & Prepare

    Preheat your oven to 350°F (180°C). Line two baking sheets with parchment paper or lightly grease them.


    2. Cream Butter & Sugars

    In a large bowl, use a hand mixer or stand mixer to cream the butter, granulated sugar, and brown sugar until light, fluffy, and pale — about 2–3 minutes.


    3. Add Eggs & Vanilla

    Add the eggs one at a time, mixing well after each addition. Stir in the vanilla extract.


    4. Combine Dry Ingredients

    In a separate bowl, whisk together flour, baking soda, and salt.


    5. Mix Wet & Dry

    Gradually add the dry ingredients to the wet ingredients, mixing on low speed until just combined. Don’t overmix — this keeps your cookies tender.


    6. Fold in the Good Stuff

    Using a spatula, gently fold in the Rice Krispies and chocolate chips until evenly distributed.


    7. Scoop & Space

    Scoop the dough using a cookie scoop or tablespoon onto the prepared baking sheets. Leave 2 inches of space between each cookie to allow for spreading.


    8. Bake

    Bake in the preheated oven for 10–12 minutes, or until the edges are golden but the centers are still soft.


    9. Cool

    Let the cookies rest on the baking sheet for 3–5 minutes, then transfer them to a wire rack to cool completely.


    Tips & Variations

    • Extra Gooey? Add an extra ¼ cup chocolate chips on top of the scooped dough for picture-perfect cookies.

    • Nutty Crunch: Stir in ½ cup chopped pecans, walnuts, or macadamia nuts.

    • Flavor Twist: Swap vanilla for almond extract for a nutty background.

    • Dried Fruit: Add ⅓ cup dried cranberries or cherries for a sweet tang.


    ⏲️ Prep & Baking Time

    • Prep Time: 20 minutes

    • Bake Time: 10–12 minutes per batch

    • Total Time: ~30–35 minutes


    Yield & Nutrition

    • Makes: About 24–30 cookies

    • Calories: ~180 per cookie (approx., depending on size and add-ins)


    Storage

    • Room Temp: Store in an airtight container for up to 5 days.

    • Freezer (Unbaked Dough): Freeze scooped dough on a tray, then transfer to a zip-top bag. Bake from frozen, adding 1–2 minutes to baking time.

    • Freezer (Baked Cookies): Cool completely and freeze in layers between parchment for up to 2 months.


    Serving Ideas

    • Enjoy warm with a glass of milk

    • Crumble over vanilla ice cream

    • Stack with marshmallow fluff for a fun cookie sandwich!

  • Layered Berry & Banana Smoothie Recipe

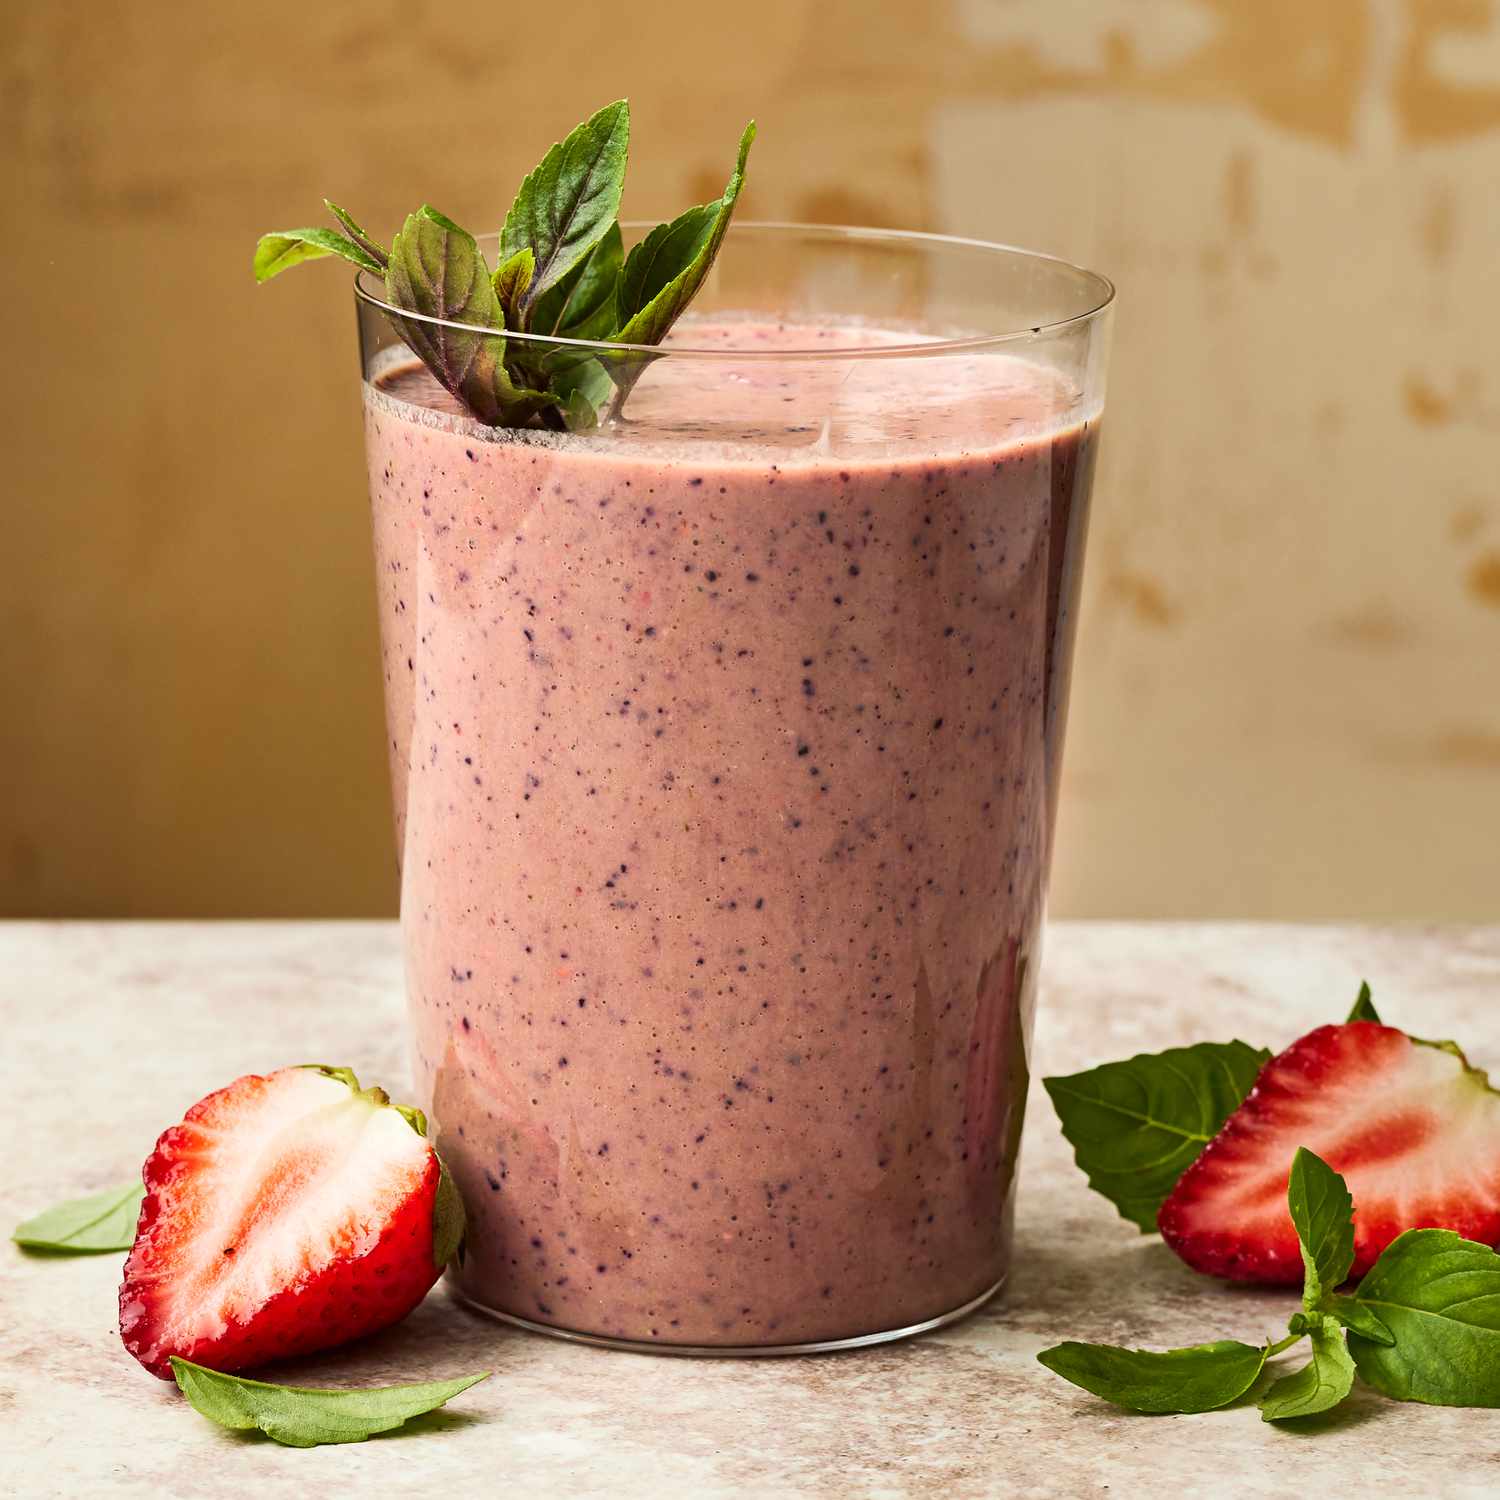
    Layered Berry & Banana Smoothie Recipe

    Layered Berry & Banana Smoothie Recipe

    Ingredients

    Yellow Layer (Banana Vanilla Smoothie)

    • 2 ripe bananas

    • 1/2 cup Greek yogurt (plain or vanilla)

    • 1/2 cup almond milk (or any milk of your choice)

    • 1 tsp honey or maple syrup (optional)

    • 1/2 tsp vanilla extract

    • 1/2 cup ice cubes (optional for thickness)

    Purple Layer (Berry Smoothie)

    • 1 cup mixed berries (blueberries, strawberries, raspberries, blackberries)

    • 1/2 cup Greek yogurt

    • 1/2 cup almond milk

    • 1 tbsp honey or maple syrup (optional)

    • 1/2 cup ice cubes (optional)


    Instructions

    1. Prepare the Yellow Layer:

      • Add all yellow layer ingredients to the blender.

      • Blend until smooth and creamy.

      • Pour it into a separate container and set aside.

    2. Prepare the Purple Layer:

      • Rinse the blender or use a separate one.

      • Add all purple layer ingredients.

      • Blend until smooth.

    3. Create the Layered Effect:

      • Pour one-third of the yellow mixture into the bottom of the blender.

      • Add the purple mixture gently over it.

      • Top with the remaining yellow mixture (or swirl for a marble effect if desired).

    4. Serve:

      • Pour into a tall glass.

      • Garnish with fresh berries or a banana slice if desired.


    Tips

    • For a thicker smoothie, use frozen fruits instead of adding ice.

    • You can substitute Greek yogurt with a dairy-free version for a vegan option.

    • Add protein powder or flax seeds for extra nutrition.

  • Banana Apple Smoothie Recipe

    Banana Apple Smoothie Recipe

    Banana Apple Smoothie Recipe

    Ingredients (Serves 2):

    • 2 ripe bananas (fresh or frozen)

    • 1 medium red apple (such as Fuji or Gala), cored and chopped

    • 1 cup plain or vanilla yogurt (Greek yogurt for more protein)

    • ½ cup milk (dairy or plant-based like almond, oat, or soy)

    • 1 tablespoon honey or maple syrup (optional, adjust to taste)

    • ¼ teaspoon cinnamon (optional for extra flavor)

    • A few ice cubes (optional, for a colder smoothie)

    • Banana slices for garnish (optional)


    Instructions:

    1. Prepare the Fruit:

      • Peel the bananas and break them into chunks.

      • Wash, core, and chop the apple. No need to peel unless preferred.

    2. Blend:

      • In a blender, combine the banana chunks, chopped apple, yogurt, and milk.

      • Add honey (if using), cinnamon, and ice cubes.

      • Blend on high until smooth and creamy. Scrape down the sides if needed.

    3. Taste and Adjust:

      • Taste the smoothie. Add more honey/maple syrup if you want it sweeter.

      • Add a bit more milk if the smoothie is too thick.

    4. Serve:

      • Pour into glasses and garnish with banana slices if desired.

      • Serve immediately while cold and fresh.


    Tips:

    • Frozen banana adds natural creaminess and chill to the smoothie.

    • You can add a tablespoon of nut butter (like almond or peanut) for extra flavor and protein.

    • For a green version, toss in a handful of spinach—the flavor stays mild!

  • Easy Loaded Cheesy Pocket Tacos

    Easy Loaded Cheesy Pocket Tacos

    These cheesy biscuit tacos are the ultimate crowd-pleaser — crispy on the outside, melty and meaty on the inside! Perfect for quick weeknight dinners, after-school snacks, or even game-day bites.


    Ingredients

    • 1 lb ground beef

    • 1 packet taco seasoning (or 2–3 tbsp homemade)

    • ¼ cup water

    • 1 cup shredded cheddar cheese (or Mexican blend)

    • ½ cup salsa (chunky or smooth, your choice)

    • 1 can (8-count) refrigerated biscuit dough (like Pillsbury Grands or similar)

    Optional Toppings (for serving):

    • Sour cream

    • Shredded lettuce

    • Diced tomatoes

    • Jalapeños

    • Avocado or guacamole

    • Hot sauce


    Instructions

    1. Preheat Oven

    Preheat your oven to 375°F (190°C). Line a baking sheet with parchment paper or lightly grease it.

    2. Cook the Beef

    • In a skillet over medium heat, brown 1 lb ground beef until fully cooked.

    • Drain any excess grease.

    • Stir in the taco seasoning and ¼ cup water.

    • Simmer for 2–3 minutes until thickened. Remove from heat and let cool slightly.

    3. Flatten the Biscuits

    • Open the can of refrigerated biscuits and separate them.

    • Using your hands or a rolling pin, flatten each biscuit into a 5-inch round on a floured surface or parchment.

    4. Fill and Fold

    • In the center of each dough round, spoon about 2 tbsp of the seasoned beef, then sprinkle with cheese and a little salsa.

    • Fold over to form a half-moon shape.

    • Press edges with a fork to seal tightly.

    5. Bake

    • Place sealed pockets on the prepared baking sheet.

    • Optional: Brush tops with beaten egg or melted butter for golden color.

    • Bake for 12–15 minutes, or until golden brown and puffed.

    6. Serve

    Serve warm with your favorite taco toppings like sour cream, lettuce, tomatoes, or guac. These are great as a grab-and-go meal or plated up taco-night style.


    Tips & Variations

    • Cheesy Upgrade: Add a small cube of cream cheese or a spoonful of queso for extra creaminess.

    • Spicy Kick: Use pepper jack cheese, hot salsa, or add chopped jalapeños to the filling.

    • Make it Veggie: Swap ground beef for black beans, corn, and sautéed peppers.

    • Freezer Friendly: Bake, cool, and freeze extras. Reheat in a toaster oven or air fryer.


    Storage

    • Fridge: Store leftovers in an airtight container up to 3 days.

    • Freezer: Freeze individually wrapped in foil or plastic wrap for up to 2 months.

    • Reheat: Warm in a 350°F oven for 8–10 minutes or air fry at 350°F for 4–6 minutes for a crispier finish.


    ❓FAQ

    Can I use crescent rolls instead of biscuits?
    Yes! Just pinch the seams together to form full rounds before filling and folding.

    Can I prepare these ahead of time?
    Absolutely — fill and seal them ahead, then refrigerate unbaked for up to 24 hours before baking fresh.

    Do they get soggy with salsa inside?
    Use thicker salsa or drain excess liquid to prevent sogginess.

  • Warm and Nutritious Vegetable Soup: Delight Your Taste Buds

    Warm and Nutritious Vegetable Soup: Delight Your Taste Buds

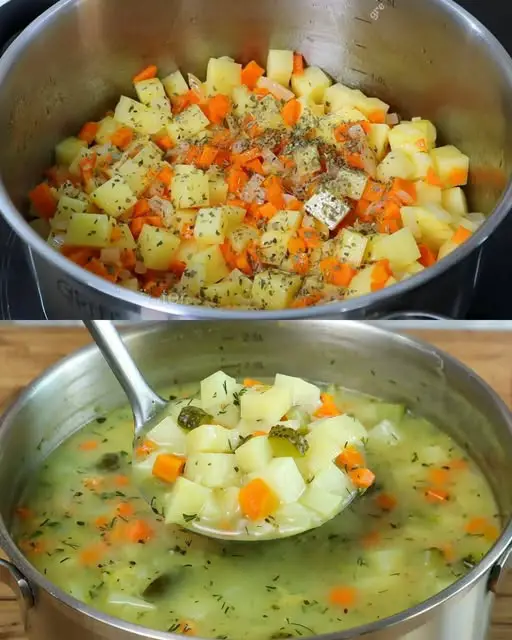
    When it comes to comfort food, vegetable soup is the ultimate choice for anyone looking for a nutritious and delicious meal. This flavorful soup is not only easy to prepare but also packed with a variety of fresh vegetables that create a harmonious blend of flavors. Whether you enjoy it as a main course or a side dish, this versatile soup is guaranteed to satisfy your cravings.

    There’s something incredibly comforting about a steaming bowl of homemade vegetable soup. It warms you up from the inside out, making you feel cozy and content. But it’s not just about the comforting feeling; this soup also provides essential nutrients to keep you energized throughout the day. With its vibrant colors and fresh ingredients, it’s a feast for both the eyes and the palate.

    Simple Ingredients, Delicious Results

    To create this delightful soup, you’ll need the following ingredients:

    1 onion, chopped
    Olive oil
    1 carrot, grated
    Green pepper, red pepper, yellow pepper, diced
    3 potatoes, diced
    1.2 liters (6 cups) water
    Salt and pepper to taste

    Easy Step-by-Step Recipe

    Preparing the vegetables for this soup is a breeze. Here’s a step-by-step guide to help you get started:

    Chop the Onion: Begin by finely chopping the onion.

    Dice the Peppers: Dice the green, red, and yellow peppers into small, uniform pieces.

    Grate the Carrot: Use a coarse grater to grate the carrot.

    Dice the Potatoes: Peel and dice the potatoes into small cubes.

    Once the vegetables are ready, follow these steps to cook the soup:

    Sauté the Onions: Heat a drizzle of olive oil in a large pot over medium heat. Cook the chopped onion until it becomes tender and see-through.

    Add the Peppers and Carrot: Stir in the diced peppers and grated carrot. Sauté for a few minutes until the vegetables start to become tender.

    Incorporate the Potatoes: Add the diced potatoes to the pot, stirring to combine them with the other vegetables.

    Pour in the Water: Add the 1.2 liters (6 cups) of water to the pot. Heat the mixture until it reaches a boil, then lower the heat to maintain a simmer.

    Add Seasoning: Adjust the flavor with salt and pepper to your liking. Let the soup simmer for about 20-25 minutes, or until the potatoes are tender and all the flavors have melded together.

    Serve Hot: Ladle the hot soup into bowls and serve immediately. This soup is perfect on its own or accompanied by a slice of crusty bread.

    A Daily Delight for Your Well-Being
    Cooking a pot of vegetable soup every day is a delightful way to ensure you’re getting a good dose of vegetables in your diet. This recipe, with its simple ingredients and straightforward preparation, makes for a delicious and nutritious meal that you can enjoy day after day. The combination of onions, peppers, carrots, and potatoes creates a rich and satisfying flavor that is hard to resist.

    Give this vegetable soup a try, and it’s sure to become a favorite in your household. Relish the warmth and comfort of this homemade soup as you savor every spoonful. Your taste buds and your well-being will thank you!

  • Mexican Brown Rice Bake – Gluten-Free

    Mexican Brown Rice Bake – Gluten-Free

    Ingredients:
    2 cups cooked brown rice
    1 cup black beans (drained and rinsed)
    1 cup corn kernels (fresh, frozen, or canned)
    1 cup diced tomatoes (canned or fresh)
    1/2 cup onion, finely chopped
    1/2 cup bell peppers, diced (any color)
    1 cup shredded cheddar cheese (or Mexican blend cheese)
    1/2 cup salsa (mild, medium, or spicy, based on your preference)
    1 teaspoon chili powder
    1 teaspoon cumin
    1/2 teaspoon smoked paprika
    Salt and pepper, to taste
    1 tablespoon olive oil
    1/4 cup fresh cilantro, chopped (optional, for garnish)
    Instructions:

    Step 1: Preheat the Oven
    Preheat your oven to 375°F (190°C)and lightly grease a baking dish with olive oil or cooking spray.
    Step 2: Prepare the Rice Mixture
    In a large mixing bowl, combine the cooked brown rice, black beans, corn, diced tomatoes, onions, and bell peppers.
    Add the chili powder, cumin, smoked paprika, salt, and pepper. Mix well to combine.
    Step 3: Assemble the Casserole

    Spread half of the rice mixture evenly into the prepared baking dish.
    Drizzle with half of the salsa and sprinkle with half of the shredded cheese.
    Repeat with the remaining rice mixture, salsa, and cheese to create layers.
    Step 4: Bake the Dish
    Cover the dish with aluminum foil and bake for 20 minutes.
    Remove the foil and bake for an additional 10–15 minutes, or until the cheese is bubbly and slightly golden.
    Step 5: Garnish and Serve
    Remove from the oven and let it cool for 5 minutes.
    Garnish with freshly chopped cilantrobefore serving.
    Serving Suggestions
    Toppings: Add sliced avocado, sour cream, or jalapeños for extra flavor.
    Side Dishes: Pair with a crisp green salad or a bowl of tortilla chips.
    Leftovers: Store in an airtight container in the refrigerator for up to 3 days. Reheat in the oven or microwave.
    Why You’ll Love This Recipe
    Gluten-Free: Perfect for those with gluten sensitivities or dietary preferences.
    Versatile: Customize with your favorite veggies, beans, or even shredded chicken.
    Easy Prep: Uses simple, everyday ingredients you likely have on hand.
    Meal Prep Friendly: Makes excellent leftovers that taste even better the next day!
    Tips for Success
    Cook Rice Ahead of Time: Use leftover rice or cook it earlier to save time.
    Spice Level: Adjust the spice level by using mild or spicy salsa and adding more chili powder or cayenne pepper.
    Cheese Options: Experiment with pepper jack or Monterey jack for a twist.
    Conclusion
    This Mexican Brown Rice Bake is a satisfying, gluten-free casserole that’s full of bold flavors and nutritious ingredients. It’s perfect for a busy weeknight or as a crowd-pleasing dish for family gatherings. Easy to customize and packed with goodness, this recipe is sure to become a staple in your kitchen!

    Enjoy!

  • Apple and cream cake – cake ready in 5 minutes, only 180 Kcal!

    Apple and cream cake – cake ready in 5 minutes, only 180 Kcal!

    That sounds like a quick and delicious treat! Here’s a simple recipe for a microwave apple and cream cake that’s low in calories:

    ### Quick Apple and Cream Cake

    Ingredients:
    – 1 small apple, peeled and diced
    – 2 tablespoons plain Greek yogurt (or low-fat cream)
    – 1 tablespoon honey or maple syrup
    – 1 egg
    – 3 tablespoons whole wheat flour (or oat flour)
    – 1/2 teaspoon baking powder
    – 1/2 teaspoon cinnamon
    – Pinch of salt

    Instructions:

    1. **Prepare the Mixture:**
    – In a bowl, mix the diced apple, Greek yogurt, honey (or maple syrup), and egg until well combined.

    2. **Add Dry Ingredients:**
    – Stir in the flour, baking powder, cinnamon, and a pinch of salt until you have a smooth batter.

    3. **Microwave:**
    – Pour the mixture into a microwave-safe mug or bowl. Microwave on high for about 1.5 to 2 minutes, or until the cake is set and a toothpick comes out clean.

    4. **Cool and Enjoy:**
    – Let it cool for a minute before enjoying it warm. You can top it with a dollop of Greek yogurt if desired.

    ### Nutritional Info:
    – This cake is roughly around 180 calories, depending on the specific ingredients you use.

    Enjoy your quick and healthy apple and cream cake!

  • Instant Pot Spaghetti and Meatballs

    Instant Pot Spaghetti and Meatballs

    If you’re craving hearty, comforting Italian food without spending hours in the kitchen, this Instant Pot Spaghetti and Meatballs recipe is a must-try! It’s a one-pot meal that comes together in under an hour, with minimal cleanup and maximum flavor.


    ⭐ Why You’ll Love It

    • One-pot convenience — no need to boil pasta separately.

    • Fast — ready in under 1 hour.

    • Customizable — make it with store-bought or homemade meatballs, or substitute ground turkey or plant-based meat.

    • Family-friendly — picky eaters love it!


    Ingredients

    For the Meat Mixture:

    • 1 tbsp olive oil

    • ½ medium onion, finely chopped

    • 1 lb ground beef (can sub ground turkey or plant-based meat)

    • 2 tsp garlic powder

    • 3 tsp minced garlic (or about 3 cloves)

    • 1 tbsp Italian seasoning

    • Salt and black pepper, to taste

    For the Pasta:

    • 1 jar (24 oz) pasta sauce (marinara or your favorite variety)

    • 1 can (14.5 oz) diced tomatoes, undrained

    • 3 cups water, divided

    • 1 lb dry spaghetti pasta, broken in half


    Instructions

    1. Sauté the Aromatics and Meat

    • Set your Instant Pot to ‘Sauté’ mode and heat the olive oil.

    • Add the chopped onion and cook for 2–3 minutes until softened.

    • Stir in the ground beef, garlic powder, minced garlic, Italian seasoning, and salt & pepper.

    • Cook until meat is browned and fully cooked, about 6–8 minutes.

    • Drain excess grease if needed, then remove the meat mixture from the pot and set it aside.

    2. Layer the Pasta and Sauce

    • Turn off ‘Sauté’ mode.

    • Pour 1½ cups of water into the pot and deglaze the bottom with a wooden spoon to prevent the burn warning.

    • Break the spaghetti in half and scatter it in a crisscross “X” pattern to prevent sticking.

    • Pour the pasta sauce and diced tomatoes evenly over the pasta — do not stir.

    • Pour in the remaining 1½ cups of water, making sure the pasta is just covered with liquid. Gently press down if needed.

    3. Pressure Cook

    • Secure the lid and set the valve to Sealing.

    • Press Manual or Pressure Cook and set to High Pressure for 5 minutes.

    • Once the cooking time is up, allow a Natural Pressure Release (NPR) for 5 minutes, then carefully do a Quick Release to let out any remaining pressure.

    4. Finish and Serve

    • Open the lid and return the cooked meat mixture to the pot.

    • Gently stir everything together until well combined and the pasta is coated in sauce.

    • Let it sit for 2–3 minutes to thicken and allow flavors to meld.


    ️ Serving Suggestions

    • Sprinkle with grated Parmesan or shredded mozzarella.

    • Garnish with fresh basil or parsley.

    • Serve with garlic bread and a simple green salad for a complete meal.


    Variations & Tips

    • Add Meatballs: Substitute ground beef with frozen or homemade meatballs. Sauté or brown separately and add them during the pressure cook step.

    • Extra Veggies: Add finely chopped bell peppers, mushrooms, or zucchini when sautéing the onions.

    • Creamy Version: Stir in a splash of heavy cream or a spoonful of cream cheese after pressure cooking for a creamy twist.

    • Gluten-Free: Use gluten-free pasta, but reduce the cook time by 1 minute and monitor for sticking.


    Storage

    • Refrigerator: Store in an airtight container for up to 4 days.

    • Freezer: Freeze in portioned containers for up to 2 months. Reheat with a splash of water or extra sauce.


    ❓FAQ

    Can I use whole wheat pasta?
    Yes, but it may require an extra minute of cooking and slightly more liquid. Monitor closely.

    Why do I layer the ingredients without stirring?
    Stirring can cause pasta to stick to the bottom and trigger a “burn” warning on the Instant Pot.

    Can I double this recipe?
    Yes — just ensure not to overfill past the “Max Fill” line and increase the water slightly.


    Enjoy your rich, saucy, satisfying Instant Pot spaghetti and meatballs — all in one pot, with no mess and no fuss!

  • My Mom’s Fudge

    My Mom’s Fudge

    My Mom’s Fudge

    Ingredients

    • ½ cup  Butter (unsalted) (1 stick)
    • 2 cups Granulated  sugar
    • ⅔ cup Evaporated milk
    • 1¾ cups Semi-sweet chocolate chips (10-12 ounces)
    • 7 ounces Marshmallow fluff (1 jar)
    • 1 tbsp Vanilla extract
    How To Make My Mom’s Fudge
    1. Combine butter, sugar, and milk in a saucepan, bring to a boil, and whisk to combine.
    2. Reduce heat and boil for five minutes.
    3. Remove from heat and melt in chocolate chips.
    4. Add marshmallow fluff and vanilla extract, whisking until smooth.
    5. Pour the mixture into a prepared dish and refrigerate until firm.
    What to Serve With Mom’s Fudge
    • Hot Cocoa: Pair this creamy treat with a warm cup of cocoa for a delightful combination.
    • Vanilla Ice Cream: Create a decadent dessert by serving fudge over a scoop of vanilla ice cream.
    • Fresh Berries: Balance the richness with the freshness of berries for a vibrant contrast.
    • Dark Roast Coffee: Enjoy a slice of fudge with a bold coffee to awaken your senses.

    Frequently Asked Questions

    • Can I double this recipe?
      Yes, simply double the ingredients and use a 9×13 pan for a larger batch.
    • How do you keep fudge from crumbling?
      Avoid overcooking, use fresh ingredients, and store it in an airtight container to prevent drying.
    • What’s the shelf life of Mom’s Fudge?
      Properly refrigerated, the fudge can last for several weeks, though it’s unlikely to stay uneaten that long!
    • Can I freeze Mom’s Fudge?
      Yes, you can freeze the fudge for longer storage. Thaw in the refrigerator before serving.

    After crafting Mom’s Fudge, expect an indulgent experience that tantalizes your taste buds with its smooth, velvety texture and rich chocolate flavor. Each bite is a journey back to cherished family moments filled with love and joy.