Category: Recipes

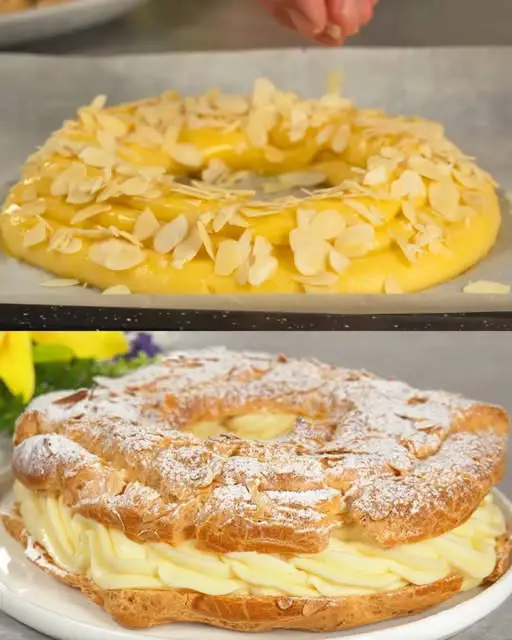
  • Lemon-Infused Cream Puffs Recipe

    Lemon-Infused Cream Puffs Recipe

    Here’s a recipe for Lemon-Infused Cream Puffs, a delightful dessert featuring a light, airy choux pastry filled with a tangy lemon cream. Perfect for a special treat or any celebration!


    Ingredients:

    For the Choux Pastry:

    • 1/2 cup (120 ml) water
    • 1/2 cup (115 g) unsalted butter
    • 1 cup (125 g) all-purpose flour
    • 1/4 teaspoon salt
    • 4 large eggs

    For the Lemon Cream Filling:

    • 1 cup (240 ml) heavy cream
    • 2 tablespoons powdered sugar
    • 1/2 teaspoon vanilla extract
    • 1 tablespoon lemon zest (from about 1 lemon)
    • 2 tablespoons lemon juice
    • 1 tablespoon lemon curd (optional, for extra lemon flavor)

    For the Glaze (optional):

    • 1/4 cup powdered sugar
    • 1 tablespoon lemon juice

    Instructions:

    Step 1: Make the Choux Pastry

    1. Preheat the Oven:
      • Preheat your oven to 375°F (190°C) and line a baking sheet with parchment paper.
    2. Prepare the Dough:
      • In a medium saucepan, combine the water and butter. Heat over medium-high until the butter is completely melted and the mixture comes to a boil.
    3. Add the Flour:
      • Remove the pan from heat and stir in the flour and salt all at once. Stir vigorously until the dough comes together and pulls away from the sides of the pan, forming a smooth ball. This should take about 1-2 minutes.
    4. Add the Eggs:
      • Allow the dough to cool slightly for about 5 minutes. Then, one at a time, add the eggs to the dough, mixing well after each addition. The dough should become smooth, glossy, and thick.
    5. Pipe the Choux:
      • Transfer the dough to a piping bag fitted with a round tip. Pipe small mounds (about 1 1/2 inches in diameter) onto the prepared baking sheet, leaving space between each.
    6. Bake the Puffs:
      • Bake the cream puffs in the preheated oven for 25-30 minutes, or until they are golden brown and puffed. Do not open the oven door during the first 20 minutes of baking to avoid collapsing.
    7. Cool:
      • Remove the puffs from the oven and allow them to cool completely on a wire rack.

    Step 2: Make the Lemon Cream Filling

    1. Whip the Cream:
      • In a chilled mixing bowl, whip the heavy cream and powdered sugar together until soft peaks form. Be careful not to overwhip.
    2. Add Lemon Flavor:
      • Gently fold in the vanilla extract, lemon zest, lemon juice, and optional lemon curd for extra flavor. Stir until smooth and well combined.

    Step 3: Fill the Cream Puffs

    1. Cut and Fill:
      • Once the puffs are completely cool, use a sharp knife to cut a small slit or hole in the side or top of each puff.
    2. Pipe the Filling:
      • Use a piping bag or spoon to fill each puff with the lemon cream filling. Be generous, as the cream will give the puffs their creamy, tangy flavor.

    Step 4: Optional Lemon Glaze

    1. Make the Glaze:
      • In a small bowl, mix together the powdered sugar and lemon juice to form a smooth glaze.
    2. Glaze the Puffs:
      • Drizzle or dip the tops of the filled cream puffs in the lemon glaze for a sweet and tangy finish.

    Step 5: Serve

    • Serve the lemon-infused cream puffs immediately, or refrigerate them for up to a few hours before serving. They are best enjoyed fresh, as the puff pastry will remain crisp and the lemon cream filling will stay light and fluffy.

    Tips:

    • To make the cream puffs ahead of time, you can bake the puffs and store them in an airtight container for up to 2 days before filling them with the cream.
    • For an extra burst of lemon flavor, feel free to add a bit more lemon zest or a splash of lemon extract to the filling or glaze.

    Enjoy these zesty and delightful lemon-infused cream puffs!

  • Weight Loss Drink: Lose 20kg in a Month! Quickly Melts Belly Fat with Carrot and Lemon – No Diet or Exercise Needed!

    Weight Loss Drink: Lose 20kg in a Month! Quickly Melts Belly Fat with Carrot and Lemon – No Diet or Exercise Needed!

    If you’re looking for a natural and effective way to lose weight and melt belly fat without diet or exercise, this carrot and lemon drink could be your secret weapon! Both carrots and lemons are loaded with fat-burning properties, antioxidants, and essential nutrients that support weight loss and detoxify the body. This refreshing drink can help you shed up to 20kg in a month if used consistently.

    Why Carrot and Lemon for Weight Loss?

    Carrots are low in calories but high in fiber, which helps keep you full longer and prevents overeating. They are also rich in vitamin A, which supports the body’s fat-burning process.

    Lemons are a natural detoxifier, packed with vitamin C and antioxidants that boost metabolism, improve digestion, and help flush out toxins. The combination of these two ingredients creates a powerful, fat-burning drink.

    Ingredients:

    • 2 medium carrots (peeled and chopped)
    • 1 large lemon (juiced)
    • 1/2 inch of ginger (optional, for extra metabolism boost)
    • 1 cup of water
    • A pinch of cayenne pepper (optional, for added fat-burning properties)

    Instructions:

    Step 1: Prepare the Ingredients

    • Peel and chop the carrots into small pieces. If using ginger, peel and grate it as well.
    • Squeeze the juice of one lemon and set it aside.

    Step 2: Blend the Carrots

    • Add the chopped carrots to a blender along with 1 cup of water. Blend until smooth to create a carrot juice base.

    Step 3: Add Lemon Juice and Other Ingredients

    • Pour the fresh lemon juice into the carrot mixture and stir well.
    • If you want to boost the fat-burning potential, add a pinch of cayenne pepper or the grated ginger. These ingredients help speed up metabolism and promote faster fat loss.

    Step 4: Strain and Serve

    • If you prefer a smoother texture, strain the mixture through a fine sieve. However, keeping the fiber from the carrots will make the drink even more effective for weight loss.

    Step 5: Drink It Fresh

    • Drink this carrot and lemon weight-loss juice first thing in the morning on an empty stomach for best results. You can also have it before meals to promote fat burning throughout the day.

    How This Drink Helps with Weight Loss:

    1. Boosts Metabolism: The vitamin C in lemons helps boost metabolism and promotes fat breakdown in the body.
    2. Promotes Fat Burning: Carrots contain nutrients that help the body break down fat cells more effectively, while the fiber helps curb appetite and reduce calorie intake.
    3. Detoxifies the Body: Lemons help flush out toxins and support liver health, which is crucial for efficient fat burning.
    4. Reduces Belly Fat: This drink is particularly effective in targeting belly fat, thanks to the fat-burning properties of lemon and the fiber in carrots, which keeps you full longer and reduces cravings.
    5. Suppresses Appetite: Drinking this juice regularly can help reduce hunger pangs, making it easier to control portions and avoid unhealthy snacks.

    Tips for Best Results:

    • Drink Daily: To achieve maximum results, drink this carrot and lemon juice every day, preferably in the morning.
    • Stay Hydrated: Drink plenty of water throughout the day to stay hydrated and support the detox process.
    • Be Consistent: While this drink can help you lose weight without diet or exercise, consistency is key! Incorporating this drink into your daily routine will enhance fat-burning results.

    Conclusion: A Natural, Simple Way to Lose Weight

    This carrot and lemon weight-loss drink is a fast and easy way to melt fat, especially around the belly, without dieting or exercising. By adding this drink to your daily routine, you can lose up to 20kg in a month and improve your overall health naturally. Give it a try, and you’ll be amazed at how quickly the pounds start to melt away!

  • Easy recipe with 4 ingredients: Simple and creamy dessert

    Easy recipe with 4 ingredients: Simple and creamy dessert

    Hi everyone, today we’re going to learn how to make creamy dessert using simple ingredients. So grab your pen and paper to jot down the ingredients, then follow the complete preparation method.

    How to Make Easy recipe with 4 ingredients

    This recipe is simple to make, uses only 4 ingredients, and yields a generous amount. See below the list of all ingredients and required quantities. And then, a very complete preparation method with details of the recipe.

    Recipe Ingredients:

    • ½ cup of warm water
    • 1 cup of powdered milk
    • ½ cup of sugar
    • 1 lemon (juice and zest)

    Instructions:

    Start by adding powdered milk, sugar, and warm water to a blender. Blend everything for a few minutes or until you get a smooth and homogeneous mixture.

    Then, add the lemon juice, use a spoon to mix, and pour the mixture into a glass dish (or individual cups).

    To finish, refrigerate for about 60 minutes (to set), sprinkle lemon zest on top, and serve.

  • Homemade Salted Caramel Ice Cream ❤️

    Homemade Salted Caramel Ice Cream ❤️

    Ingredients:
    2 cups heavy cream
    1 cup whole milk
    ¾ cup caramel sauce
    1 teaspoon vanilla extract
    ½ teaspoon sea salt
    Directions:
    Whisk together cream, milk, caramel sauce, vanilla, and salt.
    Pour into an ice cream maker and churn for 25 minutes.
    Freeze for 4 hours.
    Notes:
    Use homemade caramel for a richer flavor.
    Sprinkle flaky sea salt before serving.

  • Berry Tiramisu Trifle – A Fruity Elegance in Every Bite!

    Berry Tiramisu Trifle – A Fruity Elegance in Every Bite!

    1f4cb Ingredients
    For the Cream Layer:
    ● 1 cup mascarpone cheese
    ● 1 cup heavy whipping cream
    ● ½ cup powdered sugar
    ● 1 tsp vanilla extract
    For the Berry Mixture:
    ● 2 cups mixed berries (strawberries, blueberries, raspberries)
    ● ¼ cup granulated sugar
    ● 1 tbsp lemon juice
    For the Layers:
    ● 1 package ladyfingers (or sponge cake strips)
    ● ½ cup orange juice or berry juice (for soaking)
    Optional Garnish:
    ● Extra berries
    ● Mint leaves
    ● Powdered sugar
    1f4dd Steps
    Prepare the Berry Mixture: Toss mixed berries with sugar and lemon juice in a bowl. Let sit for 10–15 minutes to release juices.
    Make the Cream Layer: Beat mascarpone, heavy cream, powdered sugar, and vanilla extract until soft peaks form.
    Assemble the Trifle:
    Dip ladyfingers briefly into orange or berry juice.
    Layer soaked ladyfingers at the bottom of a trifle dish or serving glasses.
    Add a layer of mascarpone cream, followed by a layer of the berry mixture.
    Repeat layers, finishing with cream on top.
    Chill: Refrigerate for at least 2 hours to let the flavors meld.
    Garnish and Serve: Top with extra berries, mint leaves, and a dusting of powdered sugar for a stunning finish.
    1f552 Prep Time: 20 minutes | Chill Time: 2 hours
    1f374 Servings: 6-8
    This trifle is a light, fruity, and creamy masterpiece that will have everyone coming back for seconds. Enjoy this elegant dessert! 1f353

  • Paula Deen’s “Not Yo’ Mama’s Banana Pudding”

    Paula Deen’s “Not Yo’ Mama’s Banana Pudding”

    Ingredients:

    • 2 bags Pepperidge Farm Chessmen Cookies OR 2 bags Vanilla Wafers
    • 6 to 8 bananas, sliced
    • 2 cups whole milk
    • 1 (5 oz.) box instant French Vanilla pudding
    • 1 (8 oz.) package cream cheese
    • 1 (14 oz.) can sweetened condensed milk
    • 1 (12 oz.) container frozen whipped topping thawed, or equal amount sweetened whipped cream

    Directions:

    Line the bottom of a 13×9 inch dish with 1 bag of cookies and layer bananas on top.
    Bowl 1- Combine the milk and pudding mix and blend well using a handheld electric mixer.
    Bowl 2- Combine the cream cheese and condensed milk together and mix until smooth.
    Fold the whipped topping into the cream cheese mixture.
    Add the cream cheese mixture to the pudding mixture and stir until well blended.
    Pour the mixture over the cookies and bananas and cover with the remaining cookies.
    Refrigerate until ready to serve!

  • Almond and Chocolate Chip Cake

    Almond and Chocolate Chip Cake

    Ingredients:


    For the Cake:

      • 2 eggs


      • Pinch of salt
      • 8g vanilla sugar
      • 100g sugar


      • 60ml oil
      • 70ml milk
      • 160g flour


      • 7g baking powder
      • Sliced almonds
      • Dark chocolate chips


    • Hazelnuts, chopped

    For the Chocolate Sauce:

      • 1 tablespoon sugar


      • 1 tablespoon bitter cocoa
      • 1 tablespoon corn starch
      • 250ml milk


    • 60g dark chocolate
    • 1 teaspoon butter

    For Topping:


    • Soft sugar (powdered sugar)

    Directions:

    Prepare the Cake Batter:


    1. Preheat the Oven:
      • Preheat your oven to 180°C (350°F). Grease and flour a cake pan with a diameter of 18/27 cm.
    2. Mix the Wet Ingredients:
        • In a bowl, beat the eggs with a pinch of salt, 8g of vanilla sugar, and 100g of sugar until light and fluffy.


      • Add 60ml of oil and 70ml of milk, mixing well.
    3. Combine Dry Ingredients:
        • In a separate bowl, sift together 160g of flour and 7g of baking powder.


      • Gradually add the dry ingredients to the wet mixture, stirring until well combined.
    4. Add Nuts and Chocolate:
        • Gently fold in sliced almonds, dark chocolate chips, and chopped hazelnuts.


    5. Bake the Cake:
        • Pour the batter into the prepared cake pan and bake for approximately 30 minutes or until a toothpick inserted into the center comes out clean.
        • Let the cake cool in the pan for 10 minutes, then transfer to a wire rack to cool completely.


    Prepare the Chocolate Sauce: 6. Mix Sugar, Cocoa, and Cornstarch:

      • In a small saucepan, combine 1 tablespoon of sugar, 1 tablespoon of bitter cocoa, and 1 tablespoon of corn starch.


    1. Cook with Milk:
      • Add 250ml of milk to the saucepan and cook over medium heat, stirring constantly until the mixture thickens.
    2. Add Chocolate and Butter:
        • Add 60g of dark chocolate and 1 teaspoon of butter, stirring until melted and smooth.


    Assemble the Cake: 9. Top the Cake:

      • Once the cake has cooled, pour the chocolate sauce over the top, spreading it evenly.


    1. Decorate:
      • Sprinkle with soft sugar (powdered sugar) for a decorative touch.

    Serving Suggestions:


    • Serve with a scoop of vanilla ice cream or a dollop of whipped cream.
    • Enjoy a slice with a hot cup of coffee or tea.
  • Creamy Vegetable Casserole with Yogurt Mustard Sauce

    Creamy Vegetable Casserole with Yogurt Mustard Sauce

    Ingredients

    For the Casserole:

      • 2 cups (300 g) broccoli florets, washed and chopped
      • 1 cup (150 g) cauliflower florets


      • 1 large carrot, peeled and thinly sliced
      • 1 zucchini, sliced
      • 1 red bell pepper, diced


      • 1 yellow onion, chopped
      • 2 cloves garlic, minced
      • 1 tablespoon olive oil


      • 1/2 teaspoon salt
      • 1/2 teaspoon black pepper
      • 1/2 teaspoon dried thyme

    For the Yogurt Mustard Sauce:

      • 1 cup plain Greek yogurt (or regular yogurt)
      • 2 tablespoons Dijon mustard


      • 1 tablespoon whole grain mustard
      • 1 tablespoon lemon juice
      • 1 tablespoon olive oil


    • 1 tablespoon honey or maple syrup (optional for sweetness)
    • Salt and pepper, to taste

    For the Topping:


      • 1/2 cup breadcrumbs (panko or regular)
      • 1/4 cup grated Parmesan cheese (optional)
      • 1 tablespoon olive oil or melted butter


    Directions

      1. Preheat the Oven:
        • Preheat your oven to 375°F (190°C). Grease a large casserole dish with olive oil or butter to prevent sticking.


      1. Prepare the Vegetables:
        • Wash and chop the vegetables. Heat 1 tablespoon olive oil in a large skillet over medium heat. Add the onion and garlic, and sauté for 2–3 minutes until softened and fragrant.
      2. Cook the Vegetables:
          • Add the broccoli, cauliflower, carrots, zucchini, and red bell pepper to the skillet. Season with salt, pepper, and dried thyme. Cook for 5–7 minutes, stirring occasionally, until the vegetables are just tender but still vibrant.


      3. Make the Yogurt Mustard Sauce:
        • In a small mixing bowl, whisk together the Greek yogurt, Dijon mustard, whole grain mustard, lemon juice, olive oil, and honey or maple syrup (if using). Season with salt and pepper to taste. The sauce should be smooth, creamy, and tangy.


      1. Combine and Assemble:
        • Transfer the cooked vegetables to the prepared casserole dish. Pour the yogurt mustard sauce over the vegetables and gently toss to coat evenly.
      2. Prepare the Topping:
          • In a small bowl, mix the breadcrumbs, Parmesan cheese (if using), and olive oil or melted butter. Sprinkle the mixture evenly over the top of the casserole to create a crispy crust.


      3. Bake the Casserole:
        • Bake in the preheated oven for 20–25 minutes, or until the topping is golden and crispy, and the sauce is bubbling. For a darker crust, broil for the last 2–3 minutes, watching closely to prevent burning.


    1. Serve:
      • Remove the casserole from the oven and let it cool slightly before serving. Pair with crusty bread or a light salad for a complete meal.
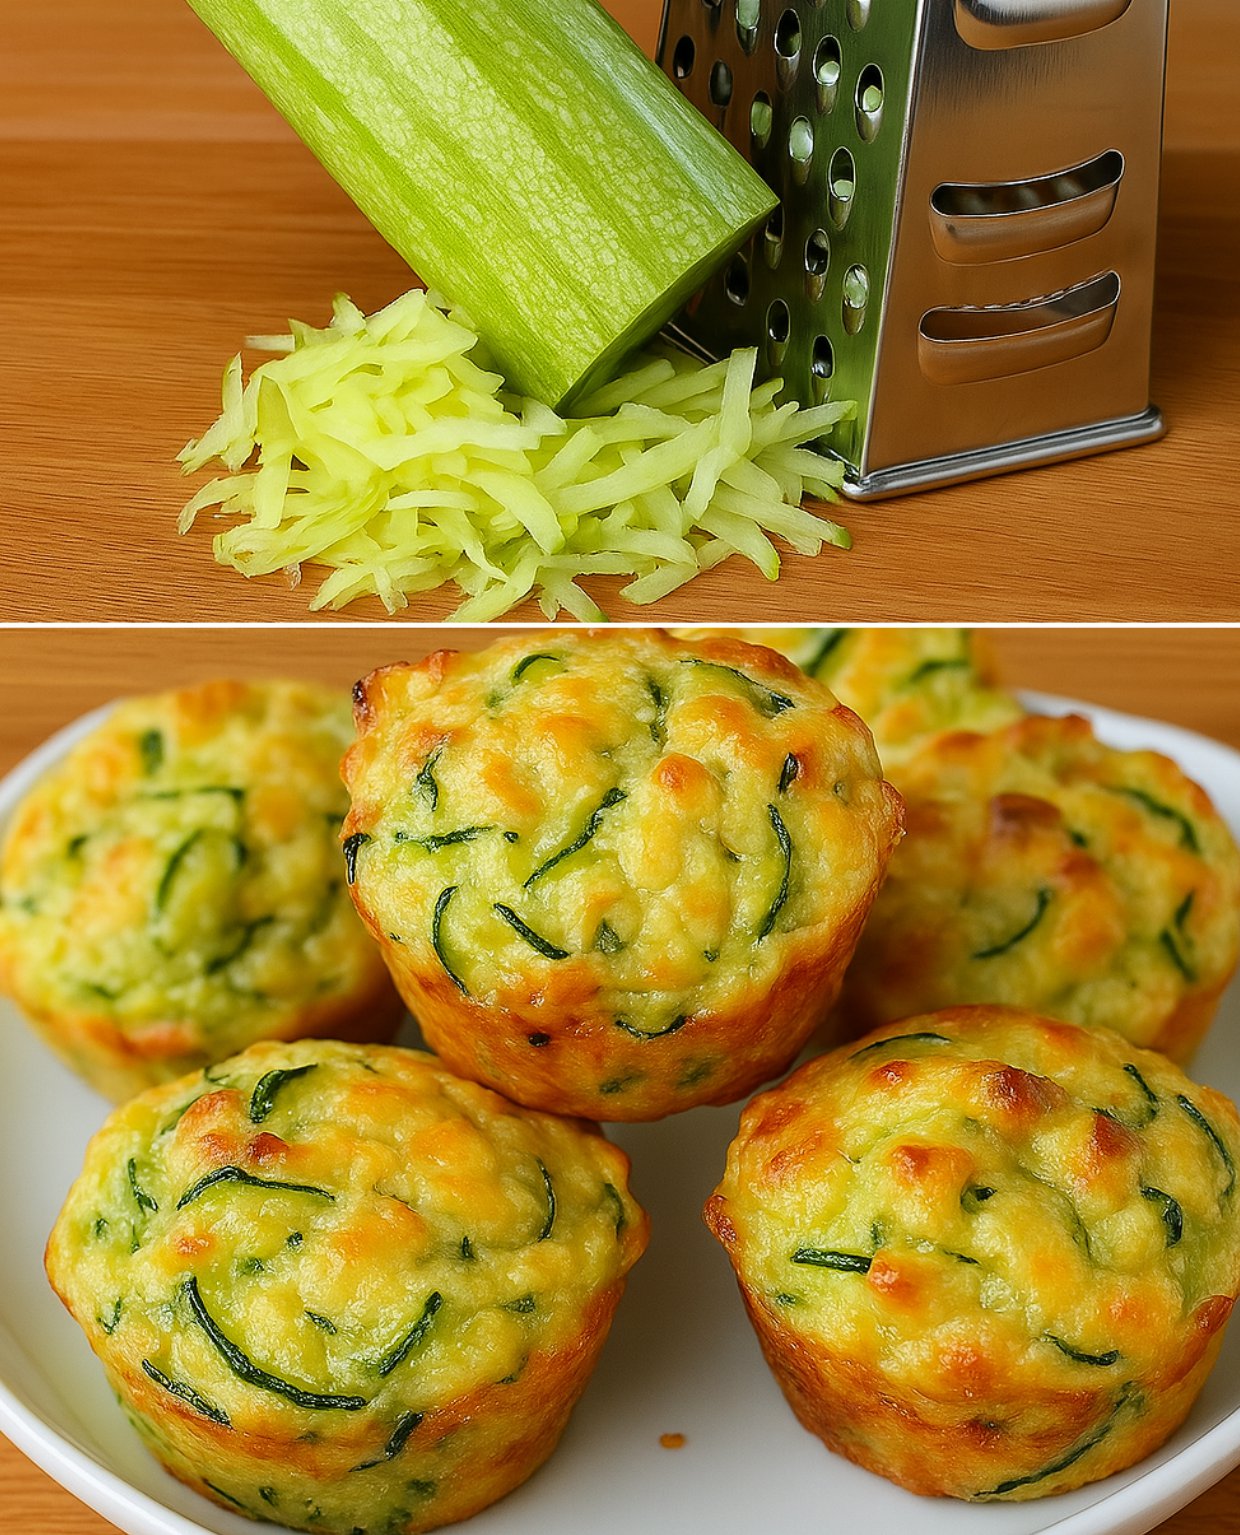
  • Zucchini and Vegetable Patties

    Zucchini and Vegetable Patties

    Ingredients

    For the Patties:

      • 1 zucchini
      • 1 teaspoon salt (for draining zucchini)
      • 2 eggs
      • 1 carrot, grated
      • 1 potato, grated
      • A handful of fresh dill, chopped
      • 100 g cheese, grated (cheddar or mozzarella works well)
      • 1 clove of garlic, minced
      • Salt, to taste
      • 1/2 teaspoon paprika
      • 1/2 teaspoon black pepper
      • 4 tablespoons oatmeal
    • 2 tablespoons flour (all-purpose or any preferred type)
    • Vegetable oil, for frying

    For the Garlic Dill Sauce:

      • 2 tablespoons sour cream
      • 1 tablespoon mayonnaise
      • A handful of fresh dill, chopped
    • 1 clove of garlic, minced

    Directions

      1. Prepare the Zucchini:
          • Grate the zucchini and sprinkle with 1 teaspoon of salt.
          • Let it sit for 15 minutes to draw out excess moisture.


        • Squeeze the zucchini well to remove as much juice as possible, using your hands or a clean cloth.
      2. Mix the Vegetables:
          • In a large bowl, add the squeezed zucchini, eggs, grated carrot, and grated potato.


        • Stir in the chopped dill, grated cheese, minced garlic, salt, paprika, and black pepper.
        • Add the oatmeal and flour, then mix until smooth and well combined.
      1. Shape the Patties:
        • Grease your hands with a little oil to prevent sticking.
        • Form the mixture into small patties, about the size of your palm.
      1. Fry the Patties:
        • Heat vegetable oil in a frying pan over medium heat.
        • Fry the patties on both sides for 3-4 minutes each, or until they are golden brown and crispy.
      1. Prepare the Garlic Dill Sauce:
        • In a small bowl, mix together sour cream, mayonnaise, chopped dill, and minced garlic.
        • Stir until well combined.
    1. Serve:
      • Serve the warm patties with the garlic dill sauce on the side. Enjoy immediately for the best taste and texture.

    Serving Suggestions

      • Serve as a side dish with grilled meats, a salad, or on their own as a light meal.
    • These patties are great when paired with fresh greens, steamed vegetables, or a bowl of soup.
    • Try them in a sandwich or wrap with lettuce, tomatoes, and your favorite sauce.

    Cooking Tips

      • Moisture Control: Be sure to drain the zucchini well to avoid soggy patties. The less moisture, the better the texture.
    • Cheese Choice: Use a cheese that melts well, like mozzarella or cheddar, to add richness and bind the patties.
    • Baking Option: For a lighter version, bake the patties at 180°C (350°F) for 15-20 minutes, flipping halfway through.

    Nutritional Benefits

      • Rich in Vegetables: Packed with zucchini, carrots, and potatoes, providing fiber, vitamins, and minerals.
    • High in Protein: Eggs and cheese contribute to the protein content, making this dish more filling.
    • Low in Carbs: Oats add a touch of whole grains, but overall, the patties are low-carb compared to traditional potato cakes.

    Dietary Information

      • Vegetarian: This recipe is perfect for vegetarians looking for a satisfying veggie dish.
    • Gluten-Free Option: Use gluten-free oats and flour to accommodate gluten-free diets.
    • Low-Sugar: Contains no added sugars, making it a healthy choice.
  • Crispy Honey Garlic Chicken

    Crispy Honey Garlic Chicken

    Ingredients:

    1 lb chicken breast or thighs, cut into bite-sized pieces
    1 cup all-purpose flour
    1/2 cup cornstarch
    2 eggs, beaten
    Oil for frying
    Honey Garlic Sauce:

    1/3 cup honey
    1/4 cup soy sauce
    2 garlic cloves, minced
    1 tbsp rice vinegar
    1 tbsp cornstarch mixed with 2 tbsp water (slurry)

    Instructions:

    Heat oil in a deep skillet or fryer to 350°F (175°C).
    Coat the chicken pieces in the flour and cornstarch mixture, then dip them into the beaten eggs, and coat again with the flour mixture.
    Fry the chicken in batches until golden brown and crispy, about 4–5 minutes per batch. Drain on a paper towel-lined plate.
    In a small saucepan, combine honey, soy sauce, garlic, and rice vinegar. Bring to a simmer over medium heat.
    Stir in the cornstarch slurry and cook until the sauce thickens, about 1–2 minutes.
    Toss the fried chicken in the honey garlic sauce until fully coated.

    Serve immediately with your favorite sides, like rice or steamed veggies.
    Enjoy !1f49e❤️

  • *Strawberry Vanilla Bean Ice Cream*

    *Strawberry Vanilla Bean Ice Cream*

    Ingredients:
    – 2 cups fresh strawberries, thoroughly washed and diced
    – 1/2 cup granulated sugar (for the strawberries)
    – 1 vanilla bean
    – 2 cups heavy cream
    – 1 cup whole milk
    – 1/2 cup granulated sugar (for the cream mixture)
    – 4 large egg yolks
    – 1 teaspoon vanilla extract
    Directions:
    1. Begin by mixing the chopped strawberries with 1/2 cup of sugar in a medium bowl. Allow this mixture to sit for approximately 30 minutes to let the strawberries release their juices, then gently mash them with a fork.
    2. While waiting for the strawberries, prepare the vanilla bean by splitting it lengthwise and scraping out the seeds.
    3. In a saucepan, combine the heavy cream, whole milk, and the seeds from the vanilla bean along with the split pod. Heat the mixture over medium heat until it begins to simmer, then remove from heat and let it steep for about 15 minutes. Make sure to discard the vanilla bean pod afterward.
    4. In a separate bowl, whisk the egg yolks together with the remaining 1/2 cup of sugar until the mixture becomes pale yellow and slightly thickens.
    5. Gradually integrate the warm cream mixture into the egg yolk mixture, whisking continuously to prevent the eggs from cooking.
    6. Return the combined mixture to the saucepan and cook over low heat, stirring constantly until the mixture thickens enough to coat the back of a spoon, being careful not to boil it.
    7. Remove the saucepan from heat and stir in the vanilla extract. Let this mixture cool to room temperature.
    8. Once cooled, fold in the mashed strawberries, ensuring they are evenly incorporated throughout the cream mixture.
    9. Pour the completed mixture into your ice cream maker and churn according to the manufacturer’s instructions until it reaches a soft-serve consistency.
    10. Transfer the ice cream to a container and freeze it for at least 4 hours for optimal texture prior to serving.
    Prep Time: 15 minutes.
    Total Time: Approximately 4 hours (plus freezing time).
    Servings: 6-8 servings.
  • Creamy Banana Pudding Cheesecake Bars

    Creamy Banana Pudding Cheesecake Bars

    Hey there, cheesecake and banana lovers!Welcome to a recipe that brings together two dessert icons into one delightful bite—our Creamy Banana Pudding Cheesecake Bars! These bars are like a hug in dessert form: creamy, dreamy, and packed with the nostalgic taste of banana pudding layered on a cheesecake foundation. Whether you’re a fan of cheesecake, banana pudding, or simply crave a unique twist on classic sweets, this is a treat you won’t want to miss. So, let’s dive into the magic of creating these Banana Pudding Cheesecake Bars that are bound to be a hit for any occasion.

    Introduction

    Imagine the smoothness of classic cheesecake meeting the rich flavor of banana pudding. Our Creamy Banana Pudding Cheesecake Bars capture the essence of a beloved Southern dessert, bringing you layers of creamy indulgence topped with iconic Nilla Wafers and fresh bananas. Cheesecake bars are perfect for portion control and make an easy yet impressive dessert for gatherings. This unique twist on banana pudding is a must-try for fans of both cheesecake and banana flavors, blending both into a dessert that’s comforting and delightfully simple to prepare.

    Ingredients for Creamy Banana Pudding Cheesecake Bars

    For this recipe, you’ll need some pantry staples and a few fresh ingredients to create this dessert sensation. Here’s everything you need:

    For the Crust:

    • 1 1/2 cups crushed Nilla Wafers – Adds the signature vanilla flavor
    • 5 tablespoons butter, melted – Helps bind the crust
    • 2 tablespoons sugar – Adds a hint of sweetness
    • Pinch of sea salt – Enhances flavors

    Filling:

    • 1 1/2 (8-oz.) blocks cream cheese, softened – Key ingredient for creaminess
    • 1/2 cup sugar – Adds sweetness to the cheesecake layer
    • 1 1/2 cups whipped topping – Lightens the texture
    • 1 (3.4-oz.) package instant banana pudding mix – Brings the banana flavor
    • 1 3/4 cups whole milk – Blends with the pudding mix to create a creamy consistency

    Topping:

    • Whipped topping – Adds a final creamy touch
    • 1/2 banana, sliced – Provides a fresh banana flavor
    • 9 Nilla Wafers – Adds a nostalgic and decorative touch

    How to Make Creamy Banana Pudding Cheesecake Bars – Step by Step

    Creating these Creamy Banana Pudding Cheesecake Bars is easy and fun! Follow these step-by-step instructions for a perfect dessert every time.

    Step 1: Prepare the Crust

    1. Crush the Nilla Wafers – You can do this in a food processor or place them in a zip-lock bag and crush them with a rolling pin.
    2. Combine Ingredients – In a medium bowl, mix the crushed Nilla Wafers with melted butter, sugar, and a pinch of sea salt.
    3. Press into Pan – Line an 8″ x 8″ pan with parchment paper and press the crust mixture firmly into an even layer at the bottom. Place the pan in the freezer while you prepare the filling to help it set.

     2: Make the Cheesecake Filling

    1. Beat the Cream Cheese – In a large bowl, use a hand or stand mixer to beat the softened cream cheese until fluffy and smooth.
    2. Add Sugar and Fold in Whipped Topping – Beat in the sugar until combined, then gently fold in the whipped topping, making the mixture lighter.

     3: Prepare the Banana Pudding Mix

    1. Combine Pudding Mix and Milk – In a separate bowl, whisk together the banana pudding mix and milk until thickened. Let it rest in the fridge for about 3 minutes for a smooth, thick consistency.

     4: Combine and Assemble

    1. Fold Pudding into Cheesecake Mixture – Once thickened, gently fold the pudding into the cream cheese mixture until fully incorporated.
    2. Pour and Smooth the Filling – Pour the filling over the prepared crust and smooth it out to create an even layer.

     5: Freeze and Finish

    1. Freeze the Bars – Place the pan in the freezer for at least 4 hours, or ideally overnight, until the bars are fully set.
    2. Add Toppings and Slice – Once set, slice into 9 bars. Top each with a dollop of whipped topping, a slice of banana, and a Nilla Wafer for the ultimate finishing touch.

    Helpful Tips for Making Creamy Banana Pudding Cheesecake Bars

    1. Use Softened Cream Cheese – Ensure the cream cheese is at room temperature to avoid lumps.
    2. Freeze for Perfect Slices – Freezing helps the bars to hold their shape and makes them easier to slice.
    3. Fold Gently – When folding in the whipped topping and pudding, be gentle to keep the mixture airy and smooth.

    Cooking Tips for the Best Creamy Banana Pudding Cheesecake Bars

    1. Quality Ingredients – Use high-quality Nilla Wafers and fresh bananas for the best flavor.
    2. Layer Carefully – Smoothing out each layer ensures even distribution and better presentation.
    3. Sturdy Crust – For a firmer crust, press the mixture down with a flat-bottomed glass.

    Serving Suggestions for Creamy Banana Pudding Cheesecake Bars

    These bars are delicious on their own but can be paired beautifully with fresh, sliced fruit on the side or a hot cup of coffee. They also work well with a light dusting of cocoa powder or drizzled caramel for added flavor.

    Nutritional Information (per serving)

    Each bar offers a balance of creaminess and flavor. Here’s the nutritional breakdown:

    Nutritional Info for Creamy Banana Pudding Cheesecake Bars:

    • Calories: 250 kcal
    • Fat: 16g
    • Carbohydrates: 23g
    • Protein: 4g

    Storage and Leftovers for Creamy Banana Pudding Cheesecake Bars

    Store any leftover bars in an airtight container in the refrigerator for up to 3 days. For longer storage, keep them in the freezer, where they can last up to 1 month. Allow frozen bars to sit at room temperature for 15 minutes before serving.

    Frequently Asked Questions (FAQs) for Creamy Banana Pudding Cheesecake Bars

    1. Can I make this recipe gluten-free?
    Yes! Substitute gluten-free vanilla wafers for a gluten-free crust.

    2. Can I use homemade whipped cream instead of whipped topping?
    Absolutely. Just make sure it’s whipped to stiff peaks for the right texture.

    3. How do I prevent my bars from becoming too soft?
    Ensure they’re frozen for at least 4 hours and keep them chilled until serving.

    4. Can I substitute other flavors of pudding?
    Of course! Vanilla or even chocolate pudding can offer a different but equally delicious twist.

    Conclusion

    We hope you’ll fall in love with these Creamy Banana Pudding Cheesecake Bars as much as we have! Try them out, share with friends, and feel free to experiment with toppings to make them your own. Don’t forget to leave a comment or share your experience!

  • Mediterranean Baked Feta Eggs ✨

    Mediterranean Baked Feta Eggs ✨

    Mediterranean Baked Feta Eggs ✨


    A flavor-packed, protein-rich breakfast with juicy tomatoes, tangy feta, and perfectly baked eggs. This dish is simple, wholesome, and brings the Mediterranean sunshine to your table!

    Ingredients:


    ✔ 2 eggs

    ✔ ¼ cup crumbled feta cheese

    ✔ ¼ cup cherry tomatoes, halved

    ✔ 1 tbsp olive oil

    ✔ ½ tsp dried oregano

    ✔ ¼ tsp paprika

    ✔ Salt & pepper to taste

    ✔ Fresh parsley for garnish (optional)

    Instructions:


    1️⃣ Preheat oven to 375°F (190°C).

    2️⃣ Drizzle olive oil in a small oven-safe dish and add halved cherry tomatoes.

    3️⃣ Season with oregano, paprika, salt, and pepper.

    4️⃣ Create two small wells in the tomatoes and crack an egg into each well.

    5️⃣ Top with crumbled feta cheese.

    6️⃣ Bake for 12-15 minutes or until the eggs reach your desired doneness.

    7️⃣ Garnish with fresh parsley and serve warm!


    ️ Enjoy with warm pita bread or crusty toast for a perfect Mediterranean breakfast!

  • Mediterranean-Style Stuffed Salmon ✨

    Mediterranean-Style Stuffed Salmon ✨

    Mediterranean-Style Stuffed Salmon ✨


    This Mediterranean-inspired stuffed salmon is bursting with sun-dried tomatoes, spinach, and feta, creating a flavor-packed, nutrient-rich dish. Perfect for an easy yet elegant dinner!

    Ingredients:


    ✔ 1 lb sockeye salmon fillet, cut into four ¼-lb fillets

    ✔ ½ cup sun-dried tomatoes, drained & chopped

    ✔ 3 cups baby spinach

    ✔ ½ cup feta cheese crumbles

    ✔ Sea salt, to taste

    ✔ 1 cup fresh basil (optional)

    ✔ 2 tsp Italian seasoning (optional)

    Instructions:


    1️⃣ Preheat oven to 350°F (175°C) and line a baking sheet with parchment paper.

    2️⃣ Heat chopped sun-dried tomatoes in a small saucepan over medium heat until they sizzle.

    3️⃣ Add spinach and cook until wilted, then remove from heat.

    4️⃣ Mix in feta cheese and a pinch of sea salt. Set aside.

    5️⃣ Slice each salmon fillet across the middle (leaving about ¼ to ½ inch attached) to create a pocket.

    6️⃣ Brush salmon with avocado oil & sprinkle with sea salt.

    7️⃣ Place fillets on the prepared baking sheet and stuff with the filling.

    8️⃣ Bake for 25-30 minutes until salmon is cooked through.

    9️⃣ Garnish with fresh basil (if using) & serve warm!

    ️ Pair with a side of roasted vegetables or a quinoa salad for the ultimate Mediterranean meal! ✨

  • Garlic Butter Steak

    Garlic Butter Steak

    Garlic Butter Steak with Brussels Sprouts and Butternut Squash (or Sweet Potatoes or Yams). This dish is packed with flavor and perfect for a hearty meal!

    Ingredients:

    For the Garlic Butter Steak:

    • 2 ribeye steaks (or any steak of your choice)
    • 2 tablespoons olive oil
    • 2 tablespoons butter (or use dairy-free butter if needed)
    • 4 cloves garlic, minced
    • 1 tablespoon fresh thyme (or 1 teaspoon dried)
    • 1 tablespoon fresh rosemary (or 1 teaspoon dried)
    • Salt and pepper, to taste
    • 1 tablespoon fresh parsley (optional, for garnish)

    For the Vegetables:

    • 1 lb Brussels sprouts, trimmed and halved
    • 2 cups butternut squash, peeled and cubed (or sweet potatoes or yams, peeled and cubed)
    • 2 tablespoons olive oil
    • 1 teaspoon garlic powder
    • 1 teaspoon onion powder
    • 1/2 teaspoon smoked paprika (optional, for extra flavor)
    • Salt and pepper, to taste
    • Fresh parsley, for garnish (optional)

    Instructions:

    1. Prepare the Vegetables:

    Preheat your oven to 400°F (200°C).

    In a large mixing bowl, toss the Brussels sprouts and butternut squash (or sweet potatoes/yams) with 2 tablespoons olive oil, garlic powder, onion powder, smoked paprika, salt, and pepper.

    Spread the vegetables out in a single layer on a baking sheet lined with parchment paper.

    Roast in the preheated oven for 20-25 minutes, or until the Brussels sprouts are crispy and golden and the butternut squash (or sweet potatoes/yams) are tender, tossing halfway through for even cooking.

    2. Cook the Steak:

    While the vegetables are roasting, season the steaks generously with salt and pepper on both sides.

    In a large skillet, heat 2 tablespoons olive oil over medium-high heat. Once the oil is hot and shimmering, add the steaks.

    Sear the steaks for 3-4 minutes per side (for medium-rare), or longer depending on your preferred level of doneness.

    When the steaks are almost done, add 2 tablespoons butter, minced garlic, thyme, and rosemary to the skillet. Spoon the melted garlic butter over the steaks as they finish cooking for extra flavor.

    Remove the steaks from the skillet and let them rest for about 5 minutes before slicing.

    3. Serve:

    Once the vegetables are roasted, remove them from the oven.

    Plate the roasted Brussels sprouts and butternut squash (or sweet potatoes/yams) alongside the steak.

    Slice the steak against the grain and serve on top of the vegetables.

    Garnish with fresh parsley and drizzle any remaining garlic butter from the pan over the steak and veggies for added flavor.