Category: Recipes

  • Healthy Oatmeal Cocoa cups

    Healthy Oatmeal Cocoa cups

    Healthy Oatmeal Cocoa cups

    Table of Contents

    Ingredients:

      • 1 cup (100 g) oatmeal
      • 1 cup (240 ml) milk of your choice
      • 2 eggs
      • 1/3 cup (100 g) Greek yogurt
      • 1 tablespoon stevia or any other sweetener of your choice
      • 1 teaspoon baking powder
    • A pinch of salt
    • 1 tablespoon unsweetened cocoa powder

    Directions:

      1. Preheat the Oven:
        • Preheat your oven to 360°F (180°C).
      2. Prepare the Oat Mixture:
          • In a bowl, combine 1 cup of oatmeal and 1 cup of milk. Let it sit for a few minutes to allow the oats to soak.


      3. Combine Ingredients:
        • Add 2 eggs, 1/3 cup of Greek yogurt, 1 tablespoon of stevia, 1 teaspoon of baking powder, a pinch of salt, and 1 tablespoon of unsweetened cocoa powder to the oat mixture. Mix well until all ingredients are combined.
      1. Pour into Baking Dish:
        • Pour the mixture into greased muffin cups or a baking dish.
      2. Bake:
          • Bake in the preheated oven for 20-25 minutes, until the tops are set and a toothpick inserted into the center comes out clean.


      3. Cool and Serve:
        • Allow to cool slightly before serving.

    Serving Suggestions:

      • Serve these muffins warm with a dollop of Greek yogurt or a drizzle of honey.
      • Pair with a cup of coffee or tea for a delightful breakfast or snack.
    • Top with fresh berries or a sprinkle of nuts for added texture and flavor.

    Cooking Tips:

      • Ensure the oats are fully soaked in the milk for a moist and tender muffin texture.
    • Use silicone muffin cups or line your baking dish with parchment paper to prevent sticking.
    • Experiment with add-ins like chocolate chips, nuts, or dried fruits for a personalized touch.

    Nutritional Benefits:

      • High in protein from the eggs and Greek yogurt, supporting muscle repair and growth.
      • Rich in fiber from the oats, promoting healthy digestion.
      • Low in added sugars, thanks to the use of stevia as a sweetener.

    Dietary Information:

      • This recipe is vegetarian.
      • Can be made dairy-free by using a plant-based milk and dairy-free yogurt.

    Storage:

    • Store in an airtight container at room temperature for up to 3 days.
    • For longer storage, refrigerate for up to a week or freeze for up to a month. Thaw before serving.
  • Juicy Chocolate Cake

    Juicy Chocolate Cake

    Juicy Chocolate Cake

    Table of Contents

    Ingredients

    For the Cake:

      • 2 eggs
      • 160 grams of sugar (8 tablespoons)
      • 10 grams of vanilla sugar (1.5 teaspoons)
      • 2 tablespoons cocoa powder
      • 160 ml milk (10 tablespoons)
      • 100 ml vegetable oil (5.6 tablespoons)
      • A pinch of salt
      • 170 grams of flour (6 tablespoons)
      • 1 teaspoon baking powder
      • Chocolate chips (optional, for garnish)

    For the Finishing Touch:

      • Powdered sugar (for dusting)
      • Butter or vegetable oil (for greasing the dish)

    Directions

    1. Prepare the Wet Ingredients:

      • Combine Milk Mixture: In a bowl, combine 160 ml of milk, 60 grams of sugar (3 tablespoons), 10 grams of vanilla sugar (1.5 teaspoons), and 2 tablespoons of cocoa powder. Mix well until smooth.
      • Beat the Eggs: In a separate bowl, beat 2 eggs with a pinch of salt and 100 grams of sugar (5 tablespoons) for 2-3 minutes until the mixture is light and fluffy.
    • Combine Wet Mixtures: Gradually add 100 ml of vegetable oil (5.6 tablespoons) to the beaten egg mixture and mix until combined. Add the milk and cocoa mixture to the egg mixture and stir until well combined.

    2. Mix the Dry Ingredients:

      • Prepare Dry Mix: In another bowl, sift together 170 grams of flour (6 tablespoons) and 1 teaspoon of baking powder.
    • Combine All Ingredients: Gradually add the dry ingredients to the wet mixture, stirring gently until just combined. Be careful not to overmix.

    3. Prepare the Baking Dish:

      • Preheat and Grease: Preheat your oven to 180°C (360°F). Grease a 24 cm (9 inch) casserole dish with butter or vegetable oil.
    See also  Quick and Easy No-Oven Yogurt Pancakes

    4. Bake the Cake:

      • Pour and Garnish: Pour the batter into the prepared dish. Garnish with chocolate chips if desired.
      • Bake: Bake in the preheated oven for 40 minutes, or until a toothpick inserted into the center comes out clean.
    • Cool and Dust: Remove the cake from the oven and let it cool slightly. Sprinkle with powdered sugar before serving.

    Serving Suggestions

    • This Juicy Chocolate Cake is perfect on its own or served with a dollop of whipped cream or a scoop of vanilla ice cream. It’s an excellent dessert for any occasion.

    Cooking Tips

      • Ensure all ingredients are at room temperature for the best results.
    • Be careful not to overmix the batter to keep the cake light and airy.

    Nutritional Benefits

    • This recipe provides a delightful treat that balances the richness of chocolate with a light, airy texture. Enjoy it in moderation as part of a balanced diet.

    Dietary Information

      • Vegetarian: Yes
    • Gluten-Free: No (contains flour)
    • Dairy-Free: No (contains milk; can be substituted with plant-based milk for a dairy-free option)

    Storage Tips

      • Store any leftover cake in an airtight container at room temperature for up to 2 days or in the refrigerator for up to 5 days. Reheat gently before serving if desired.

    Why You’ll Love This Recipe

    • This Juicy Chocolate Cake is easy to make, deliciously moist, and has a perfect balance of flavors. It’s a treat that will delight both kids and adults alike.
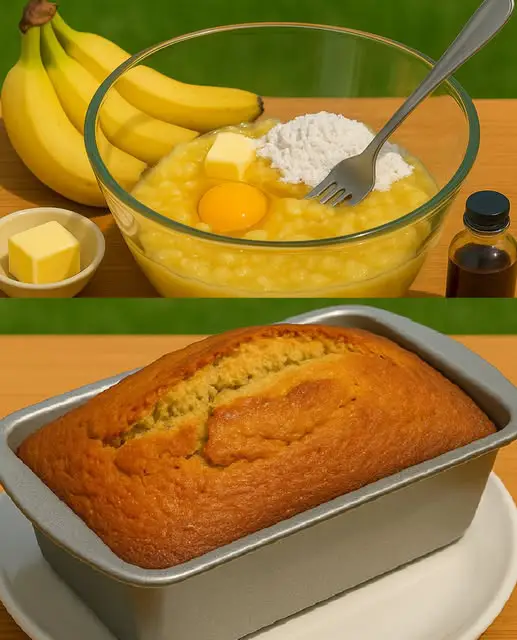
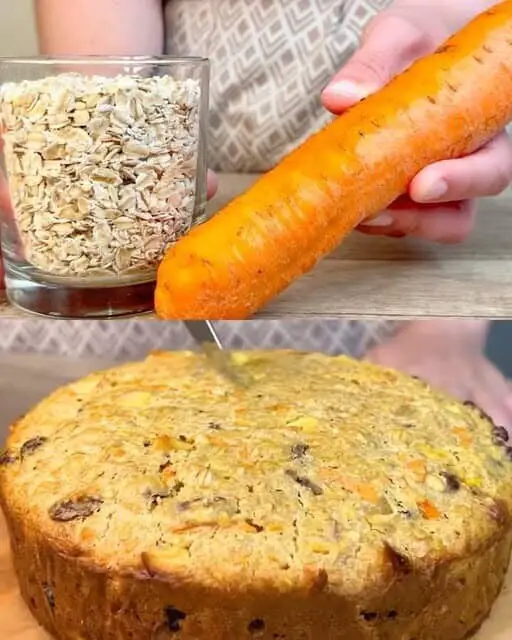
  • Oatmeal Banana Breakfast Bake

    Oatmeal Banana Breakfast Bake

    Oatmeal Banana Breakfast Bake

    Table of Contents

    Ingredients:

      • 1 cup oatmeal
      • 150 ml milk
      • 2 bananas, mashed
      • 2 eggs, beaten (wash eggs before using)
      • A pinch of vanillin
      • 50g cranberries
      • 50g dried apricots, chopped
      • 30g almond flakes
      • 1 teaspoon baking powder
      • Vegetable oil (for greasing)

    Directions:

    1. Prepare the Oatmeal Mixture:

    • In a bowl, mix the oatmeal and milk. Let it stand for 10 minutes so the oats can absorb the milk and soften.

    2. Combine Ingredients:

    • Mash the bananas and add them to the oatmeal mixture.
    • Add the beaten eggs, vanillin, cranberries, chopped dried apricots, almond flakes, and baking powder. Mix until all ingredients are well combined.

    3. Prepare the Baking Pan:

    • Preheat the oven to 180°C (360°F).
    • Line a baking pan with baking paper and grease it lightly with vegetable oil to prevent sticking.

    4. Bake the Mixture:

    • Pour the oatmeal mixture into the prepared baking pan and spread it evenly.
    • Bake for 40 minutes or until the top is golden brown and a toothpick inserted into the center comes out clean.

    5. Serve:

    • Allow the bake to cool slightly before slicing.
    • Serve warm or at room temperature.

    Serving Suggestions:

      • Enjoy with a dollop of Greek yogurt or a drizzle of honey.
    • Pair with a fresh fruit salad for a wholesome breakfast.

    Cooking Tips:

      • Ensure the oats are well mixed with the milk and have time to soften.
      • Feel free to substitute the dried apricots and cranberries with other dried fruits like raisins or dates.
    See also  Grilled Chicken Margherita the flavors of Italy

    Nutritional Benefits:

      • Oats: High in fiber to aid digestion and keep you feeling full.
      • Bananas: Packed with potassium and essential vitamins.
      • Almond Flakes: Provide healthy fats and a satisfying crunch.

    Dietary Information:

      • Vegetarian: Yes
      • Gluten-Free: Use gluten-free oats
      • Nut-Free: Omit the almond flakes or replace them with sunflower seeds

    Storage:

    • Store leftovers in an airtight container in the refrigerator for up to 3 days.
    • Reheat slices in the microwave for a quick breakfast option.

    Why You’ll Love This Recipe:

      • Simple to prepare, perfect for meal prepping.
    • Customizable with your choice of dried fruits and nuts.
    • A delightful combination of hearty oats and sweet bananas that’s both filling and delicious.
  • Embrace the Art of Hand-Rolled Crispy Pastries: A Timeless Recipe

    Embrace the Art of Hand-Rolled Crispy Pastries: A Timeless Recipe

    Embrace the Art of Hand-Rolled Crispy Pastries

    Table of Contents

    Have you ever craved a crispy, golden pastry that melts in your mouth with each bite? Join me in uncovering the magic of hand-rolled crispy pastries, a culinary adventure that combines simplicity with irresistible flavor.

    Ingredients

    Gather these simple yet essential ingredients to embark on your pastry-making journey:

    • 2 cups of water
    • 2 eggs
    • 1 egg yolk for spreading
    • 1 teaspoon of salt
    • 5.5 teaspoons of flour
    • 125 grams of cow butter or margarine
    • 200 grams of cow’s cheese

    Mixing the Dough

    1. In a bowl, combine the water and eggs, then gradually add the sifted flour and salt. Mix until a cohesive dough forms. Knead by hand until the dough becomes smooth and no longer sticks to your hands or the bowl.
    2. Divide the dough into two equal parts and roll each into thin crusts. Spread softened butter or margarine evenly over the surface, then fold the dough like an envelope. Repeat the folding process, ensuring to butter between each fold, until you achieve a compact rectangle. Refrigerate the dough for an hour.

    Preparing the Filling

    Roll out the dough into a large rectangle and cut into squares. Crumble the cheese and place it in the center of each square.

    Assembly
    • Enclose the cheese with the dough squares, pressing firmly to seal the edges. Arrange the pastries on a baking dish lined with parchment paper.
    Baking
    • Beat the egg yolk and brush it over each pastry for a golden finish. Bake in a preheated oven at 200 degrees Celsius for 20-25 minutes or until they turn golden brown.
    See also  The Secret to My Grandmother’s Longevity: Healthy Lentil Bread Recipe
    Serving
    • Serve the crispy pastries warm, allowing the irresistible aroma to tantalize your senses. Pair with your favorite beverage and enjoy every crispy, cheesy bite.
    Conclusion
    • Hand-rolled crispy pastries are more than just a recipe; they’re a testament to tradition, craftsmanship, and the joy of savoring simple pleasures. Embrace the art of pastry-making and delight in the satisfaction of creating something truly special.
  • Gooey Reese’s Cheesecake Cookies

    Gooey Reese’s Cheesecake Cookies

    Ingredients:
    1 1/2 cups all-purpose flour
    1/2 tsp baking soda
    1/4 tsp salt
    1/2 cup unsalted butter, softened
    8 oz cream cheese, softened
    3/4 cup granulated sugar
    1/2 cup brown sugar, packed
    1 large egg
    1 tsp vanilla extract
    1 cup mini Reese’s Peanut Butter Cups, chopped
    1/2 cup white chocolate chips
    1/4 cup powdered sugar (for dusting, optional)
    Directions:
    Preheat your oven to 350°F (175°C). Line a baking sheet with parchment paper or a silicone mat.
    In a medium bowl, whisk together the flour, baking soda, and salt. Set aside.
    In a large mixing bowl, beat the softened butter and cream cheese together until smooth and creamy.
    Add the granulated sugar and brown sugar to the mixture, and beat until fluffy, about 2-3 minutes.
    Mix in the egg and vanilla extract, and beat until well combined.
    Gradually add the dry ingredients to the wet ingredients, mixing just until incorporated. Be careful not to overmix.
    Gently fold in the chopped Reese’s Peanut Butter Cups and white chocolate chips until evenly distributed.
    Use a cookie scoop or tablespoon to drop dough onto the prepared baking sheet, spacing the cookies about 2 inches apart.
    Bake for 10-12 minutes, or until the edges are golden but the centers are still soft.
    Let the cookies cool on the baking sheet for 5 minutes before transferring them to a wire rack to cool completely.
    If desired, dust the cooled cookies with powdered sugar for an extra touch of sweetness.
  • CREAM CHEESE SQUARES

    CREAM CHEESE SQUARES

    These cream cheese bars are always a hit in my house! They are easy to make and always come out perfect.

    These cream cheese squares are the perfect after dinner snack or even used as a dessert. They are so easy to make, have just the right amount of sweetness and are so delicious.

    Here’s a quick and easy recipe that everyone will love. These cream cheese bars are so rich and sweet that everyone will want more.

    Ingredients
    One box of yellow cake mix.
    2 large eggs, beaten.
    1/2 cup butter, softened.

    4 cups powdered sugar.
    8 oz box softened cream cheese.
    1 teaspoon vanilla extract.

    How to Make Cream Cheese Squares
    Increase the oven temperature to 350 degrees F.
    Mix together the cake mixture, eggs, and butter until evenly distributed.
    Make a cake layer by pressing the cake batter into a greased 9×13 inch pan.

    Combine the powdered sugar, cream cheese, and vanilla extract in a bowl and mix until creamy and smooth.
    Spread the cream cheese and frosting on top of the cake mixture.
    Place in the oven and bake for 35 minutes. The next step is to let it cool completely before cutting into squares.

  • Air Fryer Chicken Rolls

    Air Fryer Chicken Rolls

    INGREDIENTS
    Serves 4
    500 g sliced ​​chicken breast
    150 g cooked ham
    150 g diced scamorza cheese breadcrumbs
    to taste
    1 lemon
    bay leaves to taste
    extra virgin olive oil to taste
    pepper to
    taste fine salt to taste
    PREPARATION

    PREPARATION
    1-Take a slice of chicken breast and add salt and pepper to taste.

    2-Place a slice of cooked ham and a piece of scamorza on top. Roll up and tighten well to close the roll.

    3-We proceed in the same way to form all the other rolls.

    4-Pour a little olive oil on a plate, coat each roll in it and then coat them in breadcrumbs on all sides.
    5-Cut the lemon into thin slices, then arrange all the rolls in the air fryer basket, alternating them with lemon slices and bay leaves.

    Insert the basket and cook at 180 °C for 20 minutes.

    6-We place our rolls on a nice serving dish and, if we like, we decorate with some bay leaves.

  • ❗️Add This to Yogurt – I Lost 10 kg. I Haven’t Eaten Sugar for a Year: Sesame Seeds, Chia Seeds, Flax Seeds

    ❗️Add This to Yogurt – I Lost 10 kg. I Haven’t Eaten Sugar for a Year: Sesame Seeds, Chia Seeds, Flax Seeds

    If you’re looking for a natural and effective way to boost weight loss and improve your overall health, this simple yogurt mix is a game-changer! By adding sesame seeds, chia seeds, and flax seeds to your yogurt, you can create a nutritious, filling meal that helps curb cravings, provides essential nutrients, and supports healthy weight loss. Here’s how this seed combination can help you lose weight, just like I did when I lost 10 kg and cut out sugar for an entire year.

    Why These Seeds Are So Effective for Weight Loss
    1. Sesame Seeds:

    Rich in Fiber: Sesame seeds are packed with dietary fiber, which helps regulate digestion and keeps you feeling full longer, reducing the chances of overeating.

    Boosts Metabolism: The healthy fats and protein in sesame seeds boost your metabolism, helping your body burn calories more efficiently.

    Nutrient-Dense: Sesame seeds are a great source of vitamins and minerals, including calcium, magnesium, and iron, which support overall health and energy levels during weight loss.

    2. Chia Seeds:

    High in Omega-3 Fatty Acids: Chia seeds are rich in omega-3 fatty acids, which reduce inflammation and support fat metabolism.

    Super Hydrating: Chia seeds absorb up to 12 times their weight in water, forming a gel-like substance that helps you feel full and hydrated, reducing hunger pangs.

    Low in Calories, High in Nutrients: These tiny seeds are low in calories but high in essential nutrients like fiber, protein, and antioxidants, making them an ideal addition to any weight loss plan.

    3. Flax Seeds:

    Rich in Fiber and Omega-3s: Flax seeds are another fantastic source of fiber and omega-3 fatty acids, both of which are essential for healthy digestion and fat loss.

    Regulates Blood Sugar: Flax seeds help stabilize blood sugar levels, reducing sugar cravings and preventing insulin spikes that lead to fat storage.

    Promotes Digestive Health: The fiber in flax seeds supports gut health, ensuring that your digestive system works efficiently to eliminate waste and toxins.

    How to Prepare the Seed-Infused Yogurt for Weight Loss
    This easy-to-make seed-infused yogurt is perfect for breakfast, a snack, or even dessert! Here’s how you can prepare it:

    Ingredients:

    1 cup of plain Greek yogurt (or any unsweetened yogurt of your choice)

    1 tablespoon of sesame seeds

    1 tablespoon of chia seeds

    1 tablespoon of flax seeds (ground for better absorption)

    A pinch of cinnamon (optional for added flavor)

    Fresh fruit like berries (optional for sweetness and added fiber)

    Instructions:
    Prepare the Yogurt Base:

    In a bowl, add 1 cup of plain Greek yogurt. Greek yogurt is high in protein, which helps keep you full and supports muscle health during weight loss.

    Add the Seeds:

    Add 1 tablespoon of sesame seeds, 1 tablespoon of chia seeds, and 1 tablespoon of ground flax seeds to the yogurt. You can grind the flax seeds using a coffee grinder for better nutrient absorption.

    Stir the mixture well to evenly distribute the seeds.

    Optional Add-Ins:

    For added flavor, sprinkle a pinch of cinnamon over the yogurt. You can also add a handful of fresh berries like blueberries or strawberries for natural sweetness and extra fiber.

    Let It Sit (Optional):

    If you want a thicker, more pudding-like texture, let the yogurt sit for about 10-15 minutes. This allows the chia seeds to absorb the liquid and form a gel-like consistency.

    Enjoy!

    Eat this yogurt mixture for breakfast or as a snack. It’s filling, nutrient-dense, and will help curb your cravings throughout the day.

    How This Yogurt Mix Helps with Weight Loss
    1. Curbs Cravings and Keeps You Full:
    The combination of fiber, healthy fats, and protein from the seeds and yogurt helps keep you full for longer, reducing hunger and preventing snacking on unhealthy foods.

    2. Boosts Metabolism and Fat Burn:
    The omega-3 fatty acids in chia and flax seeds, along with the healthy fats in sesame seeds, help boost your metabolism, allowing your body to burn more fat even at rest.

    3. Stabilizes Blood Sugar Levels:
    By regulating blood sugar levels, this yogurt mix prevents insulin spikes and sugar cravings, making it easier to avoid high-sugar, high-calorie foods.

    4. Supports Gut Health:
    The high fiber content in the seeds promotes healthy digestion and gut health, which is essential for effective weight loss and overall wellness.

    5. Provides Essential Nutrients:
    This yogurt mix is packed with nutrients like calcium, magnesium, protein, and omega-3s, ensuring that your body gets the essential vitamins and minerals it needs while you’re losing weight.

    Additional Tips for Maximum Results
    Avoid Sugar: As I did, cutting out sugar from your diet can dramatically boost your weight loss results. Stick to natural sweeteners like fruits or a pinch of stevia if needed.

    Stay Active: Combine this nutritious yogurt mix with regular physical activity to burn more calories and improve your fitness.

    Stay Consistent: Eat this yogurt mix consistently, whether as breakfast or a healthy snack, to keep your energy levels steady and support your weight loss journey.

    Conclusion
    By adding sesame seeds, chia seeds, and flax seeds to your yogurt, you can create a delicious, filling, and nutrient-packed meal that helps you lose weight naturally. This powerful combination of seeds not only helps curb cravings but also boosts metabolism, supports digestion, and stabilizes blood sugar levels—all essential factors for successful weight loss. Try incorporating this seed-infused yogurt into your daily routine and watch the weight melt away, just like I did!


  • Potato Fritters

    Potato Fritters

    Potato fritters are a simple but rich culinary experience, perfectly combining the crunchy exterior and the soft interior. This recipe, with its creamy mozzarella cheese center, promises to be an essential delight for all lovers of gourmet and authentic cuisine. Whether for a friendly aperitif, a family meal, or even for a little solitary pleasure, these fritters have it all!
    The art of making potato fritters is all about balancing flavors and mastering texture. Mashed potatoes form the base of this recipe, blending harmoniously with the refined flavors of Parmesan and nutmeg, and the fresh aroma of chopped parsley. Next comes the crispy coating of eggs and breadcrumbs, which adds a touch of crunch and goldenness to the dish.
    But the real treasure of this recipe is inside each doughnut: a generous heart of mozzarella cheese that melts deliciously when cooked. This creates an incomparable taste sensation, a blend of textures and flavors that will delight the most demanding palates. It is this fusion of the crunchy exterior and the melting interior that makes potato doughnuts such a beloved culinary specialty.
    Making this recipe is an exciting journey through textures and flavors. Every step, from making the mash to baking the doughnuts, is a rewarding culinary adventure. And the moment you bite into a warm doughnut, feeling the mozzarella cheese stretch into delicious strands, you’ll understand why this recipe is so special.
    So, we invite you to discover and enjoy this exceptional recipe for potato fritters. Follow each step carefully and dive into the wonderful world of crispy and melting delights. It is a promise of gastronomic pleasure that will, for sure, awaken your senses and delight your guests. So, put on your aprons and get ready to cook and enjoy unforgettable potato fritters!

    Ingredients :
    1 kg boiled potatoes
    2 egg yolks
    ½ teaspoon nutmeg
    Salt and pepper to taste
    100 g grated parmesan
    3 tablespoons chopped parsley
    2 eggs
    Breadcrumbs (amount needed to coat)
    1 block of mozzarella cheese
    Preparation :
    To continue reading, scroll down and click Next
    Preparation of Potatoes :
    Peel and mash the boiled potatoes until smooth.
    Mixing the Puree :
    In a bowl, mix the mashed potatoes with the egg yolks, grated Parmesan, chopped parsley, nutmeg, salt and pepper. Mix well until you get a smooth dough.

    Preparation of the Cheese :
    Cut the block of mozzarella into rectangles.
    Formation of Donuts :
    Take a few spoonfuls of mashed potatoes and form a patty. Place a rectangle of cheese in the center of the patty and wrap it completely with the mashed potatoes, forming a doughnut.
    Coating the Donuts :
    Beat the remaining 2 eggs in a bowl.
    Dip each donut in beaten egg, then coat in breadcrumbs.
    Cooking :
    Heat oil in a skillet over medium heat.
    Fry the donuts for 6-7 minutes or until evenly golden brown, turning occasionally for even cooking.
    Service :
    Drain the donuts on paper towels and serve hot.
    Advice :
    These donuts are ideal served with tomato sauce or garlic sauce.
    Serve them warm to enjoy the soft cheese inside.


  • Better than meat: Why didn’t I know about this chickpeas recipe?

    Better than meat: Why didn’t I know about this chickpeas recipe?

    Have you ever wondered about plant-based cooking and been tempted to learn more but not sure where to start? Now, your wanderings come to an end and a delectable journey into the core of vegan cooking begins today. Let’s explore a chickpea recipe that is so delicious it will likely cause even the most ardent meat fans to second-guess themselves. This is more than simply food—it’s a revelation that chickpeas may actually taste better than meat, with incredibly satisfying outcomes.

    Why are chickpeas used? Garbanzo beans, another name for chickpeas, are a nutritional powerhouse. Properly cooked, they have a meaty texture and are rich in protein, fiber, and numerous vitamins and minerals. Beyond their nutritional advantages, chickpeas can be used to create a wide variety of meals that surprise, delight, and comfort.

    The Recipe: Get Ready for a Culinary Journey: Imagine a dish that mixes a symphony of tastes meant to entice your taste buds with the robust, fulfilling essence of chickpeas. Here’s how to turn your kitchen into such a work of art:

    Ingredients

    2 cups of cooked chickpeas (canned is fine, but rinse them well)
    1 large onion, finely chopped
    2 cloves of garlic, minced

    2 teaspoons of ground cumin
    1 teaspoon of smoked paprika
    Salt and pepper to taste
    Olive oil for sautéing
    Fresh herbs for garnish (such as parsley or cilantro)

    Preparation

    Sauté the Base: In a large skillet, heat a splash of olive oil over medium heat. Add the chopped onion and garlic, sautéing until they become translucent and fragrant.
    Spice it Up: Stir in the ground cumin and smoked paprika, cooking for another minute to release their flavors.
    Chickpeas Unleashed: Add the chickpeas to the skillet. Toss them well to ensure they’re fully coated in the spice mix. Season with salt and pepper. Cook for 5-10 minutes, or until the chickpeas are golden and slightly crispy on the outside.

    Garnish and Serve: Finish the dish with a sprinkle of fresh herbs. Serve warm as a robust main course or a hearty side dish.
    Going Beyond the Recipe: This dish made with chickpeas is not simply a meal; it’s a starting point for discovering the varied and rich realm of plant-based nutrition. It shows that you can make meals that are good for the environment and your body with just a few basic items and a little imagination. So why not explore the wonderful world of chickpeas and uncover a plethora of culinary opportunities? It’s time to get cooking and quit speculating. Accept this wonderful dish and allow your taste buds to go on an exploration. Cheers to discovering happiness in the ease of plant-based cuisine and all of its hidden gems!

  • Creamy chocolate and biscuit cake

    Creamy chocolate and biscuit cake

    Ingredients

    200 g biscuits (Petit Beurre or speculoos type)
    250 ml liquid cream
    200 g dark chocolate
    250 g mascarpone
    50 g sugar
    Crumbled biscuits for decoration
    Preparation

    Preparation

    Prepare the base: Crumble the biscuits and line the bottom of a baking dish.
    Mascarpone cream: Mix the mascarpone with the sugar, then spread a layer on the biscuits.
    Chocolate ganache: Melt the chocolate with the liquid cream, mix well, then pour over the mascarpone layer.
    Leave to rest in the refrigerator for at least 2 hours.
    Personal touch: Sprinkle with crushed biscuits mixed with a pinch of cinnamon for a delicate aroma.

  • classic vanilla ice cream:

    classic vanilla ice cream:

    classic vanilla ice cream:
    Ingredients:
    – 2 cups heavy cream
    – 1 cup whole milk
    – 1/2 cup granulated sugar
    – 1 tsp pure vanilla extract
    Instructions:
    1. In a medium saucepan, combine the heavy cream, whole milk, and granulated sugar. Heat over medium heat, stirring occasionally, until the sugar has dissolved and the mixture is hot but not boiling (about 170°F to 180°F).
    2. Remove from heat and stir in the vanilla extract.
    3. Allow the mixture to cool to room temperature, then cover and refrigerate for at least 2 hours or overnight.

    4. Once chilled, pour the mixture into an ice cream maker and churn according to the manufacturer’s instructions.
    5. Once the ice cream is churned, transfer it to an airtight container and place it in the freezer to harden for at least 2 hours.
    6. Enjoy your delicious homemade vanilla ice cream!
    Note: If you don’t have an ice cream maker, you can also place the chilled mixture in a 9×13 inch baking dish and freeze for about 2 hours, stirring every 30 minutes until the desired consistency is reached.

  • Homemade Popsicle Recipe With 4 Ingredients And Very Easy To Make

    Homemade Popsicle Recipe With 4 Ingredients And Very Easy To Make

    Hi everyone, today we’re going to learn how to make Homemade Popsicle using simple ingredients. So grab your pen and paper to jot down the ingredients, then follow the complete preparation method.

    How to Make Homemade Popsicle

    Easy and Quick Homemade Popsicle. See below the list of all ingredients and required quantities. And then, a very complete preparation method with details of the recipe.

    Recipe Ingredients:

    • 200 grams/ 7 ounces of condensed milk
    • 200 grams/ 7 ounces of sour cream
    • ½ cup of water (tea)
    • ½ cup of powdered milk (tea)

    Preparation:

    First, add all the ingredients to the blender. Blend well until you get a very homogeneous mixture.

    Pour the mixture into popsicle molds. Freeze for about 8 hours until it gains a solid consistency.

    Finally, sprinkle powdered milk on top and then you can serve.

  • Sugar-Free Chocolate Coconut Flour Brownies

    Sugar-Free Chocolate Coconut Flour Brownies

    Sugar-Free Chocolate Coconut Flour Brownies

    Ingredients:

    • 2 eggs
    • 1/4 cup (35 g) stevia powder
    • 1 tsp vanilla extract
    • 4.2 oz (120 g) sugar-free chocolate (about 3/4 cup chopped)
    • 2.8 oz (80 g) butter (about 1/3 cup)
    • 1/3 cup (35 g) coconut flour
    • ✨ 1/2 tsp baking powder

    Directions:


    1️⃣ Preheat & Prepare:


    Preheat your oven to 180°C (360°F).


    Line a small baking dish with parchment paper.


    2️⃣ Melt Chocolate & Butter:


    Melt the sugar-free chocolate and butter together in a heatproof bowl over simmering water (double boiler) or microwave in short bursts. Stir until smooth. ✨


    3️⃣ Mix Wet Ingredients:


    In a separate bowl, whisk the eggs, stevia powder, and vanilla extract until well combined.


    4️⃣ Combine Wet & Chocolate Mixture:


    Slowly pour the melted chocolate mixture into the egg mixture, stirring continuously.


    5️⃣ Mix Dry Ingredients:


    In another bowl, sift together the coconut flour and baking powder.


    6️⃣ Combine Everything:


    Gently fold the dry ingredients into the wet ingredients until the batter is smooth.


    7️⃣ Bake:


    Pour the batter into the prepared dish and smooth the top.


    Bake for about 15 minutes or until a toothpick inserted in the center comes out clean.


    8️⃣ Cool & Serve:


    Allow the brownies to cool completely before slicing into squares. Enjoy your guilt-free treat!

    Serving Suggestions:


    Top with whipped cream and sugar-free chocolate shavings.

    Serve with fresh berries like raspberries or strawberries.

    ☕ Pair with hot coffee or tea for a cozy treat.

    Drizzle with sugar-free caramel or chocolate sauce.


    Cooking Tips:


    ✔️ Ensure the chocolate and butter mixture is fully melted for a smooth batter.

    ✔️ Do not overbake—check a few minutes early to keep them moist.

    ✔️ Sift the coconut flour to avoid lumps.

    ✔️ Use room-temperature eggs for smoother mixing.

    ✔️ Let the brownies cool completely before cutting to prevent crumbling.

    A perfect low-carb dessert that’s rich, moist, and irresistibly chocolatey!

  • Mediterranean Chickpea Salad

    Mediterranean Chickpea Salad

    Mediterranean Chickpea Salad


    Recipe:

    Ingredients:

    •   – 1 can chickpeas, drained and rinsed
    •   – 1/2 cup cherry tomatoes, halved
    •   – 1/2 cucumber, diced
    •   – 1/4 cup red onion, finely chopped
    •   – 1/4 cup feta cheese, crumbled
    •   – 2 tbsp olive oil
    •   – Juice of 1 lemon
    •   – 1 tsp oregano
    •   – Salt and pepper to taste


    Instructions:

    1. Combine chickpeas, cherry tomatoes, cucumber, red onion, and feta cheese in a large bowl.

    2. In a small bowl, whisk olive oil, lemon juice, oregano, salt, and pepper.

    3. Pour the dressing over the salad and toss to coat evenly.

    Serve chilled or at room temperature.