Category: Recipes

  • Chocolate Fatbomb Fluff

    Chocolate Fatbomb Fluff

    Chocolate Fatbomb Fluff
    Ingredients:
    1 1/2 cups heavy whipping cream
    2-4 tablespoons cream cheese (softened)
    1 box sugar-free pudding mix (cheesecake flavor recommended)
    1/2 cup Lily’s milk chocolate chips (or mix 1/2 cup milk chocolate chips with 1/2 cup semi-sweet chips for a richer flavor)
    Instructions:

    Whip the Fluff:
    In a medium bowl, combine the heavy whipping cream, softened cream cheese, and sugar-free pudding mix. Blend until the mixture becomes light and fluffy.
    Add the Chocolate Chips:
    Gently fold in the chocolate chips, ensuring they are evenly distributed throughout the fluff.
    Chill and Serve:
    Enjoy your delicious Fatbomb Fluff immediately, or refrigerate to keep it cool and set. This treat is perfect for satisfying those sweet tooth cravings while staying on track with your bariatric goals.

  • Bacon Cheeseburger Meatloaf Bites

    Bacon Cheeseburger Meatloaf Bites

    Ingredients:

    1 lb ground beef
    1 cup breadcrumbs
    1/2 cup shredded cheddar cheese
    1/2 cup cooked bacon, chopped (about 4-6 strips)
    1/4 cup onion, finely chopped
    1/4 cup ketchup
    1 large egg
    1 tablespoon Worcestershire sauce
    1 teaspoon garlic powder
    Salt and pepper, to taste
    Optional: extra cheese and bacon for topping
    Instructions:
    Preheat Oven:
    Preheat your oven to 375°F (190°C). Grease a muffin tin or line it with paper liners.
    Mix Ingredients:
    In a large bowl, combine the ground beef, breadcrumbs, cheddar cheese, chopped bacon, onion, ketchup, egg, Worcestershire sauce, garlic powder, salt, and pepper. Mix until just combined.
    Form Meatloaf Bites:

    Scoop the meat mixture into the prepared muffin tin, filling each cup about 3/4 full. You can press down slightly to pack them.
    Top (Optional):
    If desired, sprinkle extra cheese and bacon on top of each meatloaf bite.
    Bake:
    Bake for 20-25 minutes, or until the meatloaf bites are cooked through and have an internal temperature of 160°F (70°C).
    Serve:
    Let them cool for a few minutes before removing them from the tin. Serve warm with extra ketchup or your favorite dipping sauce.
    Enjoy!
    These bacon cheeseburger meatloaf bites are deliciously savory and make for a great appetizer or main dish. Enjoy your meal!

  • Savory Hand Pies

    Savory Hand Pies

    Ingredients:
    1 tablespoon olive oil
    1 tablespoon butter
    1 onion, finely diced
    1 carrot, peeled and finely diced
    1 rib celery, finely diced
    Salt
    Black pepper
    4 cloves garlic, pressed through garlic press
    1 pound ground beef (85/15 ratio lean to fat)
    1 ½ teaspoons Italian seasoning
    ½ teaspoon white pepper
    1 tablespoon tomato paste
    2 tablespoons Worcestershire sauce
    3 level tablespoons all-purpose flour
    1 ¼ cups beef stock or broth
    1 medium russet potato, peeled and diced into ¼ -½ inch cubes
    2 teaspoons fresh thyme leaves, plus extra for garnish
    1 tablespoon finely chopped parsley
    ¼ cup green peas
    2 (17.3 ounce) packages puff pastry sheets, frozen
    1 egg, whisked for egg wash
    Flaky salt, optional garnish

    Methods:
    Begin by gathering and prepping all of your ingredients (except for the puff pastry sheets—keep those frozen) according to the ingredients list above.
    Place a large, deep skillet or Dutch oven oven medium-high heat, and add the butter and the olive oil. Once the butter is melted, add in the onion, carrot, celery, plus a couple of good pinches of salt and pepper, and saute the veggies for a few minutes until just softened.
    Add in the garlic, and once aromatic, add in the ground beef along with the Italian seasoning, the white pepper plus a couple more pinches of salt and pepper, and use your spoon or spatula to crumble the beef into a fine consistency, cooking it for a few minutes until no longer pink.
    Next, add in the tomato paste along with the Worcestershire sauce and stir that into the beef mixture, then sprinkle in the flour and stir that in to blend well.
    Add in the beef stock or broth, followed by the diced potato, and stir to combine. Cover the pan and allow the filling to gently simmer just until the potatoes are tender and the sauce thickened, roughly 25-35 minutes.
    To finish the filling, add the thyme leaves, the chopped parsley and the peas, and stir to combine. Check to see if any additional salt or pepper is needed, and allow the beef filling to completely cool.

  • Chicken and Potato Delight

    Chicken and Potato Delight

    If you’re looking for a hearty and delicious dinner recipe that’s sure to be a hit, this potato and chicken dish is perfect for you. It’s packed with flavor, easy to prepare, and combines the satisfying taste of chicken with the comforting texture of potatoes. Follow this recipe to create a mouthwatering dinner that everyone will love.

    Full Recipe:

    Ingredients You’ll Need

    For the Potato Mixture:

    • 5 potatoes, peeled and grated
    • 3 eggs
    • 2 red peppers, finely chopped
    • 1 onion, finely chopped
    • Parsley, chopped
    • 2 tablespoons all-purpose flour (40 grams)
    • 1 teaspoon salt (8 grams)
    • 1/2 teaspoon black pepper

    For the Filling:

    • 1 onion, finely chopped
    • 2-3 tablespoons vegetable oil (20 ml)
    • 200 grams of chicken meat, finely chopped
    • 2 red peppers, finely chopped
    • 2 green peppers, finely chopped
    • 2 cloves garlic, minced
    • 1 teaspoon salt (8 grams)
    • 1/2 teaspoon black pepper
    • 1/2 teaspoon cumin
    • 1 teaspoon red pepper flakes
    • 20 grams cheddar cheese, grated

    For the Topping:

    • 100 grams cheddar cheese, grated
    • Parsley, chopped

    Step-by-Step Directions

    Prepare the Potato Mixture

    1. Preheat Oven: Preheat your oven to 200°C (392°F).
    2. Grate Potatoes: Peel and grate the 5 potatoes into a large mixing bowl.
    3. Mix Ingredients: Add the eggs, finely chopped red peppers, finely chopped onion, chopped parsley, all-purpose flour, salt, and black pepper to the grated potatoes. Mix well until all ingredients are combined.

    Prepare the Filling

    1. Cook Onion: In a large skillet, heat the vegetable oil over medium heat. Add the finely chopped onion and cook until translucent.
    2. Add Chicken: Add the finely chopped chicken meat to the skillet and cook until the chicken is browned and cooked through.
    3. Add Peppers and Garlic: Add the finely chopped red and green peppers and minced garlic to the skillet. Cook for a few more minutes until the vegetables are tender.
    4. Season: Add salt, black pepper, cumin, and red pepper flakes to the chicken and vegetable mixture. Stir well to combine.
    5. Add Cheese: Stir in 20 grams of grated cheddar cheese until melted and combined with the filling. Remove from heat.

    Assemble and Bake

    1. Layer Potatoes: Spread half of the potato mixture evenly in a greased baking dish.
    2. Add Filling: Spread the chicken and vegetable filling evenly over the potato layer.
    3. Top with Potatoes: Spread the remaining potato mixture over the filling.
    4. First Bake: Bake in the preheated oven for 20-25 minutes.

    Add Final Topping

    1. Add Cheese: Remove the dish from the oven and sprinkle 100 grams of grated cheddar cheese over the top.
    2. Second Bake: Return the dish to the oven and bake for an additional 15 minutes or until the cheese is melted and golden brown.

    Serve

    1. Garnish and Serve: Once baked, garnish with chopped parsley. Let it cool for a few minutes before serving. Enjoy your delicious potato and chicken dinner!

    Tips and Variations

    • Vegetable Variations: You can add other vegetables like mushrooms, zucchini, or spinach to the filling for added flavor and nutrition.
    • Cheese Options: Use any type of cheese you prefer, such as mozzarella, gouda, or a cheese blend.
    • Spice Level: Adjust the amount of red pepper flakes to control the spice level to your liking.
    • Herb Alternatives: Fresh herbs like thyme, rosemary, or cilantro can be added for extra flavor.
  • Pineapple Cream Cheese Pie – A Tropical Delight! ✨

    Pineapple Cream Cheese Pie – A Tropical Delight! ✨

    Pineapple Cream Cheese Pie – A Tropical Delight! ✨


    A creamy, fruity, and refreshing no-bake pie with a buttery graham cracker crust, velvety cream cheese filling, and sweet crushed pineapple! Perfect for summer, holidays, or any time you crave a tropical treat.

    Ingredients


    For the Crust:


    ✔ 1 ½ cups graham cracker crumbs

    ✔ ¼ cup granulated sugar

    ✔ ½ cup melted butter


    For the Filling:


    ✔ 8 oz cream cheese, softened

    ✔ 1 can (20 oz) crushed pineapple, drained (reserve a little juice if desired)

    ✔ 1 cup powdered sugar

    ✔ 1 teaspoon vanilla extract

    ✔ 1 cup heavy whipping cream (or 1 cup whipped topping for convenience)


    Instructions


    1️⃣ Make the Crust:

    ▪ Preheat oven to 350°F (175°C).

    ▪ In a bowl, mix graham cracker crumbs, sugar, and melted butter until combined.

    ▪ Press the mixture firmly into a 9-inch pie pan, creating an even layer.

    ▪ Bake for 10 minutes, then let it cool completely.


    2️⃣ Prepare the Filling:

    ▪ In a large bowl, beat cream cheese, powdered sugar, and vanilla extract until smooth.

    ▪ If you love extra pineapple flavor, add 1–2 tablespoons of the reserved pineapple juice.


    3️⃣ Fold in the Pineapple:

    ▪ Gently mix in the drained crushed pineapple until well combined.


    4️⃣ Whip the Cream:

    ▪ In a separate bowl, whip heavy cream until stiff peaks form (or use whipped topping for an easy shortcut).


    5️⃣ Combine & Assemble:

    ▪ Carefully fold the whipped cream into the cream cheese-pineapple mixture, keeping it light and fluffy.

    ▪ Pour the filling into the cooled graham cracker crust, spreading evenly.


    6️⃣ Chill & Set:

    ▪ Refrigerate for at least 3–4 hours (overnight is even better!) to firm up.


    7️⃣ Serve & Enjoy!

    ▪ Slice and serve chilled.

    ▪ Top it off with extra pineapple chunks, toasted coconut, or whipped cream for a tropical touch!


    Tips for the Best Pie:


    Love Chocolate? Use a chocolate cookie crust for a fun twist!

    Extra Tropical? Sprinkle toasted coconut on top!

    Zesty Upgrade? Add a squeeze of lemon juice to balance the sweetness.


    This Pineapple Cream Cheese Pie is rich, creamy, fruity, and irresistibly delicious—a slice of paradise in every bite!

  • Wonton Shrimp Cups

    Wonton Shrimp Cups

    Wonton Shrimp Cups

    Ingredients

    • 15 wonton wrappers
    • 2 tablespoons olive oil
    • Salt
    • 1 lb shrimp, peeled and deveined
    • 1 lime
    • 1 teaspoon ancho chili powder or homemade chili powder
    • 1/4 teaspoon fresh ground black pepper
    • 1 cup baby arugula leaves or spinach
    • 3 tablespoons sour cream


    Directions

    BAKE WONTON CUPS

    1Preheat the oven to 350°F (177°C).


    2Lightly brush the wonton wrappers on both sides with 1 tablespoon of olive oil. Then, lightly season one side of each wrapper with salt.


    3Using a mini muffin pan, press the wonton wrappers down into the cups, laying back the corners and pressing the bottoms down to make a defined cup. Bake until lightly browned, 8 to 10 minutes. Transfer to a rack and let cool.


    MAKE SHRIMP CUPS

    1While the wontons bake in the oven, prepare the lime sour cream and shrimp.


    2Zest the lime using a Microplane. Add the zest to a medium bowl with the shrimp, 1 tablespoon of olive oil, chili powder, 1/4 teaspoon of salt, and 1/4 teaspoon of pepper. Toss well.


    3Spread the shrimp onto a baking sheet and bake until firm and opaque, 8 to 12 minutes.


    4Make the lime sour cream in a small bowl by stirring 1 teaspoon of lime juice and a pinch of salt into the sour cream.


    5To assemble, fill the cooled wonton cups with a few leaves of arugula, a small blob of lime sour cream, and a shrimp. Serve with lime wedges for spritzing on top.

  • Crispy Baked Eggplant with Italian Seasoning

    Crispy Baked Eggplant with Italian Seasoning

    Crispy Baked Eggplant with Italian Seasoning


    Ingredients:


    • 1 large eggplant, sliced into rounds
    • 1 cup breadcrumbs
    • 1/2 cup grated Parmesan cheese
    • 1 tsp dried oregano
    • 1 tsp dried basil
    • 1/2 tsp garlic powder
    • 1 egg, beaten
    • Olive oil spray
    • Salt and pepper to taste

    Directions:

    1️⃣ Preheat oven to 200°C (400°F). Line a baking sheet with parchment paper.

    2️⃣ In a shallow dish, mix breadcrumbs, Parmesan, oregano, basil, garlic powder, salt, and pepper.

    3️⃣ Dip each eggplant slice into the beaten egg, then coat with the breadcrumb mixture.

    4️⃣ Place the coated slices on the baking sheet and lightly spray with olive oil.

    5️⃣ Bake for 20-25 minutes, flipping halfway, until golden and crispy. Serve warm!

  • Greek Chicken Meatballs

    Greek Chicken Meatballs

    Greek Chicken Meatballs


    Ingredients:


    ▪️2 pounds ground chicken

    ▪️1 teaspoon salt

    ▪️1/4 teaspoon black pepper

    ▪️1/2 teaspoon ground cumin

    ▪️1/2 teaspoon ground oregano

    ▪️1/2 teaspoon red pepper flakes

    ▪️1/4 cup fresh dill chopped

    ▪️1/4 cup fresh mint chopped

    ▪️1/4 cup finely diced red onion

    ▪️4 cloves garlic finely minced

    ▪️1/2 teaspoon lemon zest

    ▪️1 tablespoon olive oil for frying


    Bowl Additions:


    ▪️chopped romaine

    ▪️feta cheese

    ▪️cucumber sliced/diced

    ▪️tomato sliced

    ▪️white rice

    ▪️tzatziki sauce


    Instructions:


    ▪️Add the meatball ingredients to a small mixing bowl and use your hands to mix until well combined.


    ▪️Next, use a cookie dough scoop or tablespoon to scoop out the chicken mixture and use your hands to form into meatballs.


    ▪️When the meatballs are formed, heat a large skillet over medium heat and then add a tablespoon of oil.


    ▪️Next add the meatballs to the hot skillet and cook for roughly 3-4 minutes per side until browned and the internal temperature reaches 165 degrees Fahrenheit. You may have to do this in batches depending on the size of your skillet.


    ▪️Serve the meatballs over chopped romaine lettuce with feta, cucumber, tomato, rice, and tzatziki sauce.

  • French Onion Chicken Bake

    French Onion Chicken Bake

    Ingredients:

    4 boneless, skinless chicken breasts
    2 cups caramelized onions
    1 cup beef broth
    2 cups shredded mozzarella cheese
    ½ cup grated Parmesan cheese
    1 tbsp olive oil
    1 tsp garlic powder
    1 tsp dried thyme
    Salt and pepper, to taste
    Instructions:

    Prepare the Chicken:
    Preheat your oven to 375°F (190°C). Season the chicken breasts with garlic powder, thyme, salt, and pepper.

    Sear the Chicken:
    In a large oven-safe skillet, heat the olive oil over medium heat. Sear the chicken breasts for 3-4 minutes on each side until golden brown. Remove the chicken from the skillet and set aside.

    Make the Sauce:
    In the same skillet, add the caramelized onions and beef broth. Stir to combine and bring the mixture to a simmer.

    Assemble the Bake:
    Return the seared chicken breasts to the skillet, nestling them into the onion mixture. Top each chicken breast with shredded mozzarella and grated Parmesan cheese.

    Bake:
    Transfer the skillet to the preheated oven and bake for 20-25 minutes, or until the chicken is fully cooked and the cheese is melted and bubbly.

    Serve:
    Remove from the oven and let cool for a few minutes. Serve the French Onion Chicken Bake with your favorite side dishes, such as mashed potatoes or a crisp salad.

    ️ Prep Time: 15 minutes | Cook Time: 25 minutes | Total Time: 40 minutes
    ️ A comforting and cheesy dish that’s perfect for any night of the week!

  • Rotel Sausage and Cream Cheese

    Rotel Sausage and Cream Cheese

    Ingredients
    1 lb ground sausage
    1 can (10 oz) Rotel diced tomatoes and green chilies, drained
    8 oz cream cheese, softened
    2 cans (8 oz each) crescent roll dough
    Instructions
    1️⃣ Cook the Sausage:
    Heat a skillet over medium heat.
    Cook the sausage, breaking it apart, until browned and fully cooked.
    Drain any excess grease and return the sausage to the skillet.
    2️⃣ Make the Filling:
    Add the softened cream cheese to the skillet.
    Stir until the cream cheese melts and blends with the sausage.
    Mix in the drained Rotel tomatoes until evenly combined.
    3️⃣ Prepare the Crescent Rolls:
    Preheat your oven to 375°F (190°C).
    Roll out the crescent dough and separate it into individual triangles.
    4️⃣ Fill and Roll:
    Place a spoonful of the sausage mixture at the wide end of each crescent triangle.
    Roll each triangle from the wide end to the narrow tip, encasing the filling.
    5️⃣ Bake:
    Arrange the filled crescents on a baking sheet lined with parchment paper.
    Bake for 12-15 minutes, or until the crescents are golden brown.
    6️⃣ Serve:
    Let the crescents cool for a few minutes.
    Serve warm and enjoy!
    Tips:
    Make Ahead: Prepare the filling in advance and refrigerate it. Assemble and bake the crescents when ready to serve.
    Spicy Option: Use spicy sausage or add a pinch of cayenne pepper for extra heat.
    Dip It Up: Serve with ranch dressing, queso, or marinara sauce for dipping.
    These Rotel Sausage and Cream Cheese Crescents are sure to be a hit at any gathering.

  • This Mexican White Trash Casserole is the ultimate cheesy, crunchy, and comforting dish!

    This Mexican White Trash Casserole is the ultimate cheesy, crunchy, and comforting dish!

    1f6d2 Ingredients
    ✔ 1 bag Nacho Doritos, crushed 1f33d
    ✔ 2 cups shredded chicken 1f357
    ✔ 2 cups shredded cheese (cheddar, Mexican blend, or your favorite) 1f9c0
    ✔ 1 can cream of chicken soup
    ✔ 1 can Ro-Tel tomatoes (diced tomatoes & green chilies) 1f345
    ✔ ½ cup sour cream
    ✔ ½ cup milk 1f95b
    ✔ ½ package taco seasoning 1f32e
    ‍ Directions
    1️⃣ Preheat the Oven
    ✅ Set oven to 350°F (175°C).
    ✅ Grease a 2-quart casserole dish.
    2️⃣ Mix the Filling
    ✅ In a large bowl, mix:
    Shredded chicken
    Cream of chicken soup
    Ro-Tel tomatoes
    Sour cream & milk
    Taco seasoning
    ✅ Stir until everything is well combined.
    3️⃣ Layer the Casserole
    ✅ Spread half the crushed Doritos on the bottom of the dish.
    ✅ Add half the chicken mixture on top.
    ✅ Repeat layers, finishing with shredded cheese on top.
    4️⃣ Bake
    ✅ Cover with foil and bake for 35 minutes.
    ✅ Remove foil & bake for 10 more minutes for a crispy top.
    5️⃣ Serve & Enjoy!
    ✅ Let it cool for a few minutes before serving.
    ✨ PRO TIPS
    1f525 Extra Crunch? Sprinkle some extra Doritos on top before serving!
    1f9c0 More Cheese? Mix in cream cheese or extra shredded cheese!
    1f336 Spice it Up! Add jalapeños or a drizzle of hot sauce!
    1f951 Toppings? Serve with guacamole, salsa, or sour cream!
    ⏳ Time & Nutrition
    1f552 Prep Time: 10 mins | Cook Time: 45 mins | Total: ~55 mins
    1f525 Calories: ~450 kcal per serving
    This Mexican White Trash Casserole is cheesy, creamy, crunchy, & full of flavor—perfect for busy weeknights or potlucks! 1f924✨
  • Moist banana cake

    Moist banana cake

    ☑️Ingredients:


    2 cups of wheat flour
    1 cup of sugar
    1/2 cup of melted butter
    1 cup of mashed ripe bananas (about 2-3 bananas)
    1/2 cup of milk
    2 large eggs
    1 teaspoon of vanilla extract
    1 teaspoon of the chemical yeast
    1 teaspoon of baking soda
    1/4 teaspoon salt


    ☑️Preparation method:

    1. Preheat the oven to 180°C. Butter and flour a medium size mold.
    2. In a large bowl, mix flour, sugar, chemical yeast, baking soda, and salt.
    3. In another bowl, beat butter with eggs until creamy consistency. Add the mashed bananas, milk and vanilla extract and mix well.
    4. Gradually add the dry ingredients to the bananas mixture by mixing until the batter is homogeneous.
    5. Pour batter into the prepared mold and bake in the oven for 30 to 35 minutes, or until a toothpaste inserted in the center of the cake comes out clean.
    6. Take the cake out of the oven and let it cool in the mold for a few minutes before you mold it. Serve warm or at room temperature.
  • Walnut Oatmeal Cookies

    Walnut Oatmeal Cookies

    Walnut Oatmeal Cookies

    meal Cookies are soft, chewy, and packed with nutty, buttery flavors. Made with heart-healthy oats and crunchy walnuts, they have the perfect balance of sweetness and texture. Whether enjoyed with coffee, tea, or as a snack, these cookies are a simple yet satisfying treat for any occasion!

    Preparation Time

      • Prep Time: 10 minutes


      • Cook Time: 12-15 minutes
      • Total Time: 25 minutes
      • Servings: 12-15 cookies

    Ingredients

      • 1 cup (100 g) rolled oats
      • ¾ cup (95 g) all-purpose flour


      • ½ teaspoon baking soda
      • ½ teaspoon cinnamon (optional)
      • ¼ teaspoon salt


      • ½ cup (115 g) unsalted butter, softened
      • ½ cup (100 g) brown sugar
      • ¼ cup (50 g) granulated sugar


      • 1 egg
      • 1 teaspoon vanilla extract
      • ½ cup (60 g) chopped walnuts


    Directions

    1. Preheat & Prepare:

      • Preheat oven to 180°C (350°F).


    • Line a baking tray with parchment paper.

    2. Mix the Dry Ingredients:

      • In a bowl, whisk together oats, flour, baking soda, cinnamon, and salt.

    3. Cream Butter & Sugar:

      • In another bowl, beat butter, brown sugar, and granulated sugar until fluffy.
      • Add egg and vanilla extract, mixing until combined.

    4. Combine & Fold In Walnuts:

      • Gradually mix in the dry ingredients until just combined.
      • Fold in chopped walnuts for crunch.

    5. Shape & Bake:

      • Scoop tablespoon-sized dough balls onto the baking tray.
      • Bake for 12-15 minutes or until golden brown.


    • Let cool on a wire rack before serving.

    Serving Suggestions

      • Enjoy warm with a glass of milk or coffee.


    • Drizzle with melted dark chocolate for extra indulgence.
    • Serve with Greek yogurt and honey for a breakfast treat.

    Cooking Tips


      • For softer cookies, slightly underbake and let them cool on the tray.
      • For crunchier cookies, bake for an additional 2 minutes.
      • Toast walnuts before adding to enhance their flavor.


    • Use quick oats for a softer texture or rolled oats for chewiness.

    Nutritional Benefits

      • High in fiber from oats, promoting digestion.


      • Rich in healthy fats from walnuts, good for heart health.
      • Source of protein from eggs and nuts.
      • Lower in sugar compared to traditional cookies.

    Dietary Information

      • Vegetarian-friendly.
      • Can be made gluten-free by using gluten-free oats and flour.


    • Not dairy-free, but can use coconut oil or vegan butter.

    Nutritional Facts (Per Cookie)

      • Calories: 140


      • Protein: 2g
      • Carbohydrates: 16g
      • Fat: 8g


    • Fiber: 1.5g
    • Sugar: 7g

    Storage


      • Room Temperature: Store in an airtight container for up to 5 days.
      • Freezing: Freeze cookie dough balls for up to 2 months; bake directly from frozen.
      • Reheating: Warm in the microwave for 10 seconds for a fresh-baked taste.

    Why You’ll Love This Recipe

      • Quick and easy – made in just 25 minutes!
      • Chewy, nutty, and delicious with simple ingredients.


    • Healthier than store-bought cookies with fiber-rich oats and walnuts.
    • Perfect for breakfast, snacks, or dessert!

    Conclusion
    These Walnut Oatmeal Cookies are a simple yet flavorful treat that’s perfect for any time of day. Their chewy texture, nutty crunch, and warm cinnamon flavor make them irresistible. Whether you bake them for family, friends, or just yourself, these cookies are sure to be a favorite. Try them today and enjoy a homemade classic!

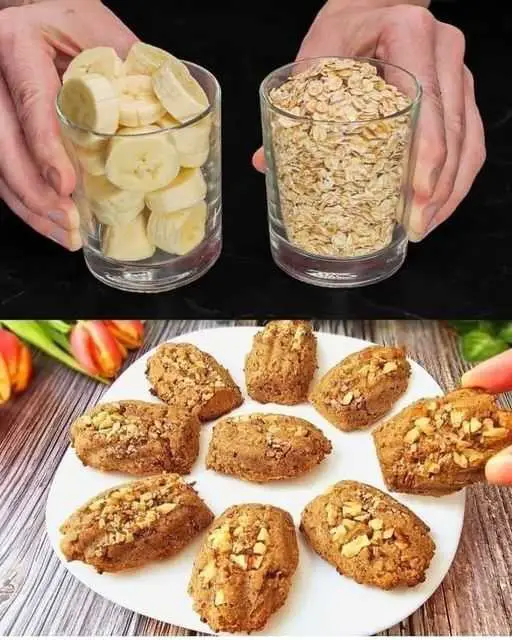
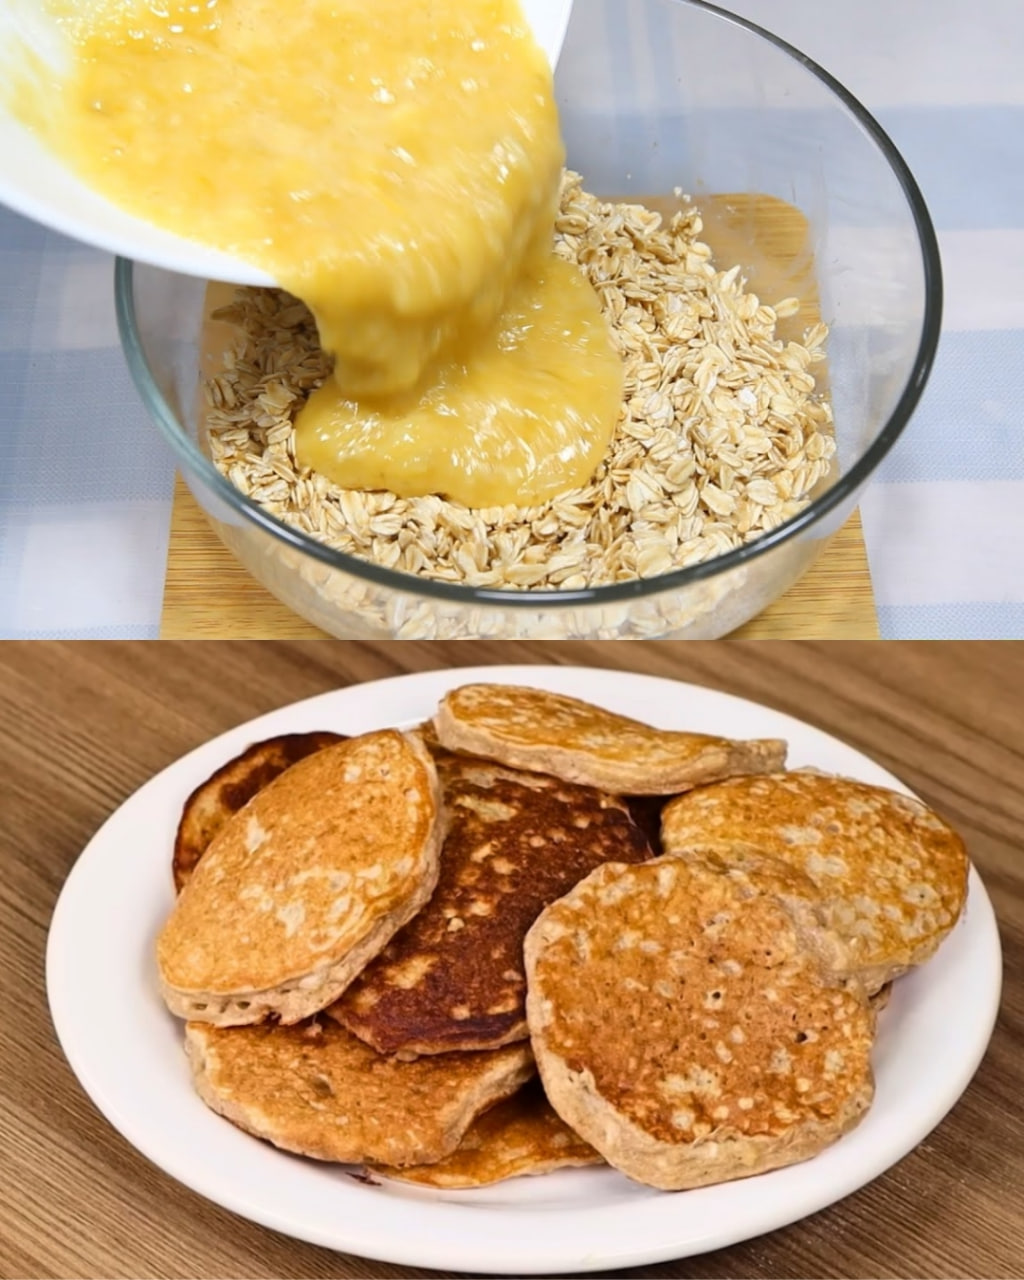
  • Healthy Banana Bread with Oat Flour

    Healthy Banana Bread with Oat Flour

    Ingredients:

      • Bananas: 3 ripe
      • Eggs: 2
      • Milk or Plant-Based Milk: ½ cup (120ml)
      • Oat Flour: 1½ cups (180g)
      • Baking Powder: 2 teaspoons
    • Sweetener: Optional, such as honey, stevia, or date paste to taste

    Directions:

      • Step 1: Mash the Bananas
        • In a large bowl, mash 3 ripe bananas with a fork until smooth. If your bananas are not ripe, you can microwave them for 2-3 minutes or bake them at 180°C (350°F) for 15-20 minutes to soften and bring out their sweetness.
      • Step 2: Add Eggs
        • Add 2 eggs to the mashed bananas and mix well.
      • Step 3: Add Sweetener (Optional)
          • If you like, you can add a sweetener of your choice, such as honey, stevia, or date paste. Adjust the amount based on your preference.


      • Step 4: Add Milk
        • Add ½ cup (120ml) of milk or plant-based milk to the mixture and stir.
      • Step 5: Add Oat Flour and Baking Powder
        • Gradually mix in 1½ cups (180g) of oat flour. If you don’t have oat flour, you can make your own by blending rolled oats in a food processor until fine.
        • Add 2 teaspoons of baking powder and mix until everything is well combined.
      • Step 6: Prepare the Baking Pan
        • Grease a 22 cm (8.6 inches) baking pan with oil or line it with parchment paper. Pour the banana mixture into the pan.
      • Step 7: Bake
          • Preheat your oven to 180°C (350°F) and bake for 45 minutes, or until a toothpick inserted into the center comes out clean.


      • Step 8: Cool and Serve
        • Once baked, allow the banana bread to cool before slicing. Serve and enjoy!

    Serving Suggestions:

      1. Serve warm with a spread of peanut butter or almond butter.
      2. Enjoy with a cup of coffee or tea for a wholesome breakfast.
      3. Top with fresh fruits like berries or banana slices.
    1. Pair with yogurt and a drizzle of honey for a nutritious snack.
    2. Use the banana bread as a base for French toast for a special breakfast treat.

    Cooking Tips:

      1. If your bananas aren’t ripe enough, bake them in the oven or microwave to bring out their natural sweetness.
      1. You can add chopped nuts, dark chocolate chips, or raisins for extra flavor and texture.
      2. If you prefer a denser banana bread, reduce the amount of baking powder by half.
      3. To make your own oat flour, simply blend rolled oats in a food processor until fine.
    1. Store leftover banana bread wrapped in foil or in an airtight container to keep it fresh for longer.

    Nutritional Benefits:

      • Bananas: Provide potassium, vitamin C, and natural sweetness.
      • Oat Flour: A good source of fiber and essential vitamins, making it a heart-healthy alternative to regular flour.
    • Eggs: High in protein and contribute to the structure of the bread.

    Dietary Information:

      • Gluten-Free Option: Use certified gluten-free oat flour.
      • Dairy-Free Option: Substitute the milk with almond, soy, or any plant-based milk.
    • Refined Sugar-Free: Sweeten naturally with the bananas or a natural sweetener of your choice.

    Nutritional Facts (per slice):

      • Calories: 150
      • Protein: 5g
    • Fat: 5g
    • Carbohydrates: 20g
    • Fiber: 3g
  • Strawberry Cheesecake Banana Pudding Recipe

    Strawberry Cheesecake Banana Pudding Recipe

    Ingredients:
    For the Banana Pudding Layer:
    3 cups whole milk
    1 (5.1 oz) package instant vanilla pudding mix
    1 (8 oz) block cream cheese, softened
    1 cup sweetened condensed milk
    2 teaspoons vanilla extract
    2 ripe bananas, sliced
    ½ cup heavy cream, whipped (for extra fluffiness)
    For the Strawberry Cheesecake Layer:
    8 oz cream cheese, softened
    1 cup heavy cream
    ¼ cup powdered sugar
    1 teaspoon vanilla extract
    1 cup fresh strawberries, diced (plus extra for garnish)
    1 cup crushed graham crackers (for a cheesecake-like crust effect)
    For Assembly:
    Vanilla wafer cookies (for layering)
    Sliced fresh strawberries (for garnish)
    Banana slices (for garnish)
    Extra graham cracker crumbs (for sprinkling on top)
    Instructions:
    Step 1: Prepare the Banana Pudding Layer
    Make the pudding: In a medium bowl, whisk together the milk and instant vanilla pudding mix until well combined. Let it sit for about 5 minutes to thicken.

    Add the cream cheese and condensed milk: In a separate bowl, beat the cream cheese until smooth. Add the sweetened condensed milk and vanilla extract and mix until fully incorporated.

    Combine the pudding with the cheesecake mixture: Gently fold the pudding mixture into the cream cheese mixture until smooth. Add the whipped heavy cream and carefully fold it in to make the mixture light and airy.

    Add bananas: Gently fold in the banana slices, but leave some aside for garnish later.

    Step 2: Prepare the Strawberry Cheesecake Layer
    Whip the cream: In a separate bowl, beat the heavy cream with the powdered sugar until stiff peaks form.

    Mix the cream cheese: In another bowl, beat the cream cheese until smooth. Add the vanilla extract and fresh strawberries and blend until the strawberries are incorporated into the cream cheese.

    Fold in the whipped cream: Gently fold the whipped cream into the strawberry-cream cheese mixture until fully combined.

    Step 3: Assemble the Dessert
    Layer the ingredients: In a large serving dish or individual trifle glasses, begin with a layer of vanilla wafer cookies. Then, spoon a layer of banana pudding mixture on top. Add a layer of strawberry cheesecake mixture and spread it evenly.

    Repeat layers: Continue layering the vanilla wafer cookies, banana pudding, and strawberry cheesecake mixtures until all ingredients are used, ending with a layer of the strawberry cheesecake mixture.

    Add toppings: Garnish the top with fresh strawberries, banana slices, and a sprinkle of crushed graham crackers for a cheesecake-inspired finish.

    Step 4: Chill and Serve
    Chill: Cover the dessert with plastic wrap and refrigerate for at least 4 hours, or overnight, to let the flavors meld and the dessert firm up.

    Serve: Serve chilled and enjoy the creamy, fruity goodness of this strawberry cheesecake banana pudding!

    Serving Tips:
    Make-ahead: This dessert is perfect for making ahead of time. Letting it chill overnight allows the flavors to develop and ensures the pudding layers set beautifully.
    Storage: Store leftovers in an airtight container in the refrigerator for up to 3 days.