Category: Recipes

  • Best Scalloped Potatoes Recipe

    Best Scalloped Potatoes Recipe

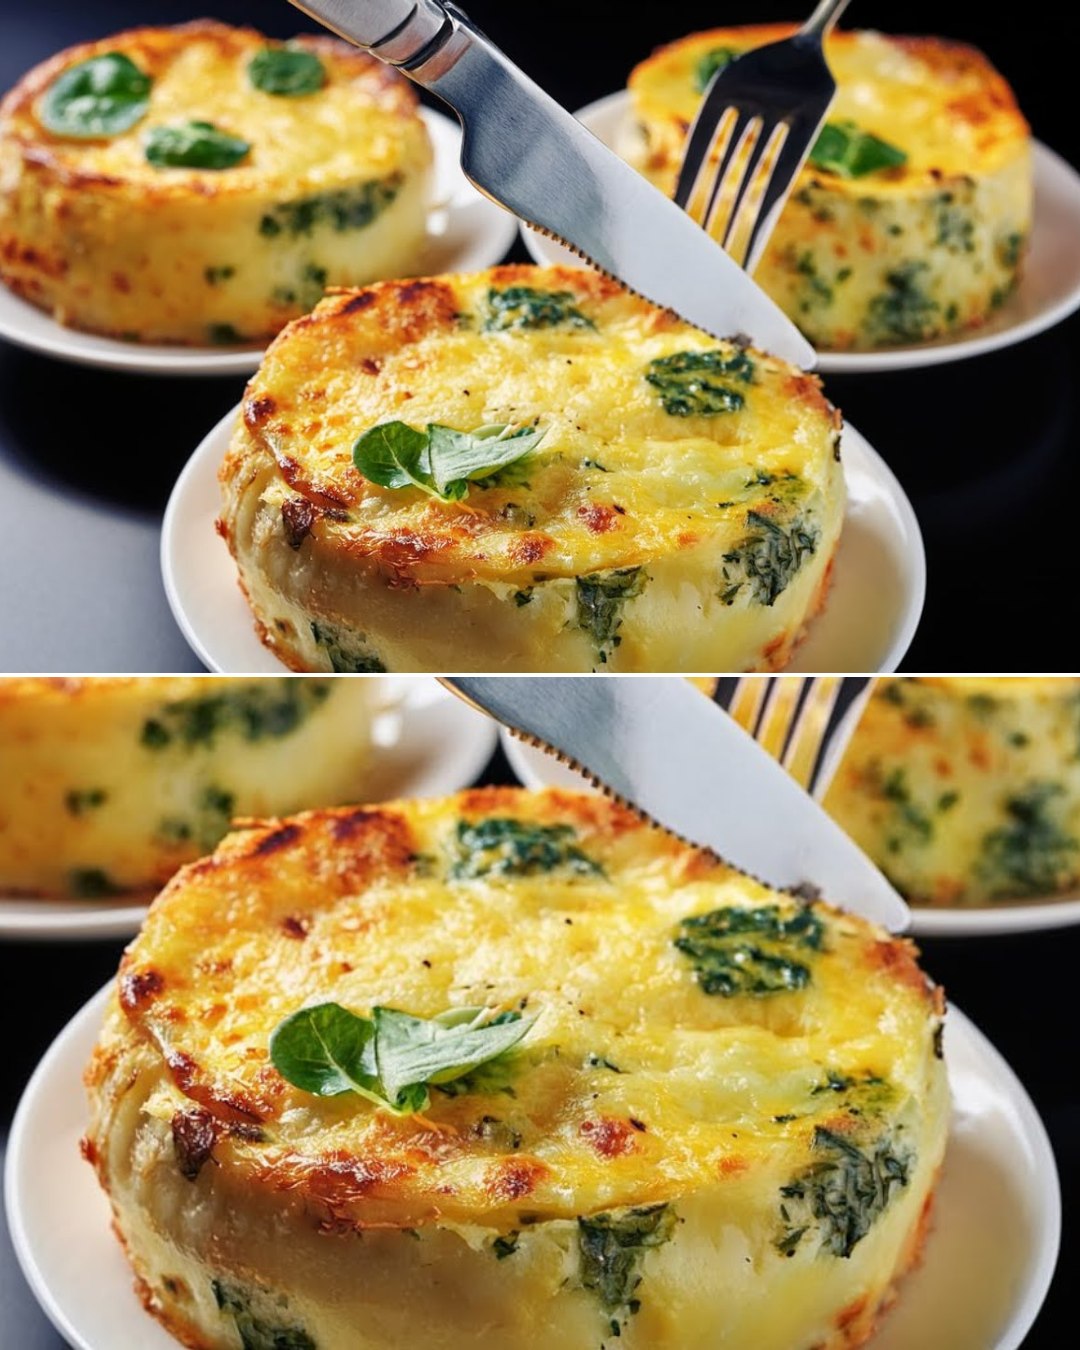
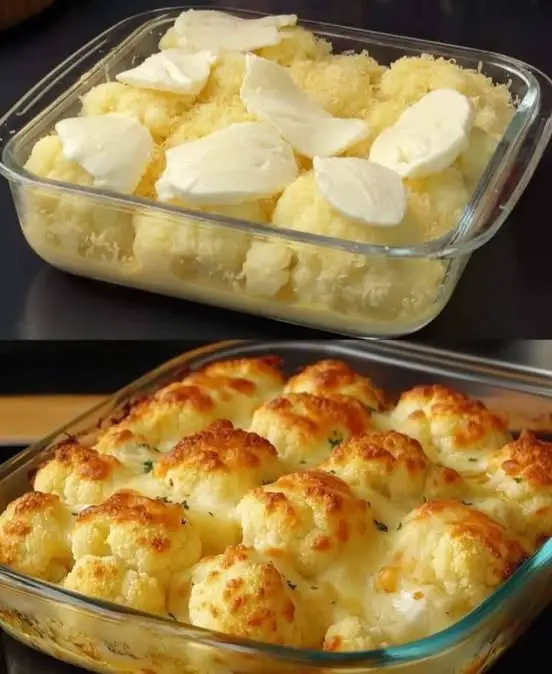
    In my humble opinion, these scalloped potatoes are a crowd-pleaser, featuring tender layers of potatoes bathed in a rich, cheesy sauce. Perfect for any occasion!

    Ingredients:
    4 cups thinly sliced potatoes (about 2-3 medium potatoes)
    3 tablespoons butter
    3 tablespoons flour
    1 1/2 cups milk (cold)
    1 teaspoon salt
    A dash of cayenne pepper
    1 cup grated sharp cheddar cheese
    1/2 cup grated cheese (for topping)
    Optional: A sprinkle of paprika for garnish
    Instructions:
    1️⃣ Make the Cheese Sauce:
    In a small saucepan, melt the butter over low heat.
    Whisk in the flour and let the mixture cook for about 1 minute to eliminate the raw flour taste.
    Gradually add the cold milk, whisking continuously to prevent lumps.
    Season with salt and a dash of cayenne pepper.
    Cook over low heat, stirring occasionally, until the sauce is smooth and begins to boil.
    Reduce the heat and stir in the cheddar cheese until it melts into the sauce.
    2️⃣ Layer the Potatoes:
    Preheat your oven to 350°F (175°C).
    In a lightly greased 1-quart casserole dish, arrange half of the sliced potatoes in an even layer.
    Pour half of the cheese sauce over the potatoes.
    Repeat the layering with the remaining potatoes and cheese sauce.
    3️⃣ Add the Toppings:
    Sprinkle the remaining grated cheese over the top.
    Optional: Add a dash of paprika for a pop of color.
    4️⃣ Bake:
    Bake uncovered in the preheated oven for about 1 hour, or until the potatoes are tender and the top is golden brown.
    Tips for Success:
    Uniform Slicing: Use a mandoline for evenly sliced potatoes, ensuring they cook evenly.
    Cheese Variations: Mix sharp cheddar with Gruyère or Parmesan for added depth of flavor.
    Extra Creamy: Add a splash of heavy cream to the cheese sauce for an even richer texture.
    Serving Suggestion:
    Pair these scalloped potatoes with roasted chicken, baked ham, or a crisp green salad for a complete meal.

    Enjoy this creamy, cheesy comfort food masterpiece—it’s sure to become a family favorite!

  • Easy Tropical Ice Cream

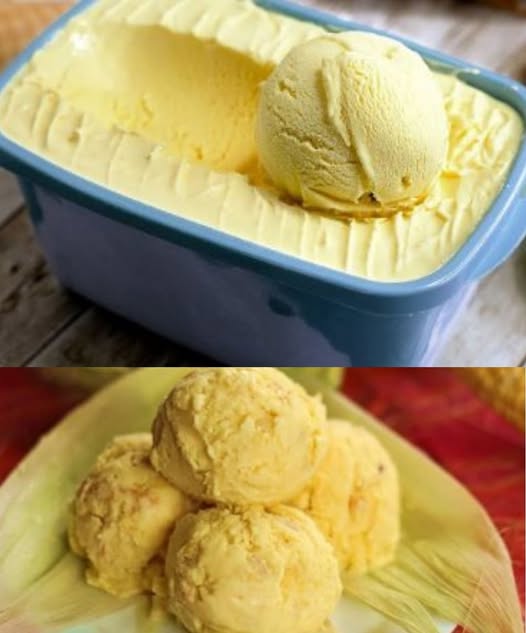
    Easy Tropical Ice Cream

    Ingredients:
    – 2 cups coconut milk
    – 1 cup pineapple chunks (fresh or canned)
    – 1 ripe banana
    – 1/2 cup sugar (or to taste)
    – 1 teaspoon vanilla extract
    – 1/4 cup shredded coconut (optional)

    Directions:
    1. Grab your blender and toss in the coconut milk, pineapple chunks, banana, sugar, and vanilla extract. Blend it all together until you have a smooth, creamy mixture.
    2. Once it’s perfectly blended, pour the tasty concoction into a container. Pop it in the freezer and let it chill for about 4 hours, or until it’s solid.
    3. When you’re ready to serve your delicious treat, let it sit at room temperature for a few minutes to soften just a bit.
    4. Scoop it into bowls and, if you’re feeling fancy, sprinkle on some shredded coconut as a delightful topping.

  • These are to die for! My hubby loves grabbing these in the morning. He couldn’t believe it was just 4 ingredients

    These are to die for! My hubby loves grabbing these in the morning. He couldn’t believe it was just 4 ingredients

    Easy Sausage Breakfast Muffins are a delicious and convenient breakfast option that combines the perfect blend of savory sausage, fluffy eggs, and melted cheese in a handheld muffin form. These muffins are not only incredibly tasty, but also versatile, making them a great option for busy mornings or as an on-the-go snack. Originating from the United States, these breakfast muffins have gained popularity due to their simplicity and ability to satisfy morning cravings in a wholesome way.
    These muffins can be enjoyed on their own as a complete breakfast or paired with a variety of sides to enhance the overall meal experience. Consider serving them alongside fresh fruit salad, a side of crispy bacon, or a simple green salad for a well-rounded and satisfying morning meal. Additionally, a dollop of creamy avocado spread or a drizzle of hot sauce can add an extra burst of flavor for those who like a bit of spice.

    Recipe: Easy Sausage Breakfast Muffins

    Ingredients:
    1 pound breakfast sausage
    1 cup Bisquick baking mix
    1 cup shredded sharp cheddar cheese
    4 eggs
    Instructions:

    1. Preheat your oven to 350°F (175°C) and grease a muffin tin (12 cups).
    2. In a skillet, cook the breakfast sausage over medium heat until it’s browned and crumbled. Drain any excess grease.
    3. In a mixing bowl, whisk the eggs. Add the shredded cheese and Bisquick baking mix to the eggs. Mix until well combined. Stir in the cooked sausage into the egg mixture.
    4. Pour the mixture evenly into the muffin cups, filling each about 2/3 full.
    5. Bake in the preheated oven for about 20 minutes or until the muffins are golden brown and a toothpick inserted into the center comes out clean.
    Allow the muffins to cool slightly before removing them from the muffin tin.
    Serve and enjoy your Sausage Breakfast Muffins!

    With their delightful combination of flavors and easy preparation, these Easy Sausage Breakfast Muffins are sure to become a favorite go-to recipe for a quick and delicious morning meal. Enjoy the convenience and taste of homemade breakfast muffins that are perfect for busy mornings or any time you need a satisfying and wholesome bite to start your day off right.

  • Baked Ham and Cheese with a Golden Crust

    Baked Ham and Cheese with a Golden Crust

    This Golden Crusted Ham and Cheese Bake is more than just food; it feels like a comforting hug served on a plate.

    The crispy outer layer holds a gooey center of cheese and ham, combining delicious flavors that are comforting and fulfilling.

    Every bite brings a taste of home, simplicity, and happiness that comes from combining basic ingredients to create something amazing.

    Great for any day, this recipe shows how the oven can turn bread, cheese, and ham into a delicious golden dish.

    It’s an ideal recipe for those seeking the joy of cooking without the fuss, for the lovers of hearty meals that speak to the soul.

    You can enjoy this dish for breakfast, lunch, or dinner. It will surely become a favorite recipe that you will want to make over and over again.

    Complete Recipe:


    List of ingredients:

    12 slices of bread
    12 slices of cheese
    6 pieces of ham
    2 huevos
    100 milliliters of milk
    A little bit of salt
    Additional cheese for topping

    Instructions:

    Heat the oven before using it. Heat your oven to 190-200°C (375-400°F) before using it.
    Make the egg mixture. Mix the eggs, milk, and a little salt in a bowl.
    Make the sandwiches. Place 6 pieces of bread on a flat surface. Place a slice of cheese on each piece of bread, top each with a slice of ham, then another slice of cheese, and cover with the remaining slices of bread to form sandwiches.
    Dunk and Organize: Dip each sandwich quickly in the egg mixture, making sure both sides get covered. Place the sandwiches that have been dipped in a baking dish.
    Choose a topping. If you want, add more cheese on top of the sandwiches for an even cheesier taste.
    Bake: Cook in the oven that has been preheated for 15-20 minutes, or until the cheese is melted and bubbly, and the bread is golden brown.
    Provide assistance. Let the baked item cool down for a bit before cutting and serving.
    Time to prepare: 10 minutes | Time to cook: 20 minutes | Total time: 30 minutes
    Calories: 300 calories in each serving | Number of servings: 6 servings


  • Weight Watchers Skinny Banana Bread

    Weight Watchers Skinny Banana Bread

    Ingredients
    1 1/2 cup self rising flour (I use Gold Medal)
    1 tsp baking powder
    1 tsp baking soda
    3 ripe bananas, medium-large
    1 egg
    2 tsp vanilla extract
    2 Tbsp brown sugar substitute ( I use Lakanto Golden Sweetener)
    3 Tbsp white sugar substitute ( I use Lakanto Classic Sweetener)
    2 Tbsp. Land o’ lakes made with canola oil light butter melted or 3 Tbsp of unsweetened applesauce
    Instructions
    Preheat oven to 350 degrees and spray bread pan (9×5 or 8×4)or a 12 muffin tin with non stick cooking spray
    In a large mixing bowl add bananas and use a fork to mash well.
    Whisk in the egg, vanilla, brown sugar and white sugar substitute. Stir well.
    In a separate bowl combine, self rising flour, baking powder and soda. Stir until well incorporated.
    Gradually add dry ingredients into the wet ingredients as you stir. Before the two are completely incorporated add in melted butter. Stir just until barely combined.
    DO NOT OVER MIX. (The number one tip is to not over mix or it will ruin the texture)
    Pour into pan and bake for 30-45 minutes or (18-20 minutes if making muffins) or until an inserted knife or toothpick comes out clean.
    Notes
    You can substitute the self rising flour for: wheat, gluten free flour, almond flour, or all-purpose flour however; you’ll want to add an additional 1/2 tsp of baking powder so the texture is on point.
    Store in an airtight container on the counter for 3 days, in the fridge for 5-7 days, or the freezer for up to a month.
    The point value can differ depending on the sugar substitutes you use.
    It is VERY important to not over mix the batter-otherwise the texture will be off. Just mix until the wet ingredients have been incorporated with the dry ingredients. Then pour batter into prepared pan.If making them into muffins decrease the cooking time to 14-16 minutes.
    If you use unsweetened applesauce it will save you one additional point. However; I love using the light butter made with canola oil rather than the unsweetened applesauce- it gives the banana a creaminess that you just don’t get from the applesauce!
    The Lakanto Monkfruit Golden Sweetener (sugar substitute) that is used in this recipe is zero points. Please keep in mind-the point value can vary depending on the brand of sugar substitute you choose to use

  • Healthy Oatmeal Cocoa cups

    Healthy Oatmeal Cocoa cups

    Healthy Oatmeal Cocoa cups

    Ingredients:

      • 1 cup (100 g) oatmeal
      • 1 cup (240 ml) milk of your choice
      • 2 eggs
      • 1/3 cup (100 g) Greek yogurt
      • 1 tablespoon stevia or any other sweetener of your choice
      • 1 teaspoon baking powder
    • A pinch of salt
    • 1 tablespoon unsweetened cocoa powder

    Directions:

      1. Preheat the Oven:
        • Preheat your oven to 360°F (180°C).
      2. Prepare the Oat Mixture:
          • In a bowl, combine 1 cup of oatmeal and 1 cup of milk. Let it sit for a few minutes to allow the oats to soak.


      3. Combine Ingredients:
        • Add 2 eggs, 1/3 cup of Greek yogurt, 1 tablespoon of stevia, 1 teaspoon of baking powder, a pinch of salt, and 1 tablespoon of unsweetened cocoa powder to the oat mixture. Mix well until all ingredients are combined.
      1. Pour into Baking Dish:
        • Pour the mixture into greased muffin cups or a baking dish.
      2. Bake:
          • Bake in the preheated oven for 20-25 minutes, until the tops are set and a toothpick inserted into the center comes out clean.


      3. Cool and Serve:
        • Allow to cool slightly before serving.

    Serving Suggestions:

      • Serve these muffins warm with a dollop of Greek yogurt or a drizzle of honey.
      • Pair with a cup of coffee or tea for a delightful breakfast or snack.
    • Top with fresh berries or a sprinkle of nuts for added texture and flavor.

    Cooking Tips:

      • Ensure the oats are fully soaked in the milk for a moist and tender muffin texture.
    • Use silicone muffin cups or line your baking dish with parchment paper to prevent sticking.
    • Experiment with add-ins like chocolate chips, nuts, or dried fruits for a personalized touch.

    Nutritional Benefits:

      • High in protein from the eggs and Greek yogurt, supporting muscle repair and growth.
      • Rich in fiber from the oats, promoting healthy digestion.
      • Low in added sugars, thanks to the use of stevia as a sweetener.

    Dietary Information:

      • This recipe is vegetarian.
      • Can be made dairy-free by using a plant-based milk and dairy-free yogurt.

    Storage:

    • Store in an airtight container at room temperature for up to 3 days.
    • For longer storage, refrigerate for up to a week or freeze for up to a month. Thaw before serving.
  • Nutty Smoothie Bliss – A Protein-Packed Delight!

    Nutty Smoothie Bliss – A Protein-Packed Delight!

    Recipes By Sarina | Easy Recipes, Desserts, and More
    Ingredients:
    1 cup almond milk
    1 medium banana (sliced)
    2 tbsp peanut butter
    1 tbsp honey or maple syrup
    1 tbsp chia seeds
    1 scoop protein powder (optional)
    ½ tsp vanilla extract
    4-5 ice cubes
    Instructions: Blend almond milk, banana, peanut butter, honey, chia seeds, protein powder, vanilla extract, and ice cubes until smooth. Pour into a glass and enjoy your creamy, nutty smoothie packed with energy!

  • Coffee Jelly Dessert Recipe

    Coffee Jelly Dessert Recipe

    Ingredients:

    -2 pack of unflavored gelatin
    -5 cup water
    -¾ cup sugar
    -2 tbsp instant coffee
    -250 ml all-purpose cream
    -1 cup condensed milk
    -1 cup evaporated milk

    ✅Procedure:

    1. Put water and unflavored gelatin in a pot. Stir to dissolve over medium heat. Then add sugar and instant coffee, stir well. (Please follow the instruction on the package of gelatin brand your going to use).

    2. Pour into a square container or baking dish. Let it cool. Cover and refrigerate until it completely set. Cut into 1 inch cube.

    3. In a bowl combine all-purpose cream, condensed milk and evaporated milk. Stir until well blended. Add coffee jelly into the mixture. Mix well. Then chill in the refrigerator.

  • Cookies and Cream Ice Cream

    Cookies and Cream Ice Cream

    Ingredients:
    – 2 cups heavy cream
    – 1 cup whole milk
    – 3/4 cup granulated sugar
    – 1 teaspoon vanilla extract
    – 1 cup crushed chocolate sandwich cookies

    Directions:
    1. Start by grabbing a mixing bowl and whisk together the heavy cream, whole milk, sugar, and vanilla extract. Make sure to whisk until the sugar is fully dissolved, creating a lovely creamy base.
    2. Now, pour that delicious mixture into your ice cream maker. Churn it according to the manufacturer’s instructions until it thickens up beautifully.
    3. Once thickened, gently fold in the crushed chocolate sandwich cookies. This will give your ice cream that iconic cookies and cream flavor!
    4. Transfer your homemade ice cream into a lidded container and pop it in the freezer. Let it chill for at least 4 hours, or until it’s firm enough to scoop.
    5. When you’re ready, scoop out a generous portion and enjoy this delightful treat!

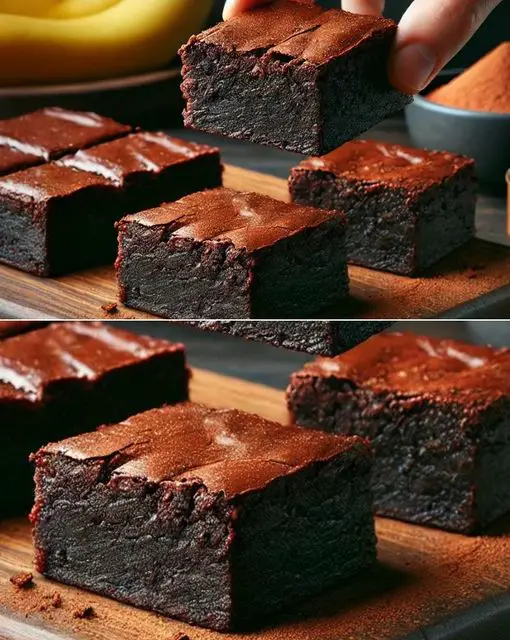
  • Healthy 3-Ingredient Fudgy Brownies

    Healthy 3-Ingredient Fudgy Brownies

    Healthy 3-Ingredient Fudgy Brownies

    Ingredients

    For one 8×8 inch pan (16 brownies):

    • 2 large very ripe bananas (about 240g peeled)
    • 1 cup (256g) smooth unsweetened almond butter
    • ½ cup (50g) unsweetened cocoa powder

    Optional enhancers:

    • 1 teaspoon (5ml) pure vanilla extract
    • ⅛ teaspoon fine sea salt
    • ¼ teaspoon baking soda

    Detailed Instructions

    1. Preparation
    • Preheat oven to 350°F (175°C)
    • Line an 8×8 inch baking pan with parchment paper
    • Leave overhang for easy removal
    1. Perfect the Bananas
    • Select very ripe bananas with dark spots
    • Mash thoroughly using a fork or blender
    • Ensure no lumps remain for best texture
    1. Create the Base
    • In a large bowl, combine mashed bananas and almond butter
    • Mix until completely smooth and uniform
    • The mixture should be thick and creamy
    1. Add Chocolate
    • Sift cocoa powder into the mixture
    • Fold in gradually to prevent cocoa clouds
    • Mix until batter is completely uniform and glossy
    1. Optional Additions
    • If using, add vanilla, salt, and baking soda
    • These enhance flavor but aren’t essential
    • Mix until just combined
    1. Bake to Perfection
    • Transfer batter to prepared pan
    • Smooth top with spatula
    • Bake 20-25 minutes until top is set but center is still soft
    1. Crucial Cooling
    • Let cool completely in pan (at least 1 hour)
    • Refrigerate for 2+ hours for best texture
    • Cut into 16 squares using sharp knife

    Pro Tips

    • Choose bananas that are very ripe with dark spots for maximum sweetness
    • Room temperature ingredients blend better
    • Don’t overbake – brownies will continue to set while cooling
    • Clean knife between cuts for pristine squares
    • Chill before cutting for cleanest results

    Nutritional Information

    Per brownie (1/16th of recipe):

    • Calories: 95
    • Total Fat: 7g
    • Saturated Fat: 0.5g
    • Cholesterol: 0mg
    • Sodium: 3mg (more with optional salt)
    • Total Carbohydrates: 8g
    • Dietary Fiber: 3g
    • Sugar: 3g (all natural from bananas)
    • Protein: 4g

    Storage Guidelines

    • Room temperature: Up to 2 days in airtight container
    • Refrigerated: Up to 5 days
    • Frozen: Up to 3 months (wrap individually)

    Variations and Add-ins

    While keeping them healthy, you can customize these brownies:

    • Add chopped walnuts or almonds for crunch
    • Sprinkle with cacao nibs
    • Mix in unsweetened shredded coconut
    • Top with fresh berries before serving

    Serving Suggestions

    • Perfect for healthy snacking
    • Great post-workout treat
    • Kid-friendly dessert
    • Excellent with coffee or tea
    • Delicious crumbled over nice cream

    The ideal healthy brownie should have a fudgy, dense texture with an intense chocolate flavor. When made correctly, these brownies satisfy chocolate cravings while providing nutritional benefits from natural ingredients. The banana sweetness should be subtle, letting the rich cocoa flavor shine through.

    These brownies prove that healthy desserts don’t have to taste like a compromise. They’re perfect for anyone looking to enjoy a chocolatey treat while maintaining a healthy lifestyle, and they’re naturally gluten-free, dairy-free, and vegan-friendly.

  • Healthy Oatmeal Cocoa cups

    Healthy Oatmeal Cocoa cups

    Healthy Oatmeal Cocoa cups

    Ingredients:

      • 1 cup (100 g) oatmeal
      • 1 cup (240 ml) milk of your choice
      • 2 eggs
      • 1/3 cup (100 g) Greek yogurt
      • 1 tablespoon stevia or any other sweetener of your choice
      • 1 teaspoon baking powder
    • A pinch of salt
    • 1 tablespoon unsweetened cocoa powder

    Directions:

      1. Preheat the Oven:
        • Preheat your oven to 360°F (180°C).
      2. Prepare the Oat Mixture:
          • In a bowl, combine 1 cup of oatmeal and 1 cup of milk. Let it sit for a few minutes to allow the oats to soak.


      3. Combine Ingredients:
        • Add 2 eggs, 1/3 cup of Greek yogurt, 1 tablespoon of stevia, 1 teaspoon of baking powder, a pinch of salt, and 1 tablespoon of unsweetened cocoa powder to the oat mixture. Mix well until all ingredients are combined.
      1. Pour into Baking Dish:
        • Pour the mixture into greased muffin cups or a baking dish.
      2. Bake:
          • Bake in the preheated oven for 20-25 minutes, until the tops are set and a toothpick inserted into the center comes out clean.


      3. Cool and Serve:
        • Allow to cool slightly before serving.

    Serving Suggestions:

      • Serve these muffins warm with a dollop of Greek yogurt or a drizzle of honey.
      • Pair with a cup of coffee or tea for a delightful breakfast or snack.
    • Top with fresh berries or a sprinkle of nuts for added texture and flavor.

    Cooking Tips:

      • Ensure the oats are fully soaked in the milk for a moist and tender muffin texture.
    • Use silicone muffin cups or line your baking dish with parchment paper to prevent sticking.
    • Experiment with add-ins like chocolate chips, nuts, or dried fruits for a personalized touch.

    Nutritional Benefits:

      • High in protein from the eggs and Greek yogurt, supporting muscle repair and growth.
      • Rich in fiber from the oats, promoting healthy digestion.
      • Low in added sugars, thanks to the use of stevia as a sweetener.

    Dietary Information:

      • This recipe is vegetarian.
      • Can be made dairy-free by using a plant-based milk and dairy-free yogurt.

    Storage:

    • Store in an airtight container at room temperature for up to 3 days.
    • For longer storage, refrigerate for up to a week or freeze for up to a month. Thaw before serving.
  • How to Use Sweet Cloves for Weight Loss – The Secret Fat-Burning Spice

    How to Use Sweet Cloves for Weight Loss – The Secret Fat-Burning Spice

    How to Use Sweet Cloves for Weight Loss – The Secret Fat-Burning Spice!


    Why Cloves Help with Weight Loss

    Boosts Metabolism: Cloves contain compounds that help increase metabolic rate, allowing your body to burn calories more efficiently.

    Reduces Bloating: Their digestive properties help eliminate bloating and gas, promoting a flatter stomach.

    Balances Blood Sugar: Cloves help regulate blood sugar levels, reducing cravings and preventing fat storage.

    Rich in Antioxidants: These tiny spices are packed with antioxidants that fight inflammation and support overall weight loss.

    Improves Digestion: Cloves stimulate digestive enzymes, promoting better nutrient absorption and fat breakdown.

    How to Use Cloves for Weight Loss

    1. Clove Tea for Fat Burning

    Drinking clove tea first thing in the morning helps kickstart metabolism and detoxify the body.

    Ingredients:

    • 1 teaspoon whole cloves
    • 1 cup boiling water
    • ½ teaspoon honey (optional)
    • ½ teaspoon lemon juice (optional)

    How to Make It:

    1. Crush the cloves slightly to release their oils.
    2. Steep in boiling water for 5–10 minutes.
    3. Strain and add honey or lemon for flavor.
    4. Drink warm, preferably on an empty stomach in the morning.

    Best Time to Drink: Morning or before meals.

    2. Clove and Cinnamon Fat-Burning Drink

    Combining cloves with cinnamon enhances their weight loss benefits by stabilizing blood sugar and reducing cravings.

    Ingredients:

    • 1 teaspoon cloves
    • 1 cinnamon stick (or ½ teaspoon cinnamon powder)
    • 1 cup boiling water
    • ½ teaspoon apple cider vinegar (optional)

    How to Make It:

    1. Steep cloves and cinnamon in hot water for 10 minutes.
    2. Strain and drink twice a day, preferably before meals.

    Bonus: This drink also improves digestion and fights bloating!

    3. Clove and Ginger Detox Water

    This powerful detox water helps flush toxins, improve metabolism, and reduce belly fat.

    Ingredients:

    • 1 teaspoon cloves
    • 1 teaspoon grated fresh ginger
    • 1 liter warm water

    How to Make It:

    1. Add cloves and ginger to warm water.
    2. Let it infuse for at least 2 hours (or overnight for stronger effects).
    3. Drink throughout the day.

    Additional Tips for Best Results

    ✅ Use Cloves Regularly – Consistency is key! Drink clove tea or add cloves to your diet daily.
    ✅ Pair with Exercise – Cloves enhance fat-burning, but they work best with physical activity.
    ✅ Eat a Balanced Diet – Avoid processed foods and sugary drinks for optimal results.
    ✅ Stay Hydrated – Drink plenty of water to aid digestion and detoxification.

    Conclusion

    Sweet cloves are a powerful natural weight loss aid that boosts metabolism, burns fat, and improves digestion. Whether you enjoy them in tea, detox water, or fat-burning drinks, adding cloves to your daily routine can help you achieve your weight loss goals naturally. Start today and watch the results!

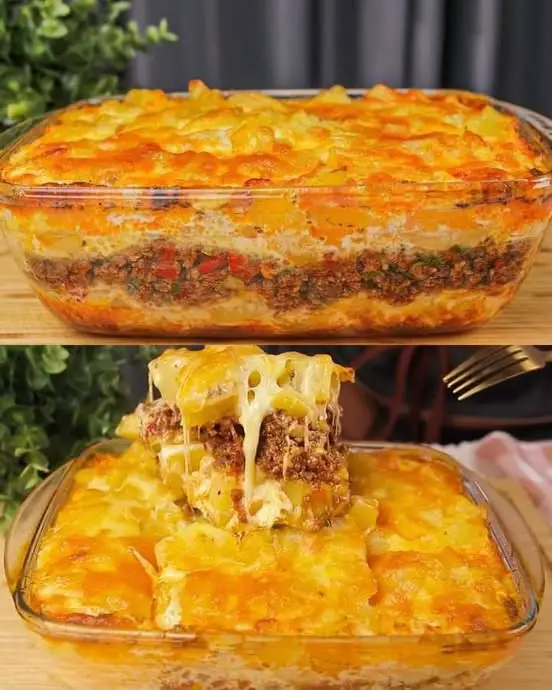
  • Potato and Sausage Bake with Sour Cream and Dill Salad

    Potato and Sausage Bake with Sour Cream and Dill Salad

    Potato and Sausage Bake with Sour Cream and Dill Salad
    This Potato and Sausage Bake is a hearty, flavorful dish that’s perfect for a filling dinner. The combination of tender potatoes, savory hunting sausages, and creamy sour cream makes for an irresistible meal. It’s complemented by a refreshing dill and cucumber salad for a balanced, delicious experience. Here’s how to make it step by step:

    Ingredients:
    For the Potato and Sausage Bake:
    4 Chicken Eggs
    200 g Sour Cream
    A bunch of Spring Onions, chopped
    1 Tomato, diced
    Salt, to taste
    Ground Black Pepper, to taste
    500 g Potatoes, peeled and sliced
    Vegetable Oil, for cooking
    Dried Ground Oregano, to taste
    Dried Ground Sweet Paprika, to taste
    2 Hunting Sausages, sliced
    50 g Hard Parmesan Cheese, grated
    For the Dill and Cucumber Salad:
    60 g Sour Cream
    40 g Mayonnaise
    Salt, to taste
    Ground Black Pepper, to taste
    A bunch of Dill, chopped
    1 Cucumber, sliced
    3 Cloves of Garlic, minced
    Step-by-Step Instructions:
    1. Prepare the Potato and Sausage Bake:
    Preheat the Oven:

    Preheat your oven to 180°C (355°F), ensuring it’s at the right temperature when the dish is ready to bake.
    Prepare the Potato Layer:

    Peel and slice the 500g potatoes into thin rounds. In a skillet, heat some vegetable oil and sauté the potato slices until they start to soften but are not fully cooked. Season with salt, black pepper, dried oregano, and dried paprika to taste for extra flavor.
    Combine Eggs and Sour Cream:

    In a mixing bowl, beat the 4 chicken eggs with 200g sour cream until smooth. Add the chopped spring onions and diced tomato, then season with salt and black pepper to taste.
    Layer the Dish:

    Grease a baking dish with a bit of vegetable oil. Layer the sautéed potatoes at the bottom of the dish. Then, layer the sliced hunting sausages over the potatoes. Pour the egg and sour cream mixture over the top, spreading it evenly.
    Top with Cheese:

    Sprinkle 50g grated Parmesan cheese evenly over the top for a cheesy, crispy finish.
    2. Bake the Dish:
    Bake:

    Place the baking dish in the preheated oven and bake for 25 minutes at 180°C (355°F), or until the potatoes are tender, and the top is golden and bubbly.
    Final Baking:

    After 25 minutes, remove the dish from the oven and add a bit more grated cheese, then return to the oven for an additional 20 minutes until the cheese is fully melted and browned.
    3. Prepare the Dill and Cucumber Salad:
    Make the Dressing:

    In a bowl, mix the 60g sour cream with 40g mayonnaise. Add salt and black pepper to taste, and stir in the minced garlic.
    Assemble the Salad:

    Slice the 1 cucumber and place it in a bowl. Add the chopped dill and the creamy dressing, mixing well to combine.
    4. Serve:
    Plate the Dish:

    Once the Potato and Sausage Bake is done, let it cool slightly before serving. Slice the bake into portions and serve alongside the refreshing dill and cucumber salad.
    Serving Suggestions:
    As a Main Course: The Potato and Sausage Bake is a hearty main dish on its own, perfect for a comforting dinner.

    With a Side Salad: The fresh dill and cucumber salad provides a crisp contrast to the rich, cheesy bake, balancing out the flavors perfectly.

    For Meal Prep: This dish is excellent for meal prepping. The flavors meld together even more the next day, making it a great option for leftovers.

    Cooking Tips:
    Adjust the Spices:
    Feel free to adjust the spices according to your taste. Add more paprika for a smoky flavor or chili flakes if you like some heat.

    Layer the Ingredients Evenly:
    Ensure that the potatoes and sausage are layered evenly for a consistent texture throughout the dish.

    Use Fresh Dill for Maximum Flavor:
    Fresh dill really enhances the flavor of the salad. If you only have dried dill, reduce the amount as dried dill is more concentrated.

    Add More Veggies:
    You can add other vegetables like bell peppers, mushrooms, or zucchini to the bake to make it even more hearty and nutritious.

    Variations to Try:
    Vegetarian Version:
    Substitute the hunting sausages with vegetarian sausage or other plant-based protein for a meat-free version.

    Sweet Potato Option:
    Swap the regular potatoes for sweet potatoes for a slightly sweeter, healthier twist.

    Cheese Variations:
    Use different cheeses like cheddar, feta, or gouda for a new flavor profile.

    Spicy Sausage Version:
    Use spicy sausage or add some chili flakes to the egg mixture for a more robust, spicy flavor.

    Conclusion:
    This Potato and Sausage Bake is a satisfying and flavorful dish that combines creamy potatoes, savory sausage, and rich cheese. Paired with a fresh dill and cucumber salad, it’s the perfect meal to enjoy with family or guests. Whether for a weeknight dinner or a special gathering, this recipe is sure to impress and delight.

    Frequently Asked Questions (FAQs):
    Can I make this bake in advance?
    Yes, you can prepare the bake ahead of time and store it in the fridge. Just bake it when you’re ready to serve. It also reheats well in the oven.

    Can I substitute the sausages with another type of meat?
    Yes, you can use chicken, bacon, or ham as alternatives to hunting sausages for a different flavor.

    How do I store leftovers?
    Store leftovers in an airtight container in the fridge for up to 3 days. Reheat in the oven or microwave before serving.

    Can I use low-fat sour cream or mayo?
    Yes, you can substitute low-fat versions of sour cream and mayonnaise for a lighter version of this dish.

    Can I make this dish gluten-free?
    Yes, substitute the regular flour with a gluten-free flour blend for a gluten-free version of this dish.

    Can I freeze the bake?
    Yes, this dish freezes well. Allow it to cool completely, then wrap it tightly in plastic wrap and aluminum foil. It can be frozen for up to 2 months.

    How do I know when the dish is fully cooked?
    The dish is fully cooked when the potatoes are tender and the top is golden brown and bubbly. You can also insert a toothpick into the center—if it comes out clean, the bake is done.

    What can I serve with this dish?
    This dish is delicious on its own, but it pairs well with a light salad, roasted vegetables, or a bowl of soup for a more filling meal.

    Can I add other vegetables to the bake?
    Yes, you can add vegetables like spinach, zucchini, or mushrooms to the dish for extra flavor and texture.

    What can I use instead of hunting sausages?
    You can replace the hunting sausages with chicken sausage, turkey sausage, or even vegetarian sausages for a different flavor.

  • Decadent Carrot and Walnut Cake with Cream Cheese Frosting

    Decadent Carrot and Walnut Cake with Cream Cheese Frosting

    Decadent Carrot and Walnut Cake with Cream Cheese Frosting
    When it comes to desserts, few things compare to the charm of a well-made carrot cake. Its unique ability to combine hearty, wholesome ingredients like carrots and walnuts with indulgent flavors of warm spices, cream cheese frosting, and just the right amount of sweetness makes it a timeless classic. This Decadent Carrot and Walnut Cake with Cream Cheese Frosting elevates the traditional carrot cake with a modern twist. The subtle citrusy zing of lemon zest and a hint of cardamom add a sophisticated flavor profile, while the cream cheese frosting, enriched with condensed milk, provides an extra layer of richness.

    This recipe isn’t just about taste; it’s also a celebration of texture. The crunch of toasted walnuts, the softness of grated carrots, and the moist, fluffy cake create a perfect harmony that makes every bite unforgettable. Whether you’re serving it for a family gathering, a birthday celebration, or just as a treat for yourself, this carrot and walnut cake will always leave a lasting impression.

    Carrot cake has stood the test of time, dating back to the Middle Ages when sweeteners were scarce, and carrots provided a natural sweetness. Today, it remains a favorite around the world, cherished for its versatility, comforting flavors, and ability to adapt to modern tastes. This recipe honors that legacy while adding a contemporary flair that will make it a standout at any table.

    Full Recipe:
    Ingredients
    For the Cake:
    Walnuts: 2 handfuls (roughly 100 g), chopped
    Carrots: 3 medium-sized, finely grated
    Chicken eggs: 5 large
    Cane sugar: 1/2 cup
    Vegetable oil: 3 tablespoons (e.g., sunflower or canola)
    Flour: 1/2 cup (all-purpose)
    Cardamom: 1/4 teaspoon
    Cocoa powder: 2 tablespoons
    Baking powder: 1 teaspoon
    Salt: A pinch
    Ground cloves: A pinch
    For the Frosting:
    Soft cream cheese: 450 g (e.g., Philadelphia or similar)
    Condensed milk: 100 g (sweetened)
    Lemon zest: Zest of 1 lemon
    Prep Time, Cooking Time, and Total Time
    Prep Time: 20 minutes
    Cooking Time: 40-45 minutes
    Total Time: 1 hour 5 minutes
    Step-by-Step Instructions
    Step 1: Preheat the Oven
    Preheat your oven to 180°C (356°F).
    Grease a 9-inch round cake pan or line it with parchment paper for easy removal.
    Step 2: Prepare the Walnuts
    Roughly chop the walnuts and toast them in a dry pan over medium heat for 3-4 minutes. This enhances their natural flavor and adds a delightful crunch to the cake. Set aside to cool.
    Step 3: Grate the Carrots
    Wash, peel, and finely grate the carrots. The finer the grate, the more evenly they’ll blend into the cake batter, ensuring a moist and tender crumb.
    Step 4: Mix the Wet Ingredients
    In a large mixing bowl, beat the eggs and sugar together until light and frothy. This will help incorporate air into the batter for a fluffy texture.
    Gradually add the vegetable oil, mixing until fully combined.
    Step 5: Combine the Dry Ingredients
    In a separate bowl, sift together the flour, baking powder, cocoa powder, cardamom, salt, and ground cloves. Sifting ensures the ingredients are evenly distributed and eliminates any lumps.
    Step 6: Create the Batter
    Gradually fold the dry ingredients into the wet mixture, stirring gently until no streaks of flour remain. Avoid overmixing to maintain the cake’s light texture.
    Add the grated carrots and toasted walnuts, folding them in until evenly distributed.
    Step 7: Bake the Cake
    Pour the batter into the prepared cake pan, smoothing the top with a spatula.
    Bake in the preheated oven for 40-45 minutes, or until a toothpick inserted into the center comes out clean.
    Let the cake cool in the pan for 10 minutes, then transfer to a wire rack to cool completely.
    Step 8: Prepare the Frosting
    In a medium bowl, beat the cream cheese until smooth and creamy.
    Gradually add the condensed milk, beating until fully incorporated.
    Stir in the lemon zest for a burst of freshness.
    Step 9: Assemble the Cake
    Once the cake has cooled completely, spread the cream cheese frosting evenly over the top and sides.
    Garnish with additional chopped walnuts or a sprinkle of lemon zest, if desired.
    Step 10: Serve and Enjoy
    Slice the cake into generous pieces and serve as a dessert or afternoon treat. Pair with a cup of tea or coffee for the ultimate experience.
    Servings and Nutritional Information
    Servings: 8-10 slices
    Calories (per serving): Approximately 290 kcal
    Protein: 6 g
    Carbohydrates: 26 g
    Fat: 18 g
    Saturated Fat: 7 g
    Sugar: 18 g
    Fiber: 2 g
    Sodium: 150 mg
    Why This Recipe is Timeless
    This Carrot and Walnut Cake is a testament to the enduring appeal of traditional recipes with a modern twist. The combination of carrots and nuts has been beloved for centuries, offering a balance of natural sweetness, earthy flavors, and satisfying textures. The addition of spices like cardamom and cloves, along with the tangy lemon-zest-enhanced cream cheese frosting, breathes new life into this classic dessert, ensuring it never goes out of style.

    What makes this cake truly timeless is its versatility. It can be dressed up for festive occasions or enjoyed as a simple comfort food. Its ingredients are readily available, and the recipe is straightforward, making it accessible to bakers of all skill levels.

    FAQs
    1. Can I use a different type of nut?
    Absolutely! Pecans, almonds, or hazelnuts are great substitutes for walnuts.

    2. Is there a gluten-free option?
    Yes, you can replace the all-purpose flour with a gluten-free baking blend.

    3. Can I make this cake ahead of time?
    Yes! The cake can be baked a day in advance and stored in the refrigerator. Add the frosting just before serving for the freshest taste.

    Tips for the Perfect Cake
    Use fresh carrots: Freshly grated carrots add more moisture and sweetness to the cake.
    Don’t skip toasting the nuts: Toasting intensifies their flavor, making a noticeable difference.
    Cool the cake completely: Frosting a warm cake will cause the frosting to melt and slide off.
    Storage Tips
    Refrigeration: Store the frosted cake in an airtight container in the refrigerator for up to 4 days.
    Freezing: The unfrosted cake can be wrapped tightly in plastic wrap and frozen for up to 2 months. Thaw overnight in the refrigerator before frosting.
    Conclusion
    The Decadent Carrot and Walnut Cake with Cream Cheese Frosting is more than just a dessert—it’s a celebration of flavor, texture, and tradition. Its rich history, combined with its modern enhancements, ensures it remains a favorite for generations to come. This cake is perfect for any occasion, whether it’s a festive gathering, a birthday, or simply a day when you crave something special.

    Its moist, spiced crumb and creamy, tangy frosting make it a showstopper, while its wholesome ingredients and straightforward preparation make it an achievable masterpiece for any home baker. Try this recipe, and you’ll understand why carrot cake has earned its place in the pantheon of timeless desserts. Enjoy every bite, and share the joy with those you love!

  • Oatmeal, Apple, and Carrot Bake Recipe

    Oatmeal, Apple, and Carrot Bake Recipe

    Oatmeal, Apple, and Carrot Bake Recipe

    Ingredients:

      • 2 cups oatmeal (200g)
      • 1 tsp baking powder
      • 250 ml milk
      • 1 carrot, grated
      • 1 apple, grated
      • 1 tsp cinnamon
      • 3 eggs
      • Pinch of vanillin
      • 4 tbsp sweetener (stevia)
    • 40g cranberries
    • Oil for greasing

    Directions:

      • Preheat Oven: Preheat to 180°C (360°F).
      • Prepare Dry Ingredients: Mix oatmeal and baking powder.
      • Mix Wet Ingredients: Beat eggs, then add milk, grated carrot, apple, cinnamon, vanillin, and stevia.
    • Combine: Pour the wet mixture into the dry ingredients, mix, and fold in cranberries.
    • Bake: Grease a baking mold, pour the mixture in, and bake for 45 minutes. Let cool before slicing.

    Serving Suggestions:

    • Serve warm or cold with a dollop of yogurt or fresh fruit on the side.

    Cooking Tips:

      • Grate the apples and carrots finely for a smooth texture.
    • Add nuts or seeds for extra crunch.

    Nutritional Benefits:

      • Oatmeal: Rich in fiber and heart-healthy.
    • Carrots & Apples: Provide essential vitamins A and C.
    • Cranberries: Packed with antioxidants.

    Dietary Information:

    • Gluten-Free: Use gluten-free oats.
    • Sugar-Free: Sweetened naturally with stevia and fruits.

    Nutritional Facts (per slice):

      • Calories: 120
      • Protein: 4g
      • Carbohydrates: 18g
    • Fat: 3g
    • Fiber: 4g

    Storage:

    • Store in an airtight container in the fridge for up to 5 days.

    Why You’ll Love This Recipe:

      • It’s easy to prepare and loaded with natural sweetness.
    • A great option for those avoiding refined sugars.
    • Perfect for meal prep and makes a nutritious snack or breakfast.