Category: Recipes

  • Apple Carrot Glow Juice

    Apple Carrot Glow Juice

    1f34e Ingredients:

    2 apples (cored and sliced)
    1 cup carrot juice
    ½ inch fresh ginger (grated)
    ½ lemon (juiced)
    Ice cubes
    1f944 Instructions:
    Blend all ingredients until smooth. Pour into a glass and enjoy a refreshing vitamin boost!

    Body Training Muscle And Fitness

  • Whisk Milk with Dates: A Naturally Sweet, Delicious Treat!

    Whisk Milk with Dates: A Naturally Sweet, Delicious Treat!

    Whisk Milk with Dates: A Naturally Sweet, Delicious Treat!

    If you’re looking for a simple yet incredibly tasty drink that’s both sweet and nutritious, milk and dates are the perfect combination. This drink is easy to make, and the dates naturally sweeten the milk, creating a rich, creamy texture. It’s perfect as a snack, breakfast, or even dessert! Plus, you can easily make it your own with added flavors like vanilla or cinnamon. Here’s how you can whisk up this delicious treat that you’ll want to share with all your friends.


    Ingredients:

    • 1 cup of milk (dairy or plant-based such as almond, coconut, or oat milk)
    • 5-6 pitted dates (use Medjool dates for the best natural sweetness)
    • 1/2 teaspoon of vanilla extract (optional, for added flavor)
    • A pinch of cinnamon or nutmeg (optional, for a warm spice kick)
    • Ice cubes (optional, if you prefer it chilled)

    Instructions:

    Step 1: Prepare the Dates

    Begin by pitting the dates if they aren’t already pitted. If the dates seem a little dry, soak them in warm water for 5-10 minutes. This will soften them, making them easier to blend and giving the drink a smoother texture. Soaking also helps bring out the natural caramel-like sweetness of the dates.

    Step 2: Blend the Ingredients

    In a blender, add the soaked dates and milk of your choice. Blend on high until smooth and creamy. The dates will blend into the milk, creating a sweet, velvety texture. You’ll notice the drink turning a rich, golden color as the dates infuse their natural sweetness into the milk.

    Step 3: Add Flavor (Optional)

    For added depth of flavor, you can incorporate 1/2 teaspoon of vanilla extract and a pinch of cinnamon or nutmeg. This will add a nice warmth to the drink, perfect for cozying up on a cool day. These spices complement the caramel-like taste of the dates and make the drink even more comforting.

    Step 4: Serve and Enjoy

    Once blended, pour the drink into a glass. If you like your drink cold, simply add a few ice cubes to the glass or blend the ice directly into the mixture for an extra-chilled treat. Serve immediately and enjoy!


    Why You’ll Love This Milk and Dates Recipe:

    1. Natural Sweetness: The dates provide all the sweetness you need without any refined sugar. The natural sugars in dates are absorbed more slowly by the body, offering a healthier alternative to sugary beverages.
    2. Quick & Easy: This recipe is incredibly simple to make and only takes a few minutes, making it an excellent option for busy mornings or a quick snack.
    3. Nutrient-Packed: Dates are a great source of fibervitamins, and minerals, like potassiummagnesium, and iron. Pairing them with milk provides a boost of calcium and protein, making this drink as nutritious as it is delicious.
    4. Versatile: Whether you prefer it warm or cold, this drink is customizable for any season or preference. It’s perfect as a snack, breakfast, or even a post-workout treat for replenishing energy.

    Bonus Tip: Make a Date Milkshake

    If you’re craving something thicker, try turning this drink into a milkshake! Add 1/2 a frozen banana or a scoop of yogurt to the blender for a richer, creamier texture that’s perfect for dessert or as an indulgent snack.


    Conclusion

    Whisking milk and dates together creates a deliciously simple, naturally sweet treat that’s full of flavor and nutrition. This easy recipe is a fantastic way to enjoy the wholesome goodness of dates, and it’s sure to become a new favorite among your friends and family. Try it out today and enjoy this creamy, nutritious drink at any time of day!

  • Refreshing Cabbage and Cucumber Salad for Belly Fat Loss

    Refreshing Cabbage and Cucumber Salad for Belly Fat Loss

    Refreshing Cabbage and Cucumber Salad for Belly Fat Loss

    Ingredients

    • White cabbage – 1/3 head
    • Salt – 1/4 tsp (for the cabbage) + 1/4 tsp (for the cucumbers)
    • Cucumbers – 1-2 medium
    • Onion – 1/2 medium
    • Rice vinegar – 1 tsp
    • Red cabbage – 1/3 head
    • Carrot – 1 medium
    • Walnuts – 20 g (about 2 tbsp)
    • Garlic – 2 cloves
    • Olive oil – 2 tbsp
    • Honey – 1 tbsp
    • Grainy mustard – 2 tbsp
    • Soy sauce – 1 tsp

    Step-by-Step Instructions

    Step 1: Prepare the White Cabbage

    Start by thoroughly washing the white cabbage. Divide it into three parts and set aside two-thirds for other recipes, using one-third for this salad. Finely chop the cabbage into thin strips and place it in a large mixing bowl. Sprinkle with 1/4 teaspoon of salt, and let it sit for a few minutes to soften slightly.

    Step 2: Prepare the Cucumbers

    Wash the cucumbers and trim off both ends. Slice the cucumbers into thin, even rounds and place them in a separate bowl. Sprinkle with 1/4 teaspoon of salt and toss gently. Let the cucumbers sit for about 10 minutes to release some of their water, which will help keep the salad crisp. Drain the excess liquid before combining them with the other vegetables.

    Step 3: Prepare the Onion and Carrot

    Cut the onion in half and set one half aside for future use. Finely chop the remaining half and place the chopped onion in a small bowl of cold water to reduce its sharpness. Let the onions sit in the water for a few minutes, then drain and set aside.

    Next, wash and peel the carrot, then grate it finely. Add the grated carrot to the white cabbage in the mixing bowl.

    Step 4: Prepare the Red Cabbage

    Wash the red cabbage, then cut it into three parts. Use one-third of the cabbage for this recipe. Finely chop the chosen portion of red cabbage and combine it with the grated carrot and white cabbage in the large bowl. The vibrant mix of colors not only makes the salad visually appealing but also adds a variety of nutrients.

    Step 5: Combine the Vegetables

    Now, drain the cucumbers of any excess juice and add them to the bowl with the cabbage and carrots. Strain the onions and mix them in as well, ensuring that all the vegetables are well incorporated.

    Step 6: Add the Walnuts

    Chop the walnuts finely, or leave them slightly larger if you prefer more texture in your salad. Add the chopped walnuts to the bowl of vegetables. The nuts provide a nice crunch and a dose of healthy fats, which help keep you feeling full and satisfied.

    Step 7: Prepare the Dressing

    To make the dressing, crush or finely grate the garlic and place it in a small bowl. Add 2 tablespoons of olive oil1 tablespoon of honey2 tablespoons of grainy mustard, and 1 teaspoon of soy sauce. Whisk everything together until well combined. This dressing strikes a perfect balance between sweet, tangy, and savory flavors, enhancing the natural taste of the fresh vegetables.

    Step 8: Mix and Serve

    Pour the dressing over the salad, and toss everything together until all the vegetables are evenly coated. The mixture of cabbage, cucumbers, walnuts, and the tangy-sweet dressing creates a refreshing and filling salad that is both nutritious and delicious.

    For best results, serve the salad immediately or refrigerate for 30 minutes to allow the flavors to meld together for a more refreshing taste. This salad can also be stored in the fridge for up to 2 days.

    Serving Suggestions

    • Pair with lean protein: This salad goes wonderfully with grilled chicken, salmon, or tofu for a complete meal that supports weight loss.
    • Serve chilled: For an extra refreshing twist, serve the salad chilled straight from the refrigerator, especially during warm weather.
    • Make it a light lunch: Enjoy a generous portion of the salad on its own for a light and filling lunch.

    Health Benefits

    This cabbage and cucumber salad is not only flavorful but also packed with ingredients that support weight loss and overall health:

    • Cabbage: High in fiber and low in calories, cabbage helps promote satiety and digestive health.
    • Cucumbers: Rich in water and low in calories, cucumbers are hydrating and refreshing.
    • Walnuts: A great source of healthy fats, walnuts provide sustained energy and help keep hunger at bay.
    • Garlic and Mustard: Both garlic and mustard boost metabolism and add depth to the flavor of the salad without adding unnecessary calories.

    Nutrition Information (per serving, assuming 4 servings):

    • Calories: 200 kcal
    • Fat: 13 g
    • Carbohydrates: 16 g
    • Protein: 3 g
    • Fiber: 4 g
    • Sodium: 340 mg

    This refreshing cabbage and cucumber salad is a perfect choice for anyone looking to enjoy a healthy, low-calorie meal that is both satisfying and delicious. The crunchy vegetables, combined with the creamy dressing and the nutty texture of walnuts, make this dish a tasty way to support belly fat loss while nourishing your body.

  • Cheap and Delicious Tuna Casserole Dinner

    Cheap and Delicious Tuna Casserole Dinner

    Cheap and Delicious Tuna Casserole Dinner

    Table of Contents

    Ingredients
    • 2 cans of tuna (about 280 g each)
    • 1 onion, cut into slices
    • 5 medium potatoes, cut into large chunks
    • 2 tablespoons (30 g) tomato paste
    • 3/4 cup (180 ml) hot milk
    • 1 1/2 tablespoons (25 g) butter
    • 1/4 cup (25 g) shredded Parmesan cheese
    • Olive oil, as needed
    • Salt, to taste
    • Black pepper, to taste

    Directions

    Step 1: Prepare the Potatoes
    1. Cut the potatoes into large chunks and place them in a pot of salted water.
    2. Cook the potatoes until tender, about 15 to 20 minutes.
    3. Drain the potatoes and transfer them to a mixing bowl.
    4. Add 1 1/2 tablespoons of butter, salt, and black pepper to taste. Mash the potatoes until smooth.
    5. Gradually add 3/4 cup of hot milk while mashing until the mixture is smooth and creamy.
    Step 2: Prepare the Tuna Mixture
    1. Heat some olive oil in a large pan over medium heat.
    2. Add the sliced onion and sauté until browned.
    3. Add the two cans of tuna and 2 tablespoons of tomato paste mixed with one ladle of potato broth.
    4. Mix well and cook for two to three minutes on low heat.
    Step 3: Assemble the Casserole
    1. Preheat your oven to 375°F (190°C).
    2. Add half of the mashed potatoes to the bottom of a casserole dish and spread it out evenly.
    3. Layer half of the tuna mixture over the mashed potatoes.
    4. Add the remaining mashed potatoes over the tuna, followed by the remaining tuna mixture.
    5. Top with 1/4 cup of shredded Parmesan cheese.
    See also  Apple and Banana Baked Oatmeal with Nuts
    Step 4: Bake the Casserole
    1. Place the casserole dish in the preheated oven.
    2. Bake for 10 to 15 minutes, or until the top is golden brown and the cheese is melted.
    Nutrition Information (Per Serving):
    • Calories: 350
    • Protein: 25g
    • Carbohydrates: 30g
    • Fat: 15g
    • Fiber: 4g
    • Sugar: 3g
  • Marbled Chocolate Banana Bread

    Marbled Chocolate Banana Bread

    **Marbled Chocolate Banana Bread **

    This delicious Marbled Chocolate Banana Bread is the perfect balance of moist banana bread and rich chocolate flavor, making it an irresistible treat. The addition of browned butter brings out a nutty, rich flavor that elevates the taste. Whether it’s for breakfast, dessert, or a snack, this banana bread will surely satisfy your cravings.

    ### Ingredients:
    – 1/2 cup (1 stick) unsalted butter, melted and browned
    – 1 cup light brown sugar
    – 2 teaspoons vanilla extract
    – 2 large eggs
    – 4 ripe bananas, mashed
    – 1/2 cup sour cream
    – 1 1/2 cups all-purpose flour
    – 1 teaspoon baking soda
    – 1/2 teaspoon salt
    – 2 tablespoons unsweetened cocoa powder

    ### Instructions:

    #### 1️⃣ Prepare for Baking
    Preheat your oven to 350°F (175°C). Grease a 9 x 5-inch loaf pan with butter or non-stick spray. Set it aside.

    #### 2️⃣ Brown the Butter
    In a small saucepan, melt the unsalted butter over medium heat. Allow it to cook for 5 to 10 minutes, stirring frequently, until it turns light brown and releases a nutty aroma. Be sure to keep an eye on it to avoid burning. Once browned, remove it from the heat and transfer the butter to a large mixing bowl.

    #### 3️⃣ Mix Wet Ingredients
    To the browned butter, add the light brown sugar and vanilla extract. Stir until well combined. Add the eggs, one at a time, mixing well after each addition. Next, stir in the mashed bananas and sour cream until fully incorporated, creating a smooth, wet batter.

    #### 4️⃣ Mix Dry Ingredients
    In a separate bowl, whisk together the all-purpose flour, baking soda, and salt. Gradually add this dry mixture to the wet ingredients, mixing just until everything is combined. Be careful not to overmix, as this can lead to dense bread.

    #### 5️⃣ Create the Chocolate Batter
    Take 1 cup of the prepared batter and transfer it to the bowl containing the dry ingredients. Add the unsweetened cocoa powder and stir until smooth, forming the chocolate portion of the batter.

    #### 6️⃣ Swirl the Batter
    Now, it’s time to create the marbled effect. Alternate spooning dollops of the plain banana batter and chocolate batter into the prepared loaf pan. Once the pan is filled, use a butter knife or a skewer to gently swirl the two batters together, creating a marbled pattern.

    #### 7️⃣ Bake
    Place the loaf pan in the preheated oven and bake for 1 hour or until a toothpick inserted in the center comes out clean. The top should be golden brown, and the bread should feel firm to the touch.

    #### 8️⃣ Cool and Serve
    Let the banana bread cool in the pan for about 20 minutes before transferring it to a wire rack to cool completely. Once fully cooled, slice and enjoy!

    ### Tips:
    – For the best flavor, use extra-ripe bananas that are speckled with brown spots.
    – Store any leftovers in an airtight container at room temperature for up to 3 days, or refrigerate for up to a week to maintain freshness.
    – This marbled banana bread is perfect for a quick snack, a breakfast treat, or a delicious dessert!

    Enjoy this delightful twist on classic banana bread, and savor the perfect blend of banana and chocolate in every bite!

  • White Bun Recipe

    White Bun Recipe

    White Bun Recipe

    Table of Contents

    Ingredients

      • 700 grams of wheat flour
      • 1 teaspoon of salt
      • 400 ml warm milk
      • 4 tablespoons of sugar
      • 8 grams of dry yeast
      • 2 eggs
      • 80 ml sunflower oil
      • 10 grams of baking powder
      • 10 ml apple cider vinegar
      • 50 grams of butter, melted
      • 1 egg yolk
    • Milk (for brushing)
    • Sesame seeds (for topping)

    Directions

      1. Activate Yeast: In a small bowl, mix the warm milk and sugar. Sprinkle the dry yeast over the top and let it sit for 5-10 minutes until it becomes frothy.
      1. Mix Dry Ingredients: In a large mixing bowl, combine the wheat flour, salt, and baking powder.
      2. Combine Wet Ingredients: In a separate bowl, whisk the eggs, sunflower oil, and apple cider vinegar. Add the melted butter and mix well.
      3. Form Dough: Add the yeast mixture and the wet ingredients to the dry ingredients. Mix until a dough forms.
      1. Knead Dough: Turn the dough onto a floured surface and knead for about 10 minutes until smooth and elastic.
      2. First Rise: Place the dough in a greased bowl, cover it with a clean towel, and let it rise in a warm place for about 1 hour, or until it has doubled in size.
      3. Shape Buns: Punch down the dough and divide it into equal portions. Shape each portion into a bun and place them on a baking sheet lined with parchment paper.
      1. Second Rise: Cover the buns with a towel and let them rise for another 30 minutes.
      2. Preheat Oven: Preheat your oven to 180°C (350°F).
      3. Prepare for Baking: In a small bowl, beat the egg yolk with a little milk. Brush the tops of the buns with this mixture and sprinkle with sesame seeds.
    1. Bake: Bake the buns in the preheated oven for 30-35 minutes, or until golden brown.
    2. Cool: Let the buns cool on a wire rack before serving.
    See also  Super Moist Banana Bread Recipe

    Serving Suggestions

    Enjoy these white buns fresh out of the oven with butter, or use them for sandwiches and burgers. They also make a great accompaniment to soups and stews.

    Cooking Tips

      • Ensure the milk is warm, not hot, to activate the yeast properly.
      • For a richer flavor, you can replace some of the milk with cream.
      • Knead the dough well to develop gluten, which helps the buns rise and become fluffy.

    Nutritional Benefits

    These white buns provide carbohydrates for energy and some protein from the eggs. Using sunflower oil and butter adds healthy fats, making these buns a more nutritious option compared to store-bought varieties.

    Dietary Information

    • Vegetarian: This recipe is suitable for vegetarians.
    • Nut-Free: There are no nuts in this recipe, making it safe for those with nut allergies.
  • Cream Puff Pastry with Rich Cream Filling

    Cream Puff Pastry with Rich Cream Filling

    Cream Puff Pastry with Rich Cream Filling

    Table of Contents

    Ingredients

    The Dough:

      • 200g flour
      • 100ml milk
      • 100ml water
      • 100g butter
      • 1/2 tsp baking powder
      • Pinch of salt
      • 4 eggs

    The Cream:

      • 2 eggs
      • 180g sugar
      • 100g flour
      • 500ml milk
      • 200g butter

    Directions

    Prepare the Dough:

      1. Heat Liquid Ingredients:
        • In a medium saucepan, combine the milk, water, and butter. Heat over medium heat until the butter melts and the mixture begins to boil.
      2. Mix the Dough:
          • Remove the saucepan from the heat and add the flour all at once, stirring vigorously until the mixture forms a ball and pulls away from the sides of the pan.


      3. Cool and Add Eggs:
        • Let the dough cool for about 5 minutes. Add the baking powder and salt, then beat in the eggs one at a time, mixing well after each addition until the dough is smooth and glossy.
        • Preheat the oven to 200°C (400°F). Line a baking sheet with parchment paper.
        • Using a spoon or piping bag, place small mounds of dough onto the prepared baking sheet.
        • Bake for 20-25 minutes, or until the puffs are golden brown and firm. Allow them to cool completely on a wire rack.
    1. Bake the Puffs:

    Prepare the Cream Filling:

      1. Heat the Milk:
        • In a medium saucepan, heat the milk over medium heat until it just begins to simmer. Remove from heat.
    1. Mix the Eggs and Sugar:
      • In a separate bowl, whisk together the eggs and sugar until well combined. Gradually add the flour, mixing until smooth.
    2. Combine and Cook:
        • Slowly pour the hot milk into the egg mixture, whisking constantly to prevent curdling.


      • Return the mixture to the saucepan and cook over medium heat, stirring constantly, until it thickens and comes to a boil. Remove from heat and let cool slightly.
    3. Add Butter:
        • Once the mixture has cooled, beat in the butter until smooth and creamy.


    Assemble the Cream Puffs:

      1. Fill the Puffs:
        • Slice each puff in half and fill with the prepared cream using a spoon or piping bag.
    1. Serve:
      • Arrange the filled cream puffs on a serving plate and dust with powdered sugar if desired. Enjoy your meal!

    Serving Suggestions

      • Serve these cream puffs as a dessert at parties or gatherings.
    • Pair with a cup of coffee or tea for a delightful afternoon treat.

    Cooking Tips

      • Ensure the dough is cool before adding the eggs to prevent them from cooking.
      • Use a piping bag for a more uniform and professional appearance of the cream puffs.
    • Allow the cream to cool completely before filling the puffs to ensure it holds its shape.

    Nutritional Benefits

    • Eggs: Provide high-quality protein and essential vitamins.
    • Milk: Adds calcium and a creamy texture to both the dough and filling.
  • Greek Yogurt Zucchini Bread

    Greek Yogurt Zucchini Bread

    Greek Yogurt Zucchini Bread is a moist, flavorful twist on the classic zucchini bread, using Greek yogurt to add richness and tang. This bread combines the natural sweetness of zucchini with a touch of cinnamon and vanilla, while the Greek yogurt keeps it extra tender and adds a subtle creaminess. It’s a perfect way to use up summer zucchini or simply enjoy a healthier, slightly lighter version of a beloved treat. The result is a deliciously soft, slightly tangy loaf that’s perfect for breakfast, a snack, or even dessert!

    Prep Time: 15 minutes 

    Cook Time: 45 minutes 

    Total Time: 1 hour
    Servings: 10 slices

    Ingredients:

    1 1/2 cups grated zucchini (about 2 medium)

    2 large eggs

    1/2 cup plain Greek yogurt

    1/3 cup honey or maple syrup

    1/4 cup Olive oil or melted coconut oil

    1 teaspoon vanilla extract

    1 1/2 cups whole wheat flour (or all-purpose flour)

    1 teaspoon baking powder

    1/2 teaspoon baking soda

    1/2 teaspoon ground cinnamon

    1/4 teaspoon ground nutmeg

    1/4 teaspoon salt

    1/2 cup chopped walnuts or chocolate chips (optional)

    Steps:

    1. Preheat your oven to 350°F (175°C) and grease a 9×5-inch loaf pan.

    2. In a large bowl, whisk together eggs, Greek yogurt, honey, oil, and vanilla extract until smooth.

    3. Stir in the grated zucchini.

    4. In another bowl, combine flour, baking powder, baking soda, cinnamon, nutmeg, and salt.

    5. Gradually mix the dry ingredients into the wet ingredients until just combined. Do not overmix.

    6. Fold in walnuts or chocolate chips if desired.

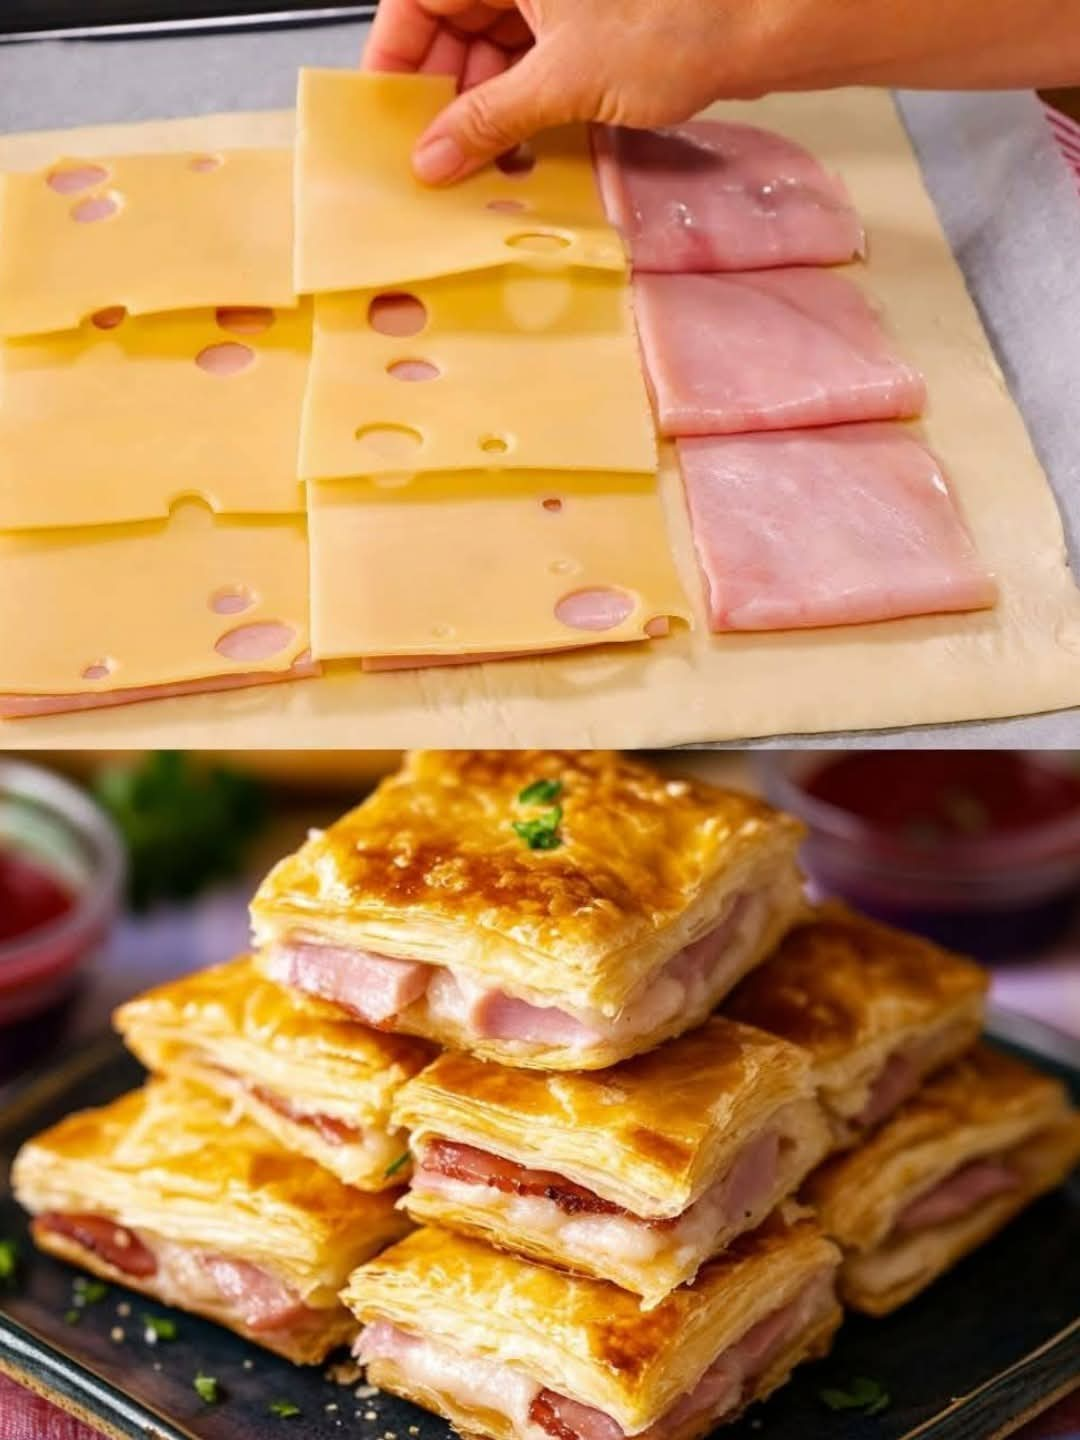
  • You only need 4 ingredients, puff pastry sticks with ham and cheese

    You only need 4 ingredients, puff pastry sticks with ham and cheese

    You only need 4 ingredients, puff pastry sticks with ham and cheese

    Table of Contents

    Ingredients

    1 pack of puff pastry from the refrigerated shelf, rectangular

    250 g sour cream

    120 g smoked ham, diced

    150 g cheese, grated

    preparation

    1. This is how it works: First, roll out the puff pastry and spread half of the sour cream on one half of the dough. Spread half of the diced ham and cheese on top. Fold the unlined side of the puff pastry over the other side.

    2. Spread half of the dough again with the remaining sour cream and add the diced ham and grated cheese on top. Fold the uncoated half of the dough over it.

    3. Now cut the puff pastry into strips. Carefully twist in a spiral and place on a baking tray lined with baking paper. Bake at 190° for about 20 minutes.

    4. Another variant: These sticks also taste very good if you use smoked salmon instead of ham. For this you need approx. 200 g.

  • Savory Meat and Melting Cheese Puff Pastry Roll

    Savory Meat and Melting Cheese Puff Pastry Roll

    :
    1 sheet puff pastry
    250g ground beef
    1 small onion, finely chopped
    1 clove garlic, minced
    1 teaspoon dried thyme
    1 teaspoon paprika
    Salt and pepper, to taste
    150g shredded mozzarella cheese
    1 egg, beaten (for egg wash)
    :
    Preheat the oven to 200°C (400°F).
    Heat a pan over medium heat and cook the ground beef until browned.
    Add the chopped onion and minced garlic, cooking until the onion softens.
    Season the mixture with thyme, paprika, salt, and pepper, then stir to combine.
    Remove from heat and let cool slightly. Once cooled, mix in the shredded mozzarella cheese.
    Roll out the puff pastry on a floured surface. Spread the beef and cheese mixture evenly across the centre.
    Roll the pastry tightly around the filling, ensuring the seam is sealed.
    Slice the rolled pastry into 6-8 pieces and place them on a baking tray lined with parchment paper.
    Brush the tops with the beaten egg for a golden finish.
    Bake for 20-25 minutes or until golden and puffed.
  • bananas with creamy vanilla ice cream!

    bananas with creamy vanilla ice cream!

    Ingredients:
    – 2 ripe bananas
    – 1/2 cup brown sugar
    – 1/4 cup butter
    – 1/4 cup rum
    – 1 pint vanilla ice cream
    – 1/2 teaspoon cinnamon

    Directions:
    1. Start by melting the butter in a skillet over medium heat. Let that delicious aroma fill your kitchen!
    2. Stir in the brown sugar and cinnamon until everything is beautifully combined, creating a sweet caramel base.
    3. Now, slice those ripe bananas and add them to the skillet. Cook them until they’re nice and soft, soaking up all that caramel goodness.
    4. Time for some excitement! Carefully pour in the rum and ignite it to flambé—watch the flames dance for just a minute before they extinguish. Safety first!
    5. Serve the warm, caramelized bananas over generous scoops of vanilla ice cream. Enjoy the perfect combo of hot and cold!

  • Moist Chocolate Cake with Chocolate Cream Filling Recipe

    Moist Chocolate Cake with Chocolate Cream Filling Recipe

    Moist Chocolate Cake with Chocolate Cream Filling Recipe

    Ingredients

    For the Cake:

    • 3 eggs
    • A pinch of salt
    • 8 g (1 tablespoon) vanilla sugar
    • 150 g (3/4 cup) sugar
    • 120 ml (1/2 cup) oil
    • 150 ml (2/3 cup) milk
    • 230 g (1 3/4 cups) flour
    • 20 g (3 tablespoons) bitter cocoa powder
    • 15 g (1 tablespoon) baking powder

    For the Coffee Mixture:

    • 100 ml (1/3 cup + 1 tablespoon) milk
    • 1 tablespoon instant coffee
    • 1 teaspoon cocoa powder

    For the Chocolate Cream Filling:

    • 60 g (1/4 cup) sugar
    • 25 g (3 tablespoons) cornstarch
    • 20 g (3 tablespoons) bitter cocoa powder
    • 250 ml (1 cup) milk
    • 100 g (3.5 oz) dark chocolate
    • 30 g (2 tablespoons) butter

    For Decoration:

    • Chocolate vermicelli

    Instructions

    Prepare the Cake

    1. Preheat the Oven: Start by preheating your oven to 180°C (350°F). Grease a round cake pan and line it with parchment paper to ensure the cake doesn’t stick and releases easily after baking.
    2. Mix the Wet Ingredients: In a large mixing bowl, combine 3 eggs with a pinch of salt, 8 g vanilla sugar, and 150 g sugar. Beat the mixture until it becomes light, fluffy, and pale in color. This will help create a soft, airy texture in the cake.
    3. Add Oil and Milk: Gradually add 120 ml oil and 150 ml milk to the egg mixture, stirring continuously until everything is well blended. This will add moisture and richness to the cake batter.
    4. Incorporate the Dry Ingredients: Sift together 230 g flour20 g bitter cocoa powder, and 15 g baking powder. Slowly fold the dry mixture into the wet ingredients, mixing gently to avoid overworking the batter, which could result in a dense cake. The batter should be smooth and lump-free.
    5. Bake: Pour the prepared batter into the greased and lined cake pan, spreading it evenly. Bake in the preheated oven for 30-35 minutes, or until a toothpick inserted into the center of the cake comes out clean. This ensures the cake is fully cooked and will have a perfect texture. Allow the cake to cool completely in the pan on a wire rack.

    Make the Coffee Mixture

    1. Prepare the Coffee Soak: In a small saucepan, heat 100 ml milk over medium heat. Stir in 1 spoon instant coffee and 1 teaspoon cocoa powder until fully dissolved and smooth. Set the mixture aside to cool slightly. This coffee soak will add depth and enhance the chocolate flavor of the cake.

    Prepare the Chocolate Cream Filling

    1. Mix the Cream Ingredients: In a medium saucepan, combine 60 g sugar25 g cornstarch, and 20 g bitter cocoa powder. Gradually whisk in 250 ml milk, stirring constantly to prevent lumps from forming. The mixture should be smooth before heating.
    2. Cook Until Thickened: Place the saucepan over medium heat, and cook the mixture, stirring constantly, until it thickens to a pudding-like consistency. This will serve as the creamy filling for the cake.
    3. Add Chocolate and Butter: Once thickened, remove the saucepan from the heat and immediately add 100 g dark chocolate and 30 g butter. Stir until the chocolate and butter are completely melted and the mixture is smooth and glossy. Allow the cream filling to cool to room temperature before using it to fill the cake.

    Assemble the Cake

    1. Soak the Cake: Once the cake has cooled, use a fork or skewer to poke holes all over the surface. This will help the cake absorb the coffee mixture. Slowly pour the prepared coffee mixture evenly over the cake, allowing it to soak in thoroughly for a moist and flavorful base.
    2. Spread the Chocolate Cream: Once the coffee mixture has been fully absorbed, spread the cooled chocolate cream filling over the top of the cake. Use a spatula to smooth it evenly across the surface, creating a luscious, creamy layer.

    Decorate the Cake

    1. Add the Finishing Touches: For decoration, generously sprinkle chocolate vermicelli over the top of the cake. This adds a delightful crunch and enhances the chocolatey appearance of the cake.

    Chill and Serve

    1. Refrigerate: Place the assembled cake in the refrigerator and chill for at least 2 hours. This will allow the cream filling to set and the flavors to meld, resulting in a perfectly textured and flavored cake.
    2. Serve: Slice the chilled cake into portions and serve. Each bite offers a rich, moist cake with a creamy, chocolate-filled center that’s sure to delight anyone with a love for chocolate.

    Nutrition Information

    • Serving Size: 1 slice (assuming 12 slices per cake)
    • Calories: 340 kcal
    • Total Fat: 20 g
    • Saturated Fat: 10 g
    • Cholesterol: 50 mg
    • Sodium: 60 mg
    • Total Carbohydrates: 36 g
    • Dietary Fiber: 3 g
    • Sugars: 22 g
    • Protein: 5 g

    Indulge in this Moist Chocolate Cake with Chocolate Cream Filling for an unforgettable dessert experience. The combination of a tender, coffee-infused cake and a velvety chocolate filling makes this dessert a must-try for any chocolate aficionado. Enjoy every bite of this rich, satisfying treat!

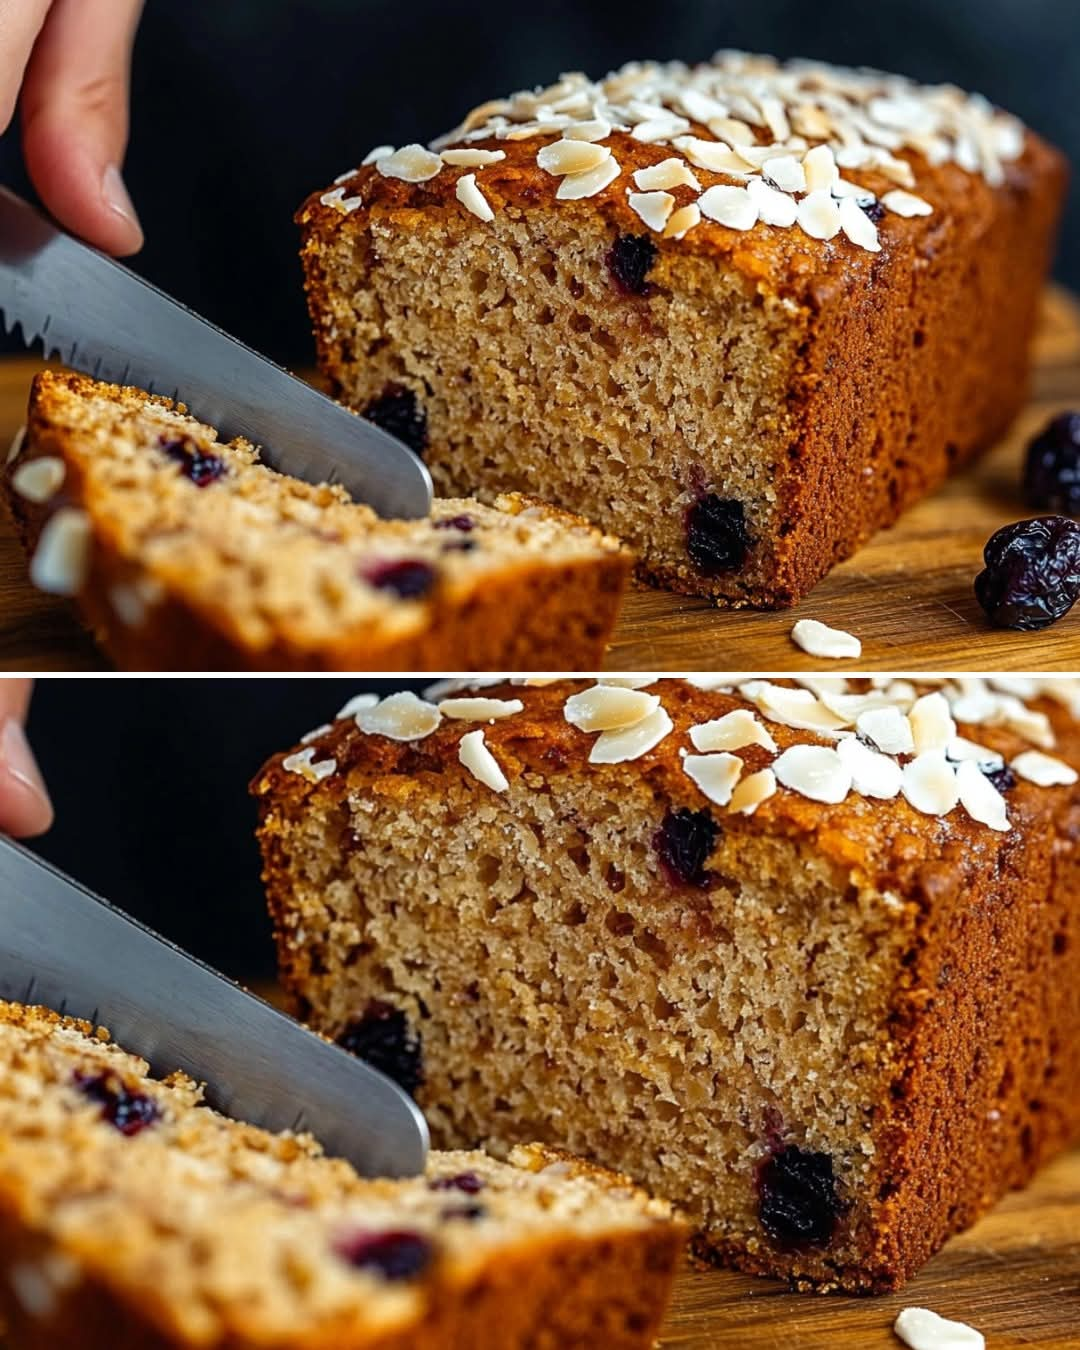
  • Irresistibly Simple and Tasty Cake

    Irresistibly Simple and Tasty Cake

    Irresistibly Simple and Tasty Cake

    Ingredients

    • Eggs – 2 large
    • Sugar – 100 g (1/2 cup or 4 large tablespoons)
    • Vanilla sugar – 1 tsp
    • Salt – A pinch
    • Butter – 80 g (5 1/2 tbsp)
    • Cottage cheese (or cream cheese) – 130 g (4.6 oz)
    • Flour – 150 g (1 1/4 cups)
    • Baking powder – 1 tsp
    • Dried candied fruit – 80 g (2.8 oz)

    Step-by-Step Instructions

    Step 1: Prepare the Ingredients

    Start by preheating your oven to 180°C (350°F). This ensures the oven is at the right temperature by the time the batter is ready.

    Break the two eggs into a deep bowl. Add 100 g of sugar1 tsp of vanilla sugar, and a pinch of salt. Mix thoroughly with a spoon or whisk until the eggs are fully incorporated with the sugar and the mixture is smooth and slightly frothy. This step helps to dissolve the sugar and evenly distribute the flavors.

    Step 2: Combine the Wet Ingredients

    Next, melt the butter either using a double boiler (steamer) or by gently heating it on the stove. Let the butter cool slightly before adding it to the egg mixture. Stir in the melted butter until it is well combined and the mixture is smooth.

    Now, add 130 g of cottage cheese (or cream cheese) to the egg and butter mixture. Mix thoroughly to ensure the cheese is evenly incorporated, creating a rich and creamy batter.

    Step 3: Prepare the Dry Ingredients

    In a separate bowl, sift 150 g of flour and 1 teaspoon of baking powder through a sieve to remove any lumps. This step ensures the dry ingredients are light and evenly mixed, helping the cake rise evenly in the oven.

    Gradually add the sifted flour mixture to the wet ingredients, stirring gently with a spatula or cake spoon. Mix just until combined, forming a thick, smooth batter. Be careful not to overmix, as this can result in dense cake.

    Step 4: Add the Final Touches

    Fold in 80 g of dried candied fruit into the batter, ensuring it is evenly distributed throughout the mixture. The dried fruit will add pops of sweetness and texture to each cake, making them even more irresistible.

    Step 5: Bake the cake

    Grease a 23×11 cm (or similar-sized) baking tin with a little softened butter to prevent sticking. Alternatively, you can use a muffin tin for individual cake.

    Transfer the batter into the prepared tin, smoothing the surface with a spatula to ensure an even layer. Place the tin in the preheated oven and bake for 35-40 minutes. The cake are done when they are golden brown on top, and a toothpick inserted into the center comes out clean or with a few moist crumbs.

    Step 6: Finishing Touches

    Once baked, remove the cake from the oven and let them cool slightly in the tin before transferring them to a wire rack to cool completely.

    For an extra sweet finishing touch, lightly dust the top of the cake with powdered sugar. This adds a touch of elegance and sweetness to the final presentation.


    Serving Suggestions

    These cake are perfect on their own, but you can also serve them with a variety of toppings:

    • Whipped cream or buttercream frosting for added richness.
    • Fresh fruit on top for a burst of freshness.
    • Drizzle of honey or chocolate sauce for an indulgent touch.

    Tips:

    • Mix-ins: Feel free to substitute the candied fruit with chocolate chipsnuts, or dried berries for different flavor variations.
    • Substitute cottage cheese: If you don’t have cottage cheese, cream cheese or ricotta works well as a substitute, giving the cake a slightly different, but equally delicious, texture.
    • Check for doneness: Make sure to test the cake with a toothpick after 35 minutes to avoid over-baking. If the toothpick comes out with a few moist crumbs, the cake are perfectly done.

    Nutrition Information:

    • Calories: 180 kcal
    • Fat: 9 g
    • Carbohydrates: 22 g
    • Protein: 4 g
    • Sugar: 10 g
    • Sodium: 120 mg

    These cake are simple, tasty, and perfect for any occasion. The combination of soft butter, creamy cottage cheese, and sweet candied fruit creates a moist, flavorful dessert that’s sure to satisfy any sweet tooth. Enjoy them with a hot cup of coffee or tea, or share them with friends and family for a delightful treat!

  • Metabolism-Boosting Drink Recipe: Just 2 Cups a Day for 1 Week

    Metabolism-Boosting Drink Recipe: Just 2 Cups a Day for 1 Week

    Metabolism-Boosting Drink Recipe: Just 2 Cups a Day for 1 Week!

    Looking to shed a few pounds and fit into smaller clothes effortlessly? This metabolism-boosting drink is an easy and natural way to support your weight loss goals. With just 2 cups a day, you’ll not only feel energized but also notice the inches melting away. Packed with ingredients like lemon, ginger, apple cider vinegar, and cinnamon, this drink will help jumpstart your metabolism and detoxify your body. Ready to see the transformation? Let’s get started!

    Ingredients
    – *2 cups of water
    – *1 lemon*, freshly squeezed
    – *1-inch piece of ginger*, grated or sliced
    – *1 tablespoon apple cider vinegar* (with “the mother”)
    – *1 teaspoon honey* (optional, for taste)
    – *1/4 teaspoon cinnamon* (optional, for an extra metabolism boost)

    Instructions

    1. *Prepare the Base:*
    Start by heating 2 cups of water in a kettle or on the stovetop until it’s warm, but not boiling. It’s important not to overheat the water as it can reduce the effectiveness of the ingredients. Warm water helps dissolve the ginger and other ingredients better than cold water and makes for a more soothing drink.

    2. *Steep the Ginger:*
    Once the water is warm, grate or slice the 1-inch piece of ginger and add it to the water. Allow the ginger to steep for 5-10 minutes, releasing its potent antioxidants and anti-inflammatory properties. Ginger is known to help increase circulation, reduce bloating, and boost metabolism, making it a perfect addition to your weight-loss drink.

    3. *Strain the Ginger Water:*
    After the ginger has steeped, strain the water into a glass or mug, removing any ginger pieces. This will leave you with a flavorful, nutrient-rich ginger infusion that forms the base of the drink.

    4. *Add the Other Ingredients:*
    Into the strained ginger water, mix in the freshly squeezed juice of 1 lemon. Lemon adds a refreshing, tangy flavor while helping to flush toxins out of your body and promote digestion. Then, stir in 1 tablespoon of apple cider vinegar with “the mother,” which contains probiotics that promote a healthy gut and help balance blood sugar levels. Add a teaspoon of honey for a touch of natural sweetness (optional), and finish with 1/4 teaspoon of cinnamon for an added metabolism boost. Cinnamon is known to regulate blood sugar and help with fat burning, making it a great ingredient for weight loss.

    5. *Drink Twice a Day:*
    To see the best results, consume 1 cup of this metabolism-boosting drink in the morning on an empty stomach. The drink will help to kickstart your digestion and provide a refreshing start to your day. The second cup should be consumed before your main meal or in the evening to aid digestion and control cravings. Be consistent and drink this twice a day for one week, and you’ll likely start noticing positive changes.

    ### *Why This Drink Works:*

    – *Lemon:* Rich in vitamin C, lemons detoxify the body, promote digestion, and support fat metabolism.
    – *Ginger:* Known to reduce inflammation and aid in digestion, ginger also stimulates your metabolism.
    – *Apple Cider Vinegar:* With “the mother,” this powerful ingredient helps regulate blood sugar, detoxifies the liver, and promotes healthy digestion.
    – *Cinnamon:* A natural metabolism booster, cinnamon helps control blood sugar levels and supports fat-burning processes.
    – *Honey:* Adds natural sweetness while providing antioxidants to support your overall health.

    ### *Tips for Best Results:*
    – Drink this mixture consistently for 1 week and pair it with a balanced diet and regular exercise for maximum results.
    – Make sure to stay hydrated throughout the day with plenty of water.
    – If you find the taste too strong, adjust the amount of honey or cinnamon to suit your preferences.

    This simple and effective metabolism-boosting drink is an easy way to kickstart your weight loss journey. With the combination of refreshing lemon, metabolism-stimulating ginger, and apple cider vinegar, you’ll feel lighter, more energized, and on your way to fitting into smaller clothes! Just 2 cups a day for 1 week is all it takes to start seeing results. Drink up, and enjoy the transformation!

  • Quick and Delicious Cake for Tea

    Quick and Delicious Cake for Tea

    Quick and Delicious Cake for Tea

    Ingredients:

      • 3 eggs: Eggs are the base of this cake, providing structure and helping to bind the ingredients together. They also add richness and moisture.
      • 1 glass (200 ml) sugar: Sugar not only sweetens the cake but also helps to achieve a light, tender crumb.
      • 1 glass (200 ml) milk: Milk adds moisture to the cake and helps to create a smooth batter. You can use any type of milk, including whole, skim, or a non-dairy alternative.
      • 100 ml vegetable oil: Oil keeps the cake moist and adds a tender texture. It also helps to mix the batter smoothly.
      • 350 grams flour: Flour is the main dry ingredient that gives the cake structure. For a lighter texture, sift the flour before measuring.
      • 10 grams baking powder: Baking powder is the leavening agent that helps the cake rise and become fluffy.
      • 1 gram vanillin: Vanillin adds a subtle vanilla flavor to enhance the overall taste of the cake.
      • 2 tablespoons cocoa powder (+ 2 tablespoons of water): Cocoa powder gives the cake a rich chocolate flavor. Mixing it with water creates a chocolate paste that blends seamlessly into the batter.
    • Butter for greasing the mold: Butter prevents the cake from sticking to the pan, ensuring it comes out clean and intact.

    Instructions:

      1. Preheat the Oven:
        • Preheat your oven to 180°C (350°F). This ensures the oven is at the right temperature when the cake goes in, allowing for even baking.
    1. Prepare the Batter:
        • In a large mixing bowl, whisk together the eggs and sugar until light and frothy. This step incorporates air into the mixture, which helps the cake rise.
        • Add the milk and vegetable oil to the egg mixture, and whisk until well combined.
        • In a separate bowl, sift together the flour, baking powder, and vanillin. Gradually add the dry ingredients to the wet ingredients, stirring until just combined.


      • In a small bowl, mix the cocoa powder with 2 tablespoons of water to form a smooth paste. Gently fold the cocoa paste into a portion of the batter to create a marbled effect. If you prefer a fully chocolate cake, mix the cocoa paste into the entire batter.
    2. Prepare the Baking Pan:
        • Grease your baking pan with butter to ensure the cake doesn’t stick. You can use any pan size you have on hand; just adjust the baking time as needed. For a thicker cake, use a smaller pan, and for a thinner cake, use a larger pan.


    3. Pour and Bake:
        • Pour the batter into the prepared pan, spreading it evenly.
        • Bake in the preheated oven for 25-30 minutes, or until a toothpick inserted into the center comes out clean. Baking times may vary based on your oven and pan size, so keep an eye on the cake.


    4. Cool and Serve:
        • Allow the cake to cool in the pan for about 10 minutes, then transfer it to a wire rack to cool completely.
        • Once cooled, you can dust the cake with powdered sugar or frost it if desired, though it’s delicious on its own.


    Tips for Success:

      • Mix Gently: When combining the wet and dry ingredients, mix until just combined. Overmixing can lead to a dense cake.
      • Check for Doneness: Since oven temperatures can vary, start checking the cake a few minutes before the suggested baking time. The cake should be golden brown and a toothpick should come out clean.
    • Customize the Flavor: Feel free to add extras like chocolate chips, nuts, or fruit to the batter for a personalized touch.
    • Storage: Store any leftover cake in an airtight container at room temperature for up to 3 days. You can also freeze it for up to a month; just make sure to wrap it tightly in plastic wrap before freezing.