Ingredients:
For the Cake:
1 cup (2 sticks) unsalted butter, softened
2 cups granulated sugar
4 large eggs
3 cups all-purpose flour
1 teaspoon baking powder
½ teaspoon salt
1 cup buttermilk
1 tablespoon lemon zest
2 tablespoons fresh lemon juice
1 teaspoon vanilla extract
½ teaspoon strawberry extract
Pink food coloring (optional)
For the Glaze:
1 cup powdered sugar
2 tablespoons fresh lemon juice
2 tablespoons strawberry puree
For the Crunch Topping:
½ cup crushed vanilla wafer cookies
¼ cup chopped pecans
2 tablespoons brown sugar
2 tablespoons melted butter
Instructions:
Making the Cake:
Preheat oven to 325°F (163°C). Grease and flour a Bundt pan or round cake pans.
In a large bowl, beat butter and sugar until light and fluffy.
Add eggs one at a time, mixing well after each.
In a separate bowl, whisk together flour, baking powder, and salt.
Alternate adding dry ingredients and buttermilk to the butter mixture, beginning and ending with dry ingredients.
Stir in lemon zest, lemon juice, vanilla, and strawberry extract.
Divide the batter in half. Add pink food coloring to one half and leave the other plain. Swirl the batters together in the pan for a marbled effect.
Bake for 55–65 minutes, or until a toothpick inserted comes out clean.
Let cool in the pan for 10 minutes, then transfer to a wire rack.
Making the Glaze & Crunch Topping:
Mix powdered sugar, lemon juice, and strawberry puree until smooth.
For the crunch topping, combine crushed cookies, pecans, brown sugar, and melted butter in a small bowl.
Drizzle the strawberry-lemon glaze over the cooled cake and sprinkle with crunch topping.
Category: Recipes
-
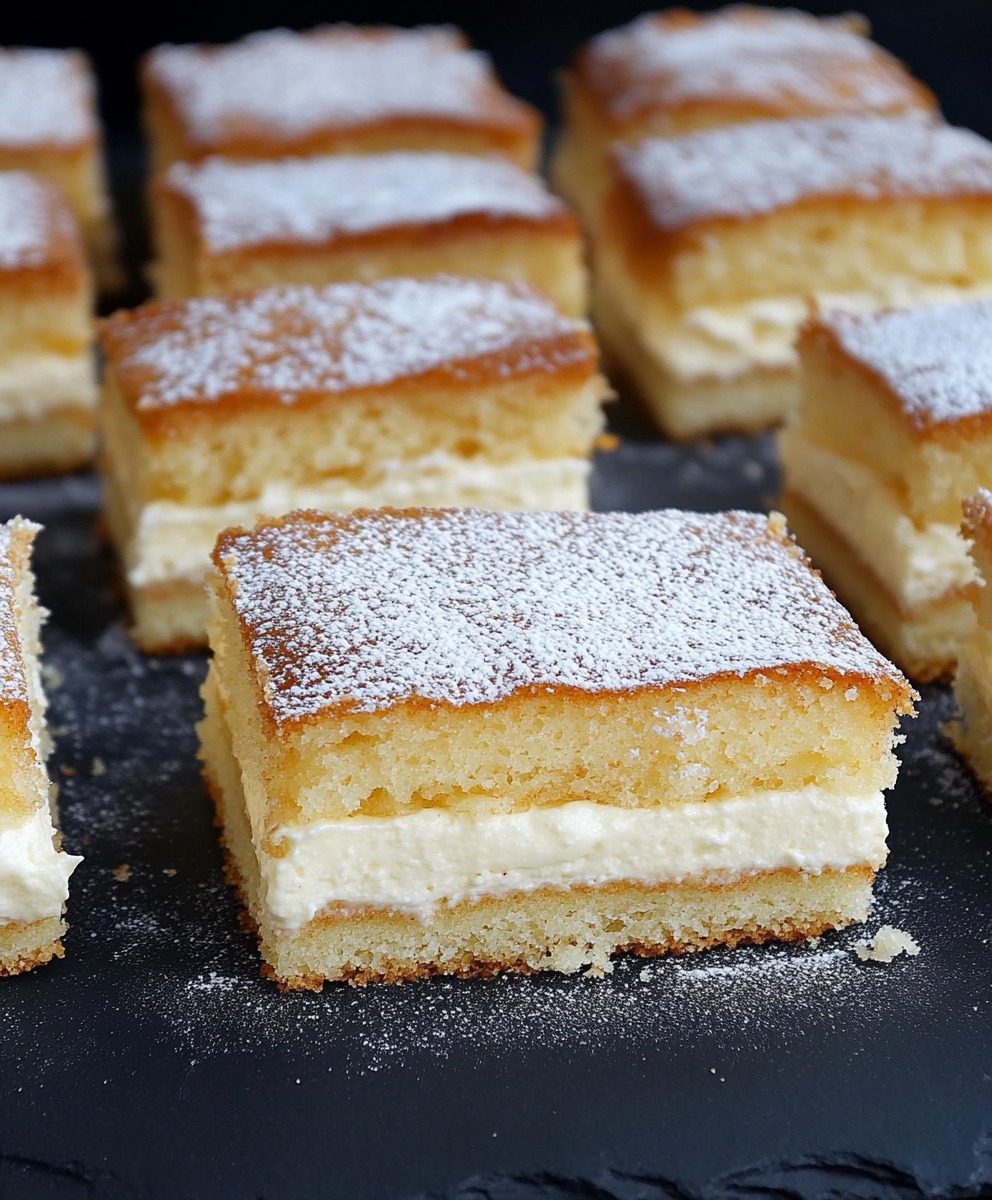
Strawberry Lemon Crunch Pound Cake
-
My Husband’s Favorite Casserole: A Simple and Delicious Comfort Food
This casserole is a beloved dish in our home, earning the title of “My Husband’s Favorite” for its hearty layers of potatoes, flavorful seasoned meat, and a rich, creamy egg and cheese topping. It’s the perfect blend of comfort and satisfaction, making it an ideal meal for busy weeknights or cozy weekend dinners. With minimal prep and a straightforward cooking process, this casserole will quickly become a favorite in your household too!Prep Time: 15 minutes
Cook Time: 40 minutes
Servings: 4-6Ingredients:
For the Potato Layer:
5-6 potatoes, peeled and cut into bite-sized cubes: The base of the casserole, providing a hearty and comforting foundation.
Water: Enough to boil the potatoes.
1 tsp salt: To season the potatoes while boiling.
For the Meat Layer:1 tbsp vegetable oil: For sautéing the onions and browning the meat.
1 onion, chopped: Adds a sweet, aromatic flavor to the meat.
500g (1.1 lbs) ground meat (beef, or turkey): Your choice of protein that brings richness and depth to the dish.
1 bell pepper, chopped (color of your choice): Adds a pop of color and a slight sweetness to the casserole.
2 tsp tomato paste: Enhances the flavor of the meat with a subtle tanginess.
50ml (1/4 cup) water: Helps to create a sauce that coats the meat and vegetables.
1 tsp salt: To season the meat layer.
1 tsp dried garlic powder: Adds a savory, garlicky kick.
1 tsp paprika: For a hint of smokiness and color.
1 tsp oregano: Provides a fragrant herbal note that complements the meat.
Black pepper to taste: Adds a bit of heat and rounds out the flavors.
For the Egg Layer:3 eggs: Acts as a binding agent and adds richness to the casserole.
125ml (1/2 cup) milk: Helps to create a smooth, creamy texture in the egg layer.
1 tsp salt: To season the egg mixture.
1 tsp oregano: Adds a subtle, earthy flavor to the egg mixture.
150g (5 oz) shredded cheese: Your choice of cheese (cheddar, mozzarella, or a blend) for a gooey, melty topping.
Topping:8-10 slices of cheese (cheddar, mozzarella, or a blend): Creates a golden, bubbly crust that seals in the flavors of the casserole.
Chopped green onions (optional): For a fresh, vibrant garnish.
Why This Recipe is a Favorite:This casserole is loved for its comforting layers and the way the flavors meld together perfectly in the oven. The tender, seasoned potatoes soak up the juices from the meat, while the melted cheese and egg layer create a luscious, creamy topping. Each bite offers a satisfying mix of textures—from the soft potatoes to the hearty meat and the gooey cheese. Plus, it’s incredibly versatile: you can easily adapt the recipe to suit your family’s tastes, whether by changing up the meat or adding extra veggies.
Instructions:
Prepare the Potatoes:
Boil the potatoes: Start by bringing a large pot of salted water to a boil. Add the peeled and cubed potatoes, cooking until they are tender but still hold their shape, about 10-12 minutes. Once cooked, drain the potatoes and set them aside. This step ensures the potatoes are perfectly tender and ready to absorb the flavors of the casserole.
Sauté the Onion:
Cook the onions: In a large skillet, heat 1 tablespoon of vegetable oil over medium heat. Add the chopped onion and sauté until softened and translucent, about 3 minutes. This step brings out the sweetness in the onions, adding a depth of flavor to the meat layer.
Brown the Meat:
Cook the meat: Add the ground meat of your choice (beef, , or turkey) to the skillet. Cook the meat, breaking it up with a spoon, until it’s browned on all sides. This step ensures the meat is well-cooked and caramelized, enhancing the overall taste of the casserole.
Add Vegetables and Spices:
Incorporate the bell pepper: Stir in the chopped bell pepper and cook for an additional minute, just until it begins to soften. The bell pepper adds a slight crunch and sweetness, balancing the richness of the meat.
Season and simmer: Next, stir in 2 teaspoons of tomato paste, 50ml of water, 1 teaspoon of salt, 1 teaspoon of garlic powder, 1 teaspoon of paprika, and 1 teaspoon of oregano. Allow the mixture to simmer for about 5 minutes, letting the flavors meld together. Adjust the seasoning with black pepper to taste. The tomato paste adds a tangy depth to the meat, while the spices bring warmth and complexity.
Preheat Oven:
Get ready to bake: Preheat your oven to 180°C (350°F). While the oven heats, you can begin assembling the casserole.
Assemble the Casserole:
Layer the potatoes: In a greased baking dish, spread the cooked potatoes evenly over the bottom. This forms the hearty base of the casserole.
Add the meat layer: Top the potatoes with the seasoned meat mixture, spreading it out evenly. The juices from the meat will seep into the potatoes, infusing them with flavor.
Cheese topping: Lay the slices of cheese over the meat layer, covering it completely. This will melt into a deliciously gooey topping during baking.
Make the Egg Mixture:
Whisk the eggs: In a bowl, whisk together 3 eggs, 125ml of milk, 1 teaspoon of salt, and 1 teaspoon of oregano until well combined. The eggs help bind the layers together, while the milk adds creaminess.
Pour over the casserole: Pour the egg mixture evenly over the cheese-covered meat layer. This will soak into the casserole as it bakes, creating a rich, custardy texture.
Bake:
Cook the casserole: Place the assembled casserole in the preheated oven and bake for 15-20 minutes, or until the top is golden brown and a toothpick inserted near the center comes out clean. This ensures that the egg layer is fully set and the cheese is melted and bubbly.
Serve:
Cool and garnish: Let the casserole cool slightly before serving. This allows the layers to set, making it easier to slice and serve. Garnish with chopped green onions for a fresh, vibrant touch if desired.
Tips for Success:Potato Preparation: If you have leftover cooked potatoes, this recipe is a great way to use them up. Simply skip the boiling step and proceed with assembling the casserole.
Adjusting Spices: Feel free to tweak the spices in the meat layer to suit your family’s tastes. For a bit of heat, you could add a pinch of cayenne pepper or some crushed red pepper flakes.
Vegetarian Version: For a meatless option, omit the ground meat and replace it with additional vegetables such as mushrooms, zucchini, or even lentils. This will still provide a hearty, satisfying dish that everyone can enjoy.
Leftovers: Store any leftovers in an airtight container in the refrigerator for up to 3 days. Reheat individual portions in the microwave for a quick and easy meal.
Conclusion:This casserole is more than just a meal—it’s a comforting dish that brings family together around the dinner table. With its layers of tender potatoes, savory meat, and creamy, cheesy topping, it’s no wonder it’s a favorite in our household. Whether you’re making it for a special occasion or just a regular weeknight dinner, this casserole is sure to please. Enjoy the delicious combination of flavors and textures, and don’t be surprised if it becomes a regular request in your home too!
-
Delicious Savory Meat and Vegetable Casserole
This hearty, comforting casserole is a perfect dish for family dinners, especially on Sundays! With a flavorful mixture of ground meat, fresh vegetables, and a creamy sauce, this recipe will surely become a household favorite. It’s easy to make, satisfying, and packed with savory goodness.Preparation, Cook, and Total Times
Preparation Time: 15 minutes
Cooking Time: 45 minutes
Total Time: 1 hour
Servings: 4-6 servings
Cuisine This recipe draws inspiration from classic Mediterranean and Eastern European dishes that combine meat, vegetables, and creamy sauces in layers, baked to perfection.Full List of Ingredients
For the Crepes:
2 eggs
1 tsp sugar
500 ml milk
30 g butter
240 g flour
Vegetable oil (for greasing the pan)
For the Meat and Vegetable Filling:1 onion, finely chopped
450 g ground minced meat (beef, chicken or a mix)
1 bell pepper, finely chopped
1 clove of garlic, minced
Salt and pepper to taste
1 tsp oregano
1/2 cup pureed tomatoes
1 tomato, finely chopped
1 carrot, grated
30 g butter
3 tbsp flour
500 ml milk
1/2 tsp salt
1/2 tsp pepper
1/2 tsp nutmeg
150 g pizza mozzarella, grated
For Garnish:Sesame seeds
Step-by-Step Cooking Directions
Prepare the Crepes:In a bowl, whisk together 2 eggs, 1 tsp sugar, and a pinch of salt.
Add 500 ml of milk and mix until combined.
Gradually add 240 g of flour, whisking continuously. If the dough is too thick, add some warm water to adjust the consistency.
Heat a pan with a little vegetable oil, just enough to grease it, before cooking the first portion of the crepe batter.
Pour a portion of the batter into the pan, swirling it to create a thin, even layer. Cook the crepes on both sides until lightly golden.
Set aside the cooked crepes. You should have enough batter for about 8-10 crepes.
Prepare the Meat and Vegetable Filling:In a skillet, heat some vegetable oil over medium heat. Add 1 finely chopped onion and cook until soft.
Add 450 g of beef meat, breaking it up with a spatula. Cook until browned and the meat is fully cooked through.
Add 1 finely chopped bell pepper, 1 minced garlic clove, salt, pepper, and 1 tsp oregano. Cook for about 5 minutes until the peppers are soft.
Stir in 1/2 cup pureed tomatoes, 1 finely chopped tomato, and 1 grated carrot. Let the mixture cook on low heat for about 10 minutes.
Remove from heat and set aside.
Make the Creamy Sauce:In a separate pan, melt 30 g of butter over low heat.
Add 3 tbsp flour and stir constantly to form a roux. Cook for a minute to remove the raw flour taste.
Gradually add 500 ml of milk, stirring continuously so that the sauce becomes smooth and free of lumps.
Season with 1/2 tsp salt, 1/2 tsp pepper, and 1/2 tsp nutmeg. Let the sauce simmer for a couple of minutes until thickened. Remove from heat.
Assemble the Casserole:Preheat the oven to 180°C (350°F).
In a baking dish, layer a few of the crepes on the bottom.
Spread half of the meat and vegetable mixture over the crepes, then pour over a layer of the creamy sauce.
Continue layering the crepes, meat, and sauce until all ingredients are used, finishing with a layer of sauce on top.
Sprinkle 150 g of grated mozzarella cheese on top and garnish with sesame seeds.
Bake the Casserole:Place the casserole in the preheated oven and bake for 20 minutes, or until the top is golden brown and bubbly.
Once done, remove from the oven and let it cool for a few minutes before serving.
Serve this delicious casserole hot, perfect for a family dinner or a special meal.
Serve:Nutritional Information (Per Serving)
Calories: 380 kcal
Protein: 24 g
Carbohydrates: 35 g
Fat: 20 g
Fiber: 4 g
Sodium: 600 mg
The Origins and Popularity of the Recipe Casseroles have long been a favorite in many cultures for their simplicity and ability to feed a crowd. This dish combines the best of savory meat, fresh vegetables, and cheese to create a comforting and satisfying meal. Whether you’re feeding a large family or looking for leftovers for the week, this casserole is the perfect choice.Reasons Why You’ll Love This Recipe
Cheesy and Comforting: The melted mozzarella cheese on top adds a rich, gooey texture that complements the savory filling.
Versatile: This recipe can be made with different meats or even with a vegetarian filling, depending on your preference.
Perfect for Meal Prep: This casserole stores well in the fridge for up to 3 days, making it perfect for preparing ahead of time.
Delicious and Hearty: Packed with vegetables, meat, and cheese, this dish will leave you full and satisfied.
Health BenefitsRich in Protein: The minced meat and cheese provide a good source of protein, which helps build and repair tissues.
High in Fiber: Vegetables like carrots, onions, and peppers contribute to the dish’s fiber content, aiding in digestion.
Calcium-Rich: The cheese provides calcium, which is essential for strong bones and teeth.
serving SuggestionsWith a Side Salad: Pair with a fresh green salad or a side of roasted vegetables for a well-rounded meal.
Serve with Rice or Pasta: You can also serve this casserole over a bed of rice or pasta to make it even more filling.
Add a Dollop of Sour Cream: Top with a dollop of sour cream or a tangy yogurt-based sauce for extra creaminess.
Cooking TipsCustomize the Filling: Feel free to add other vegetables like mushrooms, spinach, or zucchini to the filling for extra flavor and nutrition.
Cheese Variations: Try different cheeses like gouda, feta, or parmesan for a unique twist on this dish.
Make Ahead: You can assemble the casserole the night before and refrigerate it overnight for an even easier dinner the next day.
Variations to TryVegetarian Casserole: Substitute the meat with lentils, tofu, or beans for a vegetarian version.
Spicy Version: Add chili flakes or fresh chilies to the filling for a spicy kick.
Mushroom Filling: For a rich, earthy flavor, add sautéed mushrooms to the meat mixture.
Conclusion This cheesy meat and vegetable casserole is a comforting, easy-to-make dish that’s perfect for a family dinner or special occasion. With layers of savory filling, rich sauce, and melty cheese, it’s sure to become a favorite in your home. Give it a try and enjoy the delicious results! -
How to Remove Blackheads Naturally
(How to Remove Blackheads Naturally)
Blackheads, those pesky little plugs of sebum and debris that clog your pores, are a common skin concern for many. While it’s tempting to opt for harsh chemical treatments or manual extractions, there are several natural methods you can try at home that are gentle yet effective. Here are some DIY remedies to help clear up blackheads naturally.
1. Baking Soda and Water Paste Baking soda acts as a natural exfoliant that can help remove dead skin cells and absorb excess oil, which contributes to blackheads.
- Ingredients:
- 1 tablespoon of baking soda
- 2 tablespoons of water
- Directions:
- Mix the baking soda with water to form a paste.
- Apply the paste to the affected areas and gently massage in a circular motion for 2-3 minutes.
- Rinse with warm water and pat dry.
- Use this method once or twice a week.
2. Honey and Milk Pore Strips Honey has antibacterial properties, and milk contains lactic acid to soften the skin, making this combination perfect for blackhead removal.
- Ingredients:
- 1 tablespoon of raw honey
- 1 teaspoon of milk
- Directions:
- Mix honey and milk together and heat the mixture for 5-10 seconds in the microwave until it’s warm.
- Apply a thin layer over the blackheads.
- Place a clean cotton strip on top and let it dry for about 20 minutes.
- Peel the strip away gently, then rinse your face with cold water.
- Repeat twice a week.
3. Egg White Mask Egg whites help tighten pores and pull out any clogged dirt giving you smooth, clear skin.
- Ingredients:
- 1 egg white
- Tissue or toilet paper
- Directions:
- Whip the egg white until frothy and apply a thin layer on your face.
- Place tissue on the areas of the egg white and apply another layer of egg white over the tissue.
- Let it dry for about 20-30 minutes until the mask feels tight.
- Peel off the tissue gently and rinse with warm water.
- Use once a week.
4. Lemon Juice Scrub Lemon juice helps remove dead skin cells and contains vitamin C that brightens skin.
- Ingredients:
- 1 part lemon juice
- 1 part organic raw sugar
- Directions:
- Mix lemon juice and sugar until it forms a paste.
- Apply to the affected area and scrub gently for a few minutes.
- Rinse with cold water.
- Use this scrub twice a week.
5. Green Tea Green tea can help to diminish the oils and inflammation on the skin due to its antioxidant properties.
- Ingredients:
- 1 teaspoon of green tea leaves
- 1 cup of water
- Directions:
- Brew a strong green tea and allow it to cool.
- Use a cotton ball to apply the tea to your blackheads.
- Leave on for 10-15 minutes and then rinse off with lukewarm water.
- Apply once or twice a week.
Precautions:
- Always perform a patch test before trying out any new treatment.
- Be gentle when applying any scrub or mask to avoid irritating the skin.
- Follow up with a moisturizer suitable for your skin type, as some natural treatments can dry out the skin.
Using these natural remedies regularly can help manage and reduce blackheads significantly, giving you clearer, smoother skin without the need for harsh chemicals.
Enjoy!
- Ingredients:
-
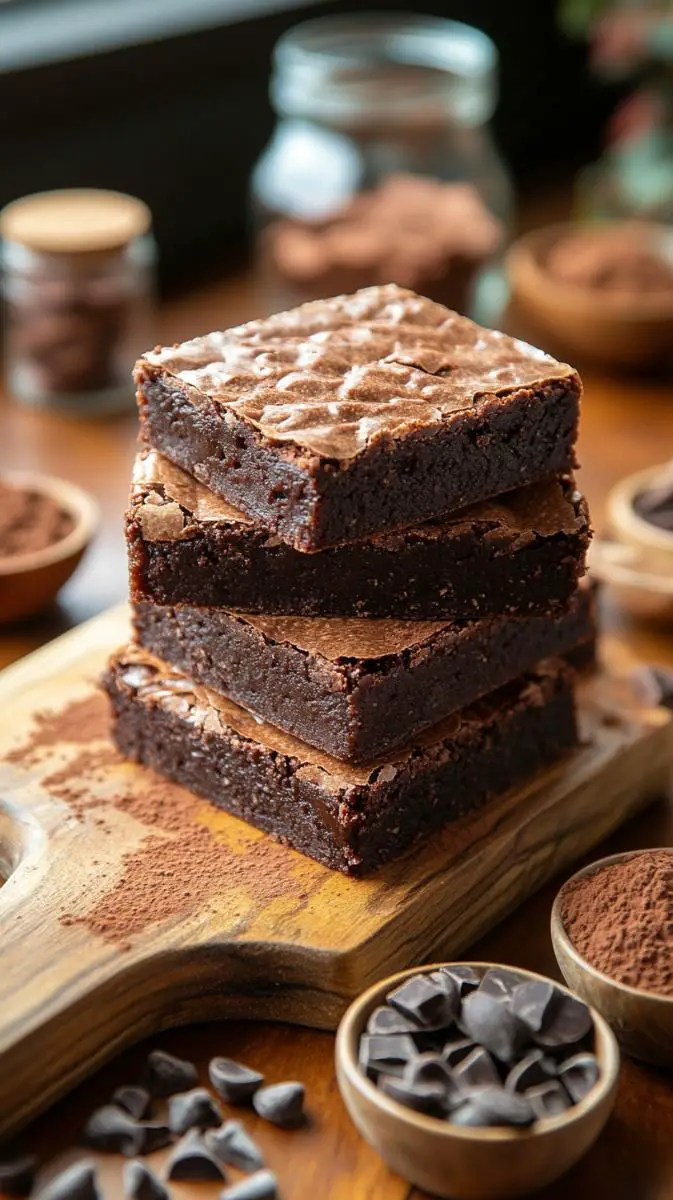
3-Ingredient Healthy Chocolate Brownies: A Game-Changing Recipe
Ingredients
- 2 large ripe bananas (about 240g / 8.5 oz)
- ½ cup unsweetened cocoa powder (50g / 1.8 oz)
- ¼ cup natural peanut butter (60g / 2.1 oz)
Key Equipment
- 8×8-inch (20×20 cm) baking pan
- Parchment paper
- Mixing bowl
- Measuring cups and spoons
- Spatula
- Wire cooling rack
Detailed Instructions
1. Preparation
I always start by preheating my oven to 350°F (175°C). This temperature creates the perfect environment for developing rich chocolate flavor while maintaining moisture. I line my 8×8-inch baking pan with parchment paper, leaving some overhang for easy removal later.
2. Creating the Perfect Batter
- I select bananas that are properly ripened – they should be covered with brown spots as these contain more natural sugars and blend more smoothly.
- In a medium mixing bowl, I thoroughly mash the bananas until they reach a smooth consistency with no lumps. This step is crucial for achieving the right texture.
- I add the unsweetened cocoa powder gradually while mixing to prevent cocoa clouds and ensure even distribution.
- Next, I incorporate the peanut butter, making sure it’s well-stirred beforehand if using natural peanut butter. The mixture should become thick and glossy.
3. Baking Process
- I spread the batter evenly in the prepared pan, using my spatula to smooth the top. Getting an even layer ensures uniform baking.
- These brownies need 20-25 minutes in the preheated oven. I start checking at 20 minutes by inserting a toothpick in the center – it should come out mostly clean with a few moist crumbs.
- I let them cool in the pan for 10 minutes before transferring to a wire rack. This prevents condensation from making them soggy.
Storage and Serving
These brownies keep well in an airtight container:
- Room temperature: 2 days
- Refrigerated: Up to 5 days
- Frozen: Up to 3 months
Pro Tips
- Choose bananas that are very ripe for maximum sweetness
- Room temperature ingredients blend more smoothly
- Don’t overbake – slightly underbaked is better than overbaked
- Allow to cool completely for the best texture
- For extra indulgence, top with a few dark chocolate chips before baking
Nutrition Information
Per serving (1/9th of recipe):
- Calories: 89
- Protein: 3g
- Carbohydrates: 13g
- Fiber: 3g
- Natural Sugars: 6g
- Fat: 4g
- Iron: 1mg
- Potassium: 240mg
Recipe Variations
I’ve successfully tested these substitutions:
- Almond butter for peanut butter
- Sunflower seed butter for nut-free version
- Add 1 teaspoon vanilla extract for enhanced flavor
- Sprinkle with sea salt before baking
Troubleshooting Tips
If your brownies seem:
- Too wet: Add 1 tablespoon cocoa powder
- Too dry: Add 2 tablespoons mashed banana
- Not sweet enough: Use riper bananas next time
This recipe proves that healthy, allergen-friendly desserts can be both delicious and simple to make. The minimal ingredient list and quick preparation time make these brownies perfect for satisfying sudden chocolate cravings while maintaining healthy eating goals.
-
Creamy Chicken and Mushroom Skillet (15-Minute Weeknight Wonder)
Ingredients
For the Protein & Vegetables
- 150g (5.3 oz) chicken strips or turkey breast
- 150g (5.3 oz) fresh mushrooms
- 1 medium onion
- 2 tablespoons fresh parsley, chopped
For the Sauce
- 1 tablespoon vegetable oil
- 1 piece (30g / 1 oz) herb butter
- 240ml (1 cup) crème fraîche
- Salt and freshly ground black pepper to taste
- 1 teaspoon mixed dried herbs (such as thyme, rosemary, and sage)
Step-by-Step Instructions
Preparation
- If using turkey breast, slice it into uniform strips about 1/2 inch (1.25cm) thick for even cooking.
- Clean and slice mushrooms into 1/4 inch (6mm) thick slices.
- Peel and slice onion into thin strips.
- Chop fresh parsley for garnish.
Cooking the Dish
- Heat vegetable oil in a large skillet over medium-high heat until shimmering.
- Add chicken strips and cook for 2-3 minutes until golden brown on all sides.
- Add sliced mushrooms and onions to the pan. Cook for 3-4 minutes, stirring occasionally.
- Add herb butter and let it melt while stirring to coat all ingredients.
- Reduce heat to medium-low and pour in the crème fraîche.
- Season with salt, pepper, and dried herbs to taste.
- Simmer for 2-3 minutes until sauce thickens slightly and chicken is fully cooked.
- Garnish with fresh parsley before serving.
Pro Tips
- Use a wide, heavy-bottomed skillet for even heat distribution and better browning.
- Don’t overcrowd the pan – this ensures proper browning rather than steaming.
- Button mushrooms work great, but feel free to use cremini or a mix of wild mushrooms for more depth of flavor.
- If crème fraîche isn’t available, heavy cream or sour cream make good substitutes.
Serving Suggestions
Serve this versatile dish over:
- Steamed rice
- Buttered egg noodles
- Mashed potatoes
- Crusty bread for sauce-soaking
Storage and Reheating
Store leftovers in an airtight container in the refrigerator for up to 3 days. Reheat gently in a skillet over medium-low heat, adding a splash of cream if needed to restore the sauce’s consistency.
Nutrition Information
Per serving (1/3 of recipe):
- Calories: 385
- Protein: 23g
- Carbohydrates: 8g
- Fat: 31g
- Saturated Fat: 18g
- Cholesterol: 105mg
- Sodium: 380mg
- Fiber: 2g
- Sugar: 3g
This protein-rich dish is perfect for low-carb diets when served without starchy sides. The mushrooms provide essential nutrients including B vitamins and selenium, while the lean protein from chicken or turkey keeps you satisfied.
Recipe Origins and Variations
Originally discovered on mushroom packaging and brilliantly adapted to include protein, this recipe demonstrates how simple variations can transform a side dish into a complete meal. The addition of chicken not only increases the protein content but also creates a more satisfying and well-rounded dish that’s become a weeknight favorite in countless households.
Feel free to customize this versatile recipe by:
- Adding garlic for extra flavor
- Including white wine in the sauce
- Incorporating different fresh herbs
- Using a mix of mushroom varieties
Whether you’re cooking for family or entertaining guests, this 15-minute wonder delivers restaurant-quality results with minimal effort.
-
Quick & Healthy Gluten-Free Oatmeal Bread (No Flour, No Butter!)
I’ve perfected this game-changing oatmeal bread recipe that’s revolutionizing healthy breakfasts. Drawing inspiration from traditional Irish oat bread while keeping modern dietary needs in mind, this recipe transforms simple oats into a hearty, nutritious loaf that’s both gluten-free and protein-rich. The combination of oats and yogurt creates a perfectly moist texture while providing sustained energy throughout your morning.
Why You’ll Love This Bread
This bread isn’t just quick and easy – it’s a nutritional powerhouse. Oats are rich in beta-glucans, which help maintain healthy cholesterol levels and promote gut health. Combined with protein-rich yogurt and eggs, this bread provides sustained energy release and keeps you feeling satisfied longer than traditional wheat bread.
Ingredients
Base Ingredients:
- 280g (3¼ cups) old-fashioned oat flakes
- 250g (1 cup) plain yogurt
- 2 large eggs
- 2 tablespoons baking powder
Add-ins:
- 1 tablespoon sesame seeds
- 1 handful (about 30g) chopped walnuts
- 1 pinch salt
- 1 pinch black pepper (optional)
Equipment Needed
- Loaf pan (plumcake mold)
- Parchment paper
- Mixing bowl
- Measuring cups and spoons
- Spatula
- Wire cooling rack
Step-by-Step Instructions
Preparation (10 minutes)
- Preheat the Oven:
- Set temperature to 356°F (180°C)
- Position rack in middle of oven
- Prepare Your Pan:
- Line loaf pan with parchment paper
- Leave overhang for easy removal
- Lightly grease exposed sides
Making the Batter (15 minutes)
- Mix Wet Ingredients:
- In a large bowl, combine yogurt and eggs
- Whisk until smooth and well integrated
- Ensure no egg streaks remain
- Combine Dry Ingredients:
- Add oat flakes gradually while stirring
- Incorporate baking powder
- Add salt and pepper if using
- Mix until well combined
- Add Texture Elements:
- Fold in chopped walnuts
- Incorporate sesame seeds
- Reserve some for topping if desired
Baking Process (30-35 minutes)
- Transfer to Pan:
- Pour batter into prepared loaf pan
- Smooth top with spatula
- Sprinkle with reserved seeds if using
- Baking:
- Place in preheated oven
- Bake for 30-35 minutes
- Check at 25 minutes with toothpick test
- Look for golden-brown top
Cooling & Storage (15 minutes)
- Initial Cooling:
- Remove from oven
- Let rest in pan for 10 minutes
- Lift out using parchment overhang
- Complete Cooling:
- Transfer to wire rack
- Cool completely before slicing
- Wait at least 1 hour for best texture
Storage Tips
- Room temperature: 2-3 days in airtight container
- Refrigerator: Up to 1 week
- Freezer: Up to 3 months (slice before freezing)
- Toast slices before serving for best results
Nutrition Information
Per slice (8 slices per loaf):
- Calories: 180
- Protein: 8g
- Carbohydrates: 24g
- Dietary Fiber: 4g
- Healthy Fats: 7g
- Iron: 2mg
- Calcium: 150mg
Pro Tips for Perfect Results
- Use old-fashioned oats rather than quick oats for better texture
- Room temperature eggs and yogurt blend better
- Don’t overmix the batter to maintain lightness
- Allow bread to cool completely before slicing
- Toast slices for a crispy exterior
Serving Suggestions
- Top with avocado and eggs for a protein-rich breakfast
- Spread with almond butter and banana for pre-workout fuel
- Toast and top with hummus for a savory snack
- Use as a base for open-faced sandwiches
This versatile bread proves that gluten-free baking can be both simple and delicious. Perfect for meal prep, it’s an excellent option for busy mornings or as a healthy snack throughout the day. Its high protein and fiber content makes it especially satisfying, while the nuts and seeds add wonderful texture and essential nutrients.
-
Chewy Coconut Dark Chocolate Energy Cookies (No Refined Sugar
Ingredients
Dry Ingredients:
- 1 cup rolled oats (100g / 3.5 oz)
- ¼ cup unsweetened shredded coconut (20g / 0.7 oz)
- ⅓ cup dark chocolate chips (60g / 2.1 oz)
- 2 tablespoons chia seeds (24g / 0.85 oz)
- Pinch of sea salt
Wet Ingredients:
- ¼ cup almond butter (60g / 2.1 oz)
- ¼ cup honey or maple syrup (60ml / 2 fl oz)
- 1 teaspoon vanilla extract
Equipment Needed
- Baking sheet
- Parchment paper
- Mixing bowls
- Measuring cups and spoons
- Cookie scoop (optional)
Detailed Instructions
Preparation Phase (5 minutes)
- Preheat your oven to 350°F (175°C)
- Line a large baking sheet with parchment paper
- Ensure all ingredients are at room temperature for best binding
Mixing the Ingredients (10 minutes)
- Combine Dry Ingredients:
- In a large mixing bowl, combine rolled oats, shredded coconut, and chia seeds
- Add a pinch of salt to enhance flavors
- Stir well to distribute ingredients evenly
- Mix Wet Ingredients:
- In a separate bowl, combine almond butter and honey/maple syrup
- Add vanilla extract
- Whisk until smooth and well combined
- Pro tip: Warm slightly if almond butter is too stiff
- Combine Mixtures:
- Pour wet ingredients over dry ingredients
- Mix thoroughly until everything is well coated
- Fold in dark chocolate chips last to prevent melting
Forming and Baking (20 minutes)
- Shape Cookies:
- Use a tablespoon measure or small cookie scoop
- Place 2-tablespoon portions onto prepared baking sheet
- Gently press down to form cookies about ½-inch thick
- Leave space between cookies for slight spreading
- Baking:
- Place in preheated oven
- Bake for 12-15 minutes until edges are golden brown
- Center should still be slightly soft
- Watch carefully after 10 minutes to prevent over-browning
Cooling and Storage (15 minutes)
- Let cookies cool on baking sheet for 5 minutes
- Transfer to wire rack for complete cooling
- Store in airtight container
Storage Tips
- Room temperature: 5 days in airtight container
- Refrigerator: Up to 2 weeks
- Freezer: Up to 3 months
Nutrition Information
Per cookie (recipe makes 12 cookies):
- Calories: 145
- Protein: 3g
- Healthy Fats: 8g
- Carbohydrates: 16g
- Fiber: 3g
- Natural Sugars: 7g
- Iron: 1.2mg
- Omega-3 Fatty Acids: 0.5g
Pro Tips for Perfect Results
- Use old-fashioned rolled oats, not quick oats, for better texture
- Choose runny almond butter for easier mixing
- Don’t overbake – cookies should be slightly soft when removed from oven
- Let cool completely before storing to maintain texture
- For extra crunch, toast coconut before adding to mixture
These nutrient-rich cookies prove that healthy snacking can be delicious! They’re perfect for meal prep, on-the-go energy, or satisfying that sweet craving with wholesome ingredients. The combination of complex carbs, healthy fats, and natural sweeteners makes them an ideal pre-workout snack or afternoon energy boost.
-
Decadent Dark Chocolate Zucchini Bread: A Guilt-Free Chocolate Lover’s Dream
Ingredients
Fresh Produce
- 350g (1½ cups) grated zucchini, excess moisture removed
- Tip: Choose medium-sized, firm zucchini for best results
Wet Ingredients
- 80ml (⅓ cup) coconut oil, melted and cooled
- 120ml (½ cup) pure maple syrup or honey
- 2 large eggs, room temperature
- 5ml (1 tsp) pure vanilla extract
Dry Ingredients
- 40g (⅓ cup) unsweetened cocoa powder
- 120g (1 cup) whole wheat flour
- 5g (1 tsp) baking soda
- 2.5g (½ tsp) baking powder
- 1.25g (¼ tsp) fine sea salt
- 45g (¼ cup) dark chocolate chips (70% cocoa or higher)
Detailed Instructions
Preparation Phase
- Position your oven rack in the center and preheat to 350°F (175°C). Grease a 9×5-inch (23x13cm) loaf pan thoroughly with coconut oil, then line with parchment paper, leaving overhang for easy removal.
Preparing the Zucchini
- Grate the zucchini using the large holes of a box grater. Place in a clean kitchen towel and squeeze firmly to remove excess moisture. This step is crucial for proper texture.
Mixing Wet Ingredients
- In a large mixing bowl, whisk together the melted coconut oil and maple syrup until fully combined. The maple syrup adds natural sweetness while keeping the glycemic index lower than refined sugar.
- Add the eggs one at a time, whisking well after each addition. The eggs provide structure and richness to the bread.
- Stir in the vanilla extract, then fold in the prepared zucchini. The zucchini will provide moisture and nutrients while remaining virtually undetectable in the final product.
Combining Dry Ingredients
- In a separate bowl, sift together the cocoa powder, whole wheat flour, baking soda, baking powder, and salt. Sifting prevents lumps and ensures even distribution of the leavening agents.
- Gradually add the dry ingredients to the wet mixture, folding gently until just combined. Do not overmix, as this can lead to a tough texture.
- Fold in the dark chocolate chips, reserving a few for topping if desired.
Baking Process
- Transfer the batter to your prepared loaf pan, smoothing the top with a spatula. Sprinkle with reserved chocolate chips if using.
- Bake for 45-50 minutes, or until a wooden skewer inserted into the center comes out clean or with just a few moist crumbs.
Cooling and Storage
- Allow the bread to cool in the pan for exactly 10 minutes. This timing allows the structure to set while preventing the bottom from becoming soggy.
- Using the parchment overhang, lift the bread out of the pan and transfer to a wire rack to cool completely.
Storage Tips
- Room temperature: Up to 3 days, wrapped in parchment paper
- Refrigerated: Up to 1 week in an airtight container
- Frozen: Up to 3 months, wrapped well in plastic wrap and foil
Nutrition Information
Per slice (1/12 of loaf):
- Calories: 185
- Total Fat: 9.5g
- Saturated Fat: 6.8g
- Cholesterol: 31mg
- Sodium: 208mg
- Total Carbohydrates: 23.4g
- Dietary Fiber: 2.8g
- Sugar: 11.2g
- Protein: 4.2g
This bread is packed with nutrients from the zucchini, including vitamin C, potassium, and fiber. The dark chocolate and cocoa powder provide antioxidants, while the whole wheat flour adds additional fiber and nutrients. Perfect for breakfast, snacking, or a wholesome dessert.
Serving Suggestions
- Warm slightly and spread with almond butter
- Top with Greek yogurt and fresh berries
- Enjoy as is with your morning coffee or tea
- Toast lightly and drizzle with extra honey for dessert
This Dark Chocolate Zucchini Bread proves that healthy ingredients can create truly decadent results!
-
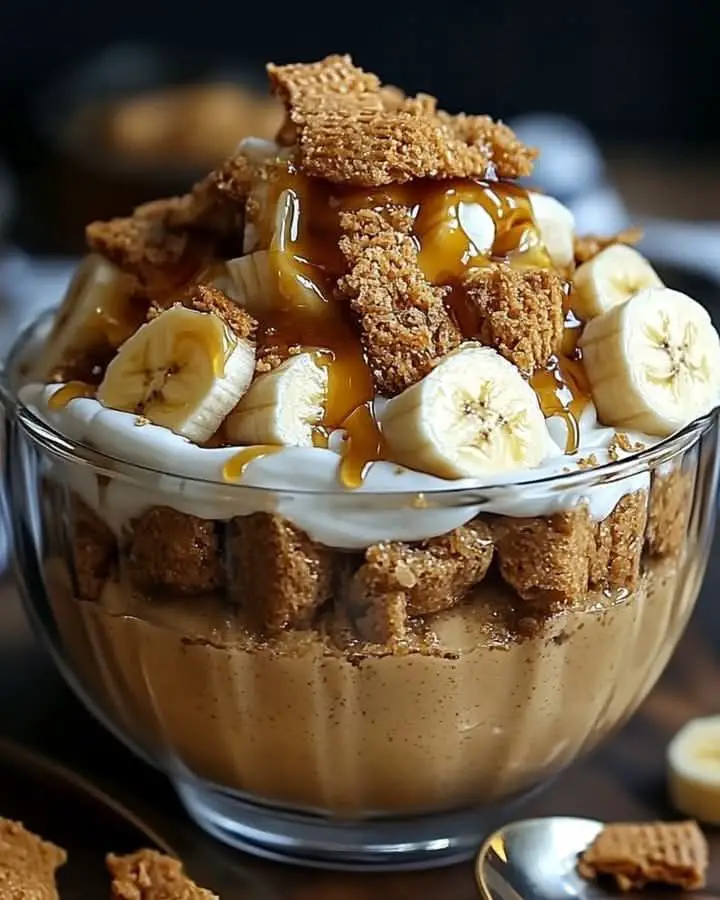
Strawberry Cheesecake Banana Pudding:
Strawberry Cheesecake Banana Pudding: The Ultimate Dessert Fusion – A Dreamy, Decadent Treat for All Occasions!
Summary: Looking for the perfect dessert that combines the rich, creamy indulgence of cheesecake with the classic comfort of banana pudding and the sweet, fresh brightness of strawberries? Strawberry Cheesecake Banana Pudding is the ultimate fusion of three beloved desserts, creating a luscious, layered masterpiece that will leave everyone asking for seconds. This dessert blends the tangy goodness of cheesecake with the smooth, velvety texture of banana pudding and the fruity punch of strawberries, creating a layered treat that’s perfect for any special occasion. Whether it’s a family gathering, a potluck, or simply a way to indulge your sweet tooth, this dessert will wow everyone!
Prep Time: 45 minutes
Chill Time: 4 hours (or overnight)
Total Time: 4 hours 45 minutes
Servings: 12 servings
Calories: 450 per servingCourses: Dessert, Sweet Treat
Cuisines: American, Comfort Food, Southern-InspiredIngredients:
For the Cheesecake Layer:
- 8 oz cream cheese, softened
- ½ cup powdered sugar
- 1 tsp vanilla extract
- 1 cup heavy whipping cream
- 2 tbsp powdered sugar
For the Banana Pudding Layer:
- 3 cups whole milk
- 1 (3.4 oz) package instant vanilla pudding mix
- 1 tsp vanilla extract
- 1 ripe banana, sliced
- 1 cup Nilla wafer cookies, crushed (or any vanilla cookies you prefer)
For the Strawberry Layer:
- 1 pound fresh strawberries, hulled and sliced
- 2 tbsp granulated sugar
- 1 tbsp lemon juice
For the Assembly:
- 1 box Nilla wafers (or any vanilla cookies of your choice)
- 2 ripe bananas, sliced
Equipment:
- Hand mixer or stand mixer
- Mixing bowls
- 9×13-inch trifle dish or any large serving dish
- Whisk
- Knife for slicing strawberries and bananas
- Spoon or spatula for layering
- Plastic wrap (for covering)
Instructions:
1. Prepare the Strawberry Layer:
- In a medium bowl, combine the sliced strawberries, granulated sugar, and lemon juice. Toss everything together and let it sit for 15-20 minutes, allowing the strawberries to release their natural juices and create a slightly syrupy consistency.
- After 20 minutes, give them another stir. You can lightly mash some of the strawberries for a more jammy texture or leave them whole for a chunkier, fresh feel. Set aside.
2. Make the Cheesecake Layer:
- Using a hand mixer or stand mixer, beat the softened cream cheese on medium speed for about 2 minutes until smooth and creamy.
- Add the powdered sugar and vanilla extract, mixing until combined.
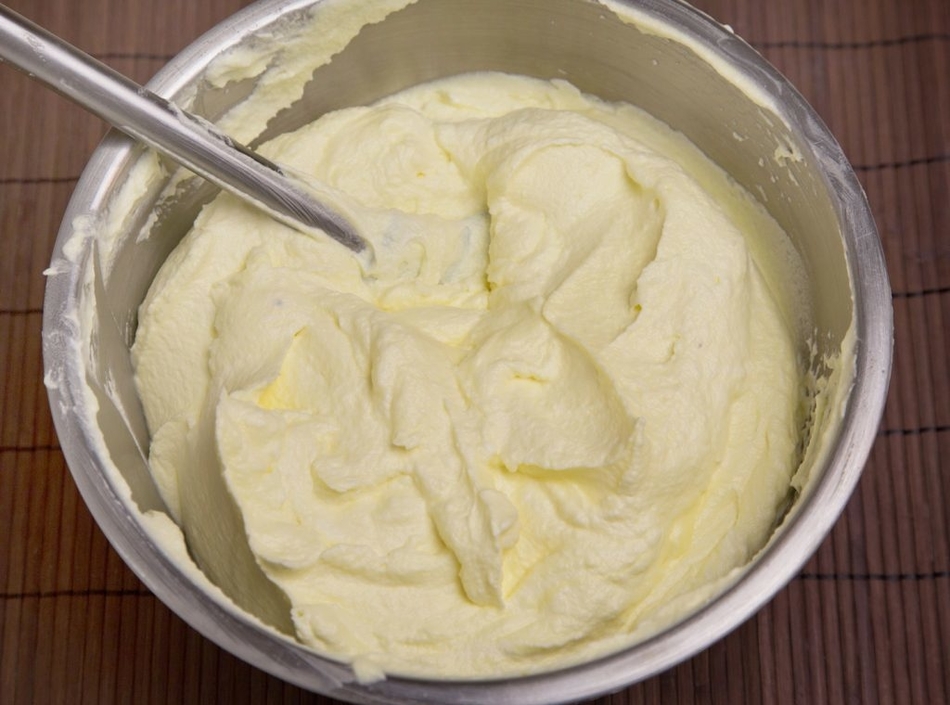
- In a separate bowl, whip the heavy whipping cream and powdered sugar until stiff peaks form (this will take about 2-3 minutes on medium speed).
- Gently fold the whipped cream into the cream cheese mixture until smooth and well incorporated. Set aside.
3. Prepare the Banana Pudding Layer:
- In a large bowl, whisk together the whole milk and instant vanilla pudding mix. Continue whisking for about 2 minutes until the pudding thickens and reaches a custard-like consistency.
- Stir in the vanilla extract for added flavor. Set the pudding mixture aside to firm up a little more.
4. Assemble the Layers:
- In a large trifle dish (or a 9×13-inch serving dish), begin by adding a layer of Nilla wafers at the bottom.
- Place a layer of banana slices over the cookies, followed by a layer of the banana pudding mixture.
- Add a layer of the cheesecake mixture on top of the pudding, smoothing it out evenly with a spatula.
- Follow with a layer of strawberries, spreading them evenly across the cheesecake layer.
- Repeat the layers—cookies, bananas, pudding, cheesecake, and strawberries—until the dish is filled or all layers are used up. Make sure to end with a layer of the cheesecake mixture on top.
- For a final touch, decorate the top with additional sliced bananas, strawberries, and crushed Nilla wafers for crunch.
5. Chill the Dessert:
- Cover the assembled dessert with plastic wrap and refrigerate for at least 4 hours, or preferably overnight. This allows all the flavors to meld together and ensures the layers set nicely.
- If you’re making this in advance, feel free to make it the night before so the dessert is ready to serve when you need it.
6. Serve and Enjoy:
- Once chilled, remove from the refrigerator and give the dessert a gentle stir to loosen the layers slightly before serving.
- Scoop out generous portions into individual bowls, and enjoy the perfect fusion of strawberry cheesecake, banana pudding, and vanilla wafer goodness!
Recipe Variations:
- Chocolate Cheesecake Banana Pudding: Swap the cheesecake layer with a chocolate cheesecake filling. Add cocoa powder to the cream cheese mixture to give it a rich, chocolatey flavor.
- Lemon Banana Pudding: For a citrus twist, add lemon zest to the banana pudding layer and top the dessert with fresh lemon slices or a dollop of lemon curd.
- Vegan Version: Use coconut milk, vegan cream cheese, and dairy-free whipped cream for a completely plant-based version of this dessert.
- Boozy Banana Pudding: For an adult version, add a splash of rum, bourbon, or amaretto to the strawberry layer to give it a rich, aromatic flavor.
Frequently Asked Questions (FAQs):
Q: Can I make this dessert ahead of time?
A: Yes, this dessert is perfect for making ahead! In fact, it tastes even better after chilling overnight, as the flavors have time to meld together.Q: Can I use frozen strawberries instead of fresh?
A: While fresh strawberries work best for this dessert, you can use frozen strawberries if fresh ones aren’t available. Just be sure to thaw them and drain off excess liquid before using.Q: How do I store the leftovers?
A: Leftovers can be stored in an airtight container in the refrigerator for up to 3 days. The dessert will continue to soften, but the flavors will still be delicious.Q: Can I substitute the Nilla wafers with other cookies?
A: Absolutely! You can use any vanilla-flavored cookies, graham crackers, or even shortbread cookies for the crust. Just be sure they are sturdy enough to hold up the layers of pudding and cheesecake.Q: Is there a non-dairy option for the cheesecake layer?
A: Yes! You can make the cheesecake layer using dairy-free cream cheese and coconut cream for a rich and creamy alternative. Use your favorite dairy-free whipped topping to make the whipped cream substitute.Notes:
- If you prefer a thicker cheesecake layer, simply double the amount of cream cheese in the recipe and reduce the amount of heavy cream.
- For extra flavor, you can toast the Nilla wafers before layering them to give the dessert a warm, nutty undertone.
Nutritional Info (per serving):
- Calories: 450
- Total Fat: 22g
- Saturated Fat: 12g
- Cholesterol: 45mg
- Sodium: 150mg
- Carbohydrates: 60g
- Fiber: 3g
- Sugars: 38g
- Protein: 4g
Conclusion:
Strawberry Cheesecake Banana Pudding: The Ultimate Dessert Fusion is a dreamy, decadent dessert that combines the best of three world-famous treats into one unforgettable dessert. With its creamy, cheesecake-like filling, the familiar taste of banana pudding, and the fresh, fruity burst of strawberries, this fusion dessert is sure to impress at any gathering or special occasion. Whether you’re a fan of classic banana pudding, cheesecake, or strawberry desserts, this layered masterpiece is a sweet escape that everyone will adore. Try it out, and prepare to indulge in the ultimate dessert experience!
-
Sweet and Spicy Mango
Sweet and Spicy Mango Salad Dressing: A Flavorful Twist for Your Greens!
Summary:
This Sweet and Spicy Mango Salad Dressing is the perfect combination of tropical sweetness and a spicy kick, making it a delicious addition to any salad. With the natural sweetness of ripe mangoes, a touch of honey, and the heat from red chili flakes, this dressing balances flavors beautifully. Drizzle it over mixed greens, grilled chicken salads, or even use it as a dipping sauce for veggies. This quick and easy homemade dressing will elevate your salads to the next level!Prep Time: 10 minutes
Cook Time: 0 minutes
Total Time: 10 minutes
Servings: 6 (2 tablespoons per serving)
Calories per serving: ~75 kcal
Courses: Dressings, Sauces
Cuisine: Fusion, Tropical
Ingredients:
1 large ripe mango, peeled and diced
2 tablespoons olive oil
1 tablespoon apple cider vinegar
1 tablespoon honey (or maple syrup for a vegan option)
1 teaspoon Dijon mustard
1/2 teaspoon red chili flakes (adjust to taste)
1/4 teaspoon salt
1/4 teaspoon black pepper
2 tablespoons fresh lime juice
1-2 tablespoons water (to thin, if needed)Instructions:
- Prepare the Mango: Peel and dice the ripe mango, ensuring it’s fully ripe for optimal sweetness.
- Blend the Ingredients: In a blender or food processor, combine mango, olive oil, apple cider vinegar, honey, Dijon mustard, chili flakes, salt, black pepper, and lime juice.
- Adjust the Consistency: Blend until smooth. If the dressing is too thick, add 1-2 tablespoons of water and blend again until desired consistency is achieved.
- Taste and Adjust: Taste the dressing and adjust the seasoning as needed. If you want more heat, add extra chili flakes.
- Serve or Store: Pour the dressing into a jar or bottle. Store in the refrigerator for up to 5 days. Shake well before use.
Equipment Needed:
- Blender or food processor
- Measuring spoons
- Cutting board and knife
- Jar or bottle for storage
Recipe Variations:
- Creamy Version: Add 1-2 tablespoons of Greek yogurt or coconut milk for a creamier consistency.
- Extra Heat: Add a small chopped fresh chili pepper instead of red chili flakes.
- Herbal Infusion: Blend in fresh cilantro or mint for an herby twist.
- Citrus Boost: Replace apple cider vinegar with orange juice for a zestier dressing.
Frequently Asked Questions (FAQs):
Q: Can I use frozen mango instead of fresh?
A: Yes! Just thaw the frozen mango before blending for the best texture.
Q: How long does this dressing last in the fridge?
A: It stays fresh for up to 5 days in an airtight container.
Q: Can I make this dressing without a blender?
A: Yes, but you’ll need to mash the mango very well and whisk everything together.
Q: Is this dressing suitable for vegans?
A: Yes! Just replace honey with maple syrup or agave nectar.
Notes:
- For a thinner consistency, add more water or olive oil.
- Shake well before using, as ingredients may separate.
- Adjust spice level to your preference by adding more or less chili flakes.
Nutritional Info (per serving):
- Calories: ~75 kcal
- Carbohydrates: 10g
- Fat: 3.5g
- Protein: 0.5g
- Sugar: 7g
- Fiber: 1g
Conclusion:
This Sweet and Spicy Mango Salad Dressing brings a bold burst of tropical flavor to any dish. Whether drizzled over salads, grilled proteins, or used as a dip, it’s a must-try for those who love sweet, tangy, and spicy flavors in one bite. Try it today and enjoy a zesty new way to enjoy your greens!
-
Make This Guilt-Free Dessert: Flourless and Sugar-Free, Yet Totally Delicious!
Craving a comforting and warm dessert but want to avoid refined sugar and flour? Look no further! This recipe combines the natural sweetness of fruit with the satisfying texture of oats to create a healthy baked treat. Packed with grated apples, carrots, and a touch of stevia, this wholesome dessert is sure to become your new favorite.
Ingredients
- 2 cups (200 g) rolled oats, finely chopped in a blender
- 1 teaspoon baking powder
- 1 cup (240 ml) milk of your choice (dairy or plant-based)
- 1 grated carrot
- 9 dried apricots, rinsed in warm water and chopped
- 4 tablespoons raisins, rinsed in warm water
- 1 grated apple
- 1 teaspoon cinnamon
- 3 eggs
- 4 tablespoons stevia or your preferred sweetener
- 1 teaspoon vanilla extract
- 2 tablespoons olive oil
- 1 18-cm (7-inch) baking dish
Instructions
1. Preheat and Prepare
- Preheat your oven to 180°C (350°F).
- Lightly grease your baking dish with olive oil to prevent sticking.
2. Mix Dry Ingredients
- In a large bowl, combine the finely chopped oats and baking powder. This will form the base of your healthy dessert.
3. Add the Fruits and Vegetables
- Add the grated carrot, chopped dried apricots, rinsed raisins, and grated apple to the oat mixture. Mix well to evenly distribute the ingredients.
4. Whisk the Wet Ingredients
- In a separate bowl, beat the eggs until they’re light and fluffy.
- Add the stevia (or your chosen sweetener), vanilla extract, and olive oil. Continue whisking until everything is well combined.
5. Combine Wet and Dry Mixtures
- Pour the wet mixture into the dry ingredients and gently fold with a spatula until fully incorporated. The batter should be smooth and uniform.
6. Bake to Perfection
- Pour the batter into the prepared baking dish and spread it evenly.
- Bake in the preheated oven for 45–50 minutes. Keep an eye on it—the top should turn golden brown, and a toothpick inserted in the center should come out clean.
7. Cool and Serve
- Remove the baking dish from the oven and let it cool for a few minutes. This allows the dessert to set and makes it easier to slice. Serve warm or at room temperature.
Recipe Tips
-
- Customize It: Feel free to experiment by adding chopped nuts or substituting dried apricots with other dried fruits like dates or cranberries.
- Alternative Oils: Swap olive oil with melted coconut oil for a different flavor profile.
- Optional Add-Ins: Add a sprinkle of shredded coconut or dark chocolate chips for an extra treat.
Why You’ll Love This Recipe
This flourless and sugar-free dessert is not only healthy but also incredibly satisfying. The natural sweetness from the fruits, paired with the hearty texture of oats, makes it a guilt-free indulgence. Perfect for an afternoon snack, breakfast, or even a light dessert after dinner.
Start baking today and enjoy this wholesome treat!
-
Oatmeal Drink Recipe: A Delicious Bedtime Beverage
Are you looking for a comforting and soothing drink to enjoy before hitting the hay? Look no further! Transform your oatmeal into a delicious bedtime beverage that is not only nutritious but also incredibly tasty. Packed with fiber and naturally calming, this oatmeal drink is the perfect addition to your nighttime routine. Let’s dive into the easy recipe!
Health Benefits of an Oatmeal Drink
Oats are so much more than just a breakfast option. They are rich in nutrients, including carbs, fiber, protein, fat, vitamins, minerals, and antioxidant plant compounds
Did you know that oats can also help promote relaxation? They contain amino acids and other nutrients that stimulate the production of melatonin, the sleep hormone. By enjoying this oatmeal drink, you’ll be preparing your body for a restful night’s sleep.
Additionally, the fiber in oats supports digestive health, helping to prevent nighttime indigestion that might disrupt your sleep.
Ingredients
To make this soothing oatmeal drink, you’ll need the following ingredients:
- 1 cup of milk (dairy or plant-based like almond, soy, or oat milk)
- 2 tablespoons of rolled oats
- 1 tablespoon of honey or maple syrup (optional, for sweetness)
- 1/4 teaspoon of cinnamon (optional, for added flavor)
- A pinch of nutmeg (optional, for added flavor)
Instructions
Follow these simple steps to create your very own oatmeal drink:
- Blend the Oats: Start by grinding the rolled oats in a blender until they turn into a fine powder. This helps them integrate smoothly into the drink.
- Heat the Milk: In a small saucepan, heat the milk over medium heat until it is just about to boil.
- Add the Oats: Stir the powdered oats into the warm milk. Reduce the heat to low and continue to stir as the mixture simmers gently. Allow it to cook for about 3-5 minutes, or until the milk thickens slightly.
- Flavor the Drink: Add honey (or maple syrup) for sweetness and sprinkle in cinnamon and nutmeg for flavor. These spices not only enhance the taste but also possess their own sleep-promoting properties.
- Simmer: Continue to simmer the mixture for another minute, stirring frequently to ensure it doesn’t stick to the bottom of the pan.
- Serve Warm: Pour the warm oatmeal drink into a mug. You might want to strain it if there are lumps, but this is optional. Drink it warm for a soothing effect.
Tips and Variations
Here are some tips and variations to enhance your oatmeal drink experience:
- Fruit Add-Ins: For a fruitier flavor, blend in a banana or some berries with the oats. This adds natural sweetness and enriches the drink’s nutritional profile.
- Make It Vegan: Use plant-based milk and sweeteners like maple syrup to keep this drink vegan-friendly.
- Cold Version: If you prefer a cold drink, especially in warm weather, let the oatmeal drink cool down and then refrigerate it. Serve it chilled for a refreshing treat.
Conclusion
Indulging in a warm, comforting, and customizable oatmeal drink before bedtime is a wonderful way to unwind and enjoy a restful night’s sleep. Whether you’re looking to improve your sleep quality or simply want a tasty and soothing beverage, this oatmeal drink is definitely worth trying. So go ahead, grab your ingredients, and treat yourself to a delicious nighttime ritual. Sweet dreams!
-
Quick & Healthy Gluten-Free Oatmeal Bread (No Flour, No Butter!)
I’ve perfected this game-changing oatmeal bread recipe that’s revolutionizing healthy breakfasts. Drawing inspiration from traditional Irish oat bread while keeping modern dietary needs in mind, this recipe transforms simple oats into a hearty, nutritious loaf that’s both gluten-free and protein-rich. The combination of oats and yogurt creates a perfectly moist texture while providing sustained energy throughout your morning.
Why You’ll Love This Bread
This bread isn’t just quick and easy – it’s a nutritional powerhouse. Oats are rich in beta-glucans, which help maintain healthy cholesterol levels and promote gut health. Combined with protein-rich yogurt and eggs, this bread provides sustained energy release and keeps you feeling satisfied longer than traditional wheat bread.
Ingredients
Base Ingredients:
- 280g (3¼ cups) old-fashioned oat flakes
- 250g (1 cup) plain yogurt
- 2 large eggs
- 2 tablespoons baking powder
Add-ins:
- 1 tablespoon sesame seeds
- 1 handful (about 30g) chopped walnuts
- 1 pinch salt
- 1 pinch black pepper (optional)
Equipment Needed
- Loaf pan (plumcake mold)
- Parchment paper
- Mixing bowl
- Measuring cups and spoons
- Spatula
- Wire cooling rack
Step-by-Step Instructions
Preparation (10 minutes)
- Preheat the Oven:
- Set temperature to 356°F (180°C)
- Position rack in middle of oven
- Prepare Your Pan:
- Line loaf pan with parchment paper
- Leave overhang for easy removal
- Lightly grease exposed sides
Making the Batter (15 minutes)
- Mix Wet Ingredients:
- In a large bowl, combine yogurt and eggs
- Whisk until smooth and well integrated
- Ensure no egg streaks remain
- Combine Dry Ingredients:
- Add oat flakes gradually while stirring
- Incorporate baking powder
- Add salt and pepper if using
- Mix until well combined
- Add Texture Elements:
- Fold in chopped walnuts
- Incorporate sesame seeds
- Reserve some for topping if desired
Baking Process (30-35 minutes)
- Transfer to Pan:
- Pour batter into prepared loaf pan
- Smooth top with spatula
- Sprinkle with reserved seeds if using
- Baking:
- Place in preheated oven
- Bake for 30-35 minutes
- Check at 25 minutes with toothpick test
- Look for golden-brown top
Cooling & Storage (15 minutes)
- Initial Cooling:
- Remove from oven
- Let rest in pan for 10 minutes
- Lift out using parchment overhang
- Complete Cooling:
- Transfer to wire rack
- Cool completely before slicing
- Wait at least 1 hour for best texture
Storage Tips
- Room temperature: 2-3 days in airtight container
- Refrigerator: Up to 1 week
- Freezer: Up to 3 months (slice before freezing)
- Toast slices before serving for best results
Nutrition Information
Per slice (8 slices per loaf):
- Calories: 180
- Protein: 8g
- Carbohydrates: 24g
- Dietary Fiber: 4g
- Healthy Fats: 7g
- Iron: 2mg
- Calcium: 150mg
Pro Tips for Perfect Results
- Use old-fashioned oats rather than quick oats for better texture
- Room temperature eggs and yogurt blend better
- Don’t overmix the batter to maintain lightness
- Allow bread to cool completely before slicing
- Toast slices for a crispy exterior
Serving Suggestions
- Top with avocado and eggs for a protein-rich breakfast
- Spread with almond butter and banana for pre-workout fuel
- Toast and top with hummus for a savory snack
- Use as a base for open-faced sandwiches
This versatile bread proves that gluten-free baking can be both simple and delicious. Perfect for meal prep, it’s an excellent option for busy mornings or as a healthy snack throughout the day. Its high protein and fiber content makes it especially satisfying, while the nuts and seeds add wonderful texture and essential nutrients.
-
Maple & Lentil Vegan Sausage Breakfast Bliss
Ingredients:
• 1 cup cooked lentils (200 g)
• 1 medium apple, grated (approx. 1 cup, 150 g)
• 1/2 cup rolled oats (45 g)
• 1/4 cup chickpea flour (30 g)
• 1 small onion, finely diced (70 g)
• 2 cloves garlic, minced
• 2 tbsp maple syrup (30 ml)
• 1 tsp dried sage
• 1/2 tsp dried thyme
• 1/2 tsp smoked paprika
• Salt and pepper to taste
• 1 tbsp olive oil (15 ml)
Directions:1. In a food processor, pulse the lentils, grated apple, and rolled oats until slightly chunky.
2. Transfer the mixture to a bowl and stir in chickpea flour, diced onion, garlic, maple syrup, and spices.
3. Season with salt and pepper; mix until well combined.
4. Form the mixture into small sausage patties.
5. Heat olive oil in a skillet over medium heat.
6. Fry the patties for about 4–5 minutes on each side until golden.
7. Serve hot with toast or as part of a breakfast platter.
Recipe Information: Preparation Time: 15 mins | Cooking Time: 15 mins | Total Time: 30 mins | Calories per Serving: 180 kcal | Number of Servings: 4