Category: Recipes

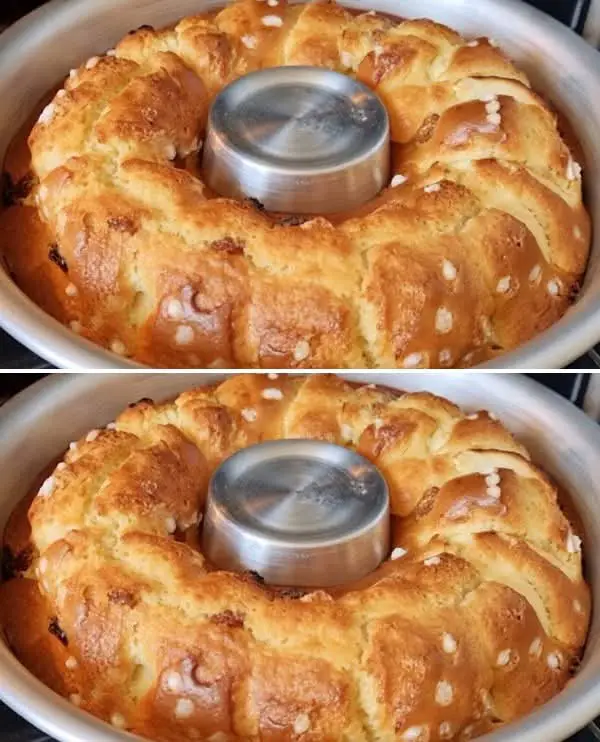
  • Traditional Holiday Fruit cake

    Traditional Holiday Fruit cake

    Traditional Holiday Fruit cake

    Traditional Holiday Fruit cake 

    Ingredients:

    • 2 cups all-purpose flour
    • 1 teaspoon baking powder
    • 1/2 teaspoon salt
    • 1/2 cup unsalted butter, softened
    • 1 cup granulated sugar
    • 3 large eggs
    • 1 teaspoon vanilla extract
    • 1/2 cup milk
    • 1 cup dried fruit mix (cherries, pineapple, apricots, etc.)
    • 1/2 cup nuts (walnuts, pecans), chopped
    • 1/4 cup candied cherries, halved
    • 1/4 cup green candied cherries, halved
    • 1/4 cup red candied cherries, halve

    Directions:

    1. Preheat the oven to 325°F (163°C). Grease and flour a loaf pan.
    2. In a medium bowl, whisk together the flour, baking powder, and salt.
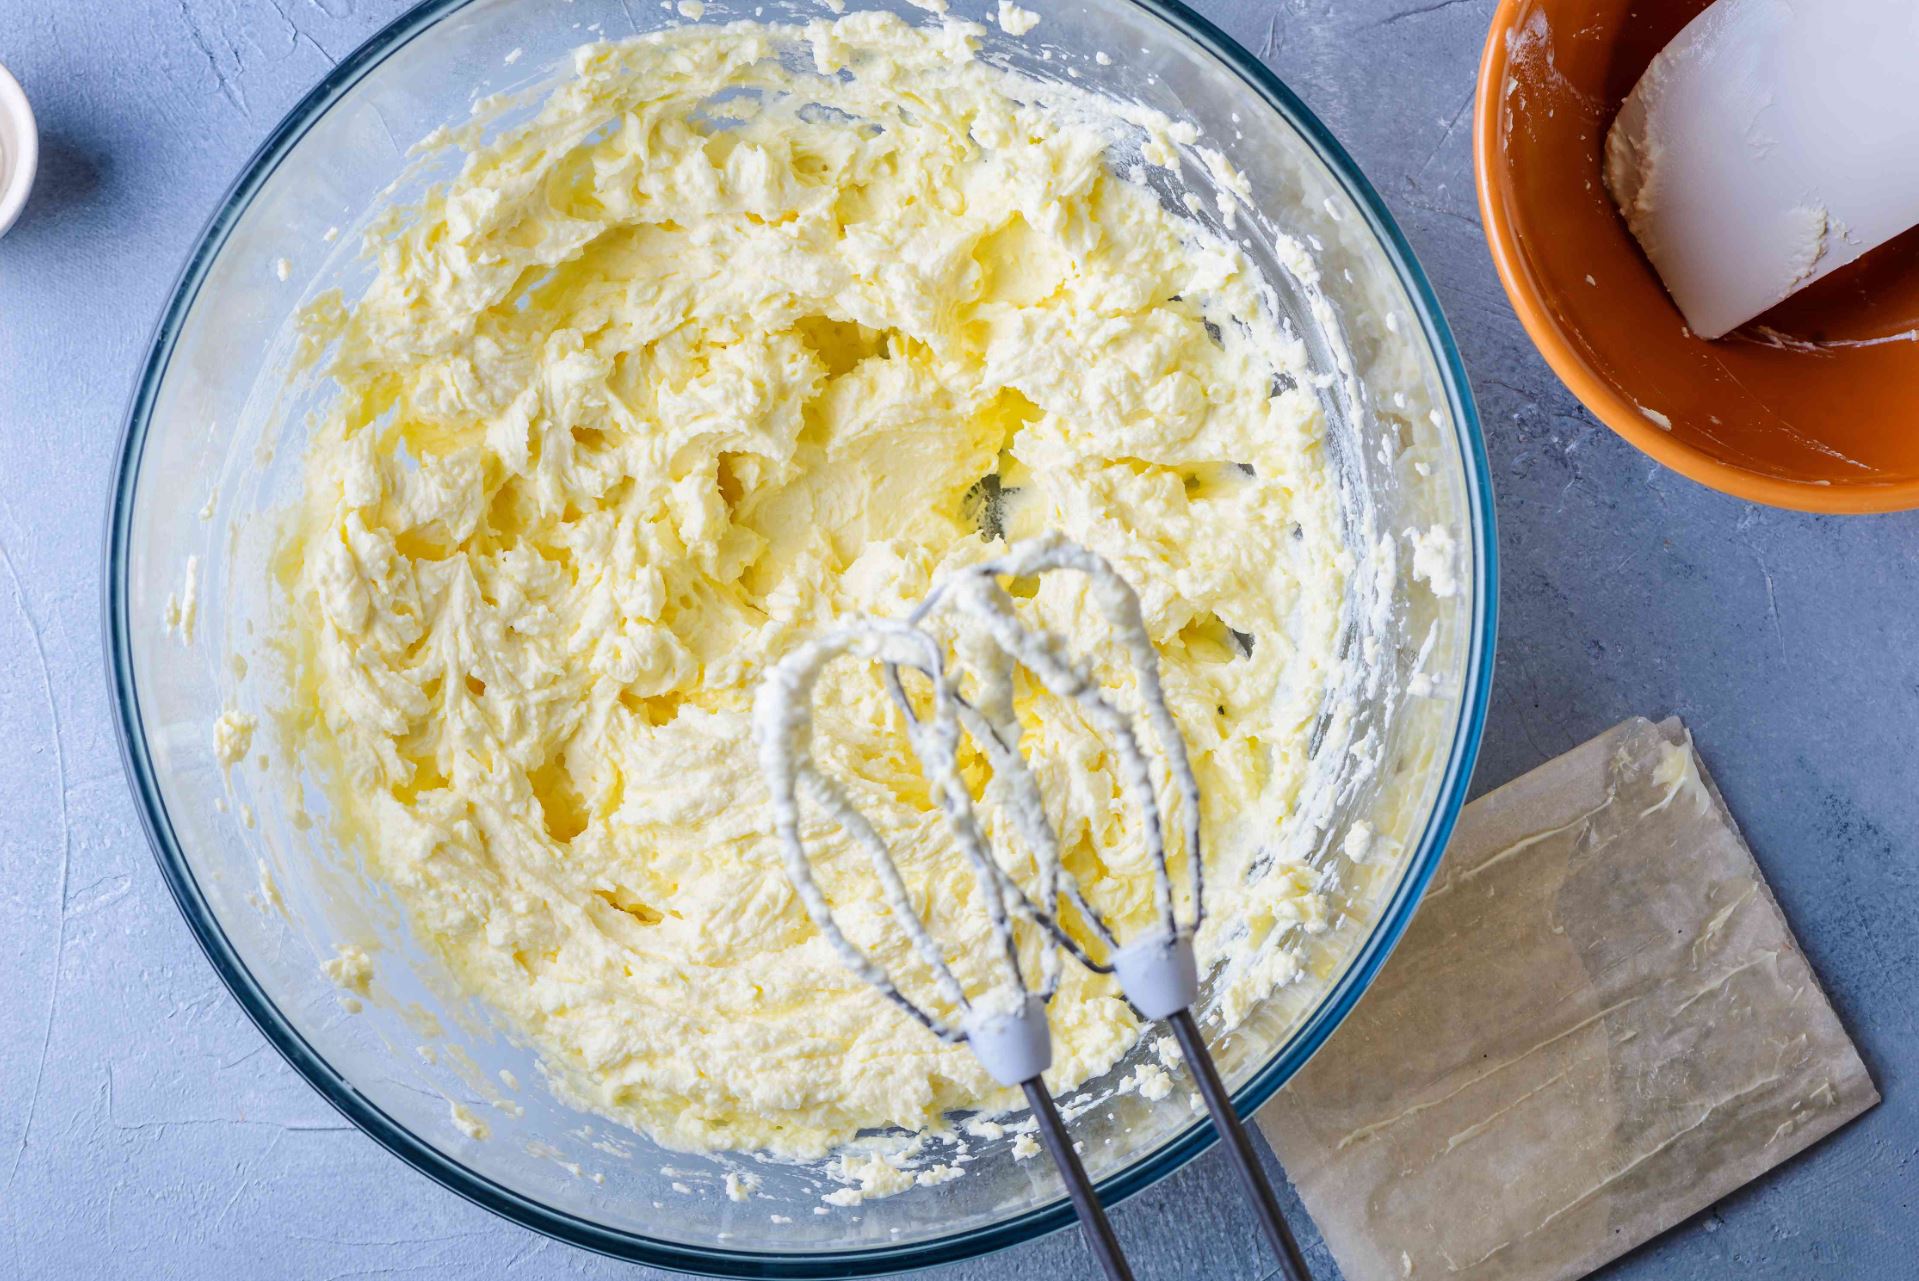
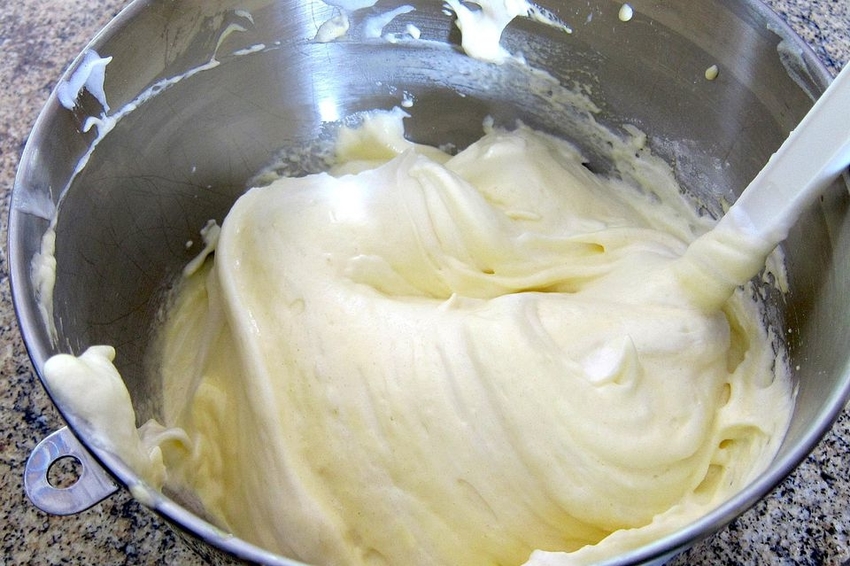
    3. In a large bowl, cream the butter and sugar until light and fluffy. Add the eggs one at a time, beating well after each addition. Mix in the vanilla extract.
    4. Gradually add the dry ingredients to the butter mixture, alternating with the milk, beginning and ending with the dry ingredients. Mix until just combined.
    5. Fold in the dried fruit mix and nuts until evenly distributed.
    6. Pour the batter into the prepared loaf pan, smoothing the top. Arrange the candied cherries on top for decoration.
    7. Bake for 70-80 minutes, or until a toothpick inserted into the center comes out clean.
    8. Let the cake cool in the pan for 10 minutes, then transfer to a wire rack to cool completely.
    9. Prep Time: 20 minutes | Cooking Time: 80 minutes | Total Time: 1 hour 40 minutes
    10. Kcal: 320 kcal | Servings: 10 servings
  • Bubble Donuts Recipe

    Bubble Donuts Recipe

    Bubble Donuts Recipe

    Table of Contents

    The best sweet and soft snack! These Bubble Donuts are a fun and delicious treat, perfect for satisfying your sweet tooth. Let’s dive into this easy recipe.

    Ingredients
    For the Donuts
    • 1 cup and 10 tablespoons of flour
    • 2.5 tablespoons of sugar
    • 1/3 teaspoon of salt
    • 1 teaspoon of yeast
    • 1 egg
    • 1/2 cup of milk
    • 1/8 cup of butter, melted
    For the Glaze
    • 1/2 cup of powdered sugar
    • 1 tablespoon of warm water
    Instructions
    Step 1: Mix the Dry Ingredients

    In a large mixing bowl, combine the flour, sugar, salt, and yeast. Mix all the dry ingredients together until well combined.

    Step 2: Add the Wet Ingredients

    Next, add the egg, milk, and melted butter to the dry ingredients. Mix until the dough is well combined. Cover the bowl with cling wrap.

    Step 3: Let the Dough Rise

    Set the bowl with the dough aside and leave it at room temperature for about an hour. This allows the dough to rise.

    Step 4: Prepare the Dough for Frying

    After an hour, transfer the mixture to a piping bag.

    See also  Hazelnut Custard Puff Pastries
    Step 5: Heat the Oil

    Place a pot over medium heat and add a generous amount of cooking oil. Heat the oil until it reaches frying temperature (around 350°F or 175°C).

    Step 6: Fry the Donuts

    Squeeze the batter from the piping bag into the hot oil, cutting the dough with a pair of clean scissors to form small balls. Fry until the donuts are brown and crispy. Remove them from the oil and drain excess oil on a paper towel-lined plate. Repeat with the remaining batter.

    Step 7: Make the Glaze

    In a small bowl, combine the powdered sugar and warm water. Mix until smooth to form the glaze.

    Step 8: Glaze the Donuts

    Spread the glaze over the bubble donuts while they are still hot. Allow the glaze to set slightly before serving.

    Tips
    • Ensure the oil is at the correct temperature to avoid greasy or undercooked donuts.
    • For an extra touch, you can sprinkle the glazed donuts with some additional powdered sugar or colored sprinkles.
    Nutrition Information (per serving)
    • Calories: 220
    • Protein: 4g
    • Carbs: 30g
    • Fat: 10g
    Why You’ll Love This Recipe

    These Bubble Donuts are the perfect combination of crispy on the outside and soft on the inside. The sweet glaze adds just the right amount of sweetness, making them an irresistible treat. They are easy to make and fun to eat, making them a great addition to any gathering or a delightful snack for any time of the day.

    Stay Connected and Share the Love!

    Did you try this recipe? I’d love to hear your feedback! Leave a comment below and share your thoughts. If you enjoyed this recipe, please consider sharing it with your friends and family on social media. Your support helps me create more delicious recipes for you!

  • Cucumber Juice

    Cucumber Juice


    – 2 pcs cucumbers (use English cucumber if available)

    – 1 large Fuji or Gala apple

    – 6-8 pieces fresh mint leaves

    – 1 pc lemon or lime, juiced

    – 2 cups water

    – Ice cubes

    – Sugar, honey, or agave syrup (if desired)


    – Wash the cucumbers and cut them into chunks.

    – Core the apple and cut it into pieces (no need to peel).

    – In a blender, combine the cucumber chunks, apple pieces, fresh mint leaves, lemon or lime juice, and water.

    – Blend until smooth and well combined.

    – If desired, strain the juice through a fine sieve for a smoother texture.

    – Pour the juice into glasses over ice cubes.

    – Sweeten with sugar, honey, or agave syrup to taste.

    – Garnish with extra mint leaves, if desired.


    ### ( )

    – Calories: 80

    – Protein: 1g

    – Fat: 0g

    – Carbs: 20g


    – Use a low-carb sweetener like stevia or erythritol in place of sugar.

    – Replace the apple with a low-carb fruit like berries for fewer carbs.

  • Cherry Vanilla Shake

    Cherry Vanilla Shake

    1f964 Ingredients:
    1 cup frozen cherries 1f352
    1/2 banana 1f34c (for creaminess)
    1/2 cup vanilla Greek yogurt 1f3661f944
    1/2 cup almond milk 1f95b
    1 tsp vanilla extract 1f33f
    1 tbsp honey (optional) 1f36f
    A handful of ice cubes ❄️
    1f504 Instructions:
    Add all ingredients to a blender. 1f300
    Blend until smooth and creamy. 1f379
    Pour into a glass & enjoy the sweet vanilla-cherry bliss! 1f60b✨
  • Eat Garlic Before Bed and Be Amazed at What Happens

    Eat Garlic Before Bed and Be Amazed at What Happens

    Eat Garlic Before Bed and Be Amazed at What Happens! 1f4a5 (Almost Nobody Knows)
    Garlic is one of nature’s most powerful superfoods, packed with health benefits that most people don’t realize. When eaten before bed, it works while you sleep to boost your body in incredible ways. Here’s what happens when you start adding garlic to your nighttime routine!
    1. Deepens Sleep & Relieves Insomnia 1f634
    Garlic contains sulfur compounds that help relax the nervous system, making it easier to fall asleep. It also boosts the production of melatonin, the hormone that regulates sleep.
    How to Use:
    ✔ Eat one clove of raw garlic 30 minutes before bed.
    ✔ If the taste is too strong, mix it with honey or warm milk.
    2. Strengthens the Immune System 1f9a01f6e1
    Garlic is a natural antibiotic, antifungal, and antiviral powerhouse. Eating it before bed strengthens the immune system, helping your body fight infections and colds while you rest.
    How to Use:
    ✔ Crush 1 clove, let it sit for 10 minutes (to activate allicin), then swallow with water.
    3. Lowers Blood Pressure & Supports Heart Health ❤️
    Garlic helps relax blood vessels, improving circulation and reducing blood pressure naturally. Regular consumption before bed can support a healthy heart over time.
    How to Use:
    ✔ Eat one raw garlic clove or mix it with olive oil before sleeping.
    4. Detoxifies the Liver & Flushes Out Toxins 1f9f9
    Garlic helps activate liver enzymes that remove toxins from the body. If you’ve been exposed to processed foods or environmental toxins, garlic at night can help cleanse your system.
    How to Use:
    ✔ Drink warm water with crushed garlic before bed for a gentle detox.
    5. Clears Congestion & Opens Airways ️
    Garlic has powerful anti-inflammatory and antibacterial properties that can clear nasal congestion, making it easier to breathe at night—especially if you have sinus issues or a cold.
    How to Use:
    ✔ Crush garlic and mix it with a teaspoon of honey. Eat before bed to help clear airways.
    6. A Natural Gut Healer & Digestion Booster 1f33f
    Garlic supports healthy gut bacteria and helps fight harmful bacteria in the digestive system. Eating it at night promotes better digestion and reduces bloating.
    How to Use:
    ✔ Swallow a small piece of raw garlic with warm water.
    ✔ If you have a sensitive stomach, mix garlic with yogurt before bed.
    Bonus: How to Reduce Garlic Smell 1f9c4➡️1f603
    If you’re worried about morning breath, try:
    ✔ Chewing fresh parsley or mint leaves.
    ✔ Drinking lemon water in the morning.
    ✔ Brushing your teeth before bed.
    Final Thoughts
    Garlic is a simple yet powerful natural remedy that can transform your health while you sleep. Try adding it to your nighttime routine and be amazed at the results! 1f4a51f632
  • Military Fat-Burning Drink to Lose Weight & Melt Belly Fat!

    Military Fat-Burning Drink to Lose Weight & Melt Belly Fat!

    Military Fat-Burning Drink to Lose Weight & Melt Belly Fat

    Looking for a potent fat-burning beverage that helps melt belly fat while boosting energy? This drink is said to be used by military soldiers for its incredible ability to speed up metabolism and promote fat loss. Combining gingerlemon, and Nescafé (instant coffee), this drink is an excellent natural way to increase your metabolism, suppress hunger, and give you more energy throughout the day.

    Military Fat-Burning Drink Recipe

    Ingredients:

    • 1 tablespoon grated ginger
    • Juice of ½ lemon
    • 1 teaspoon Nescafé (instant coffee)
    • 200ml warm water

    Instructions:

    1. Simmer the Ginger: Start by simmering 200ml of water in a small saucepan. Add grated ginger to the water and let it steep for about 5 minutes. Ginger is known for its ability to boost metabolism and promote digestion, which makes it a perfect addition to this drink.
    2. Add Nescafé and Lemon: After the ginger has steeped, remove the pot from the heat and add 1 teaspoon of Nescafé (instant coffee) and the juice of ½ lemon. The coffee provides caffeine, which is a well-known metabolism booster, while lemon helps detoxify the body and aids digestion.
    3. Mix and Drink: Stir the mixture well until the coffee dissolves completely. Drink this fat-burning beverage first thing in the morning on an empty stomach to maximize the fat-burning effects.

    How Does This Drink Help with Weight Loss?

    • Boosts Metabolism: The combination of caffeine from Nescafé, ginger, and lemon increases your metabolic rate, which helps your body burn calories faster throughout the day. This accelerates weight loss, especially around the belly area.
    • Suppresses Appetite and Reduces Cravings: Ginger has natural appetite-suppressing properties, and the caffeine in Nescafé also helps curb hunger. Drinking this in the morning can help reduce cravings, leading to fewer temptations throughout the day.
    • Flattens Stomach and Reduces Bloating: The drink helps flush out toxins, which can lead to a flatter stomach and less bloating. Lemon also promotes digestion and can reduce the feeling of fullness and discomfort.
    • Increases Energy: The caffeine from the instant coffee gives you a natural energy boost that will help you stay alert and active throughout the day.

    Extra Tips for the Best Results:

    1. Drink Water: To maximize fat loss, make sure to stay hydrated throughout the day. Drinking water helps flush out toxins, aids in digestion, and supports metabolism.
    2. Eat Clean: Pair this drink with a healthy diet that is rich in vegetables, lean proteins, and healthy fats. Avoid processed foods, sugary snacks, and excess carbohydrates, which can hinder weight loss.
    3. Exercise Regularly: Even light exercises like walking, yoga, or stretching can enhance the effects of this fat-burning drink. Consistency is key to seeing results!
    4. Be Consistent: Drink this every morning for 30 days to experience noticeable changes. Staying consistent will yield the best results.

    Q&A:

    Q: Can I drink this at any time of the day?

    • A: For maximum results, it’s best to drink this beverage first thing in the morning on an empty stomach. However, you can enjoy it later in the day if you prefer.

    Q: How long will it take to see results?

    • A: Results vary, but with consistent use and a healthy diet, you may start seeing noticeable changes within 30 days. Patience and consistency are key.

    Q: Can I use decaf coffee instead of regular coffee?

    • A: Yes, you can substitute decaf coffee if you’re sensitive to caffeine. However, regular coffee tends to provide a stronger fat-burning boost.

    Q: Can I add sweeteners to this drink?

    • A: It’s best to avoid sweeteners, as they can interfere with the natural fat-burning properties. If you prefer a bit of sweetness, consider adding a small amount of honey, but keep it minimal.

    Q: What should I do if I don’t like the taste?

    • A: The taste might be strong for some, but the health benefits are worth it. If needed, you can adjust the ratio of lemon or ginger to suit your taste. Just be sure not to add too much sugar.

    This Military Fat-Burning Drink is a powerful, natural way to jumpstart your weight loss journey. With its metabolism-boosting ingredients and appetite-suppressing properties, you’ll feel more energized and ready to tackle your day while shedding stubborn belly fat!

  • Fluffy Lemon Yogurt Cake

    Fluffy Lemon Yogurt Cake

    Fluffy Lemon Yogurt Cake

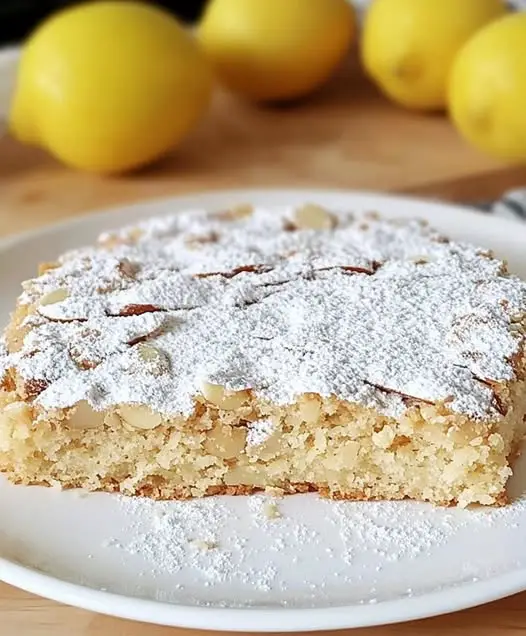
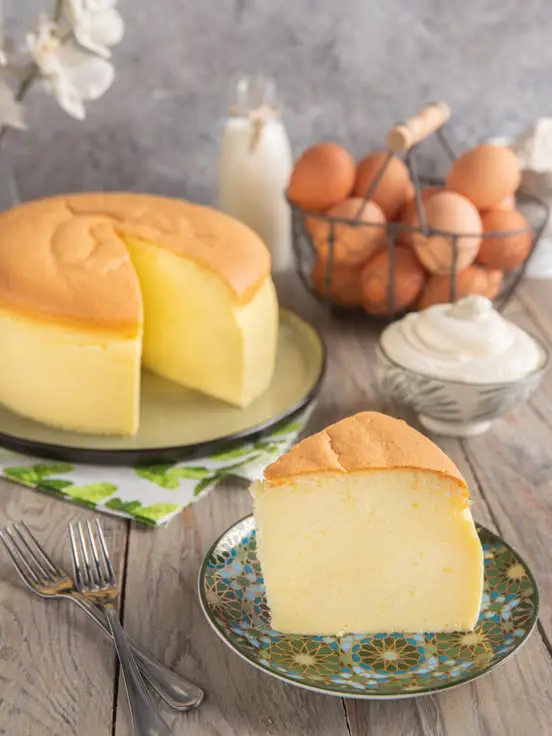
    This Fluffy Lemon Yogurt Cake is a light, moist, and delicious dessert with a hint of citrus zest. The combination of Greek yogurt, lemon zest, and a soft crumb makes it perfect for tea time, breakfast, or a sweet treat. It’s simple to make, requiring just a few ingredients for a delightful homemade cake.

    Preparation Time

      • Prep Time: 10 minutes
      • Baking Time: 35-40 minutes
      • Total Time: 50 minutes
      • Servings: 8-10

    Ingredients

      • 3 eggs
      • A pinch of salt
      • 130 g (⅔ cup) sugar
      • 60 ml (¼ cup) vegetable oil
      • 125 ml (½ cup) Greek yogurt
      • Zest of 1 lemon
      • 150 ml (⅔ cup) water
      • 300 g (2½ cups) all-purpose flour
    • 15 g (1 tbsp) baking powder

    Directions

    1. Prepare the Batter

      • Preheat oven to 175°C (350°F). Grease and flour a cake pan.
      • In a bowl, whisk eggs, salt, and sugar until pale and fluffy.
      • Add vegetable oil, Greek yogurt, and lemon zest. Mix well.
    • Stir in water and continue mixing.

    2. Add Dry Ingredients

      • Sift flour and baking powder into the wet mixture.
    • Gently fold everything together until smooth.

    3. Bake the Cake

      • Pour the batter into the prepared cake pan.
    • Bake at 175°C (350°F) for 35-40 minutes, or until a toothpick comes out clean.
    • Let cool before slicing.

    4. Serve

    • Dust with powdered sugar or drizzle with lemon glaze.

    Serving Suggestions

      • Serve with fresh berries and whipped cream.
    • Enjoy with a cup of tea or coffee.
    • Pair with a scoop of vanilla ice cream for a dessert treat.

    Cooking Tips

      • For extra lemon flavor, add 1 tsp lemon juice to the batter.
      • Use room-temperature eggs for a fluffier cake.
      • For a richer texture, replace water with milk or orange juice.

    Nutritional Benefits

      • Rich in protein from eggs and Greek yogurt.
      • Good source of calcium from yogurt.
    • Naturally flavored with fresh lemon zest.

    Dietary Information

      • Vegetarian-friendly
    • Can be made dairy-free using plant-based yogurt.

    Nutritional Facts (Per Slice, Approx.)

      • Calories: 220
      • Protein: 5g
      • Carbohydrates: 35g
      • Fat: 7g

    Storage

      • Refrigeration: Store in an airtight container for up to 3 days.
      • Freezing: Freeze for up to 1 month; thaw before serving.

    Why You’ll Love This Recipe

      • Soft, fluffy, and moist
      • Simple ingredients, easy to make
    • Perfect for any occasion
    • Light and refreshing citrus flavor

    Conclusion
    This Fluffy Lemon Yogurt Cake is a simple yet delightful homemade treat that’s moist, airy, and full of lemony goodness. Whether for a quick snack, dessert, or tea-time treat, this cake is a must-try! Make it today and enjoy a slice of homemade perfection.

  • Make Your Own Homemade Cheese in 5 Minutes!

    Make Your Own Homemade Cheese in 5 Minutes!

    Make Your Own Homemade Cheese in 5 Minutes!

    Introduction

    Creating your own homemade cheese is a quick and rewarding experience. This simple recipe uses only a few ingredients and can be made in just five minutes. Whether you use whole milk or low-fat milk, the result is a creamy, delicious cheese that you can enjoy in various dishes. Let’s get started on this easy and delightful cheese-making journey.

    Ingredients

    For this recipe, we provide measurements in both USA and European metrics to ensure accuracy and convenience.

    Main Ingredients:

    • Whole Milk (or low-fat milk): 1 liter (4 cups)
    • White Vinegar: 3 tbsp (45ml) for whole milk or 4 tbsp (60ml) for low-fat milk
    • Butter (salted or unsalted): 20g (1.4 tbsp)

    You can also replace the white vinegar with lemon juice if you prefer.

    Step-by-Step Instructions

    Step 1: Preparing the Milk

    1. Prevent Burning: Add a little water to your pot to cover the surface. This helps to prevent the milk from burning when heated.
    2. Add Milk and Vinegar: Pour in the milk and add the white vinegar according to the type of milk you’re using.
    3. Heat the Milk: Heat the milk on a medium-low flame, stirring occasionally to prevent burning.

    Step 2: Curdling the Milk

    1. Forming Curds: As the milk heats up, it will begin to thicken and form curds. Keep stirring gently until a thick layer of foam forms on the surface.
    2. Turn Off the Flame: Once the milk starts to curdle and separate, turn off the flame.

    Step 3: Straining the Curds

    1. Separate Curds and Whey: Place a sieve over a clean bowl and pour the curdled milk through it. Press gently with a spatula to drain out excess whey.
    2. Alternative Straining: If you don’t have a sieve, cheesecloth works just fine too.

    Step 4: Blending and Seasoning

    1. Blend the Curds: Transfer the drained curds to a blender and add the butter.
    2. Blend Until Smooth: Blend on high speed until the mixture is smooth and creamy.
    3. Optional Seasoning: For an extra kick, feel free to sprinkle in some salt to taste.

    Step 5: Final Touches

    1. Drying the Cheese: Once blended to perfection, transfer your homemade cheese to a plate lined with gauze. Press out any remaining liquid and allow it to dry completely.

    Storage Tips

    • Refrigeration: Store the homemade cheese in a glass jar and keep it refrigerated for up to 5 days.
    • Freezing: For longer storage, freeze the cheese in an airtight container for up to 3 months.

    Uses of Homemade Cheese

    Homemade cheese is versatile and can be used in various ways:

    • Snacks: Spread it on bread or crackers for a delicious snack.
    • Sandwiches and Wraps: Use it as a filling for sandwiches or wraps.
    • Pasta and Salads: Incorporate it into pasta dishes or salads for added flavor and creaminess.

    Conclusion

    Making your own homemade cheese is a simple and quick process that yields a delicious, creamy product perfect for a variety of dishes. With just a few basic ingredients and a little bit of time, you can enjoy fresh, homemade cheese any time you want. Happy cheese making!

  • Chocolate Coconut Dessert Recipe

    Chocolate Coconut Dessert Recipe

    Chocolate Coconut Dessert Recipe

    This Chocolate Coconut Dessert is a decadent no-bake treat that combines a creamy, sweet coconut layer with a rich, smooth chocolate topping. Perfect for parties, holidays, or an indulgent snack, this recipe is easy to make and irresistibly delicious. It’s a crowd-pleaser that looks as good as it tastes!

    Prep Time: 15 minutes
    Cook Time: 15 minutes
    Chill Time: 1 hour
    Total Time: 1 hour 30 minutes
    Servings: 8-10 pieces

    Ingredients

    For the Coconut Layer:

      • 4 tablespoons sugar (50 g)
      • 20 g cornstarch (2 tablespoons)
      • 50 g powdered milk (1/3 cup)
      • 400 ml milk (1 2/3 cups)
      • 210 g shredded coconut (2 cups)

    For the Chocolate Layer:

      • 150 g dark chocolate (5.3 oz)
      • 100 g milk chocolate (3.5 oz)
    • 30 g cocoa butter (2 tablespoons)

    Directions

    • Prepare the Coconut Layer:
        • In a saucepan, mix sugar, cornstarch, powdered milk, and shredded coconut.
        • Gradually whisk in milk, stirring continuously to avoid lumps.
        • Cook over medium heat until the mixture thickens and bubbles.
        • Pour the mixture into a parchment-lined baking dish and smooth the top.
      • Cover with plastic wrap and refrigerate for 30-40 minutes until firm.
    • Prepare the Chocolate Layer:
        • Melt dark chocolate, milk chocolate, and cocoa butter together in a heatproof bowl over simmering water (double boiler) or microwave in 20-second intervals, stirring each time.
      • Pour the melted chocolate over the coconut layer and spread evenly.
    • Chill and Serve:
        • Refrigerate the dish for another 15-20 minutes until the chocolate is fully set.
      • Slice into squares or bars and serve chilled.

    Serving Suggestions

      • Garnish with shredded coconut or a drizzle of white chocolate for extra elegance.
      • Pair with espresso or herbal tea for a delightful snack.
      • Serve as a dessert after a savory meal for a sweet finish.

    Cooking Tips

      • Use high-quality chocolate for a richer flavor.
      • For a nutty variation, sprinkle chopped almonds or hazelnuts over the chocolate layer before chilling.
    • If you don’t have cocoa butter, substitute with 1 tablespoon of vegetable oil for a glossy finish.

    Nutritional Benefits

      • Coconut: High in dietary fiber and healthy fats.
    • Dark Chocolate: Rich in antioxidants and promotes heart health.
    • Milk: Provides calcium and vitamin D.

    Dietary Information

    • Vegetarian
    • Gluten-Free

    Nutritional Facts (Per Serving)

      • Calories: 230
      • Protein: 3 g
      • Fat: 15 g
      • Carbohydrates: 20 g
      • Fiber: 3 g
      • Sugar: 15 g

    Storage

      • Store in an airtight container in the refrigerator for up to 5 days.
      • Freeze for up to 3 months; thaw in the refrigerator before serving.

    Why You’ll Love This Recipe

      • Easy to make with no baking required.
      • Combines creamy coconut and rich chocolate for a perfect balance of flavors.
    • Beautiful presentation that’s great for entertaining.
    • Customizable with your favorite toppings and variations.

    Conclusion
    This Chocolate Coconut Dessert is an indulgent treat that’s easy to prepare and loved by all. Its creamy, rich flavors make it a standout dessert for any occasion. Whether you’re hosting a dinner party or satisfying a sweet craving, this recipe is a must-try. Give it a go and enjoy the compliments!

  • Homemade Cheese Recipe

    Homemade Cheese Recipe

    Homemade Cheese Recipe

    This Homemade Cheese is simple to prepare using basic ingredients like milk, eggs, and sour cream. With no special equipment required, you can enjoy fresh, flavorful cheese in the comfort of your home. It’s perfect as a snack, for sandwiches, or as a side dish. Customize the flavor with your preferred seasonings to suit your taste.

    Ingredients:

      • 1.5 liters (6 cups) milk
      • ½ tablespoon salt
      • 3 chicken eggs
      • 200 ml (¾ cup) sour cream
      • Salt and ground black pepper (to taste)

    Directions:

      1. Prepare the milk mixture:
        • In a large pot, heat 1.5 liters of milk over medium heat until it begins to simmer, but do not let it boil. Stir occasionally to prevent the milk from burning.
      2. Add eggs and sour cream:
          • In a separate bowl, whisk together 3 eggs and 200 ml sour cream until smooth. Gradually pour this mixture into the simmering milk, stirring constantly.
      3. Season and curdle the cheese:
        • Add ½ tablespoon salt, and season with additional salt and black pepper to taste. Continue stirring the mixture gently. The milk will begin to curdle, forming curds and separating from the whey. This process will take about 10-15 minutes.
      1. Strain the curds:
        • Once the curds have fully formed, remove the pot from the heat. Line a colander with cheesecloth or a clean kitchen towel, and carefully pour the curdled mixture into it to strain out the whey.
      2. Form the cheese:
          • Gather the edges of the cheesecloth and squeeze gently to remove excess whey. You can tie the cheesecloth and hang it to drain for 15-20 minutes for a firmer texture.
      3. Cool and serve:
        • Once the cheese has cooled and firmed up, transfer it to a serving dish. You can enjoy it immediately or refrigerate it for later use.

    Serving Suggestions:

      • Enjoy the cheese as a spread on bread or crackers.
      • Use it as a filling for sandwiches, wraps, or omelets.
      • Add it to salads for a creamy texture.
    • Serve alongside fresh fruits or vegetables as part of a cheese platter.
    • Crumble it over baked potatoes or pasta dishes for extra flavor.

    Cooking Tips:

      • Use full-fat milk for a richer, creamier cheese.
      • Stir continuously while adding the egg and sour cream mixture to prevent the milk from sticking to the pot.
      • For a firmer cheese, let it drain longer, up to an hour.
      • Customize the flavor by adding herbs like chives, thyme, or rosemary.
    • You can store the leftover whey and use it in soups, smoothies, or bread making.

    Nutritional Benefits:

      • High in protein: Thanks to the milk and eggs, this cheese is a good source of protein.
      • Rich in calcium: The milk provides a significant amount of calcium, which is good for bone health.
    • Low in carbohydrates: Suitable for those following low-carb diets.
    • Contains healthy fats: Sour cream and milk provide essential fats.

    Dietary Information:

      • Vegetarian: This recipe is vegetarian-friendly, using milk and eggs.
      • Gluten-free: All ingredients are naturally gluten-free.
      • High in protein: A great option for those looking to increase their protein intake.
      • Low-carb: Ideal for those following a low-carb or keto diet.

    Nutritional Facts (Per 50g serving, Approximate):

      • Calories: 150 kcal
      • Protein: 7g
      • Carbohydrates: 2g
    • Fat: 12g
    • Calcium: 180 mg

    Storage:

      • Refrigerator: Store the cheese in an airtight container in the fridge for up to 5 days.
    • Freezer: Cheese can be frozen for up to 2 months, though the texture may change slightly after thawing.

    Why You’ll Love This Recipe:

      • Easy to make: No fancy equipment required, and it comes together quickly.
      • Fresh and customizable: You can adjust the flavor by adding your favorite herbs and spices.
      • Healthier: Homemade cheese is free from preservatives and additives found in store-bought versions.
      • Versatile: Use it in a variety of dishes, from snacks to salads and sandwiches.
      • Economical: Making cheese at home is cost-effective compared to buying artisanal varieties.

    Conclusion:

    This Homemade Cheese is a fantastic way to create fresh, flavorful cheese with minimal effort. Its soft texture and rich taste make it a versatile ingredient for various dishes, or you can enjoy it on its own. Whether you’re a cheese enthusiast or trying it for the first time, this recipe is a great way to experience the joy of homemade cheese.

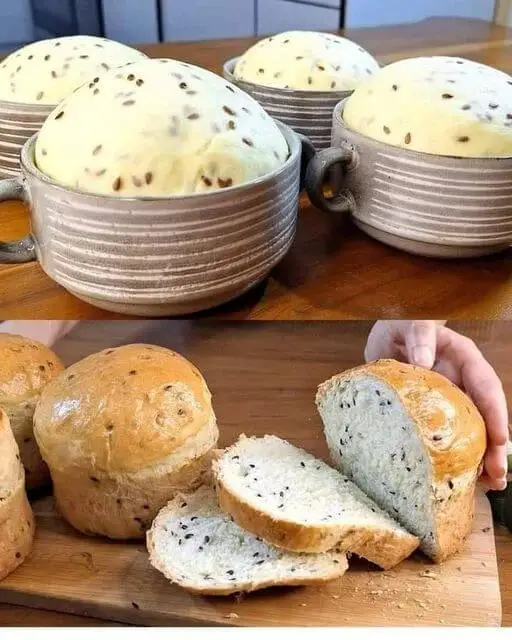
  • Protein multigrain bread in a jar! WITHOUT white flour and WITHOUT yeast!

    Protein multigrain bread in a jar! WITHOUT white flour and WITHOUT yeast!

    Protein multigrain bread in a jar! WITHOUT white flour and WITHOUT yeast! 


    -Ingredients:


    3 eggs
    1 tsp salt
    1 cup (240 ml) hot milk
    1.5 tsp psyllium husk
    2 tsp flax seeds
    2 tsp pumpkin seeds
    2 tsp sunflower seeds
    2 tsp sesame seeds
    1/2 cup (70 g) almonds
    1/3 cup baking powder
    1 clove garlic (optional)


    -Method:


    • Preheat your oven to 350°F (175°C). Grease a loaf pan or line it with parchment paper.
    • In a large bowl, whisk together the eggs and salt until well combined.
    • Add the hot milk and psyllium husk, stirring quickly to prevent lumps from forming.
    • Stir in the flax seeds, pumpkin seeds, sunflower seeds, sesame seeds, almonds, baking powder, and garlic (if using).
    • Pour the batter into the prepared loaf pan and spread evenly.
    • Bake in the preheated oven for about 30 minutes, or until the bread is golden brown and a toothpick inserted into the center comes out clean.
    • Remove from the oven and let cool in the pan for 10 minutes, then transfer to a wire rack to cool completely before slicing.
  • Creamy Strawberry Yogurt with 3 ingredients in the blender, in minutes

    Creamy Strawberry Yogurt with 3 ingredients in the blender, in minutes

    Hi, everyone, today we’re going to learn how to make Creamy Strawberry Yogurt Recipe using simple ingredients. So grab your pen and paper to jot down the ingredients, then follow the complete preparation method.

    How to Make Creamy Strawberry Yogurt

    Homemade yogurt like the market. See below the list of all ingredients and required quantities. And then, a very complete preparation method with details of the recipe.

    Recipe ingredients:

    • 400g (14oz) heavy cream
    • 395g (14oz) sweetened condensed milk
    • 1 packet (25g/0.9oz) strawberry flavored juice powder

    Instructions:

    Gather the three ingredients. In the blender, add the condensed milk and cream and, finally, the strawberry juice powder.

    Mix everything until the mixture is thick and smooth. Pour into a container and refrigerate for 2 to 3 hours.

    Serve ice cream and enjoy this creamy delight for an afternoon snack or whenever you want!

  • Caramel Pecan Loaf Cake Nutty buttery and drizzled with caramel for a sweet treat

    Caramel Pecan Loaf Cake Nutty buttery and drizzled with caramel for a sweet treat

    Caramel Pecan Loaf Cake

    Nutty, buttery, and drizzled with caramel for a sweet treat!

    This Caramel Pecan Loaf Cake is the perfect balance of rich flavors with the warmth of caramel and crunch of pecans. A moist loaf cake that’s easy to make and the perfect centerpiece for any dessert table or afternoon treat. Topped with caramel and whole pecans, it’s a slice of heaven!

    Ingredients:

    • 1 ½ cups all-purpose flour
    • 1 teaspoon baking powder
    • ½ teaspoon baking soda
    • ½ teaspoon salt
    • ½ cup unsalted butter, softened
    • ¾ cup brown sugar
    • 2 large eggs
    • 1 teaspoon vanilla extract
    • ½ cup buttermilk
    • 1 cup chopped pecans
    • ½ cup whole pecans (for topping)
    • ¼ cup caramel sauce (for drizzling)

    Instructions:

    1. Preheat and Prepare the Pan:

    Preheat your oven to 350°F (175°C). Grease a loaf pan with butter or non-stick spray, or line it with parchment paper for easy removal later.

    2. Mix the Dry Ingredients:

    In a medium bowl, whisk together the all-purpose flourbaking powderbaking soda, and salt. Set aside.

    3. Cream the Butter and Sugar:

    In another large bowl, beat together the unsalted butter and brown sugar until light and fluffy, about 2-3 minutes. You can use a hand mixer or stand mixer for the best results.

    4. Add Eggs and Vanilla:

    Add the eggs, one at a time, mixing well after each addition. Stir in the vanilla extract until combined.

    5. Combine Wet and Dry Ingredients:

    Gradually add the dry flour mixture to the butter-sugar mixture, alternating with the buttermilk. Start and end with the dry ingredients. Mix until just combined, being careful not to overmix.

    6. Fold in Pecans:

    Gently fold in the chopped pecans to distribute evenly through the batter.

    7. Bake the Cake:

    Pour the batter into the prepared loaf pan and smooth the top with a spatula. Bake for 45-50 minutes, or until a toothpick inserted into the center of the cake comes out clean.

    8. Cool and Drizzle with Caramel:

    Let the cake cool in the pan for about 10 minutes, then transfer it to a wire rack to cool completely. Once cooled, drizzle the caramel sauce over the top of the cake.

    9. Decorate and Serve:

    Arrange the whole pecans on top of the cake for an added crunch. Optionally, you can lightly dust with powdered sugar for an elegant finish. Slice and enjoy!


    Decoration Tips:

    • Extra Caramel: Drizzle extra caramel sauce over each slice when serving for a more indulgent treat.
    • Toasted Pecans: Toast the whole pecans before placing them on top for an enhanced nutty flavor.
    • Whipped Cream or Ice Cream: Serve with a side of whipped cream or vanilla ice cream for an extra indulgent dessert.

    Q&A

    Q: Can I use a different type of nut?

    • A: Yes! If you don’t have pecans, you can substitute with walnuts, almonds, or any nut of your choice. Just keep in mind that the flavor and texture may change slightly.

    Q: Can I make this cake ahead of time?

    • A: Yes, this cake keeps well! You can bake it a day in advance and store it in an airtight container at room temperature. Drizzle the caramel sauce just before serving.

    Q: Can I make this cake without buttermilk?

    • A: If you don’t have buttermilk, you can easily make your own by adding 1 tablespoon of white vinegar or lemon juice to ½ cup of milk. Let it sit for 5 minutes before using.

    Q: How can I store leftovers?

    • A: Leftover cake should be stored in an airtight container for up to 3 days at room temperature, or you can refrigerate it to extend its freshness.

    Total Time:

    • Prep Time: 15 minutes
    • Bake Time: 45-50 minutes
    • Cooling Time: 30 minutes
    • Total Time: 1 hour 30 minutes
    • Servings: 8-10 slices

    This Caramel Pecan Loaf Cake is a delicious dessert, perfect for special occasions or just a cozy treat at home! Its sweet, nutty flavor and buttery texture will leave everyone wanting more. Enjoy!

  • This Tea Removes Swelling in the Feet and Legs – Try Parsley Tea!

    This Tea Removes Swelling in the Feet and Legs – Try Parsley Tea!

    This Tea Removes Swelling in the Feet and Legs – Try Parsley Tea!

    Swollen feet and legs can cause significant discomfort and pain, often resulting from fluid retention, poor circulation, or inflammation. Fortunately, parsley tea provides a natural and effective solution. This herbal remedy acts as a diuretic, helping the body flush out excess fluids and relieve swelling in a safe and timely manner.

     Natural Diuretic

    Parsley stimulates the kidneys to flush out toxins and excess water, reducing swelling and bloating.

     Improves Circulation

    It helps to boost blood flow, preventing fluid buildup in the legs and feet.

    ️ Reduces Inflammation

    Loaded with antioxidants and vitamin C, parsley helps fight inflammation that can cause swelling.

     Supports Kidney Function

    By promoting urine production, parsley prevents water retention and helps the body stay balanced.

    How to Make Parsley Tea

    ✔️ Ingredients:

    1 handful of fresh parsley (or 1 tablespoon dried parsley)
    2 cups hot water
    ½ teaspoon lemon juice (optional, for extra detox benefits)

    ✔️ Instructions:

    – Step 1: Chop fresh parsley and place it in a cup.
    – Step 2; Pour hot water over it and let it steep for 10 minutes.
    – Step 3: Strain the tea and add lemon juice if desired.
    – Step 4: Drink warm, 1-2 cups per day for the best results.

  • Pomegranate Juice: The Secret to Glowing Skin and Youthful Energy

    Pomegranate Juice: The Secret to Glowing Skin and Youthful Energy

    Pomegranate juice isn’t just delicious—it’s packed with powerful antioxidants, vitamins, and nutrients that can transform your health from the inside out. Often called a “superfruit,” pomegranate has been a beauty and wellness secret for centuries.

    Why Pomegranate Juice?

    This vibrant red juice is rich in:

    • Antioxidants – Helps fight free radicals, keeping skin youthful and radiant.
    • Vitamin C – Boosts collagen production for firmer, healthier skin.
    • Polyphenols – Supports heart health and improves circulation.
    • Anti-inflammatory properties – Reduces redness, acne, and irritation.

    Top Benefits of Drinking Pomegranate Juice

    1. Anti-Aging and Glowing Skin

    Pomegranate juice boosts collagen production, reducing fine lines and keeping skin plump and hydrated. It also helps fade dark spots and evens out the skin tone.

    2. Stronger Hair and Faster Growth

    The nutrients in pomegranate improve scalp circulation, nourish hair follicles, and prevent hair thinning, leading to shinier, healthier hair.

    3. Natural Energy Booster

    Forget coffee! Pomegranate juice naturally increases energy levels and fights fatigue, making you feel refreshed and revitalized.

    4. Supports Heart and Brain Health

    Regular consumption improves blood flow, lowers blood pressure, and supports cognitive function, keeping the mind sharp.

    How to Use Pomegranate Juice for Beauty and Health

    1. Drink It Fresh

    • Have a glass in the morning for an instant energy boost.
    • Mix it with lemon or mint for added refreshment.

    2. Pomegranate Face Mask

    • Mix pomegranate juice with honey or yogurt.
    • Apply to clean skin for 15 minutes and rinse for a glowing complexion.

    3. Pomegranate Hair Rinse

    • Use diluted pomegranate juice as a final rinse after shampooing to add shine and strengthen hair.

    A Natural, Easy Way to Stay Youthful

    Pomegranate juice is a simple, natural way to boost overall health and beauty. Try it daily and experience the benefits for yourself!