Category: Recipes

  • Chinese Restaurant-Style Tender Beef

    Chinese Restaurant-Style Tender Beef

    Chinese Restaurant-Style Tender Beef

    Ingredients

    For the Beef and Marinade

    • 2 lbs (900g) lean beef (sirloin or flank steak)
    • 1.5 teaspoons (7.5g) baking soda
    • 1.5 teaspoons (7.5g) sugar
    • 1 teaspoon (5g) salt
    • ½ teaspoon (2.5g) MSG (optional)
    • 12 oz (355ml) ice water
    • 1 large egg white
    • 3 tablespoons (27g) cornstarch

    For the Sauce

    • 1 tablespoon (15ml) soy sauce
    • ¼ teaspoon (1.25g) sugar
    • ⅛ teaspoon (0.5g) white pepper
    • 1 teaspoon (5ml) dark soy sauce
    • 1 tablespoon (15ml) Shaoxing wine
    • ½ tablespoon (7.5ml) oyster sauce
    • 2 tablespoons (30ml) water
    • 1 teaspoon (3g) cornstarch

    For the Stir-Fry

    • 3-4 slices fresh ginger
    • 4-5 cloves garlic, sliced
    • 2-3 green onions, separated white/green parts
    • Vegetable oil for cooking

    Instructions

    1. Beef Preparation
    • Semi-freeze beef for 45-60 minutes
    • Slice against the grain into 2-3mm thick pieces
    • Place sliced beef in a large bowl
    1. Marination Process
    • Combine baking soda, sugar, salt, and MSG
    • Sprinkle mixture over beef, massage thoroughly
    • Gradually add ice water in 4-5 portions, mixing well
    • Add egg white, mix until meat feels sticky
    • Incorporate cornstarch evenly
    • Cover and marinate for 30 minutes
    1. Sauce Preparation
    • Combine all sauce ingredients in a bowl
    • Whisk until cornstarch is fully dissolved
    • Set aside until needed
    1. Cooking Method
    • Heat wok or large pan over high heat
    • Add 2-3 tablespoons oil
    • Sear beef in batches until 80% done
    • Remove and drain excess oil
    1. Final Assembly
    • In the same pan, sauté ginger until fragrant
    • Add garlic and white parts of green onions
    • Return beef to pan
    • Pour sauce mixture
    • Stir-fry until sauce thickens
    • Garnish with green onion tops

    Nutritional Information

    (Per serving – serves 4)

    • Calories: 385
    • Protein: 45g
    • Carbohydrates: 12g
    • Fat: 18g
    • Preparation Time: 45 minutes
    • Cooking Time: 15 minutes
    • Total Time: 1 hour

    Pro Tips and Tricks

    • Keep meat and water ice-cold throughout marination
    • Don’t skip the resting time after marination
    • Use high heat for quick cooking
    • Don’t overcrowd the pan when searing
    • Cut meat against the grain at a slight angle

    Variations and Substitutions

    • Replace beef with chicken or pork
    • Use dry sherry instead of Shaoxing wine
    • Substitute coconut aminos for soy sauce
    • Add vegetables like broccoli or bell peppers
    • Use arrowroot instead of cornstarch
  • Chicken & Vegetable Casserole with Mozzarella

    Chicken & Vegetable Casserole with Mozzarella

    Chicken & Vegetable Casserole with Mozzarella

    Ingredients

    For the Egg Mixture:

      • 4 large chicken eggs
      • ½ tsp salt
      • 125 ml (½ cup) milk
      • 113 g (4 oz) flour
      • 28 g (1 oz) spring onions, chopped
      • 28 g (1 oz) fresh dill, chopped
      • Black pepper to taste
    • 85 g (3 oz) mozzarella cheese, shredded

    For the Vegetables & Chicken:

      • 4 medium potatoes, peeled and diced
      • 1 zucchini, diced
      • 1 onion, chopped
      • 2 cloves garlic, minced
      • 1 carrot, grated
      • 1 chicken fillet, diced
      • 1 sweet fresh pepper, chopped
      • 1 tsp salt
      • Black pepper to taste
      • ½ tsp sweet paprika
      • 28 g (1 oz) olives, sliced
      • 2 cherry tomatoes, halved
      • 1 tbsp olive oil

    Directions

      • Prepare the Vegetables: Peel and dice the potatoes, chop the zucchini, onion, pepper, and garlic. Grate the carrot.
      • Cook the Chicken & Vegetables: In a large pan, heat olive oil over medium heat. Add the diced chicken fillet, season with salt, black pepper, and sweet paprika. Cook for 5-7 minutes until browned. Remove and set aside.
      • Sauté the Vegetables: In the same pan, sauté onions, garlic, carrots, zucchini, and sweet pepper for 4-5 minutes until they soften slightly.
      • Make the Egg Mixture: In a large bowl, whisk together eggs, salt, black pepper, and milk. Gradually add the flour, mixing until smooth. Stir in chopped spring onions and dill.
      • Layer the Casserole: Preheat the oven to 180°C (360°F). Grease a casserole dish with olive oil. Spread the diced potatoes at the bottom, then add the cooked chicken and sautéed vegetables. Pour the egg mixture over the top.
      • Bake: Bake the casserole for 30 minutes at 180°C (360°F) until the top is set and golden brown.
    • Add Mozzarella & Final Toppings: Remove the casserole from the oven. Sprinkle shredded mozzarella cheese on top, add sliced olives and halved cherry tomatoes. Return to the oven and bake for an additional 7 minutes until the cheese is melted and bubbly.
    • Serve: Garnish with extra dill or spring onions if desired and serve hot.

    Serving Suggestions

      • Pair with a simple green salad or steamed broccoli for a complete meal.
    • Serve with crusty bread or garlic toast for added texture.

    Cooking Tips

      • For a more flavorful egg mixture, add a pinch of nutmeg or smoked paprika.
      • You can substitute mozzarella with any melty cheese like cheddar or gouda.
    • If you prefer crispier potatoes, pre-bake the diced potatoes for 10 minutes before adding them to the casserole.

    Nutritional Benefits

      • High Protein: Chicken and eggs provide a great source of protein, helping with muscle repair and overall health.
      • Rich in Fiber: The vegetables, especially zucchini and potatoes, are rich in fiber, which aids in digestion.
    • Essential Vitamins: Zucchini, peppers, and carrots are rich in vitamins A and C, supporting immune health.

    Dietary Information

      • Gluten-Free Option: Use gluten-free flour to make this dish gluten-free.
      • Vegetarian Option: Omit the chicken and increase the quantity of vegetables for a vegetarian version.
    • Low Carb Option: Substitute the potatoes with cauliflower for a low-carb alternative.

    Nutritional Facts (Per Serving, makes 6 servings)

      • Calories: 320
      • Protein: 18 g
      • Carbohydrates: 25 g
      • Fiber: 5 g
      • Fat: 16 g
    • Sugars: 4 g

    Storage Tips

      • Refrigeration: Store leftovers in an airtight container in the fridge for up to 3 days.
      • Freezing: Freeze individual portions in airtight containers for up to 2 months. Reheat in the oven or microwave before serving.
    • Reheating: Reheat in a preheated oven at 150°C (300°F) for 10-15 minutes or in the microwave for 2-3 minutes.
  • Baked Oatmeal with Banana, Nuts, and Cranberries

    Baked Oatmeal with Banana, Nuts, and Cranberries

    Baked Oatmeal with Banana, Nuts, and Cranberries

    This Baked Oatmeal is a wholesome and delicious breakfast packed with fiber, protein, and natural sweetness. The combination of oats, nuts, cranberries, and banana creates a soft yet slightly crunchy texture, while the yogurt keeps it moist and creamy. It’s a perfect make-ahead breakfast that is nutritious, easy to prepare, and naturally sweetened!

    Preparation Time

      • Prep Time: 10 minutes
      • Cook Time: 30 minutes
    • Total Time: 40 minutes
    • Servings: 2-3

    Ingredients

      • 1 cup (100g) oatmeal
      • 50g nuts (walnuts, almonds, or pecans, chopped)
      • 1 teaspoon sweetener (honey, maple syrup, or sugar)
      • 50g dried cranberries
      • 10g coconut flakes
      • 1 teaspoon baking powder
      • 1 ripe banana, mashed
    • 100g yogurt (plain or flavored)

    Directions

      1. Preheat the oven: Set your oven to 180°C (350°F). Grease a small baking dish or line with parchment paper.
      2. Mix dry ingredients: In a bowl, combine oatmeal, nuts, cranberries, coconut flakes, and baking powder.
      1. Prepare wet ingredients: Mash the banana in a separate bowl and mix with yogurt and sweetener.
      2. Combine: Stir the wet ingredients into the dry mixture until well incorporated.
      3. Bake: Pour the batter into the baking dish and spread evenly. Bake for 30 minutes until golden brown and firm.
    1. Cool & Serve: Let it cool for a few minutes before slicing. Enjoy warm or at room temperature.

    Serving Suggestions

      • Drizzle with honey or maple syrup for added sweetness.
      • Serve with a dollop of Greek yogurt or nut butter for extra protein.
    • Enjoy with a side of fresh berries or sliced banana.
    • Pair with a hot coffee or tea for a cozy breakfast.

    Cooking Tips

      • Use old-fashioned oats for a chewier texture or quick oats for a softer bake.
      • Swap cranberries for raisins or chopped dates if preferred.
      • Try adding a pinch of cinnamon or vanilla extract for extra flavor.
      • For a crunchier top, sprinkle extra nuts or coconut flakes before baking.

    Nutritional Benefits

      • Oats are high in fiber and help maintain steady energy levels.
      • Banana adds natural sweetness and potassium for heart health.
      • Nuts provide healthy fats and protein for sustained fullness.
    • Yogurt offers probiotics and calcium for good digestion.

    Dietary Information

      • Vegetarian-friendly
      • Gluten-free (if using certified gluten-free oats)
    • Dairy-free option: Use plant-based yogurt
    • No refined sugar (if using natural sweeteners)

    Nutritional Facts (Per Serving)

      • Calories: 280 kcal
      • Carbohydrates: 42g
      • Protein: 8g
      • Fat: 10g
    • Fiber: 6g
    • Calcium: 150mg

    Storage

      • Refrigeration: Store in an airtight container in the fridge for up to 4 days.
    • Freezing: Wrap individual portions and freeze for up to 1 month.
    • Reheating: Warm in the oven at 150°C (300°F) for 5-10 minutes, or microwave for 30 seconds.

    Why You’ll Love This Recipe

      • Healthy & Nourishing: Packed with wholesome ingredients and no refined sugar.
    • Simple & Quick: Minimal prep and no complicated steps.
    • Versatile: Easily customizable with your favorite add-ins.
    • Great for Meal Prep: Perfect for making ahead and enjoying throughout the week.
  • Soft Apple Pancakes

    Soft Apple Pancakes

    Soft Apple Pancakes

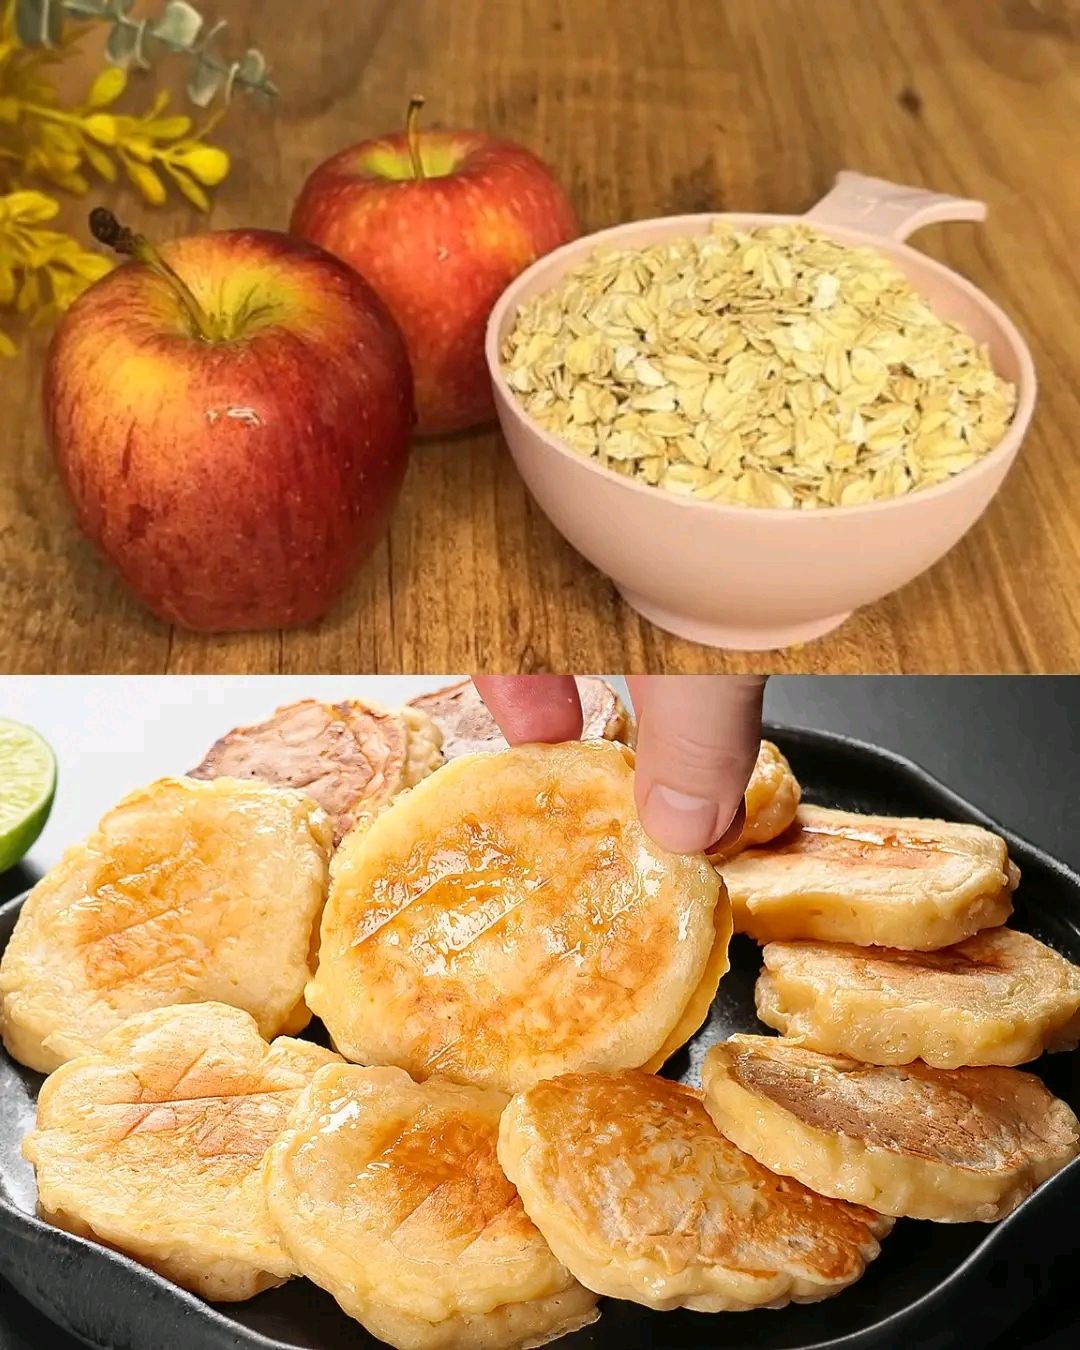
    These Soft Apple Pancakes are fluffy, flavorful, and packed with the natural sweetness of grated apples. Perfect for breakfast or dessert, they’re easy to make and sure to be a hit with everyone.

    Preparation Time: 15 minutes
    Cooking Time: 20 minutes
    Servings: 8-10 pancakes

    Ingredients

      • 1 large apple, peeled and grated
      • 1 splash lime or lemon juice
      • 1 egg
      • 1 tablespoon sugar
      • 1/2 teaspoon vanilla sugar
      • 100 grams (3.5 ounces) yogurt
      • 100 ml (3.5 fl oz) milk
      • 1 teaspoon baking powder
      • 1 teaspoon rum
      • 1/2 teaspoon salt
    • 160 grams (1 cup) all-purpose flour
    • Oil for frying

    Instructions

      • Prepare the Apple:
          • Peel and grate the apple.
        • Add a splash of lime or lemon juice to prevent browning.
      • Make the Batter:
          • In a mixing bowl, whisk the egg with sugar and vanilla sugar until combined.
          • Stir in yogurt and milk until the mixture is smooth.
          • Add baking powder, rum, and salt, and mix well.
          • Gradually add flour, stirring until the batter is smooth and lump-free.
        • Fold in the grated apple.
        • Let the batter rest for 10 minutes.
    • Cook the Pancakes:
        • Heat a pan over medium heat and lightly oil it.
        • Spoon about 1 tablespoon of batter onto the pan for each pancake.
        • Cook until bubbles form on the surface and the edges are set.
      • Flip and cook until golden brown on the other side.
    • Serve:
        • Serve the pancakes warm.

    5 Serving Suggestions

      • Drizzle with maple syrup or honey for a sweet finish.
      • Sprinkle with powdered sugar for a classic touch.
      • Add a dollop of whipped cream or a scoop of vanilla ice cream for a decadent dessert.
      • Pair with fresh fruit or a fruit compote for a refreshing twist.
      • Serve with a side of spiced apple or cinnamon butter for extra flavor.

    Cooking Tips

      • Let the batter rest for 10 minutes to allow the baking powder to activate fully, resulting in fluffier pancakes.
      • Use a non-stick pan and minimal oil for evenly cooked pancakes.
      • Keep the heat medium to avoid burning the pancakes while ensuring they cook through.
    • Adjust the consistency of the batter with a splash of milk if it’s too thick.
    • Ensure the grated apple is well mixed into the batter to distribute the flavor evenly.

    Nutritional Benefits

      • Apples: Provide dietary fiber, vitamin C, and natural sweetness.
      • Eggs: Offer high-quality protein and essential nutrients.
      • Yogurt: Adds probiotics and creaminess to the batter.
      • Low Sugar: Sweetened naturally with apples and minimal added sugar.

    Dietary Information

      • Vegetarian-Friendly: No meat or animal by-products other than dairy and eggs.
      • Customizable Sweetness: Adjust the sugar to your taste.
      • Alcohol-Free Option: Replace rum with an extra splash of milk or apple juice.

    Nutritional Facts (Per Pancake)

      • Calories: ~80
      • Carbohydrates: 12 g
      • Protein: 2 g
      • Fat: 2 g
      • Fiber: 1 g
      • Sodium: ~100 mg

    Storage

    • Refrigeration: Store leftovers in an airtight container in the fridge for up to 2 days.
    • Freezing: Freeze cooked pancakes between layers of parchment paper for up to 1 month. Reheat in a toaster or oven.

    Why You’ll Love This Recipe

      • Easy to make with pantry staples and fresh apples.
      • Soft and fluffy texture with a delightful apple flavor.
      • Perfect for any time of day—breakfast, snack, or dessert.
      • Customizable with your favorite toppings and add-ins.

    Conclusion

    These Soft Apple Pancakes are a quick and easy treat that brings the comforting taste of apples into every bite. Whether you enjoy them plain or dressed up with toppings, they’re a delicious way to brighten your morning or sweeten your day.

  • Crispy Spinach and Onion Pastry

    Crispy Spinach and Onion Pastry

    Crispy Spinach and Onion Pastry

    Table of Contents

    Ingredients
    For the Dough:

      • 1 teaspoon salt (6 g)
      • 1.5 glasses water (300 ml)


      • 4 cups all-purpose flour (455 g) (adjust as needed)
      • 1 tablespoon oil (for greasing)
      • 100 g melted butter


    • 1/2 glass oil (100 ml)

    For the Filling:

      • 350 g chopped spinach


      • 1 onion, chopped
      • 1 teaspoon salt
      • 1 teaspoon black pepper


    • 1 teaspoon red pepper

    Directions

    Prepare the Dough:

      • In a large mixing bowl, combine salt and water. Gradually add flour in a controlled manner, mixing until a medium-soft dough forms that does not stick to your hands.


    • Knead the dough for 8–10 minutes until smooth and elastic.
    • Grease the dough with 1 tablespoon of oil, cover it, and let it rest for 10 minutes.

    Portion and Rest the Dough:


    • Divide the dough into 12 equal parts. Roll each piece into a ball.
    • Cover the dough balls and let them rest for another 10 minutes.

    Prepare the Filling:


    • In a bowl, combine chopped spinach, onion, salt, black pepper, and red pepper. Mix gently, ensuring the spinach does not release too much water.

    Roll and Assemble the Pastries:

      • Roll out each dough ball to the size of a dessert plate.


      • Grease a tray with oil and arrange the rolled dough on it, brushing each layer with the melted butter and oil mixture. Cover and let it rest for 20–25 minutes.
      • Roll out each piece of dough as thin as possible, pulling gently as shown in the video.
      • Place the spinach filling in the center of each dough sheet, fold, and wrap as demonstrated.
    See also  Quick Strawberry Dessert that Disappears in 1 Minute

    Bake:

      • Preheat the oven to 185°C (365°F).
      • Brush the pastries with oil and arrange them on a greased tray.


    • Bake in the preheated oven for 40–45 minutes, or until golden and crispy.

    Serve:

      • Let the pastries cool slightly before serving. Enjoy warm with a side of yogurt or a fresh salad.

    5 Serving Suggestions

      • Pair with a dollop of plain yogurt or tzatziki.
      • Serve alongside a fresh cucumber and tomato salad.


      • Enjoy with a bowl of lentil soup for a hearty meal.
      • Garnish with fresh parsley or dill for extra flavor.
      • Serve with a hot cup of tea for a comforting snack.

    Cooking Tips

      • Use high-quality flour to ensure the dough is easy to work with.
      • Avoid overfilling the pastries to prevent them from tearing.


    • Let the dough rest properly for easier rolling and stretching.
    • Brush each layer generously with the butter and oil mixture for flakiness.
    • Store leftovers in the fridge and reheat in the oven to restore crispiness.
  • Oatmeal Banana Bake with Cranberries and Raisins

    Oatmeal Banana Bake with Cranberries and Raisins

    Oatmeal Banana Bake with Cranberries and Raisins

    Table of Contents

    Ingredients:


      • 2 cups rolled oats (200 g)
      • 2 ripe bananas (approximately 200 g)
      • 1/2 cup dried cranberries (70 g)


      • 1/2 cup raisins (75 g)
      • 2 eggs
      • 1 teaspoon vanilla extract


      • 1/4 teaspoon salt
      • 1/2 teaspoon ground cinnamon (optional)
      • 1/4 cup honey or maple syrup (optional)


    • 1 1/2 cups milk of your choice (360 ml)

    Directions:

      1. Preheat the Oven:
        Preheat your oven to 180°C (350°F).


      1. Prepare the Bananas:
        In a mixing bowl, mash the bananas with a fork until smooth.
      2. Mix Ingredients:
        Add the oats, cranberries, raisins, eggs, vanilla extract, salt, cinnamon, and milk to the mashed bananas. Stir everything together until well combined.
      3. Bake:
        Grease your favorite baking dish and pour the mixture into it. Bake in the preheated oven for 35-40 minutes, or until the top is golden and set.


    1. Serve and Enjoy:
      Allow to cool slightly before slicing. You can sweeten it further if desired and garnish with additional cranberries or sliced bananas.

    Serving Suggestions:

      • Serve warm, drizzled with honey or maple syrup.


    • Top with yogurt for added creaminess.
    • Pair with a cup of tea or coffee for a comforting breakfast.

    Cooking Tips:


      • Use overripe bananas for extra sweetness.
      • Feel free to add nuts or seeds for added crunch.
      • Adjust the sweetness to your preference by using less or more honey/maple syrup.

    Nutritional Benefits:

      • Bananas: Provide potassium and natural sweetness.
      • Oats: High in fiber and great for heart health.


    • Cranberries & Raisins: Add antioxidants and additional nutrients.

    Dietary Information:

      • Vegetarian: Yes


    • Nut-Free: Yes (if you avoid nuts)
    • Dairy-Free: Can be made with plant-based milk
    See also  Easy Upside-Down Apple Cake (French-Style Gâteau aux Pommes)

    Storage:
    Store any leftovers in an airtight container in the refrigerator for up to 3 days. Reheat before serving.

    Why You’ll Love This Recipe:

      • Nutritious and Delicious: A perfect blend of flavors and textures.
      • Easy to Make: Quick preparation with minimal cleanup.


    • Versatile: Customize with your favorite fruits and nuts.
  • Pineapple Dream Dessert! The best I’ve ever eaten! Recipe in 5 minutes! No baking!

    Pineapple Dream Dessert! The best I’ve ever eaten! Recipe in 5 minutes! No baking!

    Pineapple Dream Dessert! The best I’ve ever eaten! Recipe in 5 minutes! No baking!

    Ingredients:

    200g cookies

    80g butter

    350g pineapple

    200g cream cheese

    80g powdered sugar

    300ml 33% cream

    Directions:

    Crush the cookies into fine crumbs using a food processor or by placing them in a plastic bag and crushing them with a rolling pin.

    Melt the butter and thoroughly mix it with the cookie crumbs.

    Firmly press the cookie mixture into the bottom of a 9×9 inch (23×23 cm) baking dish to form the crust.

    In a separate bowl, beat the cream cheese and powdered sugar until smooth.

    Whip the cream until stiff peaks form.

    Gently fold the whipped cream into the cream cheese mixture.

    Evenly spread the cream mixture over the cookie crust.

    Drain the pineapple and distribute it evenly over the cream layer.

    Refrigerate the dessert for at least 4 hours, or until it is firmly set.

    Cut into squares and serve chilled.

  • Moist Banana Bread Recipe

    Moist Banana Bread Recipe

    Moist Banana Bread Recipe

    Table of Contents

    Ingredients:

      • All-purpose flour (maida): 1½ cups (200 g)
      • Bananas: 2 or 3, mashed
      • Eggs: 2
      • Melted butter: ⅓ cup (75 g)
      • Brown sugar: ¼ cup (50 g)
      • Sugar: ½ cup (100 g)
      • Milk: ½ cup (120 ml)
      • Baking powder: 1 tsp (4 g)
      • Baking soda: 1 tsp (5 g)
      • Cinnamon powder: ¼ tsp
      • Vanilla essence: 1 tsp (5 ml)
    • Salt: ¼ tsp

    Directions:

      1. Preheat the Oven:
        • Preheat your oven to 175°C (350°F). Grease and line a 24 x 10.5 x 7 cm (9 x 4 x 3 inch) loaf pan with parchment paper.
      1. Mash Bananas:
        • In a large bowl, mash the bananas until smooth.
      2. Mix Wet Ingredients:
          • Add the melted butter, brown sugar, granulated sugar, eggs, milk, and vanilla essence to the mashed bananas. Mix until well combined.


      3. Combine Dry Ingredients:
        • In another bowl, whisk together the flour, baking powder, baking soda, cinnamon powder, and salt.
      1. Combine Mixtures:
        • Gradually add the dry ingredients to the wet ingredients, mixing until just combined. Do not overmix.
      2. Pour into Pan:
          • Pour the batter into the prepared loaf pan and smooth the top.


      3. Bake:
        • Bake in the preheated oven for 50-60 minutes, or until a toothpick inserted into the center comes out clean.
    1. Cool:
      • Allow the banana bread to cool in the pan for 10 minutes, then transfer it to a wire rack to cool completely.

    Serving Suggestions:

      • Serve warm with butter or nut butter.
    • Enjoy with a cup of coffee or tea for a perfect snack.

    Cooking Tips:

      • Use overripe bananas for the best flavor and sweetness.
      • You can add walnuts or chocolate chips for extra texture and taste.

    Nutritional Benefits:

      • Rich in potassium from bananas.
      • Contains healthy fats from butter.
      • A good source of carbohydrates for energy.

    Dietary Information:

    • Vegetarian
    • Can be made dairy-free by substituting butter and milk with plant-based alternatives.

    Nutritional Facts (per slice, based on 10 servings):

      • Calories: Approximately 180
      • Carbohydrates: 27 g
      • Protein: 3 g
      • Fat: 7 g
      • Saturated Fat: 4 g
      • Sodium: 200 mg
      • Sugar: 10 g
    • Fiber: 1 g

    Storage:

    • Store in an airtight container at room temperature for up to 3 days or refrigerate for up to a week. It can also be frozen for up to 3 months.
  • Garlic and Mozzarella Cheese-Stuffed Bread Rolls with Poppy Seeds

    Garlic and Mozzarella Cheese-Stuffed Bread Rolls with Poppy Seeds

    Garlic and Mozzarella Cheese-Stuffed Bread Rolls with Poppy Seeds

    Table of Contents

    Ingredients:

    For the Dough:

      • 70 ml of warm water
      • 70 ml of warm milk
      • 1 teaspoon dry yeast
      • 1 teaspoon of sugar
      • 1 egg
      • 2 tablespoons melted butter
      • 320 grams of flour
    • Half a teaspoon of salt

    For the Garlic-Parsley Butter:

      • 60 grams of butter
      • 3 cloves of garlic (minced)
      • 1 tablespoon fresh parsley (chopped)
      • A pinch of salt
    • 1 teaspoon honey

    For the Filling and Topping:

      • Mozzarella cheese (about 150 grams, cut into small cubes)
      • 1 egg yolk (for egg wash)
      • 1 teaspoon of milk (for egg wash)
      • Poppy seeds (for sprinkling)

    Instructions:

    Step 1: Prepare the Dough

      1. Activate the yeast: In a small bowl, combine the warm water, warm milk, sugar, and dry yeast. Stir gently and let it sit for 5-10 minutes until the mixture becomes foamy. This is a sign that the yeast is active.
      2. Mix the wet ingredients: In a large mixing bowl, beat the egg and add the melted butter. Mix well.
      3. Combine dry ingredients: In another bowl, combine the flour and salt.
      1. Form the dough: Gradually add the activated yeast mixture to the egg and butter mixture. Slowly incorporate the flour and salt, mixing until a dough forms.
      2. Knead the dough: Turn the dough out onto a floured surface and knead for 8-10 minutes until smooth and elastic. If the dough feels too sticky, add a little more flour, but avoid making it too dry.
      3. Let the dough rise: Place the dough in a lightly greased bowl, cover it with a kitchen towel or plastic wrap, and let it rise in a warm place for about 1 hour, or until it has doubled in size.
    See also  Savory Cabbage Rolls with Creamy Dill Sauce

    Step 2: Prepare the Garlic-Parsley Butter

    1. Melt the butter: In a small saucepan, melt the 60 grams of butter over low heat. Add the minced garlic and sauté for 1-2 minutes until fragrant.
    2. Add parsley and honey: Remove the saucepan from the heat and stir in the chopped parsley, salt, and honey. Set aside to cool slightly.

    Step 3: Shape the Rolls

      1. Punch down the dough: Once the dough has risen, punch it down to release the air. Turn it out onto a floured surface and divide it into 8-10 equal portions, depending on how large you want your rolls.
    1. Stuff the rolls: Flatten each portion into a small disc and place a cube of mozzarella cheese in the center. Fold the dough over the cheese and pinch the edges to seal, forming a ball. Repeat with the remaining portions.
    2. Arrange the rolls: Place the rolls on a parchment-lined baking sheet, ensuring they are spaced slightly apart. Cover them with a clean kitchen towel and let them rise for another 30 minutes.

    Step 4: Bake the Rolls

      1. Preheat the oven: While the rolls are rising, preheat your oven to 180°C (350°F).
      1. Brush with egg wash: In a small bowl, whisk together the egg yolk and milk to create an egg wash. Brush the top of each roll with the egg wash to give them a beautiful golden color when baked.
      2. Sprinkle with poppy seeds: After brushing with egg wash, sprinkle each roll with poppy seeds for added texture and flavor.
      3. Bake the rolls: Place the baking sheet in the preheated oven and bake for 20-25 minutes, or until the rolls are golden brown and sound hollow when tapped.
    See also  Blueberry Flax Muffins with Oat Bran and Lemon Zest

    Step 5: Serve

    1. Brush with garlic butter: As soon as the rolls come out of the oven, brush them generously with the garlic-parsley butter.
    2. Serve warm: Serve the rolls while they’re warm, allowing the mozzarella cheese inside to be perfectly melted and gooey.

    Nutritional Facts (Per Roll):

      • Calories: 250 kcal
      • Protein: 9 grams
      • Carbohydrates: 25 grams
      • Fat: 13 grams
    • Fiber: 1 gram
    • Sodium: 320 mg
    • Sugar: 2 grams
  • Meatloaf with mortadella and pistachios: the delicious recipe to try

    Meatloaf with mortadella and pistachios: the delicious recipe to try

    Meatloaf with mortadella and pistachios: the delicious recipe to try

    Table of Contents

    Ingredients:

    450 g minced meat
    Salt to taste.
    Pepper if necessary.
    1 onion
    1 egg
    6 slices of bread
    milk to taste
    50g grated cheese
    oil to taste
    150 g Emmental cheese
    150g mortadella
    100 g pistachios

    Preparation:

    In a bowl, combine meat, chopped onions, grated cheese, salt, pepper, soaked bread and an egg.
    Form a homogeneous dough. Then mix in the coarsely chopped pistachios.
    Depending on the consistency of the dough, add some breadcrumbs.
    Spread the meat mixture on the baking paper, then fill with the mortadella and the diced Emmental cheese.
    Roll up into a meatloaf.
    Cook in the oven at 180° for 45 minutes.

  • Baked Zucchini with Fresh Herb Sauce

    Baked Zucchini with Fresh Herb Sauce

    Baked Zucchini with Fresh Herb Sauce

    Table of Contents

    Ingredients

    For the Baked Zucchini:

      • Zucchini: 2 medium, grated (about 500g)
      • Salt: To taste (for zucchini and seasoning)


      • Eggs: 2 large, beaten
      • Cherry Tomatoes: 1 cup, halved
      • Fresh Parsley: 1/4 cup, chopped


      • Garlic: 2 cloves, minced
      • Flour: 60g (1/2 cup)
      • Black Pepper: To taste


    • Mozzarella Cheese: 150g (1 1/2 cups), shredded

    For the Sauce:

      • Sour Cream: 60g (1/4 cup)


      • Mayonnaise: 60g (1/4 cup)
      • Fresh Cucumber: 1 small, finely chopped
      • Fresh Herbs (Dill or Parsley): 2 tablespoons, chopped


    • Garlic: 1 clove, minced
    • Salt: To taste

    Directions


      • Prepare the Zucchini:
        • Grate the zucchini and place it in a colander. Sprinkle with salt and let sit for 10 minutes. Squeeze out excess liquid using a clean kitchen towel or your hands.
      • Combine Ingredients:
          • In a large bowl, mix the grated zucchini, beaten eggs, halved cherry tomatoes, parsley, and garlic. Add flour and black pepper, stirring until well combined.


      • Bake the Zucchini:
          • Preheat the oven to 180°C (350°F).
          • Grease a baking dish and spread the zucchini mixture evenly. Top with shredded mozzarella.


        • Bake for 25-30 minutes, or until the top is golden and the cheese is bubbly.
      • Prepare the Sauce:
          • In a small bowl, combine sour cream and mayonnaise. Mix in the chopped cucumber, herbs, garlic, and a pinch of salt. Stir well.


      • Serve:
        • Let the baked zucchini cool slightly before cutting into portions. Serve warm with the herb sauce for dipping or drizzling.

    Serving Suggestions

      • Serve with a side salad for a complete meal.
      • Pair with crusty bread for added texture.


    • Enjoy as a side dish with grilled chicken or fish.

    Cooking Tips

      • Drain zucchini thoroughly to prevent a watery bake.


    • Use parchment paper for easy cleanup and to prevent sticking.
    • Customize toppings: Add grated Parmesan for extra flavor or sprinkle red chili flakes for a kick.
  • Pumpkin and Cheese Patties

    Pumpkin and Cheese Patties

    Pumpkin and Cheese Patties

    Table of Contents

    Pumpkin and Cheese Patties are a delicious and savory snack or appetizer that combines the sweetness of pumpkin with the richness of cheese, all wrapped in a crispy, golden pastry. They’re often spiced with a variety of seasonings, which adds a flavorful twist to the dish. These patties can be made with different types of cheese like feta, cheddar, or mozzarella, and can be either baked or fried.

    Prep Time: 15–20 minutes

    Cooking Time: 15–25 minutes

    total time : 30 to 45 minutes.

    Ingredients

    Vegetables and Herbs:

    Pumpkin: 200g, grated

    Fresh Dill: 1 small bunch, finely chopped

    Green Onions: 1 small bunch, finely chopped

    Garlic: 1 clove, crushed

    Binders and Seasoning:

    Hard Cheese: 85g, grated (such as Parmesan or Cheddar)

    Egg: 1

    Whole Wheat Flour: 1 tablespoon

    Salt, Pepper, and Ground Coriander: To taste

    Oil: For frying

    Directions

    Prepare the Ingredients:

    Peel and grate the pumpkin on a fine grater.

    Finely chop the dill and green onions, and crush the garlic.

    Combine the Mixture:

    In a large bowl, mix the grated pumpkin, dill, green onions, and garlic.

    Add the grated cheese, egg, and flour. Season with salt, pepper, and coriander to taste, then mix until fully combined.

    Form and Fry the Patties:

    Heat a bit of oil in a skillet over medium heat.

    With your hands, shape the mixture into small patties.

    Place the patties in the hot pan and fry for about 3-4 minutes on each side until golden brown. Flip, cover, and cook for another 3-4 minutes, until fully cooked and golden on both sides.

    See also  Easiest Sourdough Bread

    Serve:

    Serve the patties warm with a dollop of sour cream or yogurt, or enjoy as a delicious snack or light meal.

    Serving Suggestions

    Dipping Sauce: Serve with sour cream, Greek yogurt, or a yogurt-based dip.

    Fresh Salad: Pair with a fresh side salad for a balanced meal.

    Sprinkle of Herbs: Garnish with extra dill or green onions for a fresh touch.

    For Breakfast: Serve alongside eggs for a savory start to the day.

    With Cheese: Top with a sprinkle of extra grated cheese before serving.

    Cooking Tips

    Grate Finely: Use a fine grater for the pumpkin to ensure a smooth texture.

    Squeeze Out Excess Water: Remove extra moisture from the grated pumpkin to keep patties from becoming soggy.

    Adjust Seasonings: Feel free to add more spices or herbs for extra flavor.

    Cover the Pan: Covering helps cook the patties evenly and keeps them tender.

    Cheese Options: Cheddar, mozzarella, or gouda work well for these patties.

    Nutritional Benefits

    Pumpkin: High in vitamins A and C and fiber.

    Cheese: Adds protein and calcium.

    Herbs: Dill and green onions bring fresh flavor and antioxidants.

    Dietary Information

    Vegetarian-Friendly

    Gluten-Free Option: Substitute with gluten-free flour.

    Contains Dairy and Eggs

    Nutritional Facts (Per Serving, Approximate)

    Calories: 120

    Protein: 5g

    Carbohydrates: 8g

    Fat: 6g

    Fiber: 2g

  • Irresistible Chicken Patties with Mozzarella: A Family Favorite Recipe

    Irresistible Chicken Patties with Mozzarella: A Family Favorite Recipe

    Irresistible Chicken Patties with Mozzarella: A Family Favorite Recipe

    Table of Contents

    Ingredients

      • 30 grams (1/4 cup) green onions, finely chopped
      • 500 grams (1 lb) chicken breast, finely diced or ground
      • 2 tablespoons sour cream
      • 2 large eggs
      • 2 tablespoons fresh parsley, chopped
      • 80 grams (3/4 cup) mozzarella cheese, shredded
      • 2 tablespoons all-purpose flour
      • Salt and pepper to taste
      • 1/2 teaspoon dry garlic powder
      • 1/2 teaspoon paprika
      • Oil for frying

    Instructions

      1. Prepare the Ingredients:
        • Finely chop 30 grams of green onions and 2 tablespoons of fresh parsley. Set aside.
        • Dice or grind 500 grams of chicken breast into small pieces. Place it in a large mixing bowl.
      1. Combine Ingredients:
        • To the bowl with the chicken, add 2 tablespoons of sour cream and 2 large eggs. Mix well to combine.
        • Add the chopped green onions, parsley, and 80 grams of shredded mozzarella cheese. Stir everything together.
      1. Add Dry Ingredients and Seasonings:
        • Sprinkle in 2 tablespoons of flour, salt, and pepper to taste. Add 1/2 teaspoon each of dry garlic powder and paprika.
        • Mix all ingredients thoroughly until they are well incorporated. The mixture should be slightly sticky but hold together.
    1. Form the Patties:
      • Using your hands or a spoon, scoop out portions of the mixture and shape them into patties, about 2-3 inches in diameter.
    2. Fry the Patties:
        • Heat oil in a large skillet over medium heat. Once hot, add the patties to the pan.


      • Fry the patties for 2-3 minutes on each side, or until they are golden brown and cooked through. Make sure not to overcrowd the pan; cook in batches if necessary.
    3. Serve and Enjoy:
        • Remove the patties from the pan and drain on paper towels to remove excess oil. Serve warm, garnished with extra parsley or green onions if desired. Enjoy them as a main dish with a side salad, rice, or vegetables!


    Cooking Tips

      • Ensure Even Cooking: Make sure your chicken pieces are finely diced or well-ground for even cooking. This will help the patties cook through without burning the outside.
      • Control the Heat: Fry over medium heat to ensure the patties are crispy on the outside and fully cooked on the inside. High heat may cause them to brown too quickly.
    • Customize Your Flavors: Feel free to add other herbs like dill or basil, or substitute mozzarella with cheddar or another favorite cheese.

    Nutritional Benefits

      • High in Protein: Chicken breast is a lean source of protein that helps in muscle building and repair.
      • Calcium-Rich: Mozzarella adds a good amount of calcium, which is vital for bone health.
    • Low-Carb Option: This recipe is relatively low in carbohydrates, making it suitable for those following a low-carb diet.

    Why You’ll Love This Recipe

      • Quick and Easy: Ready in under 30 minutes, perfect for busy weeknights.
      • Deliciously Cheesy: The mozzarella melts into the patties, giving them a gooey, cheesy center.
    • Customizable: Easily adjust the herbs and spices to suit your taste.
    • Crowd-Pleaser: Whether for family dinners or gatherings, these patties are always a hit!

    Dietary Information

      • Gluten-Free Option: Substitute flour with gluten-free flour or almond flour.
    • Keto-Friendly: With minor adjustments, such as using almond flour, this recipe can fit into a keto diet plan.
    • Nut-Free: This recipe contains no nuts, making it safe for those with nut allergies.
  • Title: Sugar-Free Chocolate Coconut Flour Brownies

    Title: Sugar-Free Chocolate Coconut Flour Brownies

    Title: Sugar-Free Chocolate Coconut Flour Brownies

    Table of Contents

    Ingredients:

      • 2 eggs
      • 1/4 cup (35 g) stevia powder
      • 1 tsp vanilla extract
      • 4.2 oz (120 g) sugar-free chocolate (approximately 3/4 cup chopped)
      • 2.8 oz (80 g) butter (approximately 1/3 cup)
      • 1/3 cup (35 g) coconut flour
    • 1/2 tsp baking powder

    Directions:

      • Preheat your oven to 180°C (360°F) and line a small baking dish with parchment paper.
      • Melt the sugar-free chocolate and butter together in a heatproof bowl over simmering water (double boiler) or microwave in short bursts, stirring until smooth.
      • In a separate bowl, whisk the eggs, stevia powder, and vanilla extract until well combined.
      • Slowly add the melted chocolate mixture into the egg mixture, stirring continuously.
      • In another bowl, mix coconut flour and baking powder.
      • Fold the dry ingredients into the wet ingredients until the batter is well combined and smooth.
      • Pour the batter into the prepared baking dish and smooth the top.
    • Bake for about 15 minutes or until a toothpick inserted into the center comes out clean.
    • Allow the brownies to cool before cutting them into squares. Enjoy!

    Serving Suggestions:

      • Top with whipped cream and a sprinkle of sugar-free chocolate shavings.
      • Serve with a scoop of low-carb vanilla ice cream.
      • Pair with fresh berries like raspberries or strawberries.
    • Drizzle with sugar-free caramel or chocolate sauce.
    • Enjoy with a cup of hot coffee or tea for an afternoon treat.
    See also  Healthy and Delicious: Energy Cookies Without Sugar or Flour

    Cooking Tips:

      • Ensure the butter and chocolate mixture is fully melted and smooth to avoid clumps in the batter.
      • Do not overbake; check the brownies a few minutes early to ensure they remain moist.
      • Sift the coconut flour before adding to avoid lumps.
    • Use room temperature eggs to ensure even mixing and a smoother batter.
    • Let the brownies cool completely before slicing to prevent them from crumbling.

    Nutritional Benefits:

      • Low-carb: Coconut flour is low in carbohydrates, making it perfect for keto and low-carb diets.
      • Sugar-free: Sweetened with stevia, these brownies are a great alternative for those reducing sugar intake.
      • Gluten-free: Coconut flour is naturally gluten-free, making this recipe suitable for people with gluten sensitivities.
    • Rich in healthy fats: The butter and sugar-free chocolate provide a good dose of healthy fats to keep you satiated.
    • High in fiber: Coconut flour adds dietary fiber, supporting digestion and promoting fullness.

    Dietary Information:

      • Keto-friendly
      • Low-carb
      • Sugar-free
    • Gluten-free
    • Vegetarian

    Nutritional Facts (per serving, based on 12 servings):

      • Calories: 110
      • Total Fat: 9g
      • Saturated Fat: 5g
      • Cholesterol: 40mg
      • Sodium: 60mg
      • Total Carbohydrates: 7g
      • Dietary Fiber: 2g
      • Sugars: 1g (naturally occurring)
      • Protein: 3g

    Storage:

    Store brownies in an airtight container at room temperature for up to 3 days. Refrigerate for up to 1 week for longer shelf life. Freeze for up to 3 months; thaw at room temperature before serving.

    Why You’ll Love This Recipe:

      • It’s quick and easy to make with minimal ingredients.
      • It’s a guilt-free dessert, perfect for low-carb and keto diets.
      • You’ll love the rich, chocolatey flavor without the sugar.
      • The brownies are moist, soft, and deliciously satisfying.
    • Perfect for satisfying sweet cravings without derailing your diet.
  • Cabbage Steaks with Hearty Vegetable Toppings

    Cabbage Steaks with Hearty Vegetable Toppings

    Cabbage Steaks with Hearty Vegetable Toppings

    Table of Contents

    Ingredients


    • Cabbage Steaks:
        • 1-2 small cabbages, sliced into thick steaks
        • 2 tablespoons vegetable oil
        • Salt, to taste


      • 1 teaspoon Provencal herbs
    • Toppings:
        • 1 tablespoon vegetable oil


        • 1 leek, finely chopped
        • 1 clove garlic, minced
        • 1 carrot, grated


        • 450 grams (1 lb) mushrooms, sliced
        • 1 cup pureed tomatoes
        • Salt and black pepper, to taste


      • 1 teaspoon sweet paprika

    Directions


      • Prepare the Cabbage Steaks:
          • Preheat your oven to 200°C (390°F).
          • Slice the cabbages into thick steaks, about 1.5-2 cm (0.6-0.8 inches) thick.
          • Place the steaks on a baking sheet lined with parchment paper.


        • Brush both sides of the cabbage steaks with vegetable oil and season with salt and Provencal herbs.
        • Roast in the preheated oven for 25-30 minutes, flipping halfway through, until tender and slightly caramelized.


      • Prepare the Vegetable Toppings:
          • Heat 1 tablespoon of vegetable oil in a large skillet over medium heat.
          • Add the chopped leek and minced garlic. Sauté for 3-4 minutes until fragrant and softened.
          • Add the grated carrot and sliced mushrooms to the skillet. Cook for 5-7 minutes, stirring occasionally, until the mushrooms release their moisture and begin to brown.


        • Stir in the pureed tomatoes, salt, black pepper, and sweet paprika. Simmer for 10 minutes until the mixture thickens slightly and flavors meld.
      • Assemble and Serve:
          • Remove the roasted cabbage steaks from the oven and transfer them to serving plates.


        • Spoon the vegetable topping generously over each cabbage steak.
        • Serve hot, garnished with fresh herbs if desired.

    Serving Suggestions

      • Pair with a side of quinoa, rice, or crusty bread for a complete meal.
      • Serve with a dollop of sour cream or Greek yogurt for added creaminess.
    See also  Incredibly Delicious Zucchini Pickle Recipe


    • Enjoy alongside a crisp green salad for a refreshing contrast.