Category: Recipes

  • Easy Watermelon Ice Cream Recipe

    Easy Watermelon Ice Cream Recipe

    Easy Watermelon Ice Cream Recipe


    Ingredients:

    • 4 cups watermelon (seedless, chopped into chunks)
    • 1 cup heavy cream
    • 1/2 cup sweetened condensed milk
    • 1 tablespoon lime juice (optional, for a zesty flavor)

    Instructions:

    1. Prepare the Watermelon:
      Start by cutting the watermelon into chunks, removing any seeds if necessary. For the best results, use seedless watermelon. Puree the chunks in a blender or food processor until smooth. You should end up with about 3 to 4 cups of watermelon puree.
    2. Combine Ingredients:
      In a large mixing bowl, combine the watermelon puree, heavy cream, sweetened condensed milk, and lime juice (if using). Stir until the mixture is well combined and smooth.
    3. Freeze the Mixture:
      Pour the mixture into a freezer-safe container, spreading it out evenly. Cover with a lid or plastic wrap. Freeze for 4-6 hours, or until the ice cream is firm and scoopable.
    4. Serve and Enjoy:
      Once the ice cream is fully frozen, scoop it into bowls or cones and serve immediately. Garnish with mint leaves or lime zest for a fresh touch, if desired.

    Description:
    This easy watermelon ice cream is incredibly creamy, refreshing, and a perfect treat for warm summer days. With just four ingredients and no ice cream machine required, it’s a quick and simple dessert to prepare. The natural sweetness of the watermelon pairs beautifully with the creamy, rich texture of the heavy cream and sweetened condensed milk, while the lime juice adds a zesty kick that enhances the flavors.


    Notes:

    • For best results, use ripe watermelon for maximum sweetness.
    • If you prefer a lighter texture, you can replace some of the heavy cream with whole milk or coconut milk, but the consistency will be slightly different.
    • This recipe can be made without an ice cream maker, making it perfect for a no-fuss treat.

    Tips:

    • Blending Tip: If you want a smoother texture, you can strain the watermelon puree through a fine-mesh sieve to remove any pulp before mixing it with the cream.
    • Topping Ideas: Add toppings like fresh mint, chocolate chips, or crushed nuts for extra texture and flavor.
    • Storage: Store leftover ice cream in an airtight container in the freezer for up to 1 week. If it becomes too hard, let it sit at room temperature for a few minutes to soften before serving.

    Servings:
    This recipe yields 4-6 servings, depending on portion size. It’s perfect for sharing on a warm day or for a refreshing dessert after dinner.


    Nutritional Information (Per Serving, Approx.):

    • Calories: 210
    • Carbohydrates: 27g
    • Protein: 2g
    • Fat: 11g
    • Sugar: 22g
    • Fiber: 1g
    • Sodium: 30mg

    (Note: Nutritional values are approximate and may vary depending on specific ingredient brands.)


    Benefits:

    • Hydrating: Watermelon is about 90% water, making this ice cream a hydrating treat.
    • Rich in Vitamins: Watermelon is a good source of vitamin C and A, which supports skin health and boosts the immune system.
    • No Artificial Additives: This recipe uses natural ingredients, so it’s free from artificial preservatives or flavors.
    • Low in Fat: By using only a small amount of heavy cream and relying on watermelon for natural sweetness, this ice cream is lower in fat compared to traditional cream-heavy recipes.

    Q&A:

    Q: Can I make this recipe without heavy cream?
    A: Yes, you can substitute heavy cream with coconut cream or a dairy-free option like almond milk or oat milk for a lighter version. The texture may be slightly less creamy but still delicious.

    Q: How can I make this recipe vegan?
    A: To make it vegan, substitute the heavy cream with coconut cream or a plant-based alternative and replace the sweetened condensed milk with a dairy-free version of condensed milk.

    Q: Can I add mix-ins to the watermelon ice cream?
    A: Absolutely! You can stir in mix-ins like chocolate chips, chopped nuts, or even small pieces of fresh fruit after blending the base. Just be sure to fold them in gently before freezing.

    Q: Is there a way to make this recipe without a blender?
    A: While a blender makes it easier to puree the watermelon, you could also mash the watermelon by hand using a potato masher or fork, but the texture may be a bit chunkier.

    Q: How long does this ice cream last in the freezer?
    A: This ice cream will stay fresh in the freezer for up to a week. After that, it might become a bit icy, so it’s best enjoyed within a few days.

    Yields: About 4-6 servings
    Prep Time: 10 minutes
    Freeze Time: 4-6 hours
    Total Time: 4-6 hours 10 minutes


    This Easy Watermelon Ice Cream recipe is the perfect treat for a hot day, offering a refreshing taste with minimal effort. Its creamy texture and light sweetness will surely make it a favorite among kids and adults alike!

  • Baked Potato and Vegetable Casserole

    Baked Potato and Vegetable Casserole

    Baked Potato and Vegetable Casserole

    This Baked Potato and Vegetable Casserole is a delightful and hearty dish, perfect for a cozy family meal. With layers of tender potatoes, sautéed vegetables, kefir (or yogurt) batter, and a cheesy topping, this recipe is both nutritious and flavorful. The addition of fresh parsley adds a refreshing finishing touch to this comforting meal.

    Preparation Time

      • Prep Time: 20 minutes
      • Rest Time: 15 minutes
      • Cook Time: 40 minutes
      • Total Time: 1 hour 15 minutes

    Ingredients

      • 4-5 potatoes, peeled and sliced thinly
      • Cold water (for soaking potatoes)
      • 1 leek or onion, finely chopped
      • 1 carrot, grated
      • Salt and pepper, to taste
      • 2 eggs
      • 1 cup (240 ml) kefir or plain yogurt
      • 200 g (7 oz) wheat flour
      • Olive oil, for sautéing and greasing
      • 3 tomatoes, thinly sliced
      • Cheese (mozzarella, cheddar, or your choice), grated
    • Fresh parsley, chopped (for garnish)

    Directions

      1. Prepare the Potatoes:
          • Slice the potatoes thinly and soak them in cold water for 15 minutes. This removes excess starch and helps them cook evenly.
        • Drain and pat dry.
      2. Sauté the Vegetables:
          • Heat a drizzle of olive oil in a skillet over medium heat.
        • Add the chopped leek or onion and sauté for 2-3 minutes until soft and fragrant.
        • Stir in the grated carrot and sauté for another 5 minutes. Season with salt and pepper.
    1. Prepare the Batter:
      • In a bowl, whisk together the eggs, kefir (or plain yogurt), a pinch of salt and pepper, and the flour until smooth.
    2. Assemble the Casserole:
        • Preheat the oven to 180°C (360°F).
        • Grease a baking dish with olive oil.
        • Layer the potato slices evenly at the bottom of the dish.
        • Spread the sautéed vegetables over the potatoes.
      • Pour the kefir batter evenly over the vegetables
    3. Bake the First Layer:
        • Bake the casserole for 25 minutes at 180°C (360°F).
    4. Add the Tomato and Cheese Topping:
        • Remove the casserole from the oven and arrange the sliced tomatoes on top.
        • Sprinkle generously with grated cheese.
      • Return to the oven and bake for an additional 15 minutes, until the cheese is melted and golden brown.
    5. Garnish and Serve:
        • Let the casserole cool slightly, then garnish with fresh parsley before serving.

    Serving Suggestions

      • Serve as a standalone dish or pair with a fresh green salad.
    • Add a dollop of sour cream or tzatziki on the side for extra flavor.

    Cooking Tips

      • Thinly slice the potatoes for even cooking and a tender texture.
    • For extra flavor, add a pinch of paprika or garlic powder to the batter.
    • Use a mix of cheeses like mozzarella and Parmesan for a richer topping.

    Nutritional Benefits

      • Potatoes are a great source of potassium and vitamin C.
      • Carrots and leeks add fiber and antioxidants.
      • Kefir or yogurt provides probiotics and calcium.

    Dietary Information

      • Vegetarian
      • Can be made gluten-free by using a gluten-free flour alternative.

    Nutritional Facts (Per Serving)

      • Calories: 320
      • Protein: 12g
      • Carbohydrates: 38g
      • Fat: 14g
      • Fiber: 4g

    Storage

      • Store leftovers in an airtight container in the refrigerator for up to 3 days.
      • Reheat in the oven or microwave until warmed through.

    Why You’ll Love This Recipe

      • It’s a versatile, one-dish meal that’s easy to prepare.
      • The combination of creamy, cheesy, and fresh flavors is irresistible.
    • Packed with vegetables, it’s both hearty and nutritious.
    • Perfect for weeknight dinners or as a comforting weekend treat.

    Conclusion
    This Baked Potato and Vegetable Casserole is a perfect balance of creamy, cheesy, and fresh flavors. It’s easy to make, satisfying, and adaptable to suit your preferences. Whether you’re looking for a quick dinner option or something to impress guests, this casserole is sure to delight. Serve it hot, enjoy the gooey cheese, and savor the comforting flavors with your loved ones.

  • Healthy Zucchini and Oatmeal Pizza Crust

    Healthy Zucchini and Oatmeal Pizza Crust

    Healthy Zucchini and Oatmeal Pizza Crust

    Ingredients

    For the Crust:

    • 1 large zucchini (about 300g/10.5oz), grated
    • 4 tablespoons (40g) rolled oats
    • 100g (3.52oz) mozzarella cheese, shredded
    • 2 large eggs
    • 2 cloves garlic, minced
    • 1 teaspoon dried basil (or 2 tablespoons fresh)
    • Salt to taste
    • Black pepper to taste

    Instructions

    1. Prepare the Zucchini:
    • Grate zucchini using a box grater
    • Place in a colander and sprinkle with salt
    • Let sit for 10 minutes to release excess moisture
    • Squeeze thoroughly to remove as much liquid as possible
    1. Make the Crust Mixture:
    • In a large bowl, combine drained zucchini
    • Add shredded mozzarella cheese
    • Mix in beaten eggs
    • Add minced garlic and basil
    • Season with black pepper
    • Stir in oatmeal until well combined
    1. Form and Bake:
    • Preheat oven to 180°C (350°F)
    • Line a baking tray with parchment paper
    • Spread mixture into a circle, about 1/4 inch thick
    • Bake for 20 minutes until golden brown

    Timing

    • Prep Time: 15 minutes
    • Draining Time: 10 minutes
    • Cook Time: 20 minutes
    • Total Time: 45 minutes

    Nutritional Information (per serving, serves 4)

    • Calories: 165
    • Protein: 12g
    • Fat: 9g
    • Carbohydrates: 8g
    • Fiber: 2g
    • Sodium: 320mg

    Cooking Tips and Tricks

    • Squeeze zucchini very thoroughly – excess moisture will make crust soggy
    • Use a cheese grater with large holes for zucchini
    • Spread mixture evenly for uniform cooking
    • Let cool for 5 minutes before adding toppings
    • Use parchment paper, not wax paper

    Variations and Substitutions

    • Replace mozzarella with other firm cheeses
    • Add Italian seasoning for extra flavor
    • Use quinoa flakes instead of oatmeal
    • Add grated carrots for extra nutrition
    • Include dried herbs like oregano or thyme
  • How to Make Anti-Aging Oil That Works 100 Times Better Than Botox

    How to Make Anti-Aging Oil That Works 100 Times Better Than Botox

    How to Make Anti-Aging Oil That Works 100 Times Better Than Botox

    The effectiveness of this anti-aging oil lies in its powerful combination of natural ingredients. Each component plays a unique role in nourishing and protecting your skin:

    1. Orange Peel: Loaded with vitamin C, orange peel promotes collagen production, improves skin elasticity, and brightens the complexion.
    2. Cloves: Rich in antioxidants, cloves combat free radicals, protecting your skin from premature aging.
    3. Olive Oil: A deeply hydrating base that locks in moisture and delivers essential fatty acids to strengthen your skin barrier.
    4. Vitamin E: Known as the “skin vitamin,” vitamin E helps repair damaged skin cells and reduces the appearance of fine lines and wrinkles.

    By blending these potent ingredients, this oil provides hydration, nourishment, and protection from external aggressors, giving your skin the renewal it craves.


    DIY Magical Anti-Aging Oil Recipe

    Follow these step-by-step instructions to create your own batch of this amazing anti-aging oil:

    Ingredients:

    • 1 tablespoon of cloves
    • Olive oil (enough to cover the cloves)
    • Tools: A coffee grinder, a saucepan, cheesecloth

    Instructions:

    1. Grind the Cloves: Place 1 tablespoon of cloves into a coffee grinder and grind until they form a fine powder. This helps release their potent oils and nutrients.
    2. Infuse with Olive Oil: Pour the ground cloves into a small saucepan and add enough olive oil to cover the ingredients. Stir thoroughly to combine.
    3. Heat Gently: Place the saucepan over a water bath and let the mixture heat for 10-12 minutes. This process allows the cloves to infuse their goodness into the olive oil without losing potency.
    4. Cool and Strain: Allow the mixture to cool to room temperature. Strain the oil through a cheesecloth to remove any solid particles, leaving behind smooth, clove-infused oil.
    5. Store Properly: Pour the oil into a clean, airtight container and store it in the refrigerator. It will keep fresh for up to 30 days.

    How to Use the Anti-Aging Oil

    1. Cleanse Your Skin: Start with freshly cleansed skin to ensure maximum absorption.
    2. Apply the Oil: Take a few drops of the oil and massage it gently into your skin using upward, circular motions. This improves circulation and enhances the penetration of nutrients.
    3. Repeat Daily: Use this oil every evening before bedtime to wake up with glowing, rejuvenated skin.

    Over time, you’ll notice your skin becoming more elastic, soft, and smooth. Fine lines and wrinkles will gradually diminish, revealing a youthful, radiant complexion.


    DIY Anti-Aging Mask for Enhanced Results

    To amplify the benefits of the magical oil, combine it with this DIY anti-aging mask. The mask nourishes the skin while deeply hydrating it, leaving your face feeling plump and refreshed.

    Ingredients:

    • 200 ml (6.7 oz) of milk
    • 1 tablespoon of starch
    • 1 tablespoon of the prepared magical anti-aging oil
    • 1 capsule of vitamin E

    Instructions:

    1. Prepare the Base: In a small saucepan, combine the milk and starch. Stir until there are no lumps, then cook over low heat, stirring constantly, until the mixture thickens.
    2. Add the Magical Oil: Remove the saucepan from heat and allow the mixture to cool slightly. Add 1 tablespoon of the prepared anti-aging oil and 1 capsule of vitamin E. Stir until fully incorporated.
    3. Apply the Mask: Spread the mask evenly over your face and neck. Leave it on for 15 minutes to allow the nutrients to penetrate deeply.
    4. Rinse and Enjoy: Rinse off the mask with warm water and pat your skin dry.

    For best results, use this mask three times a week.


    The Benefits You’ll See

    By incorporating this magical oil and mask into your skincare routine, you’ll notice transformative benefits:

    • Increased Elasticity: Firmer, more youthful skin.
    • Hydration Boost: Deep moisture for a plump, dewy complexion.
    • Wrinkle Reduction: Gradual smoothing of fine lines and wrinkles.
    • Natural Glow: Brighter, healthier-looking skin with a radiant glow.

    Final Thoughts

    Achieving youthful, glowing skin doesn’t have to come at a high cost. With this easy-to-make anti-aging oil and mask, you can pamper your skin with natural, nutrient-rich ingredients. Say goodbye to dullness and hello to a firmer, smoother complexion!

    Try this recipe today and experience the magic for yourself. Don’t forget to share your results and let us know how this DIY treatment works for you!

  • Flourless Lentil Bread: A Healthy, Protein-Rich Alternative to Traditional Bread

    Flourless Lentil Bread: A Healthy, Protein-Rich Alternative to Traditional Bread

    Flourless Lentil Bread: A Healthy, Protein-Rich Alternative to Traditional Bread

    Ingredients

    For one loaf (approximately 700g):

    • 200g dried lentils (1 cup)
    • 40g sesame seeds (1/4 cup)
    • 20g flax seeds (2 tablespoons)
    • 30g psyllium husk powder (3 tablespoons)
    • 120ml water (1/2 cup)
    • 10g baking powder (2 teaspoons)
    • 2 teaspoons ground coriander
    • 1 teaspoon sweet paprika
    • 1 teaspoon dried garlic powder
    • Salt and black pepper to taste
    • Vegetable oil for greasing

    Step-by-Step Instructions

    Preparation Phase (2-3 hours)

    1. Soak the lentils in cold water for 1-2 hours until they become slightly tender.
    2. Drain and rinse the soaked lentils thoroughly under cold running water.
    3. Toast sesame seeds in a dry pan over medium heat until golden and fragrant (3-5 minutes). Set aside to cool.
    4. Grind the flax seeds in a blender until finely ground.

    Making the Dough (15-20 minutes)

    1. Place the soaked lentils in a food processor or blender with 1/2 cup water.
    2. Blend until you achieve a smooth, paste-like consistency.
    3. Transfer the lentil mixture to a large mixing bowl.
    4. Add the toasted sesame seeds, ground flax seeds, ground coriander, sweet paprika, salt, and black pepper.
    5. Mix thoroughly until well combined.
    6. Add the psyllium husk powder and baking powder.
    7. Mix again until the dough becomes thick and holds together well.

    Baking Phase (50-60 minutes)

    1. Preheat your oven to 190°C (375°F).
    2. Lightly grease a standard loaf pan (9×5 inches) with vegetable oil.
    3. Transfer the dough to the prepared pan and smooth the top with a spatula.
    4. Brush the surface lightly with vegetable oil and sprinkle with dried garlic.
    5. Bake for 50-60 minutes until golden brown and a skewer inserted into the center comes out clean.
    6. Allow to cool completely before slicing (at least 1 hour).

    Nutritional Information

    Per slice (based on 12 slices):

    • Calories: 120
    • Protein: 7g
    • Carbohydrates: 15g
    • Fiber: 6g
    • Fat: 4g
    • Iron: 2.5mg
    • Calcium: 45mg

    Professional Tips and Tricks

    1. Ensure proper lentil soaking – this is crucial for achieving the right texture and ensuring proper digestion.
    2. Don’t skip toasting the sesame seeds – this step significantly enhances the bread’s flavor profile.
    3. Use room temperature water for blending the lentils to achieve optimal consistency.
    4. Let the bread cool completely before slicing to prevent crumbling.

    Variations and Substitutions

    • Lentil options: Any variety of lentils works well, though red lentils provide the mildest flavor.
    • Seed variations: Sunflower or pumpkin seeds can replace sesame seeds.
    • Seasoning alternatives: Try Italian herbs, cumin, or caraway seeds for different flavor profiles.
    • Psyllium alternatives: Xanthan gum (use 1/3 of the amount) can work as a substitute.
  • Crispy Red Lentil and Leek Patties

    Crispy Red Lentil and Leek Patties

    Crispy Red Lentil and Leek Patties

    Ingredients

    For the Patties:

    • 200g (1 cup) red lentils
    • 1 large leek (approximately 200g/7 oz), finely chopped
    • 1 medium onion (approximately 150g/5.3 oz), finely diced
    • 1 medium sweet potato (approximately 200g/7 oz), grated
    • 1 medium carrot (approximately 100g/3.5 oz), grated
    • 3 cloves garlic, minced
    • 1 teaspoon (5g) cayenne pepper
    • 1 teaspoon (5g) caraway seeds
    • 1 teaspoon (5g) garam masala powder
    • 2 teaspoons (10g) salt
    • 2-3 tablespoons (30-45ml) olive oil
    • Juice of 1 lemon (approximately 30ml/2 tablespoons)
    • 1 handful fresh parsley (approximately 15g/0.5 oz), finely chopped
    • 50g (1/2 cup) breadcrumbs
    • 2 teaspoons (10g) baking soda
    • Vegetable oil for deep frying

    Instructions

    Preparation Phase:

    1. Rinse the red lentils thoroughly under cold running water until the water runs clear.
    2. Soak the lentils in cold water for 20 minutes, then drain well.
    3. While the lentils are soaking, prepare all vegetables:
    • Clean and finely chop the leek
    • Dice the onion
    • Grate the sweet potato and carrot
    • Mince the garlic
    • Chop the parsley

    Cooking Phase:

    1. Heat olive oil in a large skillet over medium heat.
    2. Add the chopped leeks, onions, sweet potato, and carrot.
    3. Sauté the vegetables for approximately 10 minutes until softened but not browned.
    4. Add minced garlic, cayenne pepper, caraway seeds, and garam masala.
    5. Cook for an additional 2 minutes until fragrant.
    6. Remove from heat and let cool for 10 minutes.

    Forming and Frying the Patties:

    1. In a food processor, combine the drained lentils, cooled vegetable mixture, lemon juice, and parsley.
    2. Pulse until well combined but still maintaining some texture.
    3. Transfer to a large bowl and mix in breadcrumbs and baking soda.
    4. Form the mixture into oval-shaped patties, approximately 2 tablespoons each.
    5. Heat vegetable oil in a deep pan to 350°F/175°C.
    6. Fry patties in batches for 3-4 minutes until golden brown.
    7. Drain on paper towels.

    Nutritional Information

    Per serving (3 patties):

    • Calories: 320
    • Protein: 12g
    • Carbohydrates: 42g
    • Fiber: 8g
    • Fat: 14g
    • Iron: 4mg
    • Calcium: 45mg

    Timing:

    • Prep Time: 30 minutes
    • Cook Time: 25 minutes
    • Total Time: 55 minutes
    • Serves: 6 (18 patties)

    Cooking Tips and Tricks

    1. Don’t skip the lentil soaking step – it ensures proper texture and prevents the patties from becoming too dense.
    2. When chopping leeks, clean them thoroughly between layers to remove any hidden dirt.
    3. The mixture should be slightly wet but holdable. If too wet, add more breadcrumbs gradually.
    4. Test the oil temperature with a small amount of mixture – it should sizzle immediately.
    5. Don’t overcrowd the frying pan; leave space between patties for even cooking.

    Variations and Substitutions

    • Replace sweet potato with regular potato or butternut squash
    • Swap red lentils for yellow split peas (adjust soaking time to 1 hour)
    • Use cumin instead of caraway seeds for a different flavor profile
    • Make it gluten-free by using gluten-free breadcrumbs
    • Add fresh herbs like dill or cilantro instead of parsley
  • Spinach and Crab Stuffed Salmon with Lemon Cream Sauce

    Spinach and Crab Stuffed Salmon with Lemon Cream Sauce

    ️Ingredients:1f60b
    – 2 salmon fillets (6 oz each), sliced to form a pocket
    – 1/2 cup fresh spinach, chopped
    – 1/4 cup crab meat (imitation or fresh)
    – 2 tablespoons cream cheese, softened
    – 1 garlic clove, minced
    – Salt and black pepper to taste
    For the lemon cream sauce:
    – 2 tablespoons unsalted butter
    – 1 garlic clove, minced
    – 1/2 cup heavy cream
    – 1 teaspoon Dijon mustard
    – 1 teaspoon lemon zest
    – 1 tablespoon lemon juice
    – Salt and black pepper to taste
    Directions:1f60b
    1. Preheat oven to 375°F (190°C).
    2. Make the stuffing: In a bowl, mix chopped spinach, crab meat, cream cheese, minced garlic, salt, and pepper until well combined.
    3. Stuff the salmon: Carefully fill the pockets in the
    salmon fillets with the spinach and crab mixture. Use toothpicks to secure if needed.
    4. Sear and bake: Heat a skillet over medium heat with a drizzle of olive oil. Sear the salmon for 2 minutes per side. Transfer the skillet to the oven and bake for 10-12 minutes, until fully cooked.
    5. Prepare the lemon cream sauce: In a saucepan, melt butter over medium heat. Add minced garlic and sauté for 1 minute. Stir in heavy cream, Dijon mustard, lemon zest, lemon juice, salt, and pepper. Simmer for 2-3 minutes until slightly thickened.
    6. Serve: Plate the salmon and drizzle generously with the lemon cream sauce.
    Prep time: 15 min
    Cooking time: 20 min
    Servings: 2, 480 kcal per serving.
    Enjoy1f60b1f60b

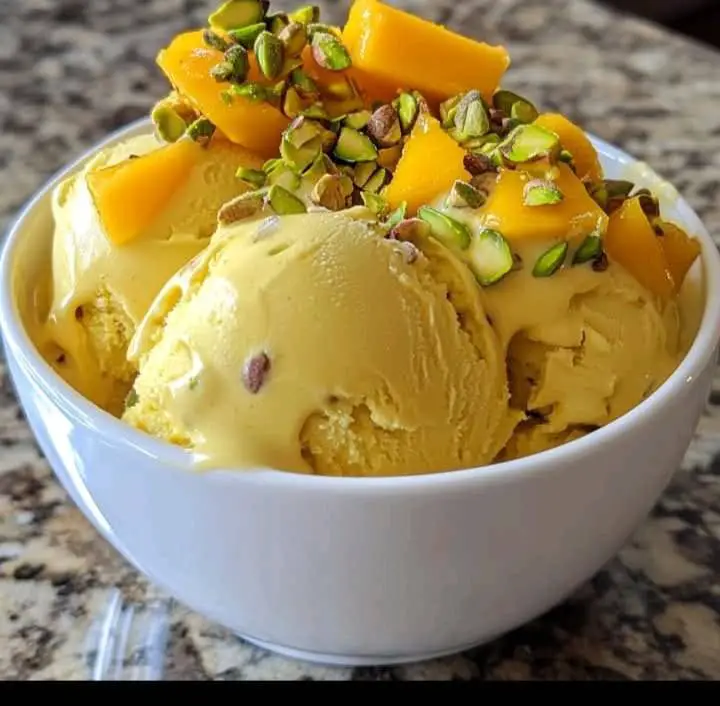
  • Homemade Vanilla Ice Cream

    Homemade Vanilla Ice Cream

    Ingredients:

    2 cups (480ml) heavy cream
    1 cup (240ml) whole milk
    ¾ cup (150g) granulated sugar
    1 vanilla bean (or 2 tsp pure vanilla extract)
    4 large egg yolks
    A pinch of salt

    Instructions:

    Prepare the Vanilla Mixture:

    In a medium saucepan, combine the heavy cream, milk, and half of the sugar.
    Split the vanilla bean lengthwise and scrape out the seeds. Add both the seeds and the pod to the saucepan. Heat the mixture over medium heat until it begins to steam (do not boil).

    Whisk the Egg Yolks:

    In a separate bowl, whisk the egg yolks with the remaining sugar and salt until the mixture is pale and creamy.

    Temper the Eggs:

    Slowly pour a small amount of the warm cream mixture into the egg yolks while whisking constantly. This prevents the yolks from curdling.
    Gradually add the tempered yolks back into the saucepan with the cream mixture.

    Cook the Custard:

    Cook the mixture over low heat, stirring constantly, until it thickens and coats the back of a spoon (170–175°F or 77–80°C).
    Remove from heat and strain the custard through a fine-mesh sieve to remove the vanilla pod and any lumps.

    Chill the Custard:

    Let the custard cool to room temperature, then cover and refrigerate for at least 4 hours or overnight for the best flavor.

    Churn the Ice Cream:

    Once chilled, pour the mixture into an ice cream maker and churn according to the manufacturer’s instructions until thick and creamy.

    Freeze and Serve:

    Transfer the churned ice cream to an airtight container and freeze for at least 4 hours to firm up.
    Scoop into bowls or cones and enjoy the rich, homemade vanilla goodness!

    Tips:
    For a lighter version, use half-and-half instead of heavy cream.
    Add mix-ins like chocolate chips, cookie crumbles, or fruit during the last few minutes of churning.
    If you don’t have an ice cream maker, pour the mixture into a shallow dish, freeze, and stir every 30 minutes for 2-3 hours to break up ice crystals.


    Seeve and Enjoy

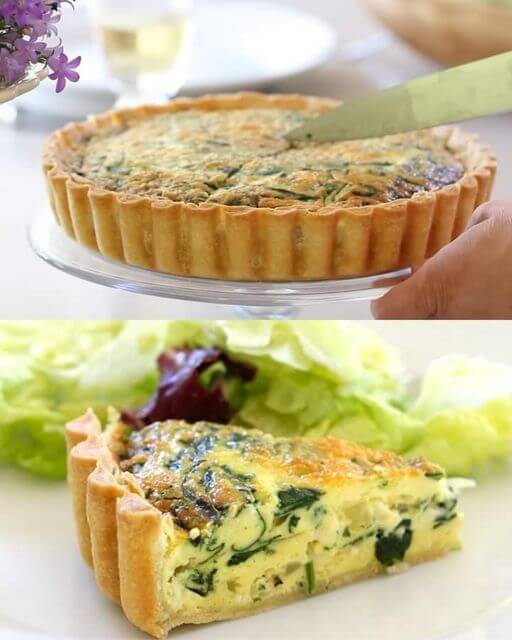
  • Sweet Potato Crust Quiche with Swiss Chard and Cashew Cream

    Sweet Potato Crust Quiche with Swiss Chard and Cashew Cream

    Ingredients

    For the Sweet Potato Crust:

  • Lost weight in 7 days forever! Fat from the stomach and hips disappears in front of your eyes.

    Lost weight in 7 days forever! Fat from the stomach and hips disappears in front of your eyes.

    Lost weight in 7 days forever! Fat from the stomach and hips disappears in front of your eyes.

    Losing weight, especially from the stomach and hips, is a goal for many people. While quick fixes and extreme diets promise fast results, the best way to shed fat and keep it off is through a balanced diet and sustainable habits. This 7-day meal plan focuses on clean eating, healthy fats, and metabolism-boosting foods that help you lose weight while feeling satisfied.

    7-Day Fat-Burning Meal Plan

    This plan eliminates processed foods, sugar, and empty carbs while emphasizing whole, nutrient-dense meals. Every meal is designed to boost metabolism, reduce bloating, and target stubborn fat.

    Day 1: Detox & Reset

    • Breakfast: Warm lemon water and a green smoothie with spinach, avocado, flaxseeds, and almond milk.
    • Lunch: Quinoa salad with chickpeas, cucumbers, cherry tomatoes, and olive oil.
    • Dinner: Stir-fried tofu with broccoli, bell peppers, and ginger in coconut oil.

    Tip: Hydration is key. Drink at least 2 liters of water to flush toxins and reduce bloating.

    Day 2: Metabolism Boosting

    • Breakfast: Chia pudding with unsweetened coconut milk and almonds.
    • Lunch: Lentil soup with turmeric and cumin.
    • Dinner: Baked sweet potatoes with tahini dressing and steamed greens.

    Why it works: Fiber-rich foods like chia and lentils help digestion and keep you full longer.

    Day 3: Belly Fat Attack

    • Breakfast: Scrambled tofu with tomatoes, onions, and basil.
    • Lunch: Zucchini noodles with avocado pesto.
    • Dinner: Grilled portobello mushrooms with quinoa and kale.

    Tip: Healthy fats from avocado and nuts reduce cravings and target belly fat.

    Day 4: No More Sugar Cravings

    • Breakfast: Coconut yogurt with walnuts and cinnamon.
    • Lunch: Spicy black bean chili with lime.
    • Dinner: Cauliflower rice with sautéed spinach and mushrooms.

    Why it works: Eliminating sugar balances blood sugar levels, reducing fat storage.

    Day 5: Flatten Your Stomach

    • Breakfast: Smoothie with blueberries, hemp seeds, and almond butter.
    • Lunch: Grilled eggplant with chickpeas and tahini.
    • Dinner: Miso soup with seaweed and tofu.

    Tip: Fermented foods like miso improve digestion and prevent bloating.

    Day 6: Ultimate Fat Burn

    • Breakfast: Almond flour pancakes with coconut cream.
    • Lunch: Roasted Brussels sprouts with balsamic glaze and lentils.
    • Dinner: Spicy Thai curry with tofu and zucchini.

    Why it works: Spices like chili and turmeric speed up metabolism.

    Day 7: Keep the Results

    • Breakfast: Green smoothie with kale, flaxseeds, and unsweetened almond milk.
    • Lunch: Quinoa-stuffed bell peppers.
    • Dinner: Grilled tempeh with roasted vegetables.

    Tip: Continue this clean eating approach for long-term fat loss!

    Final Thoughts

    Losing weight in 7 days is possible, but the key is maintaining these habits beyond the first week. This meal plan focuses on anti-inflammatory foods, plant-based proteins, and healthy fats that naturally reduce belly and hip fat. Stay consistent, and you’ll see lasting results!

  • Oatmeal and Nut Breakfast Bowl

    Oatmeal and Nut Breakfast Bowl

    Oatmeal and Nut Breakfast Bowl

    This Oatmeal and Nut Breakfast Bowl is a nourishing and satisfying meal to kick-start your day. Packed with healthy fats, protein, and fiber from walnuts, sesame seeds, and pumpkin seeds, it offers a great balance of nutrients to fuel your morning. The addition of banana provides natural sweetness, while the oatmeal base is comforting and hearty. A drizzle of lemon juice enhances the flavors and adds a refreshing twist to the bowl. This recipe is simple to prepare, customizable, and a great way to enjoy a wholesome breakfast or snack.

    Preparation Time

      • Prep Time: 5 minutes
      • Cook Time: 10 minutes
    • Total Time: 15 minutes

    Ingredients

      • 1 cup oatmeal
      • 1 cup walnuts, chopped
      • 1 tablespoon vanilla sugar
      • 1 tablespoon sesame seeds
      • 40 g pumpkin seeds
      • 1 banana, sliced
      • Lemon juice (to taste)
      • 100 ml water

    Directions

    1. Cook the Oatmeal:

    • In a medium saucepan, add 100 ml of water and bring to a boil.
    • Stir in the oatmeal and reduce the heat to low. Let it cook, stirring occasionally, for about 5-7 minutes or until the oatmeal has thickened and reached your desired consistency.

    2. Prepare the Nuts and Seeds:

      • While the oatmeal is cooking, chop the walnuts into small pieces.
    • In a small pan over medium heat, toast the walnuts, sesame seeds, and pumpkin seeds for about 2-3 minutes, stirring frequently to prevent burning. Once toasted, remove from heat and set aside.

    3. Assemble the Bowl:

      • Once the oatmeal is cooked, spoon it into a bowl.
      • Top the oatmeal with the toasted nuts and seeds, and sliced banana.

    4. Add Lemon Juice:

    • Drizzle a bit of lemon juice over the bowl to enhance the flavors and add a zesty finish.

    5. Serve:

    • Enjoy your oatmeal and nut breakfast bowl warm, and feel free to adjust the toppings or drizzle more lemon juice if desired.

    Serving Suggestions

      • Top with additional fruits: Add other fruits like berries, apples, or dried fruits for extra flavor and nutrients.
    • Add a sweetener: If you prefer a sweeter breakfast, drizzle honey or maple syrup on top.
    • Pair with a beverage: Enjoy this breakfast bowl with a cup of tea, coffee, or freshly squeezed juice.

    Tips

      • Make it creamier: For a creamier texture, you can substitute the water with milk (dairy or plant-based) while cooking the oatmeal.
    • Use raw nuts and seeds: If you prefer a raw version of this recipe, skip the toasting step and simply add the nuts and seeds directly to the oatmeal.
    • Customize the flavors: Feel free to experiment with other seeds like chia or flax seeds, or swap the banana for other fruits like mango or apple slices.

    Nutritional Benefits

    This Oatmeal and Nut Breakfast Bowl is packed with health benefits. Oatmeal is a great source of soluble fiber, which helps lower cholesterol and stabilize blood sugar levels. Walnuts, sesame seeds, and pumpkin seeds are rich in healthy fats, protein, and antioxidants, promoting heart health and overall well-being. The banana provides potassium and natural sugars, making it a great energy source, while lemon juice adds vitamin C and helps with digestion. This breakfast bowl offers a balanced combination of macronutrients to fuel your day.

    Conclusion

    This Oatmeal and Nut Breakfast Bowl is not only quick and easy to prepare but also loaded with essential nutrients to support a healthy start to your day. With a combination of whole grains, healthy fats, and natural sweetness, it’s a satisfying meal that will keep you full and energized. Plus, it’s highly customizable to suit your taste preferences or dietary needs. Whether you enjoy it as a quick breakfast or a wholesome snack, this bowl is a delicious and nutritious way to fuel your body.

  • Famous Cream Puffs Recipe

    Famous Cream Puffs Recipe

    These delicious cream puffs are a perfect treat for any occasion! Filled with a rich, creamy filling and a light, airy pastry, they’re a real crowd-pleaser. Here’s the full recipe for the classic cream puff with Mom’s famous filling.

    Ingredients

    For the Cream Puff Shells:

    • 1 stick (1/2 cup) butter
    • 1 cup water
    • 1 tsp vanilla extract
    • 1 cup all-purpose flour
    • 4 large eggs

    For Mom’s Famous Filling:

    • 1 pint (2 cups) heavy cream
    • 1 package (3.4 ounces) instant vanilla pudding mix
    • ⅓ cup milk

    Instructions

    1. Make the Cream Puff Shells:

    • In a medium saucepan, combine the butter and water. Heat over medium-high heat until the butter melts and the water comes to a boil.
    • Remove the saucepan from heat and stir in the vanilla extract.
    • Gradually add the flour to the water mixture while stirring constantly. Continue stirring until the mixture pulls away from the sides of the pan and forms a ball.
    • Allow the dough to cool slightly for a few minutes.

    2. Add the Eggs:

    • Once the dough has cooled a bit, beat in the eggs, one at a time, until smooth and fully incorporated. The dough will be thick but should be smooth after all the eggs are added.

    3. Shape the Puffs:

    • Preheat your oven to 400°F (200°C).
    • Line a baking sheet with parchment paper.
    • Using a tablespoon, drop rounded dollops of dough onto the baking sheet, leaving space between each puff (you should aim for about 8 large puffs).

    4. Bake the Cream Puffs:

    • Bake in the preheated oven for 40 minutes, or until the puffs are golden brown and puffed up.
    • Pro Tip: After baking, poke a toothpick into the side of each puff and return them to the oven with the oven off. Leave the oven door slightly cracked while they cool to prevent them from deflating.

    5. Cool the Puffs:

    • Let the puffs cool completely on a wire rack.

    Make Mom’s Famous Filling:

    1. Prepare the Filling:
      • In a mixer, beat together the heavy cream, instant vanilla pudding mix, and milk until the mixture thickens and forms a creamy filling.
    2. Fill the Puffs:
      • Slice the cooled cream puffs in half horizontally.
      • Pipe or scoop the filling into the bottom half of each puff.
      • Place the top half of the cream puff on top.

    6. Finish and Serve:

    • Dust with powdered sugar or drizzle with melted chocolate, if desired.
    • Serve and enjoy your delicious cream puffs!

    These cream puffs are a perfect balance of crisp, airy pastry and rich, creamy filling, making them an irresistible treat for any gathering. Enjoy!

  • Banana-Blueberry Smoothie

    Banana-Blueberry Smoothie

    Ingredients:

    – 1f34c 2 ripe bananas
    – 1fad0 150 g blueberries (fresh or frozen)
    – 1f95b 200 g plain yogurt
    – 1f36f 2 tablespoons honey
    – 1f95b 250 ml almond milk

    Instructions:

    1. Preparation of ingredients: Peel the bananas and cut them into pieces. If using frozen blueberries, let them defrost slightly.

    2. Blending: In a blender, add the banana pieces, blueberries, yogurt, honey and almond milk.

    3. Blending: Blend on high speed until smooth and creamy. If the mixture is too thick, you can add a little more almond milk to adjust it to your taste.

    4. Taste: Taste the smoothie and adjust the honey if you want a sweeter taste.

    5. Serve: Pour the smoothie into glasses and serve immediately. You can garnish with a few more blueberries or a slice of banana on the rim of the glass for an attractive presentation.

    Additional tips: For an even creamier texture, you can use Greek yogurt. This smoothie is perfect for breakfast or as a healthy snack. Enjoy this refreshing and vitamin-packed drink!

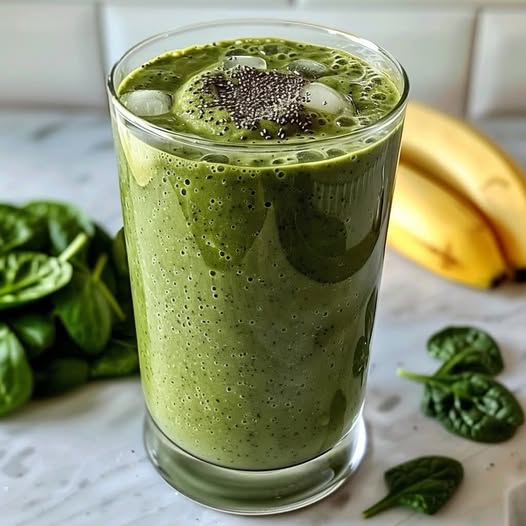
  • 4 Smoothies recipes

    4 Smoothies recipes

    1⃣ Avocado Almond:
    1 banana
    1 avocado
    1/4 cup almond nuts
    1 cup milk
    Ice cubes

    2⃣ Strawberry Walnuts:
    1 banana
    1 cup strawberry
    1/4 cup walnuts
    1 tablespoon vanilla yoghurt
    1 cup almond milk
    Ice cubes

    3⃣ Mango Pistachio:
    1 banana
    1 mango
    1/4 cup pistachio
    1 cup almond milk
    Ice cubes

    4⃣ Blueberry Cashew:
    1 banana
    1/2 cup blueberries
    1/2 cup pineapple
    1/4 cup cashews
    1 cup almond milk
    Ice cubes

  • Velvety Mango Cream

    Velvety Mango Cream

    Mangoes, with their rich flavor and vibrant color, are a beloved fruit that transforms any dish into a tropical delight.

    Velvety Mango Cream is a dessert that highlights the luscious sweetness of mangoes while delivering a creamy.

    indulgent texture. It’s a simple yet sophisticated treat perfect for any occasion.

    This dessert blends ripe mangoes with creamy elements to create a smooth, luxurious experience.

    The natural brightness of mangoes is balanced by the rich creaminess, making it a refreshing choice for warm days or a delightful way to end a meal.

    Ingredients

    Ripe mangoes, peeled and pureed

    Heavy cream, chilled

    Sweetened condensed milk

    Vanilla extract

    A pinch of salt

    Optional garnishes like fresh mint leaves, mango slices, or crushed nuts

    Instructions

    Select fresh, ripe mangoes with a sweet aroma and vibrant color. Peel and pit them carefully.

    then blend the flesh into a smooth puree using a blender. Set aside the puree while you prepare the cream.

    Whip the chilled heavy cream in a mixing bowl until soft peaks form. Using chilled equipment helps the cream whip faster and maintain its structure.

    Fold the mango puree gently into the whipped cream, ensuring the mixture stays light and airy. Be careful not to overmix, as it could deflate the cream.

    Add the sweetened condensed milk to the mixture and stir until well combined. The condensed milk enhances the sweetness and contributes to the creamy texture.

    Incorporate a dash of vanilla extract and a pinch of salt. These additions enhance the overall flavor by balancing the sweetness and adding depth.

    Transfer the prepared mango cream into serving dishes or glasses. Cover them with plastic wrap and refrigerate for a few hours to allow the dessert to chill and the flavors to meld.

    When ready to serve, garnish with your choice of fresh mango slices, mint leaves, or a sprinkle of crushed nuts. The garnish adds texture and visual appeal to the dessert.

    How to Make

    Start by washing and preparing the mangoes. Peel them carefully, remove the pits, and cut the flesh into chunks. Blend the mango pieces until they form a smooth, lump-free puree.

    Prepare the whipped cream in a separate chilled bowl. Whip the cream until it reaches soft peaks, which gives the dessert its light and fluffy texture.

    Combine the whipped cream with the mango puree by folding them together gently. This technique helps retain the airy consistency of the mixture.

    Sweeten the mango cream by adding condensed milk gradually. Stir until the mixture is smooth and free of streaks. Taste and adjust the sweetness as needed.

    Enhance the flavor with a splash of vanilla extract and a tiny pinch of salt. These ingredients amplify the natural sweetness and balance the creaminess of the dessert.

    Refrigerate the dessert for a few hours to allow it to set and cool completely. Chilling also intensifies the flavors, making the dessert even more delicious.

    Serve the mango cream in individual bowls, dessert glasses, or as part of a layered dessert. Add your preferred garnishes for a final touch of elegance.

    Tips

    Choose mangoes that are naturally sweet and fragrant, as they are the star ingredient of this dessert. Avoid mangoes that are too fibrous, as they may affect the texture.

    If fresh mangoes are unavailable, use canned mango puree, but opt for unsweetened versions to control the sweetness of the dessert.

    To make a vegan version, substitute heavy cream with coconut cream and condensed milk with a plant-based alternative like coconut or almond condensed milk.

    Use chilled equipment and ingredients to ensure the cream whips effectively. Warm cream is harder to whip and may not achieve the desired consistency.

    Experiment with additional flavors such as a pinch of cardamom, grated lime zest, or a drizzle of honey for a unique twist.

    Layer the mango cream with other ingredients like fresh berries, crushed cookies, or sponge cake for a visually appealing and flavorful parfait.

    Store the dessert in the refrigerator and consume within two days for the best taste and texture. Avoid freezing, as it may alter the creamy consistency.

    Conclusion

    Velvety Mango Cream is a dessert that combines simplicity with sophistication, making it a favorite among mango enthusiasts.

    The blend of fresh mangoes and creamy textures creates a dessert that is both refreshing and indulgent.

    The recipe’s flexibility allows you to adapt it to suit your taste or dietary preferences, ensuring it can be enjoyed by everyone.

    Whether served as a standalone dessert or paired with other elements, it always impresses.

    Using ripe, in-season mangoes ensures the best flavor and highlights the natural beauty of this tropical fruit.

    The vibrant color and rich taste of the dessert make it an ideal centerpiece for any meal.

    This recipe is perfect for those seeking a quick yet luxurious dessert that doesn’t require advanced cooking skills.

    Its simplicity ensures that anyone can create a stunning dish with minimal effort.