Category: Recipes

  • Rainbow Sherbet Piña Colada

    Rainbow Sherbet Piña Colada

    Ingredients:

    1 cup pineapple juice 1f34d
    1/2 cup coconut cream 1f965
    2 scoops rainbow sherbet 1f368 (the more colors, the better!)
    1/2 cup crushed ice 1f9ca
    1 shot white rum (optional for a tropical kick!) 1f379
    Pineapple slices and maraschino cherries for garnish 1f34d1f352
    A drizzle of grenadine or fruit syrup for extra color

    Directions:

    In a blender, combine the pineapple juice, coconut cream, rainbow sherbet, crushed ice, and white rum (if using).
    Blend until smooth and creamy. If the mixture is too thick, add a little more pineapple juice or a splash of water.
    Pour the vibrant mixture into a tall glass.
    Garnish with a pineapple slice, maraschino cherry, and a drizzle of grenadine or fruit syrup for a pop of color.
    Serve immediately and enjoy this tropical, fruity delight!

    Prep Time: 5 minutes | Cooking Time: 0 minutes | Total Time: 5 minutes
    Kcal: 200 kcal (without rum) | Servings: 1 serving

  • Mixed berries and banana smoothie is a refreshing, healthy

    Mixed berries and banana smoothie is a refreshing, healthy

    Mixed Berries and Banana Smoothie

    A mixed berries and banana smoothie is a refreshing, healthy, and delicious way to start your day or enjoy as a midday snack. Packed with vitamins, antioxidants, and fiber, it’s the perfect boost for your body and energy levels. This recipe is easy to prepare and fully customizable, whether you prefer it with a creamy texture, a sweeter taste, or a thicker consistency. Here’s how you can make your own tasty smoothie.

    Ingredients:

    • 1 ripe banana
    • 1 cup mixed berries (strawberries, blueberries, raspberries, blackberries, or any combination)
    • 1/2 cup Greek yogurt (optional but adds creaminess and protein)
    • 1 cup almond milk (or any milk of your choice, such as oat, soy, or regular dairy milk)
    • 1 tablespoon honey or maple syrup (optional for sweetness)
    • A handful of ice cubes (optional, but helps if you want a chilled smoothie)

    Instructions:

    1. Prepare the Banana: Start by peeling your ripe banana. Bananas are a fantastic source of potassium and provide a natural sweetness that balances the tartness of the berries. Once peeled, slice the banana into smaller chunks to make it easier for the blender to process.
    2. Add the Mixed Berries: Next, add 1 cup of mixed berries into the blender. You can use fresh or frozen berries depending on what you have available. Frozen berries are great for making your smoothie colder and thicker, while fresh berries will give you a slightly lighter texture. Berries are rich in antioxidants, fiber, and vitamin C, making them a nutritious addition to your smoothie.
    3. Incorporate Greek Yogurt: If you’re looking for a creamy texture and a protein boost, add 1/2 cup of Greek yogurt. This step is optional, but it will create a richer, smoother smoothie. Greek yogurt also adds probiotics, which are beneficial for gut health. If you prefer a non-dairy alternative, you can substitute coconut yogurt or skip it altogether.
    4. Pour in the Almond Milk: Add 1 cup of almond milk or the milk of your choice to help blend everything together smoothly. Almond milk is a great dairy-free option, but any milk will work depending on your preferences. The liquid helps create the perfect consistency for drinking, making the smoothie easy to enjoy without being too thick.
    5. Sweeten to Taste: Taste your smoothie and decide if you’d like to add any extra sweetness. If the fruits aren’t sweet enough for your taste, drizzle in 1 tablespoon of honey or maple syrup. Both are natural sweeteners that complement the fruity flavors without overpowering them.
    6. Blend: Add a handful of ice cubes if you want to enjoy a cold, refreshing smoothie. Blend all the ingredients together on high until smooth and creamy. If the consistency is too thick for your liking, you can always add a bit more almond milk or water.
    7. Serve and Enjoy: Pour the smoothie into a glass. You can also garnish it with a few extra berries on top for decoration or a sprinkle of chia seeds for added texture and nutritional value. Serve immediately and enjoy your vibrant, nutrient-packed smoothie!

    Tips:

    • For a vegan version, simply skip the Greek yogurt or use a plant-based yogurt.
    • If you prefer a thicker smoothie, add more banana or frozen berries.
    • Experiment with other fruits like mango, pineapple, or spinach to change the flavor profile.

    Enjoy this delicious, nutrient-packed mixed berries and banana smoothie as part of a balanced diet and feel great with every sip!

  • Untitled post 54892

    :
    1 sheet puff pastry
    250g ground beef
    1 small onion, finely chopped
    1 clove garlic, minced
    1 teaspoon dried thyme
    1 teaspoon paprika
    Salt and pepper, to taste
    150g shredded mozzarella cheese
    1 egg, beaten (for egg wash)
    :
    Preheat the oven to 200°C (400°F).
    Heat a pan over medium heat and cook the ground beef until browned.
    Add the chopped onion and minced garlic, cooking until the onion softens.
    Season the mixture with thyme, paprika, salt, and pepper, then stir to combine.
    Remove from heat and let cool slightly. Once cooled, mix in the shredded mozzarella cheese.
    Roll out the puff pastry on a floured surface. Spread the beef and cheese mixture evenly across the centre.
    Roll the pastry tightly around the filling, ensuring the seam is sealed.
    Slice the rolled pastry into 6-8 pieces and place them on a baking tray lined with parchment paper.
    Brush the tops with the beaten egg for a golden finish.
    Bake for 20-25 minutes or until golden and puffed.

  • Fresh Cabbage and Apple Salad with Lemon Dressing

    Fresh Cabbage and Apple Salad with Lemon Dressing

    Fresh Cabbage and Apple Salad with Lemon Dressing

    This light and refreshing salad combines crunchy vegetables, sweet apple, and a zesty lemon dressing for a perfect side dish or healthy snack.

    Preparation Time: 15 minutes
    Chill Time: 30 minutes
    Total Time: 45 minutes
    Servings: 4

    Ingredients:

      • Cabbage: 1/3 portion, shredded
      • Carrot: 1 large, julienned or grated
      • Cucumber: 1, julienned or thinly sliced
      • Apple: 1 red, julienned or thinly sliced
      • Red Onion: 1, sliced into rings
      • Lemon Juice: Juice of 1 lemon
    • Extra Virgin Olive Oil: 50 ml
    • Salt and Pepper: To taste

    Directions:

    Prepare the Vegetables:

    • In a large mixing bowl, combine the shredded cabbage, julienned carrot, cucumber, apple, and sliced red onion.

    Prepare the Dressing:

    • In a small bowl, whisk together the lemon juice and extra virgin olive oil.
    • Season with salt and pepper to taste.

    Combine and Chill:

    • Pour the dressing over the salad ingredients and toss gently to coat evenly.
    • Refrigerate the salad for at least 30 minutes to allow the flavors to meld.

    Serve:

    • Serve the salad chilled as a refreshing side dish or appetizer.

    Serving Suggestions:

      • Pair with grilled chicken or fish for a complete meal.
      • Serve alongside sandwiches or wraps for a light lunch.
      • Enjoy as a standalone snack.
      • Add toasted nuts like almonds or walnuts for crunch.
    • Pair with a creamy soup for a balanced meal.

    Cooking Tips:

      • Use a mandoline slicer for uniform vegetable slices.
      • Adjust the dressing ingredients to suit your taste—add a touch of honey for sweetness or a pinch of chili flakes for spice.
      • For added flavor, sprinkle the salad with fresh herbs like parsley or cilantro.
      • Refrigerating enhances the flavors, but don’t keep it too long to retain the crunchiness of the vegetables.
    • Ensure the apple is sliced just before combining to prevent browning, or toss it in a little lemon juice.

    Nutritional Benefits:

      • Cabbage: Rich in vitamins C and K, and high in fiber.
      • Carrots: Packed with beta-carotene and antioxidants.
      • Cucumber: Hydrating and low in calories.
      • Apple: Adds natural sweetness and dietary fiber.
    • Olive Oil: Provides healthy fats and enhances nutrient absorption.

    Dietary Information:

      • Gluten-free and vegetarian-friendly.
    • Suitable for vegans.
    • Low-calorie and nutrient-dense.

    Nutritional Facts (Per Serving):

      • Calories: 120
      • Protein: 1.5 g
      • Carbohydrates: 12 g
      • Fat: 8 g
      • Fiber: 3 g
      • Sugar: 7 g

    Storage:

      • Store leftovers in an airtight container in the refrigerator for up to 2 days.
      • Stir before serving as the dressing may settle.

    Why You’ll Love This Recipe:

      • Quick and easy to prepare with fresh, wholesome ingredients.
      • Light, crisp texture with a perfect balance of sweet and tangy flavors.
    • Versatile – pairs well with many main dishes or can be enjoyed on its own.
    • Nutrient-packed and ideal for those seeking a healthy meal option.

    Conclusion:
    This fresh cabbage and apple salad with lemon dressing is a delightful addition to any meal. Its crunchy texture, vibrant flavors, and nutritious ingredients make it a perfect choice for a healthy and refreshing dish. Enjoy this simple salad as a versatile side or light meal that’s sure to please!

  • delicious Coffee Ice Cream!

    delicious Coffee Ice Cream!

    Ingredients:
    – 2 cups heavy cream
    – 1 cup whole milk
    – 3/4 cup granulated sugar
    – 1 cup brewed coffee, cooled
    – 1 teaspoon vanilla extract
    – 1 cup crushed cookies

    Directions:
    1. In a mixing bowl, whisk together the heavy cream, whole milk, sugar, cooled coffee, and vanilla extract until the sugar is completely dissolved.
    2. Pour the creamy mixture into your ice cream maker and churn according to the manufacturer’s instructions—this is where the magic happens!
    3. As the ice cream starts to thicken in the last few minutes of churning, sprinkle in the crushed cookies for that delightful crunch.
    4. Once the churning is done, transfer your creamy creation to a lidded container and pop it into the freezer for at least 4 hours to firm up nicely.
    5. Once it’s ready, serve it up and enjoy every spoonful of your Coffee Ice Cream

  • Crack Chicken Tenders

    Crack Chicken Tenders

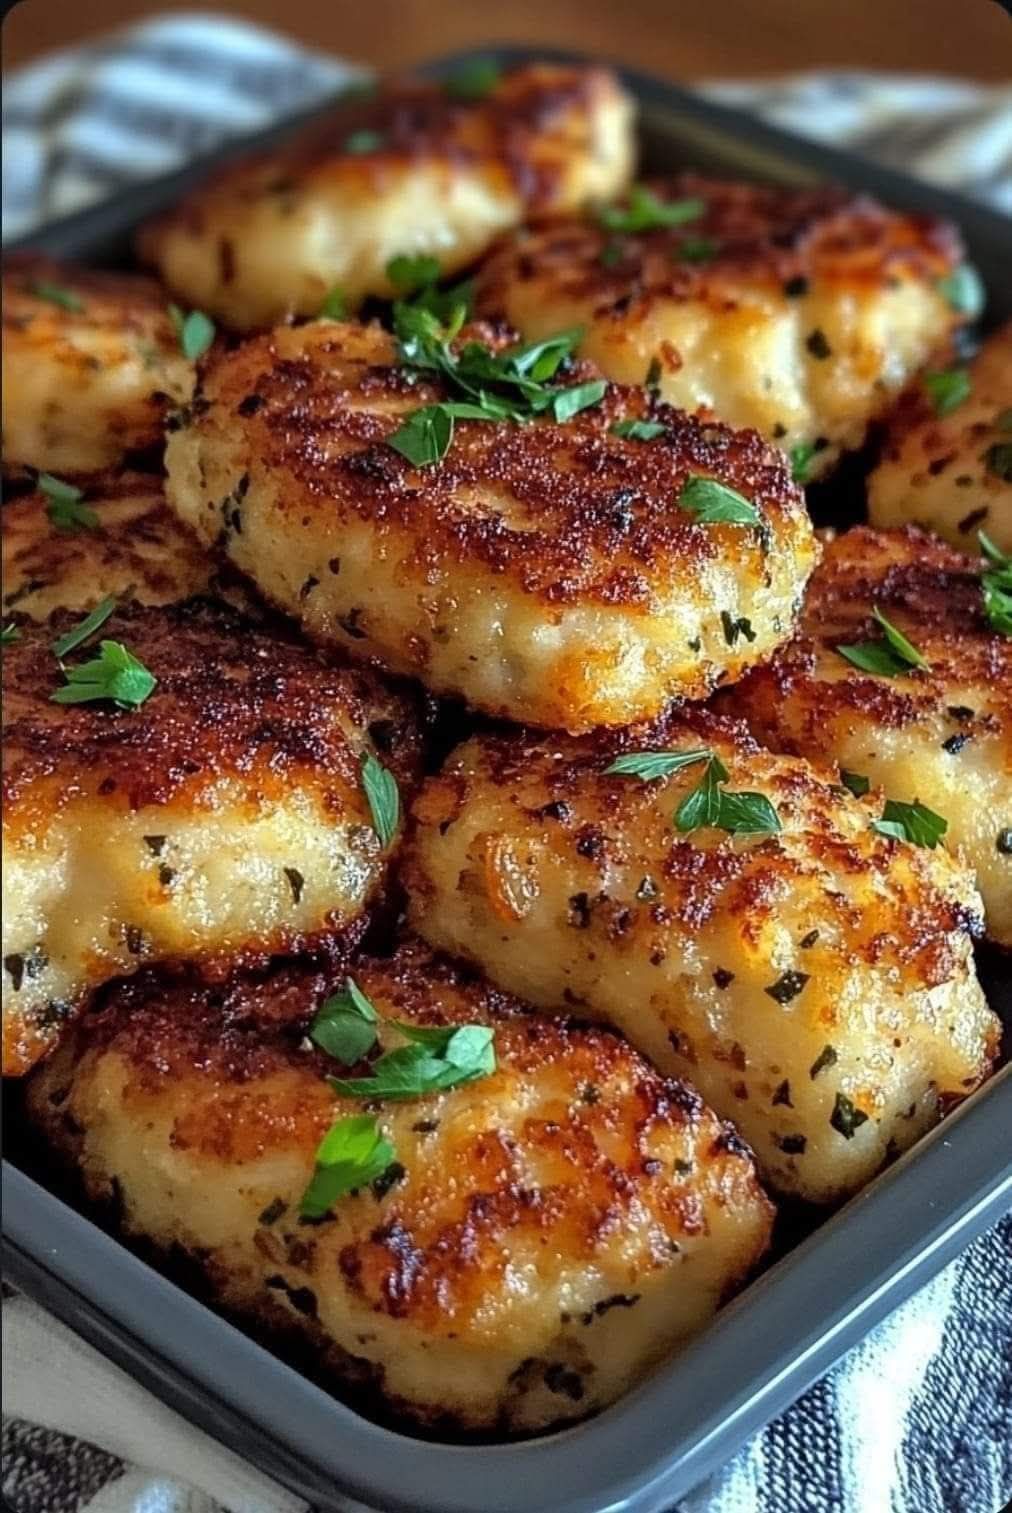
    These Crack Chicken Tenders are coated in a savory, crispy layer of crushed Ritz crackers, Ranch seasoning, and Parmesan cheese, making each bite packed with flavor! They’re quick to prepare and bake, creating an easy, family-friendly meal that’s anything but boring. Perfect as a snack, appetizer, or main dish, these tenders are sure to become a favorite!

    Ingredients
    1 lb. chicken tenders
    ½ cup mayonnaise
    ½ cup Parmesan cheese grated
    1 packet Ranch seasoning mix
    ½ tsp garlic powder
    ½ tsp onion powder
    1 cup Ritz crackers crushed

    Instructions

    Preheat oven to 375°F (190°C).
    Line a baking sheet with parchment paper or lightly grease it.
    In a mixing bowl, combine mayonnaise, Parmesan cheese, Ranch seasoning mix, garlic powder, and onion powder until smooth.
    Coat each chicken tender in the mayo mixture, then dredge in crushed Ritz crackers, pressing to ensure coating sticks.
    Arrange chicken tenders on the prepared baking sheet, spacing them out for even cooking.
    Bake for 20-25 minutes, or until golden and cooked through (internal temperature of 165°F).
    Allow to cool slightly before serving. Enjoy with your favorite dipping sauce!
    Notes
    Substitutions: Greek yogurt or sour cream can replace mayonnaise for a lighter option.
    Gluten-Free Option: Use gluten-free crackers instead of Ritz.
    Extra Crispiness: Broil for the last 1-2 minutes of baking for added crunch, watching carefully to prevent burning.
    Storage: Refrigerate leftovers in an airtight container for up to 3 days. Reheat in an oven or air fryer to maintain crispiness.

  • Chocolate Banana Oatmeal Pancakes

    Chocolate Banana Oatmeal Pancakes

    Chocolate Banana Oatmeal Pancakes

    Table of Contents

    Ingredients (in cups and grams):

        • 1 cup (90 g) oatmeal


        • 1 cup (240 ml) water
        • 2 eggs

      Ezoic

      • A pinch of salt


    Ezoic

        • 1 tablespoon (10 g) stevia sweetener
        • 1 teaspoon (5 ml) vanilla extract
        • 2 ripe bananas, mashed


          • 1 tablespoon (7 g) cocoa powder

        • 1 teaspoon (5 g) baking powder
        • 1 tablespoon (6 g) coconut flakes


      • Almonds, chopped (for topping)
      • No-sugar chocolate syrup (for topping)

    Instructions:

    Prepare the Batter:

        1. Soak the oatmeal in water for 10 minutes until softened.
        2. In a mixing bowl, mash the bananas and add eggs, stevia, vanilla extract, and salt. Mix well.


      1. Stir in the softened oatmeal, cocoa powder, baking powder, and coconut flakes until a smooth batter forms.

    Cook the Pancakes:
    4. Heat a non-stick skillet over medium heat. Lightly grease if needed.
    5. Pour a ladle of batter onto the skillet and spread gently to form a pancake.
    6. Cook for 2–3 minutes on one side until bubbles form, then flip and cook the other side for 1–2 minutes. Repeat with the remaining batter.

    Serve:
    7. Stack the pancakes on a plate. Drizzle with no-sugar chocolate syrup, sprinkle with chopped almonds, and enjoy!

    Serving Suggestions:

        • Serve with fresh berries for added flavor.
        • Pair with a dollop of Greek yogurt or whipped cream for creaminess.

    Ezoic 

    • Add a sprinkle of extra coconut flakes or granola for texture.

    Cooking Tips:

      • Use ripe bananas for the best natural sweetness.


    • Ensure the skillet is at medium heat to prevent burning.
    • Add a splash of milk or water if the batter is too thick.
    » MORE:  Cauliflower and Broccoli Bake

    Nutritional Benefits:


        • Oatmeal: Rich in fiber, promotes digestion, and keeps you full longer.
        • Bananas: Provide natural sweetness and are packed with potassium and vitamins.

      • Eggs: High-quality protein for energy and muscle repair.
    See also  Vegetable Pan Pizza Recipe: Delicious and Healthy!


    • Cocoa Powder: A good source of antioxidants and adds a rich chocolate flavor.
    • Coconut Flakes: Adds healthy fats and a tropical twist.

    Dietary Information:


        • Gluten-free (ensure oats are certified gluten-free)
        • Low in added sugar

      • High in protein and fiber

    Nutritional Facts (Per Serving – Approx. 6 Pancakes):


      • Calories: 160
      • Protein: 5 g


          • Fat: 5 g

        • Carbohydrates: 22 g
        • Fiber: 4 g

    Storage:

        • Store in an airtight container in the refrigerator for up to 3 days.
        • Reheat in a skillet or microwave before serving.

    Why You’ll Love This Recipe:

        • It’s naturally sweetened with bananas and stevia.

      • Quick and easy to prepare with wholesome ingredients.


    • Packed with flavor and nutrients for a satisfying meal.
    • Perfect for both adults and kids!
  • Crispy Cheesy Potato Patties Recipe

    Crispy Cheesy Potato Patties Recipe

    Crispy Cheesy Potato Patties Recipe

    Looking for a delightful and healthier alternative to traditional pizza? These Crispy Cheesy Potato Patties are the perfect solution! Made with fresh ingredients like grated potatoes, tomatoes, and cheese, these patties are versatile, flavorful, and easy to prepare. They offer a crispy exterior and a deliciously cheesy topping that will satisfy your cravings. Whether you serve them as a snack, side dish, or main course, these patties are sure to become a family favorite.

      • Preparation: 20 minutes
      • Cooking: 30 minutes
    • Total: 50 minutes

    Ingredients:

    Main Ingredients:

      • 3 large potatoes
      • 1 onion
      • 3 tablespoons flour
      • 1 egg
      • Salt (to taste)
      • Pepper (to taste)
      • Vegetable oil (for frying)
      • 2 tomatoes
      • 100 grams cheese
      • A bunch of spring onions
      • Italian herbs (to taste)
      • Ground chili pepper (to taste)
      • A bunch of dill

    For the Sauce:

      • 3 tablespoons sour cream
      • 3 cloves garlic
    • A pinch of salt

    Instructions:

      1. Prepare the Potatoes:
        • Peel and grate the 3 large potatoes. Place the grated potatoes in a bowl and fill with water. Let them sit for 5 minutes. Drain and squeeze the water out of the potatoes to remove excess moisture. This step ensures the patties are crispy and not soggy
      1. Mix the Ingredients:
        • Finely chop the onion and add it to the grated potatoes. Add 3 tablespoons of flour, 1 egg, salt, and pepper to the potato mixture. Mix well to combine. The flour and egg help bind the ingredients together, creating a cohesive mixture.
      2. Fry the Potato Cakes:
          • Heat vegetable oil in a large frying pan over medium heat. Spoon the potato mixture into the pan, forming small patties. Fry the patties until they are golden brown on both sides. Remove and place on a paper towel-lined plate to drain any excess oil. This step gives the patties a deliciously crispy exterior.
      3. Prepare the Toppings:
        • Slice the tomatoes and grate the cheese. Finely chop the spring onions. Mix the Italian herbs and ground chili pepper together. These toppings add layers of flavor and texture to the patties.
      1. Assemble the Dish:
        • Place the fried potato patties on a baking sheet. Top each patty with a slice of tomato and a generous amount of grated cheese. Sprinkle the chopped spring onions, Italian herbs, and ground chili pepper on top. This step transforms the patties into mini “pizzas” with vibrant toppings.
      2. Bake:
          • Preheat your oven to 180°C (350°F). Bake the assembled patties until the cheese is melted and bubbly, about 10 minutes. Baking melds the flavors together and gives the dish a wonderful cheesy finish.
      3. Prepare the Sauce:
        • In a small bowl, combine the sour cream, finely chopped dill, squeezed garlic, and a pinch of salt. Mix well. This garlic-dill sauce adds a creamy, tangy element that complements the savory patties.
    1. Serve:
      • Serve the potato patties hot, with the prepared garlic-dill sauce on the side. The sauce is perfect for dipping and enhances the overall flavor of the dish.

    Why You’ll Love This Recipe:

      • Crispy and Flavorful: The combination of grated potatoes and onions, fried to golden perfection, creates a crispy base that is both satisfying and delicious.
    • Versatile and Easy: This recipe is incredibly versatile. You can enjoy these patties as a snack, appetizer, side dish, or even a main course. Plus, it’s easy and quick to prepare with ingredients you likely already have at home.
    • Healthy and Nutritious: Made with fresh potatoes, tomatoes, and herbs, this dish is packed with nutrients. It’s a healthier alternative to traditional pizza, offering more vitamins and fewer processed ingredients.

    Tips for the Best Potato Patties:

      • Remove Excess Moisture: Ensure you squeeze out as much water as possible from the grated potatoes. This step is crucial for achieving a crispy texture.
    • Season Well: Don’t skimp on the seasoning. Properly seasoning the potato mixture and toppings enhances the overall flavor of the patties.
    • Serve Immediately: These patties are best enjoyed hot and fresh out of the oven. The crispy texture and melted cheese are at their best when served immediately.

    Serving Suggestions:

      • As a Snack: Serve these potato patties as a delicious and satisfying snack. They’re perfect for game nights, parties, or casual get-togethers
    • As a Side Dish: Pair the patties with grilled meats, fish, or a fresh salad for a complete meal. They complement a variety of main dishes beautifully.
    • For Breakfast: Enjoy these patties as a hearty breakfast option. Serve with a side of scrambled eggs and fresh fruit for a balanced meal.

    Health Benefits of Key Ingredients:

      • Potatoes: Rich in vitamins C and B6, potassium, and fiber, potatoes are nutritious and versatile. They provide energy and support digestive health.
      • Tomatoes: High in vitamins C and K, tomatoes also contain antioxidants like lycopene, which supports heart health and reduces inflammation.
      • Garlic: Known for its immune-boosting properties, garlic also adds a robust flavor to the sauce and patties.
      • Dill: Rich in antioxidants and vitamins, dill adds a fresh, vibrant flavor to the sauce and supports overall health.

    Conclusion:

    This potato patties recipe is a game-changer. Easy to make and bursting with flavor, it’s a fantastic alternative to pizza that your whole family will love. Try this recipe today and enjoy the deliciousness of crispy, cheesy potato patties!

  • Kulfi Ice Cream Recipe

    Kulfi Ice Cream Recipe

    Ingredients:
    4 cups whole milk
    1/2 cup sweetened condensed milk
    1/4 cup powdered sugar
    1/4 teaspoon ground cardamom 1/4 cup chopped nuts (pistachios, almonds, cashews)
    Saffron strands for garnish (optional)
    Chopped pistachios for garnish (optional)

    Directions:
    1. In a heavy-bottomed saucepan, heat the whole milk over medium heat until simmering.
    2. Reduce the heat to low and simmer, stirring frequently, until the milk is reduced by half (about 30-40 minutes).
    3. Add sweetened condensed milk, powdered sugar, cardamom, and chopped nuts to the reduced milk, and stir well.
    4. Simmer for another 10-15 minutes, stirring occasionally until slightly thickened.
    5. Let the mixture cool to room temperature.
    6. Pour the mixture into popsicle molds or small cups, insert sticks, and freeze for at least 6 hours.
    7. To serve, pop out the kulfi and garnish with saffron strands and chopped pistachios if desired.
    Remember, love your food and it will love you back! If you enjoyed this recipe.

    Serve and Enjoy 1f60b1f4951f60a

  • Traditional Dried Fruit Tea: A Warming Morning Beverage

    Traditional Dried Fruit Tea: A Warming Morning Beverage

    Ingredients

    • 4-5 dried figs
    • 4-5 premium dates
    • 4-5 prunes (dried plums)
    • 500ml (2 cups) water

    Equipment Needed

    • Medium saucepan
    • Fine-mesh strainer
    • Glass jar for storage
    • Cutting board
    • Sharp knife

    Instructions

    1. Prepare the Dried Fruits
    • Thoroughly rinse all dried fruits
    • Cut the dates, figs, and prunes into small pieces
    • Remove any stems or tough parts
    1. Cooking Process
    • In a medium saucepan, bring 500ml of water to a boil
    • Add the chopped dried fruits
    • Reduce heat and simmer for 10 minutes
    • Remove from heat and let steep for 5 minutes
    1. Straining
    • Strain the mixture through a fine-mesh strainer
    • Gently press fruits to extract maximum flavor
    • Let cool slightly before serving

    Pro Tips for Perfect Dried Fruit Tea

    • Choose high-quality, preservative-free dried fruits
    • Store dried fruits in an airtight container before use
    • Cut fruits into similarly sized pieces for even cooking
    • Don’t skip the straining step – it ensures a smooth beverage
    • Consider using filtered water for the best taste

    Variations and Substitutions

    • Spice it up: Add a cinnamon stick or star anise while simmering
    • Extra warmth: Include a small piece of fresh ginger
    • Different dried fruits: Try adding dried apricots or raisins
    • Cold version: Chill and serve over ice in summer
    • Natural sweetness: Add a teaspoon of honey if desired

    Storage and Make-Ahead Tips

    • Store prepared tea in an airtight container in the refrigerator for up to 3 days
    • Reheat gently on the stovetop or microwave when ready to serve
    • Pre-cut fruits can be stored in an airtight container for quick preparation
    • Freeze leftover tea in ice cube trays for iced tea variations

    Nutritional Information

    (Per 1 cup serving, approximate values)

    • Calories: 95
    • Carbohydrates: 25g
    • Fiber: 4g
    • Protein: 1g
    • Natural Sugars: 18g
    • Iron: 2% DV
    • Potassium: 300mg
  • Fresh Cabbage and Apple Salad with Lemon Dressing

    Fresh Cabbage and Apple Salad with Lemon Dressing

    Fresh Cabbage and Apple Salad with Lemon Dressing

    This light and refreshing salad combines crunchy vegetables, sweet apple, and a zesty lemon dressing for a perfect side dish or healthy snack.

    Preparation Time: 15 minutes
    Chill Time: 30 minutes
    Total Time: 45 minutes
    Servings: 4

    Ingredients:

      • Cabbage: 1/3 portion, shredded
      • Carrot: 1 large, julienned or grated
      • Cucumber: 1, julienned or thinly sliced
      • Apple: 1 red, julienned or thinly sliced
      • Red Onion: 1, sliced into rings
      • Lemon Juice: Juice of 1 lemon
    • Extra Virgin Olive Oil: 50 ml
    • Salt and Pepper: To taste

    Directions:

    Prepare the Vegetables:

    • In a large mixing bowl, combine the shredded cabbage, julienned carrot, cucumber, apple, and sliced red onion.

    Prepare the Dressing:

    • In a small bowl, whisk together the lemon juice and extra virgin olive oil.
    • Season with salt and pepper to taste.

    Combine and Chill:

    • Pour the dressing over the salad ingredients and toss gently to coat evenly.
    • Refrigerate the salad for at least 30 minutes to allow the flavors to meld.

    Serve:

    • Serve the salad chilled as a refreshing side dish or appetizer.

    Serving Suggestions:

      • Pair with grilled chicken or fish for a complete meal.
      • Serve alongside sandwiches or wraps for a light lunch.
      • Enjoy as a standalone snack.
      • Add toasted nuts like almonds or walnuts for crunch.
    • Pair with a creamy soup for a balanced meal.

    Cooking Tips:

      • Use a mandoline slicer for uniform vegetable slices.
      • Adjust the dressing ingredients to suit your taste—add a touch of honey for sweetness or a pinch of chili flakes for spice.
      • For added flavor, sprinkle the salad with fresh herbs like parsley or cilantro.
      • Refrigerating enhances the flavors, but don’t keep it too long to retain the crunchiness of the vegetables.
    • Ensure the apple is sliced just before combining to prevent browning, or toss it in a little lemon juice.

    Nutritional Benefits:

      • Cabbage: Rich in vitamins C and K, and high in fiber.
      • Carrots: Packed with beta-carotene and antioxidants.
      • Cucumber: Hydrating and low in calories.
      • Apple: Adds natural sweetness and dietary fiber.
    • Olive Oil: Provides healthy fats and enhances nutrient absorption.

    Dietary Information:

      • Gluten-free and vegetarian-friendly.
    • Suitable for vegans.
    • Low-calorie and nutrient-dense.

    Nutritional Facts (Per Serving):

      • Calories: 120
      • Protein: 1.5 g
      • Carbohydrates: 12 g
      • Fat: 8 g
      • Fiber: 3 g
      • Sugar: 7 g

    Storage:

      • Store leftovers in an airtight container in the refrigerator for up to 2 days.
      • Stir before serving as the dressing may settle.

    Why You’ll Love This Recipe:

      • Quick and easy to prepare with fresh, wholesome ingredients.
      • Light, crisp texture with a perfect balance of sweet and tangy flavors.
    • Versatile – pairs well with many main dishes or can be enjoyed on its own.
    • Nutrient-packed and ideal for those seeking a healthy meal option.

    Conclusion:
    This fresh cabbage and apple salad with lemon dressing is a delightful addition to any meal. Its crunchy texture, vibrant flavors, and nutritious ingredients make it a perfect choice for a healthy and refreshing dish. Enjoy this simple salad as a versatile side or light meal that’s sure to please!

  • Homemade Dragonfruit Strawberry Ice Cream

    Homemade Dragonfruit Strawberry Ice Cream

    1f4cb Ingredients:

    • 1 cup fresh or frozen dragonfruit (pitaya), diced
    • 1 cup fresh or frozen strawberries, hulled
    • 2 cups heavy whipping cream
    • 1 cup whole milk (or coconut milk for dairy-free option)
    • ¾ cup granulated sugar
    • 1 tsp vanilla extract
    • 1 tbsp lemon juice (enhances the fruit flavor)

    1f963 Directions:

    1️⃣ Blend the Fruits:
    • In a blender, puree dragonfruit and strawberries until smooth.
    • Add lemon juice and pulse to combine.
    2️⃣ Prepare the Ice Cream Base:
    • In a large bowl, whisk together heavy cream, milk, sugar, and vanilla extract until the sugar is fully dissolved.
    • Stir in the fruit puree, mixing until evenly combined.
    3️⃣ Churn or Freeze the Ice Cream:
    • With an Ice Cream Maker: Pour the mixture into your ice cream maker and churn according to the manufacturer’s instructions (about 20-25 minutes).
    • Without an Ice Cream Maker: Pour the mixture into a freezer-safe container and freeze, stirring every 30 minutes for the first 2 hours to maintain creaminess.
    4️⃣ Freeze Until Firm:
    • Transfer to a loaf pan or airtight container, cover, and freeze for at least 4 hours or until fully set.
    5️⃣ Serve and Enjoy:
    • Scoop and enjoy with fresh fruit, shredded coconut, or a drizzle of honey!

    1f4a1 Pro Tip:
    For a tropical twist, mix in toasted coconut flakes or white chocolate chips before freezing!

    ⏱ Prep Time: 10 mins | Churn Time: 25 mins | Freeze Time: 4 hrs | Total Time: ~4 hrs 35 mins
    1f374 Servings: 6 | 1f525 Calories: 290 kcal

  • Why Watermelon Ginger And Lime Juice?

    Why Watermelon Ginger And Lime Juice?

    Looking for a refreshing and invigorating drink? Watermelon Ginger and Lime Juice is the perfect answer! This delightful beverage combines the sweet juiciness of watermelon with the zesty kick of ginger and the tangy brightness of lime. It’s not only delicious but also packed with health benefits.

    Benefits:

    1. Hydrating and Refreshing: With over 90% water content, watermelon keeps you cool and hydrated.
    2. Health Boost: Ginger adds a spicy kick and offers anti-inflammatory and digestive benefits. Lime provides vitamin C and balances the sweetness of the watermelon.
    3. Easy to Make: Just a few simple ingredients and you can whip up this tasty juice in no time.

    Ingredients:

    • 4 cups cubed watermelon (seeds removed)
    • 1-2 inches fresh ginger, peeled and grated
    • Juice of 2 limes
    • Ice cubes (optional)
    • Fresh mint leaves (optional) for garnish

      Instructions:

    1. Prepare the Ingredients:
      • Cube the watermelon and remove any seeds. Peel and grate the ginger. Juice the limes.
    2. Blend the Watermelon:
      • Place the watermelon cubes in a blender and blend until smooth. Use the juicing setting if available for a smoother consistency.
    3. Add Ginger and Lime:
      • Add the grated ginger and lime juice to the blender. Blend again until all ingredients are well combined.
    4. Strain the Juice:
      • For a smoother juice, strain the mixture through a fine-mesh sieve or cheesecloth into a pitcher. Press down on the pulp to extract as much juice as possible.
    5. Serve:
      • Pour the juice into glasses over ice cubes if desired. Garnish with fresh mint leaves for an extra touch of freshness.

    Tips:

    • Sweetness: Add a tablespoon of honey or agave syrup for a sweeter drink.
    • Spice Level: Adjust the amount of ginger to suit your taste. Use less for a milder flavor or more for a stronger kick.
    • Chill Time: Chill the watermelon in the refrigerator before blending for an even more refreshing drink.

    Health Benefits:

    • Hydration: Perfect for staying hydrated, especially on hot days.
    • Digestive Aid: Ginger helps with digestion and can relieve nausea.
    • Immune Boost: Lime provides vitamin C, supporting your immune system.

    Watermelon Ginger and Lime Juice is a fantastic way to stay cool, hydrated, and healthy. With its blend of sweet, tangy, and spicy flavors, it’s a delightful drink that’s easy to make and packed with benefits. Give this recipe a try and enjoy the refreshing taste of summer in a glass. Cheers to your health and happiness! 

  • Homemade Granola Bars – A Wholesome and Energizing Snack

    Homemade Granola Bars – A Wholesome and Energizing Snack

    Homemade Granola Bars – A Wholesome and Energizing Snack
    These Homemade Granola Bars are a fantastic way to fuel your day with nutritious ingredients like oats, nuts, seeds, and dried fruits. The addition of honey and banana not only provides natural sweetness but also helps bind the ingredients together to form a chewy, satisfying bar. Perfect for breakfast, as a snack, or an on-the-go energy booster, these granola bars offer a perfect balance of protein, fiber, and healthy fats to keep you feeling full and energized.

    Preparation Time
    Prep Time: 15 minutes
    Cooking Time: 30 minute
    Total Time: 45 minutes
    Servings: 12-16 bars
    Ingredients
    300g (3 cups) oat flakes (long cooking)
    130g (1/3 cup) honey
    1/2 teaspoon salt
    1 teaspoon vanilla extract
    1 banana (approx. 120g)
    150g dates (can be replaced with a second banana)
    50g dried apricots
    30g blueberries
    50g cranberries
    30g pumpkin seeds
    50g almonds
    100g walnuts
    20g macadamia nuts
    Baking Instructions
    Bake at 150°C (302°F) for 30 minutes
    Step-by-Step Instructions
    Step 1: Prepare the Nuts and Fruit
    Chop the Nuts: Chop the almonds, walnuts, and macadamia nuts into large pieces. Set them aside in a large bowl.
    Chop the Dried Fruits: Cut the dates, dried apricots, cranberries, and blueberries into small cubes. Add them to the same bowl with the nuts.
    Step 2: Prepare the Banana Base
    Mash the Banana: In a separate small bowl, mash the banana until smooth.
    Mix with Honey and Vanilla: Add the honey, vanilla extract, and salt to the mashed banana and mix well. This mixture will serve as the binding agent for the granola bars.
    Step 3: Mix the Dry Ingredients
    Add the Oats and Seeds: Pour the rolled oats and pumpkin seeds into the bowl with the chopped nuts and dried fruit. Stir until everything is evenly distributed.
    Combine with the Wet Ingredients: Gradually pour the banana-honey mixture over the oats, nuts, and dried fruits. Stir well to coat all the ingredients evenly.
    Step 4: Press into the Baking Pan
    Line a baking pan (18 cm x 26 cm) with parchment paper.
    Pour the mixture into the pan and press it down firmly with a spatula or your hands to ensure it’s compacted and even.
    Step 5: Bake
    Preheat your oven to 150°C (302°F) and bake the mixture for 30 minutes, or until the bars are golden and firm.
    Step 6: Cool and Slice
    Once baked, let the granola bars cool completely in the pan before cutting them into squares or rectangles.
    Serving Suggestions
    Quick Breakfast: Serve the granola bars as a quick breakfast with a cup of coffee or tea.
    Healthy Snack: Pack them as a healthy snack for a road trip or picnic.
    Energy Boost: Enjoy them as an energy boost before or after a workout.
    With Yogurt: Pair them with yogurt and fresh fruits for a complete snack.
    Smoothie Topping: Use the granola bars as a topping for smoothie bowls for added crunch and nutrition.
    Cooking Tips
    Binding: If the mixture feels too dry, add a little more mashed banana or honey to help it come together.
    Customize the Nuts: Feel free to substitute the nuts with your favorites, such as cashews or pecans.
    Sweetness Adjustment: If you prefer a sweeter bar, add a little extra honey or a handful of chocolate chips for an indulgent twist.
    Storage: Store the granola bars in an airtight container at room temperature for up to 1 week or refrigerate for longer shelf life.
    Nutritional Benefits
    Oats: Rich in fiber, oats help regulate blood sugar levels and provide long-lasting energy.
    Nuts and Seeds: Packed with healthy fats, protein, and fiber, the nuts and seeds provide a great source of nourishment and help keep you feeling full.
    Dried Fruits: Dried fruits, such as dates and apricots, are full of vitamins, minerals, and antioxidants, which support overall health.
    Honey and Banana: Both honey and banana provide natural sweetness along with potassium, vitamin C, and antioxidants.
    Storage
    Room Temperature: Store the granola bars in an airtight container for up to 1 week at room temperature.
    Freezing: To keep them fresh longer, you can freeze the bars. Wrap them individually in parchment paper and store in a freezer bag for up to 3 months. Thaw at room temperature before serving.
    Why You’ll Love This Recipe
    Healthy and Nutritious: Packed with fiber, protein, and healthy fats, these granola bars provide a nutritious snack or breakfast that will keep you energized.
    Customizable: Feel free to swap out nuts and dried fruits based on your preferences to create your ideal granola bar.
    Natural Sweetness: The combination of honey and banana gives these bars a natural, wholesome sweetness without the need for refined sugars.
    Easy to Make: This recipe is simple, requires minimal prep time, and can be made in just 45 minutes.
    5 Frequently Asked Questions
    1. Can I use a different type of fruit instead of banana?
    Yes, you can replace the banana with applesauce or yogurt for a different texture and flavor.

    2. Can I make these granola bars vegan?
    Yes, to make them vegan, simply substitute the honey with maple syrup or agave nectar, and use dairy-free yogurt if needed.

    3. How do I prevent the granola bars from falling apart?
    Be sure to compact the mixture well before baking and allow the bars to cool completely before cutting them into squares. This helps them hold together better.

    4. Can I add chocolate to these granola bars?
    Absolutely! You can stir in chocolate chips or melt dark chocolate to drizzle on top for a delicious twist.

    5. How long will these granola bars last?
    Stored in an airtight container, the granola bars will last for about 1 week at room temperature. For longer storage, refrigerate them or freeze for up to 3 months.

    These Homemade Granola Bars are the perfect blend of flavor, texture, and nutrition. Whether you’re looking for a quick breakfast, an on-the-go snack, or an energy-boosting treat, these bars will become a favorite in your kitchen! Enjoy!

  • Vibrant Beetroot, Carrot, and Cabbage Salad

    Vibrant Beetroot, Carrot, and Cabbage Salad

    Vibrant Beetroot, Carrot, and Cabbage Salad
    Introduction: A Rainbow of Flavor and Nutrition
    This colorful Beetroot, Carrot, and Cabbage Salad is a feast for both the eyes and the palate. Combining the earthy sweetness of beetroot, the crispness of cabbage, and the refreshing crunch of carrots, this salad delivers an explosion of flavors and textures. The addition of red beans provides protein and heartiness, transforming this from a simple side dish into a satisfying meal.

    Perfect for those looking to incorporate more vegetables into their diet, this vibrant salad is as nutritious as it is beautiful. The natural colors of the beetroot, carrot, and cabbage create a stunning presentation that’s sure to impress at any table, from casual family dinners to special occasions.

    Ingredients
    1/4 head of cabbage (about 250g/9oz)
    1 medium beetroot (about 150g/5.3oz), peeled
    1 large carrot (about 100g/3.5oz), peeled
    240g (8.5oz) red beans, cooked and drained
    1 medium onion (about 100g/3.5oz)
    3 tablespoons fresh parsley, chopped
    Juice of 1/2 lemon (about 2 tablespoons)
    50ml (1.7 fl oz) olive oil
    1/2 teaspoon salt, or to taste
    1/4 teaspoon freshly ground black pepper
    A pinch of sugar (optional)
    Instructions
    Preparing the Vegetables
    Prepare the cabbage: Remove the core from the cabbage quarter and thinly slice the leaves. Place in a large mixing bowl.
    Prepare the beetroot: Peel the beetroot and grate it using the large holes of a box grater or a food processor with a grating attachment. Add to the bowl with the cabbage.
    Prepare the carrot: Peel the carrot and grate it using the large holes of a box grater or a food processor. Add to the bowl.
    Prepare the onion: Peel and finely dice the onion. If you prefer a milder onion flavor, you can rinse the diced onion under cold water for a few seconds and pat dry before adding to the salad.
    Prepare the beans: Drain and rinse the cooked red beans if using canned. If cooking dried beans, ensure they are cooked until tender but not mushy.
    Assembling the Salad
    Combine vegetables and beans: Add the diced onion and drained red beans to the bowl with the grated vegetables.
    Add herbs: Chop the fresh parsley and add to the mixture.
    Make the dressing: In a small bowl, whisk together the lemon juice, olive oil, salt, black pepper, and a pinch of sugar if using.
    Dress the salad: Pour the dressing over the salad and toss gently until all ingredients are well coated.
    Rest and serve: For best flavor, allow the salad to rest for about 15-30 minutes before serving, giving the flavors time to meld. Toss once more before serving.
    Nutritional Information
    Per serving (recipe serves 4):

    Calories: 245 kcal
    Protein: 7g
    Carbohydrates: 20g
    Dietary Fiber: 6g
    Fat: 15g
    Saturated Fat: 2g
    Sodium: 310mg
    Potassium: 530mg
    Vitamin A: 70% DV
    Vitamin C: 45% DV
    Iron: 15% DV
    Calcium: 6% DV
    Timing:
    Prep Time: 15 minutes
    Resting Time: 15-30 minutes
    Total Time: 30-45 minutes
    Cooking Tips and Tricks
    Vegetable Preparation
    Beetroot staining: Beetroot will stain your hands and cutting board. Wear gloves if concerned about staining, and use a plastic or glass cutting board that won’t absorb the color.
    Grating options: For a different texture, you can dice the beetroot and carrot into small cubes instead of grating them.
    Cabbage technique: For the most tender cabbage, slice it as thinly as possible, almost like making coleslaw.
    Bean preparation: If using dried beans, soak them overnight and cook according to package directions until tender before adding to the salad.
    Flavor Enhancements
    Onion variations: For a milder onion flavor, use green onions or red onion soaked in cold water for 10 minutes.
    Herb options: While parsley is classic, you can experiment with dill, cilantro, or mint for different flavor profiles.
    Acidity balance: If your lemon is particularly tart, adjust with a bit more olive oil or a touch more sugar to balance the flavors.
    Spice additions: Add 1/2 teaspoon of caraway seeds or cumin for an aromatic twist that pairs beautifully with beetroot.
    Make-Ahead Tips
    Early preparation: This salad actually improves if made a few hours ahead, allowing the flavors to develop.
    Keeping it crisp: To maintain maximum crispness if preparing ahead, add the dressing just before serving.
    Storage: Keep in an airtight container in the refrigerator if not serving immediately.
    Variations and Substitutions
    Vegetable Swaps
    Cabbage options: Green cabbage can be replaced with red cabbage or savoy cabbage for different colors and textures.
    Root vegetable alternatives: Sweet potatoes, turnips, or kohlrabi can substitute for either the beetroot or carrot.
    Bean variations: Black beans, chickpeas, or white beans can replace the red beans based on preference or availability.
    Dietary Adaptations
    Vegan/Vegetarian: This salad is naturally vegan and vegetarian.
    Lower fat option: Reduce the olive oil to 2 tablespoons and increase the lemon juice slightly for a lighter dressing.
    Higher protein version: Add 100g of crumbled feta cheese or 150g of diced tofu to increase protein content.
    Flavor Variations
    Mediterranean twist: Add 50g of crumbled feta cheese, 10 halved kalamata olives, and 1 teaspoon of dried oregano.
    Asian-inspired: Replace the lemon juice with rice vinegar, add 1 tablespoon of soy sauce, and garnish with sesame seeds.
    Spicy kick: Add 1 finely chopped jalapeño or 1/2 teaspoon of red pepper flakes for heat.
    Sweetness boost: Add 1 diced apple or 50g of raisins for additional sweetness and texture.
    Serving Suggestions
    As a main dish: Serve over a bed of quinoa or brown rice for a complete meal.
    With protein: Pair with grilled chicken, baked tofu, or roasted salmon.
    In a wrap: Use as a filling for whole grain wraps with hummus spread.
    On a buffet: Offer alongside other salads and cold dishes for a colorful spread.
    Common FAQs
    1. Can I prepare this salad in advance?
    Answer: Yes, this salad actually benefits from being made a few hours ahead as the flavors have time to develop. It will keep well in the refrigerator for up to 2 days. If preparing more than a few hours ahead, you might want to add the dressing just before serving to maintain optimal crispness.

    2. How can I make the beetroot easier to handle?
    Answer: To prevent beetroot from staining your hands, wear kitchen gloves when handling it. You can also rub a little oil on your hands before handling beetroot to create a barrier that makes the color easier to wash off. Using a food processor with a grating attachment can also minimize direct contact.

    3. Can I use canned beetroot?
    Answer: While fresh beetroot provides the best flavor and texture, you can use canned beetroot in a pinch. Drain it well and pat dry before adding to the salad. Note that canned beetroot is usually softer and may not provide the same crisp texture as fresh.

    4. How can I make this salad more substantial for a main meal?
    Answer: To make this salad heartier, you can double the amount of beans, add 100g of cooked quinoa or barley, include 100g of diced firm tofu or tempeh, or top with 2 hard-boiled eggs per serving. Adding 50g of nuts or seeds (such as sunflower seeds or walnuts) also increases both nutrition and satiety.

    5. Is this salad suitable for meal prep?
    Answer: This is an excellent salad for meal prep, as the sturdy vegetables hold up well for several days. Prepare the salad and store it in airtight containers in the refrigerator for up to 3 days. You can either dress the entire salad ahead of time or keep the dressing separate in small containers and add just before eating.

    Storage and Make-Ahead Tips
    Refrigeration
    Storage container: Keep the salad in an airtight container to prevent it from absorbing other food odors and to maintain freshness.
    Storage duration: The dressed salad will keep well for 2-3 days in the refrigerator. The cabbage and beetroot may release more juice over time, which you can either drain off or mix back into the salad.
    Serving from refrigeration: Take the salad out of the refrigerator about 15 minutes before serving to take the chill off for better flavor.
    Component Preparation
    Pre-grate vegetables: Cabbage can be sliced and stored in a damp paper towel inside an airtight container for up to 3 days. Carrots can be grated 2-3 days ahead.
    Beetroot preparation: Beetroot oxidizes once grated, so it’s best to grate it no more than 24 hours in advance. Store it separately from other ingredients if preparing ahead.
    Make dressing ahead: The dressing can be prepared up to a week in advance and stored in a jar in the refrigerator. Bring to room temperature and shake well before using.
    Serving at Events
    Potluck presentation: If bringing to a potluck, consider layering the ingredients in a clear bowl for visual appeal, with the brightest (beetroot) at the bottom, then add the dressing and toss just before serving.
    Outdoor serving: This salad holds up well outdoors as it doesn’t contain ingredients that spoil quickly, but keep it in the shade and don’t leave it out for more than 2 hours in warm weather.
    This Beetroot, Carrot, and Cabbage Salad is not only a nutritional powerhouse but also a beautiful addition to any meal. The combination of crunchy vegetables, hearty beans, and zesty dressing creates a satisfying dish that can be enjoyed year-round. With its vibrant colors and robust flavors, it’s a wonderful way to incorporate more vegetables into your diet while delighting your taste buds.