Category: Recipes

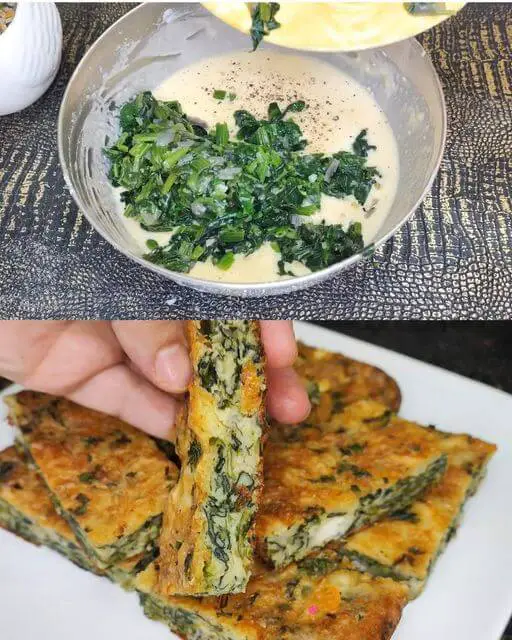
  • Spinach and Feta Egg Bake

    Spinach and Feta Egg Bake

    1f447

    Ingredients

      • 500 g spinach, fresh
      • 2 tablespoons olive oil (about 30 ml)
      • 1 red onion, chopped
      • 2 cloves of garlic, minced
      • 3 eggs
      • 120 ml milk
      • 150 g all-purpose flour
      • Salt and pepper to taste
      • Optional: 1 chili pepper, chopped (for a spicy kick)
      • 200 g Greek feta cheese, crumbled
      • 100 g grated mozzarella cheese
    • Fresh parsley, chopped for garnish

    Directions

      1. Preheat the Oven:
        • Preheat your oven to 180°C (356°F). Grease a baking dish with a little olive oil.
      1. Prepare the Spinach:
        • In a large pan, heat 2 tablespoons of olive oil over medium heat. Add the chopped red onion and sauté until translucent, about 3-4 minutes. Add the minced garlic and sauté for an additional minute until fragrant.
      2. Add the Spinach:
          • Add the fresh spinach to the pan and cook until wilted, about 3-5 minutes. If using, add the chopped chili pepper at this stage. Season with salt and pepper to taste.


      3. Mix the Batter:
        • In a mixing bowl, whisk together the eggs, milk, and flour until smooth. Season with salt and pepper.
      1. Combine Ingredients:
        • Fold the sautéed spinach mixture into the egg batter. Add the crumbled feta cheese and grated mozzarella, mixing until well combined.
      2. Bake:
          • Pour the mixture into the prepared baking dish. Bake in the preheated oven for 20 minutes or until the top is golden and set.


      3. Garnish and Serve:
        • Once baked, remove from the oven and let it cool for a few minutes. Garnish with fresh parsley before slicing and serving.

    Serving Suggestions

    • Serve warm or at room temperature, paired with a side salad or crusty bread for a complete meal.

    Cooking Tips

      • For a lighter version, you can use low-fat milk or a dairy-free alternative.
      • Feel free to add other vegetables like bell peppers or mushrooms for extra flavor and nutrition.

    Nutritional Benefits

      • Spinach is rich in vitamins A, C, and K, as well as iron and calcium.
      • Feta cheese provides protein and healthy fats, adding creaminess to the dish.
      • Eggs are an excellent source of protein and essential nutrients.

    Dietary Information

    • Dietary Restrictions: This dish is vegetarian and can be made gluten-free by substituting flour with a gluten-free flour blend.

    Nutritional Facts (per serving, based on 6 servings)

      • Calories: 190
      • Protein: 10g
      • Carbohydrates: 15g
      • Fat: 10g
      • Fiber: 2g
    • Sugar: 2g

    Storage

    • Store leftovers in an airtight container in the refrigerator for up to 3 days. Reheat in the oven or microwave before serving.

    Why You’ll Love This Recipe

      • Quick and easy to prepare with minimal clean-up.
    • Nutritious and satisfying, perfect for any meal.
    • Versatile recipe that can be customized with your favorite ingredients.
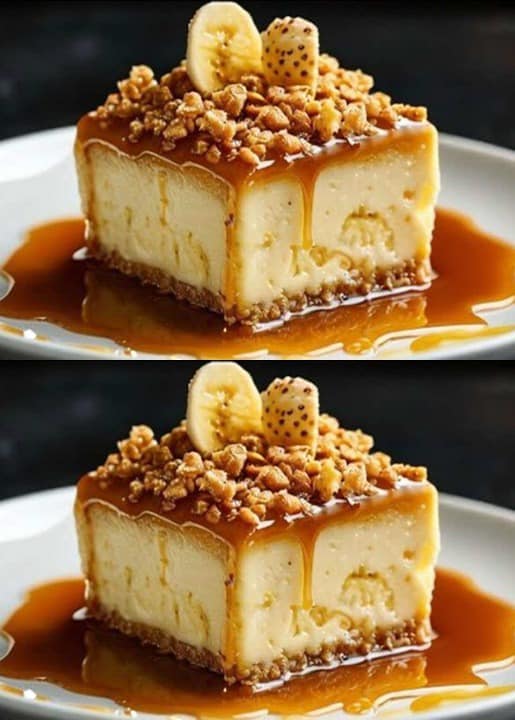
  • Just milk and banana! Delicious Italian dessert! You’ll lick your fingers!

    Just milk and banana! Delicious Italian dessert! You’ll lick your fingers!

    Just milk and banana! Delicious Italian dessert! You’ll lick your fingers!

    Discover how to prepare an irresistible Italian dessert with just two ingredients.

    Get ready to be amazed by an irresistible Italian dessert, made with just two simple ingredients: milk and banana!

    This delicious combination will win you over with every spoonful, providing a sweet and smooth experience that will have you licking your fingers!

    In this post, we will show you how to prepare this divine dessert quickly and easily, ideal for both a special dinner and for that moment of sweet pleasure in your everyday life.

    We will guide you step by step through the preparation and share some tips to make your creation even more refined.

    Don’t waste time and come fall in love with this irresistible temptation!

    Ingredients:

      • 3 bananas
      • 2 tablespoons of butter
      • 70 g sugar (for the banana)
      • 700 ml of milk
      • 150 g sugar (for the caramel)
    • 70 ml of water (to dissolve the gelatin)
    • 30 g unflavored gelatin powder

    Preparation method:

    In a pan, melt the butter and add the sliced ​​banana. Sauté, stirring constantly, until it begins to break down.

    Add the sugar and continue cooking until the banana breaks down completely.

    Transfer to a bowl and process with a mixer (or blender) until you obtain a smooth puree.

    Add the milk in two stages, mixing with a whisk until well incorporated. Set aside.

    Dissolve the unflavored gelatin powder in 70 ml of water, stirring until completely dissolved.

    Refrigerate for 5 minutes, then microwave for 30 seconds.

    Mix the dissolved gelatin into the banana cream with milk, stirring well. Set aside.

    Prepare the caramel:

    In a saucepan, melt the sugar over medium heat until it turns into a golden caramel.

    Pour the caramel into a glass baking dish (Marinex type), spreading it along the sides as well.

    Assembly:

    Pour the milk, banana and gelatin mixture over the caramel in the baking dish.

    Refrigerate for at least 5 hours, until completely set.

    Carefully unmold onto a plate.

    To serve, cut into slices or chunks and, if desired, garnish with crushed nuts and banana slices.

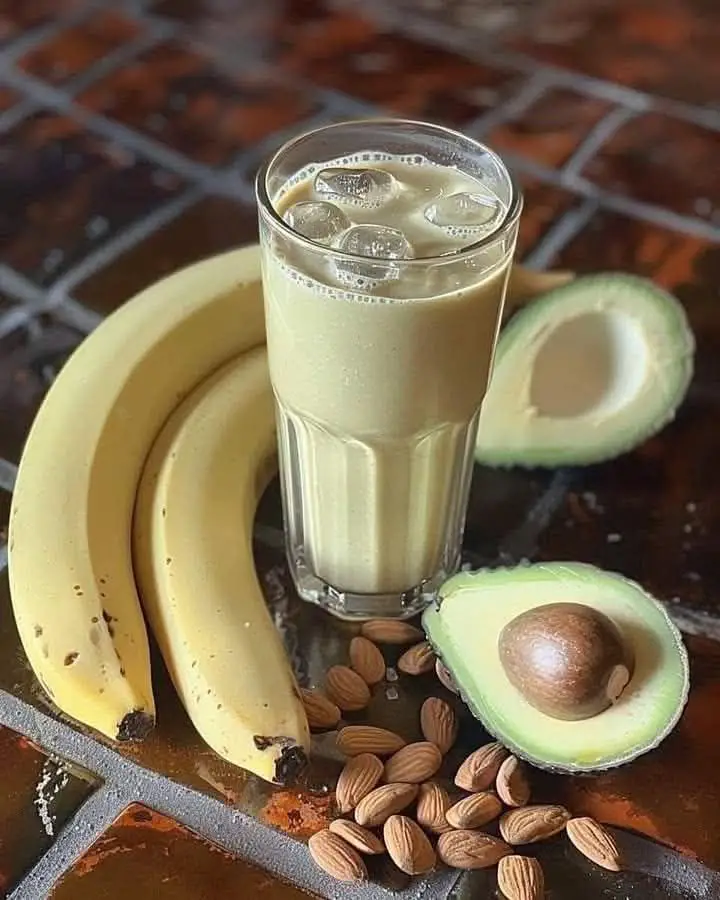
  • Banana Avocado Almond Smoothie Recipe

    Banana Avocado Almond Smoothie Recipe

    Banana Avocado Almond Smoothie Recipe

    Ingredients:

    • 1 ripe banana

    • 1/2 ripe avocado

    • 10–12 raw almonds (or 2 tablespoons almond butter)

    • 1 cup milk (dairy or non-dairy like almond, oat, or soy milk)

    • 1–2 teaspoons honey or maple syrup (optional, for sweetness)

    • 1/2 teaspoon vanilla extract (optional)

    • Ice cubes (4–5 or as desired)

    Instructions:

    1. Prep the ingredients:

      • Peel the banana and avocado.

      • If using raw almonds and a standard blender, soak them in warm water for at least 1–2 hours or overnight to soften (optional but recommended for smoother texture).

    2. Blend:

      • Add banana, avocado, almonds (or almond butter), milk, honey/maple syrup (if using), and vanilla extract into a blender.

      • Blend on high until smooth and creamy.

    3. Add ice:

      • Add ice cubes and blend again until the ice is crushed and well mixed.

    4. Serve:

      • Pour into a glass and enjoy immediately!


    This smoothie is creamy, energizing, and packed with healthy fats, fiber, and protein — perfect for breakfast or a post-workout snack.

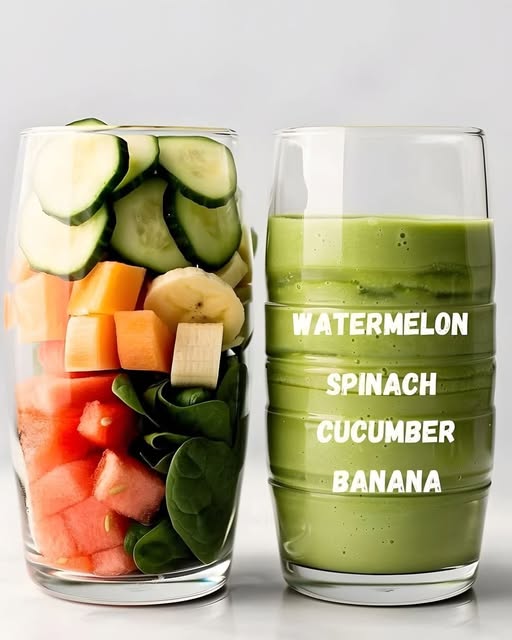
  • Green Smoothie Recipe

    Green Smoothie Recipe

    Green Smoothie Recipe

    Ingredients:

    • Watermelon (bottom layer, cubed)

    • Spinach (a handful)

    • Cantaloupe (cubed orange fruit)

    • Banana (sliced)

    • Cucumber (sliced)

    Instructions:

    1. Add the watermelon cubes to a blender.

    2. Add a handful of fresh spinach.

    3. Add cantaloupe cubes (roughly equal amount to the watermelon).

    4. Add slices of banana (about half to one banana).

    5. Add cucumber slices (a few rounds).

    6. Blend everything until smooth. Add water or ice if needed for consistency.

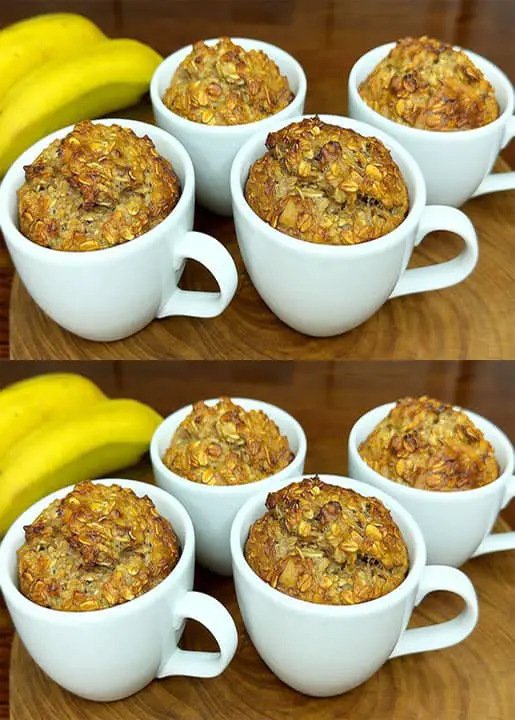
  • Use banana and oats! I haven’t eaten sugar in a year! No flour, no gluten and no sugar!A simple and delicious banana oatmeal dessert recipe made in a mug.

    Use banana and oats! I haven’t eaten sugar in a year! No flour, no gluten and no sugar!A simple and delicious banana oatmeal dessert recipe made in a mug.

    Use banana and oats! I haven’t eaten sugar in a year! No flour, no gluten and no sugar!A simple and delicious banana oatmeal dessert recipe made in a mug.

    Mug cake is a great option for breakfast or  an afternoon snack.  

    Practical to make, it can be prepared in just a few minutes with a variety of ingredients.

    So, we’re going to teach you how to make a healthy, yet delicious version, using oats, bananas and nuts.

    To add a sweet and refreshing touch to the dessert, we will make a cocoa topping and a decoration with fresh strawberries.

    Oatmeal, Banana and Walnut Mug Cake

    Healthy and delicious, these mug cakes help satisfy your hunger and sweet tooth without breaking your diet. They’re practical and easy to prepare!

    Ingredients:

      • 4 bananas
      • 1 egg
      • 1/3 cup (80 ml) milk
      • 1 cup (100 g) oats
    • 1 teaspoon baking powder for cake (Royal)
    • 1 pinch of salt
    • 1/2 teaspoon ground cinnamon
    • 1/3 cup chopped walnuts
    • 1 tablespoon unsweetened  cocoa
    • Strawberry to taste

    Preparation method:

    Mash two bananas well with a fork until they form a puree and place in a bowl. Set aside the other two bananas for the topping.

    Add the egg and milk to the mashed banana and mix well. Then add the oats, baking powder, a pinch of salt and cinnamon. Add the chopped walnuts and mix everything again.


    Grease 4 mugs with a little oil and pour the batter into them. Bake in a preheated oven at 180°C for 20 to 25 minutes, or until golden brown. After baking, remove the cakes from the mugs.

    For the topping, place the remaining two bananas and unsweetened cocoa in a blender and blend until smooth.

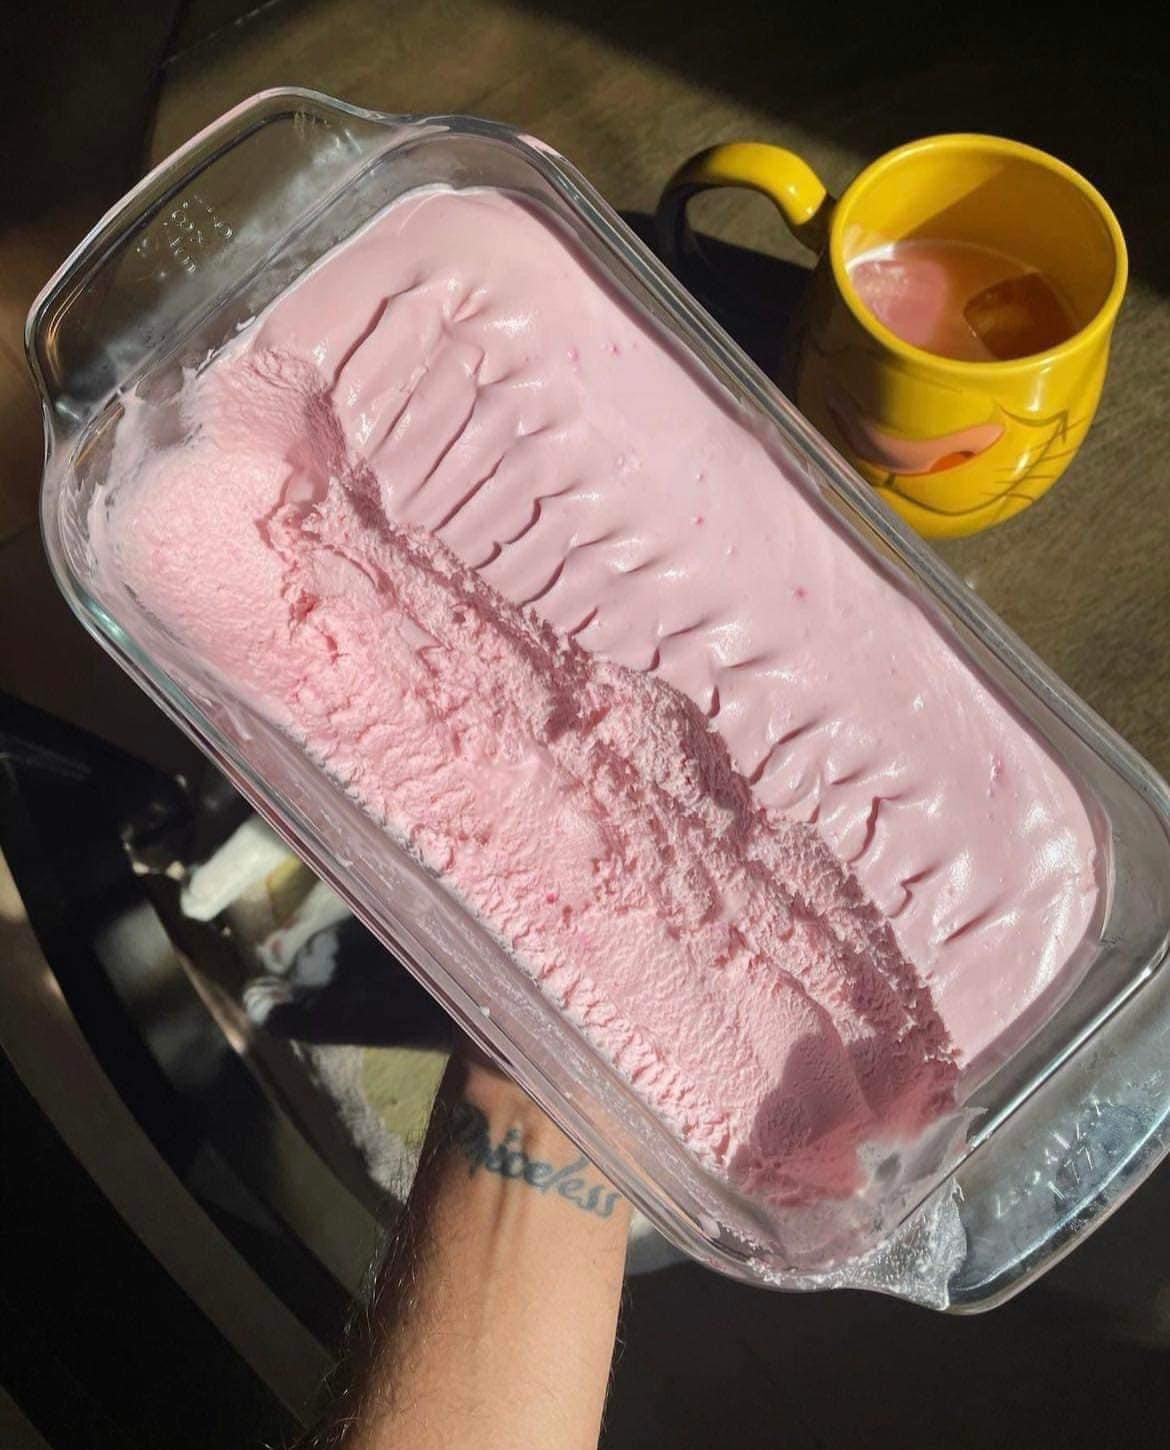
  • Homemade Strawberry Ice Cream (No-Churn)

    Homemade Strawberry Ice Cream (No-Churn)

    Homemade Strawberry Ice Cream (No-Churn)

    Ingredients:

    • 2 cups heavy whipping cream (cold)

    • 1 can (14 oz) sweetened condensed milk

    • 1½ cups fresh or frozen strawberries (hulled)

    • 1 tsp vanilla extract

    • Pinch of salt

    • Optional: a few drops of pink food coloring for a vibrant color

    Instructions:

    1. Prepare the strawberries:

      • In a blender or food processor, purée the strawberries until smooth. Optionally, strain to remove seeds.

      • Heat the purée in a saucepan over medium heat until it reduces slightly (about 10–15 minutes). This intensifies the flavor.

      • Let cool completely.

    2. Whip the cream:

      • In a large mixing bowl, beat the heavy cream with a mixer until stiff peaks form.

    3. Mix the base:

      • In another bowl, combine the sweetened condensed milk, cooled strawberry purée, vanilla extract, and salt.

      • Gently fold the whipped cream into the strawberry mixture until fully combined.

    4. Freeze:

      • Transfer the mixture into a loaf pan or airtight container.

      • Smooth the top, cover, and freeze for at least 6 hours or overnight.

    5. Serve:

      • Let sit at room temperature for 5 minutes before scooping. Enjoy!

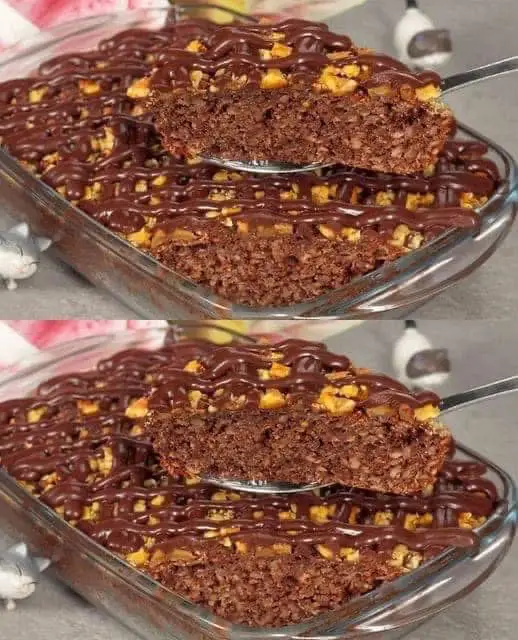
  • Gluten-Free Chocolate Oatmeal Banana Cake

    Gluten-Free Chocolate Oatmeal Banana Cake

    No flour, no sugar, no gluten—just wholesome goodness with bananas, oats, and cocoa!


    Why You’ll Love This Dessert

    • Naturally sweet: Bananas add natural sugar—no refined sugar needed.

    • Wholesome ingredients: Oats, eggs, bananas, and cocoa powder keep it simple and nutritious.

    • Gluten-free & flourless: Ideal for those with dietary restrictions.

    • Great texture: Soft, moist cake with a crunch from walnuts and a smooth finish of melted dark chocolate.

    • Perfect any time: Enjoy it as a healthy dessert, breakfast, or snack.


    Ingredients

    • 120 g oats (old-fashioned or quick oats work fine)

    • 250 ml warm milk (use dairy or plant-based milk like almond or oat)

    • 2 ripe bananas (the riper, the sweeter)

    • 2 large eggs

    • 45 g unsweetened cocoa powder (approx. 4 tablespoons)

    • 10 g baking powder (approx. 1 tablespoon)

    • 40 g walnuts, finely chopped (about 1/3 cup)

    • 75 g dark chocolate, melted (70% or higher recommended)


    Step-by-Step Instructions

    1. Soften the Oats

    In a large mixing bowl, combine:

    • 120 g oats

    • 250 ml warm milk

    Stir and let the mixture rest for 10 minutes so the oats soften and absorb the milk.

    2. Mash the Bananas

    While oats rest:

    • Peel and mash the 2 ripe bananas using a fork until smooth and creamy.

    Add the mashed bananas to the oat mixture and stir to combine.

    3. Add Cocoa Powder

    Mix in:

    • 45 g cocoa powder (4 tablespoons)

    Stir well until the cocoa is fully incorporated and the mixture looks chocolatey and uniform.

    4. Add Eggs and Baking Powder

    In a separate bowl:

    • Beat 2 eggs lightly.

    Then add to the chocolate oat mixture along with:

    • 10 g baking powder (1 tablespoon)

    Stir thoroughly to create a smooth, pourable batter.

    5. Prepare to Bake

    • Lightly grease a cake pan (8-inch round or similar size) with a bit of oil or line with parchment paper.

    • Pour the batter into the prepared pan and spread it evenly with a spatula.

    • Sprinkle 40 g chopped walnuts evenly over the top.

    6. Bake the Cake

    • Preheat oven to 180°C (350°F).

    • Bake for 35–40 minutes, or until a toothpick inserted into the center comes out mostly clean (a few moist crumbs are okay).

    7. Add the Chocolate Topping

    While the cake is still warm:

    • Melt 75 g dark chocolate using a microwave in 30-second intervals or in a double boiler.

    • Spread or drizzle the melted chocolate over the cake using a spoon or piping bag.

    Let the chocolate set slightly before slicing.


    ⏱️ Timing Summary

    • Prep Time: 10 minutes

    • Rest Time: 10 minutes

    • Cook Time: 40 minutes

    • Total Time: ~1 hour


    Serving Suggestions

    • Warm or chilled: Serve slightly warm for a gooey texture or chilled for a firmer bite.

    • With extras: Top with berries, Greek yogurt, or a dollop of nut butter for added richness.

    • Perfect for: Breakfast, dessert, or a post-workout snack.


    Tips & Variations

    • Milk options: Use oat, almond, or coconut milk for a dairy-free version.

    • Nut-free version: Skip the walnuts or use sunflower seeds or shredded coconut.

    • Add-ins: Consider mixing in a handful of raisins, dates, or chopped dried figs for extra natural sweetness.

    • Mini mug version: Make single portions in a mug and microwave for 2 minutes for a quick treat.


    Storage

    • Store in an airtight container at room temperature for 2 days, or in the refrigerator for up to 5 days.

    • To freeze: Wrap individual slices and freeze for up to 1 month. Defrost at room temperature or microwave before serving.


    Final Thoughts

    This Gluten-Free Chocolate Oatmeal Banana Cake is a wonderful, feel-good dessert that doesn’t compromise on taste or texture. Whether you’re avoiding gluten, cutting sugar, or simply want a nourishing sweet bite, this cake is a keeper. Naturally sweet, deeply chocolatey, and satisfying!

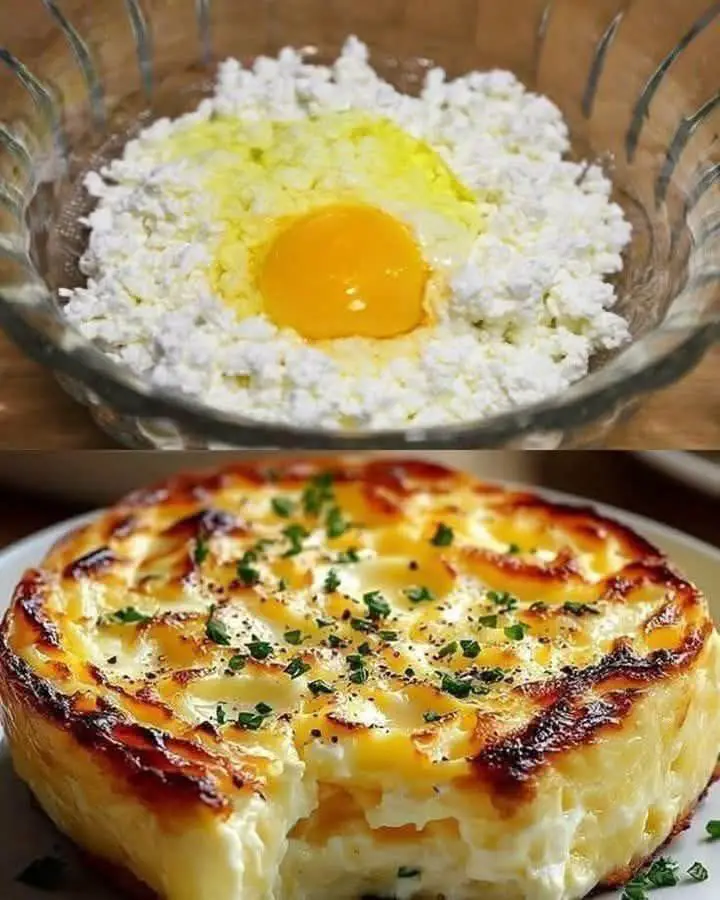
  • Cheesy Potato Casserole (with Cottage Cheese & Egg)

    Cheesy Potato Casserole (with Cottage Cheese & Egg)

    Cheesy Potato Casserole (with Cottage Cheese & Egg)

    Ingredients:

    • 4–5 medium potatoes, peeled and thinly sliced

    • 1 cup cottage cheese

    • 1 egg

    • 1 cup shredded mozzarella or cheddar cheese (optional for extra cheesiness)

    • 1/2 cup sour cream or heavy cream

    • Salt and pepper to taste

    • 1 tablespoon butter (for greasing)

    • Chopped fresh herbs (like parsley or chives) for garnish

    Instructions:

    1. Preheat Oven:

      • Preheat your oven to 375°F (190°C).

    2. Prepare Filling:

      • In a bowl, mix the cottage cheese with the egg. Add a pinch of salt and pepper. Optionally, stir in sour cream or shredded cheese for a richer taste.

    3. Layer the Casserole:

      • Grease a baking dish with butter.

      • Layer the sliced potatoes in the dish, overlapping slightly.

      • Spread a layer of the cheese and egg mixture over the potatoes.

      • Repeat the layers until all ingredients are used, finishing with the cheese mixture on top.

    4. Bake:

      • Cover the dish with foil and bake for 35–40 minutes.

      • Remove the foil and bake an additional 15–20 minutes, or until the top is golden and bubbly.

    5. Garnish and Serve:

      • Let it cool slightly, then garnish with chopped herbs.

      • Slice and serve warm.

  • Ham and Cheese Frittata Recipe

    Ham and Cheese Frittata Recipe

    Ham and Cheese Frittata Recipe

    Servings: 6-8
    Prep Time: 10 minutes
    Cook Time: 25-30 minutes
    Total Time: ~40 minutes


    Ingredients:

    • 8 large eggs

    • 1/2 cup milk (whole or 2%)

    • 1 cup cooked ham, diced

    • 1 cup shredded cheddar cheese

    • 1/2 cup shredded mozzarella cheese (optional)

    • 1/4 cup diced onion

    • 1 tablespoon butter or olive oil

    • Salt and pepper to taste

    • Fresh parsley, chopped (for garnish)


    Instructions:

    1. Preheat oven:
      Preheat your oven to 375°F (190°C).

    2. Prepare the pan:
      Grease an oven-safe skillet or baking dish with butter or olive oil.

    3. Sauté the onions:
      In the skillet over medium heat, melt the butter and sauté diced onions for 2-3 minutes until softened.

    4. Mix eggs and milk:
      In a large bowl, whisk together the eggs, milk, salt, and pepper until well combined.

    5. Add fillings:
      Stir in the diced ham, cheddar, mozzarella, and sautéed onions.

    6. Pour into skillet:
      Pour the egg mixture into the prepared skillet and spread it evenly.

    7. Bake:
      Bake in the preheated oven for 25-30 minutes, or until the eggs are set in the center and the top is golden.

    8. Garnish and serve:
      Let it cool slightly, then sprinkle with fresh parsley. Slice and serve warm

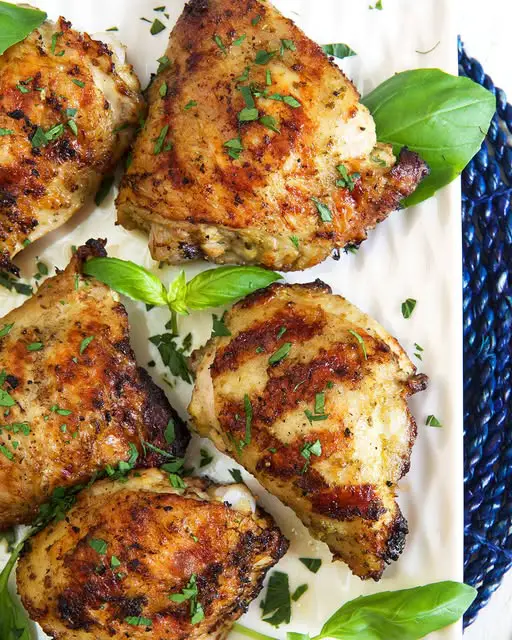
  • Grilled Chicken Thighs Recipe

    Grilled Chicken Thighs Recipe

    Grilled Chicken Thighs Recipe

    Ingredients:

    • 5–6 bone-in, skin-on chicken thighs

    • 3 tbsp olive oil

    • 3 garlic cloves, minced

    • 1 tbsp lemon juice

    • 1 tbsp fresh parsley, chopped (plus extra for garnish)

    • 1 tsp dried oregano

    • 1 tsp smoked paprika

    • 1/2 tsp salt

    • 1/2 tsp black pepper

    Instructions:

    1. Marinate the Chicken:

      • In a large bowl, whisk together olive oil, garlic, lemon juice, parsley, oregano, paprika, salt, and pepper.

      • Add the chicken thighs and coat them thoroughly with the marinade.

      • Cover and refrigerate for at least 30 minutes (ideally 2–4 hours for more flavor).

    2. Preheat the Grill:

      • Preheat your grill to medium-high heat (about 400°F/200°C).

    3. Grill the Chicken:

      • Place the chicken thighs skin-side down on the grill.

      • Cook for 6–7 minutes per side, or until the internal temperature reaches 165°F (74°C) and the skin is crispy and golden.

    4. Rest and Serve:

      • Let the chicken rest for 5 minutes after removing from the grill.

      • Garnish with chopped parsley or fresh basil leaves.

      • Serve hot with your favorite sides.

  • Crispy Potato Latkes (Fritters)

    Crispy Potato Latkes (Fritters)

    Crispy Potato Latkes (Fritters)

    Ingredients:

    • 4 large russet potatoes, peeled

    • 1 medium onion

    • 2 large eggs

    • 1/4 cup all-purpose flour (or matzo meal for a traditional version)

    • 1 tsp salt

    • 1/2 tsp black pepper

    • 1/2 tsp garlic powder (optional)

    • Vegetable oil for frying

    • Chopped chives or green onions (for garnish)

    For Dipping Sauce:

    • 1 cup sour cream or Greek yogurt

    • 1 tbsp chopped chives

    • Salt and pepper to taste

    • Optional: 1 tsp lemon juice or garlic powder for extra flavor


    Instructions:

    1. Prep the Potatoes and Onion:

      • Grate the potatoes and onion using a box grater or food processor.

      • Place the grated mixture in a cheesecloth or clean kitchen towel and squeeze out as much moisture as possible. This is key to crispy latkes.

    2. Mix the Batter:

      • In a large bowl, combine the drained potato-onion mixture with eggs, flour, salt, pepper, and garlic powder (if using).

      • Mix until evenly combined.

    3. Fry the Latkes:

      • Heat about 1/4 inch of vegetable oil in a large skillet over medium-high heat.

      • Scoop heaping tablespoons of the mixture into the pan, flattening slightly with a spatula.

      • Fry until golden brown and crisp, about 3-4 minutes per side.

      • Transfer to a paper towel-lined plate to drain.

    4. Make the Sauce:

      • In a small bowl, combine sour cream, chives, and seasoning. Chill until ready to serve.

    5. Serve:

      • Plate the latkes and garnish with additional chives.

      • Serve warm with the dipping sauce on the side.

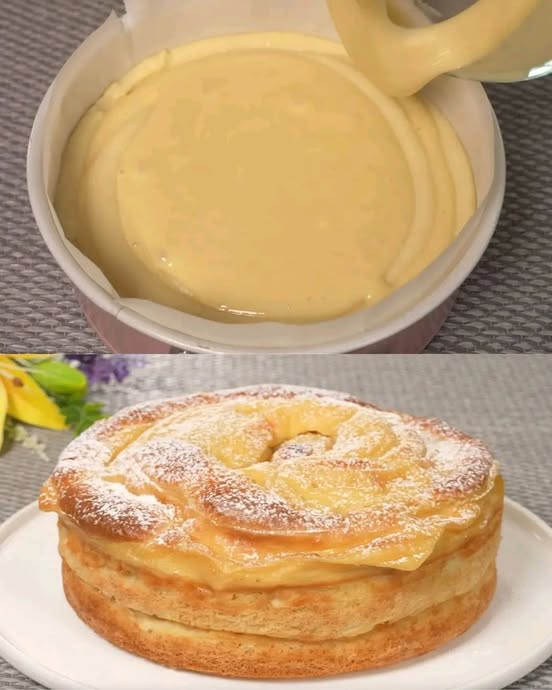
  • Vanilla Custard Apple Cake

    Vanilla Custard Apple Cake

    Vanilla Custard Apple Cake

    This delightful Vanilla Custard Apple Cake is the perfect harmony of creamy vanilla custard and moist apple cake. A timeless dessert, it’s great for family gatherings, holidays, or a sweet treat on any day.

    Preparation Time
    Prep Time: 20 minutes
    Cooking Time: 45 minutes
    Total Time: 1 hour, 5 minutes
    Servings: 8
    Calories per serving: ~290 kcal

    Ingredients

      • Vanilla Custard Layer:
          • 2 eggs
          • ¼ cup sugar (60 g)
          • 1.5 tablespoons cornstarch (30 g)
        • 2 cups milk (480 ml / 16 fl oz)
        • 1 teaspoon vanilla essence
      • Apple Cake Layer:
          • 3 eggs
          • ¾ cup sugar (150 g)
          • A pinch of salt
          • ⅔ cup sunflower oil (80 ml / 2.7 fl oz)
          • 2 cups flour (300 g)
          • 2 teaspoons baking powder
        • 2 apples, peeled and diced
        • 1 teaspoon powdered sugar (for decoration)

    Step-by-Step Instructions

    Step 1: Prepare the Vanilla Custard Layer

      • In a medium saucepan, whisk together the eggs and sugar until smooth.
      • Add the cornstarch, mixing well to ensure there are no lumps.
      • Gradually pour in the milk while whisking constantly.
      • Place the saucepan over medium heat, stirring continuously until the custard thickens (about 7-10 minutes).
    • Remove from heat, stir in the vanilla essence, and let cool slightly.

    Step 2: Prepare the Apple Cake Batter

      • Preheat your oven to 170°C (340°F). Grease and flour an 8- or 9-inch round baking pan.
      • In a large bowl, whisk the eggs, sugar, and salt until light and fluffy.
      • Gradually add the sunflower oil, whisking until fully incorporated.
      • In another bowl, sift together the flour and baking powder. Slowly fold the dry ingredients into the egg mixture until smooth.
    • Gently fold in the diced apples, ensuring even distribution.

    Step 3: Bake the Cake

      • Pour the apple cake batter into the prepared baking pan and smooth the surface.
    • Bake for 45 minutes or until a toothpick inserted into the center comes out clean.
    • Allow the cake to cool for 10-15 minutes before removing it from the pan.

    Step 4: Assemble and Decorate

    • Pour the cooled vanilla custard over the top of the cake, spreading it evenly with a spatula.
    • Dust with powdered sugar for decoration.

    Step 5: Serve

    • Slice and serve with fresh mint or an extra sprinkle of powdered sugar. Enjoy slightly warm or at room temperature.

    Serving Suggestions

      • Pair with a dollop of whipped cream or a scoop of vanilla ice cream.
    • Serve with a hot cup of tea or coffee for a cozy treat.

    Cooking Tips

      • Make sure the custard cools slightly before spreading it over the cake to prevent it from sliding off.
    • Use tart apples for a flavor contrast to the sweet cake and custard.
    • Do not overmix the batter to keep the cake soft and tender.

    Nutritional Benefits

      • Apples: High in fiber and vitamin C.
      • Eggs: Rich in protein and essential nutrients.
      • Milk: Provides calcium and vitamin D.

    Dietary Information

      • This recipe is vegetarian.
      • To make it dairy-free, substitute milk with almond or oat milk and use a dairy-free margarine.

    Nutritional Facts (per serving):

      • Calories: ~290 kcal
      • Protein: 6g
    • Carbs: 38g
    • Fat: 12g

    Storage

    • Store leftovers in an airtight container in the refrigerator for up to 3 days.
    • Reheat slices in the microwave for 10-15 seconds before serving.

    Why You’ll Love This Recipe

      • Combines the comforting flavors of vanilla and apples.
      • Perfect balance of creamy custard and fluffy cake.
      • Simple ingredients make it easy to prepare.
    • A versatile dessert for any season.

    Conclusion
    The Vanilla Custard Apple Cake is a true crowd-pleaser with its creamy custard layer and moist apple cake base. Whether served at a party or enjoyed as a midweek treat, this dessert is bound to impress. Give it a try and savor every bite!

  • Creamy corn cake recipe: no wheat flour and very moist

    Creamy corn cake recipe: no wheat flour and very moist

    Creamy corn cake recipe: no wheat flour and very moist

    Corn cake can be stored in a closed container for up to 3 days. You need to make this recipe!

    Today we are going to share with you a delicious and simple corn cake  recipe , ideal to accompany breakfast or serve as a tasty afternoon snack. 

    If you’re a fan of moist, aromatic cakes, you’ll love this version, which is easy to make and brings all the flavor of corn in an incredibly delicious way.

    Ingredients:

    • 3 eggs
    • 1 can of drained sweet corn
    • Half a can of oil (using the can of corn as a measure)
    • 1 can of sugar (using the can of corn as a measurement)
    • 1 can of milk (using the corn can as a measurement)
    • 1 and a half cans of cornmeal (using the corn can as a measurement)
    • 1 teaspoon baking powder

    Preparation method:


    1. Dough Preparation:
      • In a blender, add the eggs and drained corn. Blend for five minutes to crush the corn well.
      • Add the oil and continue beating.
      • Gradually add the sugar, milk and cornmeal, beating well after each addition until the batter is smooth.
      • Finally, add the yeast and beat quickly just to incorporate it into the mixture.
    2. Baking the Cake:


      • Grease a 20cm x 10cm pan with butter and sprinkle with cornmeal to prevent the cake from sticking.
      • Pour the mixture into the pan. The batter will be quite liquid, but this is normal for this recipe.
      • Bake in a preheated oven at 180°C for approximately 40 minutes, or until the cake is golden and a toothpick inserted into the center comes out clear
    3. Serving:
      • Let the cake cool a little before unmolding.
      • Cut into slices and serve with fresh coffee to enhance the flavors of the corn.
    Image: Reproduction

    Tips:

    • Variations: You can substitute cornmeal for corn flakes if you prefer a different texture.
    • Storage: Corn cake can be stored in a closed container for up to 3 days, maintaining its moisture and flavor.

    We hope you enjoyed this creamy corn cake recipe. It’s a wonderful option for those who like moist cakes with the authentic flavor of corn.

  • Low Carb Crustless Pizza Bowl – Your New Favorite Weeknight Dinner!

    Low Carb Crustless Pizza Bowl – Your New Favorite Weeknight Dinner!

    Low Carb Crustless Pizza Bowl – Your New Favorite Weeknight Dinner!

    Ingredients:

    1 tablespoon olive oil

    1/2 cup chopped onions

    1/2 cup chopped green bell peppers

    1 cup sliced mushrooms

    2 cloves garlic, minced

    1 pound ground beef or ground turkey

    1/2 teaspoon Italian seasoning

    Salt and pepper to taste

    1 cup low-carb marinara sauce (no sugar added)

    1 ½ cups shredded mozzarella cheese

    1/4 cup grated Parmesan cheese

    1/4 teaspoon crushed red pepper flakes (optional)

    Fresh basil or parsley, chopped (for garnish)

    Directions:

    Preheat Oven:

    Preheat your oven to 400°F (200°C) and prepare 2–3 oven-safe ramekins or small baking dishes.

    Sauté the Veggies:

    Heat olive oil in a large skillet over medium heat. Add onions, bell peppers, and mushrooms. Sauté for 4–5 minutes until softened. Stir in minced garlic and cook for 1 minute more.

    Cook the Meat:

    Push the veggies to one side of the skillet and add the ground beef or turkey. Season with Italian seasoning, salt, and pepper. Cook until browned and fully cooked through, breaking it up as it cooks. Drain excess fat if needed.

    Add Marinara:

    Stir in the marinara sauce and let the mixture simmer for 2–3 minutes to combine the flavors.

    Assemble the Pizza Bowls:

    Divide the meat and veggie mixture evenly into your ramekins. Top with shredded mozzarella, then sprinkle with Parmesan and crushed red pepper flakes if using.

    Bake:

    Place the ramekins on a baking sheet and bake for 10–12 minutes, or until the cheese is melted and bubbly with golden spots.

    Garnish and Serve:

    Remove from the oven, let cool slightly, then garnish with fresh basil or parsley. Serve hot and dig into your guilt-free pizza bowl!

    Nutritional Information:

    Prep Time: 10 minutes | Cooking Time: 20 minutes | Total Time: 30 minutes

    Kcal: ~320 kcal per serving | Servings: 3 bowls

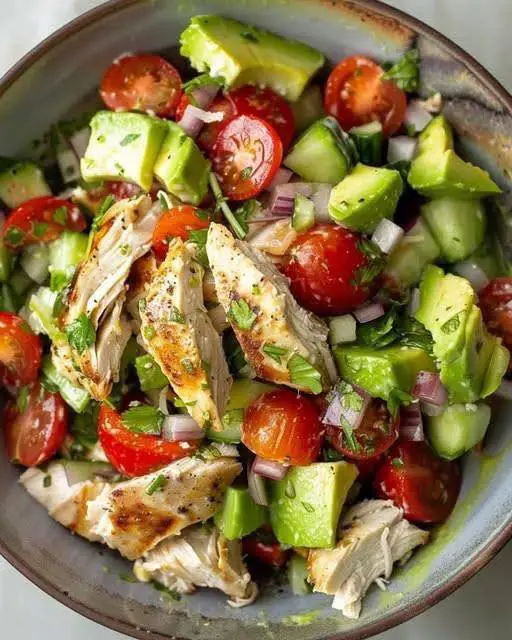
  • Healthy Avocado Chicken Salad

    Healthy Avocado Chicken Salad

    Healthy Avocado Chicken Salad

    Ingredients:

    2 cups cooked chicken breast, shredded or diced (you can use rotisserie chicken for convenience)

    1 ripe avocado, mashed

    1 tablespoon lime juice (or lemon juice)

    1/4 cup Greek yogurt (plain)

    1/4 cup red onion, finely chopped

    1/2 cup cherry tomatoes, halved

    1/2 cup cucumber, diced

    1/4 cup fresh cilantro or parsley, chopped (optional)

    Salt and pepper to taste

    Optional: 1/4 teaspoon garlic powder or minced garlic for extra flavor

    Instructions:

    Prepare the Chicken:

    If you haven’t already, cook and shred or dice the chicken breast. You can poach, grill, or bake it.

    Make the Dressing:

    In a large bowl, combine the mashed avocado, lime juice, and Greek yogurt. Mix until smooth and creamy. If using, add garlic powder or minced garlic for extra flavor.

    Combine Ingredients:

    Add the shredded chicken, red onion, cherry tomatoes, cucumber, and cilantro (if using) to the bowl with the avocado dressing. Gently mix until everything is well coated.

    Season:

    Season with salt and pepper to taste. Adjust lime juice if needed for extra tanginess.

    Serve:

    Serve the avocado chicken salad on a bed of greens, in a wrap, or on whole-grain bread as a sandwich. It can also be enjoyed on its own!

    Store:

    If you have leftovers, store them in an airtight container in the refrigerator for up to 2 days. Note that the avocado may brown slightly, but it will still be delicious!