Category: Recipes

  • Whole Wheat Bread Recipe

    Whole Wheat Bread Recipe

    Whole Wheat Bread Recipe

    This Whole Wheat Bread is a wholesome, hearty, and healthy option perfect for sandwiches, toast, or enjoying on its own. Made with a combination of bread flour and whole wheat flour, it’s soft, flavorful, and easy to make at home.

    Preparation Time

      • Prep Time: 20 minutes
      • Resting Time: 1-2 hours
      • Cook Time: 30-35 minutes
      • Total Time: 2 hours 55 minutes

    Ingredients

      • Water: 1 cup (230 ml), warm
      • Fresh yeast: ¾ tsp. (3 g) or dry yeast: ½ tsp. (2 g)
      • (Optional) Sugar: 1 tsp. (4 g)
      • Bread flour: 1 ½ cups (220 g)
      • Whole wheat flour: ¾ cup (100 g)
    • Salt: 1 tsp. (6 g)

    Directions

      1. Activate the Yeast:
          • In a small bowl, combine warm water, yeast, and sugar (if using).
        • Stir gently and let sit for 5-10 minutes until frothy.
      2. Mix the Dough:
          • In a large mixing bowl, combine bread flour, whole wheat flour, and salt.
        • Create a well in the center and pour in the yeast mixture.
        • Mix until the dough starts to come together.
      1. Knead the Dough:
        • Transfer the dough onto a floured surface and knead for about 8-10 minutes until smooth and elastic.
        • Alternatively, use a stand mixer with a dough hook attachment for 5-7 minutes.
    1. First Rise:
      • Place the dough in a lightly oiled bowl, cover with a damp cloth, and let it rise in a warm place for 1-1.5 hours, or until doubled in size.
    2. Shape the Dough:
        • Punch down the risen dough and shape it into a loaf or rolls as desired.
      • Place the shaped dough into a greased loaf pan or onto a baking tray lined with parchment paper.
    3. Second Rise:
        • Cover the shaped dough and let it rise for another 30-45 minutes until slightly puffy.
    4. Bake the Bread:
        • Preheat your oven to 375°F (190°C).
        • Bake the bread for 30-35 minutes, or until the top is golden brown and the bread sounds hollow when tapped.
    5. Cool and Serve:
        • Remove the bread from the oven and let it cool in the pan for 5-10 minutes.
        • Transfer to a wire rack to cool completely before slicing.

    Serving Sugeestions

      • Pair with butter, jam, or honey for a simple breakfast.
    • Use as a base for sandwiches, paninis, or avocado toast.
    • Serve alongside soups, stews, or salads.

    Cooking Tips

      • Use a kitchen thermometer to ensure your water is warm but not hot (around 105°F to 110°F).
      • Add a drizzle of olive oil for extra flavor and softness in the dough.
      • For a crispy crust, place a pan of water in the oven while baking.

    Nutritional Benefits

      • Whole Wheat Flour: High in fiber, vitamins, and minerals.
      • Yeast: Provides small amounts of protein and B vitamins.
    • Bread Flour: Offers a higher protein content for better structure and texture.

    Dietary Information

      • Vegetarian: Yes
    • Vegan: Yes (if no honey is used)
    • Dairy-Free: Yes

    Nutritional Facts (Per Slice)

      • Calories: ~130
      • Carbohydrates: ~25 g
      • Protein: ~4 g
    • Fat: ~1 g
    • Fiber: ~3 g

    Storage

    • Room Temperature: Store in an airtight container or bread box for 2-3 days.
    • Freezer: Wrap tightly and freeze for up to 2 months. Thaw at room temperature before serving.

    Why You’ll Love This Recipe

      • Made with wholesome ingredients for a nutritious boost.
      • Easy to customize with seeds, nuts, or herbs.
      • Soft, fluffy interior with a slightly crisp crust.
    • Versatile for any meal of the day.

    Conclusion
    This Whole Wheat Bread is a delightful combination of taste and nutrition, making it a must-try for any home baker. Perfect for beginners or seasoned bakers alike, this recipe ensures a successful and satisfying loaf every time. Once you taste the difference of homemade bread, you’ll never look back!

  • Cheesecake Stuffed Banana Bread

    Cheesecake Stuffed Banana Bread

    Ingredients

    For the Banana Bread:

    • 2 to 3 ripe bananas, mashed
    • 1/3 cup melted butter
    • 3/4 cup sugar
    • 1 large egg, beaten
    • 1 teaspoon vanilla extract
    • 1 teaspoon baking soda
    • A pinch of salt
    • 1 1/2 cups all-purpose flour

    For the Cheesecake Filling:

    • 8 oz (225 g) cream cheese, softened
    • 1/4 cup sugar
    • 1 large egg
    • 1 teaspoon vanilla extract

    Optional Toppings:

    • Banana slices
    • Chocolate spread or Nutella (to swirl, optional)

    Preparation

    Preheat the Oven:

    • Preheat your oven to 350°F (175°C). Butter and flour a 9×5-inch loaf pan.

    Prepare the Banana Bread Batter:

    1. In a mixing bowl, mash the ripe bananas with a fork until smooth.
    2. Stir in the melted butter into the mashed bananas.
    3. Mix in the sugar, beaten egg, and vanilla extract.
    4. Sprinkle the baking soda and salt over the mixture, then mix in the flour until just combined. Set aside.

    Prepare the Cheesecake Filling:

    1. In another mixing bowl, beat the softened cream cheese with sugar until smooth.
    2. Add the egg and vanilla extract, and continue beating until well combined and creamy.

    Assemble the Bread:

    1. Pour half of the banana bread batter into the prepared loaf pan.
    2. Spread the cheesecake filling over the layer of banana bread batter.
    3. Pour the remaining banana bread batter over the cheesecake filling.
    4. Optional: Drop spoonfuls of chocolate spread or Nutella on top and use a knife to swirl it into the batter.
    5. Arrange banana slices on top for decoration.

    Bake:

    • Bake in the preheated oven for 50 to 60 minutes, or until a toothpick inserted into the center comes out clean.
    • If the top starts to brown too quickly, cover it loosely with aluminum foil.

    Cool and Serve:

    1. Let the banana bread cool in the pan for 10 minutes before transferring it to a wire rack to cool completely.
    2. Slice and enjoy!

    Banana bread layered with creamy cheesecake makes a delicious side dish or parfait for a small meal or dessert. Enjoy!

  • The easiest cookie recipe

    The easiest cookie recipe

    Ingredients

    2 ½ cups all-purpose flour

    1 teaspoon baking soda

    1/2 teaspoon salt

    1 cup (2 sticks) unsalted butter

    3/4 cup granulated sugar

    3/4 cup packed brown sugar

    2 large eggs

    1 teaspoon vanilla extract

    Preparation

    Preheat the oven to 350°F (175°C), and use parchment paper or slightly grease the baking sheets.

    Cream the softened butter, granulated sugar, and brown sugar until light and fluffy in a large mixing bowl.

    Beat the eggs one after another until they are combined well. Stir in vanilla extract.

    Whisk together all-purpose flour, baking soda, and salt in a separate bowl

    Gradually add dry ingredients into wet ones to make sure that it is just mixed. Be careful not rto overmix.

    Carefully stir through semisweet chocolate chips so that they are distributed throughout the dough evenly.

    Using either a spoon or a cookie scoop, drop rounded tablespoons of dough onto prepared baking sheets, spacing them about 2 inches apart from each other,

    Place on preheated oven for 10-12 minutes or until cookies become golden brown on edges

    Cool on baking sheets for few minutes before transferring to wire racks to cool completely

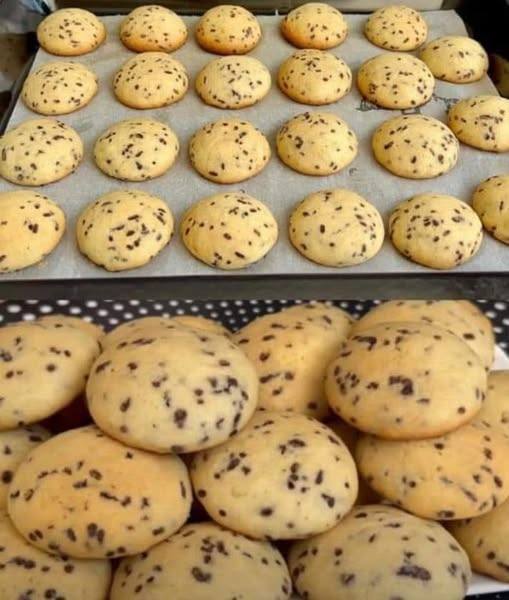
    With your favorite drink or a glass of milk enjoy these delightful homemade choco chip cookies!

    These are ideal biscuits for sharing with loved ones as well as satisfy sweet desires of any individual. Enjoy!

  • I typically create around 500 of these at birthday celebrations

    I typically create around 500 of these at birthday celebrations

    These soft and tasty nougat bars are very simple to make using only four basic ingredients. An ideal snack for any event!

    Ingredients

    Amount of Ingredients
    Small marshmallows 2 bundles
    Two tablespoons of melted butter.
    Pieces of white chocolate 2 bundles
    Red and green candy drops One and a half cups

    Preparation

    Make Marshmallow Mix: Mix marshmallows and melted butter in a bowl that can be used in the microwave. Heat in the microwave for 1-2 minutes, stirring until it is smooth.
    Melt white chocolate: Put white chocolate chips in a bowl that can go in the microwave. Heat for 30 seconds at a time, stirring until it is smooth.
    Mix the ingredients together. Pour melted white chocolate on top of the marshmallow mixture. Mix until everything is well blended. Mix in pieces of gumdrops.

    Bar forms: Put the mixture into a baking dish lined with parchment paper. Press down evenly.
    Cool down and slice: Put in the refrigerator for 1-2 hours. Cut into bars and eat!

  • Irresistible Rotel Cream Cheese Sausage Balls

    Irresistible Rotel Cream Cheese Sausage Balls

    Ingredients

    1 lb ground sausage (your choice of mild or spicy)

    1 (10 oz) can Rotel diced tomatoes and green chilies, drained

    8 oz cream cheese, softened

    2 cups shredded cheddar cheese

    1 ½ cups all-purpose flour

    1 tsp baking powder

    1 tsp garlic powder

    ½ tsp onion powder

    ½ tsp salt

    ½ tsp black pepper

    ½ tsp cayenne pepper (optional for heat)

    1 cup shredded cheese for topping (optional)

    Preparation

    Preheat the Oven: Preheat your oven to 350°F (175°C).

    Mix Ingredients: In a large mixing bowl, combine the ground sausage, cream cheese, and drained Rotel. Mix until well combined.

    Add Dry Ingredients: In a separate bowl, whisk together the flour, baking powder, garlic powder, onion powder, salt, black pepper, and cayenne pepper. Gradually add the dry mixture to the sausage mixture, stirring until fully incorporated. Then fold in the shredded cheddar cheese.

    Shape the Balls: Use your hands to form the mixture into small balls, about 1 inch in diameter. Place them on a greased or lined baking sheet.

    Bake: Bake in the preheated oven for 20-25 minutes, or until the sausage balls are golden brown and cooked through. If using, sprinkle the additional shredded cheese on top during the last 5 minutes of baking.

    Serve: Let them cool slightly before serving. Enjoy warm!

    Tips

    Storage: Leftovers can be stored in an airtight container in the fridge for up to 3 days or frozen for longer storage.

    Serving Ideas: These are great as appetizers, snacks, or even breakfast bites. Serve with a side of ranch or your favorite dipping sauce!

    Enjoy your delicious sausage balls!

    Enjoy!

  • FROZEN FRUIT SALAD

    FROZEN FRUIT SALAD

    This vintage recipe comes straight from my great-grandma’s recipe box. It is a fun twist on marshmallow fruit salad, but even more fun because it is frozen!

    It is perfect for holidays or as a refreshing summer side dish. Frozen fruit salad could even be a light dessert.

    This recipe is still a staple at my family holidays.  My Aunt Jenny usually makes it now and it is present at every Easter, Thanksgiving and Christmas.

    Ingredients

    • 8 ounces cream cheese, softened
    •             2 cups whipped topping, plus more for serving
    •             1 pint Strawberries, diced
    •             2 large bananas, chopped and diced
    •             20 ounces crushed pineapple, drained

    Preparation

    In a mixing bowl combine the cream cheese and the strawberries

    Fold in the crushed pineapple and the chopped or diced bananas and the whipped topping into the cream cheese mixture

    SECOND STEP:

    Spread evenly in a 9×13 baking pan

    THIRD STEP:

    Place into the freezer  until the dessert hardens

    When ready to serve, allow to sit on the counter for 10 minutes. Dip a knife into hot water and slice the frozen dessert

    Enjoy!

  • No-Bake Mini Chocolate Cheesecakes

    No-Bake Mini Chocolate Cheesecakes

    Yields: 10-12 mini cheesecakes
    Prep time: 30 minutes
    Chill time: 30 minutes (freezer) or 60 minutes (fridge) or longer
    Ingredients
    Oreo Crust
    27 Oreos
    6 Tablespoons Butter, melted
    Chocolate Cheesecake
    3/4 Cup Heavy Cream
    10 Ounces Cream Cheese, softened
    3/4 Cup Powdered Sugar
    1/3 Cup Sour Cream
    6 Ounces Semi-Sweet Chocolate, melted
    1/3 Cup Chocolate Chips, melted (some melted chocolate is used in the filling)
    For Serving / Decorating
    1/3 Cup Chocolate Chips, melted (for drizzling)
    Fresh Strawberries
    Instructions
    Oreo Crust
    Crush the Oreos: Crush the Oreo cookies in a food processor until they are finely ground.
    Combine with Butter: Stir the crushed cookies and melted butter together until well combined.
    Prepare Muffin Pan: Line a muffin pan with a sheet of plastic wrap (or 2). This makes it easier to remove the cheesecakes later.
    Form the Crust: Spoon the Oreo mixture evenly into the muffin pan wells to get 10-12 total.
    Press Down: Press down with your fingers to cover the base and about 1/3 to 1/2 up the sides of each well.
    Chill the Crust: Place the muffin pan in the freezer to harden the crust while you make the filling.
    Chocolate Cheesecake
    Whip Heavy Cream: Whip the heavy cream in a bowl until stiff peaks form.
    Beat Cream Cheese and Sugar: In a separate bowl, beat together the softened cream cheese and powdered sugar until smooth and creamy.
    Add Sour Cream and Chocolate: Beat in the sour cream and melted chocolate (6 ounces) until well combined.
    Fold in Whipped Cream: Turn off the mixer and carefully fold in the whipped heavy cream until just combined. Be gentle so you don’t deflate the whipped cream.
    Fill the Crusts: Spoon the cream cheese mixture into each Oreo crust. Alternatively, you can spoon the batter into a piping bag and pipe the cheesecake filling into each crust for a neater presentation.
    Chill the Cheesecakes: Place the muffin pan in the freezer to chill for at least 30 minutes, or in the fridge for at least 60 minutes (or longer). This allows the cheesecakes to set.
    Remove from Pan: Carefully lift the plastic wrap up to release the cheesecakes from the muffin pan.
    For Serving / Decorating
    Drizzle with Chocolate: Drizzle the melted chocolate chips (1/3 cup) over the cheesecakes.
    Garnish: Garnish with fresh strawberries.
    Notes
    Cheesecake can be stored in an airtight container in the fridge
  • Indulgent Goodness: Homemade Sugar-Free Energy Bars

    Indulgent Goodness: Homemade Sugar-Free Energy Bars

    Indulgent Goodness: Homemade Sugar-Free Energy Bars

    Elevate your snacking game with our Homemade Sugar-Free Energy Bars! These bars are a nutritious and delicious treat, packed with wholesome ingredients like oats, nuts, dried fruits, and a decadent dark chocolate topping. Whether you need a quick breakfast on the go, a satisfying post-workout snack, or a guilt-free indulgence, these energy bars are sure to hit the spot.

    Preparation Time:

    Preparation time for these Homemade Sugar-Free Energy Bars is approximately 15 minutes, with an additional baking and chilling time of about 50-60 minutes.

    Ingredients:

      • 1 cup (80g) rolled oats
      • 3/4 cup (100g) raisins
      • 3/4 cup (80g) walnuts, roughly chopped
      • 100g (3.5 oz) dried apricots, chopped
      • 1 medium ripe banana, mashed
      • 100g (3.5 oz) dark chocolate (without added sugar), chopped
      • 1 teaspoon coconut oil (or oil of your choice)

    Ingredients:

      • 1 cup (80g) rolled oats
      • 3/4 cup (100g) raisins
      • 3/4 cup (80g) walnuts, roughly chopped
      • 100g (3.5 oz) dried apricots, chopped
      • 1 medium ripe banana, mashed
      • 100g (3.5 oz) dark chocolate (without added sugar), chopped
    • 1 teaspoon coconut oil (or oil of your choice)

    Instructions:

    Preheat the Oven:

      1. Preheat your oven to 180°C (360°F). Line a baking dish or tray with parchment paper.

    Mix the Ingredients:

      1. In a large mixing bowl, combine the rolled oats, raisins, walnuts, and dried apricots.
      2. Stir in the mashed banana until everything is well mixed and the mixture starts to stick together.

    Form the Bars:

    1. Transfer the mixture to the prepared baking dish. Press it down firmly into an even layer to help the bars stick together after baking.

    Bake:

    1. Place the baking dish in the preheated oven and bake for 20 minutes, or until the edges start to turn golden brown.

    Prepare the Chocolate Topping:

      1. While the bars are baking, melt the dark chocolate with the coconut oil. You can do this in a microwave in short bursts of 20 seconds, stirring in between, or use a double boiler on the stove.

    Add Chocolate Layer:

    1. Once the bars are done, remove them from the oven and while still warm, pour the melted chocolate over the top, spreading it out to cover the surface evenly.

    Refrigerate:

    1. Allow the chocolate to set at room temperature, then place the bars in the refrigerator for 20-30 minutes to firm up the chocolate and make the bars easier to cut.

    Cut and Serve:

      1. Once chilled, remove the bars from the refrigerator and lift them out of the dish using the edges of the parchment paper.
    1. Cut into desired sizes and shapes.

    Storage:

      1. Store the bars in an airtight container in the refrigerator. They can also be wrapped individually for on-the-go snacks.

    Tips:

      • Use ripe bananas for natural sweetness and proper binding.
      • Customize with your favorite nuts and dried fruits.
    • Toast oats and nuts for a crunchier texture if desired.

    Serving Suggestions:

    Enjoy these Homemade Sugar-Free Energy Bars as a quick breakfast option, a midday snack, or a post-workout refuel. Pair them with a cup of tea or coffee for a satisfying treat.

    Cooking Tips:

      • Ensure the banana is ripe for natural sweetness and better binding of the ingredients.
      • Customize the bars with your favorite nuts, dried fruits, or seeds for added texture and flavor.
    • Press the mixture firmly into the baking dish to create cohesive bars.

    Nutritional Benefits:

    These energy bars offer a range of nutritional benefits:

      • Oats provide complex carbohydrates and fiber, promoting sustained energy.
      • Walnuts are rich in omega-3 fatty acids, antioxidants, and minerals like copper and manganese.
      • Dried fruits like raisins and apricots add natural sweetness and vitamins.
    • Dark chocolate (without added sugar) contains antioxidants and may support heart health.

    Dietary Information:

      • Sugar-Free: Ideal for those looking to reduce their sugar intake.
    • Vegan-Friendly: Suitable for vegans when using dairy-free dark chocolate.
    • Gluten-Free: Naturally gluten-free if using certified gluten-free oats.

    Why You’ll Love This Recipe:

      1. Healthy Ingredients: Packed with nutrient-rich ingredients, these bars offer a wholesome snack option.
      2. Customizable: Customize the bars with your favorite flavors and textures.
      3. Convenient: Perfect for on-the-go snacking or as a quick breakfast option.
    1. Satisfying: The combination of oats, nuts, fruits, and chocolate provides a satisfying and indulgent treat.

    Conclusion: These Homemade Sugar-Free Energy Bars are a delicious and nutritious snack that’s easy to make and perfect for any time of day. With their natural sweetness, satisfying crunch, and wholesome ingredients, they’re sure to become a favorite in your snacking repertoire. Enjoy the goodness of homemade treats without the added sugar and revel in the energy-boosting benefits of these delightful bars!

  • The Lightest Blueberry Cheese Cake

    The Lightest Blueberry Cheese Cake

    The Lightest Blueberry Cheese Cake

    Discover the lightest cake in the world! This delightful blueberry cheese cake is incredibly easy to make and melts in your mouth with every bite. Perfect for any occasion, this cake combines a light and fluffy batter with a creamy cheese filling, topped with juicy blueberries. It’s a crowd-pleaser that’s sure to impress your family and friends.

    Ingredients:

    Cake Batter:

      • 2 eggs
      • A pinch of salt
      • 80g sugar
      • Vanilla flavor
      • 100ml seed oil
      • 100ml milk
    • 200g flour
    • 12g baking powder

    Cheese Filling:

      • 150g fresh cheese (cream cheese or ricotta)
      • 20g sugar
      • 1 egg
    • Vanilla flavor
    • Blueberries (to taste)

    Directions:

    Prepare the Cake Batter:

      1. Preheat your oven to 180°C (350°F). Grease and flour a baking pan.
      2. In a large bowl, beat the 2 eggs with a pinch of salt until frothy.
      1. Add 80g of sugar and vanilla flavor, and continue to beat until the mixture is light and fluffy.
      2. Gradually add 100ml of seed oil and 100ml of milk, mixing well after each addition.
      3. Sift together 200g of flour and 12g of baking powder. Gradually add the dry ingredients to the wet mixture, stirring gently until you get a smooth batter.

    Prepare the Cheese Filling:

    1. In a separate bowl, combine 150g of fresh cheese, 20g of sugar, 1 egg, and vanilla flavor. Mix until smooth and well combined.

    Assemble the Cake:

      1. Pour half of the cake batter into the prepared baking pan.
      2. Add the cheese filling on top of the batter, spreading it out evenly.
      3. Pour the remaining cake batter over the cheese filling.
    1. Scatter blueberries on top of the cake.

    Bake:

      1. Bake in the preheated oven for about 30-35 minutes, or until a toothpick inserted into the center comes out clean.
    1. Let the cake cool slightly before serving.

    Serve:

      1. Slice and serve the cake, enjoying its light and fluffy texture.

    More Information:

    This Light and Fluffy Blueberry Cheese Cake is an exquisite blend of flavors and textures. The airy cake batter is perfectly balanced with the creamy cheese filling, creating a dessert that is both light and satisfying. Blueberries add a burst of freshness and natural sweetness, complementing the subtle vanilla flavor of the cake. This recipe uses simple ingredients that you probably already have in your pantry, making it an easy go-to dessert for any time.

    Conclusion:

    The Light and Fluffy Blueberry Cheese Cake is a testament to how easy and rewarding baking can be. With its melt-in-your-mouth texture and delightful flavor, this cake is perfect for breakfast, dessert, or a snack. Enjoy the simplicity and deliciousness of this cake, and share it with your loved ones. It’s sure to become a favorite in your recipe collection.

  • Natural trick to get rid of unsightly tartar stains from teeth

    Natural trick to get rid of unsightly tartar stains from teeth

    Natural trick to get rid of unsightly tartar stains from teeth

    Maintaining proper dental hygiene is crucial not only for a radiant smile but also for overall well-being. One common issue many people struggle with is tartar buildup—a hardened form of plaque that, if ignored, can lead to gum inflammation, cavities, and even tooth loss.

    That’s where my Nana’s simple yet effective method comes in. Her tried-and-true trick has been a game-changer in our family, providing an effortless way to remove tartar stains with minimal effort.

    Nana’s Trusted Remedies

    1. Baking Soda & Hydrogen Peroxide Paste

    A mixture of baking soda and hydrogen peroxide forms a powerful yet gentle paste that effectively breaks down tartar. Baking soda acts as a mild abrasive, scrubbing away plaque without harming enamel, while hydrogen peroxide offers antibacterial benefits.

    • Combine two tablespoons of baking soda with one tablespoon of hydrogen peroxide to create a paste.
    • Use a soft-bristled toothbrush to apply the paste, concentrating on areas with tartar buildup.
    • Let it sit for a few minutes before rinsing thoroughly with water.
    • Use this method once a week for tartar control without harsh chemicals.

    2. Apple Cider Vinegar Rinse

    Apple cider vinegar (ACV) contains natural acidity that helps loosen and dissolve tartar while fighting harmful bacteria.

    • Mix two tablespoons of ACV with a cup of water.
    • Swish the solution in your mouth for about a minute, ensuring it reaches areas prone to tartar buildup.
    • Rinse well with water to remove any leftover acidity.
    • Doing this every few days can contribute to cleaner teeth.

    3. Orange Peel Rub

    The white inner part of an orange peel contains natural compounds that help break down tartar while also whitening teeth and freshening breath.

    • Take a fresh orange peel and rub the white side directly onto your teeth.
    • Focus on areas with visible tartar and let the natural compounds work for a few minutes.
    • Rinse with water afterward.
    • Using this method a couple of times a week can help maintain tartar-free teeth.

    A Simple Path to Healthier Teeth

    My Nana’s approach provides an easy, natural way to tackle tartar stains with minimal effort. By incorporating these simple techniques into your dental routine, you can save time, money, and discomfort while keeping your smile healthy and bright. With consistency, you’ll not only notice the difference but feel it too—free from stubborn tartar buildup.

  • Decadent No-Bake Chocolate Biscuit Bars: A Quick Dessert Sensation

    Decadent No-Bake Chocolate Biscuit Bars: A Quick Dessert Sensation

    Decadent No-Bake Chocolate Biscuit Bars: A Quick Dessert Sensation

    The Sweet Story Behind the Recipe

    Some of the most memorable desserts are born from simplicity and creativity. These No-Bake Chocolate Biscuit Bars are a testament to the magic that happens when a few humble ingredients come together. Imagine a dessert that requires no oven, minimal effort, and delivers maximum flavor – a treat that brings together the rich taste of chocolate, the crunch of biscuits, and the nutty warmth of peanuts. It’s a recipe that speaks to the heart of home baking: delicious, easy, and utterly irresistible.

    Ingredients

    For the Biscuit Base

    • Biscuits: 350g (12.3 oz)
    • Ground Peanuts: 85g (3 oz / 1 cup)
    • Sugar: 85g (3 oz / 1/2 cup)
    • Vanilla Sugar: 10g (1 bag, optional)
    • Cocoa Powder: 45g (1.6 oz / 1/2 cup)

    For the Chocolate Coating

    • Butter: 110g (3.9 oz / 1/2 cup)
    • Milk Chocolate: 90g (3.2 oz)
    • Dark Chocolate: 30g (1 oz)
    • Vegetable Oil: 30g (1 oz / 2 tablespoons)

    Additional Topping

    • Ground Peanuts: 70g (2.5 oz / 3/4 cup)
    • Sweet Cream: 180ml (6 fl oz / 3/4 cup)

    Step-by-Step Instructions

    1. Prepare the Biscuit Mixture
      • Place biscuits in a food processor
      • Pulse until you have fine, even crumbs
      • Transfer crumbs to a large mixing bowl
      • Add ground peanuts
      • Mix in sugar and vanilla sugar
      • Sift in cocoa powder
      • Stir until well combined
    2. Create the Binding Mixture
      • In a saucepan, melt butter over low heat
      • Add sweet cream
      • Stir gently to combine
      • Pour the warm mixture over the biscuit crumbs
      • Mix thoroughly until the mixture holds together
      • If too dry, add a little more cream
      • If too wet, add more biscuit crumbs
    3. Shape the Bars
      • Line a rectangular baking dish with parchment paper
      • Press the biscuit mixture firmly into the dish
      • Create an even, compact layer
      • Refrigerate for 30 minutes to set
    4. Prepare the Chocolate Coating
      • Chop milk and dark chocolate into small pieces
      • In a double boiler or microwave, melt chocolates
      • Stir in vegetable oil to create a smooth glaze
      • Remove biscuit base from refrigerator
      • Pour chocolate over the base
      • Spread evenly with a spatula
    5. Finish and Decorate
      • Sprinkle additional ground peanuts over the chocolate
      • Tap the dish to settle the peanuts
      • Refrigerate for 1 hour until completely set
      • Cut into bars using a sharp knife
      • Wipe knife between cuts for clean edges

    Nutritional Information

    Per Serving (1 Bar):

    • Calories: Approximately 250
    • Protein: 5g
    • Carbohydrates: 22g
    • Fat: 16g
    • Fiber: 2g
    • Sugar: 12g

    Preparation Time: 20 minutes Chilling Time: 1 hour 30 minutes Total Time: 1 hour 50 minutes Servings: 12-16 bars

    Pro Cooking Tips and Tricks

    • Use a food processor for even biscuit crumbs
    • Ensure butter and cream are at room temperature
    • Press mixture firmly for compact bars
    • Use a hot knife for clean cuts
    • Chill thoroughly before cutting

    Variations and Substitutions

    • Nut-Free: Replace peanuts with seeds or more biscuit crumbs
    • Vegan Option: Use plant-based butter and chocolate
    • Gluten-Free: Use gluten-free biscuits
    • Nutty Variations: Try almonds or hazelnuts
    • Flavor Twists: Add orange zest or espresso powder

    Frequently Asked Questions

    Q1: Can I make these bars in advance? A: Absolutely! They’re perfect for making 2-3 days ahead.

    Q2: How long do these bars last? A: Refrigerated, they’ll keep for up to 5 days.

    Q3: Can I freeze these chocolate bars? A: Yes, wrap individually and freeze for up to 1 month.

    Q4: What type of biscuits work best? A: Plain digestive biscuits or graham crackers are ideal.

    Q5: How can I make them less sweet? A: Reduce sugar and use darker chocolate.

    Storage and Make-Ahead Tips

    • Refrigeration: Store in an airtight container for 5 days
    • Freezing: Wrap individually, freeze up to 1 month
    • Room Temperature: Not recommended due to chocolate coating
    • Prep Ahead: Complete all steps up to 3 days in advance

    Indulge in these irresistible No-Bake Chocolate Biscuit Bars – a simple yet luxurious treat that promises to delight!

  • Homemade Fresh Cheese (Paneer or Ricotta Style)

    Homemade Fresh Cheese (Paneer or Ricotta Style)

    Homemade Fresh Cheese (Paneer or Ricotta Style)

    This homemade fresh cheese is incredibly easy to make using just three main ingredients: milk, lemon juice (or vinegar), and salt. It’s creamy, mild, and can be used in both savory and sweet dishes. Whether you want a soft, spreadable cheese or a firmer block for slicing, this recipe is perfect for you!

    Preparation Time

      • Prep Time: 5 minutes
      • Cook Time: 15 minutes
    • Resting Time: 30 minutes – 2 hours (depending on texture)
    • Total Time: 45 minutes – 2 hours

    Ingredients (Cups and Grams)

      • 4 cups (1 liter) whole milk
      • 2 tablespoons lemon juice (or white vinegar)
      • ½ teaspoon salt
      • 10g (2 tsp) butter (optional, for creaminess)
    • Herbs or spices (optional, for flavoring: garlic, chives, black pepper, etc.)

    Directions

    Step 1: Heat the Milk
      • Pour 1 liter of milk into a large saucepan.
      • Slowly heat it over medium heat, stirring occasionally to prevent scorching.
    • Heat until the milk reaches 85°C (185°F), just below boiling.
    Step 2: Add Lemon Juice or Vinegar
      • Once the milk is hot, remove it from the heat.
      • Stir in 2 tablespoons of lemon juice or vinegar.
    • The milk will start to curdle, separating into curds (solids) and whey (liquid).
    Step 3: Let It Sit
      • Gently stir for a few seconds.
      • Cover the pot and let the mixture sit for 10-15 minutes to allow the curds to form completely.
    Step 4: Drain the Curds
      • Line a colander with cheesecloth or a clean kitchen towel.
      • Pour the curdled milk through it to drain the whey.
      • Let the curds drain for about 30 minutes for a soft cheese or longer for a firmer texture.
    Step 5: Season and Mix
      • Transfer the drained curds to a bowl.
      • Stir in ½ teaspoon salt and 10g butter (optional) for extra creaminess.
      • Mix in herbs or spices if desired (e.g., chopped chives, garlic powder, black pepper).
    Step 6: Shape and Chill
      • For soft cheese: Store the cheese in an airtight container.
      • For firm cheese: Wrap the curds in cheesecloth and gently squeeze out any excess whey.
      • Shape it into a ball or log, cover with cling film, and refrigerate for 2-3 hours until set.

    Serving Suggestions

      • Spread on crackers or toast with honey or jam.
      • Use in salads, sandwiches, or wraps.
      • Add to pasta, pizza, or soups for a creamy texture.
    • Crumble over roasted vegetables or grilled meats.

    Cooking Tips

      • Use fresh whole milk for the best flavor and texture.
      • Don’t overheat the milk—keeping it just below boiling ensures the best curds.
    • For a firmer cheese, press the curds under a weight for a few hours.
    • Save the whey! It’s great for baking, smoothies, or soups.

    Nutritional Benefits

      • High in protein – great for muscle repair and growth.
      • Rich in calcium – supports strong bones and teeth.
      • Lower in fat than many store-bought cheeses.
      • No preservatives – a fresh, homemade alternative.

    Dietary Information

      • Vegetarian
      • Gluten-Free
      • Low-carb & Keto-friendly

    Nutritional Facts (Per Serving – Approximate)

      • Calories: 120
      • Protein: 7g
      • Carbohydrates: 1g
    • Fat: 9g
    • Calcium: 15% DV

    Storage

      • Refrigerator: Store in an airtight container for up to 5 days.
    • Freezer: Not recommended, as fresh cheese loses texture when frozen.

    Why You’ll Love This Recipe

      • Easy to make with just 3 ingredients!
      • Healthier and fresher than store-bought cheese.
    • Customizable with herbs, spices, or different textures.
    • Versatile – use in sweet or savory dishes.

    Conclusion

    Making fresh cheese at home is easier than you think! This quick and foolproof recipe yields a creamy, delicious cheese perfect for spreading, crumbling, or slicing. No preservatives, no artificial ingredients—just pure homemade goodness. Once you try it, you’ll never go back to store-bought cheese again!

  • Whisk Banana with Cookies! You’ll be Amazed! Delicious Dessert in 5 Minutes Without Baking

    Whisk Banana with Cookies! You’ll be Amazed! Delicious Dessert in 5 Minutes Without Baking

    Whisk Banana with Cookies! You’ll be Amazed! Delicious Dessert in 5 Minutes Without Baking

    Table of Contents

    Who doesn’t love a quick and easy dessert fix? Especially when it involves the irresistible combination of bananas and cookies. In this article, we’ll delve into a simple yet divine dessert recipe that will tantalize your taste buds and leave you craving for more. Get ready to whip up a delightful treat in just five minutes!

    Ingredients
    • 2 bananas
    • 120g of cookies
    • 35g of butter
    • 75g whipped cream
    • 200g milk concentrate
    • 35g of sugar
    • Fine sugar
    • Chocolate flakes
    Instructions

    Let’s break down the steps to creating this delectable dessert:

    Crushing the Cookies

    Grab a handful of your favorite cookies and place them in a plastic bag. Use a rolling pin to crush them into fine crumbs. This step adds a delightful crunch to our dessert.

    Preparing the Base

    In a mixing bowl, combine the crushed cookies with mashed bananas using a potato masher. Mix until well combined, and then transfer the mixture into a round cake pan to form the base.

    Making the Creamy Filling

    In a saucepan, melt the butter and sugar. Once melted, add the milk concentrate and mix well. Allow it to cook for about 5 minutes while continuously stirring. This creamy concoction will serve as the filling for our dessert.

    Assembling the Dessert

    Pour the creamy mixture onto the prepared cookie and banana base in the cake pan. Arrange banana slices on top for an extra burst of flavor.

    See also  Mouthwatering Apple Pie Recipe: Simple and Delicious
    Decorating with Chocolate Flakes

    In a separate bowl, whip the cream with a teaspoon of powdered sugar until it forms stiff peaks. Spread this creamy goodness over the assembled dessert. Sprinkle chocolate flakes generously on top for a delightful finishing touch.

    Serving Suggestions

    Once assembled, refrigerate the dessert for a few minutes to allow it to set. Serve chilled for the best taste experience. You can also get creative with toppings like additional fruits or a drizzle of caramel sauce.

    Conclusion

    In just five minutes, you’ve created a mouthwatering dessert that will impress even the most discerning of palates. The combination of bananas, cookies, and creamy goodness is simply irresistible. So why wait? Whip up this delightful treat today and indulge in pure bliss!

  • Pear and Pudding Cake

    Pear and Pudding Cake

    Pear and Pudding Cake

    This delicious pear and pudding cake is a delightful dessert with a soft, airy cake batter, creamy pudding pockets, and a sweet layer of pear in syrup. The combination of smooth pudding and tender cake creates a wonderfully comforting texture. With its subtle sweetness and soft richness, this cake is perfect for any occasion—whether you’re serving it for a family gathering or enjoying a slice with your afternoon tea. The powdered sugar dusting gives it a sophisticated finish, making it look as good as it tastes.

    Preparation Time

      • Preparation time: 20 minutes
    • Cooking time: 45 minutes
    • Total time: 1 hour 5 minutes

    Ingredients

    • For the Pudding:

        • 1 egg
        • 50 grams of sugar
        • 15 grams of vanilla sugar
        • 15 grams of cornstarch
        • 250 ml milk
    • For the Cake Batter:

        • 2 eggs
        • 100 grams of sugar
        • A pinch of salt
        • 100 ml milk
        • 50 ml vegetable oil
        • 220 grams of flour
        • 1 teaspoon baking powder
      • 300 grams of pear in syrup (drained and chopped)
    • Additional:

      • Powdered sugar for dusting

    Instructions

      1. Prepare the Pudding:

          • Combine Ingredients: In a medium-sized saucepan, whisk together 1 egg, 50 grams of sugar, 15 grams of vanilla sugar, and 15 grams of cornstarch until smooth.
          • Add Milk Gradually: Slowly pour in 250 ml of milk, stirring constantly to ensure there are no lumps.
        • Cook the Pudding: Place the saucepan over low heat and cook the mixture, stirring continuously, until it begins to thicken. Be careful not to let it boil, as this can cause the pudding to curdle. Once it has reached a smooth, thick consistency, remove it from the heat.
        • Cool the Pudding: Transfer the pudding to a bowl and allow it to cool to room temperature. Cover it with plastic wrap, pressing the wrap directly onto the surface to prevent a skin from forming.
      1. Prepare the Cake Batter:

          • Mix Eggs and Sugar: In a large mixing bowl, beat 2 eggs with 100 grams of sugar and a pinch of salt. Use a hand mixer or whisk and beat the mixture for about 3-4 minutes, or until it becomes light, fluffy, and pale in color. This step ensures that the cake will be airy and soft.
          • Add Milk and Oil: Pour in 100 ml of milk and 50 ml of vegetable oil, stirring until everything is well combined.
        • Incorporate Dry Ingredients: Sift together 220 grams of flour and 1 teaspoon of baking powder, then gradually add them to the wet ingredients. Mix until the batter is smooth and free of lumps.
        • Prepare the Pears: Drain the canned pears from the syrup and chop them into small, even pieces.
      1. Assemble the Cake:

          • Preheat the Oven: Set your oven to 170°C (340°F) and allow it to heat up while you prepare the cake.
          • Prepare the Baking Mold: Line a 27 x 18 cm baking mold with parchment paper. This will make it easy to remove the cake once it’s done.
        • Layer the Batter and Pears: Pour half of the prepared cake batter into the baking mold, spreading it out evenly. Scatter the chopped pears over the top of the batter, ensuring an even distribution. Pour the remaining batter over the pears, smoothing it out with a spatula.
        • Add the Pudding: Spoon the cooled pudding into a piping bag. Pipe it over the top of the cake batter, creating any pattern you desire. The pudding will sink slightly into the batter as it bakes, creating delicious pockets of creamy filling throughout the cake.
    1. Bake the Cake:

        • Place the assembled cake in the preheated oven and bake for 40-45 minutes. Check for doneness by inserting a toothpick into the center of the cake; if it comes out clean, the cake is ready.
        • Allow the cake to cool completely in the mold before removing it. This will help it set and make it easier to slice without breaking apart.
    2. Serve:

        • Dust with Powdered Sugar: Once the cake has cooled, lightly dust the top with powdered sugar for an elegant finishing touch.
      • Slice and Enjoy: Cut the cake into even slices and serve. This cake is best enjoyed fresh but can also be served chilled.

    Nutritional Facts (Per Serving, Estimated)

      • Calories: 260 kcal
      • Carbohydrates: 35g
      • Protein: 5g
      • Fat: 10g
      • Saturated Fat: 3g
      • Cholesterol: 38mg
    • Sugars: 22g
    • Sodium: 80mg

    The Origins and Popularity of Tiramisu Variations
    Though tiramisu is the most famous Italian dessert, variations of layered, creamy cakes like this one have been around for centuries. The traditional approach to these layered desserts is to combine flavors like coffee, cream, and chocolate, but regional variations have included fruits like pears, berries, and citrus. This pear and pudding cake is a modern twist on these beloved desserts, incorporating the light and airy texture of a cake with rich and creamy pudding layers, resulting in a dessert that’s both comforting and innovative.

    Why You’ll Love This Recipe
    This pear and pudding cake is a perfect balance of sweet, creamy, and fruity flavors. The combination of soft cake, pear, and smooth pudding creates a melt-in-your-mouth experience. It’s easy to make, with minimal preparation and a few simple ingredients, making it a great dessert for both beginners and experienced bakers alike. The powdered sugar finish adds a professional touch, making it look as beautiful as it tastes.

    Health Benefits of this Recipe
    While this cake is indulgent, the pears add a natural source of fiber and vitamin C. The pudding made with milk and eggs provides calcium and protein. By enjoying a slice of this cake, you’re getting a treat that has some nutritional benefits, even though it’s sweet and rich. While it’s not low in sugar, it’s a great way to enjoy dessert in moderation, especially when served alongside fresh fruit or a light drink.

    Serving Suggestions of Pear and Pudding Cake
    This cake is perfect on its own, but it can be served with whipped cream, a scoop of vanilla ice cream, or even a drizzle of caramel sauce for added indulgence. Pair it with a cup of coffee or a glass of dessert wine for a more sophisticated treat. If you want to make it a bit lighter, serve it with a fresh berry compote or a side of whipped cream.

    Tips

      • Make Ahead: This cake can be made ahead and stored in the fridge for up to 2 days. It’s a great dessert to prepare for gatherings or family meals.
      • Dairy-Free Option: Use a dairy-free cream and plant-based milk if you need a dairy-free version of this cake.
    • More Fruits: You can substitute the pears with other fruits like apples, peaches, or berries if you prefer a different flavor.

    Variations to Try

      • Chocolate version: Add cocoa powder to the cake batter for a chocolatey twist, and pair it with chocolate pudding for extra richness.
    • Spiced version: Add cinnamon, nutmeg, or ginger to the cake batter for a warm, spiced flavor.
    • Nutty version: Add chopped nuts like walnuts or almonds to the cake batter or as a topping to add a crunchy texture.
    Conclusion
    This pear and pudding cake is a wonderfully sweet dessert that blends the flavors of fruit, creamy pudding, and airy cake into a delightful treat. Whether you serve it for a special occasion or as an everyday dessert, it’s sure to be a hit. The ease of preparation, delicious flavors, and light, yet rich, texture make this cake a perfect addition to any dessert table.

    Frequently Asked Questions

      • Can I make this cake ahead of time?
        Yes, you can prepare this cake ahead of time and store it in the refrigerator for up to 2 days. The flavors only get better with time!

    • Can I use fresh pears instead of canned?
      Yes, you can use fresh pears, just make sure to peel and chop them into small pieces. You may also want to cook them slightly to soften them before adding them to the cake.

    • Can I freeze this cake?
      Yes, this cake can be frozen. Just make sure to wrap it tightly and store it in the freezer for up to 1 month. Let it thaw in the refrigerator before serving.

    • Can I make this recipe without eggs?
      Yes, you can replace the eggs with egg substitutes, such as flaxseed or chia egg replacements, for a vegan version of this cake

  • How to make flake ice cream in 4 easy steps

    How to make flake ice cream in 4 easy steps

    Flake ice cream is a delicious dessert that has the creamy texture of ice cream but combined with the crunchy taste of chocolate flakes. It is ideal for those hot summer days or as a special treat; this homemade flake ice cream will be loved by both kids and adults.


    Ingredients:

    2 cups whipping cream

    1 cup full-fat milk

    3/4 cup sugar granules

    1 teaspoon vanilla extract

    1 cup flaked chocolate (or crumbled chocolate bar)


    Directions:

    Preparing the Base:

    In a big bowl, combine heavy cream, whole milk and granulated sugar until the sugar dissolves completely.

    Introduce vanilla extract into it.

    Chill the Mixture:

    Put plastic wrap and refrigerate the mixture for at least two hours or overnight. This firming everything up slightly and allowing flavors to mingle.

    Churn the Ice Cream:

    Take your ice cream freezer bowls and put chilled mixture in it. Churn it there according to what the manufacturer recommends (usually about 20-25 minutes) till you acquire the soft serve texture.

    Add Chocolate Flakes:

    Taste as you go along, and in case you want more chocolate flavor, put some more flakes of chocolate during last several minutes of churning. As soon as all contents are combined together, detach them from ice cream machine.

    Put ice cream into lidded container; freeze for no less than two hours before serving.


    Serving and Storage Tips

    Serving:

    Bowls or cones can be used to serve the flaky ice cream.

    Add some more chocolate flakes or a drop of syrup for that additional decadence.

    Storage:

    The ice cream will keep in an air-tight container for up to two weeks when stored in the freezer.

    To prevent formation of ice crystals, place a piece of plastic wrap directly on top of the surface of the ice cream, then cover the container.


    Tips for Success

    Cold Ingredients: Make sure all ingredients are cold before starting. This helps the mixture churn faster and gives it a better texture.

    Proper Churning: Do not over-churn your homemade ice cream as this may cause it to become too hard. Follow your specific ice cream maker’s instructions closely.

    Mix-Ins Timing: Towards the end of churning, add things like chocolate flakes so they do not sink to the bottom.


    Health Benefits

    Calcium: Providing essential minerals such as calcium from dairy products which is important for bone development.

    Protein: A good source of protein used in muscle repair and growth purposes.

    Antioxidants: Dark chocolate flakes that help fight free radicals found in human bodies can be taken as antioxidants.


    Nutrition Information (per serving)

    Calories: 250

    Total Fat: 18g

    Saturated Fat: 11g

    Cholesterol: 65mg

    Sodium: 50mg

    Total Carbohydrate: 20g

    Dietary Fiber: 1g

    Sugars: 18g

    Protein:3g


    Variations and Substitutions

    Flavored Extracts : To achieve a different twist, swap vanilla for almond or mint extract.

    Dairy-Free : In vegan versions, consider replacing dairy with coconut milk and coconut cream.

    Mix-Ins : Alongside chocolate flakes, test out nuts, dried fruits or even cookie crumbles.


    Frequently Asked Questions (FAQs)

    Can I make this without an ice cream maker?

    Yes, you can blend all the ingredients together and go ahead to freeze them while stirring after each thirty minutes until it thickens enough.

    How can I make it softer?

    Adding a tablespoonful of alcohol such as vodka or rum can help keep it soft.

    Is low fat milk okay to use?

    For the best results, it is recommended that you use full-fat dairy products, however you can also use low fat milk which gives a slightly altered texture.

    How long does homemade ice cream last?

    Homemade ice cream is freshest when eaten within two weeks for flavors which are optimum and best texture.


    Conclusion:

    It is easy to make flake ice cream at home and enjoy it. Just use several ingredients together with the steps provided below and have a tasty treat you can customize. This dessert is worth trying whether you follow the regular recipe or experiment with different flavors. Enjoy homemade flake ice cream and its smiles!