Category: Recipes

  • Chocolate Fatbomb Fluff

    Chocolate Fatbomb Fluff

    Chocolate Fatbomb Fluff
    Ingredients:
    1 1/2 cups heavy whipping cream
    2-4 tablespoons cream cheese (softened)
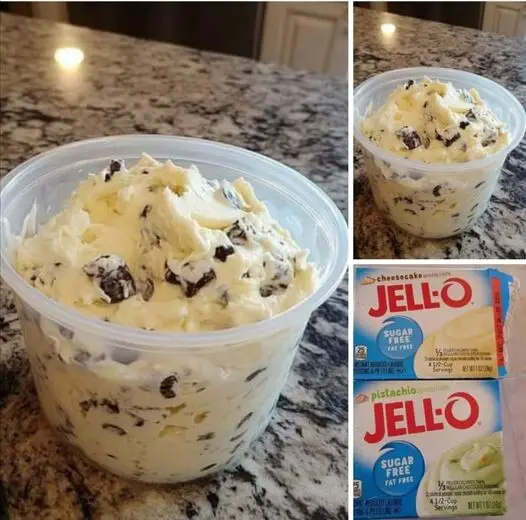
    1 box sugar-free pudding mix (cheesecake flavor recommended)
    1/2 cup Lily’s milk chocolate chips (or mix 1/2 cup milk chocolate chips with 1/2 cup semi-sweet chips for a richer flavor)
    Instructions:

    Whip the Fluff:
    In a medium bowl, combine the heavy whipping cream, softened cream cheese, and sugar-free pudding mix. Blend until the mixture becomes light and fluffy.
    Add the Chocolate Chips:
    Gently fold in the chocolate chips, ensuring they are evenly distributed throughout the fluff.
    Chill and Serve:
    Enjoy your delicious Fatbomb Fluff immediately, or refrigerate to keep it cool and set. This treat is perfect for satisfying those sweet tooth cravings while staying on track with your bariatric goals.

  • Pear and Pudding Cake

    Pear and Pudding Cake

    Pear and Pudding Cake

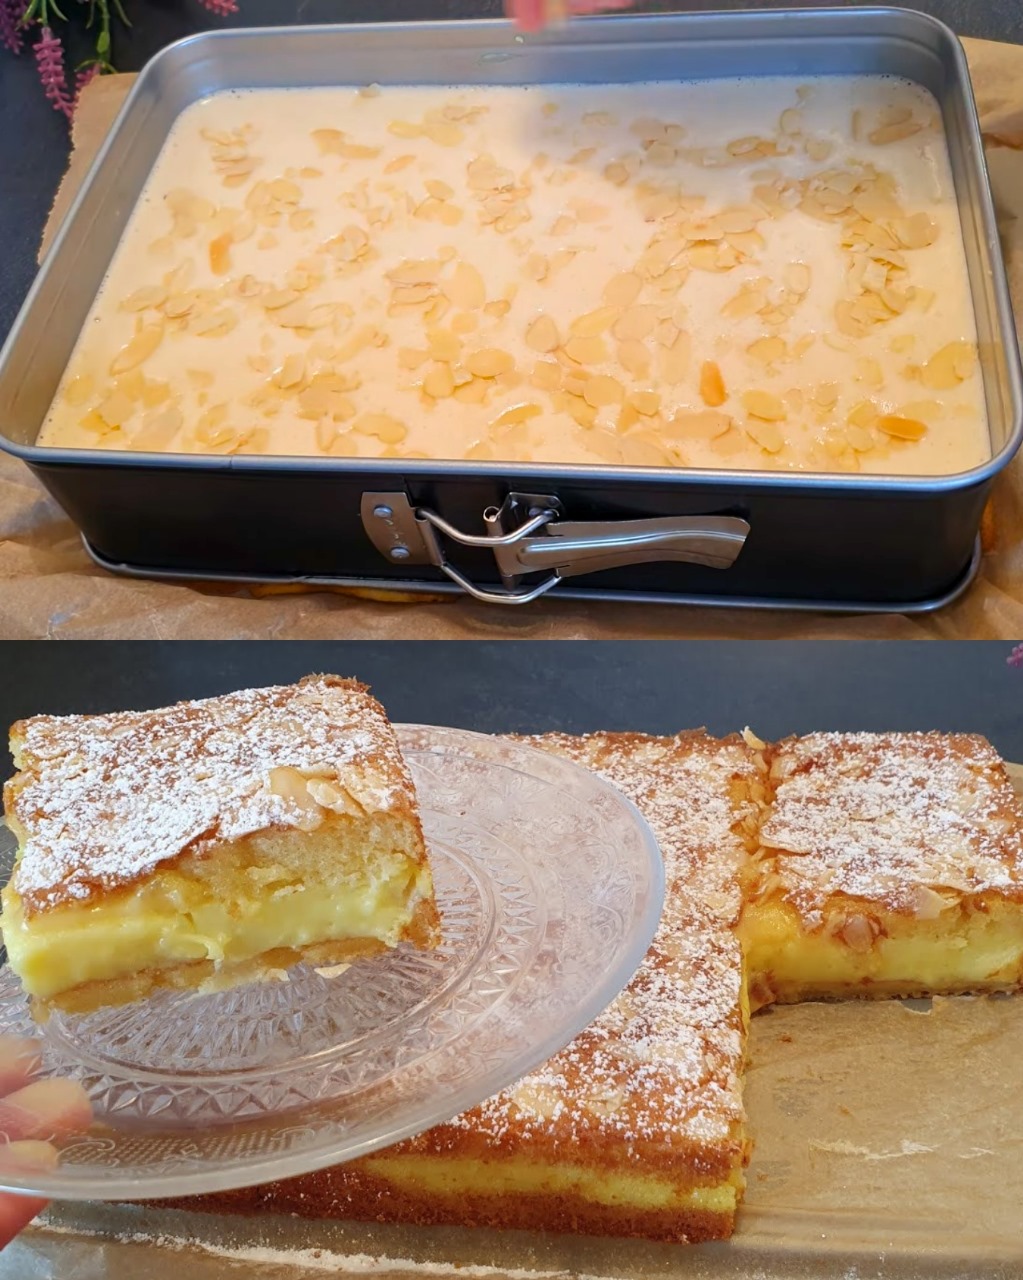
    This delicious pear and pudding cake is a delightful dessert with a soft, airy cake batter, creamy pudding pockets, and a sweet layer of pear in syrup. The combination of smooth pudding and tender cake creates a wonderfully comforting texture. With its subtle sweetness and soft richness, this cake is perfect for any occasion—whether you’re serving it for a family gathering or enjoying a slice with your afternoon tea. The powdered sugar dusting gives it a sophisticated finish, making it look as good as it tastes.

    Preparation Time

      • Preparation time: 20 minutes
    • Cooking time: 45 minutes
    • Total time: 1 hour 5 minutes

    Ingredients

    • For the Pudding:

        • 1 egg
        • 50 grams of sugar
        • 15 grams of vanilla sugar
        • 15 grams of cornstarch
        • 250 ml milk
    • For the Cake Batter:

        • 2 eggs
        • 100 grams of sugar
        • A pinch of salt
        • 100 ml milk
        • 50 ml vegetable oil
        • 220 grams of flour
        • 1 teaspoon baking powder
      • 300 grams of pear in syrup (drained and chopped)
    • Additional:

      • Powdered sugar for dusting

    Instructions

      1. Prepare the Pudding:

          • Combine Ingredients: In a medium-sized saucepan, whisk together 1 egg, 50 grams of sugar, 15 grams of vanilla sugar, and 15 grams of cornstarch until smooth.
          • Add Milk Gradually: Slowly pour in 250 ml of milk, stirring constantly to ensure there are no lumps.
        • Cook the Pudding: Place the saucepan over low heat and cook the mixture, stirring continuously, until it begins to thicken. Be careful not to let it boil, as this can cause the pudding to curdle. Once it has reached a smooth, thick consistency, remove it from the heat.
        • Cool the Pudding: Transfer the pudding to a bowl and allow it to cool to room temperature. Cover it with plastic wrap, pressing the wrap directly onto the surface to prevent a skin from forming
      1. Prepare the Cake Batter:

          • Mix Eggs and Sugar: In a large mixing bowl, beat 2 eggs with 100 grams of sugar and a pinch of salt. Use a hand mixer or whisk and beat the mixture for about 3-4 minutes, or until it becomes light, fluffy, and pale in color. This step ensures that the cake will be airy and soft.
          • Add Milk and Oil: Pour in 100 ml of milk and 50 ml of vegetable oil, stirring until everything is well combined.
        • Incorporate Dry Ingredients: Sift together 220 grams of flour and 1 teaspoon of baking powder, then gradually add them to the wet ingredients. Mix until the batter is smooth and free of lumps.
        • Prepare the Pears: Drain the canned pears from the syrup and chop them into small, even pieces.
      1. Assemble the Cake:

          • Preheat the Oven: Set your oven to 170°C (340°F) and allow it to heat up while you prepare the cake.
          • Prepare the Baking Mold: Line a 27 x 18 cm baking mold with parchment paper. This will make it easy to remove the cake once it’s done.
        • Layer the Batter and Pears: Pour half of the prepared cake batter into the baking mold, spreading it out evenly. Scatter the chopped pears over the top of the batter, ensuring an even distribution. Pour the remaining batter over the pears, smoothing it out with a spatula.
        • Add the Pudding: Spoon the cooled pudding into a piping bag. Pipe it over the top of the cake batter, creating any pattern you desire. The pudding will sink slightly into the batter as it bakes, creating delicious pockets of creamy filling throughout the cake.
    1. Bake the Cake:

        • Place the assembled cake in the preheated oven and bake for 40-45 minutes. Check for doneness by inserting a toothpick into the center of the cake; if it comes out clean, the cake is ready.
        • Allow the cake to cool completely in the mold before removing it. This will help it set and make it easier to slice without breaking apart.
    2. Serve:

        • Dust with Powdered Sugar: Once the cake has cooled, lightly dust the top with powdered sugar for an elegant finishing touch.
      • Slice and Enjoy: Cut the cake into even slices and serve. This cake is best enjoyed fresh but can also be served chilled.

    Nutritional Facts (Per Serving, Estimated)

      • Calories: 260 kcal
      • Carbohydrates: 35g
      • Protein: 5g
      • Fat: 10g
      • Saturated Fat: 3g
      • Cholesterol: 38mg
    • Sugars: 22g
    • Sodium: 80mg

    The Origins and Popularity of Tiramisu Variations
    Though tiramisu is the most famous Italian dessert, variations of layered, creamy cakes like this one have been around for centuries. The traditional approach to these layered desserts is to combine flavors like coffee, cream, and chocolate, but regional variations have included fruits like pears, berries, and citrus. This pear and pudding cake is a modern twist on these beloved desserts, incorporating the light and airy texture of a cake with rich and creamy pudding layers, resulting in a dessert that’s both comforting and innovative.

    Why You’ll Love This Recipe
    This pear and pudding cake is a perfect balance of sweet, creamy, and fruity flavors. The combination of soft cake, pear, and smooth pudding creates a melt-in-your-mouth experience. It’s easy to make, with minimal preparation and a few simple ingredients, making it a great dessert for both beginners and experienced bakers alike. The powdered sugar finish adds a professional touch, making it look as beautiful as it tastes.

    Health Benefits of this Recipe
    While this cake is indulgent, the pears add a natural source of fiber and vitamin C. The pudding made with milk and eggs provides calcium and protein. By enjoying a slice of this cake, you’re getting a treat that has some nutritional benefits, even though it’s sweet and rich. While it’s not low in sugar, it’s a great way to enjoy dessert in moderation, especially when served alongside fresh fruit or a light drink.

    Serving Suggestions of Pear and Pudding Cake
    This cake is perfect on its own, but it can be served with whipped cream, a scoop of vanilla ice cream, or even a drizzle of caramel sauce for added indulgence. Pair it with a cup of coffee or a glass of dessert wine for a more sophisticated treat. If you want to make it a bit lighter, serve it with a fresh berry compote or a side of whipped cream.

    Tips

      • Make Ahead: This cake can be made ahead and stored in the fridge for up to 2 days. It’s a great dessert to prepare for gatherings or family meals.
      • Dairy-Free Option: Use a dairy-free cream and plant-based milk if you need a dairy-free version of this cake.
    • More Fruits: You can substitute the pears with other fruits like apples, peaches, or berries if you prefer a different flavor.

    Variations to Try

      • Chocolate version: Add cocoa powder to the cake batter for a chocolatey twist, and pair it with chocolate pudding for extra richness.
    • Spiced version: Add cinnamon, nutmeg, or ginger to the cake batter for a warm, spiced flavor.
    • Nutty version: Add chopped nuts like walnuts or almonds to the cake batter or as a topping to add a crunchy texture.

    Conclusion
    This pear and pudding cake is a wonderfully sweet dessert that blends the flavors of fruit, creamy pudding, and airy cake into a delightful treat. Whether you serve it for a special occasion or as an everyday dessert, it’s sure to be a hit. The ease of preparation, delicious flavors, and light, yet rich, texture make this cake a perfect addition to any dessert table.

    Frequently Asked Questions

      • Can I make this cake ahead of time?
        Yes, you can prepare this cake ahead of time and store it in the refrigerator for up to 2 days. The flavors only get better with time!

    • Can I use fresh pears instead of canned?
      Yes, you can use fresh pears, just make sure to peel and chop them into small pieces. You may also want to cook them slightly to soften them before adding them to the cake.

    • Can I freeze this cake?
      Yes, this cake can be frozen. Just make sure to wrap it tightly and store it in the freezer for up to 1 month. Let it thaw in the refrigerator before serving.

    • Can I make this recipe without eggs?
      Yes, you can replace the eggs with egg substitutes, such as flaxseed or chia egg replacements, for a vegan version of this cake.

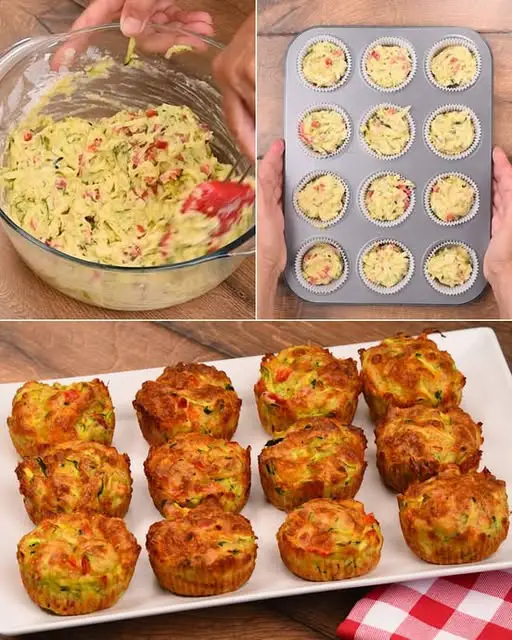
  • Red Pepper Zucchini Muffins

    Red Pepper Zucchini Muffins

    Healthy Red Pepper Zucchini Muffins are more than just a way to use up leftover summer squash! These tasty quick muffins can be enjoyed as a breakfast treat, a satisfying snack, or even a light lunch. They’re super easy to whip up, requiring just a quick mixing of grated zucchini (hello, summer!), red pepper, eggs, flour, and a touch of sweetness. The batter is spooned into muffin tins and baked until golden brown. Simple ingredients, easy methods, and a flavor combination that never disappoints!

    Healthy Zucchini Muffins with Red Pepper: A Twist on a Summertime Classic
    Zucchini muffins with red pepper are a delicious variation of the classic savory zucchini muffin. It likely emerged as a creative way to use up plentiful summer vegetables.

    Savory muffins themselves have been around since at least the early 20th century, with cookbooks featuring recipes for corn muffins, cheese muffins, and even oyster muffins. Zucchini, a summer squash native to Central America, was introduced to Europe in the 16th century and eventually made its way to North America. Its mild flavor and versatility made it a popular addition to gardens, and zucchini bread became a staple in the 1930s as a way to use up excess zucchini.

    The addition of red pepper to zucchini muffins is a tasty twist that adds a touch of sweetness and vibrant color. Zucchini muffins are a sneaky way to add veggies! Perfect for picky eaters who might be hesitant about zucchini on its own. They’re also versatile. Play around with different cheeses, herbs, or even add crumbled sausage for a more substantial snack.

    Tips
    Grating zucchini releases moisture. To prevent soggy muffins, grate the zucchini and transfer it to a colander. Gently squeeze out any excess liquid or let it drain for a few minutes.
    Don’t underestimate the power of salt and pepper! These simple ingredients enhance the overall flavor of your muffins. Use a good amount of freshly ground black pepper for a flavor boost.
    Freshly grated cheese melts more evenly and offers a superior taste compared to pre-shredded cheese, which often contains anti-caking agents affecting texture. Consider parmesan, cheddar, goat cheese, or feta for different flavor profiles.
    Consider adding chopped fresh herbs like dill, chives, or parsley for a delightful touch. Smoked paprika or a pinch of red pepper flakes can add a subtle kick.
    Coat your muffin cups with nonstick cooking spray or use paper liners. This ensures your perfectly golden muffins come out of the pan effortlessly.
    Are Zucchini Muffins Healthy?
    Yes, they can be! Zucchini is a low-calorie vegetable, and depending on the recipe, it can be a good source of fiber and vitamins.

    My Zucchini Muffins Are Too Wet, What Happened?
    You might not have squeezed out enough moisture from the grated zucchini. Try following a recipe that instructs you to drain the zucchini or use less of it.

    Can I Substitute Other Vegetables For Zucchini?
    Yes! You can try grated carrots, sweet potato, or butternut squash.

    What Cheese Can I Use In Zucchini Muffins?
    Many cheeses work well! Popular choices include cheddar, parmesan, feta, or goat cheese.

    How to Store Zucchini Muffins
    Store the muffins at room temperature in an airtight container for up to 3 days. You can also freeze them for up to 3 months. Enjoy them throughout the week or pull them out for a quick and delicious snack.

    More Zucchini Recipes
    Zucchini Muffins

    Zucchini Skillet Pie

    Zucchini Pasta

    Zucchini Pinwheels

    Marinated Zucchini

    Zucchini Rolls

    Zucchini Fritters

    Ingredients
    ZUCCHINI
    1
    RED PEPPER
    1/4
    GRATED CHEESE
    200g (1 cup)
    EGGS
    2
    SALT
    4g (1 tsp)
    PEPPER
    4g (1 tsp)
    FLOUR
    125g (1 cup)
    BAKING POWDER
    5g (1 tsp)
    How to make zucchini muffins

    Step 1
    Grate the zucchini in a bowl. In a separate bowl, whisk together two eggs, salt, and pepper.

    Step 2
    Add the grated zucchini to the mixture along with chopped red pepper, grated cheese, baking powder, and all-purpose flour.

    Step 3
    Fold everything together until just combined. Be careful not to overmix!

    Step 4
    Divide the batter evenly between muffin cups lined with paper liners.

    Step 5
    Bake at 180°C for 25 minutes, or until a toothpick inserted into the center comes out clean.

    Step 6
    Let the muffins cool slightly before serving.
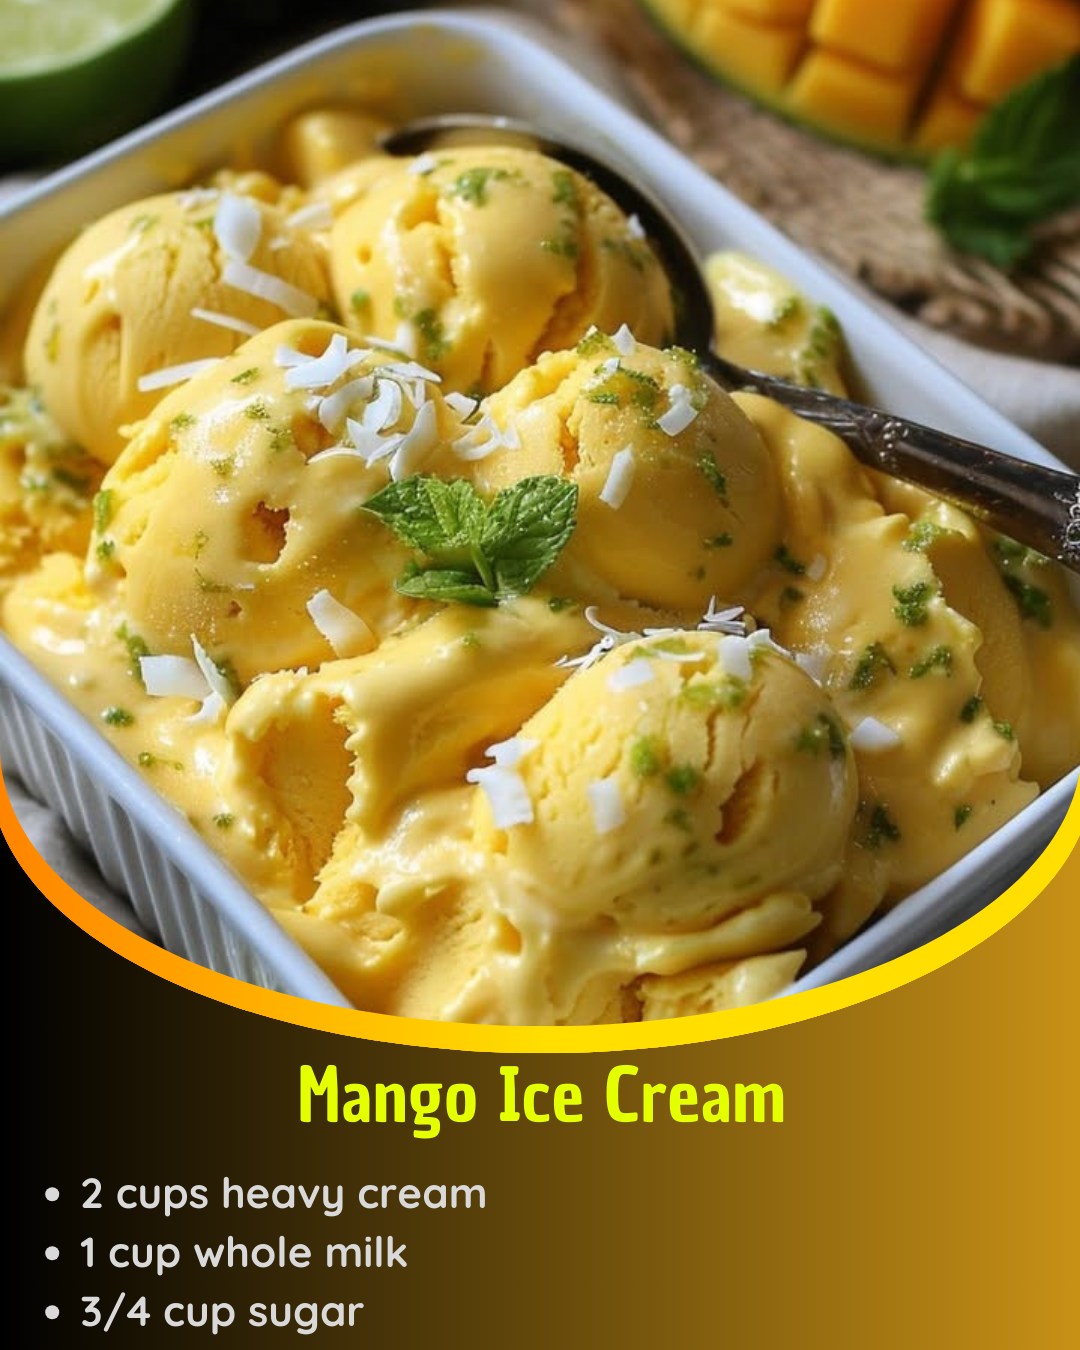
  • Mango Ice Cream

    Mango Ice Cream

    Ingredients:
    – 2 cups heavy cream
    – 1 cup whole milk
    – 3/4 cup sugar
    – 1 cup mango puree
    – 1 teaspoon lime juice

    Directions:
    Start by whisking together the heavy cream, whole milk, sugar, mango puree, and lime juice in a large bowl until smooth and well combined. Once you’ve achieved that creamy consistency, pour the mixture into your ice cream maker. Churn it for about 25 minutes, or until it reaches that dreamy, scoopable texture. Transfer the ice cream to an airtight container and pop it in the freezer for at least 4 hours to firm up. Get ready to enjoy a refreshing scoop of mango bliss!

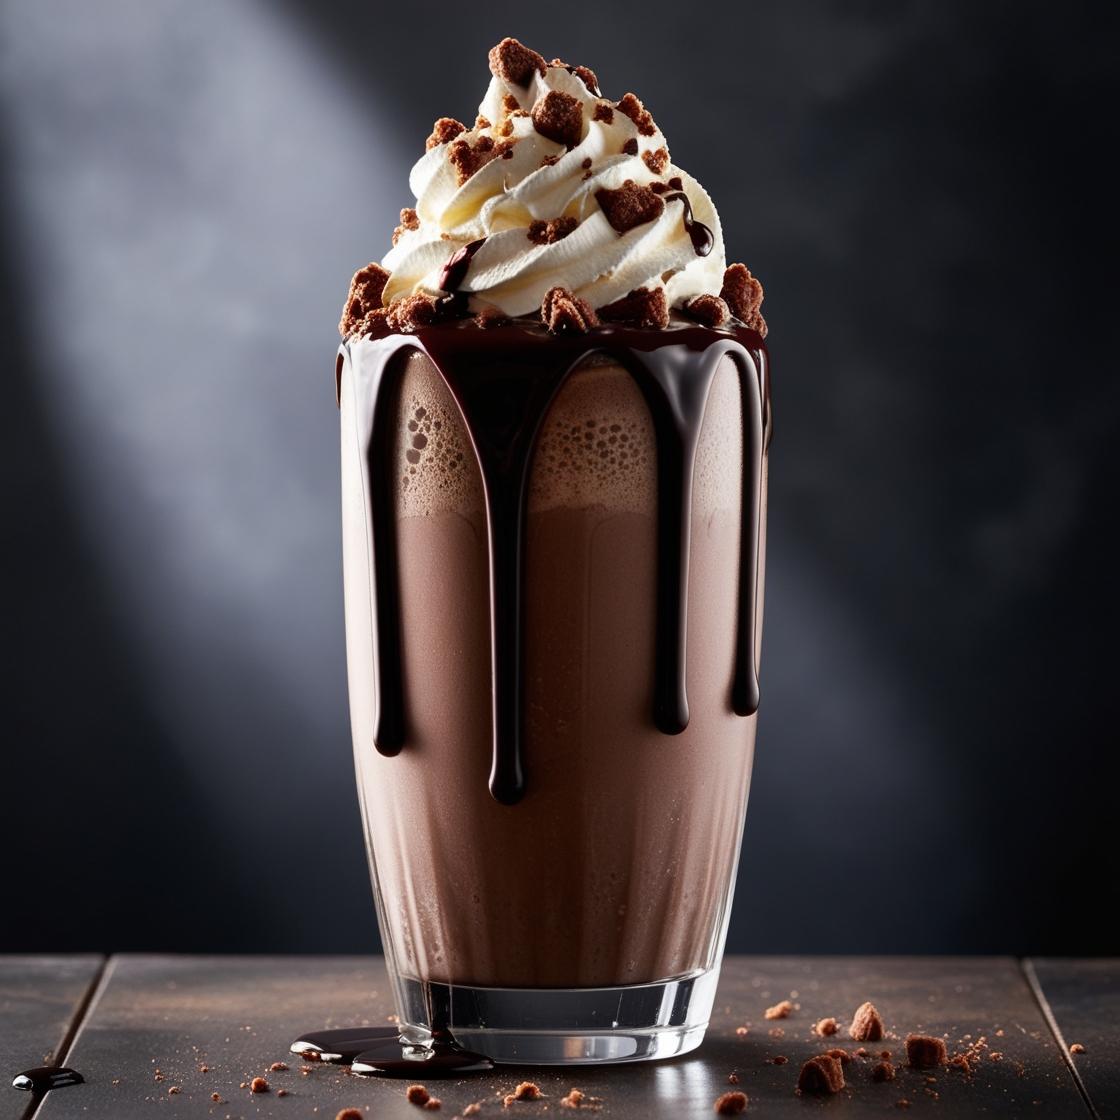
  • Oreo Nutella Milkshake

    Oreo Nutella Milkshake

    Ingredients:
    4 Oreo cookies 1f36a
    2 tbsp Nutella 1f36b
    2 cups vanilla ice cream 1f366
    1/2 cup milk 1f95b (adjust for desired thickness)
    1/4 tsp vanilla extract 1f366
    Whipped cream (optional) 1f365
    Extra crushed Oreos for garnish 1f36a (optional)
    Instructions:
    Crush the Oreos: Take 4 Oreo cookies 1f36a and roughly crush them or break them in half for a chunky texture.

    Blend the milkshake: In a blender, combine the crushed Oreos 1f36a, Nutella 1f36b, vanilla ice cream 1f366, milk 1f95b, and vanilla extract 1f366. Blend until smooth and creamy. You can adjust the amount of milk for a thicker or thinner consistency.

    Serve and garnish: Pour the milkshake into a glass, top with whipped cream 1f365, and sprinkle some crushed Oreos on top for extra crunch.

    Enjoy! Indulge in this creamy, chocolatey, and cookie-filled milkshake!

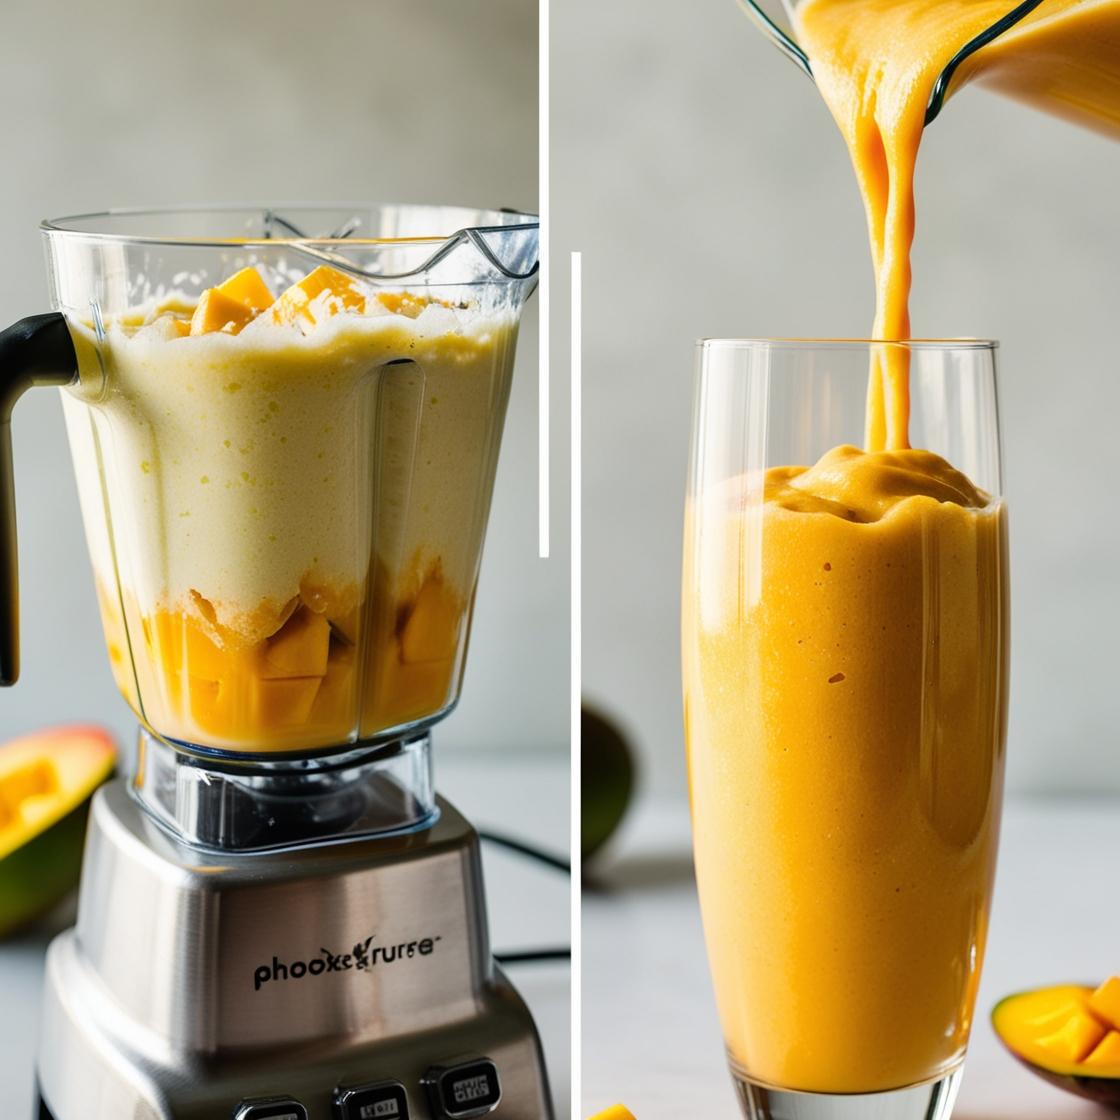
  • Creamy Coconut Mango Smoothie

    Creamy Coconut Mango Smoothie

    Ingredients:
    1/2 cup frozen mango 1f96d
    1/2 cup coconut milk 1f965
    1/2 banana 1f34c
    1 tbsp shredded coconut 1f965
    1 tsp honey 1f36f (optional)
    Instructions:
    Combine frozen mango 1f96d, coconut milk 1f965, and banana 1f34c in a blender.
    Add shredded coconut 1f965 for extra texture and sweetness.
    Add honey 1f36f if you like a sweeter smoothie.
    Blend until smooth and serve chilled. Enjoy the creamy coconut mango goodness!

  • Honey, Lemon, Onion, Garlic and Ginger – The Ultimate Natural Remedy!

    Honey, Lemon, Onion, Garlic and Ginger – The Ultimate Natural Remedy!

    This potent natural remedy combines honey, lemon juice, onion, garlic, and ginger to create a super immune, anti-inflammatory, and detoxifying elixir. It’s been used for centuries to combat colds, flu, infections, and even improve digestion and overall wellness.
    The health benefits of this powerful combination
    Strengthens the immune system – Fight infections and viruses.
    Relieves cold and flu symptoms – Soothes sore throat, cough and congestion.
    Supports heart health – helps lower cholesterol and blood pressure
    Aids digestion – Reduces bloating, improves gut health.
    Cleanses the body – Detoxes the liver and eliminates toxins.
    Fight inflammation and joint pain – Great for arthritis and muscle pain.
    naturel How to prepare this natural remedy
    Ingredients :
    1 onion (chopped) )
    4 garlic cloves (crushed) 4
    1 tablespoon of grated ginger 1
    Juice of 1 lemon
    3 tablespoons of raw honey
    Instructions :
    Chop the onion and garlic, and grate the ginger.
    Place all the ingredients in a jar and add lemon juice and honey.
    Stir well and let sit for at least 12 hours (best for overnight).
    Strain the liquid (optional) and store in the refrigerator.
    How to use this remedy
    For immunity: Take 1 tablespoon every day on an empty stomach.
    To relieve cold and flu: take 1 c. on soup 2-3 times a day until the sympathetic
    For digestion and detox: drink 1 tablespoon of warm water before meals.
    For sore throat: gargle with a small amount before swallowing.
    Final thoughts
    This honey, lemon, onion, garlic and ginger remedy is a natural powerhouse that supports immunity, heart health, digestion and overall wellness. Keep a jar in your fridge and use it whenever you need a natural boost to your health. cheers
  • Oatmeal and Nut Breakfast Bowl

    Oatmeal and Nut Breakfast Bowl

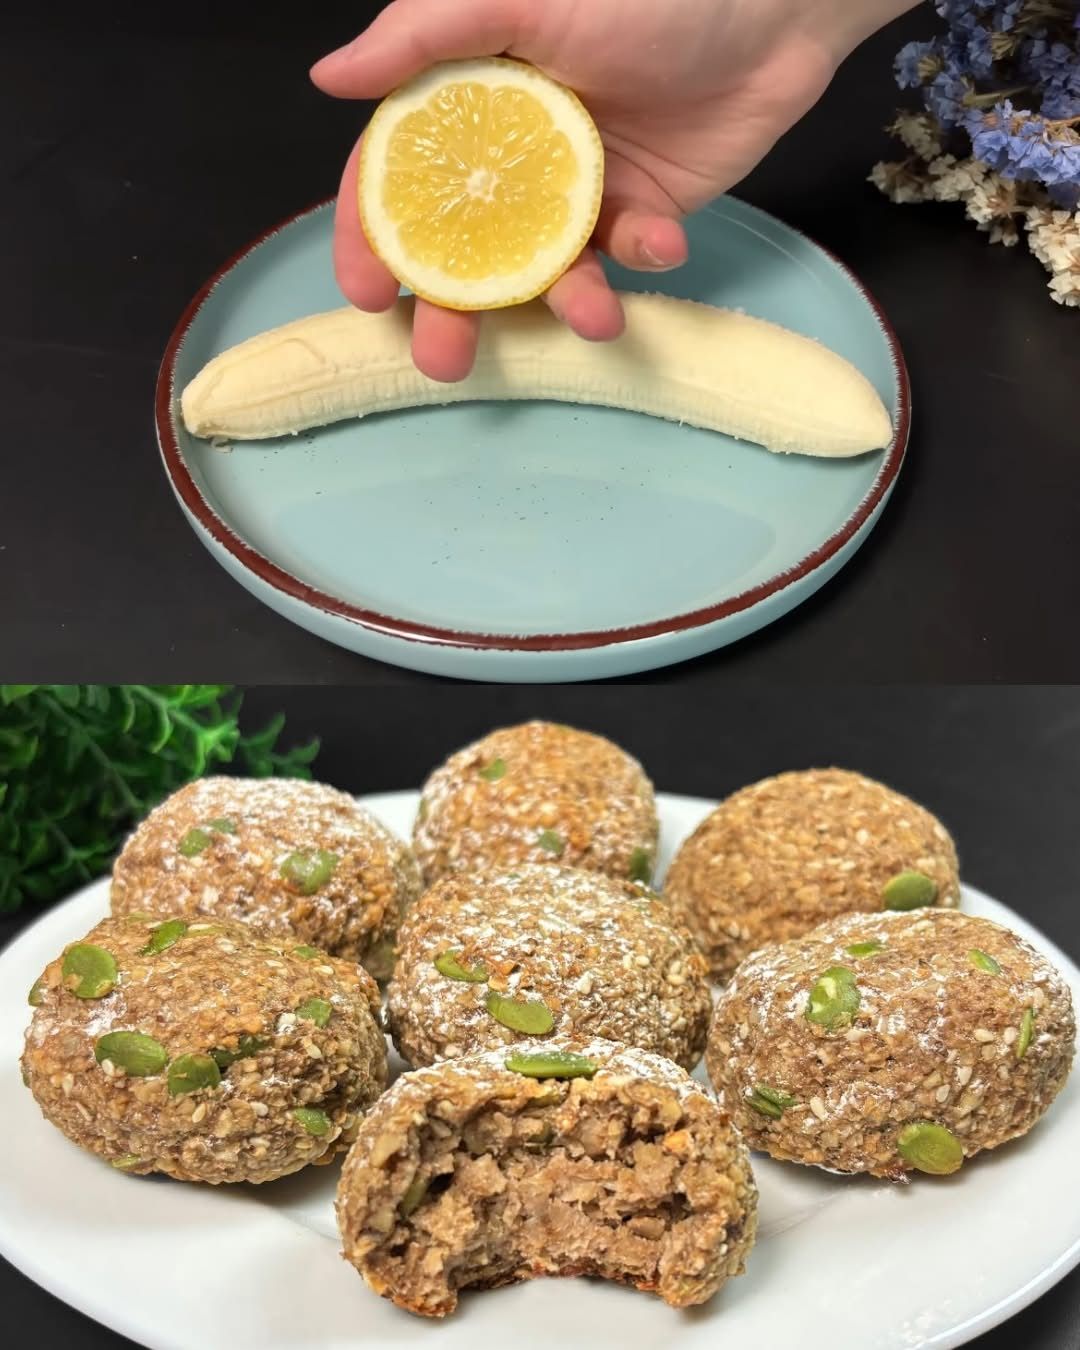
    This Oatmeal and Nut Breakfast Bowl is a nourishing and satisfying meal to kick-start your day. Packed with healthy fats, protein, and fiber from walnuts, sesame seeds, and pumpkin seeds, it offers a great balance of nutrients to fuel your morning. The addition of banana provides natural sweetness, while the oatmeal base is comforting and hearty. A drizzle of lemon juice enhances the flavors and adds a refreshing twist to the bowl. This recipe is simple to prepare, customizable, and a great way to enjoy a wholesome breakfast or snack.

    Preparation Time
    Prep Time: 5 minutes
    Cook Time: 10 minutes
    Total Time: 15 minutes

    Ingredients
    1 cup oatmeal
    1 cup walnuts, chopped
    1 tablespoon vanilla sugar
    1 tablespoon sesame seeds
    40 g pumpkin seeds
    1 banana, sliced
    Lemon juice (to taste)
    100 ml water
    Directions

    1. Cook the Oatmeal:
    In a medium saucepan, add 100 ml of water and bring to a boil.
    Stir in the oatmeal and reduce the heat to low. Let it cook, stirring occasionally, for about 5-7 minutes or until the oatmeal has thickened and reached your desired consistency.
    2. Prepare the Nuts and Seeds:
    While the oatmeal is cooking, chop the walnuts into small pieces.
    In a small pan over medium heat, toast the walnuts, sesame seeds, and pumpkin seeds for about 2-3 minutes, stirring frequently to prevent burning. Once toasted, remove from heat and set aside.
    3. Assemble the Bowl:
    Once the oatmeal is cooked, spoon it into a bowl.
    Top the oatmeal with the toasted nuts and seeds, and sliced banana.
    4. Add Lemon Juice:
    Drizzle a bit of lemon juice over the bowl to enhance the flavors and add a zesty finish.
    5. Serve:
    Enjoy your oatmeal and nut breakfast bowl warm, and feel free to adjust the toppings or drizzle more lemon juice if desired.
    Serving Suggestions
    Top with additional fruits: Add other fruits like berries, apples, or dried fruits for extra flavor and nutrients.
    Add a sweetener: If you prefer a sweeter breakfast, drizzle honey or maple syrup on top.
    Pair with a beverage: Enjoy this breakfast bowl with a cup of tea, coffee, or freshly squeezed juice.
    Tips
    Make it creamier: For a creamier texture, you can substitute the water with milk (dairy or plant-based) while cooking the oatmeal.
    Use raw nuts and seeds: If you prefer a raw version of this recipe, skip the toasting step and simply add the nuts and seeds directly to the oatmeal.
    Customize the flavors: Feel free to experiment with other seeds like chia or flax seeds, or swap the banana for other fruits like mango or apple slices.
    Nutritional Benefits
    This Oatmeal and Nut Breakfast Bowl is packed with health benefits. Oatmeal is a great source of soluble fiber, which helps lower cholesterol and stabilize blood sugar levels. Walnuts, sesame seeds, and pumpkin seeds are rich in healthy fats, protein, and antioxidants, promoting heart health and overall well-being. The banana provides potassium and natural sugars, making it a great energy source, while lemon juice adds vitamin C and helps with digestion. This breakfast bowl offers a balanced combination of macronutrients to fuel your day.

    Conclusion
    This Oatmeal and Nut Breakfast Bowl is not only quick and easy to prepare but also loaded with essential nutrients to support a healthy start to your day. With a combination of whole grains, healthy fats, and natural sweetness, it’s a satisfying meal that will keep you full and energized. Plus, it’s highly customizable to suit your taste preferences or dietary needs. Whether you enjoy it as a quick breakfast or a wholesome snack, this bowl is a delicious and nutritious way to fuel your body.

    Frequently Asked Questions
    Can I make this recipe ahead of time? Yes, you can cook the oatmeal ahead of time and store it in the fridge for up to 3 days. Just reheat it with a splash of water or milk before serving.

    Can I use other types of seeds? Absolutely! You can swap out the pumpkin seeds for sunflower seeds or add flaxseeds for a nutritional boost.

    Can I make this oatmeal without banana? Yes, you can substitute the banana with other fruits like berries, apples, or even dried fruit like raisins or figs.

    Can I use maple syrup instead of vanilla sugar? Yes, maple syrup can be used as a natural sweetener. Just drizzle it over the top or mix it into the oatmeal for added sweetness.

    Can I make this recipe vegan? Yes, simply use plant-based milk (like almond or oat milk) and ensure the seeds and nuts are raw or roasted without any animal-based ingredients.

  • Lemon Cream Cake Recipe

    Lemon Cream Cake Recipe

    This Lemon Cream Cake is a delightful and refreshing dessert perfect for any occasion. Combining a fluffy cake base with a rich and zesty lemon cream, this cake is sure to impress your family and friends. The vibrant yellow color and tangy lemon flavor make it a wonderful treat for warm days or festive gatherings.

    Preparation Time
    Total Time: 2 hours 30 minutes
    Active Preparation Time: 40 minutes
    Chilling Time: 2 hours
    Ingredients
    For the Lemon Cream:

    500 ml milk
    120g sugar
    70g cornstarch
    100 ml fresh lemon juice
    1 egg
    A few drops of yellow food coloring
    For the Cake Base:

    4 eggs
    100g sugar
    A pinch of salt
    8g vanilla sugar
    100 ml vegetable oil
    120 ml milk
    130g sifted flour
    10g baking powder
    Baking Pan:

    Size: 28 cm x 18.5 cm
    Directions

    Lemon Cream:
    Mix Dry Ingredients: In a saucepan, combine the sugar and cornstarch. Mix well.
    Add Milk: Gradually add the milk to the mixture, stirring constantly to avoid lumps.
    Cook the Mixture: Place the saucepan over medium heat and cook, stirring constantly until the mixture thickens and starts to boil.
    Add Lemon Juice: Once thickened, remove from heat and slowly add the fresh lemon juice while stirring.
    Incorporate Egg: Beat the egg in a separate bowl and gradually add it to the lemon mixture, stirring continuously to combine.
    Add Food Coloring: Add a few drops of yellow food coloring to achieve a vibrant lemon color.
    Cool Down: Pour the lemon cream into a bowl, cover it with plastic wrap to prevent a skin from forming, and let it cool to room temperature.
    Cake Base:

    Preheat Oven: Preheat your oven to 180°C (350°F).
    Beat Eggs and Sugar: In a large bowl, beat the eggs with the sugar, vanilla sugar, and a pinch of salt until the mixture is light and fluffy.
    Add Wet Ingredients: Gradually add the vegetable oil and milk, mixing until well combined.
    Incorporate Dry Ingredients: Sift together the flour and baking powder, then gradually add them to the wet mixture, folding gently to avoid deflating the batter.
    Bake the Cake: Pour the batter into the prepared baking pan (28 cm x 18.5 cm) and bake for about 25-30 minutes, or until a toothpick inserted into the center comes out clean.
    Cool the Cake: Once baked, let the cake cool in the pan for 10 minutes, then transfer it to a wire rack to cool completely.
    Assembly:
    Layer the Cake: Once the cake is completely cooled, cut it into two equal layers.
    Add Lemon Cream: Spread the lemon cream evenly over the bottom layer of the cake.
    Top Layer: Place the top layer of the cake over the lemon cream.
    Chill: Refrigerate the assembled cake for at least 2 hours to allow the cream to set and flavors to meld.
    Serving Suggestions
    Dust with powdered sugar before serving.
    Garnish with lemon zest or slices for a decorative touch.
    Serve chilled for the best taste experience.
    Cooking Tips
    Ensure the milk mixture for the lemon cream is cooked thoroughly to avoid a raw cornstarch taste.
    Beat the eggs well for a light and fluffy cake base.
    Allow the cake to cool completely before cutting and layering to prevent it from breaking.
    Nutritional Benefits
    Lemon Juice: Rich in vitamin C and antioxidants.
    Eggs: Provide high-quality protein and essential nutrients.
    Milk: Source of calcium and vitamin D.

    Dietary Information
    Vegetarian: Yes
    Nut-free: Yes
    Dairy: Contains milk

    Storage
    Store the lemon cream cake in the refrigerator for up to 3 days.
    Cover the cake with plastic wrap or store it in an airtight container to prevent it from drying out.
    Why You’ll Love This Recipe
    The combination of fluffy cake and zesty lemon cream is refreshing and delightful.
    It’s a perfect dessert for gatherings and special occasions.
    Easy to make with simple ingredients.
    Conclusion
    This Lemon Cream Cake is the perfect balance of light, fluffy cake and rich, tangy lemon cream. It’s an ideal dessert for any occasion, bringing a burst of citrus flavor to your table. Easy to make and delightful to eat, this cake will surely become a favorite in your recipe collection. Enjoy every bite of this refreshing treat!

  • The Inspiration Behind Lemon Cheesecake Mousse

    The Inspiration Behind Lemon Cheesecake Mousse

    Ingredients:

    • Crust:
      3/4 cup crushed graham crackers (6 full sheets)
    • 2 Tbsp (26g) granulated sugar
    • 3 Tbsp (42g) salted butter, melted

    Mousse:

    • 2 1/2 Tbsp fresh lemon juice
    • 1 1/2 Tbsp water
    • 1 1/2 tsp unflavored gelatin powder
    • 1 1/2 cups (355ml) heavy cream
    • 1 cup (110g) powdered sugar, divided
    • Yellow food coloring (optional)
    • 12 oz (340g) cream cheese, softened
    • 1 (10 oz) jar lemon curd (tested with Dickenson’s)
    • Sweetened whipped cream , lemon wedges, blueberries and mint for garnish (optional)


    PREPARATION:

    1. In a mixing bowl whisk together graham cracker crumbs and sugar. Pour in butter and stir until evenly moistened. Divide mixture among 8 – 10 dessert cups and lightly press into an even layer, set aside.
    2. Pour lemon juice and water into a small bowl. Sprinkle gelatin evenly over top, let rest 5 minutes. Meanwhile, whip heavy cream in a medium mixing bowl until soft peaks form.
    3. Add in 1/3 cup of the powdered sugar, tint with yellow food coloring if desired and whip until stiff (but not lumpy) peaks form (shake cream from beaters, no need to clean).
    4. In a separate large mixing bowl whip cream cheese until smooth and fluffy. Mix lemon curd and remaining 2/3 cup powdered sugar into cream cheese mixture.
    5. Heat rested gelatin mixture in the microwave on high power for 30 seconds. Whisk for 1 minute to thoroughly dissolve gelatin, then let cool 3 minutes (no longer or it may start to set then you could end up with little lumps in the mousse).
    6. While mixing cream cheese mixture with hand mixer, slowly pour in gelatin mixture then blend until thoroughly combined.
    7. Gently fold 1/3 of the whipped cream mixture into the cream cheese mixture to lighten, then add remaining whipped cream and gently fold until combined.
    8. Spoon or pipe mixture into dessert cups over graham cracker layer. Cover and refrigerate 2 hours (or up to 1 day ahead if desired) to set. Garnish as desired. Serve cold.

    enjoy!

    Enjoy !

  • Mosaic jelly

    Mosaic jelly

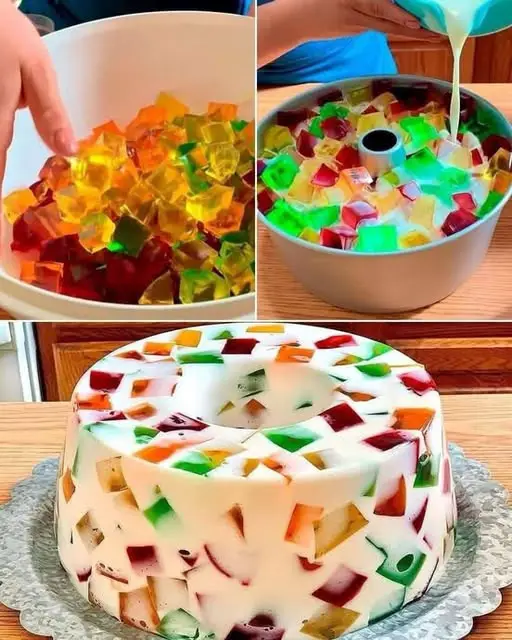
    Here’s a fun and colorful Mosaic Jelly recipe — a vibrant, wobbly dessert that’s sure to impress! ✨


     Ingredients:

    For the colored jellies:

    • 1 box (3 oz each) of red gelatin (strawberry, cherry, etc.)
    • 1 box green gelatin (lime or apple)
    • 1 box yellow gelatin (lemon or pineapple)
    • 1 box blue gelatin (berry or tropical)
    • 4 cups boiling water (1 cup per flavor)

    For the creamy base:

    • 1 can (14 oz) sweetened condensed milk
    • 1 cup evaporated milk
    • 1 cup hot water
    • 2 envelopes (14g total) unflavored gelatin
    • 1/2 cup cold water

     Instructions:

    1. Prepare the colored jellies:

      • In separate bowls, dissolve each flavored gelatin in 1 cup of boiling water.
      • Pour each into a square or rectangular container (to cut into cubes later).
      • Refrigerate for 4 hours or until fully set.
    2. Cut the jellies:

      • Once set, cut each colored jelly into small cubes.
      • Gently toss them together in a large bowl — like a rainbow puzzle!
    3. Make the creamy mixture:

      • In a small bowl, sprinkle unflavored gelatin over cold water and let it bloom for 5 minutes.
      • Add hot water and stir until the gelatin dissolves completely.
      • In another bowl, whisk together sweetened condensed milk and evaporated milk.
      • Slowly add the dissolved gelatin to the milk mixture, stirring until smooth.
    4. Assemble the mosaic jelly:

      • Place the jelly cubes into a mold or large glass dish.
      • Pour the creamy mixture evenly over the cubes, ensuring they’re all coated.
      • Gently tap the mold to remove air bubbles.
      • Refrigerate for 4–6 hours or until fully set.
    5. Serve:

      • Carefully unmold or slice into cubes.
      • Serve cold and enjoy the wobbly, colorful magic!

     Pro Tips:

    • Creative molds: Use bundt pans, silicone molds, or individual cups for a fun twist.
    • Extra flavor: Add a splash of vanilla extract to the creamy base for a subtle, rich aroma.
    • Fruit boost: Mix in diced fruit (like kiwi or berries) for an extra pop of flavor and texture!

    Would you like me to suggest a decorative topping — maybe whipped cream or a fruit drizzle? Let me know! 

  • Skillet Pizza: Easy, Crispy, and Delicious

    Skillet Pizza: Easy, Crispy, and Delicious

    Skillet Pizza: Easy, Crispy, and Delicious

    There’s nothing quite like a homemade pizza, and this Skillet Pizza Recipe is perfect for those days when you want a quick and satisfying meal without turning on the oven. Made with simple ingredients and cooked to golden perfection in a skillet, this pizza has a crispy crust, flavorful toppings, and gooey melted cheese. Whether you’re a beginner or a seasoned cook, this recipe is easy to follow and delivers fantastic results every time!

    Preparation Time:

      • Prep Time: 15 minutes
      • Cook Time: 15 minutes
      • Total Time: 30 minutes
      • Servings: 2-3

    Ingredients:

      • 1 tablespoon oil (plus extra for cooking the pizza)
      • 1/2 cup water
      • 1 piece garlic, minced
      • 1 tablespoon sugar
      • 1 slice onion, finely chopped
      • 1 1/2 cups all-purpose flour
      • A pinch of oregano
      • Pepperoni slices
      • 1/2 tablespoon baking powder
      • 100 grams mozzarella cheese, grated
      • A pinch of salt
    • 3 pieces tomatoes, sliced

    Directions:

      • Heat 1 tablespoon of oil in a skillet over medium heat.
      • In a mixing bowl, combine water, minced garlic, sugar, and chopped onion. Stir well.
      • Gradually add flour while stirring until the dough starts forming.
      • Transfer the dough to a floured surface and knead it until it becomes smooth.
      • Roll the dough into a circle that fits your skillet.
      • Spread a little oil in the skillet and place the dough in it. Cook for a few minutes until the bottom starts to puff up and turn golden.
      • Flip the dough and cook the other side until lightly golden brown.
      • Remove the cooked dough from the skillet and set it aside.
      • In the same skillet, add a little oil and spread it around.
      • Place the cooked dough back in the skillet.
      • Spread tomato slices over the dough evenly.
      • Sprinkle with oregano, salt, and baking powder.
      • Add pepperoni slices on top.
      • Spread grated mozzarella cheese over the pizza.
      • Cover the skillet and cook for a few minutes until the cheese melts and the crust is crispy.
      • Slice and serve hot!

    Nutritional Facts (Per Serving):

      • Calories: 320
      • Protein: 12g
      • Carbohydrates: 40g
      • Fat: 12g
      • Fiber: 3g
    • Sodium: 450mg

    The Origins and Popularity of Skillet Pizza Skillet pizza is a variation of traditional pizza that is cooked in a stovetop pan instead of an oven. This method is especially popular in households that don’t have an oven or for those looking for a quicker cooking method. Pizza itself originated in Naples, Italy, where it was first created as a simple dish consisting of flatbread, tomatoes, and cheese. Over time, different cooking methods emerged, including baking, grilling, and now, skillet cooking.

    Skillet pizza has gained popularity due to its quick preparation and crispy crust. Since the skillet traps heat efficiently, the dough cooks evenly, resulting in a perfectly golden, crunchy bottom and a soft, chewy center. This method is widely loved by home cooks and professionals alike as it allows for great pizza-making without any fancy equipment!

    Why You’ll Love This Recipe This skillet pizza recipe is a game-changer for homemade pizza lovers. The crispy yet tender crust, flavorful toppings, and gooey melted cheese make it irresistible! Plus, it’s quick, easy, and requires only a few pantry staples. No oven? No problem! This pizza comes together effortlessly in just 30 minutes.

    Health Benefits of Skillet Pizza Pizza doesn’t always have to be unhealthy! This skillet pizza can be customized with nutritious ingredients like whole wheat flour, fresh vegetables, and lean proteins. Tomatoes provide antioxidants and vitamin C, while mozzarella cheese is a good source of calcium and protein. Adding veggies like bell peppers, mushrooms, or spinach can enhance the nutritional value even more.

    Serving Suggestions Skillet pizza is delicious on its own, but you can make it even better with the right pairings. Serve with a side salad, garlic bread, or a refreshing lemonade for a complete meal. If you’re hosting a pizza night, consider making multiple variations so everyone can enjoy their favorite flavors!

    Tips for Perfect Skillet Pizza

      • Use a well-seasoned skillet: A non-stick or cast-iron skillet works best to achieve a crispy crust.
      • Don’t over-knead the dough: Just knead until smooth—overworking it can make it tough.
    • Cover while cooking: This helps the cheese melt evenly and prevents the toppings from drying out.
    • Keep the heat medium-low: Too high heat can burn the crust before the toppings are fully cooked.

    Variations to Try Skillet pizza is versatile, so feel free to experiment with different toppings and styles.

      • Veggie Lover’s Pizza: Use bell peppers, mushrooms, onions, and olives.
      • BBQ Chicken Pizza: Swap pepperoni for shredded BBQ chicken and drizzle with BBQ sauce.
      • Margherita Pizza: Keep it simple with tomato slices, fresh basil, and mozzarella.
    • Spicy Kick: Add red pepper flakes or jalapeños for an extra heat boost.

    Conclusion If you’re craving homemade pizza but don’t have an oven, this skillet pizza recipe is the perfect solution! It’s quick, easy, and deliciously crispy with endless topping possibilities. Whether you’re making it for a family dinner, date night, or just a solo treat, this pizza is guaranteed to impress!

    Frequently Asked Questions

      • Can I use whole wheat flour instead of all-purpose flour?
        Yes! Whole wheat flour will add a nuttier flavor and more fiber but may make the dough slightly denser.
      • What type of skillet is best for this recipe?
        cast-iron skillet is ideal because it retains heat well and gives a nice crispy crust, but a non-stick pan works too.
      • Can I make this pizza without cheese?
        Absolutely! Try adding a dairy-free cheese alternative or simply enjoy it with flavorful toppings like olives, mushrooms, and basil.
    • How can I store leftover skillet pizza?
      Store in an airtight container in the refrigerator for up to 3 days. Reheat in the skillet for the best texture.
    • Can I make this recipe gluten-free?
      Yes! Use a gluten-free flour blend to make the dough suitable for gluten-sensitive individuals.
  • Vanilla Ice Cream Recipe

    Vanilla Ice Cream Recipe

    Ingredients:

    • 2 cups heavy cream
    • 1 cup whole milk
    • ¾ cup granulated sugar
    • 1 tablespoon pure vanilla extract
    • Pinch of salt

    Instructions:

    1. Mix Ingredients: In a mixing bowl, whisk together the heavy cream, milk, sugar, vanilla extract, and salt until the sugar is fully dissolved.
    2. Chill: Cover and refrigerate the mixture for at least 2 hours (or overnight for better flavor).
    3. Churn: Pour the chilled mixture into an ice cream maker and churn according to the manufacturer’s instructions (typically 20-25 minutes) until it reaches a soft-serve consistency.
    4. Freeze: Transfer the ice cream to an airtight container and freeze for at least 4 hours to firm up.
    5. Serve & Enjoy! Scoop and serve with your favorite toppings!

    Now, let me generate a picture of your homemade vanilla ice cream. 

  • Pineapple & Papaya Juice for a Flat Stomach – Natural & Healthy Weight Loss Drink!

    Pineapple & Papaya Juice for a Flat Stomach – Natural & Healthy Weight Loss Drink!

    Pineapple & Papaya Juice for a Flat Stomach – Natural & Healthy Weight Loss Drink!

    If you’re looking for a flatter stomach and improved digestion, this pineapple and papaya juice is the ideal natural remedy! These two tropical fruits work together to burn fat, reduce bloating, and detoxify your body, making them a fantastic option for weight loss and gut health.

    Why Pineapple & Papaya Juice Helps Burn Belly Fat

    Pineapple: Packed with bromelain, a natural enzyme that aids digestion, reduces bloating, and helps break down fat.

    Papaya: Rich in papain, which supports digestion, boosts metabolism, and reduces inflammation.

    Lemon (optional): Helps enhance fat burning and detoxifies the liver.

    Ginger (optional): Improves digestion and increases calorie burn.

    How to Make Pineapple & Papaya Juice for a Flat Stomach

    Ingredients:

    • 1 cup fresh pineapple chunks
    • 1 cup fresh papaya chunks
    • 1 cup water or coconut water (for hydration)
    • Juice of ½ lemon (optional, for added fat-burning benefits)
    • ½ teaspoon grated fresh ginger (optional, to boost metabolism)

    Instructions:

    1. Blend all ingredients until smooth.

    2. Strain (optional) if you prefer a smoother juice.

    3. Pour into a glass and drink immediately for maximum benefits.

    4. Drink daily, ideally on an empty stomach in the morning or before meals.

    Benefits of This Juice for a Flat Stomach:

    Reduces bloating & enhances digestion

    Naturally burns belly fat

    Detoxifies the liver & boosts metabolism

    Curbs cravings & promotes a feeling of fullness

    Final Tip for Faster Results

    Pair this juice with a balanced diet and regular physical activity (like walking or yoga) for even more effective belly-flattening results!

    This refreshing tropical juice is an easy and natural way to lose weight and feel great. Give it a try and enjoy a healthier, slimmer you!

  • Cottage Cheese Eggs Baked in the Oven A Cozy Breakfast Choice

    Cottage Cheese Eggs Baked in the Oven A Cozy Breakfast Choice

    Cottage Cheese Eggs Baked in the Oven A Cozy Breakfast Choice

    In the collection of family recipes, there are some cozy dishes that become a part of our mornings, adding warmth and satisfaction to the beginning of each day. One of our favorite recipes in our family is Baked Cottage Cheese Eggs. This tasty and nutritious dish has always been a favorite at our breakfast table, providing a delicious way to energize ourselves for the day ahead.

    The recipe for Baked Cottage Cheese Eggs has been in our family for many years, handed down from my grandmother to my mother, and now to me. Its beginnings can be linked to a time when basic, homemade meals were essential to family routines.

    What our family loves about this dish is how simple and adaptable it is. It’s simple to make with just a few ingredients, but it’s full of flavor and protein to give us energy for the day. Also, you can make it your own by adding the herbs, vegetables, or meats you prefer.

    Baked eggs with cottage cheese are an important part of our family’s breakfast routine. Whether it’s a relaxed weekend breakfast or a hectic weekday morning, this meal always makes us happy and brings us comfort.

    Ingredients

    6 big eggs

    1 cup of cheese made from milk

    1/4 cup of shredded cheddar cheese

    2 tablespoons of chopped chives, you can add them if you like.

    Add salt and pepper according to your preference.

    Use cooking spray or butter to grease the pan.

    Preparation

    Way of doing something.

    Heat up the oven: Turn on your oven and set it to 375°F (190°C). Apply cooking spray or butter to the baking dish to avoid food sticking.

    Get the eggs ready: In a big bowl, break the eggs and whisk them gently with a fork or whisk. Put the cottage cheese, shredded cheddar cheese, chopped chives (if you have them), salt, and pepper. Mix until everything is well mixed together.

    Baking: Pour the beaten eggs into the baking dish, making sure to spread them out evenly. Put the dish in the oven that has been preheated and bake for 25-30 minutes, or until the eggs are cooked and the top is golden brown.

    Instructions: After baking, take the dish out of the oven and allow it to cool for a short while. Cut into squares or triangles and serve while hot.

    Baked Cottage Cheese Eggs are not just for breakfast; they represent comfort, warmth, and being together. They show us the happiness of eating with family and beginning the day with a tasty meal. Whether you are cooking them for your loved ones or just for yourself, these eggs will surely become a favorite part of your morning. Next time you want a delicious and filling breakfast, try making our family’s Baked Cottage Cheese Eggs recipe. It’s bound to be a hit in your home as well.