Category: quick and easy recipe

  • Ossetian Pie Recipe: A Delicious Tradition

    Ossetian Pie Recipe: A Delicious Tradition

    Ossetian Pie Recipe: A Delicious Tradition

    Table of Contents

    Ossetian pie, a traditional dish from the Caucasus region, offers a delightful blend of flavors and textures. In this article, we’ll explore the steps to create this culinary masterpiece right in your own kitchen.

    Ingredients

    To prepare an Ossetian pie, you’ll need:

    • For the filling:
      • 300 grams of peeled potatoes
      • 200 grams of hard cheese
      • Black pepper to taste
    • For the dough:
      • Flour: 250 grams
      • Baking soda: 1 teaspoon (level)
      • Kefir: 200 milliliters
      • Vegetable oil: 40 milliliters
      • Salt: 1/2 teaspoon
      • Sugar: 1 teaspoon
    Instructions
    1. Prepare the Potatoes: Peel the potatoes, place them in a pan, cover with water, add a pinch of salt, and cook until tender.
    2. Make the Dough: In a mixing bowl, combine the flour and baking soda. In another bowl, mix kefir, vegetable oil, salt, and sugar. Gradually add the flour mixture to the kefir mixture, kneading until you have a smooth, elastic dough. Let it rest while preparing the filling.
    3. Prepare the Filling: Drain the cooked potatoes and mash them into a puree. Grate the hard cheese and mix it with the mashed potatoes. Season with black pepper to taste.
    4. Assemble the Pie: Roll out the dough on a floured surface into a circle. Place the filling in the center of the dough circle. Fold the edges of the dough over the filling, pinching them together like a bag. Shape the pie into a circle, about 30 cm in diameter.
    5. Preheat the Oven: Preheat your oven to the maximum temperature.
    6. Bake the Pie: Transfer the assembled pie onto a baking sheet. Mix the yolk with milk and brush it over the pie. Make an incision in the middle of the pie. Bake in the preheated oven for about 10 minutes at 220°C until golden brown.
    7. Serve and Enjoy: Serve the Ossetian pie warm to enjoy the stretchy melted cheese. It’s equally delicious when served cold, making it a versatile treat for any time of day.
    See also  Practical Potato Crepe Pastry Recipe
    4. Tips for Success
    • Use a silicone mat for easy dough handling.
    • Adjust the ratio of filling to dough according to your preference.
    • Experiment with different cheeses and seasonings for unique flavor variations.
    5. Serving Suggestions

    Serve the Ossetian pie warm to enjoy the stretchy melted cheese. It’s also delicious when served cold, making it a versatile dish for any occasion.

    6. Variations and Additions
    • Add cooked meat for a heartier pie.
    • Incorporate herbs or spices for extra flavor.
    • Try different dough recipes for a personalized touch.
    7. Conclusion

    Crafting an Ossetian pie is a rewarding experience that brings people together through the joy of food. With simple ingredients and a bit of creativity, you can create a culinary masterpiece that’s sure to impress.

  • Prepare this Easy and Delicious Potato Recipe Whenever You Have Potatoes!

    Prepare this Easy and Delicious Potato Recipe Whenever You Have Potatoes!

    Prepare this Easy and Delicious Potato Recipe Whenever You Have Potatoes!

    Table of Contents

    Potatoes are a staple in many households, loved for their versatility and delicious taste. If you’re looking for a simple yet satisfying potato recipe, crispy potato croquettes are the way to go. With just a few basic ingredients and easy-to-follow steps, you can whip up a batch of these golden-brown delights that will have everyone asking for more.

     Ingredients
    • 6 potatoes (800 g)
    • 1/2 cup of starch (100 g)
    • Grated cheddar cheese (150 g)
    • 1 pinch of parsley
    • 1 teaspoon of salt (8 g)
    • 1 egg
    • 1 cup bread crumbs
    • Vegetable oil (for frying)
    Preparation of Potato Croquettes
    1. Peel and Cut Potatoes: Start by peeling the potatoes and cutting them into cubes.
    2. Boil Potatoes: Place the potato cubes in a pot, cover them with water, and boil until they are soft.
    3. Mash Potatoes: Drain the water and transfer the boiled potatoes to a large bowl. Mash them until they reach a smooth, puree-like consistency.
    4. Add Ingredients: To the mashed potatoes, add starch, grated cheddar cheese, salt, and parsley. Mix everything well until fully combined.
    4. Shaping the Croquettes
    • Grease Hands: Grease your hands with oil to prevent sticking.
    • Shape Croquettes: Take portions of the potato mixture and shape them into croquettes, forming them into oval or cylindrical shapes.
    See also  I CAN’T Stop Making It! NO FRYING OR FUSSING. Tastier than MEAT!
    5. Coating and Frying
    • Coat with Egg and Breadcrumbs: Dip each croquette first in beaten egg, then coat it evenly with breadcrumbs.
    • Fry Croquettes: Heat vegetable oil in a pan and fry the croquettes until they are golden brown and crispy on all sides.
    6. Serving the Croquettes

    Once the croquettes are fried to perfection, serve them hot and crispy. They can be enjoyed as a snack, appetizer, or side dish alongside your favorite dipping sauce or condiment.

    7. Why Potato Croquettes?

    Potato croquettes are a fantastic dish because they are:

    • Versatile: They can be served as a snack, appetizer, or side dish.
    • Kid-Friendly: Children love their crispy texture and delicious taste.
    • Easy to Make: With simple ingredients and straightforward steps, anyone can prepare them at home.
    8. Tips for Perfect Croquettes
    • Ensure the potatoes are cooked until soft but not mushy.
    • Use high-quality cheese for maximum flavor.
    • Fry the croquettes in hot oil for a crispy exterior.
    • Serve them immediately for the best taste and texture.
    9. Health Considerations

    While potato croquettes are undeniably delicious, it’s essential to enjoy them in moderation as part of a balanced diet. Considerations include:

    • Portion Control: Enjoy croquettes as a treat rather than a staple.
    • Balance: Pair them with healthier options like a side salad or steamed vegetables.
    • Moderation: Limit intake of fried foods for overall health.
    10. Conclusion

    In conclusion, crispy potato croquettes are a fantastic way to enjoy the humble potato in a new and exciting form. With simple ingredients and easy steps, you can create a dish that’s sure to impress friends and family alike. Whether served as a snack, appetizer, or side dish, these golden-brown delights are bound to become a favorite in your household.

  • How to Make Delicious Cookies in Minutes with Just One Egg!

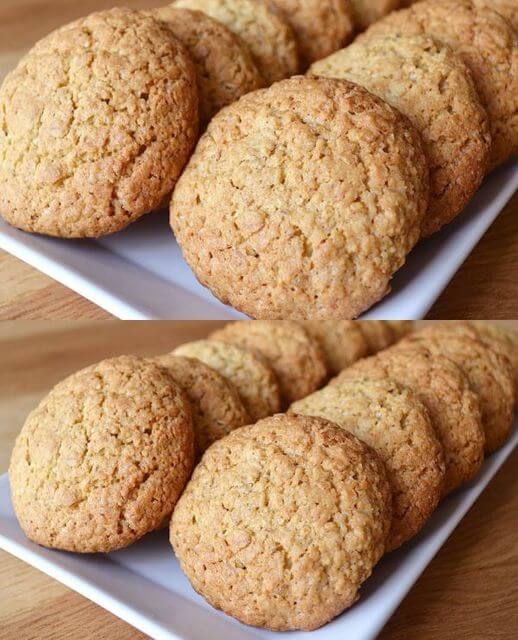
    How to Make Delicious Cookies in Minutes with Just One Egg!

    How to Make Delicious Cookies in Minutes with Just One Egg!

    Table of Contents

    Are you ready to embark on a baking adventure that’s both effortless and rewarding? This article will guide you through the process of making delectable cookies with just a handful of ingredients and a little bit of time. Get your aprons on and let’s dive into the world of homemade goodness!

    Ingredients

    To create these delightful cookies, you’ll need:

    • 1 egg
    • 1 1/2 cups (200 g) flour
    • 1/2 cup (100 g) sugar
    • 1 teaspoon baking powder
    • 1/2 cup vegetable oil
    Preparing the Dough
    1. Combine the Wet Ingredients: Break an egg into a mixing bowl and add granulated sugar and vegetable oil. Whisk the ingredients vigorously until the sugar dissolves completely.
    2. Incorporate the Dry Ingredients: Pour vanilla sugar into the egg mixture and continue whisking until the mixture turns white.
    3. Mix in the Flour: In a separate bowl, mix flour and baking powder. Sift these dry ingredients into the egg mixture and gently fold them together until a dough forms.
    Shaping the Cookies
    1. Knead the Dough: Transfer the dough onto a clean surface and knead it by hand until it becomes soft and elastic.
    2. Form the Cookies: Pinch off small pieces of dough and roll them into balls. Place the balls onto a baking sheet lined with parchment paper, leaving some space between each.
    Baking the Cookies
    1. Preheat the Oven: Heat your oven to 200 degrees Celsius (approximately 390 degrees Fahrenheit).
    2. Bake to Perfection: Place the baking sheet in the preheated oven and bake the cookies for 10-12 minutes, or until they turn golden brown.
    See also  No-Bake Cake with the Taste of Ice Cream: A Delicious and Easy Dessert
    Serving Suggestions

    Serve these warm, freshly baked cookies with a glass of cold milk for the ultimate indulgence. They also make fantastic gifts for friends and family – just package them up in a cute tin or jar!

    Why Homemade Cookies?

    There’s something truly special about homemade cookies. Unlike store-bought varieties, which are often laden with preservatives and artificial flavors, homemade cookies are made with love and wholesome ingredients. Plus, the satisfaction of creating something delicious from scratch is incomparable.

    Tips for Success
    • Use Fresh Ingredients: Make sure your egg and flour are fresh for the best results.
    • Don’t Overmix: Be gentle when combining the ingredients to avoid tough cookies.
    • Experiment with Flavors: Add chocolate chips, nuts, or dried fruit to customize your cookies to your taste.
  • No-Bake Cake with the Taste of Ice Cream: A Delicious and Easy Dessert

    No-Bake Cake with the Taste of Ice Cream: A Delicious and Easy Dessert

    No-Bake Cake with the Taste of Ice Cream: A Delicious and Easy Dessert

    Table of Contents

    Ingredients

    For the Filling

    • Eggs: 2 large
    • Sugar: 3/4 cup (150 g)
    • Sour Cream: 2 cups (480 g), 20% fat
    • Vanilla Sugar: 1 bag (10 g or 1 tablespoon)
    • Corn Starch: 2 tablespoons (16 g)
    • Butter: 3 1/2 tablespoons (50 g), softened

    For the Cake Base

    • Flour: 2 cups (250 g)
    • Sugar: 1/3 cup (65 g)
    • Butter: 2/3 cup (150 g), cold and grated

    Yield: 8-10 servings
    Total Time: 3 hours 30 minutes (including chilling time)

    Step-by-Step Instructions

    1. Make the Cream Filling

    1. Mix Ingredients: In a medium saucepan, crack in the 2 eggs. Add 3/4 cup of sugar, 1 bag (10 g) of vanilla sugar, and 2 tablespoons of corn starch. Whisk thoroughly until smooth and bubbly.
    2. Add Sour Cream: Gradually add 2 cups of sour cream, whisking continuously until well combined and smooth.
    3. Cook the Cream: Place the saucepan over medium heat and cook the mixture, stirring constantly with a whisk, until it thickens (about 2-3 minutes). Once thickened, remove from heat.
    4. Add Butter: Stir in 3 1/2 tablespoons of butter and mix until fully melted and incorporated into the cream. Set the cream aside to cool slightly while you prepare the cake base.
    See also  Don’t Cook Dinner Until You See These Recipes! Incredibly Delicious, Quick, and Easy!

    2. Prepare the Cake Base

    1. Combine Dry Ingredients: In a large bowl, combine 2 cups of flour and 1/3 cup of sugar. Mix well to combine.
    2. Incorporate Butter: Grate 2/3 cup (150 g) of cold butter using a coarse grater directly into the flour mixture. Rub the butter into the flour and sugar using your hands until the mixture resembles coarse crumbs.
    3. Cook the Crumbs: Heat a non-stick frying pan over low heat. Add the crumb mixture and cook, stirring constantly, until golden and fragrant. This will take about 5-7 minutes. Remove from heat and let cool slightly.

    3. Assemble the Cake

    1. Prepare the Mold: Use a pastry mold or a detachable cake ring. Line it with oiled dense polyethylene or plastic wrap to keep the sides intact and for easy removal of the cake.
    2. Layer the Cake:
      • Start with Crumbs: Sprinkle a couple of spoonfuls of the crumbs on the bottom of the prepared mold and level the surface.
      • Add Cream: Spoon a couple of spoonfuls of the cream filling over the crumbs, smoothing it out carefully to avoid disturbing the crumb layer.
      • Repeat Layers: Continue layering crumbs and cream alternately, finishing with a layer of cream on top.

    4. Finish and Chill

    1. Chill the Cake: Cover the assembled cake with cling film and refrigerate for at least 2-3 hours, or preferably overnight, to allow the layers to set and the flavors to meld.

    5. Serve

    1. Decorate and Serve: When ready to serve, remove the cake from the mold and peel away the plastic wrap. Optionally, decorate the top with shavings of white chocolate or fresh fruit for an elegant touch. Slice and enjoy!
    See also  Chocolate Yogurt Cake

    Nutrition Information (Per Serving, Based on 10 Servings)

    • Calories: 310 kcal
    • Protein: 4 g
    • Carbohydrates: 34 g
    • Sugars: 17 g
    • Total Fat: 18 g
    • Saturated Fat: 10 g
    • Cholesterol: 90 mg
    • Sodium: 50 mg

    Tips for the Best No-Bake Cake

    • Ensure Cream is Thickened: Cook the  cream mixture until it thickens to a pudding-like consistency. This will help the layers hold together when the cake is sliced.
    • Chill Thoroughly: Allowing the cake to chill for several hours or overnight ensures the layers set properly and the flavors develop fully.
    • Customize Fillings: Add fresh berries, chocolate chips, or a layer of fruit preserves between the layers for added flavor and variety.
  • Quick and Delicious Chickpea Lavash with Yogurt: A No-Yeast Recipe

    Quick and Delicious Chickpea Lavash with Yogurt: A No-Yeast Recipe

    Quick and Delicious Chickpea Lavash with Yogurt: A No-Yeast Recipe

    Table of Contents

    1. Prepare the Dough:
    In a mixing bowl, combine the chickpea flour and salt. Add the yogurt and start mixing with a spoon or your hands.
    Gradually add a little warm water until the mixture comes together to form a soft, pliable dough. The dough should be easy to handle and not too sticky.
    2. Knead the Dough:
    Turn the dough onto a lightly floured surface (using chickpea flour) and knead gently for about 2-3 minutes. If desired, knead in herbs or spices to enhance the flavor.
    3. Roll Out the Lavash:
    Divide the dough into small balls, about the size of a golf ball.
    Using a rolling pin, roll each ball into a thin circle or oval shape. Aim for the dough to be as thin as possible without tearing.
    4. Cook the Lavash:
    Heat a non-stick skillet over medium-high heat. Once hot, place a rolled-out dough circle onto the skillet.
    Cook for about 1-2 minutes on each side or until the surface is golden brown and bubbly. Flip and cook the other side.
    5. Serve:
    Serve the warm lavash immediately. It’s perfect for wrapping vegetables and grilled meats or simply dipping into hummus or other spreads.
    Conclusion:
    This chickpea and yogurt lavash is not only a healthy alternative to traditional flatbreads but also a quick and delicious option for any meal. Whether you’re a novice or an experienced baker, this recipe is straightforward and satisfying, proving that making homemade bread can be simple and fun. Enjoy the fresh, warm lavash as part of a nutritious meal, and revel in the flavors and textures that homemade bread brings to the table.
  • The Famous Orange Cake: A Delightful Treat for Every Palate

    The Famous Orange Cake: A Delightful Treat for Every Palate

    The Famous Orange Cake: A Delightful Treat for Every Palate

    Table of Contents

    Are you ready to embark on a culinary journey filled with citrusy goodness and sweet sensations? Say hello to the Famous Orange Cake, a delectable dessert that has taken the world by storm. In this article, we’ll dive into the tantalizing world of orange-infused delights, exploring the ingredients, preparation steps, baking process, serving suggestions, and more. Get ready to tantalize your taste buds and impress your guests with this mouthwatering treat!

    Ingredients
    • 3 oranges
    • 40 g white granulated sugar
    • 1 grated zest of one lemon
    • 60 ml vegetable oil
    • 1 egg
    • 50 g white sugar
    • 160 g cake flour
    • 1 teaspoon baking powder
    Preparation of Orange Mixture
    • Peel three oranges and cut them into small pieces.
    • In a non-stick pan, combine the orange pieces with 40 g of white granulated sugar and the juice of half a lemon.
    • Cook the mixture over medium heat until the oranges form a soft cream, stirring occasionally with a soft spatula.
    • Once done, remove from heat and let it cool.

    Dough Preparation and Assembly

    • In a large bowl, whisk together 1 egg and 50 g of white sugar until well combined.
    • Add 60 ml of vegetable oil and the grated zest of a lemon to the egg mixture, and mix thoroughly.
    • Gradually incorporate 160 g of cake flour and 1 teaspoon of baking powder into the mixture, kneading until a smooth dough forms.
    • Cover the dough with plastic wrap and let it rest for 5 minutes.
    • Line a cake pan with parchment paper and spread a portion of the dough evenly on the bottom.
    • Poke holes in the dough with a fork and spread a layer of the cooked orange mixture on top.
    • Add another layer of dough and orange mixture, then finish with a final layer of dough.
    See also  Irresistible Generous Cake Recipe
    Baking the Cake

    Preheat your oven to 180°C and bake the cake for 35 minutes, or until golden brown and a toothpick inserted into the center comes out clean.

    Final Touch: Icing Sugar Dusting

    Once baked, allow the cake to cool to room temperature before dusting it with icing sugar for a decorative finish.

    Serving the Orange Cake

    Slice the Orange Cake into generous portions and serve it as a delightful dessert for any occasion. Pair it with a dollop of whipped cream or a scoop of vanilla ice cream for an extra indulgent treat!

    Why Orange Cake?

    Orange Cake has become a beloved dessert worldwide due to its unique blend of sweet and tangy flavors. Unlike traditional cakes, the infusion of fresh oranges adds a refreshing twist that appeals to a wide range of palates.

    Health Benefits of Oranges

    Beyond its delicious taste, oranges offer a myriad of health benefits. Packed with vitamin C, antioxidants, and fiber, indulging in Orange Cake can boost your immune system, promote heart health, and improve digestion.

  • Pudding Cake: Simply MEGA CLASS

    Pudding Cake: Simply MEGA CLASS

    Pudding Cake: Simply MEGA CLASS

    Table of Contents

    Welcome to the ultimate dessert experience – the Pudding Cake that will captivate your taste buds and steal your heart. This delightful creation is a perfect blend of creamy vanilla pudding and rich, buttery dough, creating a symphony of flavors and textures that will leave you craving more. Whether you’re preparing it for a special occasion or just to indulge yourself, this recipe is bound to impress.

    Ingredients
    For the Cream:
    • 750 ml milk (3 cups)
    • 1 ½ packs of vanilla pudding powder
    • Sugar (approx. 50 – 100 grams / 1/4 – 1/2 cup)
    • 200 grams of butter (1 cup)
    For the Dough:
    • 250 ml water (1 cup)
    • 120 grams of butter (1/2 cup)
    • 150 grams of flour (1 1/4 cups)
    • ½ pack of baking powder (1 teaspoon)
    • 4 eggs
    Step-by-Step Instructions
    Preparing the Cream:
    1. Mixing the Pudding: Begin by combining the vanilla pudding powder with 250 ml of milk. Stir until well mixed to avoid any lumps.
    2. Boiling the Milk: In a separate saucepan, bring the remaining 450 ml of milk to a boil over medium heat.
    3. Thickening the Pudding: Once the milk is boiling, add the pudding mixture to the saucepan, stirring constantly. Continue to stir until the mixture becomes thick and creamy.
    4. Sweetening the Cream: Add sugar to the thickened pudding, adjusting the sweetness to your taste. Stir well until the sugar is completely dissolved.
    5. Cooling the Pudding: Remove the saucepan from heat and allow the pudding to cool completely. This step is crucial for achieving a smooth and creamy texture.
    6. Incorporating the Butter: Once the pudding has cooled, use a mixer to briefly blend it. Then, add 200 grams of softened butter and mix until the cream is smooth and well combined.
    See also  Tender Beef in 5 Minutes! Chinese Secret to Soften the Toughest Beef
    Preparing the Dough:
    1. Boiling Water and Butter: In a large saucepan, bring 250 ml of water and 120 grams of butter to a boil over medium heat.
    2. Adding Flour and Baking Powder: Reduce the heat to low and vigorously stir in the flour and baking powder. Continue to stir until the mixture pulls away from the sides of the pan and forms a smooth dough.
    3. Cooling the Dough: Remove the saucepan from heat and allow the dough to cool to room temperature.
    4. Incorporating Eggs: Once the dough has cooled, add the eggs one at a time, mixing thoroughly after each addition. Use a mixer on the highest setting to blend the dough for about 2 to 3 minutes until it is smooth and slightly glossy.
    Baking the Dough:
    1. Preheating the Oven: Preheat your oven to 200 degrees Celsius (top/bottom heat).
    2. Preparing the Baking Tray: Divide the dough into two equal parts. Spread the first part thinly and evenly onto a baking tray lined with parchment paper.
    3. Baking the First Layer: Bake the dough in the preheated oven for approximately 20 minutes or until it turns golden brown.
    4. Repeating the Process: Remove the first layer from the oven and allow it to cool completely. Repeat the process with the second half of the dough.
    Assembling the Pudding Cake:
    1. Spreading the Cream: Once both layers of the dough have cooled, spread the prepared vanilla pudding cream evenly over the bottom layer.
    2. Adding the Top Layer: Carefully place the second layer of baked dough on top of the cream.
    3. Finishing Touches: Sprinkle the top layer with powdered sugar for a beautiful and sweet finish.
    See also  Ultimate Apple Cake Extravaganza
    Serving Suggestions

    For an added touch of elegance, serve your Pudding Cake with a dollop of whipped cream or a scoop of vanilla ice cream. Fresh berries also make a delightful accompaniment, adding a burst of color and a tangy contrast to the creamy sweetness of the cake.

    Conclusion

    This Pudding Cake is more than just a dessert; it’s a celebration of flavors and textures that will make any occasion special. The combination of creamy vanilla pudding and buttery dough creates a harmonious balance that’s sure to please even the most discerning palate.

  • The Famous Flatbread

    The Famous Flatbread

    Table of Contents  hide 

    1 The Famous Flatbread

    1.2 Instructions

    The Famous Flatbread

    Table of Contents

    Ingredients
    For the Dough:

    300 grams of flour (approximately 2 cups)
    1 teaspoon salt (5 grams)
    1 teaspoon baking powder (5 grams)
    200 milliliters warm water (about 4/5 cup)
    For the Toppings:
    150 grams spring onions, finely chopped
    150 grams hard cheese of your choice, grated
    100 grams unsalted butter (1/3 cup), melted
    Sesame seeds (for sprinkling)
    Black pepper (to taste)
    For Cooking:
    oil (for frying)

    Instructions

    1. Prepare the Dough:


    » MORE:  How to Make Chicken Alfredo Lasagna
    Mix the Dry Ingredients: Start by sifting together 300 grams of flour, 1 teaspoon of salt, and 1 teaspoon of baking powder in a large mixing bowl. Sifting helps to evenly distribute the baking powder and salt throughout the flour.
    Add Warm Water: Gradually pour 200 milliliters of warm water into the flour mixture while stirring continuously. The warm water will help activate the baking powder, giving the flatbread a light, fluffy texture.
    Knead the Dough: Once the dough starts to come together, knead it by hand for about 2 minutes until it’s smooth and medium-soft. The dough should be pliable but not sticky. If it feels too dry, add a little more water; if too sticky, add a bit more flour.
    Rest the Dough: Cover the dough with a clean cloth or plastic wrap and let it rest for 10-15 minutes. This resting period allows the gluten to relax, making it easier to roll out later.
    2. Prepare the Toppings:
    Chop the Spring Onions: Finely chop 150 grams of spring onions. These will add a fresh, slightly sharp flavor that pairs beautifully with the cheese.
    Grate the Cheese: Grate 150 grams of hard cheese of your choice. Whether you opt for cheddar, Gouda, or Parmesan, the cheese will melt into gooey perfection when cooked.
    Melt the Butter: In a small saucepan or microwave, melt 100 grams of unsalted butter. This will be brushed over the dough to add richness and help the toppings adhere.
    3. Assembly and Cooking:
    Divide the Dough: After the dough has rested, divide it into 4 equal pieces. Roll each piece into a ball, ensuring they’re all roughly the same size for even cooking.
    Roll Out the Dough: On a lightly floured surface, take one dough ball and roll it out as thinly as possible using a rolling pin. The thinner the dough, the crispier your flatbread will be.
    Add the Toppings: Brush the surface of the rolled-out dough with melted butter. Sprinkle sesame seeds evenly over the buttered surface for a nutty crunch. Next, scatter the chopped spring onions and grated cheese on top. Season with black pepper to taste.
    Fold and Roll Again: Carefully fold the dough over itself, creating layers with the toppings inside. Once folded, gently roll the dough out again to maintain an even thickness and to seal in the toppings.
    4. Cooking the Flatbread:
    Heat the Skillet: Place a skillet over medium heat and add a small amount of vegetable oil. If you’re using a non-stick pan, you can opt to cook the flatbread without any oil for a lighter version.
    Cook the Flatbread: Once the skillet is hot, carefully place the flatbread onto the skillet. Cook until the bottom is golden brown, about 3-4 minutes, then flip and cook the other side until golden and crisp. Repeat with the remaining dough balls.
    5. Serve:
    Slice and Serve: Once cooked, slice the flatbreads into wedges or strips and serve them warm. The combination of crispy dough, melted cheese, and the fresh bite of spring onions is absolutely irresistible.
  • Cheap and Delicious Tuna Casserole Dinner

    Cheap and Delicious Tuna Casserole Dinner

    Cheap and Delicious Tuna Casserole Dinner

    Table of Contents

    This budget-friendly Tuna Casserole recipe is not only easy to make but also incredibly delicious. Using canned tuna and simple ingredients, you can create a hearty and satisfying dinner that your whole family will love. Perfect for a cozy weeknight meal, this casserole combines the flavors of tuna, potatoes, and a creamy tomato sauce, all topped with a layer of melted Parmesan cheese.

    Ingredients
    • 2 cans of tuna (about 280 g each)
    • 1 onion, cut into slices
    • 5 medium potatoes, cut into large chunks
    • 2 tablespoons (30 g) tomato paste
    • 3/4 cup (180 ml) hot milk
    • 1 1/2 tablespoons (25 g) butter
    • 1/4 cup (25 g) shredded Parmesan cheese
    • Olive oil, as needed
    • Salt, to taste
    • Black pepper, to taste
    Directions
    Step 1: Prepare the Potatoes
    1. Cut the potatoes into large chunks and place them in a pot of salted water.
    2. Cook the potatoes until tender, about 15 to 20 minutes.
    3. Drain the potatoes and transfer them to a mixing bowl.
    4. Add 1 1/2 tablespoons of butter, salt, and black pepper to taste. Mash the potatoes until smooth.
    5. Gradually add 3/4 cup of hot milk while mashing until the mixture is smooth and creamy.
    Step 2: Prepare the Tuna Mixture
    1. Heat some olive oil in a large pan over medium heat.
    2. Add the sliced onion and sauté until browned.
    3. Add the two cans of tuna and 2 tablespoons of tomato paste mixed with one ladle of potato broth.
    4. Mix well and cook for two to three minutes on low heat.
    See also  Crispy French Fries with Cheese Sauce
    Step 3: Assemble the Casserole
    1. Preheat your oven to 375°F (190°C).
    2. Add half of the mashed potatoes to the bottom of a casserole dish and spread it out evenly.
    3. Layer half of the tuna mixture over the mashed potatoes.
    4. Add the remaining mashed potatoes over the tuna, followed by the remaining tuna mixture.
    5. Top with 1/4 cup of shredded Parmesan cheese.
    Step 4: Bake the Casserole
    1. Place the casserole dish in the preheated oven.
    2. Bake for 10 to 15 minutes, or until the top is golden brown and the cheese is melted.
    Nutrition Information (Per Serving):
    • Calories: 350
    • Protein: 25g
    • Carbohydrates: 30g
    • Fat: 15g
    • Fiber: 4g
    • Sugar: 3g
    Conclusion

    This Tuna Casserole is a delicious and economical meal that is sure to become a family favorite. With its creamy mashed potatoes and flavorful tuna mixture, it’s perfect for any night of the week. Share your cooking creations with us using #madebyemily on social media. Enjoy your meal!

  • Banana Medallions: A Simple, Economical, and Delicious Treat

    Banana Medallions: A Simple, Economical, and Delicious Treat

    Banana Medallions: A Simple, Economical, and Delicious Treat

    Table of Contents

    Ingredients

    For the  Dough

    • Wheat Flour: 210 g (1 3/4 cups)
    • Sugar: 15 g (1 tablespoon)
    • Organic Dry Yeast: 5 g (1/2 packet)
    • Egg: 1 large
    • Oil: 39 ml (3 tablespoons)
    • Warm Milk: 80 ml (1/3 cup)
    • Salt: 1 pinch
    • Bananas: 7 to 10 units, firm and not overly ripe
    • Oil for Frying: as needed

    For the Coating

    • Sugar: 135 g (3/4 cup)
    • Cinnamon Powder: to taste

    Yield: About 40-50 medallions
    Total Time: 1 hour 30 minutes

    Step-by-Step Instructions

    1. Prepare the Dough

    1. Mix Dry Ingredients: In a bowl, combine half of the wheat flour (about 1 cup), 15 g of sugar, and 5 g of dry yeast. Mix well.
    2. Add Wet Ingredients: Make a well in the center of the flour mixture and add 1 egg, 39 ml of oil, 80 ml of warm milk, and a pinch of salt.
    3. Combine: Mix the ingredients with a spatula until a rough dough forms. Gradually add the remaining flour and continue mixing with a spatula.
    4. Knead the Dough: When the dough becomes difficult to mix with a spatula, transfer it to a floured surface and knead with your hands until smooth and homogeneous. If necessary, sprinkle a little more flour to prevent sticking.
    5. Let the Dough Rise: Place the dough back into the bowl and cover it with a cloth. Let it rise in a warm, draft-free place for about 40 minutes, or until it has doubled in size.
    See also  Mediterranean Chickpea Salad Recipe: A Tasty and Nutritious Delight

    2. Roll Out and Shape the Dough

    1. Roll the Dough: Once the dough has risen, transfer it to a lightly floured surface. Roll it out with a rolling pin to a thickness of about 3 mm.
    2. Cut into Strips: Use a pizza cutter or knife to cut the dough into strips that are about 2 cm wide.

    3. Wrap the Bananas and Form Medallions

    1. Prepare the Bananas: Use firm bananas that are not overly ripe. Peel the bananas and wrap each one with a strip of dough, ensuring the dough covers the entire banana.
    2. Form Medallions: Once the banana is fully wrapped, gently press the dough to adhere to the banana. Slice the wrapped bananas into medallions, about 1 cm thick.

    4. Fry the Medallions

    1. Heat the Oil: Heat enough oil in a deep fryer or large pot to submerge the medallions. Heat to about 180°C (350°F). Once the oil is hot, lower the flame to maintain the temperature without overheating.
    2. Fry the Medallions: Fry the medallions in batches, turning them occasionally until they are golden brown on all sides, about 2-3 minutes per batch.
    3. Drain: Remove the medallions from the oil with a slotted spoon and place them on a plate lined with absorbent paper towels to drain excess oil.

    5. Coat and Serve

    1. Prepare the Coating: In a shallow dish, mix 135 g of  sugar with cinnamon powder to taste.
    2. Coat the Medallions: While the medallions are still warm, roll them in the cinnamon-sugar mixture until they are well coated.
    3. Serve: Serve the banana medallions warm. They are perfect as a snack or a sweet treat for any occasion.
    See also  No-Rise Spelt and Wheat Bread Recipe

    Nutrition Information (Per Medallion, Based on 40 Medallions)

    • Calories: 65 kcal
    • Protein: 1 g
    • Carbohydrates: 10 g
    •  Sugars: 4 g
    • Total Fat: 2 g
    • Saturated Fat: 0.5 g
    • Cholesterol: 5 mg
    • Sodium: 20 mg

    Tips for Perfect Banana Medallions

    • Use Firm Bananas: Choose bananas that are still firm and not overly ripe to ensure the medallions hold their shape during frying.
    • Monitor Oil Temperature: Keep the oil at a steady temperature of about 180°C (350°F) to ensure the medallions cook evenly without absorbing too much oil.
    • Serve Fresh: For the best taste and texture, serve the banana medallions while they are warm and freshly coated in cinnamon sugar.
  • Quick and Delicious 5-Minute Bread Recipe

    Quick and Delicious 5-Minute Bread Recipe

    Quick and Delicious 5-Minute Bread Recipe

    Table of Contents

    Say goodbye to store-bought bread with this perfect quick bread recipe!

    Ingredients:

    • 350g wheat flour (sieved)
    • 1 tsp sugar
    • 1 tsp salt (season to taste)
    • 5g dry yeast
    • 210ml boiled, not hot water
    • 30g vegetable oil
    • Milk and butter for brushing
    • Additional flour for dusting

    Instructions:

    1. In a bowl, mix sieved flour, sugar, salt, and dry yeast.
    2. Combine all dry ingredients thoroughly.
    3. Pour in 210ml of boiled, not hot water.
    4. Add 30g of vegetable oil.
    5. Mix well until a dough forms.
    6. Brush the dough with vegetable oil.
    7. Cover with cling film and let it rest in a warm place for 15 minutes.
    8. Brush the dough with milk and butter.
    9. Dust with flour.
    10. Cut the dough with a knife.
    11. Bake in a preheated oven at 180°C (356°F) for 20 minutes.
    12. Savor your homemade bread – quick and simply delicious!
  • Quick and Easy Laughing Bread without Oven | Grandma’s Recipe

    Quick and Easy Laughing Bread without Oven | Grandma’s Recipe

    Quick and Easy Laughing Bread without Oven | Grandma’s Recipe

    Table of Contents

    Discover the delightful and addictive Laughing Bread, a quick and easy treat that you can make without an oven. This recipe, passed down from Grandma, brings back the nostalgic flavors of homemade comfort food. Perfect for snacking or sharing with family, these golden brown balls of goodness are sure to put a smile on your face.

    Ingredients
    • 1 medium egg
    • 1/2 teaspoon (2.5 g) of salt
    • 3/4 teaspoon (3.5 g) of baking soda
    • 4 tablespoons (50 g) of sugar
    • 1 teaspoon (5 ml) of vanilla extract or 1/2 teaspoon (2.5 g) of vanilla powder
    • 1 tablespoon (15 ml) of water
    • 1 and 1/2 tablespoons (22.5 ml) of vegetable oil
    • 1 and 2/3 cups (210 g) of all-purpose flour
    • Sesame seeds for coating
    • Oil for frying
    Instructions
    Step 1: Mix the Ingredients
    1. In a big mixing bowl, add 1 medium egg, 4 tablespoons of sugar, 1 tablespoon of water, 1 and 1/2 tablespoons of vegetable oil, 1/2 teaspoon of salt, 3/4 teaspoon of baking soda, and 1 teaspoon of vanilla extract. Stir until the sugar dissolves.
    Step 2: Prepare the Dough
    1. Gradually add the all-purpose flour into the mixture while gently mixing. Once it forms into a dough, knead it briefly. Avoid over-kneading to prevent the gluten from building up.
    See also  This is the moistest cake we’ve ever made
    Step 3: Form the Dough Balls
    1. Transfer the dough to a plate, then form it into small balls.
    Step 4: Prepare for Coating
    1. Add sesame seeds to a container.
    2. Prepare a large bowl filled with water.
    Step 5: Coat the Dough Balls
    1. Place some of the balls in a strainer, then dip them in the water.
    2. Transfer the wet balls to the sesame seeds and toss until fully coated.
    Step 6: Shape the Balls
    1. Roll each coated ball and slightly press the sesame seeds into them.
    Step 7: Heat the Oil
    1. Pour a generous amount of oil into a pot and heat it to 338°F (170°C).
    Step 8: Fry the Dough Balls
    1. Place the balls in the hot oil. Let the oil come to a boil, then reduce the heat to medium to low.
    2. Deep fry the balls for about 5 minutes, stirring in a circular motion with a spatula, until they are golden brown.
    Step 9: Drain and Serve
    1. Remove the fried balls from the oil using a slotted spoon and transfer them to a plate lined with a paper towel.
    2. Enjoy your Laughing Bread warm and fresh!
    Nutrition Information (Per Serving):
    • Calories: 250
    • Protein: 5g
    • Carbohydrates: 35g
    • Fat: 10g
    • Fiber: 2g
    • Sugar: 8g
    Conclusion

    This Laughing Bread recipe is a delightful and quick snack that brings a taste of nostalgia with every bite. Simple to make and irresistibly delicious, it’s perfect for sharing with loved ones or enjoying on your own. Share your baking adventures with us. Happy cooking and snacking!

  • Indulge in Decadence: Chocolate-Banana Brownies with Nuts

    Indulge in Decadence: Chocolate-Banana Brownies with Nuts

    Chocolate-Banana Brownies with Nuts

    Table of Contents

    Craving a heavenly dessert that’s both wholesome and indulgent? Look no further than chocolate-banana brownies with nuts! These delightful treats combine the goodness of ripe bananas, the richness of cocoa, and the crunch of mixed nuts to create a symphony of flavors. Follow along as we unravel the secrets to crafting these mouthwatering brownies that are sure to tantalize your taste buds.

    Gathering Ingredients
    • 1/2 cup mixed nuts or peanuts (80g): Choose your favorite nuts for that perfect crunch.
    • 2-3 ripe bananas (1-1/2 cup banana puree – 375g): Opt for bananas with speckled skins for maximum sweetness.
    • 1/2 cup unsweetened cocoa (50g): Use high-quality cocoa powder for rich chocolatey flavor.
    Preparing the Batter
    1. Crush the nuts: Using a knife, crush the mixed nuts or peanuts into small pieces. This will add a delightful crunch to your brownies.
    2. Mash the bananas: On a plate, mash the ripe bananas with a fork until smooth to form banana puree. Alternatively, use a blender for a smoother consistency. Transfer the puree to a bowl and gradually sprinkle in the unsweetened cocoa, mixing well until combined.
    Cooking to Perfection
    1. Cooking the batter: Pour the banana-cocoa mixture into a saucepan and cook over low heat, stirring constantly to prevent sticking. Cook for 5-7 minutes until the mixture thickens to a brownie batter consistency.
    Decorating with Delight
    1. Adding nuts: Sprinkle a portion of the crushed nuts into the batter mixture, saving some for decoration.
    See also  Bread in 10 Minutes! No Oven Required! The Tastiest I’ve Ever Eaten! Anyone Can Do It
    Cooling and Serving
    1. Preparing the mold: Grease a 19 x 9 x 5 cm baking mold or line it with parchment paper. Pour the brownie batter into the mold, spreading it evenly.
    2. Decorating the top: Sprinkle the remaining crushed nuts or add raisins on top of the brownie batter for a visually appealing finish.
    3. Chilling: Allow the brownies to cool slightly, then transfer them to the refrigerator for at least 2 hours to set. These brownies can be stored in the fridge for up to 5 days.
    Storage Tips
    • Refrigeration: Store the brownies in an airtight container in the refrigerator for up to 5 days.
    • Freezing: You can also freeze the brownies for longer storage. Wrap them individually in plastic wrap and place them in a freezer-safe bag or container. They can be frozen for up to 3 months.
    Why Choose Chocolate-Banana Brownies with Nuts?
    • Flavor Fusion: The combination of chocolate, banana, and nuts creates a harmonious blend of flavors that is simply irresistible.
    • Nutritional Benefits: Bananas add natural sweetness and moisture, while nuts provide protein, healthy fats, and crunch.
    • Versatility: These brownies can be enjoyed as a dessert, snack, or even breakfast treat, making them a versatile addition to any menu.
    Health Benefits
    • Potassium: Bananas are rich in potassium, which helps regulate blood pressure and maintain heart health.
    • Antioxidants: Cocoa is packed with antioxidants that can improve heart health, lower blood pressure, and boost brain function.
    • Protein and Fiber: Nuts are a great source of plant-based protein and fiber, which promote satiety and digestive health.
  • No-Oven Banana Egg Cakes

    No-Oven Banana Egg Cakes

    No-Oven Banana Egg Cakes

    Table of Contents

    Make these delightful banana egg cakes without an oven for dessert. Here’s how:

    Ingredients:

    For the Cakes:

    • 2 bananas
    • 2 eggs
    • 200 ml of fresh milk
    • 50g sugar
    • 5g salt
    • 200g flour
    • 2 tablespoons of olive oil or regular oil

    Extra banana

    Vanilla ice cream

    • Mango or multifruit juice

    Instructions:

    For the Cakes:

    1. In a blender or mixing bowl, combine 2 bananas, 2 eggs, 200 ml of fresh milk, 50g of sugar, and 5g of salt.
    2. Blend or mix until you have a smooth liquid mixture.
    3. Gradually add 200g of flour while continuing to blend or mix until the batter is well combined.
    4. Stir in 2 tablespoons of olive oil or regular oil.
    5. Preheat a non-stick skillet or pan over medium heat.
    6. Pour a ladleful of the batter onto the skillet to make individual banana egg cakes.
    7. Cook until bubbles form on the surface and the edges start to set, then flip and cook the other side until golden brown.
    8. Repeat for the remaining batter, adding more oil to the skillet as needed.
    9. Serve the banana egg cakes with a scoop of vanilla ice cream and the sliced banana on top.
    10. Drizzle with mango or multifruit juice for extra flavor.


    Enjoy your homemade banana egg cakes