Category: healthy food

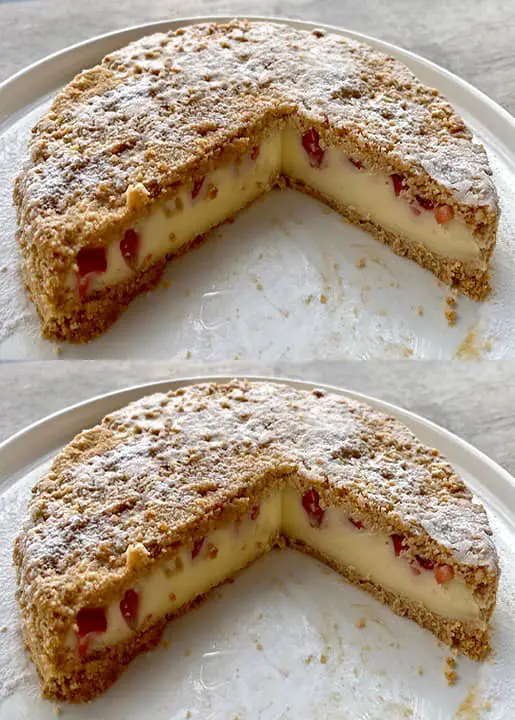
  • No Flour! No-Bake Carrot Cake: A Deliciously Healthy Dessert

    No Flour! No-Bake Carrot Cake: A Deliciously Healthy Dessert

    No Flour! No-Bake Carrot Cake: A Deliciously Healthy Dessert

    Ingredients

    Carrot Mixture

    2.5 cups (250 g) grated carrots

    1 cup (80 g) coconut flakes

    1 cup (150 g) dates, pitted and finely chopped

    1 cup (120 g) walnuts, chopped

    1 teaspoon cinnamon (to taste)

    1 teaspoon ginger (to taste)

    1 teaspoon ground cloves (to taste)

    1/4 teaspoon nutmeg (to taste)

    Creamy Yogurt Layer

    10.6 oz (300 g) plain yogurt

    3 teaspoons coconut flour

    Sweetener of choice (to taste)

    Optional Garnishes

    Chopped walnuts

    Cinnamon

    Honey or maple syrup (optional for extra sweetness)

    Step-by-Step Preparation

    1. Preparing the Carrot Mixture

    To start, we’ll prepare the base of this delightful no-bake carrot cake, which is packed with natural sweetness and a medley of textures.


    Grating the Carrots

    First, wash and peel your carrots, then grate them finely until you have 2.5 cups (250 g). Fresh, vibrant carrots will add both flavor and moisture, ensuring your cake is deliciously soft and aromatic.


    Combining the Ingredients

    In a large mixing bowl, combine the grated carrots with 1 cup (80 g) of coconut flakes. The coconut adds a subtle sweetness and a lovely texture that pairs perfectly with the carrots. Next, chop the dates finely. Ensure the dates are soft; if not, you can soak them in warm water for about 10 minutes to make them easier to chop. Add the 1 cup (150 g) of dates to the bowl.


    Adding Nuts and Spices

    Now, add 1 cup (120 g) of chopped walnuts to the mixture. Walnuts introduce a pleasant crunch and a rich flavor that contrasts beautifully with the sweetness of the dates and carrots. For that classic carrot cake spice, add 1 teaspoon of cinnamon, 1 teaspoon of ginger, 1 teaspoon of ground cloves, and 1/4 teaspoon of nutmeg. These spices will infuse your cake with warmth and depth of flavor. Mix everything thoroughly until well combined, making sure the spices and ingredients are evenly distributed.


    2. Preparing the Creamy Yogurt Layer

    This layer provides a creamy and tangy counterpoint to the sweet, spiced carrot mixture.


    Mixing the Yogurt

    In a separate bowl, add 10.6 oz (300 g) of plain yogurt. For a richer texture, you might opt for Greek yogurt, but plain yogurt works perfectly as well.


    Incorporating Coconut Flour

    Next, add 3 teaspoons of coconut flour to the yogurt. The coconut flour helps thicken the yogurt slightly, giving it a creamier texture without the need for any additional thickening agents.


    Sweetening the Mixture

    Add a sweetener of your choice to the yogurt mixture. Since this cake is designed to be sugar-free, you could use stevia, erythritol, or any other preferred sugar substitute. Start with a small amount and adjust to taste. Mix thoroughly until the yogurt mixture is smooth, creamy, and well combined.


    3. Assembling the Cake

    Now that both the carrot mixture and yogurt layer are ready, it’s time to assemble your no-bake carrot cake.


    Layering the Cake

    On a flat serving plate, start by placing a portion of the carrot mixture, shaping it into a rounded and compact layer. This will form the base of your cake. Next, spoon a portion of the creamy yogurt mixture over the carrot layer, spreading it evenly to cover the surface. Repeat this process, alternating between layers of the carrot mixture and the yogurt mixture, until all the ingredients are used up. Ensure that you finish with a final layer of the creamy yogurt on top for a beautiful, smooth finish.


    4. Garnishing and Serving

    To add the perfect finishing touch to your no-bake carrot cake, consider the following garnishes:


    Walnut Topping

    Sprinkle a handful of chopped walnuts over the top layer of yogurt. This not only adds a decorative element but also enhances the nutty flavor of the cake.


    Optional Garnishes

    For an extra burst of flavor and visual appeal, you can sprinkle a little cinnamon over the top or drizzle with a bit of honey or maple syrup if you prefer additional sweetness.


    Chilling

    For best results, chill the assembled cake in the refrigerator for at least an hour before serving. This allows the flavors to meld together and the cake to firm up slightly, making it easier to slice.


    Nutritional Information (Per Serving)

    Servings: 8

    Calories: 215 kcal

    Carbohydrates: 25g

    Protein: 5g

    Fat: 12g

    Fiber: 5g

    Sugar: 15g

    This No-Bake Carrot Cake is a testament to the fact that you don’t need flour, eggs, sugar, or butter to create a delicious, satisfying dessert. The natural sweetness of the dates, the crunch of the walnuts, and the creaminess of the yogurt come together in perfect harmony, making this cake a healthy treat you can enjoy any time. Serve it as a refreshing dessert afNo Flour! No-Bake Carrot Cake: A Deliciously Healthy Dessert

    Ingredients

    Carrot Mixture

    2.5 cups (250 g) grated carrots

    1 cup (80 g) coconut flakes

    1 cup (150 g) dates, pitted and finely chopped

    1 cup (120 g) walnuts, chopped

    1 teaspoon cinnamon (to taste)

    1 teaspoon ginger (to taste)

    1 teaspoon ground cloves (to taste)

    1/4 teaspoon nutmeg (to taste)

    Creamy Yogurt Layer

    10.6 oz (300 g) plain yogurt

    3 teaspoons coconut flour

    Sweetener of choice (to taste)

    Optional Garnishes

    Chopped walnuts

    Cinnamon

    Honey or maple syrup (optional for extra sweetness)

    Step-by-Step Preparation

    1. Preparing the Carrot Mixture

    To start, we’ll prepare the base of this delightful no-bake carrot cake, which is packed with natural sweetness and a medley of textures.


    Grating the Carrots

    First, wash and peel your carrots, then grate them finely until you have 2.5 cups (250 g). Fresh, vibrant carrots will add both flavor and moisture, ensuring your cake is deliciously soft and aromatic.


    Combining the Ingredients

    In a large mixing bowl, combine the grated carrots with 1 cup (80 g) of coconut flakes. The coconut adds a subtle sweetness and a lovely texture that pairs perfectly with the carrots. Next, chop the dates finely. Ensure the dates are soft; if not, you can soak them in warm water for about 10 minutes to make them easier to chop. Add the 1 cup (150 g) of dates to the bowl.


    Adding Nuts and Spices

    Now, add 1 cup (120 g) of chopped walnuts to the mixture. Walnuts introduce a pleasant crunch and a rich flavor that contrasts beautifully with the sweetness of the dates and carrots. For that classic carrot cake spice, add 1 teaspoon of cinnamon, 1 teaspoon of ginger, 1 teaspoon of ground cloves, and 1/4 teaspoon of nutmeg. These spices will infuse your cake with warmth and depth of flavor. Mix everything thoroughly until well combined, making sure the spices and ingredients are evenly distributed.


    2. Preparing the Creamy Yogurt Layer

    This layer provides a creamy and tangy counterpoint to the sweet, spiced carrot mixture.


    Mixing the Yogurt

    In a separate bowl, add 10.6 oz (300 g) of plain yogurt. For a richer texture, you might opt for Greek yogurt, but plain yogurt works perfectly as well.


    Incorporating Coconut Flour

    Next, add 3 teaspoons of coconut flour to the yogurt. The coconut flour helps thicken the yogurt slightly, giving it a creamier texture without the need for any additional thickening agents.


    Sweetening the Mixture

    Add a sweetener of your choice to the yogurt mixture. Since this cake is designed to be sugar-free, you could use stevia, erythritol, or any other preferred sugar substitute. Start with a small amount and adjust to taste. Mix thoroughly until the yogurt mixture is smooth, creamy, and well combined.


    3. Assembling the Cake

    Now that both the carrot mixture and yogurt layer are ready, it’s time to assemble your no-bake carrot cake.


    Layering the Cake

    On a flat serving plate, start by placing a portion of the carrot mixture, shaping it into a rounded and compact layer. This will form the base of your cake. Next, spoon a portion of the creamy yogurt mixture over the carrot layer, spreading it evenly to cover the surface. Repeat this process, alternating between layers of the carrot mixture and the yogurt mixture, until all the ingredients are used up. Ensure that you finish with a final layer of the creamy yogurt on top for a beautiful, smooth finish.


    4. Garnishing and Serving

    To add the perfect finishing touch to your no-bake carrot cake, consider the following garnishes:


    Walnut Topping

    Sprinkle a handful of chopped walnuts over the top layer of yogurt. This not only adds a decorative element but also enhances the nutty flavor of the cake.


    Optional Garnishes

    For an extra burst of flavor and visual appeal, you can sprinkle a little cinnamon over the top or drizzle with a bit of honey or maple syrup if you prefer additional sweetness.


    Chilling

    For best results, chill the assembled cake in the refrigerator for at least an hour before serving. This allows the flavors to meld together and the cake to firm up slightly, making it easier to slice.


    Nutritional Information (Per Serving)

    Servings: 8

    Calories: 215 kcal

    Carbohydrates: 25g

    Protein: 5g

    Fat: 12g

    Fiber: 5g

    Sugar: 15g

    This No-Bake Carrot Cake is a testament to the fact that you don’t need flour, eggs, sugar, or butter to create a delicious, satisfying dessert. The natural sweetness of the dates, the crunch of the walnuts, and the creaminess of the yogurt come together in perfect harmony, making this cake a healthy treat you can enjoy any time. Serve it as a refreshing dessert after a meal or as a guilt-free snack whenever you crave something sweetter a meal or as a guilt-free snack whenever you crave something sweet

  • Incredible Cauliflower Bake: Better Than Meat! No Frying Needed

    Incredible Cauliflower Bake: Better Than Meat! No Frying Needed

    Incredible Cauliflower Bake: Better Than Meat! No Frying Needed

    Ingredients

    Cauliflower: 3.5 lbs (1.6 kg)

    Water: 6.5 cups (1.5 liters)

    Salt: 1 teaspoon (for boiling)

    Milk: 2 tablespoons (30 ml)

    Eggs: 3

    Oil: 3 tablespoons (for puree) + 4 tablespoons (for sautéing)

    Flour: 3 tablespoons

    Mushrooms: 3.5 oz (100 g), diced

    Green peppers: 4, diced

    Red peppers: 2, diced

    Carrot: 1, diced

    Onion: 1, diced

    Tomatoes: 2, diced

    Salt: 1 teaspoon (for seasoning)

    Mint: 1 teaspoon

    Red pepper: 1 teaspoon

    Black pepper: 1 teaspoon

    Cheese: 5.5 oz (150 g), grated

    Step-by-Step Instructions

    Step 1: Prepare the Cauliflower

    Cut and Boil the Cauliflower

    Start by cutting the cauliflower into florets. Bring a large pot of 6.5 cups (1.5 liters) of water to a boil. Add 1 teaspoon of salt and 2 tablespoons of milk. The milk helps retain the cauliflower’s color and tenderness. Add the cauliflower florets to the boiling water and simmer until they are soft, about 10-12 minutes.

    Blend into Puree

    Drain the cooked cauliflower well and transfer it to a blender or food processor. Add 3 eggs and 3 tablespoons of oil. Blend until smooth and creamy, achieving a puree consistency. Set aside.

    Step 2: Prepare the Vegetables

    Dice the Vegetables

    Dice the mushrooms, green peppers, red peppers, carrot, onion, and tomatoes into small, even pieces to ensure they cook uniformly.

    Sauté the Vegetables

    Heat 4 tablespoons of oil in a large skillet over medium heat. Add the diced onions, carrots, and mushrooms. Sauté until the onions become translucent and the carrots and mushrooms soften, about 5-6 minutes.

    Add and Cook the Remaining Vegetables

    Add the diced tomatoes, green peppers, and red peppers to the skillet. Season with 1 teaspoon of salt, mint, red pepper, and black pepper. Stir well and cook for another 5 minutes or until all the flavors meld together. Remove from heat.

    Step 3: Assemble and Bake

    Grease the Baking Dish

    Preheat your oven to 375°F (190°C). Grease a baking dish with 3 tablespoons of oil to prevent sticking.

    Layer the Cauliflower Puree

    Spread the smooth cauliflower puree evenly in the bottom of the prepared baking dish.

    Top with Sautéed Vegetables

    Spoon the sautéed vegetable mixture over the cauliflower puree, spreading it out to cover the entire surface evenly.

    Add the Cheese

    Sprinkle the grated cheese evenly over the top of the vegetables.

    Bake

    Place the dish in the preheated oven and bake for 25-30 minutes or until the top is golden brown and bubbly.

    Tips for the Perfect Cauliflower Bake

    Don’t Overcook the Cauliflower

    Make sure the cauliflower is just tender enough to blend smoothly. Overcooking can make it too watery.

    Use Fresh Vegetables

    Fresh vegetables will give the dish a vibrant color and a burst of flavor. You can substitute or add other vegetables like zucchini or spinach to customize the dish.

    Season Generously

    The right balance of seasoning is key to enhancing the natural flavors of the vegetables. Adjust the seasoning according to your taste.

    Nutritional Information

    Servings: 6

    Calories: Approx. 240 per serving

    Protein: 10g

    Carbohydrates: 16g

    Fat: 16g

    This delicious cauliflower bake is a fantastic alternative to heavier meat dishes. With its rich texture, creamy base, and cheesy topping, it’s sure to become a regular favorite. Enjoy this healthy, no-fry recipe that’s easy to make and full of flavour

  • Mouthwatering, Buttery and Melt In Your Mouth Cookies

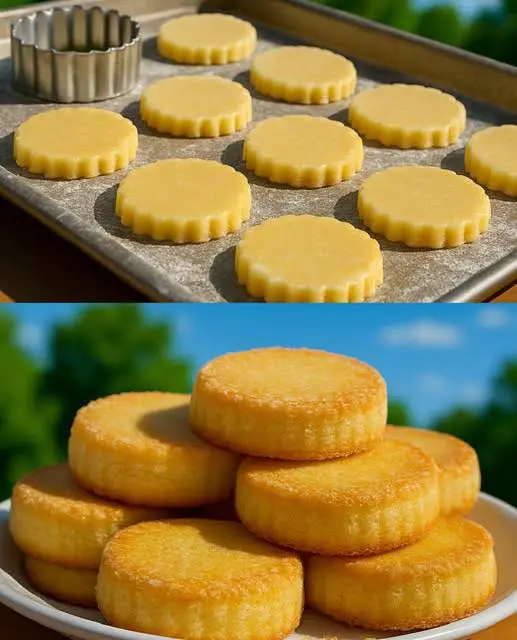
    Mouthwatering, Buttery and Melt In Your Mouth Cookies

    You can also use this as the base for any recipe that calls for shortbread. You can roll them out with powdered sugar, though, since additional flour can make them too dense.


    Ingredients;

    1 cup (2 sticks) butter, softened

    1/2 cup powdered sugar

    2 cups all-purpose flour

    Instructions;

    Preheat oven to 350 degrees F. Prepare two large baking sheets lined with parchment paper.

    In a large bowl, cream together butter and sugar.

    Add flour and continue to mix until the mixture forms a soft dough (it will be crumbly at first, but keep mixing and it will form a dough). Form dough into a cohesive ball with your hands.

    Roll dough 1/4-inch thick on a surface dusted with flour or powdered sugar with a well-dusted rolling pin. Cut into rounds and place on prepared baking sheets. Repeat as necessary.

    Bake for 16-18 minutes, or until cookies are pale golden brown. Let cool on baking sheets.


  • Sunshine Oatcake: A Zesty Orange and Oat Delight

    Sunshine Oatcake: A Zesty Orange and Oat Delight

    Sunshine Oatcake: A Zesty Orange and Oat Delight

    The Story Behind This Vibrant Treat

    Imagine a cake that captures the essence of a sunny morning – bright, wholesome, and bursting with flavor. This oatcake is more than just a recipe; it’s a celebration of simple, nutritious ingredients that come together to create something truly magical.


    Ingredients (US and Metric Measurements)

    150g (1 1/2 cups) rolled oats

    2 medium oranges (zest and juice)

    3 large eggs

    70g (5 tablespoons) butter, melted

    1 teaspoon salt

    1 teaspoon ground cinnamon

    1 teaspoon ground cardamom

    100g (3/4 cup) all-purpose flour

    100g (1/2 cup) granulated sugar

    1 teaspoon baking powder

    1/2 teaspoon vanilla powder

    50g (1/3 cup) prunes, chopped

    50g (1/2 cup) walnuts, chopped

    Powdered sugar for dusting

    Desiccated coconut for topping

    Step-by-Step Instructions

    Prepare the Ingredients:

    Zest and juice the oranges

    Melt butter

    Chop prunes and walnuts

    Mix Dry Ingredients:

    In a large bowl, combine oats, flour, sugar

    Add salt, cinnamon, cardamom, baking powder

    Mix thoroughly

    Combine Wet Ingredients:

    In another bowl, whisk eggs

    Add melted butter

    Incorporate orange zest and juice

    Add vanilla powder

    Create the Batter:

    Pour wet ingredients into dry ingredients

    Fold gently

    Add chopped prunes and walnuts

    Mix until just combined

    Bake:

    Preheat oven to 180°C (350°F)

    Pour batter into a lined loaf pan

    Bake for 35-40 minutes

    Check with a toothpick for doneness

    Finish:

    Cool completely

    Dust with powdered sugar

    Sprinkle desiccated coconut

    Nutritional Information

    Calories: Approximately 250 per slice

    Preparation Time: 10 minutes

    Baking Time: 35-40 minutes

    Total Time: 50 minutes

    Servings: 8-10 slices

    Pro Baking Tips and Tricks

    Don’t overmix the batter

    Use room temperature eggs

    Toast walnuts for enhanced flavor

    Zest oranges before juicing

    Delicious Variations

    Replace prunes with dried cranberries

    Use almonds instead of walnuts

    Add dark chocolate chips

    Try different spice combinations

    Make it gluten-free with alternative flour

    Frequently Asked Questions

    Q: Can I make this vegan? A: Use flax eggs and plant-based butter


    Q: How to store the oatcake? A: Room temperature, covered, for 3-4 days


    Q: Can I freeze this cake? A: Yes, up to 1 month


    Q: What if I don’t have vanilla powder? A: Use vanilla extract


    Q: Can I reduce the sugar? A: Yes, but it may affect texture


    Storage and Make-Ahead Tips

    Store in an airtight container

    Best consumed within 3-4 days

    Can be frozen for longer storage

    Tastes even better the next day

    A cake that brings sunshine to your table – wholesome, flavorful, and absolutely delightful!

  • Yogurt Cookies: The Easiest, Softest Treat for Your Coffee Break

    Yogurt Cookies: The Easiest, Softest Treat for Your Coffee Break

    Yogurt Cookies: The Easiest, Softest Treat for Your Coffee Break

    The Sweetest Simple Pleasure

    Imagine a cookie so effortless to make, yet so delightfully tender that it melts in your mouth. These yogurt cookies are a testament to the magic that happens when simple ingredients come together with minimal effort. Perfect for those moments when you crave something sweet but don’t want to spend hours in the kitchen.


    Ingredients (US and Metric Measurements)

    120g (1/2 cup) plain yogurt

    50ml (1/4 cup) vegetable oil

    1 large egg

    40g (3 tablespoons) granulated sugar

    10g (2 teaspoons) vanilla sugar

    Pinch of salt

    300g (2 1/2 cups) all-purpose flour

    1 teaspoon baking powder

    Additional sugar for rolling

    Step-by-Step Instructions

    Prepare the Wet Ingredients:

    In a large mixing bowl, combine yogurt and vegetable oil

    Whisk until smooth

    Add the egg

    Mix thoroughly

    Add the Sugars:

    Incorporate granulated sugar

    Add vanilla sugar

    Sprinkle in a pinch of salt

    Mix until well combined

    Create the Dough:

    Sift flour and baking powder together

    Gradually add flour mixture to wet ingredients

    Mix until a soft dough forms

    Knead gently to bring the dough together

    Shape the Cookies:

    Roll dough into a ball

    Pinch off small portions

    Roll each portion in sugar

    Place on a baking sheet

    Bake to Perfection:

    Preheat oven to 180°C (350°F)

    Bake for 15 minutes

    Cookies should be lightly golden

    Let cool on a wire rack

    Nutritional Information

    Calories: Approximately 70 per cookie

    Preparation Time: 10 minutes

    Cooking Time: 15 minutes

    Total Time: 25 minutes

    Yield: 20-24 cookies

    Pro Baking Tips and Tricks

    Use room temperature ingredients for best results

    Don’t overmix the dough to keep cookies tender

    Leave space between cookies on the baking sheet

    Cool completely before storing

    Delicious Variations

    Add lemon zest for a citrusy twist

    Sprinkle with cinnamon sugar instead of plain sugar

    Dip half in melted chocolate

    Add chopped nuts to the dough

    Use flavored yogurt for variety

    Frequently Asked Questions

    Q: Can I use Greek yogurt? A: Yes, but may need to adjust flour slightly


    Q: How long do these cookies stay fresh? A: 3-4 days in an airtight container


    Q: Can I freeze the dough? A: Yes, wrap tightly and freeze for up to 1 month


    Q: Are these cookies crisp or soft? A: Soft and slightly crumbly


    Q: Can I make them gluten-free? A: Use a gluten-free flour blend


    Storage and Make-Ahead Tips

    Store in airtight container at room temperature

    Layer with parchment paper to prevent sticking

    Best enjoyed within 3-4 days

    Can be frozen for up to 1 month

    A cookie that proves sometimes the simplest recipes are the most magical – enjoy with your favorite coffee or tea!

  • Shawarma Sauce

    Shawarma Sauce

    Ingredients:


    1 cup mayonnaise


    1/4 cup plain yogurt


    2 cloves garlic, minced


    1 tablespoon olive oil


    1 teaspoon vinegar (white or apple cider)


    1/2 teaspoon salt (adjust to taste)


    1/2 teaspoon black pepper


    1/2 teaspoon ground cumin


    1/2 teaspoon paprika


    1/4 teaspoon cayenne pepper (optional for spice)


    1 tablespoon lemon juice (optional for extra tang)


    Instructions:


    1. Prepare the garlic – Mince the garlic cloves finely or crush them into a paste for a smoother sauce.


    2. Combine ingredients – In a mixing bowl, whisk together mayonnaise, yogurt, minced garlic, olive oil, and vinegar.


    3. Season – Add salt, black pepper, cumin, paprika, and cayenne (if using). Mix well to combine.


    4. Adjust consistency – If the sauce is too thick, add a teaspoon of water or lemon juice and mix until you reach your desired texture.


    5. Chill – Cover and refrigerate for at least 30 minutes to let the flavors blend.


    6. Serve – Use as a sauce for shawarma wraps, grilled meats, or as a dip for fries and veggies.

  • Chai-Spiced Apple Hand Pies with Pecan Crumble

    Chai-Spiced Apple Hand Pies with Pecan Crumble

    Chai-Spiced Apple Hand Pies with Pecan Crumble

    Ingredients

    For the Filling:

    3 medium Honeycrisp apples (600g/21oz), diced

    1 tablespoon coconut sugar (12g)

    2 tablespoons lemon juice (30ml)

    1/4 cup pecans (28g), finely chopped

    For the Chai Spice Blend:

    1 teaspoon ground cardamom

    1 teaspoon ground cinnamon

    1/2 teaspoon ground ginger

    1/4 teaspoon ground cloves

    1/4 teaspoon ground black pepper

    1/8 teaspoon ground star anise

    For the Pastry:

    1 sheet puff pastry (275g/9.7oz), thawed

    1 large egg for egg wash

    Additional coconut sugar for sprinkling

    Step-by-Step Instructions

    Prepare the Spice Blend

    Combine all spices in small bowl

    Mix thoroughly to ensure even distribution

    Set aside 2 teaspoons for filling

    Reserve remainder for future use

    Prepare the Filling

    Peel and dice apples into 1/4-inch cubes

    Toss with lemon juice to prevent browning

    Add coconut sugar and chai spice blend

    Mix in chopped pecans

    Let stand 15 minutes to release juices

    Prepare the Pastry

    Preheat oven to 400°F (200°C)

    Line baking sheet with parchment paper

    Roll pastry into 15×12-inch rectangle

    Cut into 6 equal rectangles

    Assembly

    Place filling on one half of each rectangle

    Leave 1/2-inch border for sealing

    Brush edges with egg wash

    Fold pastry over filling

    Crimp edges with fork

    Cut small vents in top

    Brush with egg wash

    Sprinkle with coconut sugar

    Baking

    Bake 20-25 minutes until golden brown

    Rotate pan halfway through

    Cool 15 minutes before serving

    Expert Tips

    Choose firm apples that hold their shape

    Drain excess liquid from filling before assembling

    Keep pastry cold until ready to use

    Don’t overfill to prevent leakage

    Cool slightly before eating to allow filling to set

    Storage Instructions

    Best enjoyed same day

    Store at room temperature up to 2 days

    Reheat in 350°F (175°C) oven for 5-7 minutes

    Nutrition Information

    Per serving (1 hand pie):


    Calories: 290

    Total Fat: 16g

    Saturated Fat: 3g

    Cholesterol: 31mg

    Sodium: 170mg

    Total Carbohydrates: 35g

    Dietary Fiber: 3g

    Natural Sugars: 12g

    Added Sugars: 2g

    Protein: 4g

    Serving Size: 1 hand pie

    Servings Per Recipe: 6

    These Chai-Spiced Apple Hand Pies offer a sophisticated twist on the classic apple pie. The complex blend of chai spices adds depth and warmth while complementing the natural sweetness of the apples. The pecans provide a subtle crunch and nutty flavor that enhances the overall texture experience.


    The use of coconut sugar instead of refined sugar adds a subtle caramel note while keeping the sweetness level moderate. The flaky puff pastry creates the perfect portable package for enjoying these aromatic treats any time of day.


    For the best experience, enjoy these hand pies while still slightly warm, when the pastry is at its flakiest and the filling is perfectly tender. The aromatic chai spices will fill your kitchen with an inviting fragrance that makes these pies even more

  • Wholesome Pumpkin Seed and Honey Oat Cookies

    Wholesome Pumpkin Seed and Honey Oat Cookies

    Wholesome Pumpkin Seed and Honey Oat Cookies

    Ingredients

    Dry Ingredients

    1½ cups (150g) rolled oats

    ½ cup (70g) pumpkin seeds

    ¼ cup (35g) sesame seeds

    1 teaspoon ground cinnamon

    ¼ teaspoon sea salt

    Wet Ingredients

    ½ cup (170g) honey

    ¼ cup (60ml) coconut oil, melted

    1 teaspoon vanilla extract

    Instructions

    Prepare Your Workspace

    Preheat oven to 350°F (175°C)

    Line a baking sheet with parchment paper

    Ensure all ingredients are at room temperature

    Mix Dry Ingredients

    Combine rolled oats, pumpkin seeds, and sesame seeds in a large bowl

    Add cinnamon and salt

    Whisk together to distribute evenly

    Combine Wet Ingredients

    In a separate bowl, mix melted coconut oil and honey

    Stir in vanilla extract until well combined

    Ensure coconut oil doesn’t solidify by keeping mixture warm

    Form the Cookie Dough

    Pour wet ingredients over dry ingredients

    Mix thoroughly until all oats and seeds are well-coated

    Let mixture rest for 5 minutes to allow oats to absorb liquid

    Shape and Bake

    Scoop 2 tablespoons of mixture for each cookie

    Place on prepared baking sheet

    Flatten each cookie to ¼-inch thickness

    Leave 1 inch space between cookies

    Baking Process

    Bake for 12-15 minutes until edges turn golden brown

    Rotate pan halfway through for even baking

    Watch carefully in final minutes to prevent burning

    Cooling and Storage

    Let cookies cool on baking sheet for 5 minutes

    Transfer to wire rack to cool completely

    Store in airtight container for up to 1 week

    Pro Tips

    Toast pumpkin seeds beforehand for enhanced flavor

    Press additional seeds on top before baking for aesthetic appeal

    For crispier cookies, extend baking time by 2-3 minutes

    Drizzle with dark chocolate for added indulgence

    Storage and Make-Ahead

    These cookies keep well in an airtight container at room temperature for up to 7 days. You can also freeze them for up to 3 months. Place parchment paper between layers when storing to prevent sticking.


    Nutrition Information

    Per cookie (based on 12 servings):


    Calories: 165

    Total Fat: 9g

    Saturated Fat: 4g

    Carbohydrates: 20g

    Fiber: 2g

    Protein: 4g

    Sugar: 12g

    Iron: 1mg

    Magnesium: 48mg

    These nutrient-dense cookies provide a good balance of healthy fats, protein, and complex carbohydrates. They’re particularly rich in magnesium and zinc from the pumpkin seeds, and fiber from the oats.

  • Flaxseed Chocolate Avocado Cake: A Guilt-Free Indulgence

    Flaxseed Chocolate Avocado Cake: A Guilt-Free Indulgence

    If you’re looking to satisfy your sweet tooth without compromising your health goals, a flaxseed chocolate avocado cake might just be your new favorite treat. This wholesome dessert cleverly incorporates nutrient-rich ingredients like avocado and flaxseed to create a moist, decadent cake that’s both delicious and good for you. Whether you’re gluten-free, dairy-free, or simply exploring healthier dessert alternatives, this cake strikes the perfect balance between indulgence and nourishment.


    Unlike traditional chocolate cakes loaded with refined sugar and butter, this version swaps in natural sweeteners like honey or maple syrup, and uses unsweetened cocoa powder for that rich, chocolatey flavor. The use of avocado not only adds a velvety texture but also delivers a punch of healthy fats and vital nutrients. As Kam Sokhi, the Allergy Chef, emphasizes, “Baking with functional ingredients transforms desserts into nutrient-packed snacks that support your overall well-being.”


    In fact, more home cooks are embracing this mindful dessert trend. Blogs like Produce On Parade and Sugar Free Londoner share creative ways to enjoy dessert while prioritizing health. According to The Big Man’s World, adding superfoods like flaxseed to baked goods can offer long-term benefits, from improved digestion to better heart health.


    Health Benefits of the Key Ingredients in Flaxseed Chocolate Avocado Cake

    Avocado: The Creamy Nutrient Powerhouse

    Rich in monounsaturated fats that support heart health and reduce bad cholesterol

    Loaded with vitamins E, K, and folate to boost immunity and support cell function

    Provides a buttery texture that eliminates the need for processed oils or butters in baking

    Flaxseed: A Small Seed with Big Benefits

    High in omega-3 fatty acids, especially ALA, which promote cardiovascular health

    Excellent source of dietary fiber, aiding in digestion and blood sugar balance

    Packed with lignans, a powerful antioxidant known for its anti-inflammatory properties

    (More on the benefits of flaxseed can be found at The Big Man’s World)

    Cocoa Powder: A Chocolatey Dose of Antioxidants

    Rich in flavonoids, which help fight oxidative stress and may improve brain function

    Supplies key minerals like magnesium and iron that support muscle and blood health

    (Find more nutritional insights at Sugar Free Londoner)

    Whole Wheat Flour: Wholesome and Hearty

    Contains more fiber than all-purpose flour, promoting digestive health and satiety

    Offers B vitamins such as niacin, thiamin, and folate, essential for energy production

    By combining these ingredients into one cake, you’re not just enjoying dessert—you’re nourishing your body with every bite.


    Flaxseed Chocolate Avocado Cake


    How to Make Flaxseed Chocolate Avocado Cake: A Step-by-Step Guide

    Making a flaxseed chocolate avocado cake at home is surprisingly simple, and the result is a rich, fudgy cake packed with nutrients. From the heart-healthy fats in avocado to the fiber-rich flaxseed and cocoa, each ingredient contributes both flavor and function. If you’re new to baking with these wholesome alternatives, don’t worry—this guide walks you through each step to ensure perfect results every time.


    This cake is a great choice for those who want to enjoy a chocolate dessert without refined sugar or butter. The avocado creates a creamy, indulgent texture, while the ground flaxseed adds bulk and nutritional value. As seen in Sugar Free Londoner’s healthy cake recipes, baking with flaxseed is a smart swap for increasing omega-3 intake and reducing carbs. Plus, almond flour or whole wheat flour keeps the base hearty without compromising on taste.


    Blogs like The Big Man’s World recommend using natural ingredients like maple syrup and unsweetened cocoa to create desserts that feel indulgent without excess sugar. This flaxseed chocolate avocado cake fits the bill and can easily be customized to fit a variety of dietary needs.


    Main Ingredients

    1 large ripe avocado (about 1 cup mashed)

    1/2 cup unsweetened cocoa powder

    1/2 cup ground flaxseed

    1 cup whole wheat flour (or almond flour for a gluten-free option)

    1/2 cup honey or maple syrup (natural sweetener)

    1/2 cup unsweetened almond milk (or any plant-based or dairy milk)

    2 large eggs (or flax eggs for a vegan-friendly version)

    1 teaspoon baking soda

    1 teaspoon vanilla extract

    A pinch of salt

    Optional Toppings and Add-Ins

    Fresh berries like strawberries, raspberries, or blueberries

    Dark chocolate ganache drizzle

    Crushed nuts, such as walnuts or almonds

    A dollop of Greek yogurt or coconut whipped cream

    Step-by-Step Instructions for Flaxseed Chocolate Avocado Cake

    Preparing the Avocado

    Choose a ripe avocado: Look for one that yields slightly when pressed.

    Scoop and mash: Cut it in half, remove the pit, and scoop the flesh into a bowl.

    Blend until creamy: Use a fork, hand mixer, or blender to achieve a smooth consistency with no lumps.

    Measure: Ensure you have about 1 cup of mashed avocado.

    Mixing the Dry Ingredients

    In a large bowl, whisk together the dry ingredients:

    1/2 cup ground flaxseed

    1 cup whole wheat or almond flour

    1/2 cup cocoa powder

    1 teaspoon baking soda

    A pinch of salt

    Stir until everything is evenly combined. The flaxseed and flour form the base structure of the cake, while cocoa provides its rich flavor.


    Flaxseed Chocolate Avocado Cake


    Combining the Wet Ingredients

    In a separate mixing bowl, add:

    1 cup mashed avocado

    1/2 cup maple syrup or honey

    2 large eggs or flax eggs

    1 teaspoon vanilla extract

    1/2 cup almond milk

    Whisk until the mixture is fully emulsified. The avocado acts as both fat and binder, creating a moist, cohesive batter. Flax eggs can be made by combining 1 tablespoon of ground flaxseed with 2.5 tablespoons of water per egg—let it sit for 5 minutes to gel.

    Bringing It All Together

    Slowly incorporate the dry ingredients into the wet ingredients.

    Stir gently until just combined; overmixing can make the cake dense.

    The result should be a thick, spreadable batter. You may notice a slight green hue from the avocado, but it will bake into a deep chocolate color.

    Baking the Cake

    Preheat your oven to 350°F (175°C).

    Grease a 9-inch round cake pan or line it with parchment paper.

    Pour the batter into the pan, using a spatula to smooth the top evenly.

    Bake for 25 to 30 minutes, or until a toothpick inserted into the center comes out clean.

    Keep an eye on the cake during the last few minutes—don’t overbake or it may dry out.

    Cooling and Serving

    Remove the cake from the oven and let it rest in the pan for 10 minutes.

    Transfer it to a wire rack and allow it to cool completely before slicing.

    Now comes the fun part—toppings! Add a drizzle of dark chocolate ganache, top with fresh berries, or serve with a dollop of Greek yogurt for extra creaminess.

    Nutritional Information per Serving

    Prep Time: 20 minutes

    Cooking Time: 30 minutes

    Total Time: 50 minutes

    Calories: 220 per slice (based on 8 servings)

    Fat: 13g

    Carbohydrates: 22g

    Fiber: 5g

    Protein: 6g

    This flaxseed chocolate avocado cake recipe proves you don’t need to sacrifice flavor for nutrition. It’s easy to make, easy to adapt, and absolutely satisfying. Whether you’re baking for a celebration or just treating yourself on a weekday, this cake is a nutritious indulgence you can feel good about.


    Flaxseed Chocolate Avocado Cake


    Frequently Asked Questions About Flaxseed Chocolate Avocado Cake

    Can I make this flaxseed chocolate avocado cake vegan?

    Yes! Simply replace the eggs with flax eggs. Mix 2 tablespoons of ground flaxseed with 5 tablespoons of water and let it sit for 5–10 minutes to thicken.


    Can I use almond flour instead of whole wheat flour?

    Absolutely. Almond flour creates a gluten-free and slightly nuttier version of the cake. The texture may be a bit softer, but still rich and moist.


    Does the cake taste like avocado?

    Not at all. The unsweetened cocoa powder and natural sweeteners completely mask the avocado taste, making the cake taste like a traditional chocolate cake.


    How should I store leftovers?

    Store the cake in an airtight container at room temperature for up to 2 days or refrigerate for 5 days. You can also freeze slices for later.


    For more tips on baking with healthier ingredients, visit The Big Man’s World.


    Serving Suggestions for Flaxseed Chocolate Avocado Cake

    This flaxseed chocolate avocado cake is delicious on its own, but there are plenty of ways to elevate it. Serve slices warm or chilled, depending on your preference.


    Top with fresh berries for a pop of natural sweetness

    Add a light drizzle of dark chocolate ganache for richness

    Serve with a dollop of Greek yogurt or coconut whipped cream for creaminess

    Sprinkle crushed nuts for texture and crunch

    Pair it with your favorite hot beverage—coffee, herbal tea, or almond milk are perfect choices. For presentation ideas, check out Produce On Parade.


    Conclusion: Why Flaxseed Chocolate Avocado Cake Belongs in Your Recipe Box

    Incorporating superfoods into desserts doesn’t mean compromising on taste. This flaxseed chocolate avocado cake is proof that healthy baking can be both indulgent and satisfying. With its fudgy texture, naturally sweetened flavor, and nutrient-dense ingredients, it offers a delicious way to treat yourself while nourishing your body.


    From the fiber-rich flaxseed to the creamy avocado and antioxidant-packed cocoa, every bite delivers flavor and benefits. It’s also a versatile recipe—easy to make vegan, gluten-free, or dairy-free, depending on your needs.


    More importantly, baking this cake at home allows you to control the ingredients and sweetness level. As noted by Sugar Free Londoner, reducing processed sugars while using real food ingredients can make all the difference in how we feel after indulging.


    So go ahead—slice into this guilt-free chocolate cake and enjoy dessert the smart way.

  • Chocolate brownies

    Chocolate brownies

    Ingredients


    1/2 cup (115g) unsalted butter, melted


    1 cup (200g) granulated sugar


    2 large eggs


    1 teaspoon vanilla extract


    1/3 cup (40g) unsweetened cocoa powder


    1/2 cup (65g) all-purpose flour


    1/4 teaspoon salt


    1/4 teaspoon baking powder


    1/2 cup (90g) chocolate chips or chopped chocolate (optional)


    1/2 cup (60g) chopped nuts (optional)


    Instructions


    1. Preheat your oven to 350°F (175°C) and grease or line an 8×8-inch (20×20 cm) baking pan with parchment paper.


    2. In a mixing bowl, whisk together melted butter and sugar until smooth.


    3. Add the eggs and vanilla extract, and whisk until well combined.


    4. Sift in cocoa powder, flour, salt, and baking powder, then gently fold the ingredients together using a spatula.


    5. Stir in chocolate chips or nuts if using.


    6. Pour the batter into the prepared baking pan and spread evenly.


    7. Bake for 20-25 minutes, or until a toothpick inserted in the center comes out with a few moist crumbs.


    8. Let the brownies cool in the pan for 10 minutes, then transfer to a wire rack to cool completely before cutting.


    Enjoy your fudgy and rich chocolate brownies! Let me know if you’d like any modifications, like making them extra gooey or adding caramel.

  • Classic Cinnamon Coffee Cake: A Comforting Slice of Tradition

    Classic Cinnamon Coffee Cake: A Comforting Slice of Tradition

    Classic Cinnamon Coffee Cake: A Comforting Slice of Tradition

    The Heartwarming Story of Cinnamon Coffee Cake

    Cinnamon Coffee Cake is more than just a dessert – it’s a nostalgic journey through American baking traditions. Originating from European streusel cakes brought by immigrants, this beloved treat has become a staple of weekend breakfasts, afternoon coffee breaks, and family gatherings. The perfect balance of tender cake, rich cinnamon, and crumbly streusel topping creates a symphony of flavors that warms both heart and home.


    Ingredient List with US and Metric Measurements

    For the Cake Batter:

    1 3/4 cups (220g) all-purpose flour

    1 1/2 teaspoons (7g) baking powder

    1/4 teaspoon (1.5g) baking soda

    1/2 teaspoon (3g) salt

    1/4 cup (57g) unsalted butter, softened

    1/4 cup (60ml) canola or vegetable oil

    3/4 cup (150g) granulated sugar

    2 large eggs (100g), room temperature

    1 teaspoon (5ml) vanilla extract

    1/2 cup (120ml) milk, room temperature

    For the Cinnamon Streusel:

    1 cup (220g) light brown sugar, gently packed

    1 tablespoon (7g) ground cinnamon

    1/2 cup (63g) all-purpose flour

    1/4 cup (57g) unsalted butter, softened

    Step-by-Step Cooking Instructions

    Prepare for Baking

    Preheat oven to 350°F (175°C)

    Grease an 8×8 inch (20×20 cm) square baking pan

    Ensure pan is well-greased to prevent sticking

    Mix Dry Ingredients

    In a medium bowl, whisk together:

    Flour

    Baking powder

    Baking soda

    Salt

    Set aside and prepare for later use

    Cream Butter and Sugar

    In a large mixing bowl, cream together:

    Softened butter

    Canola oil

    Granulated sugar

    Beat until light and fluffy

    This process incorporates air for a tender cake

    Add Wet Ingredients

    Add eggs one at a time, mixing well after each addition

    Stir in vanilla extract

    Mix until fully incorporated and smooth

    Combine Cake Batter

    Alternately add dry ingredients and milk

    Add in halves to prevent overmixing

    Mix just until ingredients are combined

    Avoid overworking the batter to keep cake tender

    Prepare Cinnamon Streusel

    In a small bowl, combine:

    Brown sugar

    Ground cinnamon

    Flour

    Add softened butter

    Work butter into dry ingredients

    Mix until crumbly and well-combined

    Assemble the Cake

    Pour half the batter into prepared pan

    Spread evenly to cover bottom of pan

    Sprinkle half of the cinnamon streusel over batter

    Add remaining batter, carefully spreading to cover

    Top with remaining streusel

    Baking

    Bake for 35-40 minutes

    Test with a toothpick inserted in center

    Toothpick should come out clean

    Look for golden brown top and set center

    Cooling and Serving

    Let cool in pan for at least 10 minutes

    Allows cake to set and makes cutting easier

    Serve warm or at room temperature

    Nutritional Information

    Per Serving (Approximate):


    Calories: 300-350

    Protein: 4-5g

    Carbohydrates: 45-50g

    Fat: 15-18g

    Preparation Time: 20 minutes

    Baking Time: 35-40 minutes

    Total Time: 1 hour

    Servings: 9-12 slices

    Pro Cooking Tips and Tricks

    Ingredient Temperature:

    Use room temperature eggs and milk

    Helps create a smoother, more consistent batter

    Mixing Technique:

    Do not overmix the batter

    Stir just until ingredients are combined

    Streusel Secrets:

    Work butter into dry ingredients with fingertips

    Creates a perfect crumbly texture

    Baking Precision:

    Use an oven thermometer for accurate temperature

    Rotate pan midway for even baking

    Serving Suggestion:

    Serve slightly warm for maximum flavor

    Pairs perfectly with coffee or tea

    Recipe Variations and Substitutions

    Gluten-Free Option: Use gluten-free flour blend

    Nut Lovers: Add chopped pecans or walnuts to streusel

    Dairy-Free Version: Use plant-based milk and margarine

    Spice Variations: Add nutmeg or cardamom to streusel

    Healthier Twist: Substitute some butter with applesauce

    Frequently Asked Questions

    Q1: Can I make this cake ahead of time? A: Yes! Can be made 1-2 days in advance and stored at room temperature.


    Q2: How do I keep the streusel from sinking? A: Ensure batter is thick and don’t overmix. Layer streusel carefully.


    Q3: Can I freeze Cinnamon Coffee Cake? A: Absolutely! Freeze individual slices for up to 3 months.


    Q4: Why is my cake dry? A: Likely due to overbaking or overmixing. Check oven temperature and mix gently.


    Q5: Can I use different spices? A: Experiment with nutmeg, cardamom, or pumpkin pie spice.


    Storage and Make-Ahead Tips

    Room Temperature: Store in airtight container for 3 days

    Refrigeration: Keeps up to 1 week

    Freezing: Wrap slices individually, freeze up to 3 months

    Thawing: Bring to room temperature or warm slightly

    Preparation Hack: Make streusel and measure dry ingredients in advance

    Indulge in this delightful Cinnamon Coffee Cake – a true celebration of comfort and flavor

  • Almond Cream Cake: A Slice of Pure Indulgence

    Almond Cream Cake: A Slice of Pure Indulgence

    The Enchanting Story Behind This Divine Dessert

    Picture a dessert that transcends ordinary baking—a cake so delicate, so rich with flavor, that it transforms an everyday moment into a celebration. The Almond Cream Cake is more than just a recipe; it’s a culinary journey that weaves together the warmth of freshly baked bread, the richness of cream, and the delicate crunch of almond petals.


    Rooted in traditional baking techniques, this cake represents the art of patience and passion. From the gentle rising of the yeast dough to the careful layering of cream and almonds, each step is a testament to the magic that happens when simple ingredients are treated with love and skill.


    Ingredients: Your Gateway to Baking Bliss

    Gather these carefully selected ingredients:


    Warm Milk: 200 ml (6.8 fl oz / 3/4 cup + 1 tbsp)

    Active Dry Yeast: 2 tsp

    Sugar (for yeast): 2 tbsp

    Eggs: 2 large

    Vanillin: 2 g (1/2 tsp vanilla extract)

    Salt: 1 pinch

    Butter (melted): 120 g (4.2 oz / 1/2 cup)

    All-Purpose Flour: 470 g (16.6 oz / 4 cups)

    Sugar (for sprinkling): 120 g (4.2 oz / 1/2 cup)

    Butter (for sprinkling): 50 g (1.8 oz / 1/4 cup)

    Almond Petals: As needed for topping

    Heavy Cream: 125 ml (4.2 fl oz / 1/2 cup)

    Step-by-Step Cooking Instructions: Crafting the Perfect Almond Cream Cake

    Activate the Yeast

    Warm the milk to about 110°F (43°C)

    Add 2 tbsp of sugar to the warm milk

    Sprinkle 2 tsp of active dry yeast over the milk

    Stir gently and let sit in a warm place

    Wait 15-20 minutes until the mixture becomes frothy

    This step is crucial for developing the cake’s light, airy texture

    Prepare the Wet Ingredients

    In a large mixing bowl, combine the activated yeast mixture

    Add 2 eggs at room temperature

    Pour in 120 g of melted butter

    Add 2 g of vanillin or 1/2 tsp of vanilla extract

    Whisk thoroughly to combine all ingredients

    Ensure butter is not too hot to prevent cooking the eggs

    Create the Dough

    Sift 470 g of all-purpose flour to remove any lumps

    Gradually add flour to the wet ingredients

    Add a pinch of salt

    Knead the dough until smooth and elastic

    This process takes about 10-15 minutes

    The dough should be soft but not sticky

    First Rise

    Place the dough in a lightly greased bowl

    Cover with plastic wrap or a clean kitchen towel

    Let rise in a warm, draft-free place

    Allow 1 hour for the dough to double in size

    Ideal rising temperature is around 80-85°F (27-29°C)

    Prepare the Topping

    In a small bowl, mix 120 g of sugar

    Add 50 g of cold, refrigerated butter

    Work the mixture until it resembles coarse crumbs

    This will create a delightful streusel-like topping

    Shape and Second Rise

    Grease a baking pan (9×13 inch or similar)

    Gently transfer the risen dough to the pan

    Spread evenly with your hands

    Let rise again for 20-30 minutes

    Preheat oven to 180°C (350°F)

    Prepare for Baking

    Use your fingers or the back of a spoon to create small indentations

    Sprinkle the sugar-butter mixture over the top

    Dust lightly with additional sugar if desired

    Bake to Golden Perfection

    Place in preheated oven

    Bake for 25-30 minutes until lightly golden brown

    Look for a rich, even color across the top

    Cream and Almond Finish

    Remove cake from oven

    Pour 125 ml of heavy cream over the warm cake

    Sprinkle generously with almond petals

    Return to oven for an additional 10 minutes

    This step adds moisture and a beautiful finish

    Cooling and Serving

    Remove from oven and let cool completely

    The cake will continue to set as it cools

    Cut into generous squares

    Serve at room temperature

    Nutritional Information and Cooking Details

    Serving Size: 1 slice (approximately 100g)

    Calories: 350-400

    Preparation Time: 1 hour 30 minutes

    Rising Time: 1 hour 20 minutes

    Baking Time: 35-40 minutes

    Total Time: Approximately 3 hours

    Servings: 12-16 slices

    Pro Baking Tips and Tricks

    Yeast Activation: Use warm (not hot) milk to activate yeast

    Dough Rising: Create a warm environment for optimal rise

    Flour Sifting: Ensures smooth, lump-free dough

    Butter Temperature: Use room temperature ingredients

    Oven Positioning: Bake in the center of the oven for even browning

    Recipe Variations and Substitutions

    Gluten-Free Option: Use gluten-free flour blend

    Dairy-Free Adaptation: Substitute milk and butter with plant-based alternatives

    Flavor Variations: Add lemon zest or almond extract

    Nut-Free Version: Replace almond petals with coconut flakes

    Spice Twist: Add a pinch of cinnamon or cardamom

    Frequently Asked Questions

    Q1: Can I make this cake ahead of time? A: Yes, you can prepare the dough a day in advance and refrigerate before the second rise.


    Q2: How do I store the cake? A: Store at room temperature, covered, for 2-3 days. Refrigerate for up to 5 days.


    Q3: Can I freeze this cake? A: Yes, wrap tightly and freeze for up to 1 month. Thaw at room temperature.


    Q4: What if my dough doesn’t rise? A: Ensure yeast is fresh and milk is at the right temperature. Warm environment is key.


    Q5: Can I use instant yeast instead? A: Yes, but reduce the amount to 1 1/2 tsp and mix directly with flour.


    Storage and Make-Ahead Tips

    Room Temperature Storage: 2-3 days in an airtight container

    Refrigeration: Up to 5 days

    Freezing: Can be frozen for up to 1 month

    Reheating: Warm briefly in oven at 300°F (150°C)

    Prep Ahead: Dough can be made a day in advance

    Indulge in this heavenly Almond Cream Cake—a true celebration of flavor, texture, and baking

  • Cottage Cheese-Stuffed Pancakes with Sour Cream Glaze

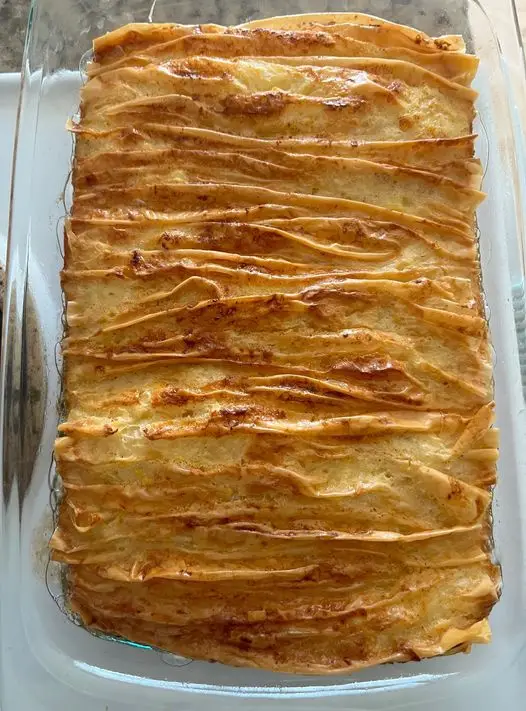
    Cottage Cheese-Stuffed Pancakes with Sour Cream Glaze

    Pancakes with Sour Cream Glaze

    Cottage cheese-stuffed pancakes are a delightful combination of tender, golden pancakes filled with a rich, creamy cottage cheese mixture and topped with a luscious sour cream glaze. This dish is a favorite across many cultures, where variations of stuffed pancakes are cherished for breakfast, brunch, or dessert. With a balance of flavors from the lightly sweet pancake batter to the tangy glaze, this recipe is a versatile treat that can be enjoyed any time of the day.


    Perfect for family gatherings or as a special indulgence, these pancakes offer a harmonious blend of textures and tastes. Whether served warm from the oven or enjoyed as leftovers, they bring a sense of warmth and nostalgia to the table. Let’s dive into this classic recipe and explore why it remains a timeless favorite.


    Full Recipe:

    Ingredients

    For the Pancakes:

    Milk: 350 ml

    Eggs: 3 pcs

    Flour: 170 g

    Sugar: 1 tbsp

    Vanilla sugar: 0.5 tsp

    Salt: 0.5 tsp

    Oil: 3–4 tbsp

    For the Filling:

    Cottage cheese: 350 g

    Egg yolk: 1 pc

    Sugar: 2 tbsp

    Vanilla sugar: 1 tsp

    Salt: 0.5 tsp

    For the Glaze:

    Butter: 50 g

    Sour cream: 2 tbsp

    Sugar: 1 tbsp

    Prep Time, Cooking Time, and Total Time

    Prep Time: 20 minutes

    Cooking Time: 40 minutes

    Total Time: 1 hour

    Servings and Nutrition Facts

    Servings: 6

    Calories (per serving): Approximately 350 kcal

    Macronutrients (per serving):

    Protein: 12 g

    Carbohydrates: 30 g

    Fat: 20 g

    Steps to Make Cottage Cheese-Stuffed Pancakes

    1. Prepare the Pancake Batter

    In a mixing bowl, whisk together the eggs, milk, sugar, vanilla sugar, and salt until combined.

    Gradually add the flour, whisking constantly to prevent lumps.

    Stir in the oil, ensuring the batter is smooth and slightly runny. Let the batter rest for 10–15 minutes.

    2. Cook the Pancakes

    Heat a non-stick skillet over medium heat and lightly grease it with oil.

    Pour a ladleful of batter into the skillet, swirling it to coat the surface evenly.

    Cook for 1–2 minutes on one side until lightly golden, then flip and cook the other side for another minute.

    Repeat with the remaining batter, stacking the pancakes on a plate.

    3. Prepare the Filling

    In a bowl, combine the cottage cheese, egg yolk, sugar, vanilla sugar, and salt. Mix until smooth and creamy.

    4. Assemble the Pancakes

    Take a cooked pancake and place a spoonful of the cottage cheese filling in the center.

    Fold the pancake into a rectangle or roll it into a cylinder, ensuring the filling is sealed inside

    Repeat with the remaining pancakes and filling.

    5. Bake the Stuffed Pancakes

    Preheat your oven to 180°C (356°F). Arrange the stuffed pancakes in a greased baking dish.

    6. Prepare the Glaze

    In a small saucepan, melt the butter over low heat. Add the sour cream and sugar, stirring until the glaze is smooth and slightly thickened.

    7. Glaze and Bake

    Pour the glaze over the stuffed pancakes, ensuring they are evenly coated.

    Bake for 10–15 minutes until the glaze is bubbling and the pancakes are heated through.

    8. Serve

    Serve the pancakes warm, garnished with fresh fruit, a drizzle of honey, or a sprinkle of powdered sugar, if desired.

    Why This Recipe is Timeless

    Cottage cheese-stuffed pancakes are a testament to the enduring appeal of comfort food. Their simplicity, versatility, and rich flavors make them a favorite across generations. The soft pancakes, combined with the creamy, slightly tangy filling, offer a delightful contrast that appeals to both sweet and savory palates.


    This recipe’s timelessness also lies in its adaptability. While the classic version calls for cottage cheese and a sour cream glaze, it can easily be customized with different fillings like cream cheese, fruit preserves, or even chocolate. Similarly, the glaze can be swapped for a dusting of powdered sugar or a dollop of whipped cream, making it a versatile dish for any occasion.


    Nutrition Facts (Per Serving)

    Calories: 350 kcal

    Protein: 12 g

    Carbohydrates: 30 g

    Fat: 20 g

    Fiber: 1 g

    Sugar: 10 g

  • Healthy Banana Chocolate Cake: A Guilt-Free Chocolate Dream

    Healthy Banana Chocolate Cake: A Guilt-Free Chocolate Dream

    Healthy Banana Chocolate Cake: A Guilt-Free Chocolate Dream

    Ingredients

    For the Cake:

    3 large ripe bananas (about 1.5 cups mashed)

    ½ cup oat flour (60g)

    ½ cup unsweetened cocoa powder (50g)

    2 large eggs, room temperature

    ¼ cup pure maple syrup (60ml)

    1 teaspoon baking powder

    1 teaspoon pure vanilla extract

    ¼ teaspoon salt

    ¼ cup chopped walnuts (optional)

    Optional Chocolate Ganache:

    ½ cup dark chocolate chips

    ¼ cup almond milk or coconut milk

    Detailed Instructions

    Preparation:

    Preheat oven to 350°F (175°C)

    Line an 8-inch round cake pan with parchment paper

    Lightly grease the sides of the pan

    Making the Batter:

    Banana Preparation:

    Choose very ripe bananas with brown spots

    Mash thoroughly until no lumps remain

    Measure to ensure you have 1.5 cups

    Wet Ingredients:

    In a large bowl, combine mashed bananas

    Add room temperature eggs

    Pour in maple syrup

    Add vanilla extract

    Whisk until well combined

    Dry Ingredients:

    In a separate bowl, whisk together:

    Oat flour

    Cocoa powder

    Baking powder

    Salt

    Combining:

    Gradually fold dry ingredients into wet

    Mix until just combined

    Don’t overmix to keep cake tender

    Fold in walnuts if using

    Baking Process:

    Pour batter into prepared pan

    Smooth top with spatula

    Bake for 25-30 minutes or until:

    Toothpick comes out mostly clean

    Top springs back when lightly pressed

    Edges start to pull away from pan

    Optional Ganache Topping:

    Heat almond milk until just simmering

    Pour over chocolate chips

    Let stand 2 minutes

    Stir until smooth

    Pour over cooled cake

    Storage Tips

    Room temperature: 2 days in airtight container

    Refrigerated: up to 5 days

    Freezer: up to 3 months (wrap well)

    Nutrition Information

    Per slice (1/8 of cake, without ganache):


    Calories: 145

    Protein: 4g

    Carbohydrates: 25g

    Fiber: 4g

    Sugar: 12g (all from natural sources)

    Fat: 5g

    Potassium: 280mg

    Iron: 1.5mg

    Expert Tips

    Use very ripe bananas for maximum sweetness

    Make fresh oat flour by blending rolled oats

    Bring eggs to room temperature for better mixing

    Don’t overbake – cake should remain fudgy

    Cool completely before adding toppings

    Sift cocoa powder to prevent lumps

    Variations

    Add ½ teaspoon cinnamon or espresso powder

    Replace walnuts with pecans or almonds

    Add dark chocolate chips to the batter

    Top with sliced bananas

    Spread with almond butter instead of ganache

    Add orange zest for chocolate-orange flavor

    This healthy banana chocolate cake is perfect for:


    Clean eating desserts

    Gluten-free diets

    Post-workout treats

    Kid-friendly healthy snacks

    Breakfast cake

    Special occasions requiring a healthier option

    The beauty of this cake lies in how it transforms everyday healthy ingredients into a decadent dessert that satisfies even the strongest chocolate cravings. It’s particularly impressive served to those who are skeptical about healthy desserts – they won’t believe it’s made without traditional flour or refined sugar!

  • 4-Ingredient Healthy Chocolate Cake: A Guilt-Free Indulgence

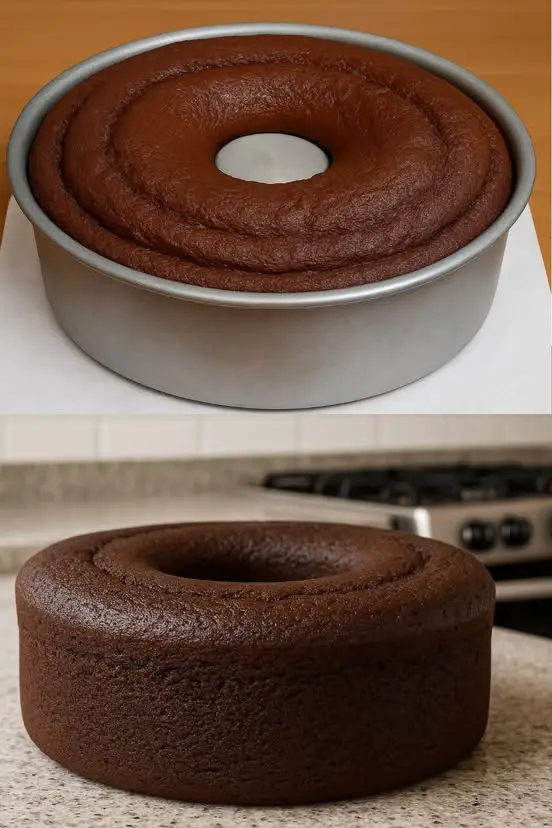
    4-Ingredient Healthy Chocolate Cake: A Guilt-Free Indulgence

    Ingredients

    For the Cake:

    2 large ripe bananas (about 240g peeled)

    2 large eggs, room temperature

    33g unsweetened cocoa powder (⅓ cup)

    1 teaspoon baking powder

    For the Topping:

    60g dark chocolate (70% cocoa or higher) (2 ounces)

    Detailed Instructions

    Preparation:

    Preheat your oven to 170°C (340°F)

    Line a 16cm (6-inch) round cake pan with parchment paper or lightly grease it

    Making the Batter:

    Select perfectly ripe bananas:

    Should have brown spots on the peel

    Soft but not mushy

    The riper the banana, the sweeter your cake

    Blend the ingredients:

    Place peeled bananas in the blender

    Add eggs

    Sift in cocoa powder and baking powder

    Blend until just combined (15-20 seconds)

    Stop and scrape down sides if needed

    Baking Process:

    Pour the batter into the prepared pan

    Smooth the top with a spatula

    Tap the pan gently on the counter to remove air bubbles

    Bake for 25 minutes or until:

    A toothpick comes out clean

    The top springs back when lightly pressed

    The edges start to pull away from the pan

    Creating the Chocolate Topping:

    While the cake is hot:

    Chop the dark chocolate into small pieces

    Place pieces evenly over the hot cake

    Let stand for 2-3 minutes until chocolate begins to melt

    Spread the melted chocolate:

    Use a spatula to create an even layer

    Work from the center outward

    Create swirls or patterns if desired

    Storage and Serving

    Allow to cool completely before serving (about 1 hour)

    Store in an airtight container:

    Room temperature: 2 days

    Refrigerated: up to 5 days

    Can be frozen for up to 2 months

    Nutrition Information

    Per slice (1/8 of cake):


    Calories: 115

    Protein: 4g

    Carbohydrates: 15g

    Fiber: 3g

    Sugar: 8g (all from natural sources)

    Fat: 6g

    Iron: 1.2mg

    Potassium: 235mg

    Expert Tips

    Use very ripe bananas for maximum sweetness

    Bring eggs to room temperature for better blending

    Don’t overmix the batter to keep the cake light

    Use high-quality cocoa powder for best flavor

    Choose dark chocolate with at least 70% cocoa for health benefits

    Let cool completely before cutting for clean slices

    Variations

    Add 1 teaspoon vanilla extract for extra flavor

    Sprinkle with chopped nuts before the chocolate sets

    Add a pinch of cinnamon or espresso powder

    Top with fresh berries before serving

    Blend in a tablespoon of nut butter for extra protein

    This healthy chocolate cake proves that dessert can be both nutritious and delicious. Perfect for:


    Health-conscious chocolate lovers

    Gluten-free diets

    Sugar-free lifestyle

    Clean eating

    Post-workout treat

    Kid-friendly healthy dessert

    The simplicity of this recipe, combined with its rich, chocolatey taste, makes it a perfect choice for anyone looking to enjoy dessert without compromising their health goals. It’s particularly impressive served at gatherings where guests are often amazed to learn it’s made with such wholesome ingredients.