Category: healthy food

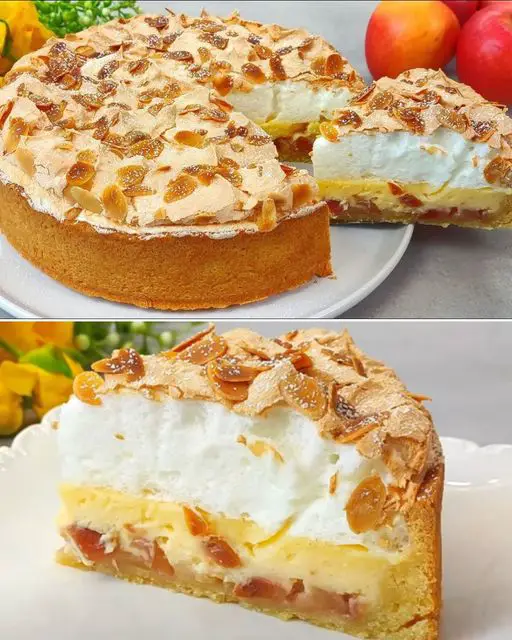
  • Lemon Lattice Tart Recipe

    Lemon Lattice Tart Recipe

    Lemon Lattice Tart Recipe

    Table of Contents

    Ingredients

    For the Pastry:

    • 120 g (1/2 cup) Soft Butter
    • A Pinch of Salt
    • 80 g (1/3 cup + 1 tbsp) Sugar
    • Grated Zest of 1 Lemon
    •  Eggs
    • 380 g (3 cups + 1 tbsp) All-Purpose Flour
    • 10 g (2 tsp) Baking Powder
    For the Lemon Cream Filling:
    • 500 ml (2 cups) Latte Macchiato (or Milk)
    •  Egg Yolks
    • 2 tbsp Cornstarch
    • 1 tbsp Flour
    • 20 g (1.5 tbsp) Butter
    • Juice of 1 Lemon
    • 80 g (1/3 cup + 1 tbsp) Sugar
    • Nutrition Information

    • Servings: 8
    • Calories: Approximately 320 kcal per serving
    • Protein: 5 g
    • Carbohydrates: 42 g
    • Fat: 15 g
    • Fiber: 1 g

    Step-by-Step Instructions

    1. Prepare the Pastry Dough

    Start by preparing the pastry, which forms the delicious base and lattice topping of our tart. In a large mixing bowl, combine the softened butter with sugar and the grated lemon zest. Beat the mixture until it becomes light and fluffy. The lemon zest infuses the dough with a delicate citrus aroma that will complement the filling beautifully.

    Next, add the eggs one at a time, mixing well after each addition. The eggs should be fully incorporated, giving the dough a smooth and consistent texture.

    In a separate bowl, sift together the flour and baking powder. Gradually add these dry ingredients to the butter mixture, stirring gently to combine. As the dough comes together, you’ll notice it becoming soft yet pliable—perfect for rolling out.

    Divide the dough into two portions, with one slightly larger than the other. This larger piece will form the base of your tart, while the smaller piece will be used for the lattice. Wrap each portion in plastic wrap and chill in the refrigerator for at least 30 minutes. Chilling the dough helps it firm up, making it easier to roll out later.

    2. Prepare the Lemon Cream Filling

    While the dough chills, you can move on to making the lemon cream filling. Begin by heating the latte macchiato (or milk) in a saucepan over medium heat until it is warm but not boiling. The warm milk provides a rich, creamy base for the filling.

    In a separate bowl, whisk together the egg yolkssugarcornstarch, and flour until the mixture is smooth. The cornstarch and flour act as thickeners, ensuring the filling sets properly.

    Slowly pour the warm latte macchiato into the egg mixture, whisking constantly to prevent the eggs from curdling. Once combined, pour the mixture back into the saucepan.

    Cook the mixture over medium heat, stirring continuously until it thickens to a custard-like consistency. This process can take several minutes, so patience is key. Once thickened, remove the saucepan from the heat and stir in the butter and lemon juice. The butter adds richness, while the lemon juice brings a refreshing tartness. Allow the filling to cool slightly before assembling the tart.

    3. Assemble the Tart

    Preheat your oven to 180°C (350°F). Take the larger portion of dough from the refrigerator and roll it out on a lightly floured surface. The dough should be large enough to cover the bottom and sides of a 25-27 cm (10-11 inch) tart pan. Press the dough gently into the pan, trimming any excess dough that hangs over the edges.

    Next, pour the prepared lemon cream filling into the pastry-lined tart pan. Use a spatula to spread it out evenly, ensuring that it reaches all the edges.

    Now, take the smaller portion of dough and roll it out. Cut it into strips about 1-2 cm (1/2 inch) wide. Arrange the strips over the lemon filling in a crisscross pattern to create a lattice. Press the edges of the strips gently into the crust to seal them.

    4. Bake the Tart

    Place the tart in the preheated oven and bake for 45 minutes, or until the crust is golden brown and the filling is set. The tart should be firm to the touch, with a slight jiggle in the center indicating a perfectly set cream.

    5. Garnish and Serve

    Once baked, allow the tart to cool completely before removing it from the tart pan. This cooling period helps the filling to fully set and makes slicing easier.

    For a finishing touch, dust the top of the tart with powdered sugar. You can also garnish it with lemon slices and fresh mint leaves for added color and a burst of freshness.

    Enjoy

    Slice the tart into even pieces and serve. This Lemon Lattice Tart is a refreshing dessert that pairs wonderfully with a cup of coffee or tea. Its combination of buttery pastry and tangy lemon cream is sure to delight your taste buds, making it a perfect choice for any gathering or special occasion.

    Tips for Perfect Results

    • Chill the Dough: Don’t skip the chilling step for the dough. It makes rolling out easier and helps the crust maintain its shape during baking.
    • Avoid Overcooking the Filling: When cooking the lemon cream filling, keep a close eye on it. Overcooking can cause it to curdle. Stir constantly and remove from heat as soon as it thickens.
    • Serving Suggestions: This tart is delicious on its own, but you can elevate it by serving with a dollop of whipped cream or a scoop of vanilla ice cream.

    This Lemon Lattice Tart combines the tangy brightness of lemon with a rich, creamy filling and a tender, buttery crust. Its elegant presentation and delightful flavor make it an ideal dessert for both everyday indulgence and special occasions.

  • Yeast-Free Baked Pastry Recipe That Never Absorbs Oil Material

    Yeast-Free Baked Pastry Recipe That Never Absorbs Oil Material

    Yeast-Free Baked Pastry Recipe That Never Absorbs Oil Material

    Table of Contents

    Ingredients

    1 egg
    1 cup of yoghurt
    2 tablespoons of olive oil
    1 teaspoon salt
    1 packet of baking powder
    3 cups flour
    For Frying;
    Liquid oil

    preparation
    How to Make Yeast-Free Pishi
    Recipe That Never Takes Grease;
    Let’s add all the ingredients except flour to the yoghurt ingredients and mix.
    Let’s knead a soft dough by adding flour in a controlled manner.
    Let it sit for 15 minutes.
    Let’s roll out the dough with the help of a shaped rolling pin.
    Let’s cut the dough with a roulette to get square words.
  • Cupcake de vainilla

    Cupcake de vainilla

    Substances:

    – 2 cups of flour for truffles

    – 2 teaspoons of baking powder

    Three-fourths to at least one cup of sugar.

    (favourite stage of sweetness)

    – 3 huevos

    Ezoic

    – just a little little bit of salt

    – 1/2 cup melted margarine

    – 1 teaspoon of vanilla extract

    Ezoic

    – 1 cup of milk

    Directions:

    – Beat eggs, sugar, and vanilla till they’re gentle and fluffy. Then, add melted baking margarine and blend completely.

    – Mix flour, baking powder, and salt.

    – Add the dry components to the egg combination, alternating with the milk.

    – Cook dinner in a preheated oven at 180°C for 20 minutes or till a skewer inserted comes out clear.

  • Heavenly Pineapple Cheeseball August 15, 2024 by Admin

    Heavenly Pineapple Cheeseball August 15, 2024 by Admin

    Heavenly Pineapple Cheeseball

    Ingredients

        • 2 packages of softened and room temperature cream cheese

        • 1 can crushed pineapple, drained very well
        • ½ cup chopped green onions

        • ½ cup chopped green pepper
        • 1 tsp seasoning salt
        • 1 tsp lemon pepper seasoning

      • 2 cups pecans, chopped nicely
      • Assorted crackers

    Preparation

    How to Make Heavenly Pineapple Cheeseball

    Step 1:

    In a large bowl, beat the cream cheese until smooth. Gently fold in the chopped green onions and green pepper.

    Step 2:

    Add the seasoning salt, lemon pepper seasoning, and ½ cup of chopped pecans. Mix well.

    Step 3:

    Place the mixture on a sheet of plastic wrap, roll, and shape it into a ball. Refrigerate overnight.

    Ezoic

    Step 4:

    Just before serving, roll the cheese ball in the remaining chopped pecans. Set it on a plate and surround it with assorted crackers.

    Enjoy!

  • Slow Cooker Savory Salisbury Steak

    Slow Cooker Savory Salisbury Steak

    Ingredients

      • 6 oz sliced mushrooms

      • ½ onion sliced
      • 1 ½ c beef broth low sodium

      • 1 oz package brown gravy mix dry
      • 2 tbsp ketchup
      • 1 tsp Dijon mustard

      • 2 tbsp fresh parsley
      • 2 tbsp cornstarch
      • 4 tbsp water

    Beef Patties:

      • 1 ½ lbs lean ground beef
      • 1 egg yolk
      • ¼ c minced onion

      •  c Panko breadcrumbs
      • 3 tbsp milk
      • 1 clove garlic minced

    • Salt & pepper to taste

    Instructions

    Prepare the Slow Cooker:

    • Place the sliced mushrooms and onions at the bottom of the slow cooker.

    Make the Patties:

      • In a bowl, combine the ground beef, egg yolk, minced onion, Panko breadcrumbs, milk, minced garlic, salt, and pepper. Mix well.

    Ezoic

    • Form the mixture into six equal-sized patties.

    Brown the Patties:

    • Heat a skillet over medium-high heat and sear each patty for about 3 minutes on each side until golden brown.

    Layer in Slow Cooker:

      • Place the browned patties on top of the mushrooms and onions in the slow cooker.

    Mix the Sauce:

    • In a separate bowl, combine the beef broth, gravy mix, ketchup, and Dijon mustard. Pour this mixture over the patties in the slow cooker.

    Cook:

    • Set the slow cooker to low and cook for 5 hours.

    Thicken the Gravy:

      • After cooking, remove the patties and set aside.

    • Turn the slow cooker to high. Mix cornstarch with cold water and stir it into the broth. Let it cook for a few more minutes until the gravy thickens.

    Serve:

      • Return the patties to the slow cooker, coating them in the thickened gravy.
      • Serve the Salisbury steaks over mashed potatoes or rice for a complete meal.

    Notes

    To make this Slow Cooker Savory Salisbury Steak recipe gluten-free. You’ll want to make. A few simple swaps. First, replace the Panko breadcrumbs in the beef patties. With a gluten-free breadcrumb option. Which is readily available. In most grocery stores. Also, ensure your brown gravy mix. Is labeled gluten-free. As traditional gravy mixes often contain wheat. As a thickener. By making these changes. You can enjoy this comforting, hearty dish. Without worrying about gluten!
  • Speedy Potato Breakfast Flatbreads

    Speedy Potato Breakfast Flatbreads

    Speedy Potato Breakfast Flatbreads

    Table of Contents

    Ingredients:

    1 potato
    ½ onion
    ½ teaspoon crushed garlic
    ½ teaspoon red paprika
    150g all-purpose flour
    Salt to taste
    1 tablespoon vegetable oil
    300ml water
    Parsley for garnish

    Description:
    Prepare Potato:
    Boil 1 potato until soft.
    Peel and grate the potato.
    Prepare Onion Mixture:
    Grate half an onion and add it to a bowl.
    Mix in ½ teaspoon crushed garlic, ½ teaspoon red paprika, and salt to taste.
    Make Dough:
    To the onion mixture, add 150g all-purpose flour and 1 tablespoon vegetable oil.
    Gradually add water, stirring to form a dough. Adjust the amount of water as needed to achieve the right consistency.
    Fry Flatbreads:
    Heat a non-stick skillet over medium heat.
    Take portions of the dough and flatten them into thin rounds.
    Fry the flatbreads in the skillet until golden brown on both sides.
    Serve:
    Garnish with chopped parsley.
    Serve warm with garlic sauce for dipping.
    Serving Suggestions:
    These flatbreads pair well with a variety of breakfast accompaniments such as eggs, yogurt, or fresh fruit. They can also be enjoyed as a snack or light lunch with a side salad.
    Cooking Tips:
    Make sure the skillet is well-heated before frying the flatbreads to ensure they cook evenly and develop a nice golden crust.
    Nutritional Benefits:
    These flatbreads are a good source of carbohydrates from the potato and flour, and they provide some fiber and essential nutrients. They are also low in fat, especially if you use minimal oil for frying.
    Dietary Information:
    This recipe is vegetarian-friendly. You can make it vegan by omitting the garlic sauce or using a vegan alternative. It’s also nut-free and can be made gluten-free by using a gluten-free flour blend.
    Storage:
    Store any leftover flatbreads in an airtight container in the refrigerator for up to 2 days. Reheat them in a skillet or toaster oven before serving to regain their crispiness.
    Why You’ll Love This Recipe:
    These flatbreads are quick and easy to make, perfect for busy mornings.
    They are versatile and can be customized with your favorite spices and herbs.
    They are budget-friendly and require simple ingredients that you likely already have on hand.
    Conclusion:
    These Speedy Potato Breakfast Flatbreads are a delightful twist on traditional breakfast options. With their crispy exterior and soft interior, they are sure to become a favorite in your morning routine. Whether enjoyed with a savory garlic sauce or paired with your favorite breakfast toppings, these flatbreads are a delicious way to start your day on the right foot!
  • Hearty Beef Broth with Vegetables

    Hearty Beef Broth with Vegetables

    Hearty Beef Broth with Vegetables

    Table of Contents

    Ingredients:

    700 g beef shank (1 lb 8¾ oz)
    Vegetable oil (for searing)
    1/2 turnip greens
    1 onion
    3 cloves of garlic
    1 parsley root
    2 carrots
    1/2 celery root
    4 sticks of celery
    1 leek
    1 parsnip
    1 piece of turmeric root, about the size of a thumb
    80 g salt (¼ cup)
    1 tsp allspice
    4 bay leaves

    Directions:
    Prepare the Meat:
    Sear the Beef:
    Heat vegetable oil in a large pot over medium-high heat.
    Sear the beef shank on both sides until browned.
    Fill the pot with enough water to almost completely cover the meat.
    Cover the pot and simmer gently over low heat until the meat is tender, about 2 hours.
    Prepare the Vegetables:
    Chop the Vegetables:
    While the meat is simmering, chop the turnip greens, onion, garlic, parsley root, carrots, celery root, celery sticks, leek, and parsnip.
    Peel and chop the turmeric root.
    Add Vegetables and Spices:
    Combine Ingredients:
    After 2 hours of simmering, add the chopped vegetables to the pot with the beef.
    Add the salt, allspice, and bay leaves.
    Simmer:
    Sauté the vegetables and beef in the pot until the vegetables are lightly browned and releasing their juices.
    Cover the pot and gently simmer over medium-high heat for 12 minutes, until the vegetables are tender.
    Final Steps:
    Cool and Freeze:
    Let the broth cool slightly.
    Transfer the broth to a container or silicone molds, cover with double-sided baking paper and aluminum foil, and freeze for 12 hours or overnight.
    Serving Suggestions:
    As a Soup:
    Serve the beef broth hot with a sprinkle of fresh parsley.
    As a Base:Use the broth as a base for soups, stews, and sauces to add depth and flavor.
    Cooking Tips:
    Seared Flavor:
    Ensure the beef is well-seared for a deeper flavor.
    Even Chopping:
    Chop vegetables evenly for consistent cooking.
    Nutritional Benefits:
    Beef Shank:
    Rich in protein and essential nutrients.
    Root Vegetables:
    Packed with vitamins, minerals, and fiber.
    Turmeric:
    Contains anti-inflammatory properties.
    Dietary Information:
    Gluten-Free:
    This recipe is naturally gluten-free.
    Low-Carb:
    Suitable for low-carb diets.
    Storage:
    Refrigerate:
    Store any leftovers in an airtight container in the refrigerator for up to 3 days.
    Freeze:
    Freeze in portions for up to 3 months. Reheat gently on the stove or microwave.
    Why You’ll Love This Recipe:
    Comforting and Nutritious:
    Perfect for soothing an upset stomach or as a warming meal.
    Versatile:
    Use it as a base for various dishes.
    Rich Flavor:
    The combination of beef and vegetables creates a rich, flavorful broth.
    Conclusion:
    Enjoy this hearty beef broth with vegetables as a soothing and nutritious meal or use it as a versatile base for your favorite recipes. With its rich flavor and comforting qualities, it’s sure to become a staple in your kitchen
  • Vanilla Almond Cream Cake

    Vanilla Almond Cream Cake

    Vanilla Almond Cream Cake

    Table of Contents

    Ingredients:

    For the Cream:

    2 eggs
    150 grams sugar (3/4 cup)
    1 teaspoon vanilla sugar
    70 grams cornstarch (1/2 cup)
    500 ml milk (2 cups)
    For the Choux Pastry:

    100 ml water (1/2 cup)
    100 ml milk (1/2 cup)
    80 grams butter (1/3 cup)
    A pinch of salt
    1 teaspoon sugar
    120 grams flour (1 cup)
    3-4 eggs (depending on size)
    Flaked almonds for topping
    For the Buttercream:

    140 grams butter at room temperature (2/3 cup)
    Prepared pudding from the cream filling (at room temperature)

    Directions:

    Prepare the Cream:
    Combine Ingredients: In a saucepan, whisk together 2 eggs, 150 grams sugar, vanilla sugar, and 70 grams cornstarch.
    Add Milk: Gradually stir in 500 ml milk, mixing until smooth.
    Cook the Cream: Cook over medium heat, stirring constantly, until the mixture thickens to a pudding-like consistency.
    Cool the Cream: Cover the cream with cling film, pressing it directly onto the surface to prevent a skin from forming. Let it cool completely.
    Prepare the Choux Pastry:
    Heat Ingredients: In a saucepan, combine 100 ml water, 100 ml milk, 80 grams butter, a pinch of salt, and 1 teaspoon sugar. Heat until the butter is fully melted.
    Add Flour: Stir in 120 grams flour all at once and cook the batter for 1-2 minutes, stirring constantly until it forms a smooth dough that pulls away from the sides of the pan.
    Cool Slightly: Remove from heat and let the dough cool for about 4 minutes.Add Eggs: Gradually add 3-4 eggs to the dough, one at a time, mixing well after each addition until the dough is smooth and glossy. The dough should slowly pull away from the spoon when lifted.
    Form and Bake: Preheat your oven to 180°C (355°F). On a baking sheet, pipe or spoon the dough into a circle with a diameter of 18 cm (7 inches). Brush with the remaining egg and sprinkle with flaked almonds. Bake for 30-40 minutes or until golden brown. Let cool completely.
    Prepare the Buttercream:
    Mix Buttercream: Gradually add the room temperature pudding to the 140 grams of room temperature butter, mixing until smooth and creamy.
    Assemble the Cake:
    Slice and Fill: Slice the cooled choux pastry horizontally to create two layers. Spread the buttercream evenly on the bottom layer and place the top layer over it.
    Chill: Refrigerate the assembled cake for 30 minutes before serving to allow the cream to set.
    Serving Suggestions:
    Serve chilled with a dusting of powdered sugar on top.
    Pair with a cup of tea or coffee for a delightful dessert experience.
    Garnish with fresh berries for added color and flavor.
    Serve with a dollop of whipped cream or a drizzle of chocolate sauce for extra indulgence.
    Cooking Tips:
    Ensure the cream and butter are at room temperature before mixing to avoid curdling.
    If the choux pastry dough is too thick, add a bit more egg, little by little, until the consistency is right.
    Allow the choux pastry to cool completely before slicing to avoid deflation.
    To prevent the choux pastry from becoming soggy, assemble the cake shortly before serving.
    Nutritional Benefits:
    Eggs: Provide high-quality protein and essential vitamins.
    Milk: A good source of calcium and vitamin D.
    Almonds: Rich in healthy fats, fiber, and protein.
    Dietary Information:
    Vegetarian: This recipe is suitable for vegetarians.
    Gluten-Free Option: Substitute regular flour with a gluten-free flour blend.
    Nutritional Facts (per serving, based on 10 servings):
    Calories: 320
    Protein: 6g
    Carbohydrates: 28g
    Dietary Fiber: 2g
    Sugars: 15g
    Fat: 20g
    Saturated Fat: 12g
    Cholesterol: 120mg
    Sodium: 180mg
    Calcium: 100mg
    Iron: 1mg
    Storage Tips:
    Refrigerate: Store the assembled cake in an airtight container in the refrigerator for up to 3 days.
    Freeze: Freeze the unfilled choux pastry for up to 1 month. Thaw before using.
    Why You’ll Love This Recipe:
  • Jam-Stuffed Buns

    Jam-Stuffed Buns

    Jam-Stuffed Buns

    Table of Contents

    Ingredients:

    200 ml warm milk
    7 g dry yeast
    20 g sugar
    350 g flour (added gradually)
    1 egg white
    30 ml vegetable oil
    6 g salt
    Orange jam (or any jam of your choice)
    40 g flour (for decoration)
    50 ml water (for decoration)
    1 egg yolk
    1 tablespoon milk
    Poppy seeds

    Instructions:

    Prepare the Yeast:
    In a bowl, mix 200 ml of warm milk, 7 g of dry yeast, and 20 g of sugar.
    Add 100 g of flour and mix well.
    Cover the bowl and let it sit for 15 minutes.
    Prepare the Dough:
    Add 1 egg white and 30 ml of vegetable oil to the yeast mixture.
    Gradually add 220-240 g of flour and 6 g of salt.
    Knead the mixture until a homogeneous dough forms, then continue kneading by hand for 5-6 minutes.
    Form the dough into a ball and place it in a greased bowl.
    Cover the bowl and let the dough rest in a warm place for 45 minutes.
    Form the Buns:
    Place the dough on a floured surface and divide it into 8 equal parts.
    Shape each part into a ball, cover them, and let them rest for 10 minutes.
    Roll each ball of dough out to a thickness of 0.5 cm.
    Place a spoonful of jam in the center of each dough circle, then roll it up into a tube, sealing the edges.
    Shape the rolls and repeat the process with the remaining dough.
    Baking:
    Place the rolls in molds for 9 cm diameter cupcakes.
    Let them rest for 10 minutes.
    Mix 40 g of flour with 50 ml of water, place the mixture in a plastic bag, and use it for decoration.
    Beat an egg yolk with a tablespoon of milk and brush it over the rolls.
    Decorate the rolls with the flour and water mixture, then sprinkle with poppy seeds.
    Bake the rolls at 180°C for 20-25 minutes.
    Serve:
    Let the rolls cool slightly before serving.
    Enjoy your soft and delicious jam-stuffed buns!
  • Beyond Pizza: Crafting Irresistible Homemade Bread

    Beyond Pizza: Crafting Irresistible Homemade Bread

    Beyond Pizza: Crafting Irresistible Homemade Bread
    Table of Contents
    In the world of culinary delights, few things rival the satisfaction of homemade bread. Move over pizza; we’re about to unravel a recipe that promises to be not just a meal but a sensory experience. Join me as we explore the steps to create a bread that’s not only tastier but also richer in flavor and texture.

    Ingredients
    For the Dough:
    450 g of flour
    1/2 cube of fresh yeast (20 g)
    2 tablespoons of flour
    1/2 teaspoon of sugar
    1 teaspoon of salt
    250 g of lukewarm water
    For Coating:
    100 ml of olive oil
    2 cloves of garlic
    1 handful of fresh basil
    1 handful of fresh parsley
    Additional Toppings:
    Grated mozzarella or parmesan
    A few olives
    Procedure
    Activating the Yeast
    Place half a cube of yeast in a bowl.
    Add half a teaspoon of sugar and pour 250 ml of lukewarm water.
    Add two tablespoons of flour and stir until all ingredients dissolve without lumps.
    Leave the dissolved yeast in a warm place for about 10 minutes until it activates and foams.
    Creating the Dough
    Measure and sift 450 g of flour, add a teaspoon of salt, and the activated yeast.
    Knead with a dough mixer until it becomes compact and separates from the bowl’s walls.
    If kneading by hand, mix until the flour is absorbed and continue until the dough is compact, smooth, and not too sticky.
    Shape into a ball, cover, and let it ferment in a warm, draft-free room for about half an hour or until doubled in volume.

    Rolling and Preparing
    • Spread the risen dough on a floured surface and roll it out evenly.
    • Transfer it to a piece of baking paper on a wide, shallow baking tray.
    • Cut it into cubes.
    Crafting the “Pesto”
    • Chop fresh basil and parsley, grate or squeeze garlic, and mix with 100 ml of olive oil.
    • Spread the mixture across all the incisions, then brush the entire surface with a silicone brush.
    Toppings and Baking
    • Sprinkle grated mozzarella, parmesan, or your preferred cheese along the cuts.
    • Place a sliced olive on top of each cube and press gently.
    • Optionally, sprinkle more mozzarella over the entire bread.
    • Bake in a preheated oven at 180 degrees for 20 minutes.
    Conclusion

    As the aroma of this artisanal bread fills your kitchen, you’ve not just baked; you’ve crafted an experience. With its golden crust, flavorful coating, and delightful toppings, this bread transcends the ordinary. Pizza might have a competitor on the table, but this creation is in a league of its own.

  • Mixing Apples and Nuts: A Delectable Apple Pie Recipe

    Mixing Apples and Nuts: A Delectable Apple Pie Recipe

    ixing Apples and Nuts: A Delectable Apple Pie Recipe

    Table of Contents

    Picture this: you’re craving a delicious dessert, something that’s comforting yet indulgent. Well, look no further because we have the perfect solution – a mouthwatering apple pie infused with the goodness of nuts. In this article, we’ll guide you through the process of creating this delectable treat step by step. So, put on your apron and let’s get baking!

    Ingredients

    • 260g all-purpose flour (or oat flour for a twist)
    • 100g raisins
    • 120ml oil
    • 120ml water
    • 50g chopped walnuts
    • 90g stevia sweetener (or 180g normal sugar)
    • 12g baking powder
    • 4 apples
    • 3 eggs
    • Juice of 1 lemon
    • 1 teaspoon vanilla sugar
    • 1 teaspoon vanilla essence
    • A pinch of salt
    • A knob of butter for greasing
    • Ground cinnamon
    • Icing sugar (for dusting)
    Preparing the Apples
    1. Clean and Cube: Wash the apples, remove the cores, and cut them into small cubes without peeling. Place them in a bowl and sprinkle with lemon juice to prevent browning.
    2. Sweeten and Spice: Add water, vanilla sugar, and stevia sweetener (or sugar) to the apples. Mix well to coat them evenly. Then, throw in the raisins, chopped walnuts, a pinch of salt, and a generous sprinkle of cinnamon. Let the flavors mingle for about 10 minutes.
    Mixing the Batter
    1. Blend the Wet Ingredients: In a separate bowl, combine oil, eggs, and vanilla essence. Give it a good whisk until smooth.
    2. Incorporate the Dry Ingredients: Gradually add the flour and baking powder to the wet mixture. Stir gently until everything is well combined, and you have a smooth batter.
    3. Fuse the Flavors: Fold the apple mixture into the batter, ensuring an even distribution of apples and nuts throughout.
    See also  Potato Pizza Recipe
    Buttering the Mold
    1. Grease it Up: Take a rectangular glass mold and generously grease it with butter. This will prevent the pie from sticking to the sides.
    2. Spread the Joy: Pour the batter into the greased mold, using a spoon to spread it evenly and level the surface.
    Baking to Perfection
    1. Preheat and Bake: Preheat your oven to 180°C. Once heated, pop the mold into the oven and bake for 40-45 minutes, or until the pie is golden brown and a toothpick inserted into the center comes out clean.
    2. Dust and Delight: Once baked, remove the pie from the oven and let it cool slightly. Dust the top with icing sugar for that extra touch of sweetness and visual appeal.
    Serving and Enjoying
    1. Slice and Serve: Cut the pie into generous slices and serve warm. Pair it with a dollop of vanilla ice cream for an indulgent treat.
    2. Enjoy the Moment: Take a bite and let the flavors dance on your palate. Whether it’s a cozy evening at home or a gathering with loved ones, this apple pie is sure to be a crowd-pleaser.
  • Lizzy cake Put the biscuit in the tray evenly

    Lizzy cake Put the biscuit in the tray evenly

    Lizzy cake Put the biscuit in the tray evenly

    Table of Contents

    Ingredients:

    2 gentleman cookies packets.
    1 tablespoon of vanilla
    2 cups of raw cocoa.
    1 cup of milk
    1 cup of soft white sugar.
    1 cup of Butter..

    Instructions :

    Put the biscuit in the tray evenly

    Raw cocoa is brought, placed in a pot, vanilla added, mix the ingredients together, milk added, flip the ingredients together until fully harmonious.

    The amount of sugar is brought and mixed with the ingredients, then the amount of butter is added taking into account that it is melted so that it is easy to mix with the previous ingredients.

    Cake tray is brought in, butter paper added at the bottom, cookies added, then separated, solid chocolate sauce added and formed into a roller shape, topped well until it is homogeneous and even.

    Ingredients are refrigerated, left for approximately two to three hours, then taken out of the fridge, cut into pieces or slices as desired and served straight away cold.

  • Just 1 Avocado and 4 Eggs: A Delicious Breakfast!

    Just 1 Avocado and 4 Eggs: A Delicious Breakfast!

    Just 1 Avocado and 4 Eggs: A Delicious Breakfast!

    Table of Contents

    Avocado and eggs – a match made in breakfast heaven! In this article, we’ll explore how you can transform just one avocado and four eggs into a delectable morning treat. Whether you’re cooking for yourself or entertaining guests, these avocado appetizer recipes are sure to impress.

    Ingredients

    • 4 eggs
    • 1/2 lemon
    • 1 bunch of green onions
    • 50g yogurt
    • 50g mayonnaise
    • Ground black pepper
    • Salt
    • 6 pieces of baguette
    • 1-2 avocados (depending on size and preference)

    Preparation

    1. Boil the Eggs: Boil the eggs for 10-12 minutes until they are hard-boiled. While the eggs are cooking, prepare the other ingredients.
    2. Prep the Avocado: Cut the avocado in half, remove the pit, and scoop out the flesh. Cut the avocado into medium-sized cubes and place them in a bowl. Squeeze the juice from half a lemon over the avocado and mix gently.
    3. Prepare the Dressing: Finely chop the green onions and combine them with yogurt, mayonnaise, black pepper, salt, and the remaining lemon juice in a separate bowl. Mix well to create a creamy dressing.
    Mixing it Up
    1. Combine Eggs and Avocado: Peel the boiled eggs and chop them into pieces similar in size to the avocado cubes. Add the eggs to the bowl of avocado.
    2. Add the Dressing: Pour the creamy dressing over the eggs and avocado mixture. Gently toss everything together until well combined.
    Spreading the Goodness
    1. Prepare the Baguette: Slice the baguette into six pieces and toast them lightly to add a crunchy texture.
    2. Spread the Mixture: Evenly spread the avocado and egg mixture onto the toasted baguette slices.
      Quick and Easy
      1. Efficient Preparation: With just a few simple steps, you can create a delicious breakfast or snack in no time. This recipe is perfect for busy mornings when you need something nutritious and satisfying.
      Serving Suggestions
      1. Versatile Dish: Serve these avocado appetizers for breakfast, brunch, or as a tasty afternoon snack. Pair them with a side salad or fresh fruit for a well-rounded meal.
      Conclusion

      In conclusion, with just one avocado and four eggs, you can create a mouthwatering breakfast or snack that’s both delicious and nutritious. Whether you’re cooking for yourself or sharing with others, these avocado appetizer recipes are sure to impress.

  • Discover a Delightful Healthy Dessert: Oatmeal, Apple, and Blueberries

    Discover a Delightful Healthy Dessert: Oatmeal, Apple, and Blueberries

    Discover a Delightful Healthy Dessert: Oatmeal, Apple, and Blueberries

    Table of Contents

    Are you in search of a delectable and nutritious dessert that won’t compromise your health goals? Look no further! In this article, we’re going to share an easy-to-follow recipe that combines the goodness of oatmeal, the natural sweetness of apples, and the antioxidant-rich blueberries to create a scrumptious, healthy dessert. It’s a treat you can enjoy guilt-free. So, grab your apron, and let’s get started!


    Ingredients

    let’s gather all the ingredients:


    130 g oat flakes

    1 apple

    80 g blueberries

    50 g avocado oil (+ extra for greasing)

    20 g stevia sweetener

    2 egg whites

    240 ml hot water

    2 teaspoons of vinegar

    1 teaspoon vanilla extract

    ½ teaspoon baking powder

    Prepare the Healthy Dessert

    let’s go through each step to create this delightful dessert:


    Preparation of the Oats

    Place the oat flakes in a mixing bowl.

    Add the hot water and gently stir with a spatula.

    Allow the mixture to sit for approximately 5 minutes. This will allow the oats to absorb the water and soften.

    Main Mix

    Add the egg whites to the hydrated oats.

    Incorporate the stevia sweetener, vanilla extract, and 50 g of avocado oil into the mixture.

    Mix thoroughly until you achieve a smooth and homogeneous consistency.

    Apple and Blueberries

    Peel the apple, remove the core, and slice it into thin pieces.

    Add the sliced apple to the oat mixture, stirring carefully to distribute the apple evenly.

    Next, incorporate the blueberries, ensuring they are well integrated with the other ingredientsPrepare the Mold

    Grease a rectangular glass mold with a splash of avocado oil. This will prevent the dessert from sticking to the mold.

    Transfer the oat mixture to the greased mold and ensure it is level and even.

    Baking

    Preheat your oven to 180°C (350°F) to get it ready for baking.

    Place the mold in the preheated oven and bake for approximately 50 minutes. Keep an eye on it; the dessert should turn golden brown.

    Once the baking is complete, remove the dessert from the oven, cover it with a kitchen towel, and allow it to cool.


  • Cheesy Bread Recipe

    Cheesy Bread Recipe

    Cheesy Bread Recipe

    Table of Contents

    Ingredients

    400 ml warm milk

    15 grams sugar

    10 grams dry yeast

    480 grams wheat flour, sifted

    8 grams salt

    20 grams olive oil

    200 grams mozzarella or cheddar cheese, grated

    1 egg yolk

    Vegetable oil, for greasing

    Sesame seeds, for topping

    Directions

    Prepare the Yeast Mixture:

    In a large mixing bowl, combine 400 ml of warm milk, 15 grams of sugar, and 10 grams of dry yeast.

    Mix thoroughly and let it sit for a few minutes until the yeast becomes frothy.

    Prepare the Dough:

    In another bowl, mix 480 grams of sifted wheat flour and 8 grams of salt.

    Gradually add the flour mixture to the yeast mixture, mixing slowly and carefully.

    Add 20 grams of olive oil and knead the dough until it is soft but not hard.

    Remove the dough from the bowl and knead on a lightly floured surface for 3-4 minutes until smooth.

    Form the dough into a ball.

    First Rising:

    Grease a bowl with a little vegetable oil and place the dough ball inside.

    Cover the bowl and let the dough rise for 30 minutes.

    Prepare the Dough for Baking:

    After 30 minutes, remove the excess gases from the dough by pressing it down.

    Divide the dough into 4 equal parts and form each part into a ball.

    Roll each ball out to the width of a small plate.

    Add the Cheese:

    Place 50 grams of grated mozzarella or cheddar cheese in the center of each rolled-out dough.

    Fold the dough over the cheese and shape it into a ball again.

    Second Rising:

    Place the filled dough balls on a baking tray lined with greased baking paper.

    Press each ball lightly with your hands to flatten slightly.Cover and let the dough rise for another 20 minutes.

    Prepare for Baking:

    Preheat your oven to 200 degrees Celsius (392 degrees Fahrenheit).

    Mix the egg yolk with a bit of vegetable oil and brush it over the top of each dough ball.

    Use your fingers to shape and create patterns on the surface of the dough.

    Sprinkle sesame seeds on top.

    Bake:

    Bake in the preheated oven for 20 minutes or until the bread is golden brown and cooked through.

    Serve:

    Remove from the oven and let cool slightly before serving.

    Enjoy this delicious, soft, and fragrant cheesy bread with your family.

    Serving Suggestions

    Serve the cheesy bread warm as a side dish with soups or salads.

    It can also be enjoyed on its own as a savory snack.

    Cooking Tips

    Ensure the milk is warm but not hot, as high temperatures can kill the yeast.

    Be gentle when handling the dough to retain its softness.

    Nutritional Benefits

    Cheese provides a good source of calcium and protein.

    Whole wheat flour can be used to add extra fiber and nutrients.

    Dietary Information

    This recipe contains dairy and gluten.

    To make it vegetarian, ensure the cheese is made without animal rennet

    .

    Storage Tips

    Store any leftover bread in an airtight container at room temperature for up to 2 days.

    1. For longer storage, freeze the bread and reheat in the oven before serving.