Category: healthy food

  • Stuffed Meat and Chicken Roll Recipe (Bacon-Free)

    Stuffed Meat and Chicken Roll Recipe (Bacon-Free)

    Stuffed Meat and Chicken Roll Recipe (Bacon-Free)

    Table of Contents

    Ingredients

    For the Meat Mixture:

    • Eggs: 2
    • Ground beef: 300 grams (10.5 oz)
    • Ground chicken: 300 grams (10.5 oz)
    • Salt: 1 teaspoon
    • Dried dill: 1 tablespoon
    • Pepper mix: To taste
    • Dried garlic: 1 teaspoon
    • Meat seasoning: 1 tablespoon

    For the Filling:

    • Potatoes: 2 medium (about 400 grams / 14 oz), peeled and grated
    • Cottage cheese: 300 grams (10.5 oz)
    • Garlic: 3-4 cloves, minced
    • Dried dill: 20 grams (about 2 tablespoons)
    • Flour: 2 teaspoons (about 10 grams)
    • Salt: 1/2 teaspoon
    • Black pepper: To taste

    For Wrapping:

    • Alternative to Bacon: 250 grams (9 oz) thinly sliced turkey or chicken breast

    Instructions

    Step 1: Prepare the Meat Mixture

    1. Combine the Meats: In a large bowl, mix together the ground beef and ground chicken. Add the salt, pepper mix, dried dill, dried garlic, and meat seasoning. Crack the eggs into the mixture and blend well until all ingredients are evenly combined.

    Step 2: Prepare the Filling

    1. Mix the Filling: In a separate bowl, combine the grated potatoes, cottage cheese, minced garlic, and dried dill. Add the flour and mix thoroughly until the filling is well blended. Season with salt and black pepper to taste.
    See also  Crispy Pita Recipe ⬇️with 1 Bread

    Step 3: Assemble the Roll

    1. Lay Out the Slices: Lay out the thin slices of turkey or chicken breast on a piece of plastic wrap or parchment paper, slightly overlapping to form a continuous sheet.
    2. Spread the Meat Mixture: Evenly spread the meat mixture over the layer of turkey or chicken, pressing it down gently to ensure a uniform layer.
    3. Add the Filling: Place the potato and cottage cheese filling along the center of the meat layer, shaping it into a log. Compact the filling slightly with your hands.

    Step 4: Roll and Secure

    1. Roll It Up: Use the plastic wrap or parchment paper to help roll the meat around the filling, forming a tight cylinder. Make sure the turkey or chicken slices completely encase the roll.
    2. Secure the Roll: Wrap the roll tightly in plastic wrap or parchment paper and refrigerate for about 30 minutes. This will help the roll maintain its shape during cooking.

    Step 5: Cook the Roll

    1. Preheat the Oven: Preheat your oven to 200°C (400°F).
    2. Bake the Roll: Remove the roll from the refrigerator and unwrap it. Place it on a baking tray lined with parchment paper or lightly greased.
    3. Bake: Bake in the preheated oven for 35-40 minutes, or until the roll is cooked through and golden brown on the outside. Lightly brush the roll with a bit of olive oil if using turkey or chicken slices to help them crisp up.

    Step 6: Serve

    1. Slice and Serve: Let the roll rest for a few minutes after baking, then slice into rounds and serve hot. Garnish with fresh herbs if desired.
    See also  Best Ever Chicken Thighs! Discover the magic of our simple and quick chicken thigh recipe!

    Nutrition Information

    • Serving Size: 1 slice (approximately 100g)
    • Servings: 6
    • Calories: 280
    • Total Fat: 18g
    • Saturated Fat: 7g
    • Cholesterol: 110mg
    • Sodium: 600mg
    • Total Carbohydrates: 8g
    • Dietary Fiber: 1g
    • Sugars: 1g
    • Protein: 22g

    Tips for Making the Best Stuffed Meat and Chicken Roll

    • Wrapping Alternatives: If turkey or chicken slices are not available, consider using thinly sliced zucchini or eggplant as a wrap for a lighter, vegetable-based alternative.
    • Add More Flavor: A dash of soy sauce or Worcestershire sauce can enhance the meat mixture, adding depth and a savory boost.
    • Prep Ahead: This roll can be prepared in advance and stored in the fridge. When ready to serve, simply bake according to the instructions.
  • Funeral Potato Empanadas

    Funeral Potato Empanadas

    I know you may hear the name “funeral potato” and not instantly think of a delicious cheesy potato dish, but this one is. Funeral potatoes are a famous Idaho and Utah dish that is traditional for families to bring to an after-funeral luncheon. A very simple, yet tasty dish always here to warm people’s stomachs and indulge in something so creamy. There are usually so many leftovers that I can’t help, but think of something fun to repurpose them into. Why not empanadas? Using a store-bought pie crust, we’re going to cut out empanada wrappers and stuff this pastry to the gills with cheesy potatoes, fry them up, and enjoy them the next day. You can just as easily bake them, but why not indulge in something even better? Serve them up with a delicious creamy dipping sauce.

    00:00
    00:36

    Next Video

    Funeral Potato Empanadas Vertical 1

    If you’re making these from scratch, you are going to need some time to first bake your cheesy potatoes, then let them cool. Best to do this overnight because the more firm the potatoes are, the easier to stuff the empanadas. While your potatoes are baked, take the time to cut your pie dough into the perfect size empanada wrapper. Wrap these in plastic wrap and store them in the fridge for an easy project the next day.

    Funeral Potato Empanadas Vertical 3

    When stuffing, use a fork to seal the edges on both sides to give that classic empanada fan. Don’t worry if some of the cheesy potatoes are squeezing out as long as the seal on the fan is tight. Freeze or refrigerate your appetizers until ready for cooking. Make a lot of these and just save for a rainy day or unexpected visitors. They make such a tasty treat to air fry, bake, or fry. This is by far one of my favorite ways to use up and store leftover potatoes.

    Funeral Potato Empanadas Vertical 4

    After these are baked, they will stay crispy for hours. The buttery flakey pie crust will protect these from drying out and are great for a picnic or summer outdoor barbecue. Transfer these crispy empanadas to a foil tray covered with perforated foil to ensure the crust stays crisp.

    Funeral Potato Empanadas Vertical 13

    I love the taste of these cheesy potatoes wrapped in pie crust. This is a quick method to take leftovers and repurpose them into something even better. If you have the time to make your dough or you can find store-bought empanada wrappers, try it out. It will get infinitely better.

    Funeral Potato Empanadas Vertical 9

    Yield(s): Makes 20

    20m prep time

    55m cook time

    1h inactive

    5.0
    Rated by 1 reviewers

    Allergens: GlutenMilk

    hearts
    When you share or print a 12 Tomatoes recipe,
    you’re making mealtime meaningful.
    100% of the Share to Care sponsor fees fund meals for families in need. Learn More


    Ingredients
    • 1 package store-bought pie dough
    • 4 cups frozen hash browns
    • 2 cups shredded cheddar cheese
    • 2 (10oz.) Cans Campbells cream of chicken soup
    • 1 cup sour cream
    • 5 – 6 cups vegetable oil at 350° F
    Preparation
    1. Preheat your oven to 350 °F and spray a 9×13 tray.
    2. Mix the hash browns, cheddar cheese, cream of chicken and sour cream in a large mixing bowl until combined. Use a spatula to spread into the prepared 9×13 pan.
    3. Bake for 40 – 45 minutes or until golden. Remove and scoop out half of the potatoes in a bowl and cool in the fridge for 1 hour.
    4. Use a biscuit cutter to cut rounds into your prepared pie dough to make empanadas in the meantime, rolling extra dough out to create more empanada wraps.
    5. Preheat oil or oven to 350 °F and start to fill your empanadas using a small ice cream scoop with chilled funeral potatoes. Fold over each filled empanada and use a fork to crimp the edges.
    6. Fry for 2 – 3 minutes or bake in the oven for 20 – 22 minutes or until golden brown. Let cool on a wire rack and enjoy!
  • Pineapple Juice Cake

    Take your taste buds on a tropical vacation with this easy Pineapple Juice Cake. Moist as can be and loaded with tangy pineapple flavor, it’s sure to be an instant family favorite. The best part might just be how simple it is to whip up. With the help of a boxed cake mix, the batter comes together with only four ingredients and bakes in just over half an hour. A simple pineapple syrup is poured over the baked cake to add even more sweet, fruity flavor and to lock in all the moisture. Yum!

    00:00
    00:49

    Next Video

    Pineapple Juice Cake Vert-58
    Pineapple Juice Cake Vert-53
    Pineapple Juice Cake Vert-52

    Once the syrup has been fully absorbed, it’s time to flip the bundt cake onto your favorite serving plate. Drizzle a little more syrup over the top and add fresh or canned pineapple slices for the final touch. Slice, serve, and get ready for all the compliments to roll in. This recipe has been a favorite to just about everyone I’ve ever served it to!

    Pineapple Juice Cake Vert-50
    Pineapple Juice Cake Vert-44
    Pineapple Juice Cake Vert-32

    The next time you’re looking for a crowd-pleasing dessert give this easy Pineapple Juice Cake a try. It will take no time at all and still make you look like the hostess with the mostess. Who could resist the tangy goodness of this tropical dessert!

    Pineapple Juice Cake Vert-27
    Pineapple Juice Cake Vert-16
    Pineapple Juice Cake Vert-05

    Yield(s): Serves 8-10

    10m prep time

    30m cook time

    4.8
    Rated by 163 reviewers
    hearts
    When you share or print a 12 Tomatoes recipe,
    you’re making mealtime meaningful.
    100% of the Share to Care sponsor fees fund meals for families in need. Learn More


    Cake
    • 1 (15.25 oz) yellow cake mix
    • 3/4 cup vegetable oil
    • 3/4 cup pineapple juice
    • 4 eggs, room temperature
    Pineapple Syrup
    • 2 cups powdered sugar
    • 3/4 cup pineapple juice
    • 4 tablespoons butter, melted, still hot
    Preparation
    1. Preheat oven to 350 degrees F and grease a standard bundt pan.
    2. In a large bowl, combine all cake ingredients and mix until just combined.
    3. Transfer batter to the prepared bundt and bake for 28-32 minutes, or until an inserted toothpick comes out clean.
    4. Allow cake to cool in pan for 10-15 minutes while you prepare the syrup.
    5. Pineapple Syrup: Mix powdered sugar and pineapple juice into the melted butter while it’s still hot. Whisk until smooth.
    6. Using a fork or skewer, poke holes all over the top of the cake (while it’s still in the pan), then pour about ¾ of the syrup over the top.
    7. Allow syrup to soak in for 15 more minutes, then invert it onto a serving plate. Drizzle remaining syrup overtop.
  • YUMMY BRAIDED BRIOCHE RECIPE

    YUMMY BRAIDED BRIOCHE RECIPE

    YUMMY BRAIDED BRIOCHE RECIPE

    Table of Contents

    INGREDIENTS:

    250ml (1 cup) milk
    200ml (4/5 cup) mineral water
    200ml (4/5 cup) vegetable oil
    1 tbsp dry yeast
    2 tbsp sugar
    1/2 tsp salt
    3 tbsp cocoa powder
    625g (5 cups) flour
    1 egg yolk

    METHOD:

    1. In a bowl mix together warm milk with sugar and yeast, and add in oil and mineral water.
    2. Add in flour, divide the dough into two portions and add a little flour to the first portion and cocoa powder to
    the second. Let the dough rise for 40 minutes.
    3. Divide each portion into 4 pieces, roll it and top the white dough with the dark one and cut it into strips and
    twist them, then roll up it and transfer to the baking pan.
    4. Let the dough rise for 20 minutes more and spread with egg yolk.
    5. Bake at 180’C (360’F) for 50-60 minutes.
    6. Enjoy your Braided brioche.

  • Banana Cocoa Walnut Loaf

    Banana Cocoa Walnut Loaf

    Banana Cocoa Walnut Loaf

    Table of Contents

    Ingredients:

    3 ripe bananas
    2 large eggs
    2 tablespoons cocoa powder (15 g)
    1 teaspoon baking powder (5 g)
    1/2 cup walnuts, chopped (50 g)

    Directions:

    Preheat the Oven:
    Preheat your oven to 175°C (350°F). Grease and flour a loaf pan or line it with parchment paper.

    Prepare the Bananas:
    In a bowl, mash the 3 ripe bananas until smooth.

    Mix Wet Ingredients:
    Beat the 2 large eggs in a separate bowl, then mix them into the mashed bananas.

    Add Dry Ingredients:
    Stir in 2 tablespoons cocoa powder and 1 teaspoon baking powder into the banana mixture until well combined.

    Incorporate Walnuts:
    Fold in the 1/2 cup chopped walnuts.

    Bake the Loaf:
    Pour the batter into the prepared loaf pan and smooth the top. Bake in the preheated oven for about 45 minutes, or until a toothpick inserted into the center comes out clean.

    Cool:
    Let the loaf cool in the pan for 10 minutes, then transfer to a wire rack to cool completely.

    Serving Suggestions:
    Serve this loaf sliced and enjoy it as a breakfast treat, an afternoon snack, or a dessert. It pairs well with a cup of coffee or tea.

    Cooking Tips:

    Ensure the bananas are ripe for maximum sweetness and moisture.
    For extra texture, sprinkle additional chopped walnuts on top of the batter before baking.
    Nutritional Benefits:

    Bananas provide potassium and natural sweetness.
    Cocoa adds a rich flavor while offering antioxidants.
    Walnuts contribute healthy fats and protein.

  • Easy No-Knead Garlic Focaccia Bread

    Easy No-Knead Garlic Focaccia Bread

    Easy No-Knead Garlic Focaccia Bread

    Table of Contents

    Ingredients:

    260g bread flour
    200g water
    15g olive oil
    4g salt
    2g yeast
    For Garlic Topping:

    70g garlic, minced
    20g olive oil
    1g salt
    Pepper to taste

    Directions:

    Prepare the Dough: In a large bowl, mix together the bread flour, water, olive oil, salt, and yeast until a sticky dough forms. Cover the bowl with plastic wrap and let it rest in the refrigerator overnight for low-temperature aging.

    Prepare the Garlic Topping: In a small bowl, mix together the minced garlic, olive oil, salt, and pepper. Set aside.
    Preheat the Oven: Preheat your oven to its highest setting (around 250°C or 482°F). Oven preheating is essential for a crispy focaccia.

    Shape the Dough: Remove the dough from the refrigerator and transfer it to a well-oiled baking sheet. Using your fingers, gently press and stretch the dough to your desired thickness. Drizzle a generous amount of olive oil over the top and bottom of the dough, ensuring it is well-coated.

    Add the Topping: Spread the garlic mixture evenly over the top of the dough.

    Bake: Place the baking sheet in the preheated oven and bake until the focaccia is golden brown and crispy, about 15-20 minutes. Baking time may vary depending on your oven.

    Serve: Remove the focaccia from the oven and let it cool slightly before cutting into pieces. Enjoy your ultra bubbly garlic focaccia bread warm.

    Prep Time: 10 minutes | Resting Time: Overnight | Cooking Time: 20 minutes | Total Time: 30 minutes (plus overnight resting) | Kcal: 180 kcal per serving | Servings: 8 servings

    TIPS AND TRICKS

    See also  This is the moistest cake we’ve ever made

    Low-Temperature Aging: Allowing the dough to rest overnight in the refrigerator enhances the flavor and texture of the focaccia. This slow fermentation process develops a deeper taste.

    Olive Oil Generosity: Be generous with the olive oil on both the top and bottom of the dough. This not only prevents sticking but also contributes to the crispy texture of the crust.

    Baking Time: Keep an eye on the focaccia while it bakes. Depending on your oven, the baking time might vary. You want a golden brown and crispy crust.

    Garlic Preparation: Mince the garlic finely to ensure it spreads evenly across the dough. This ensures every bite is packed with garlic flavor.

    Srving Suggestions: Serve the focaccia warm, straight from the oven, for the best taste. Pair it with a simple salad, a bowl of soup, or use it as a base for your favorite toppings.

    Storing Leftovers: Store any leftover focaccia in an airtight container at room temperature for up to two days. Reheat in the oven to regain its crispiness.

    Herb Variations: Experiment with adding fresh or dried herbs like rosemary, thyme, or oregano to the dough or topping for extra flavor.

    Thickness Preference: If you prefer a thinner focaccia, press the dough out more before baking. A thicker dough will result in a softer, more bread-like texture.

    Salt Levels: Adjust the amount of salt in the dough and topping to suit your taste. Remember, the olive oil and garlic will also add to the flavor.

    Alternative Flours: While bread flour is recommended for its gluten content, you can experiment with all-purpose flour or a blend of flours for different textures.

     
  • Savory Lentil Bread Recipe

    Savory Lentil Bread Recipe

    Savory Lentil Bread Recipe

    Table of Contents

    Ingredients

    Lentils: 180 g (1 cup)
    Eggs: 2 large
    Yogurt: 100 g (1/2 cup)
    Salt: 1/4 teaspoon (or to taste)
    Dried garlic: 1/2 teaspoon
    Parmesan cheese: 30 g (1/4 cup, grated)
    Parsley: 1 tablespoon (finely chopped)
    Baking powder: 10 g (2 teaspoons)
    Olive oil: 20 ml (1 1/2 tablespoons)
    Sesame seeds: 1 tablespoon (for sprinkling)
    Vegetable oil: for greasing the pan

    Directions

    Soak the Lentils: Place 180 g of lentils in a bowl, fill with water, and let them soak for at least 1 hour. After soaking, rinse and drain the lentils thoroughly.

    Prepare the Batter: In a mixing bowl, combine the soaked lentils, 2 eggs, and 100 g of yogurt. Blend the mixture with an immersion blender until smooth.

    Add Seasonings: Add a bit of salt, 1/2 teaspoon of dried garlic, 30 g of grated Parmesan cheese, and 1 tablespoon of chopped parsley. Mix well to combine.

    Incorporate Baking Powder and Olive Oil: Add 10 g of baking powder and 20 ml of olive oil to the mixture. Stir until everything is well combined.

    Prepare the Baking Pan: Grease a baking pan with vegetable oil to prevent sticking.

    Pour the Batter: Pour the lentil batter into the prepared baking pan, spreading it evenly.

    Add Toppings: Sprinkle 1 tablespoon of sesame seeds on top for a crunchy finish.

    Bake the Bread: Preheat the oven to 180°C (350°F). Bake the bread for 40-45 minutes, or until the top is golden brown and a toothpick inserted into the center comes out clean.

    Cool and Serve: Allow the bread to cool slightly before slicing. Serve warm or at room temperature.

    See also  Simple and Delicious Sugar-Free, White Flour-Free Baked Donuts

    Serving Suggestions
    Enjoy as a savory breakfast with a side of fresh vegetables or a salad.
    Use as a base for sandwiches or toast, topped with avocado, hummus, or cheese.
    Serve as a side dish with soups, stews, or curries.

    Cooking Tips
    Check the Consistency: If the batter seems too thick, add a little more yogurt or water to reach a smooth consistency.
    Soaking the Lentils: Soaking the lentils not only softens them but also makes them easier to blend and digest.

  • Do you have oatmeal and bananas? Healthy dessert in 5 minutes! I lost 10 kg in a month!

    Do you have oatmeal and bananas? Healthy dessert in 5 minutes! I lost 10 kg in a month!

    Do you have oatmeal and bananas? Healthy dessert in 5 minutes! I lost 10 kg in a month!

    Table of Contents

    Are you looking for a delicious and healthy dessert that you can whip up in just 5 minutes? Well, you’re in luck! In this article, we’ll be sharing an amazing recipe that combines the goodness of oatmeal and bananas to create a mouthwatering dessert that not only satisfies your sweet tooth but also helps you on your journey to a healthier you.

    Ingredients:

    1. 3.5 ounces (100 grams) of oat flakes.
    2. 3/4 cup (200 milliliters) of milk.
    3. 2 eggs.
    4. A pinch of salt.
    5. 1 teaspoon of vanillin.
    6. 2 bananas.
    7. 1 apple.
    8. A baking pan (18 cm / 7 inches).
    9. Cranberries.
    10. 1.1 ounces (30 grams) of walnuts.

    Step by Step Instructions:

    Preheat the Oven

    Begin by preheating your oven to 180°C/360°F. This ensures that your dessert bakes evenly and comes out perfectly golden brown.

    Prepare the Ingredients

    Gather all the ingredients listed above. The oat flakes, milk, eggs, salt, and vanillin will form the base of your dessert, while the bananas, apples, cranberries, and walnuts will add flavor and texture.

    Mix the Dry Ingredients

    In a large bowl, combine the oat flakes, a pinch of salt, and a teaspoon of vanillin. Mix them well to ensure even distribution.

    Add the Wet Ingredients

    In a separate bowl, beat the two eggs and add them to the dry mixture. Pour in the 200 ml of milk and stir until you have a smooth, creamy batter.

    See also  Savory Puff Pastry Appetizers Recipe
    Slice the Fruits

    Take the bananas and apple and slice them into thin pieces. These will be added to the dessert for a burst of natural sweetness and flavor.

    Assemble the Dessert

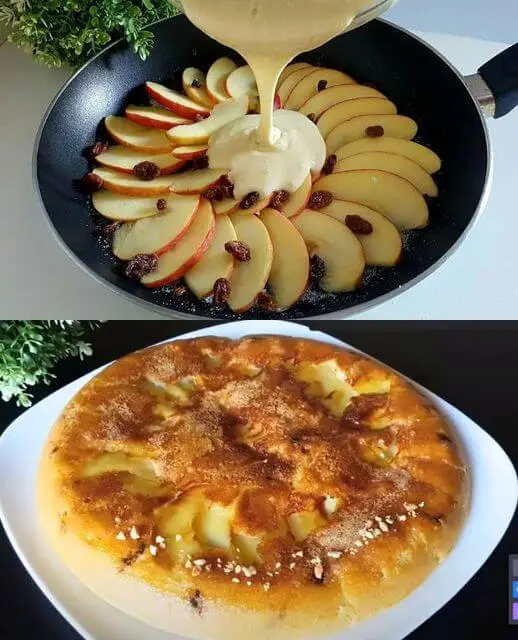
    Grease the baking pan (18 cm / 7 inches) to prevent sticking. Pour half of the oat mixture into the pan, spreading it evenly. Next, add a layer of sliced bananas and apples. Sprinkle some cranberries and walnuts on top for extra crunch and flavor. Repeat this process with the remaining oat mixture and fruit layers.

    Bake to Perfection

    Place the baking pan in the preheated oven and bake for approximately 40 minutes or until the top turns golden brown and the dessert is firm to the touch.

    Conclusion

    In just 5 simple steps, you can create a healthy and delicious oatmeal and banana dessert that is not only satisfying but also good for you. This dessert is a perfect treat for those looking to shed some extra pounds, as it’s low in calories and packed with fiber and nutrients. I personally lost 10 kg in a month by incorporating this dessert into my diet, and I believe you can achieve similar results. Give it a try, and you won’t be disappointed!

  • Soft and Fluffy Cinnamon-Walnut Rolls with Cream Cheese Frosting

    Soft and Fluffy Cinnamon-Walnut Rolls with Cream Cheese Frosting

    Soft and Fluffy Cinnamon-Walnut Rolls with Cream Cheese Frosting

    Table of Contents

    Ingredients

    Dough:
    7 Tbsp (80g) sugar
    1 tsp (4g) dry yeast
    1 cup (250ml) lukewarm milk
    1 egg
    2 Tbsp vegetable oil
    4 cups (500g) flour
    1 tsp (4g) salt
    Filling:
    1/3 cup (80g) butter
    1/2 cup (80g) sugar
    Cinnamon to taste
    1/2 cup (100g) crushed walnuts
    Cream Cheese Frosting:
    1 1/4 cups (300g) cream cheese
    3 Tbsp milk
    1/2 cup (100g) powdered sugar

    Directions

    Prepare the Dough:

    In a large bowl, mix 7 Tbsp sugar with 1 tsp dry yeast. Add 1 cup lukewarm milk and let it sit until frothy. Mix in 1 egg and 2 Tbsp vegetable oil. Gradually add 4 cups flour and 1 tsp salt. Knead until smooth, then let rise for 1-2 hours.
    Prepare the Filling:

    Melt 1/3 cup butter and mix with 1/2 cup sugar, cinnamon, and 1/2 cup crushed walnuts.
    Shape and Bake:

    Divide dough into 9 parts, roll, spread with filling, and shape. Let rise for 20 minutes. Bake at 350°F (180°C) for 20 minutes.
    Prepare the Frosting:

    Blend 1 1/4 cups cream cheese, 3 Tbsp milk, and 1/2 cup powdered sugar until smooth. Frost cooled baked goods.
    Serving Suggestions

    Serve warm with a cup of tea or coffee.
    Great for breakfast or as a snack.
    Top with extra crushed walnuts for added crunch.
    Pair with fresh fruit for a balanced treat.

    Cooking Tips
    Ensure the milk is lukewarm to activate the yeast properly.
    Knead the dough well for a light, fluffy texture.
    Let the dough rise in a warm, draft-free area.
    Frost only after the baked goods have cooled to avoid melting.

    See also  Potato and Egg Delight Recipe

    Nutritional Benefits
    Provides a good source of calcium from cream cheese.
    Nuts add healthy fats and protein.
    Includes whole grains if using whole wheat flour.
    Sweetened naturally with sugar and not high in artificial ingredients.

  • Savory Recipe: Cheese Balls with Just 4 Ingredients, Ready in Minutes

    Savory Recipe: Cheese Balls with Just 4 Ingredients, Ready in Minutes

    Savory Recipe: Cheese Balls with Just 4 Ingredients, Ready in Minutes

    Table of Contents

    ingredients.

    10.5 oz (300 grams) shredded mozzarella cheese
    3 tablespoons cornstarch
    1 egg
    Salt to taste

    Instructions:

    1. In a mixing bowl, combine the shredded mozzarella cheese, cornstarch, salt, and egg. Stir well until the mixture is fully integrated.
    2. Shape the mixture into small balls.
    3. Heat oil in a frying pan and fry the cheese balls until they are golden brown.
    4. Transfer the fried cheese balls to paper towels to drain any excess oil.
    5. Serve hot with your favorite dipping sauces.
    6. Enjoy your savory cheese balls, perfect for a quick snack or a satisfying breakfast!
  • Peach Dream Cake Recipe

    Peach Dream Cake Recipe

    Peach Dream Cake Recipe

    Table of Contents

    Ingredients

    For the Dough

    • 1 egg
    • 100 g (1/2 cup) sugar
    • 8 g (1 tablespoon) vanilla sugar
    • Rind of 1 lemon (finely grated)
    • 140 g (10 tablespoons) butter, softened
    • 300 g (2 1/2 cups) plain flour
    • 10 g (2 teaspoons) baking powder

    For the Cream

    • 400 ml (1 2/3 cups) milk
    • 2 egg yolks
    • 60 g (5 tablespoons) sugar
    • 8 g (1 tablespoon) vanilla sugar
    • 3 tablespoons cornstarch
    • 3 tablespoons sour cream or mascarpone
    • 30 ml (2 tablespoons) lemon juice

    Other Ingredients

    • 800 g (28 oz) peaches in syrup, drained
    • 1 egg white (for brushing)
    • Sliced almonds (for decoration)

    Step-by-Step Instructions

    1. Preparing the Dough

    Start by beating the egg, sugar, and vanilla sugar together in a large bowl until the mixture becomes foamy and light. Add the grated rind of one lemon to infuse the dough with a refreshing citrus aroma. Add the softened butter and continue to beat until you achieve a smooth, creamy consistency.

    Sift the flour and baking powder together to ensure even distribution of the leavening agent. Gradually add this dry mixture to the egg and butter mixture, stirring gently. Continue until a dough forms. The dough should be smooth and not sticky.

    Divide the dough into two portions, making one slightly larger than the other. Roll out the larger portion into a circle and use it to line the bottom of a 25 cm (10 inch) cake tin. Make sure the dough fits snugly against the edges, then use a fork to pierce the base of the dough all over. This helps prevent bubbling during baking.

    See also  Indulge in this super delicious and easy-to-make cake that I bake three times a week!

    2. Making the Cream Filling

    In a medium saucepan, combine the milk, egg yolks, sugar, and vanilla sugar. Whisk thoroughly until all the ingredients are fully mixed. Add the cornstarch and lemon juice to the milk mixture and continue to whisk until smooth and free of lumps.

    Place the saucepan over medium heat and cook the mixture, stirring constantly, until it thickens into a custard-like consistency. This process may take several minutes, so be patient and keep stirring to avoid burning or curdling.

    Once thickened, remove the saucepan from the heat and allow the cream to cool slightly. After it has cooled, fold in the sour cream or mascarpone to add a rich, tangy flavor and extra creaminess to the filling.

    3. Assembling the Cake

    Spread the cooled cream filling evenly over the prepared dough in the cake tin, smoothing the surface with a spatula. Drain the peaches well, then slice them thinly. Arrange the peach slices over the cream filling in an even layer, covering the entire surface.

    Roll out the smaller portion of the dough into a circle, just large enough to cover the top of the cake. Carefully place this dough over the peaches, gently pressing the edges to seal. Trim any excess dough if necessary.

    4. Finishing Touches and Baking

    Lightly beat the egg white until frothy, then brush it over the top layer of dough. This will give the cake a beautiful sheen when baked. Sprinkle a handful of sliced almonds over the top for a delightful crunch and an elegant finish.

    Bake the cake in a preheated oven at 180°C (350°F) for about 30 minutes, or until the top is golden brown and the almonds are lightly toasted. The cake should be firm to the touch and the edges should be slightly pulling away from the tin.

    See also  Three-Glass Cake Recipe

    5. Cooling and Serving

    Allow the cake to cool in the tin for about 10 minutes before transferring it to a wire rack to cool completely. This cake can be served warm or at room temperature, making it versatile for any setting.

    Nutritional Information (Per Serving, Approximately 10 Servings)

    • Calories: 320
    • Protein: 5 g
    • Carbohydrates: 45 g
    • Sugars: 20 g
    • Fat: 15 g
    • Saturated Fat: 8 g
    • Fiber: 2 g
    • Sodium: 150 mg

    Tips for Success

    • Peach Selection: If using fresh peaches, poach them briefly in sugar syrup to soften before adding to the cake.
    • Dough Handling: If the dough feels too soft to roll, chill it in the refrigerator for 10-15 minutes to make it easier to handle.
    • Decoration: For an extra touch, dust the cooled cake with powdered sugar before serving or add a drizzle of honey for added sweetness.
  • CHOCOLATE CUPCAKES

    CHOCOLATE CUPCAKES

    CHOCOLATE CUPCAKES

    1f31f INGREDIENTS
    ◾️200g of common wheat flour
    ◾️15g cocoa
    ◾️6g baking powder
    ◾️4g baking soda
    ◾️1g of salt
    ◾️150 ml of milk
    ◾️10ml white vinegar
    ◾️2 eggs
    ◾️200 brown sugar
    ◾️1 tsp vanilla essence
    ◾️125 ml of oil
    1f31f PREPARATION
    ◾️In a bowl, place common wheat flour, cocoa powder, baking powder, bicarbonate of soda and salt. Then mix and reserve.
    ◾️In a cup, place the milk and white vinegar, mix and reserve.
    ◾️In a bowl, place the eggs, beat for 2 minutes, then add brown sugar, continue beating until the volume triples.
    ◾️Add the oil, beat for 1 minute, then add the mixed milk, the vanilla essence and beat for 2 more minutes.
    ◾️Add the dry ingredients little by little, mix thoroughly.
    ◾️Pour into 18 cupcake liners, bake in a preheated oven at 180°C for 15 minutes.
    I love you all ♥1f4951f60d

  • Mini Donuts

    Mini Donuts

    Mini Donuts

    Table of Contents

    Ingredients

    • 4 cups flour
    • 6 t baking powder
    • 1 t salt
    • 5 tablespoons sugar
    • 1 and a 1/2 cups warm water

    Instructions

    • Heat a deep pan with vegetable oil such as canola or peanut, grapeseed oil etc over medium heat.
    • While heating the oil in a large bowl mix all the ingredients into a batter.
    • On a lightly floured surface shape the dough into a thick circle then use a cookie cutter to cut out even circles.
    • You can also form regular balls with floured hands.
    • Fry in hot oil until golden and golden brown on one side.
    • The other side looks even but is still pale.
    • Turn them over and fry them until golden brown.
    • After frying transfer to a large bowl lined with paper towel.
    • Allow to cool slightly and serve with sweet
    • tea or coffee.
  • Fresh Fruit and Milk Delight: A Gelatin-Free Dessert

    Fresh Fruit and Milk Delight: A Gelatin-Free Dessert

    Fresh Fruit and Milk Delight: A Gelatin-Free Dessert

    Table of Contents


    Ingredients:

    Tangerines, peeled and sections separated
    Kiwis, peeled and sliced
    Persimmons, peeled and sliced
    Grapefruit, peeled and sections separated
    Apple, cored and chopped
    Banana, peeled and sliced
    8 g agar-agar
    50 ml water
    350 ml milk
    200 grams condensed milk
    200 grams sour cream or yogurt

    See also  Discover the Ultimate Eggplant Recipe: Easy, Affordable, and Delicious!

    Instructions:

    Prepare the Fruit:
    Arrange the sliced tangerines, kiwis, persimmons, grapefruit, apple, and banana in individual serving dishes or a large serving bowl.
    Prepare the Agar-Agar Mixture:
    In a small saucepan, mix the agar-agar with 50 ml of water. Let it soak for about 3-5 minutes.
    Heat the mixture over medium heat, stirring constantly, until the agar-agar completely dissolves. Remove from heat.
    Mix the Milk Mixture:
    In a separate saucepan, gently warm the milk and condensed milk together, just enough to integrate smoothly. Do not boil.
    Once the milk is warm, stir in the dissolved agar-agar mixture. Mix well to ensure everything is fully combined.
    Combine with Sour Cream or Yogurt:
    Remove the milk mixture from the heat. If using yogurt, ensure it’s at room temperature to prevent curdling. Mix the sour cream or yogurt into the milk mixture until smooth.
    Assemble the Dessert:
    Pour the milk and yogurt mixture over the arranged fruits.
    Let the dessert sit until it begins to firm up, then refrigerate for at least 1 hour to fully set.
    Serve:
    Once set, serve the dessert chilled. It can be garnished with additional fresh fruit or a drizzle of honey for extra sweetness.
    Serving Suggestions:

    This Fresh Fruit and Milk Delight is an excellent way to end any meal on a light and refreshing note. It’s also perfect as an afternoon snack on warm days. The creamy texture and vibrant flavors of the fruits make this dessert a delightful treat for both kids and adults.

    Ezoic
    Enjoy the natural goodness of fruits in this simple, quick, and delicious dessert that’s sure to become a new favorite in your household!

  • Day and Night Cake: A Quick and Delicious Treat

    Day and Night Cake: A Quick and Delicious Treat

    Day and Night Cake: A Quick and Delicious Treat

    Table of Contents

    Ingredients

    • 220 g butter (softened)
    • 220 g sugar (1 cup)
    • 7 eggs (5 of them separated into yolks and whites)
    • 300 g all-purpose flour (2 ½ cups)
    • 1 pack baking powder (approximately 1 tablespoon or 15 g)
    • 1 pack vanilla sugar (approximately 1 tablespoon or 15 g)
    • Fat for greasing the baking tray
    • 2 tablespoons cocoa powder
    • ¼ liter hot milk (1 cup)

    Step-by-Step Instructions

    1. Preheat and Prepare the Baking Tray

    Preheat your oven to 180°C (350°F). Grease a baking tray thoroughly with butter or non-stick spray to ensure the cake releases easily after baking.

    2. Prepare the Cake Batter

    In a large mixing bowl, beat the butter, sugar, vanilla sugar, 2 whole eggs, and 5 egg yolks until the mixture is light, fluffy, and pale in color. This creaming step incorporates air into the batter, contributing to the cake’s soft texture.

    3. Incorporate the Dry Ingredients

    Gradually add the flour and baking powder to the butter mixture. Mix until just combined, ensuring not to overwork the batter to keep it light.

    4. Fold in the Egg Whites

    In a separate clean, dry bowl, beat the 5 egg whites until stiff peaks form. This step is crucial as the beaten egg whites will help aerate the batter, making the cake light and fluffy. Gently fold the egg whites into the batter using a spatula, being careful not to deflate the mixture.

    See also  Easy and Delicious Cabbage Casserole with Cheddar Cheese: Two Ways to Cook!

    5. Divide and Color the Batter

    Spread two-thirds of the batter evenly onto the prepared baking tray. In a separate bowl, mix the remaining one-third of the batter with 2 tablespoons of cocoa powder. This will create the chocolate portion of the cake. Using a spoon, place small heaps of the chocolate batter randomly over the vanilla batter on the tray. To achieve the characteristic “day and night” marbled effect, you can gently swirl the batters with a knife.

    6. Bake the Cake

    Place the tray in the preheated oven and bake for 20 to 30 minutes. Check for doneness by inserting a toothpick into the center of the cake; it should come out clean or with a few moist crumbs. The cake should be golden around the edges and slightly springy to the touch.

    7. Add the Milk Soak

    As soon as you take the cake out of the oven, carefully spoon ¼ liter of hot milk over the still hot cake. This step adds moisture and a tender crumb to the cake, enhancing its flavor and texture. Allow the cake to cool completely in the tray.

    8. Optional: Chocolate Glaze for Extra Indulgence

    For an extra decadent touch, spread a layer of  chocolate glaze over the cooled  cake. To make a simple glaze, melt 100 g of dark chocolate with 2 tablespoons of butter over low heat until smooth, then pour over the cake and spread evenly with a spatula. Allow the glaze to set before slicing and serving.

    Nutritional Information (Per Serving)

    • Servings: 20 pieces
    • Calories: 220
    • Total Fat: 12g
    • Saturated Fat: 7g
    • Cholesterol: 75mg
    • Sodium: 50mg
    • Total Carbohydrates: 25g
    • Dietary Fiber: 1g
    • Sugars: 15g
    • Protein: 4g
    See also  Mixing Apples and Nuts: A Delectable Apple Pie Recipe

    Baking Tips for Day and Night Cake

    • Ensure Ingredients are at Room Temperature: This helps the ingredients combine more smoothly, especially the butter and eggs, resulting in a better cake texture.
    • Beat Egg Whites to Stiff Peaks: This is crucial for achieving the light, airy structure of the cake. Make sure no yolk gets into the whites, and the bowl is clean and grease-free.
    • Avoid Overmixing: When folding the egg whites into the batter, do so gently to retain the air you’ve incorporated.
    • Customize the Swirl: For a more pronounced marbling effect, you can adjust how much you swirl the chocolate batter into the vanilla.

    Storage and Serving Suggestions

    • Storage: Store the cake in an airtight container at room temperature for up to 3 days. If you’ve added a chocolate glaze, keep the cake in the fridge to maintain the glaze’s consistency.
    • Serving: This cake is versatile and pairs beautifully with a hot cup of coffee or tea. For an extra treat, serve with a dollop of whipped cream or a scoop of vanilla ice cream.