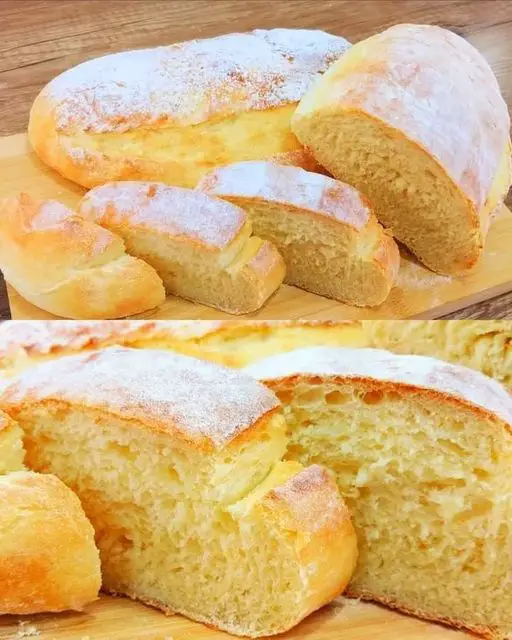
Category: healthy food

  • Perfect Vanilla Muffins

    Perfect Vanilla Muffins

    Perfect Vanilla Muffins

    Table of Contents

    Vanilla Muffins are the epitome of culinary perfection, offering a delightful blend of simplicity and heavenly flavors. In this article, we’ll explore the world of Vanilla Muffins, from the basics to expert tips, recipes, and frequently asked questions. Get ready to embark on a flavorful journey that will leave your taste buds tingling with joy.

    Ingredients
    • 2 cups of all-purpose flour
    • 2/3 cup of granulated sugar
    • 2 tsp of baking powder
    • 1/2 tsp of salt
    • 1/2 cup of unsalted butter melted
    • 2 large eggs
    • 1 cup of milk
    • 2 tsp of pure vanilla extract
    Instructions
    • Preheat your oven to 375°F (190°C) and line a muffin tin with paper liners.
    • In a large mixing bowl, whisk together the flour, sugar, baking powder, and salt.
    • In another bowl, combine the melted butter, eggs, milk, and vanilla extract.
    • Pour the wet ingredients into the dry ingredients and mix until just combined. Be careful not to overmix; a few lumps are okay.
    • Fill each muffin cup about two-thirds full with the batter.
    • Bake for 18-20 minutes or until a toothpick inserted into the center of a muffin comes out clean.
    • Allow the muffins to cool for a few minutes in the pan before transferring them to a wire rack to cool completely.
    Vanilla Muffins: A Delicious Classic

    Vanilla Muffins are a timeless classic loved by people of all ages. These moist, tender delights are the perfect treat for any occasion, be it breakfast, a snack, or dessert. Let’s dive into the world of Vanilla Muffins and discover what makes them so special.

    The Origin of Vanilla Muffins

    The exact origin of Vanilla Muffins is a bit of a mystery, but they have been a staple in the world of baking for centuries. Vanilla, with its rich aroma and sweet flavor, was often used to enhance the taste of various baked goods. The idea of infusing muffins with vanilla was a stroke of culinary genius.

    The Magic of Vanilla

    Vanilla Muffins owe their irresistible flavor to the star of the show – vanilla. This aromatic spice is derived from the orchids of the genus Vanilla and has a sweet, warm, and comforting scent. When added to muffin batter, vanilla extract imparts a fragrant and slightly sweet undertone that elevates the entire experience.

  • Easy and Delicious Cabbage Casserole with Cheddar Cheese: Two Ways to Cook!

    Easy and Delicious Cabbage Casserole with Cheddar Cheese: Two Ways to Cook!

    Easy and Delicious Cabbage Casserole with Cheddar Cheese: Two Ways to Cook!

    Table of Contents

    Ingredients:

    1 cabbage, shredded thinly
    3 medium potatoes, grated
    1 red onion, chopped
    2 carrots, grated
    Dill and parsley, chopped (to taste)
    5-6 garlic cloves, minced
    4-5 eggs
    2 cups of flour
    1 tablespoon of salt
    125g (5oz) cheddar cheese, grated
    Olive oil (for greasing and frying)

    Directions:

    1. Prepare the Vegetables:

    Shred the cabbage as thinly as possible.
    Grate the potatoes and carrots, and chop the red onion. Set aside.
    In a large mixing bowl, combine the shredded cabbage, grated potatoes, carrots, chopped red onion, dill, parsley, and minced garlic.
    2. Prepare the Batter:

    In the same bowl, add the eggs, flour, and salt. Mix everything together until well combined.
    3. Cooking Method 1: Oven-Baked

    Preheat your oven to 200°C (400°F).
    Grease a baking dish with olive oil.
    Spread half of the vegetable mixture evenly in the baking dish.
    Bake in the preheated oven for 40 minutes.
    After 40 minutes, sprinkle the grated cheddar cheese over the top.
    Return to the oven and bake for an additional 5-10 minutes, or until the cheese is melted and golden.

    4. Cooking Method 2: Skillet-Fried

    Heat a skillet over low heat and add a little olive oil.
    Spoon the remaining half of the vegetable mixture into the skillet, pressing it down to form a flat layer.
    Fry for 8-10 minutes on each side, or until golden brown and cooked through.
    Sprinkle the grated cheddar cheese on top during the last few minutes of cooking to let it melt.
    5. Serve:

    Serve the baked or fried cabbage casserole hot. Enjoy your comforting meal!
    Serving Suggestions:

    Serve with a dollop of sour cream or Greek yogurt on the side.
    Pair with a slice of crusty bread for a complete meal.
    Cooking Tips:

    Make sure to shred the cabbage as thinly as possible for even cooking.
    Adjust the seasoning to your taste by adding more garlic, herbs, or even a pinch of chili flakes for some heat.
    If you prefer a gluten-free option, you can substitute the flour with a gluten-free alternative.
    Nutritional Benefits:

    Cabbage: Low in calories, high in vitamins C and K, and rich in antioxidants.
    Potatoes: A good source of potassium and fiber, providing energy and keeping you full.

    Cheddar Cheese: Adds calcium and protein to the dish.
    Dietary Information:

    Vegetarian-friendly.
    Can be made gluten-free by using gluten-free flour.
    Nutritional Facts (Per Serving):

    Calories: 350 kcal
    Carbohydrates: 40g
    Protein: 12g
    Fat: 15g
    Fiber: 7g
    Storage:

    Store any leftovers in an airtight container in the refrigerator for up to 2 days.
    Reheat in the oven or on the stovetop before serving.

  • Cheesy Breakfast Casserole

    Cheesy Breakfast Casserole

    Cheesy Breakfast Casserole

    Table of Contents

    Ingredients

    Base Ingredients:

    8 large eggs

    2 cups milk

    1 cup shredded cheddar cheese

    1 cup shredded mozzarella cheese

    1 pound breakfast sausage, cooked and crumbled

    1 red bell pepper, diced

    1 green bell pepper, diced

    1 medium onion, diced

    2 cups cubed bread (preferably day-old)

    1 teaspoon salt

    1/2 teaspoon black pepper

    1/2 teaspoon garlic powder

    1/2 teaspoon paprika

    Instructions

    Step 1: Prepare the Ingredients

    Preheat Oven:

    Preheat your oven to 350°F (175°C).

    Cook Sausage:

    In a skillet over medium heat, cook the breakfast sausage until browned and crumbled. Remove from heat and drain any excess fat.


    Dice Vegetables:

    Dice the red and green bell peppers and onion. Set aside.

    Step 2: Assemble the Casserole

    Mix Eggs and Milk:

    In a large bowl, whisk together the eggs, milk, salt, black pepper, garlic powder, and paprika.

    Combine Ingredients:

    Add the cooked sausage, diced bell peppers, onion, and cubed bread to the egg mixture. Stir to combine.

    Add Cheese:

    Stir in half of the shredded cheddar and mozzarella cheese into the mixture.

    Pour into Baking Dish:

    Pour the mixture into a greased 9×13 inch baking dish, spreading it out evenly.

    Top with Cheese:

    Sprinkle the remaining cheddar and mozzarella cheese on top of the casserole.

    Step 3: Bake the Casserole

    Bake:

    Bake in the preheated oven for 45-50 minutes, or until the casserole is set in the center and the top is golden brown.

    Cool and Serve:

    Allow the casserole to cool for a few minutes before slicing and serving.

    Tips for Best Results

    Day-Old Bread: Using day-old bread helps absorb the egg mixture better, creating a more cohesive casserole.

    Vegetable Variations: Feel free to add or substitute vegetables such as mushrooms, spinach, or tomatoes to customize the casserole to your taste.

    Cheese Varieties: Experiment with different types of cheese like pepper jack or Swiss for a unique flavor.

    Conclusion

    This cheesy breakfast casserole is a delightful and versatile dish, perfect for feeding a crowd or preparing ahead of time for busy mornings.

    With its rich blend of flavors and textures, it’s sure to become a family favorite.

  • Hearty Red Lentil Soup

    Hearty Red Lentil Soup

    Hearty Red Lentil Soup

    Table of Contents

    Ingredients

    1 cup (~220 g) red lentils (only red!)
    1 medium-sized onion, chopped
    1 leek, sliced
    1 medium-sized carrot, chopped
    1-2 tbsp olive oil
    1 tsp butter
    1 medium-sized potato, chopped
    Salt and pepper to taste
    A pinch of cumin
    1 tbsp tomato paste
    1 liter boiling water or broth
    A small bunch of cilantro or parsley, chopped
    Lemon juice to taste (about 1 tbsp)

    Directions

    Prepare the Vegetables:
    Chop the potato, carrot, and onion into small pieces.
    Slice the leek.

    Rinse the Lentils:
    Rinse the red lentils thoroughly under cold water.
    Sauté the Vegetables:
    Heat 1-2 tbsp of olive oil and 1 tsp of butter in a large pot over medium heat.
    Add the chopped onion and sauté until soft, about 3-4 minutes.

    Add the chopped carrot and sliced leek. Sauté for another 2-3 minutes.
    Add a pinch of cumin and stir well.
    Add the chopped potato and mix thoroughly.

    Cook the Lentils:
    Add the rinsed red lentils to the pot and stir well.
    Pour in 1 liter (approximately 4.2 cups) of boiling water or broth.
    Bring the mixture to a boil, then reduce the heat to a simmer.
    Cover and cook for 10-15 minutes until the lentils and vegetables are tender.

    Add Tomato Paste and Seasonings:
    Stir in 1 tbsp of tomato paste and mix well.
    Add salt and pepper to taste.
    Add chopped cilantro or parsley.

    Blend the Soup:
    Using an immersion blender, blend the soup until smooth and creamy. If you prefer a chunkier texture, you can blend only a part of the soup.
    Finish with Lemon Juice:
    Stir in lemon juice to taste (about 1 tbsp).
    Add a little more olive oil if desired.

    Serve:
    Ladle the soup into bowls and garnish with additional chopped herbs if desired.
    Enjoy your meal!

    Serving Suggestions
    Serve this red lentil soup with a side of crusty bread or a fresh salad.
    Pair with a dollop of yogurt or a sprinkle of red pepper flakes for added heat.

    Cooking Tips
    Rinse the Lentils: Make sure to rinse the lentils thoroughly to remove any debris and reduce foam while cooking.

  • Loaded Cheesy Pocket Tacos With Ground Beef

    Loaded Cheesy Pocket Tacos With Ground Beef

    This handheld snack is so delicious. It pairs up Mexican flavors with American ones to make the most delicious savory snacks. You will need flour tortillas to make these, along with ground beef and cheddar cheese, cream cheese, and butter.

    Taco pockets 2

    Taco seasoning and salsa adds flavor and then you can take your pick from various toppings like sour cream, green onions and salsa. You can spice these fusion pocket tacos up if you like with jalapenos or hot sauce, or you can use a hot salsa rather than a mild one.

    Taco pockets 3

    Perhaps you want to experiment with different kinds of meat, cheese or flavors. This is a great basic recipe which you can tweak however you wish. These pocket tacos are lovely served hot while the cheese is all ooey-gooey and melty!

    Taco pockets 4

    Why You’ll Love the Recipe

    These delicious hot snacks pair up Mexican and American flavors. They’re a handheld snack and they’re delicious served hot or warm from the oven.

    Taco pockets 5

    How to Serve Them

    Enjoy these with your favorite drink, perhaps as a light lunch or simple dinner paired up with another Mexican side dish.

    Taco pockets 6

    Storage Instructions:

    Leftovers will keep for up to 3 days in an airtight container in the refrigerator.

    Variations and Substitutions

    You can use another kind of ground meat, another kind of cheese or spice them up by adding minced jalapenos, hot sauce or red pepper flakes to the beef mixture.

    Taco pockets 7

    Ingredients needed:

    • Ground beef
    • Cream cheese, at room temperature
    • Taco seasoning
    • Shredded cheddar cheese
    • Tomato salsa
    • Flour tortillas
    • Melted butter
    • Salsa, guacamole, sour cream, green onions, and/or cilantro, for topping (all optional)
    Taco pockets ingredients

    How to make Loaded Cheesy Pocket Tacos:

    Cook the ground beef in a skillet until browned all over, then drain off the excess grease.

    Stir in the taco seasoning mix.

    Taco pockets step1

    Beat the cream cheese in a bowl and then blend in the salsa.

    Taco pockets step2
    Taco pockets step3

    Put a spoonful of the cream cheese mixture in the middle of a tortilla and top with the beef.

    Sprinkle with the cheese and fold up burrito-style.

    Taco pockets step4

    Repeat with the remaining tortillas and fillings.

    Preheat the oven to 350°F.

    Arrange the rolled tortillas on a greased baking sheet and brush melted butter over the tops.

    Taco pockets step5

    Bake for 15 minutes.

    Taco pockets step6

    Take them out of the oven and add any extra toppings you like, such as avocado, lettuce, olives, sour cream, or cilantro.

    Looking for a new savory snack idea? These handheld pocket tacos are fantastic and they’re so easy to make.

    Taco pockets 8

    Can You Make Them Ahead?

    Yes, you can assemble them up to a day ahead and bake later if you want.

    Taco pockets 10

    Ingredients

    Scale
    • 1 pound ground beef
    • 8 ounces cream cheese, at room temperature
    • 1 package taco seasoning
    • 1 cup shredded cheddar cheese
    • ½ cup tomato salsa
    • 12 (6-inch) flour tortillas
    • 2 tablespoons melted butter
    • Salsa, guacamole, sour cream, green onions, and/or cilantro, for topping (all optional)

    Instructions

      1. Cook the ground beef in a skillet until browned all over, then drain off the excess grease.
      2. Stir in the taco seasoning mix.
      3. Beat the cream cheese in a bowl and then blend in the salsa.
      4. Put a spoonful of the cream cheese mixture in the middle of a tortilla and top with the beef.
      5. Sprinkle with the cheese and fold up burrito-style.
      6. Repeat with the remaining tortillas and fillings.
      7. Preheat the oven to 350°F.
      8. Arrange the rolled tortillas on a greased baking sheet and brush melted butter over the tops.
      9. Bake for 15 minutes.
    1. Take them out of the oven and add any extra toppings you like, such as avocado, lettuce, olives, sour cream, or cilantro.
  • Deviled Egg Pasta Salad

    Deviled Egg Pasta Salad

    Deviled eggs are very popular around Easter time, but if you want to enjoy their taste, you can make this pasta salad.

    Contents
    Why you’ll love the recipe:How to serve it:Ingredients:How to make Deviled Egg Pasta Salad:Can you make it ahead?Storage instructionsVariations and substitutesThe fun part of this recipe is that you make the dressing by mashing the egg yolks and mixing them with the mayo, ketchup, and other ingredients.

    Deviled egg pasta salad Final 12 scaled

    Then, you mix the diced ingredients with the creamy dressing, and the pasta is ready to enjoy. Chill it well in the fridge before serving it for a much better taste.

    Deviled egg pasta salad Final 7 scaled

    Why you’ll love the recipe:

    Everything related to pasta is always a great recipe. This pasta salad is nothing less than great. You can make it throughout the whole year and enjoy these simple ingredients together, making the best flavor possible.

    How to serve it:

    Chill it well before serving it. That way, you can taste all the flavors.

    Deviled egg pasta salad Final 3 scaled

    Ingredients:

    • Macaroni pasta
    • Eggs
    • Mayonnaise
    • Mustard
    • Ketchup
    • White vinegar
    • Granulated sugar
    • Red onion
    • Celery
    • Paprika
    • Salt
    • Pepper
    • Green onions for garnish
    Deviled egg pasta salad Ingredients scaled

    How to make Deviled Egg Pasta Salad:

    Step 1. First, cook the pasta according to the package instructions.

    Step 2. Cut the hard-boiled eggs in half and remove the egg yolks. Place the egg yolk in a bowl and mash with a fork.

    Step 3. Stir in the mayo, ketchup, vinegar, sugar and mustard and mix until a creamy paste is formed. Set aside.

    Step 1 31 scaled

    Step 4. Add the diced egg white, chopped onion, celery, and cooked pasta in another bowl.

    Step 2 29 scaled

    Step 5. Stir in the egg yolk mixture and mix until combined and season with salt and pepper to taste and some paprika.

    Step 3 25 scaled

    This salad is perfect for brunch, dinner or just a snack. You can serve it in crackers or toasted bread or just eat it with a fork.

    Ingredients

    • 8 oz. macaroni pasta cooked as per directions on the box
    • 6 hard-boiled eggs diced yolk removed
    • ½ cup mayonnaise
    • 1 tbsp. mustard
    • 1 tbsp. Ketchup
    • 1 tbsp. white vinegar
    • 1 tbsp. granulated sugar
    • 1 small red onion chopped
    • 2 ribs celery chopped
    • ½ tsp. paprika
    • ½ tsp Salt
    • ½ tsp pepper
    • Green onions for garnish
  • KFC coleslaw

    KFC coleslaw

    This copycat recipe is ideal, especially when the weather is hot and warm. This coleslaw recipe goes well with fried chicken, hamburgers, hot dogs, cheeseburgers, or any cooked meat. It’s easy and quick to assemble, and you love it when served with your favorite main dish.

    Contents
    Why you’ll love the recipe:How to serve it:Ingredients:How to make KFC coleslaw:Can you make it ahead?Storage instructions:Variations and substitutes:When the weather outside is calling to turn your grill on, this coleslaw recipe will become more than handy to serve it as a side dish.

    KFC coleslaw 3 677x1024 1

    Why you’ll love the recipe:

    This is a perfect recipe to accompany your hamburger, hot dog, or cheeseburger. It’s a copycat recipe from KFC that everyone will crave even more when trying the first time. I am sure of that.

    KFC coleslaw 4 683x1024 1

    How to serve it:

    Serve it as it is or just as a side dish to your hamburger.

    KFC coleslaw 5 683x1024 1

    Ingredients:

    • Coleslaw mix shredded cabbage
    • Shredded carrots
    • Onion
    • Mayonnaise
    • Buttermilk
    • Milk
    • Granulated sugar
    • Lemon juice
    • White vinegar
    • Salt and pepper to taste
    KFC coleslaw Ingredients 683x1024 1

    How to make KFC coleslaw:

    First, mix the cabbage, onions, and carrots in a large mixing bowl until everything is combined.

    Step 1 23 683x1024 1

    In a bowl aside, whisk the mayo, buttermilk, milk, sugar, lemon juice, and vinegar until thoroughly combined.

    Pour the sauce on the grated coleslaw and mix until thoroughly combined.

    Step 2 20 683x1024 1

    Serve and enjoy.

    I love to make this dish as a side dish when I am grilling outside, and I think this is a perfect creamy salad idea for the ones who love these recipes.

    Ingredients

    • 1 Bag coleslaw mix shredded cabbage
    • ½ C. Shredded carrots
    • ¼ C. Finely chopped onion
    • ½ C. Mayonnaise
    • ¼ C. Buttermilk
    • ¼ C. Milk
    • ¼ C. Granulated sugar
    • 2 Tbsp. Lemon juice
    • 1 Tbsp. White vinegar
    • Salt and pepper to taste

    Instructions

    • First, mix the cabbage, onions, and carrots in a large mixing bowl until everything is combined.
    • In a bowl aside, whisk the mayo, buttermilk, milk, sugar, lemon juice, and vinegar until thoroughly combined.
    • Pour the sauce on the grated coleslaw and mix until thoroughly combined.
    • Serve and enjoy.
  • Pasta shells with ground beef

    Are you ready to cook an inexpensive dinner and feed the whole family? I guarantee that there will be leftovers too. It’s a comforting meal prepared with cheap ingredients, and I am sure that most of them you have in your pantry. In my opinion, any pasta dish promises a good meal to feed the whole family, and when we mention pasta, let’s not forget how our kids enjoy it. It can be so much fun.

    Pasta shells with ground beef 2 683x1024 1

    When bound together, these simple ingredients form the perfect pasta dish with ground beef. It’s an amazing casserole dish that will feed a crowd.

    Pasta shells with ground beef 3 683x1024 1

    Why you’ll love the recipe:

    This pasta shell with ground beef is a great dinner or lunch idea that will feed a crowd. It’s a perfect dish to make when friends come for dinner or lunch.

    Pasta shells with ground beef 4 683x1024 1

    How to serve it:

    Serve this dish freshly prepared while it’s still warm.

    Pasta shells with ground beef 5 683x1024 1

    Ingredients:

    • Ground beef
    • Sazon perfecta seasoning
    • Black pepper to taste
    • Pasta shells
    • Olive oil
    • Water
    • Granulated chicken broth
    • Diced serrano peppers
    • Onion
    • Rotel
    • Chopped parsley
    • Garlic powder and onion powder to taste
    • Red sazon seasoning
    • Bay leaf
  • Philly Cheesesteak Sloppy Joes

    Philly Cheesesteak Sloppy Joes

    f you love rich sandwiches, you should try these Pihilly Cheesesteak Sloppy Joes.

    Contents
    Why you’ll love the recipe:
    How to serve it:
    Ingredients:
    How to make Philly Cheesesteak Sloppy Joes:
    Can you make it ahead?
    Storage instructions:
    Variations and substitutes:
    They are bursting with flavors, and the preparation time is so easy.

    It will take around 20 minutes to make the meat sauce and then top it into burger buns. Serve with a lot of cheese on top, and enjoy the flavors.

    They are perfect for picnics or whenever you crave something scrumptious and easy to make.

    It’s a comfort food that makes in less than 30 minutes.

    Why you’ll love the recipe:
    The juicy filling will soften the burger buns, and that will infuse the whole meal into a perfect lunch or dinner. The cheese will make it even more decadent.

    How to serve it:
    Serve these sloppy joes loaded with a lot of cheese. Mixing a bowl with some burger sauce or mayo and mustard will also be nice.

    Ingredients:
    Ground beef
    Onion diced
    Green bell pepper
    Red bell pepper
    Worcestershire sauce
    Balsamic vinegar
    Beef broth
    Minced garlic
    Salt
    Black pepper
    Gouda cheese
    Burger buns

    How to make Philly Cheesesteak Sloppy Joes:
    Step 1. In a nonstick frying pan over medium heat, brown the ground beef and stir in the peppers, onion, and garlic.

    Step 2. Cook for about 5 minutes until the veggies are softened.

    Step 3. Stir in the Worcestershire sauce, balsamic vinegar, beef broth, salt, and pepper to taste, and bring everything to a boil. Cover and simmer for about 10 minutes.

    Step 4. Spoon the mixture to the bottom of a bun, top it with cheese, and the top bun on top.

    Enjoy.

    These sloppy joes are perfect for your guests if you enjoy and want to serve a cooked meal outside in the garden. Make individual sandwiches, enjoy them with a glass of beer, and make lots of memories together.

  • Creamy Beef Noodle Casserole

    Creamy Beef Noodle Casserole

    If you find yourself making the same dinner dishes week in and week out, you might be looking for a brand-new idea. Something that’s quick and easy to make and that can be on the table in just over half an hour is the following beef and noodle casserole. It’s made with ground beef, onion, cheese, tomato sauce, and egg noodles. A touch of garlic adds all the flavor this recipe needs.

    Contents
    Why You’ll Love the Recipe:
    How to Serve It:
    Ingredients:
    How to make Creamy Beef Noodle Casserole:
    Can You Make It Ahead?
    Storage Instructions:
    Variations and Substitutions:

    It’s a meal-in-one as it has noodles, meat, and tomatoes, along with cheese, but you might like to serve broccoli, green beans, or even peas on the side. This serves a family of four but it’s still worth making for two or even one since you can enjoy it for longer and it also freezes well, so you can freeze individual portions to enjoy at a later date. This might be a relatively simple casserole recipe but it’s full-flavored and really tasty.

    Beef and egg noodles combine beautifully if you’re making Chinese food but if you add tomatoes, cheese and onion, you can make a fabulous casserole with these ingredients instead.

    Why You’ll Love the Recipe:
    This delicious beef and egg noodle casserole is rich, hearty, and filling. It’s so simple to make and you can use the same pan for the egg noodles and the beef mixture to save on the washing up.

    How to Serve It:
    This casserole is best served hot with your favorite vegetable on the side.

    Ingredients:
    Onion
    Garlic powder
    Shredded cheddar cheese
    Italian seasoning
    Uncooked egg noodles
    Lean ground beef
    Salt
    Black pepper
    Olive oil
    Tomato sauce
    Diced tomatoes
    Nonstick cooking spray, as needed

    How to make Creamy Beef Noodle Casserole:
    Preheat the oven to 400°F and grease a 13×9-inch baking dish with nonstick spray.

    Cook the egg noodles in boiling water for 1 minute less than what the package recommends.

    You want them to be al dente, as they will finish cooking in the oven.

    Drain the noodles and pour out the water.

    Put the olive oil in the same pot and heat it up.

    Add the ground beef and cook for 5 minutes, breaking it up with a wooden spoon.

    Pour off the grease.

    Next, add the onion, salt, pepper, Italian seasoning, and garlic powder to the pan.

    Cook for 4 minutes or until the beef is cooked through and the onions are tender.

    Stir in the canned tomatoes and tomato sauce.

    Stir in the drained egg noodles.

    Add 2 cups of the cheese and stir again.

    Now pour the mixture into the greased baking dish.

    Sprinkle the remaining cheese on top.

    Bake for 10 minutes or until the cheese has melted on top.

    Ingredients

    • 1 finely chopped yellow onion
    • ¼ teaspoon garlic powder
    •  cups shredded cheddar cheese
    • 1 teaspoon Italian seasoning
    • 8 ounces uncooked egg noodles
    • 1 pound lean ground beef
    • 1 teaspoon salt
    • ½ teaspoon black pepper
    • 1 teaspoon olive oil
    • 8- ounce can tomato sauce
    • 15- ounce can undrained Italian style diced tomatoes
    • Nonstick cooking spray as needed

    Instructions

    • Preheat the oven to 400°F and grease a 13×9-inch baking dish with nonstick spray.
    • Cook the egg noodles in boiling water for 1 minute less than what the package recommends.
    • You want them to be al dente, as they will finish cooking in the oven.
    • Drain the noodles and pour out the water.
    • Put the olive oil in the same pot and heat it up.
    • Add the ground beef and cook for 5 minutes, breaking it up with a wooden spoon.
    • Pour off the grease.
    • Next, add the onion, salt, pepper, Italian seasoning, and garlic powder to the pan.
    • Cook for 4 minutes or until the beef is cooked through and the onions are tender.
    • Stir in the canned tomatoes and tomato sauce.
    • Stir in the drained egg noodles.
    • Add 2 cups of the cheese and stir again.
    • Now pour the mixture into the greased baking dish.
    • Sprinkle the remaining cheese on top.
    • Bake for 10 minutes or until the cheese has melted on top.
  • Christmas Breakfast Casserole

    Christmas Breakfast Casserole

    After the first morning coffee on a Christmas day, you want something perfect for breakfast to enjoy with your family.

    This Christmas breakfast casserole is the perfect combination of flavors that you and your family are looking for.

    Christmas breakfast casserole Final 2 scaled

    If you don’t have sausages at home, you can use ground beef and make the recipe too. It will be absolutely perfect.

    This is not only a good breakfast idea, but also it can be served as lunch or even dinner.

    Christmas breakfast casserole Final 5 scaled

    It’s a perfect recipe to use your leftover bread and make a whole new dish to enjoy.

    Christmas breakfast casserole Final 6 scaled

    Why you’ll love the recipe

    This is a perfect casserole to serve on a Christmas morning because the whole family will enjoy these flavors bound together.

    How to serve it

    Serve with a scoop of sour cream or Greek yogurt or some simple tomato salad.

    Christmas breakfast casserole Final 8 scaled

    Ingredients:

    • Ground pork sausage
    • Mustard powder
    • Kosher salt
    • Large eggs
    • Whole milk
    • White bread
    • Gouda cheese
    Christmas breakfast casserole Ingredients scaled

    How to make Christmas Breakfast Casserole:

    Step 1. First, cook the sausage in a nonstick frying pan for about 5 minutes.

    Step 2. Mix the mustard powder, salt, eggs, and whole milk in a medium-sized bowl.

    Step 3. Add the crumbled sausages, bread cubes, and cheese. Stir until combined.

    Step 1 28 scaled

    Step 4. Pour the mixture into a well-greased 9×13-inch casserole pan and bake for about 45 minutes in an already heated oven at 350 F or 180 C degrees.

    Step 2 26 scaled

    Step 5. Cut pieces and serve to enjoy.

    Christmas breakfast casserole is a perfect breakfast idea for a busy family that wants to enjoy home-cooked meals. Yum!

  • Chocolate Depression Cake

    Chocolate Depression Cake

    Are you looking for a rich, decadent chocolate cake recipe that will require almost no time? This is the recipe you are searching for.

    I am sure that once you make this recipe, you will absolutely adore it and make it over and over again.

    Chocolate depression cake Final 3 scaled
    https%3A%2F%2Fres.cloudinary.com%2Fgrow

    Free Membership!

    Get all our new recipes straight to your inbox plus a BONUS download in your first email! ❤️

    Once you make it, you will realize that everyone can prepare it because everything happens in a single bowl, and you can enjoy the end result with your loved ones.

    Chocolate depression cake Final 4 scaled

    The sponge cake is so rich and decadent, but the frosting is what makes this cake so special and yummy in every bite.

    Chocolate depression cake Final 5 scaled

    Why you’ll love the recipe:

    Who doesn’t love a perfect slice of chocolate? Rich in flavour I am sure that you can never get enough of this amazing chocolate depression cake.

    Chocolate depression cake Final 6 scaled

    How to serve it:

    Serve this cake well chilled and with a scoop of vanilla ice cream. YUM!

    Chocolate depression cake Final 7 scaled

    Ingredients:

    For the cake:

    • All Purpose Flour
    • Cocoa Powder
    • Oil
    • Baking Soda
    • Sugar
    • Water
    • Vanilla Extract
    • White Vinegar
    • Pinch of salt

    For the frosting:

    • Powdered Sugar
    • Milk
    • Cocoa powder
    • Honey
    • Butter
    • Vanilla
    Chocolate depression cake Ingredients scaled

    How to make Chocolate Depression Cake:

    Step 1. First, preheat your oven to 350 F or 180 C degrees.

    Step 2. Then, in a large mixing bowl, mix all the ingredients needed for the cake.

    Step 1 27 scaled

    Mix until smooth and creamy.

    Step 2 25 scaled

    Step 3. Pour the batter into 9×13 inch baking pan and bake for about 30 minutes

    Step 3 22 scaled

    Step 4. While that’s baking, in a bowl, combine the ingredients needed for the icing until creamy and delicious.

    Step 4 17 scaled

    Step 5. Spread the icing over the cooled cake.

    Step 5 11 scaled

    serve to enjoy.

    Step 6 4 scaled

    This chocolate depression cake is a perfect dessert that anyone can make in almost no time. A rich chocolate flavor is always hard to resist.

  • Cauliflower Pizza Crust

    Cauliflower Pizza Crust

    Cauliflower Pizza Crust

    What you need to make the cauliflower pizza dough is as follows:

    Riced cauliflower: either make your own or buy it already made.-purchased part-skim mozzarella cheese, dried oregano, basil, and egg.

    Several suggestions for toppings:

      • pizza sauce
      • Shredded mozzarella cheese
      • red pepper smashed with fresh basil

    Ezoic

    Remarks and Alterations

    Riced Cauliflower: This dish steals the spotlight. Don’t be scared if you’re unfamiliar with the world of cauliflower rice! All you have to do is put the cauliflower florets in your food processor and pulse them until they are the consistency of rice. If you don’t have a food processor, you can manually prepare rice with a cheese grater or blender. Pre-riced cauliflower is also available, but make sure it is fresh rather than frozen, since the latter has too much moisture and will not combine well with the crust.

    Dairy-free: You can try leaving out the cheese or use dairy-free mozzarella. Although some people have tested this dish without the cheese and it worked just fine, I personally prefer it with cheese.

    Ezoic

    Vegan: You can use a flaxseed egg or a vegan egg substitute in place of the egg in the crust. Although I haven’t tried it yet, it ought to work!

    Toppings: Since the pizza will only be broiling for a little while, feel free to top it with whatever you desire. Just make sure the toppings have already cooked. Remember that the cauliflower pizza crust is not as solid as most other dough-based crusts, so avoid adding too many things to it. Maintain simplicity.

    Saute cauliflower rice: Cook the riced cauliflower in a nonstick skillet over medium heat for 6 to 8 minutes, or until it turns translucent. Drying out the cauliflower is greatly aided by this crucial step.

    Mix the ingredients for the crust in a big basin. Add the cooked cauliflower, egg, shredded cheese, dried oregano, and dried basil. It’s okay if the cheese melts a little bit during this process.To make the crust, grease or line a pizza stone or baking sheet with parchment paper and olive oil. Form the dough into a circle by spreading it out evenly on the baking sheet. It should have a thickness of roughly 1/4 inch.

    Bake crust – Bake at 400ºF for 25-30 minutes or until the crust is golden, crispy on the edges and cooked through the middle.


    Add toppings – Remove the crust from the oven and set the oven temperature to broil. Top the crust with pizza sauce, cheese and any other toppings you’d like.
    Broil – Broil the pizza for 5 minutes or until the toppings are hot and the cheese has melted. Allow the pizza to cool for 2-3 minutes before cutting and serving.

    Ezoic

  • Vegetable pizza

    Vegetable pizza

    Vegetable pizza

    Table of Contents

    Ingredients:

    1 zucchini, grated
    1/2 young cabbage, finely shredded
    2 tablespoons olive oil
    1 carrot, grated
    Salt, to taste
    1 onion, finely chopped
    2 chicken eggs
    Pepper, to taste
    2 tablespoons flour
    1 cup rice
    2 cups water
    Green onions, chopped

    Directions:

    Heat 1 tablespoon of olive oil in a pan over medium heat.
    Add the grated zucchini, shredded young cabbage, and grated carrot. Season with salt and sauté for 5 minutes.
    In the same pan, add the chopped onion and continue to sauté for another 5 minutes until the vegetables are softened.
    In a bowl, beat the eggs with pepper and salt. Add the mixture to the pan with sautéed vegetables and stir gently until the eggs are cooked.
    Stir in the flour until well combined.
    Add the rice and water to the pan. Bring to a boil, then reduce the heat to low. Cover and simmer for about 20 minutes or until the rice is cooked and the liquid is absorbed.
    Garnish with chopped green onions before serving.
    Serving Suggestions:
    Serve hot as a main dish or side dish with a fresh salad or yogurt. This dish pairs well with grilled chicken or fish for a complete meal.
    Cooking Tips:
    Ensure the zucchini, young cabbage, and carrots are grated finely to cook evenly and blend well with the rice.
    Adjust seasoning according to personal preference.
    Keep the pan covered while simmering the rice to ensure even cooking.
    Use a non-stick pan to prevent sticking and ensure easy cleanup.
    Nutritional Benefits:
    Zucchini provides vitamins B, C, K, and minerals like potassium and magnesium.
    Young cabbage is rich in vitamins C and K, and dietary fiber.
    Eggs offer protein and essential nutrients.
    Carrots add beta-carotene and fiber.
    Rice provides carbohydrates for energy.
    Dietary Information:
    Suitable for vegetarians.
    Can be made gluten-free by using gluten-free flour.
    This dish is low in calories and high in vitamins and minerals.
    Storage:
    Store leftovers in an airtight container in the refrigerator for up to 2 days.
    Reheat gently on the stove or in the microwave, adding a splash of water if needed to maintain moisture.
  • Biscoff Brownies

    Biscoff Brownies

    Biscoff Brownies

    Table of Contents

    Ingredients:

    For the Brownies:
    1/2 cup unsalted butter
    1 cup granulated sugar
    2 large eggs
    1 teaspoon vanilla extract
    1/2 cup all-purpose flour
    1/3 cup unsweetened cocoa powder
    1/4 teaspoon salt
    1/4 teaspoon baking powder
    1/2 cup Biscoff cookie spread (creamy or chunky)
    1/2 cup chopped Biscoff cookies (for mixing in)
    For the Biscoff Drizzle (optional):
    1/4 cup Biscoff cookie spread
    1 tablespoon milk

    Instructions:

    Preheat the Oven:
    Preheat your oven to 350°F (175°C). Line an 8×8-inch baking pan with parchment paper or lightly grease it.
    Prepare the Brownie Batter:
    In a medium saucepan, melt the butter over low heat. Remove from heat and stir in the granulated sugar until well combined.
    Beat in the eggs, one at a time, mixing well after each addition.
    Stir in the vanilla extract.
    In a separate bowl, whisk together the flour, cocoa powder, salt, and baking powder.
    Gradually add the dry ingredients to the wet ingredients, mixing until just combined.
    Fold in the Biscoff cookie spread and chopped Biscoff cookies.
    Bake:
    Pour the brownie batter into the prepared baking pan, spreading it evenly.
    Bake for 25-30 minutes, or until a toothpick inserted into the center comes out with a few moist crumbs (not wet batter).
    Allow the brownies to cool in the pan on a wire rack before cutting them into squares.
    Prepare the Biscoff Drizzle (Optional):
    In a small bowl, microwave the Biscoff cookie spread and milk for about 20-30 seconds, stirring until smooth and drizzly.
    Drizzle the mixture over the cooled brownies for an extra touch of Biscoff goodness.
    Serve:
    Enjoy these rich and fudgy Biscoff Brownies with a glass of milk or a cup of coffee!
    These brownies offer a delightful combination of chocolatey richness and the unique flavor of Biscoff cookies, making them a perfect treat for any occasion! 🍫🍪