Category: healthy food

  • Bubble Donuts Recipe

    Bubble Donuts Recipe

    Bubble Donuts Recipe

    Table of Contents

    The best sweet and soft snack! These Bubble Donuts are a fun and delicious treat, perfect for satisfying your sweet tooth. Let’s dive into this easy recipe.

    Ingredients
    For the Donuts
    • 1 cup and 10 tablespoons of flour
    • 2.5 tablespoons of sugar
    • 1/3 teaspoon of salt
    • 1 teaspoon of yeast
    • 1 egg
    • 1/2 cup of milk
    • 1/8 cup of butter, melted
    For the Glaze
    • 1/2 cup of powdered sugar
    • 1 tablespoon of warm water
    Instructions
    Step 1: Mix the Dry Ingredients

    In a large mixing bowl, combine the flour, sugar, salt, and yeast. Mix all the dry ingredients together until well combined.

    Step 2: Add the Wet Ingredients

    Next, add the egg, milk, and melted butter to the dry ingredients. Mix until the dough is well combined. Cover the bowl with cling wrap.

    Step 3: Let the Dough Rise

    Set the bowl with the dough aside and leave it at room temperature for about an hour. This allows the dough to rise.

    Step 4: Prepare the Dough for Frying

    After an hour, transfer the mixture to a piping bag.

    Step 5: Heat the Oil

    Place a pot over medium heat and add a generous amount of cooking oil. Heat the oil until it reaches frying temperature (around 350°F or 175°C).

    Step 6: Fry the Donuts

    Squeeze the batter from the piping bag into the hot oil, cutting the dough with a pair of clean scissors to form small balls. Fry until the donuts are brown and crispy. Remove them from the oil and drain excess oil on a paper towel-lined plate. Repeat with the remaining batter.

    Step 7: Make the Glaze

    In a small bowl, combine the powdered sugar and warm water. Mix until smooth to form the glaze.

    Step 8: Glaze the Donuts

    Spread the glaze over the bubble donuts while they are still hot. Allow the glaze to set slightly before serving.

    Tips
    • Ensure the oil is at the correct temperature to avoid greasy or undercooked donuts.
    • For an extra touch, you can sprinkle the glazed donuts with some additional powdered sugar or colored sprinkles.
    Nutrition Information (per serving)
    • Calories: 220
    • Protein: 4g
    • Carbs: 30g
    • Fat: 10g
    Why You’ll Love This Recipe

    These Bubble Donuts are the perfect combination of crispy on the outside and soft on the inside. The sweet glaze adds just the right amount of sweetness, making them an irresistible treat. They are easy to make and fun to eat, making them a great addition to any gathering or a delightful snack for any time of the day.

    Stay Connected and Share the Love!

    Did you try this recipe? I’d love to hear your feedback! Leave a comment below and share your thoughts. If you enjoyed this recipe, please consider sharing it with your friends and family on social media. Your support helps me create more delicious recipes for you!

  • CRISPY CHICKEN STRIPS

    CRISPY CHICKEN STRIPS

    CRISPY CHICKEN STRIPS

    Table of Contents

    Ingredients:

    Chicken breast
    Roasted cornflakes
    Flour
    Beaten egg
    Salt
    Black pepper
    Extra virgin olive oil
    Ketchup
    Pitted black olives

    Preparation:

    1. Cut the chicken breast into strips that we season with salt and pepper and lightly flour.
    2. Then, we pass these strips through beaten egg and then through the toasted cornflakes, which we have crushed a little with our hands.
    3. We fry them in extra virgin olive oil, very hot, until they are golden brown, take out and let rest on kitchen paper or absorbent paper .
  • Creamy Raspberry Cottage Cheese Cake

    Creamy Raspberry Cottage Cheese Cake

    Creamy Raspberry Cottage Cheese Cake

    Table of Contents

    Ingredients

    For the Dough:

    • Butter: 250 g (9 oz), softened
    • Vanilla: (to taste)
    • Sugar: 200 g (7 oz)
    • Eggs: 3
    • Baking Powder: 1/2 teaspoon
    • Flour: 250 g (9 oz)

    For the Filling:

    • Cottage Cheese or Cream Cheese: 600 g (21 oz)
    • Sugar: 100 g (3.5 oz)
    • Vanilla: (to taste)
    • Eggs: 4
    • Raspberries: (as needed)

    Instructions

    Step 1: Prepare the Dough

    1. Preheat the Oven
      Preheat your oven to 180°C (356°F). Grease a 20×30 cm baking tin to prevent sticking.
    2. Cream the Butter and Sugar
      In a large mixing bowl, cream together 250 g of softened butter and 200 g of sugar until light and fluffy. This should take about 3-5 minutes using an electric mixer.
    3. Add Eggs and Vanilla
      Add the 3 eggs, one at a time, beating well after each addition to ensure a smooth mixture. Mix in vanilla to taste.
    4. Combine Dry Ingredients
      Sift together 250 g of flour and 1/2 teaspoon of baking powder. Gradually add the dry ingredients to the butter mixture, mixing until a soft dough forms.

    Step 2: Prepare the Filling

    1. Mix the Cheese and Sugar
      In another bowl, combine 600 g of cottage cheese or cream cheese with 100 g of sugar and vanilla to taste. Mix until smooth and creamy.
    2. Add Eggs
      Add the 4 eggs one at a time, beating well after each addition until the filling is smooth and well combined.

      Step 3: Assemble the Cake

      1. Spread the Dough
        Evenly spread the dough into the base of the greased 20×30 cm baking tin, pressing it down to create a flat, even layer.
      2. Pour the Cheese Filling
        Pour the prepared cheese filling over the dough base, spreading it evenly with a spatula.
      3. Add the Raspberries
        Scatter fresh or frozen raspberries over the top of the cheese filling as desired.

      Step 4: Bake the Cake

      1. Bake Until Set
        Place the baking tin in the preheated oven and bake for 40-45 minutes, or until the cheese filling is set and the top is lightly golden.

      Step 5: Serve

      1. Cool and Slice
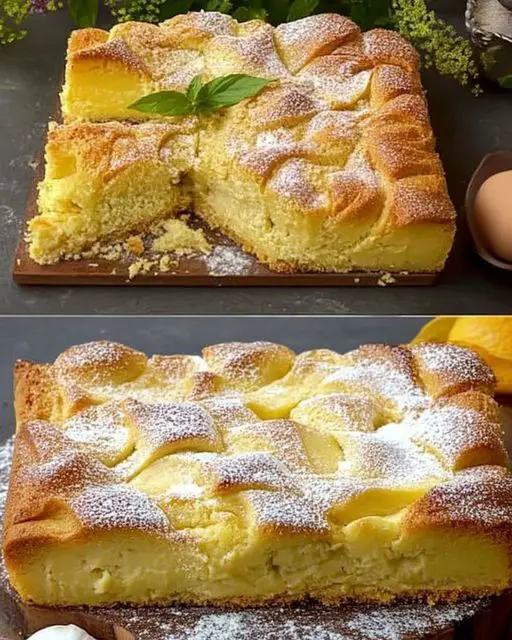
        Allow the cake to cool completely in the tin before cutting it into squares. Serve and enjoy the creamy texture of the cheese filling combined with the tartness of the raspberries.

      Tips for the Perfect Raspberry Cottage Cheese Cake

      • Use Softened Butter
        Make sure the butter is softened to room temperature for easy mixing and a smooth dough.
      • Avoid Overmixing
        Mix the dough and filling just until combined to maintain a light and fluffy texture.
      • Customize with Fruit
        Feel free to substitute raspberries with other fruits like blueberries, strawberries, or blackberries.

      Serving Suggestions

      Serve this cake chilled or at room temperature. It pairs wonderfully with a dollop of whipped cream or a scoop of vanilla ice cream for added indulgence.

      Nutritional Information

      • Servings: 12
      • Calories: Approx. 250 per serving
      • Protein: 8g
      • Carbohydrates: 30g
      • Fat: 12g
  • Walnut Coffee Cake with Coffee Icing Drip

    Walnut Coffee Cake with Coffee Icing Drip

    Walnut Coffee Cake with Coffee Icing Drip

    Walnut Coffee Cake with Coffee Icing Drip

    Table of Contents

    Ingredients

    For the Topping:

    • Instant Coffee: 2 teaspoons
    • Cinnamon Powder: 1 teaspoon
    • Melted Butter: 50g (3 ½ tablespoons)
    • Plain Flour: 2 tablespoons
    • Dark Brown Sugar: 75g (about 4 tablespoons)
    • Chopped Walnuts: 50g (¼ cup)

    For the Cake:

    • Butter: 150g (⅔ cup), softened
    • Sugar: 150g (¾ cup)
    • Eggs: 3 medium size
    • Plain Flour: 180g (1 cup, 3 tablespoons)
    • Baking Powder: 1 teaspoon
    • Vanilla Extract: 1 teaspoon
    • Almond Essence: ½ teaspoon (optional)

    For the Coffee Icing Drip:

    • Powdered Sugar: 50g (¼ cup)
    • Instant Coffee: 1 teaspoon
    • Milk: 1-2 tablespoons

    Measuring Cup Size:

    • 240ml

    Instructions

    Step 1: Prepare the Topping

    1. Mix the Topping Ingredients
      In a small bowl, combine 2 teaspoons of instant coffee1 teaspoon of cinnamon powder50g of melted butter2 tablespoons of plain flour75g of dark brown sugar, and 50g of chopped walnuts. Stir well until all ingredients are evenly mixed and set aside.

    Step 2: Prepare the Cake Batter

    1. Preheat the Oven
      Preheat your oven to 170°C (338°F). Grease a 20×20 cm baking pan or line it with parchment paper to prevent sticking.
    2. Cream Butter and Sugar
      In a large mixing bowl, beat 150g of softened butter and 150g of sugar together until light and fluffy. This should take about 3-5 minutes using an electric mixer.
    3. Add Eggs and Flavorings
      Add the 3 eggs, one at a time, beating well after each addition. Mix in 1 teaspoon of vanilla extract and ½ teaspoon of almond essence (if using).
    4. Combine Dry Ingredients
      Sift together 180g of plain flour and 1 teaspoon of baking powder. Gradually add this mixture to the wet ingredients, mixing just until combined. Be careful not to overmix to keep the cake light and airy.

      Step 3: Combine and Bake

      1. Pour the Batter into the Pan
        Pour the cake batter into the prepared baking pan, smoothing the top with a spatula to create an even surface.
      2. Add the Topping
        Evenly sprinkle the prepared topping mixture over the batter, covering the entire surface.
      3. Bake the Cake
        Bake in the preheated oven for 30-35 minutes or until a toothpick inserted into the center comes out clean. The cake should be golden brown and firm to the touch.

      Step 4: Prepare the Coffee Icing Drip

      1. Mix the Icing Ingredients
        While the cake is baking, combine 50g of powdered sugar1 teaspoon of instant coffee, and 1-2 tablespoons of milk in a small bowl. Stir until smooth. If the icing is too thick, add a little more milk to reach your desired consistency.

      Step 5: Drizzle the Icing

      1. Cool the Cake Slightly
        Once the cake is baked, allow it to cool slightly in the pan for about 10-15 minutes.
      2. Drizzle the Icing
        Drizzle the prepared coffee icing over the cooled  cake, letting it drip down the sides for a beautiful finish.

      Step 6: Serve

      1. Cut and Serve
        Cut the cake into squares and serve. Enjoy the delicious combination of rich walnut flavor and coffee icing!

      Tips for a Perfect Walnut Coffee Cake

      • Use Room Temperature Ingredients
        Make sure your butter and eggs are at room temperature to ensure a smooth batter and even baking.
      • Avoid Overmixing
        Mix the batter just until the ingredients are combined to prevent the cake from becoming dense.
      • Adjust the Icing Consistency
        If the icing is too thick, add a little more milk, a teaspoon at a time, until it reaches a pourable consistency.

        Serving Suggestions

        Serve this Walnut Coffee  Cake warm or at room temperature. It pairs beautifully with a cup of hot coffee or tea. For an extra touch, top with a dollop of whipped cream or a scoop of vanilla ice cream.

        Nutritional Information

        • Servings: 9
        • Calories: Approx. 310 per serving
        • Protein: 5g
        • Carbohydrates: 35g
        • Fat: 18g
  • German Oatmeal Squares: A Delicious and Popular Recipe!

    German Oatmeal Squares: A Delicious and Popular Recipe!

    German Oatmeal Squares: A Delicious and Popular Recipe!

    Table of Contents

    Ingredients:

    • Oatmeal: 1 cup (90 g)
    • Almonds: 1/2 cup (75 g)
    • Ripe Banana: 1 medium-sized
    • Vanillin: A pinch
    • Ginger: To taste
    • Melted  Butter: 2 tablespoons (30 g)

    Instructions:

    Step 1: Preheat the Oven

    1. Preheat Your Oven
      Set your oven to 180°C (356°F) to preheat while you prepare the ingredients.

    Step 2: Prepare the Dry Ingredients

    1. Grind the Oats and Almonds
      In a blender or food processor, combine 1 cup of oatmeal and 1/2 cup of almonds. Pulse until they are finely ground to form a coarse flour.

    Step 3: Mix the Wet Ingredients

    1. Mash the Banana
      In a mixing bowl, mash 1 ripe banana until it is smooth and creamy.
    2. Add Butter and Spices
      Add 2 tablespoons of melted butter, a pinch of vanillin, and ginger to taste. Stir well to combine all the ingredients.

    Step 4: Combine and Form the Dough

    1. Mix Together
      Add the ground oats and almonds to the banana mixture. Mix until everything is well combined to form a  dough.

    Step 5: Shape and Bake

    1. Spread the Mixture
      Spread the dough evenly on a baking tray lined with parchment paper, forming a square or rectangle shape.
    2. Bake
      Place the tray in the preheated oven and bake for 30 minutes or until the edges are golden brown and the mixture is firm to the touch.

      Step 6: Cool and Serve

      1. Cool Completely
        Let the baked oatmeal mixture cool completely on the tray. This helps to firm up the squares and makes them easier to cut.
      2. Cut and Serve
        Once cooled, cut into squares or bars and serve. Enjoy this wholesome treat with your family!

      Tips for Perfect Oatmeal Squares:

      • Use Ripe Bananas
        Make sure the banana is ripe for natural sweetness and a smooth texture.
      • Customize with Spices
        Feel free to experiment with other spices like cinnamon, nutmeg, or cardamom to suit your taste.
      • Add Mix-Ins
        You can add raisins, dried cranberries, or chocolate chips for extra flavor and texture.

      Serving Suggestions:

      Enjoy these oatmeal squares on their own or with a dollop of yogurt, a drizzle of honey, or a spread of nut butter. They also make a great addition to a packed lunch or a healthy snack for kids.

      Nutritional Information:

      • Servings: 6
      • Calories: Approx. 150 per serving
      • Protein: 4g
      • Carbohydrates: 18g
      • Fat: 7g
  • Potato and Egg Delight Recipe

    Potato and Egg Delight Recipe

    Potato and Egg Delight Recipe

    Table of Contents

    Ingredients:

    3 potatoes
    Water
    1 onion
    Sunflower oil
    1 pepper
    100 grams of cheese (3.5 oz)
    Spring onions
    Salt
    Black pepper
    2 eggs
    1/2 tablespoon of sugar
    500 ml of milk / 2 cups (17 fl.oz)
    200 grams of flour / 11 tablespoons (7 oz)
    2 tablespoons of potatoes
    3 eggs
    Breadcrumbs
    Butter

    Instructions:

    Begin by peeling and boiling three potatoes until tender.
    Mash the boiled potatoes to a smooth consistency.
    Slice one onion and sauté it in sunflower oil until translucent.
    Add one sliced pepper to the pan and continue frying until tender.
    Season with salt and black pepper to taste.
    In a separate bowl, beat two eggs with salt and 1/2 tablespoon of sugar.
    Mix in 500 ml of milk and 200 grams of flour until a smooth batter forms.
    Heat sunflower oil in a pan and pour a small amount of the batter to make thin pancakes.
    Fry the pancakes until they turn golden brown on both sides.
    To assemble, serve the pancakes with a generous portion of mashed potatoes, fried onions and peppers.
    Sprinkle 100 grams of cheese and chopped spring onions over the dish.
    Optionally, top with breadcrumbs and bake in the oven with a dab of butter for added crunch.
    Enjoy this delightful dish,
  • Vanilla cream rolls

    Vanilla cream rolls

    Vanilla cream rolls

    Table of Contents

    Ingredients

    For the custard cream (crema pastiera):

    • 3 egg yolks
    • 3 tablespoons 30 gr of all-purpose flour
    • 1/2 cup 100 gr of sugar
    • 1 teaspoon of vanilla extract
    • 8 oz 235 ml of milk

    For the cannoncini:

    • 1 sheet of puff pastry defrosted (about 8 oz, 225 gr)
    • 1/4 cup 50 gr of sugar
    • 1 egg for egg wash
    • powdered sugar to decorate

    Instructions

    Start by preparing the custard cream (crema pastiera):

    • Warm up the milk until hot (not boiling).
    • In a medium-sized pan, whisk the egg yolks with the sugar, vanilla extract, and flour, until light and fluffy.
    • Add the milk some at a time while whisking, making sure there are no lumps.
    • Set the pan over mediocre heat and stir continuously until it reaches a slow boil. The cream will thicken, so be careful not to let it stick to the bottom. Lower the flame and cook for a couple of more minutes, until you reach the desired thickness.
    • Pour the cream into a glass bowl, cover with plastic wrap, and let it cool down. Chill for at least one hour.

    For the pastry horns:

    • Preheat the furnace to 400°F (200°C).
    • Spray some sugar on the counter and on top of the puff pastry and roll it out to a rectangle about 9 by 12 inches.
    • Cut into 12 strips (about 1 inch thick). Easy way to do it: cut the pastry into three parts, and then each part into four strips.
    • Roll each strip onto a horn mold (conical in shape). The pastry has to overlap (about half of the length).
    • Place on a baking sheet lined with parchment paper with seem (end of the strip) side down.
    • Beat one egg with one tablespoon of water. Brush lightly each pastry cone with the egg wash.
    • Make sure you keep the egg wash away from the mold. It will make it harder to remove the pastry horn from the mold once baked.
    • Bake at 400°F (200°C) for about 15-20 minutes until golden on top.
    • Let them cool down for a couple of minutes and gently remove from the mold.
  • Crispy Zucchini Parmesan

    Crispy Zucchini Parmesan

    Crispy Zucchini Parmesan

    Table of Contents

    Ingredients

    2 zucchinis
    4 eggs
    Salt, to taste
    Black pepper, to taste
    Dried parsley, to taste
    50 g cheese (grated)
    100 g breadcrumbs
    70 g flour
    Sunflower oil (for frying)

    Directions

    Prepare the Zucchinis:
    Wash and grate the zucchinis. Place the grated zucchinis in a colander, sprinkle with a little salt, and let them sit for about 10 minutes to draw out excess moisture. Afterward, squeeze out as much liquid as possible using a clean kitchen towel or cheesecloth.

    Mix the Ingredients:
    In a large mixing bowl, beat the 4 eggs. Add the grated zucchini, a pinch of salt, black pepper, and dried parsley to taste. Mix well.
    Stir in the grated cheese, 70 g of flour, and 50 g of breadcrumbs until the mixture is well combined.

    Form the Fritters:
    Take a spoonful of the zucchini mixture and form it into a small patty. Dredge the patty in the remaining breadcrumbs to coat evenly. Repeat with the rest of the mixture.

    Fry the Fritters:
    In a large skillet, heat a generous amount of sunflower oil over medium heat.
    Once the oil is hot, carefully place the patties in the skillet. Fry the fritters in batches, ensuring not to overcrowd the pan.

    Cook each fritter for about 3-4 minutes on each side, or until golden brown and crispy.

    Ezoic

    Drain and Serve:
    Once the fritters are cooked, remove them from the skillet and place them on a plate lined with paper towels to drain any excess oil.
    Serve the crispy zucchini parmesan fritters warm, with your favorite dipping sauce if desired.

    Serving Suggestions
    Serve with a side of marinara sauce or ranch dressing for dipping.
    Pair with a fresh garden salad for a light meal.
    Enjoy as a side dish with grilled chicken or fish.

    Cooking Tips
    Make sure to squeeze out as much moisture as possible from the grated zucchini to ensure the fritters hold together well.
    Adjust the seasoning according to your taste. You can add other herbs or spices to customize the flavor.

  • I Don’t Buy Pizza Anymore! Discover a Healthier and Tastier Alternative

    I Don’t Buy Pizza Anymore! Discover a Healthier and Tastier Alternative

    Pizza, with its gooey cheese, flavorful toppings, and crispy crust, has long been a favorite indulgence for many. However, as people become more health-conscious, they’re seeking alternatives that satisfy their cravings without sacrificing nutrition.

    Enter Zucchini Pizza Crust: A Game-Changing Solution

    In recent years, zucchini pizza crust has emerged as a popular substitute for traditional pizza dough. Not only is it lighter and lower in carbohydrates, but it also offers a unique flavor profile that’s surprisingly delicious.

    Making the Transition: Embracing Zucchini Pizza Crust
    Ingredients You’ll Need
      • 1 zucchini

    Ezoic

      • 4 tablespoons of oat flour
      • 3.5 ounces (100g) grated mozzarella cheese
      • 2 eggs

    Ezoic

    • Salt and black pepper to taste
    Preparing the Zucchini Pizza Crust
      1. Grating the Zucchini: Begin by washing the zucchini thoroughly and grating it using a coarse grater, leaving the skin on for added texture and nutrients.
      2. Draining Excess Liquid: Transfer the grated zucchini to a bowl, season it with salt, and let it rest for 5 minutes. Afterward, squeeze handfuls of the zucchini to remove excess liquid, ensuring a crispier crust.

    Ezoic

    1. Mixing the Ingredients: In another bowl, combine the drained zucchini with oat flour, grated cheese, eggs, and freshly ground black pepper. Mix the ingredients thoroughly until well combined.
    2. Shaping the Crust: Spread the zucchini mixture evenly onto a round pizza pan that has been lightly greased or lined with parchment paper. Ensure the crust is uniform in thickness for even baking.
    3. Baking to Perfection: Preheat your oven to 180°C and bake the zucchini pizza crust for approximately 20 minutes or until golden brown. Keep an eye on it to prevent burning.
      The Taste Test: Why Zucchini Pizza Crust Reigns Supreme
      Satisfying Cravings Without Sacrifice

      Despite its unconventional ingredients, zucchini pizza crust delivers a satisfying pizza experience without the guilt. The crust maintains a crispy texture while providing a subtle hint of zucchini flavor, making each bite a delightful surprise.

      Nutritional Benefits That Can’t Be Beat

      Compared to traditional pizza dough, zucchini pizza crust is significantly lower in carbohydrates and calories, making it an ideal choice for those watching their waistlines. Additionally, zucchini is packed with essential vitamins and minerals, adding nutritional value to every slice.

      Conclusion: A Delicious Twist on a Classic Favorite

      In conclusion, zucchini pizza crust offers a delicious and nutritious alternative to traditional pizza dough. With its simple preparation and satisfying flavor, it’s no wonder that more pizza lovers are making the switch. So the next time you’re craving a slice, consider giving zucchini pizza crust a try—you won’t be disappointed!

  • Apple Crumble Cheesecake

    Apple Crumble Cheesecake

    Apple Crumble Cheesecake

    Table of Contents

    Ingredients

    For the Apples:

    • 3 apples, peeled, cored, and diced
    • 1 teaspoon cinnamon

    For the Pastry Crumble:

    • 2/3 cup (85 g) flour
    • 1/3 cup (65 g) sugar
    • 1/4 cup butter (about 4 tablespoons or 60 g), softened

    For the Cheesecake Base:

    • 2 cups (200 g) speculaas (gingerbread cookies), crushed
    • 1/3 cup butter (about 5 tablespoons or 75 g), melted

    For the Cheesecake Filling:

    • 2 cups natural cream cheese (about 17.6 oz or 500 g)
    • 1/2 cup (120 g) sour cream
    • 1/3 cup (65 g) sugar
    • 1 teaspoon vanilla extract
    • 3 eggs
    • 1.5 teaspoons cinnamon

    Preparation Method

    Step 1: Preheat the Oven

    1. Preheat Your Oven
      Set your oven to 160°C (320°F). This temperature ensures a gentle bake, allowing the cheesecake to cook evenly without cracking.

    Step 2: Prepare the Speculaas Base

    1. Grind the Gingerbread Cookies
      Use a food processor to finely grind 200 grams of speculaas cookies into a sandy texture. This will form a solid base for your cheesecake.
    2. Melt the Butter
      Melt 75 grams of butter in the microwave or on the stove. Mix the melted butter thoroughly with the ground cookies until the mixture resembles wet sand.
    3. Prepare the Springform Pan
      Grease a springform pan with a little butter to prevent sticking. Pour the cookie mixture into the pan and press it firmly into an even layer using the back of a spoon.

      Step 3: Prepare the Apple Filling

      1. Peel and Dice the Apples
        Peel 3 apples, core them, and cut them into small cubes. This ensures even cooking and a uniform texture.
      2. Mix with Cinnamon
        In a bowl, sprinkle the apple cubes with 1 teaspoon of cinnamon. If desired, add a bit of sugar to enhance the sweetness. Mix well to coat all the apple pieces evenly.

      Step 4: Make the Shortcrust Pastry Crumble

      1. Combine Ingredients
        In a large bowl, combine 2/3 cup (85 g) flour1/3 cup (65 g) sugar, and 60 grams of butter.
      2. Form Crumbs
        Using your fingers or a pastry cutter, knead the mixture until large crumbs form. This crumbly dough will create a delightful, crunchy topping for your cheesecake.

      Step 5: Prepare the Cheesecake Filling

      1. Mix the Ingredients
        In a large mixing bowl, add 500 grams of natural cream cheese125 grams of sour cream75 grams of sugar1 teaspoon of vanilla extract1.5 teaspoons of cinnamon, and 3 eggs.
      2. Blend Until Smooth
        Use a mixer or food processor to blend the ingredients until you achieve a smooth, creamy consistency. Ensure there are no lumps for the best texture.

      Step 6: Assemble the Cheesecake

      1. Pour the Filling
        Pour the cream cheese mixture over the cookie base in the springform pan. Spread it out evenly to ensure a smooth layer.
      2. Add the  Apples
        Evenly distribute the cinnamon-spiced  apple cubes over the cream cheese layer.
      3. Top with Crumbs
        Sprinkle the prepared shortcrust pastry crumbs over the apples, ensuring an even layer to create a crunchy top.

      Step 7: Bake the Cheesecake

      1. Bake
        Place the cheesecake in the preheated oven and bake for 60 minutes. The cheesecake should be set but still slightly jiggly in the center.
      2. Cool Gradually
        Once baked, turn off the oven and leave the oven door slightly ajar. Let the cheesecake cool in the oven gradually to prevent cracks from forming on the surface.

        Step 8: Chill and Serve

        1. Chill
          After cooling in the oven, refrigerate the cheesecake for at least 4 hours or overnight. This allows the flavors to meld and the cheesecake to set properly.
        2. Serve
          Remove the cheesecake from the springform pan, slice, and serve chilled. Enjoy the creamy, crunchy, and spiced flavors of this delightful dessert.

        Layers of Flavor

        This Apple Crumble Cheesecake is all about layers of flavor and texture. The base offers a firm, spicy foundation from the speculaas cookies, the filling is rich and creamy with a hint of cinnamon, and the topping provides a delightful crunch with each bite. The spiced apples add natural sweetness and moisture, making every mouthful a delectable experience.

  • Ice cream sandwiches

    Ice cream sandwiches

    Ice cream sandwiches

    Traditional handcrafted ice cream sandwiches feature a soft vanilla ice cream in the center and a chocolate biscuit shell.

    Components

      1. Half a gallon of ice cream
      2. Two and a half cups all-purpose flour

    Ezoic

      1. 1 cup (minus 2 teaspoons) cocoa powder
      2. three-quarters teaspoon of salt
      3. 1 cup of sugar, granulated

    Ezoic

      1. 1/4 cup of butter without salt
      2. two yolks from eggs
      3. Two tsp of essence from vanilla

    Ezoic

    Guidelines

      • Ice cream can be softened slightly by letting it sit at room temperature for half an hour. Press parchment paper into a 9 x 13-inch pan, letting the paper overhang the sides.
      • Smooth surface of ice cream after pressing into pan. Freeze until totally solid, or for at least one hour.
      • Turn the oven on to 350°F. Use parchment paper to line two baking sheets
      • Combine the flour, cocoa, and salt in a medium-sized basin and mix until thoroughly combined.
      • Using the paddle attachment, add the butter and sugar to the bowl of stand mixer and mix on medium speed for minimum of one minute. Add vanilla and yolks and stir. Add the dry mixture gradually until barely mixed.
      • After dividing the dough in half, shape each half into 5-inch square. Cover dough with plastic wrap and refrigerate until solid, at least 30 minutes.
      • Each dough portion should be rolled into an by 12-inch rectangle on surface dusted with flour.
      • Cut the dough into six pieces by cutting it into 2-inch lengths along the 12-inch side
      •  To get 12 4×2 pieces, cut each piece in half down the middle.
    • Place each of the ice cream reactangle on top of  cookies and place another cookies on to
    • Repeat the process Notes

      • To make softer cookies, wrap each one in parchment or wax paper and place it in the freezer overnight. Alternatively, serve the cookies right away if you prefer them crunchy
  • Savory Cheese and Pepperoni Bread

    Savory Cheese and Pepperoni Bread

    Savory Cheese and Pepperoni Bread

    Ingredients:

      • 300 ml (10.14 fl oz) for the Dough
      • 30 g (1 oz) warm milk,
      • 7 g (0.25 oz) sugar
      • 650 g (22.93 oz) of yeast flour
      • 100 g (3.5 oz) melted butter two eggs
      • 10 g (0.35 oz) salt

    Ezoic

    Regarding the Sauce:

      • 300 g (10.6 oz) cheese cream
      • 150 g, or 5.3 oz grated mozzarella
      • (30 g; 1 ounce) Mayonnaise

    Ezoic

    • 7 g, or 0.25 oz garlic powder
    • 30 g (one ounce) chopped pepperoni salami

    Instructions:

    Hydrate the Yeast:

    In a small bowl, combine the warm milk, sugar, and yeast. Let it sit for 10 minutes until the yeast is activated and foamy.

    Prepare the Dough:

    In a large mixing bowl, combine the flour and salt. Make a well in the center and add the melted butter, eggs, and hydrated yeast mixture. Mix until a soft dough forms. Knead the dough for about 10 minutes on a floured surface until it is smooth and elastic.

    First Rise:

    Put the dough in a bowl that has been lightly greased, cover it with a clean cloth, and let it rise in a warm place for 40 minutes, or until it has doubled in size.

    Prepare the Sauce:

    In a medium bowl, combine the cheese cream, grated mozzarella, mayonnaise, garlic powder, and chopped pepperoni salami. Mix well and set aside.

    Shape and Second Rise:

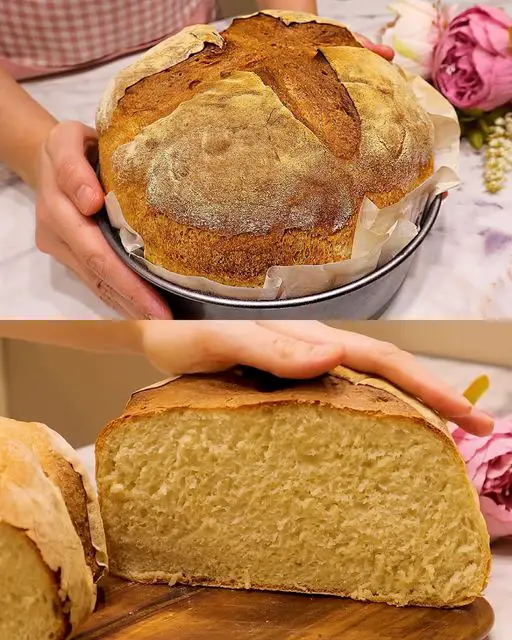
    Preheat your oven to 160°C (320°F). Punch down the risen dough and shape it into a round loaf. Place it in a greased 23 cm (9 in) baking tray. Cover and let it rise again for 20 minutes.

    Bake:

    Brush the top of the dough with a beaten egg. Spread the prepared cheese and pepperoni sauce evenly over the top. Bake in the preheated oven for 30 minutes or until golden brown and cooked through.

    Serve:

    Remove from the oven and let it cool slightly before slicing. Serve warm and enjoy!

    Serving Suggestions:

    Serve this bread as a main dish with a side salad. It also pairs well with soups or as a snack on its own. Cooking Tips: Ensure the milk is warm (not hot) to activate the yeast properly. You can adjust the amount of garlic powder andpepperoni to your taste.

    Nutritional Benefits:

    This bread provides a good source of protein from the eggs and cheese. The dough made with yeast offers beneficial nutrients such as B vitamins and minerals.

    Dietary Information:

    Contains gluten, dairy, and eggs. To make it gluten-free, substitute the flour with a gluten-free flour blend.

    Storage Tips:

    Store any leftovers in an airtight container at room temperature for up to 2 days. For longer storage, wrap the bread tightly in plastic wrap and freeze for up to 1 month. Thaw at room temperature before serving. Why You’ll Love This Recipe: It’s a savory and filling option that’s great for any meal. The combination of cheese and pepperoni offers a delicious and satisfying flavor. It’s easy to make andConclusion: With its rich flavors and easy preparation, this Savory Cheese and Pepperoni Bread is a delightful addition to your recipe collection. It’s sure to become a favorite in your kitchen. Enjoy baking and feel the warm, inviting aroma of freshly baked bread wafting through your home!

  • Fluffy Pancakes

    Fluffy Pancakes

    Fluffy Pancakes

    Table of Contents

    Ingredients

    • 2 eggs
    • 10 g of unsalted butter
    • 1 teaspoon of concentrated coffee aroma
    • 1 pinch of salt
    • 20 ml of whole milk
    • 30 gr of wheat flour
    • 40 grams of sugar
    • 1 teaspoon lemon juice

    Instructions

    • The first step to making these fluffy pancakes
    • We will start by separating the yolks from the whites. Mix the yolks in a bowl with the previously melted butter, the milk, and the teaspoon of coffee flavoring, if you prefer you can use other essences such as vanilla. Now we will mix well.
    • Then add a pinch of salt and the previously sifted flour, mixing it with the kitchen rods.
    • Next, beat the egg whites until stiff, for this put the mixer at full power and, when it starts to thicken, add a teaspoon of lemon and, little by little, the sugar until the egg whites are mounted. If you prefer, you can make it by hand with the rods.
    • Then add the egg whites to the bowl with the egg yolks and, with enveloping movements, mix everything very well using the icing tongue.
    • Finally, as soon as it is ready, preheat a large saucepan with a few drops of oil using a brush on the base of the saucepan, using a small ladle or pastry bag to introduce the mixture.

    Tips for Making Fluffy Pancakes

    Achieving the perfect stack of fluffy pancakes requires attention to detail and a few tricks of the trade.

    Ingredient Ratios

    The ratio of flour to liquid in the pancake batter is crucial. Too much flour can result in dense pancakes, while too much liquid can make them thin and flat. Aim for a balanced ratio to achieve optimal fluffiness.

    Mixing Methods

    When mixing the batter, avoid overmixing, as this can overdevelop the gluten in the flour, leading to tough pancakes. Instead, mix the ingredients until just combined, leaving some lumps in the batter.

    Cooking Temperature

    Cook pancakes on a preheated griddle or skillet over medium-low heat. This allows them to cook through evenly without burning on the outside. Use a non-stick cooking spray or a small amount of butter to prevent sticking.

    Conclusion

    Fluffy pancakes are more than just a delicious breakfast treat—they’re a culinary canvas for creativity and exploration. By mastering the art of making fluffy pancakes, you can elevate your breakfast game and delight your taste buds with each fluffy bite.

  • Cinnamon Roll Honeybun Cheesecake

    Cinnamon Roll Honeybun Cheesecake

    Cinnamon Roll Honeybun Cheesecake 

    Table of Contents

    ~Ingredients~

    For the Crust 🍁
    1 1/2 cups graham cracker crumbs
    1/4 cup granulated sugar
    1/2 cup melted butter
    For the Cinnamon Roll Filling:🍁
    1/2 cup brown sugar
    2 tbsp ground cinnamon
    For the Cheesecake Filling:🍁
    16 oz cream cheese, softened
    1 cup granulated sugar
    1 tsp vanilla extract
    3 large eggs
    1 cup sour cream
    1 cup heavy cream
    For the Honeybun Topping:🍁
    1/2 cup powdered sugar
    2 tbsp milk
    1 tsp vanilla extract

    Directions:

    Prepare the Crust:🍂
    Preheat your oven to 325°F (163°C).
    In a medium bowl, mix together the graham cracker crumbs, granulated sugar, and melted butter until well combined.
    Press the mixture evenly into the bottom of a 9-inch springform pan. Set aside.
    Prepare the Cinnamon Roll Filling:
    In a small bowl, combine the brown sugar and ground cinnamon.
    Stir in the melted butter until the mixture forms a crumbly texture. Set aside.
    Prepare the Cheesecake Filling:
    In a large bowl, beat the softened cream cheese and granulated sugar until smooth and creamy.
    Add the vanilla extract and mix well.
    Add the eggs one at a time, beating well after each addition.
    Mix in the sour cream and heavy cream until fully incorporated.
    Pour half of the cheesecake filling over the prepared crust.
    Add the Cinnamon Roll Swirl:
    Spoon half of the cinnamon roll filling mixture in dollops over the cheesecake layer.
    Use a knife or toothpick to swirl the cinnamon filling into the cheesecake batter.
    Pour the remaining cheesecake filling on top and repeat the swirling process with the remaining cinnamon roll mixture.
    Bake the Cheesecake:
    Place the cheesecake in the oven and bake for 60-70 minutes, or until the center is set and the edges are lightly golden. The center may still jiggle slightly.
    Turn off the oven and let the cheesecake cool in the oven with the door slightly open for 1 hour.
    Remove from the oven and refrigerate for at least 4 hours or overnight.
    Prepare the Honeybun Topping:
    In a small bowl, whisk together the powdered sugar, milk, and vanilla extract until smooth.
    Drizzle the glaze over the chilled cheesecake just before serving.
    Tips:
    To avoid cracks in your cheesecake, ensure that all ingredients are at room temperature before mixing.
    For an extra touch, you can garnish with additional cinnamon roll crumbs or a sprinkle of cinnamon before serving.
    Enjoy your Cinnamon Roll Honeybun Cheesecake! 🍰🍩
    1/4 cup unsalted butter, melted
  • Soft and Fluffy Bread with Chickpea Spread

    Soft and Fluffy Bread with Chickpea Spread

    Soft and Fluffy Bread with Chickpea Spread

    Table of Contents

    Ingredients
    FOR THE SOFT AND FLUFFY BREAD:
    • 3 cups all-purpose flour
    • 1 packet (2 1/4 teaspoons) instant yeast
    • 1 tablespoon sugar
    • 1 teaspoon salt
    • 1 cup warm water (110°F/45°C)
    • 2 tablespoons olive oil
    • Additional flour for dusting
    FOR THE CHICKPEA SPREAD:
    • 1 can (15 oz) chickpeas, drained and rinsed
    • 2 tablespoons tahini
    • 1 tablespoon lemon juice
    • 2 cloves garlic, minced
    • 2 tablespoons olive oil
    • Salt and pepper to taste
    • Optional: chopped fresh parsley or cilantro for garnish
    Step-by-Step Instructions

    STEP 1: MAKE THE BREAD DOUGH

    1. Combine Dry Ingredients: In a large mixing bowl, whisk together the flour, instant yeast, sugar, and salt.
    2. Add Wet Ingredients: Make a well in the center and add the warm water and olive oil. Mix until a dough begins to form.
    3. Knead the Dough: Turn the dough onto a floured surface and knead for about 8-10 minutes, until the dough is smooth and elastic.
    4. First Rise: Place the kneaded dough in a lightly oiled bowl, cover with a clean kitchen towel, and let it rise in a warm place for about 1 hour, or until doubled in size.

    STEP 2: PREPARE THE CHICKPEA SPREAD

    1. Blend Ingredients: In a food processor, combine the chickpeas, tahini, lemon juice, minced garlic, and olive oil.
    2. Season: Blend until smooth, adding a bit of water if necessary to reach your desired consistency. Season with salt and pepper to taste.
    3. Garnish: Optionally, fold in chopped parsley or cilantro for added flavor and freshness.

      STEP 3: SHAPE THE BREAD

      1. Preheat Oven: Preheat your oven to 375°F (190°C).
      2. Shape Dough: After the dough has risen, punch it down to release air. Turn it out onto a floured surface and shape it into a loaf or divide it into smaller pieces for rolls.
      3. Second Rise: Place the shaped dough on a baking sheet lined with parchment paper. Cover and let rise for another 30 minutes.

      STEP 4: BAKE THE BREAD

      1. Bake: Bake in the preheated oven for 25-30 minutes for a loaf or 15-20 minutes for rolls, or until golden brown and sounds hollow when tapped.
      2. Cool: Remove from the oven and let cool on a wire rack.

      STEP 5: SERVE

      1. Slice and Spread: Slice the bread and spread the chickpea mixture generously on each slice.
      2. Enjoy: Serve as an open-faced sandwich, or enjoy the bread and spread on their own.